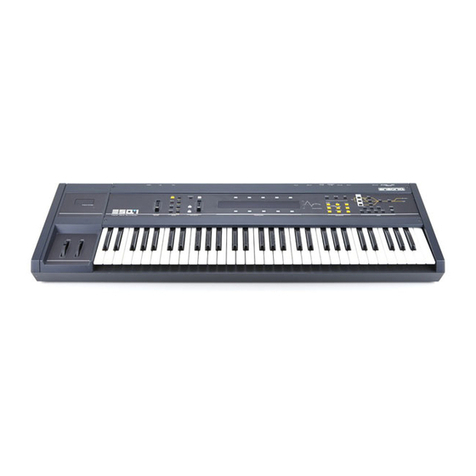
Hammond Sk PRO User manual

MIDI
(incl. INT. /EXT. ZONES)

MIDI2
MIDI
uA Word About What MIDI Can Do
The letters MIDI stand for Musical Instrument Digital Interface. MIDI is an international standard for
allowing electronic musical instruments equipped with MIDI capability to exchange performance
information. For example, a synthesizer can be used to communicate with a drum machine, an electronic
piano can interface with a computer, and so forth. Additionally, since MIDI is an international standard
recognized and implemented by all musical instrument manufacturers worldwide, instruments made by
different manufacturers can communicate with each other via MIDI.
uMIDI Connections
tMIDI IN and MIDI OUT
In order to allow communication to take place, all MIDI-equipped instruments have at least two MIDI
jacks - MIDI IN and MIDI OUT. MIDI IN is for receiving MIDI data from another instrument, while MIDI
OUT is for sending MIDI data out to another instrument.
In the example above, the keyboard(s) of the sending or transmitting instrument (MIDI OUT) are being
used to control the sound generators of the receiving instrument (MIDI IN). When a key is played on the
sending instrument, the corresponding note will play on the receiving instrument as though the
appropriate key had been pressed on the receiving instruments's keyboard. When the key is released on
the sending instrument, the tone being played by the receiving instrument will stop. (This is called "Note
On / Note Off" data.) The instrument receiving the MIDI data is called a MIDI secondary and the sending
instrument is called the MIDI controller. This is the most basic MIDI hookup.
The above is an example of two-way communication between two MIDI-equipped devices. In this
example, the keyboard(s) of either instrument can be used to control the sound generators of the other.
NOTE: In some MIDI tutorials, you may also see references to Main and Secondary or Source and
Destination.

MIDI 3
uAudio and MIDI Connections
tExample: A synthesizer
If you connect the MIDI OUT jack of the SK PRO to the MIDI IN jack on the synthesizer and the
synthesizer's LINE OUTPUT jack to the organ's LINE IN jack, you can play both instruments simultaneously
from the SK PRO keyboard.
tExample: A sound module
Note that the LINE OUT or AUDIO OUT signal connection is made to an external amplifier. The LINE OUT
audio connection from the module, of course, could also be connected to the LINE IN of the SK-PRO.

MIDI4
uMIDI FUNCTION Mode
This Parameter Menu allows you to set the overall MIDI parameters for the instrument.
TRY THIS:
1. From any of the PLAY Mode screens, press the MENU/EXIT button once. The Information
Center Display should now look like this:
2. Press the PAGE “u” button two times. The word, “SOUND” should be highlighted.
3. Press the DIRECTION “u” button. The Information Center Display should now look like this:

MIDI 5
4. Press the ENTER button. The Information Center Display should now look like this:
You are now in the MIDI FUNCTION Mode. You may now use the DIRECTION and PAGE buttons
in conjunction with the VALUE knob to change the MIDI performance of your SK PRO. This is
explained starting below.
uHow MIDI Works on the SK PRO:
The SK PRO can function in a large variety of MIDI environments. In addition to transmitting basic MIDI
information such as Note On/Note Off and Note Velocity, the SK PRO also can transmit Program Changes,
Control Changes, NRPN and System Exclusive (SyxEx) codes.
It is also possible to use the SK PRO as a MIDI Master or Controller Keyboard for layering or multi-timbral
(playing more than one sound at the same time) applications. The following paragraphs explain this in
more detail.
tINTERNAL ZONES
The internal sounds of the instrument - both Drawbars and Extra Voices - will play on what are called the
Internal Zones. The Internal Zones transmit Note On/Note Off and Velocity data from the UPPER, LOWER
and PEDAL Parts. These channels will both send (MIDI OUT) and receive (MIDI IN) data, and are
therefore used when recording and playing back sequences.
NOTE: The UPPER Channel, in addition to Note On/Note Off and Velocity, also is used for transmitting
Controller data.
tEXTERNAL ZONES
The External Zone Channels allow you to use the SK PRO as a MIDI Master or Controller Keyboard.
These allow you to play additional sounds from another MIDI instrument such as a sound module. The
External Zones transmit but do not receive MIDI data - in other words, they are MIDI OUT only.
There are three (3) External Zone Channels which can be assigned to the UPPER, LOWER or PEDAL Parts.
In addition, different configurations can be saved to different Patches - for example, one Patch can have all
three External Zones assigned to UPPER, another Patch can have one External Zone each for UPPER,
LOWER and PEDAL, etc.
The Internal and External Channels of the instrument are referred to as Zones. The features available for
the Zones are found in the ZONE Edit Menu. This is explained fully starting on page 20.

MIDI6
tTEMPLATE
What Is a “MIDI Template?”
Because MIDI can be used with such a wide variety of devices - such as synthesizers, sound modules,
sequencers, etc. - there are a number of features associated with MIDI, such as Program Change,
Controller Change, etc., that allow each MIDI setup to be optimized for the best results in each
application. However, making all of these settings manually can be quite time-consuming and error-
prone.
Therefore, your SK PRO contains a number of pre-formatted settings for the various MIDI parameters
which represent the most ideal settings for each MIDI environment. A group of these settings is called a
MIDI Template.
This Parameter Menu Page allows you to select the MIDI Template you want to use.
Use the VALUE knob to see the various Template settings.
When you have made your selection, Press the ENTER button. The MIDI parameters will be set
according to the Template you selected.
IMPORTANT NOTE: For a complete listing of the MIDI Templates for the SK PRO, consult the next
two pages. In addition to the specific Parameter settings, the chart also contains explanations for the
performing environment each Template is designed for. Therefore please read the descriptions carefully to
determine the best setting for your particular setup.

MIDI 7
MIDI Templates - SK PRO

MIDI8
MIDI Templates - SK PRO

MIDI 9
From the screen shown on page 492, press the PAGE “u” button once. The GENERAL FUNCTION
Mode Page should now display.
tGENERAL
This Page allows you to set the MIDI Parameters which affect how the entire instrument will function in a
MIDI environment. It consists of several screens.
NOTE: This is separate from General MIDI, which is explained in the Appendix starting on page 601
Use the DIRECTION “p” and “q” buttons to move up and down among the various screens.
MIDI IN MODE
This Parameter allows you to set how incoming MIDI data (external MIDI device connected via the MIDI
IN port) is handled. The data chart below shows the options you may select.
MIDI IN jack options
Setting Description
Upper /
Lower /
Pedal
Incoming MIDI data will sound the Sections allocated to the (UPPER / LOWER /
PEDAL) keyboard ignoring the MIDI Channel, and is re-transmitted to both MIDI OUT
and USB-MIDI.
Upper + Pedal / Lower +
Pedal
Incoming MIDI data will sound the Sections allocated to (UPPER + PEDAL / LOWER +
PEDAL) keyboards on the assigned MIDI Channels, and is re-transmitted to both MIDI
OUT and USB MIDI.
Organ Upper / Piano /
Ensemble /
Synth
Incoming MIDI data plays the selected Voice Section. Data is not retransmitted.
Sequence Incoming MIDI data plays UPPER, LOWER and PEDAL parts, but is not retransmitted.
NOTE: The ORGAN Section will play from an UPPER Keyboard only.
NOTE: The SPLIT does not function when the MIDI IN mode is set at “Upper / Lower,” “Lower + Pedal”
or “Upper + Pedal”
Turn the VALUE knob to make your selection.

MIDI10
From the screen shown on the previous page, press the DIRECTION “q” button once.
The box to the right of “LOCAL” should be highlighted.
LOCAL - MIDI Local Control
This Parameter allows you to turn Local Control "ON" or "OFF.” When Local Control is "ON,” the SK PRO
will play both its internal sounds and the sounds from a connected MIDI device. When Local Control is
"OFF,” the SK PRO will play only the sounds from a connected MIDI device (synthesizer, sound module,
Digital Audio Workstation or hardware sequencer) and the SK PRO's internal sounds are silenced.
NOTE: Even if LOCAL is “ON,” MIDI messages sent from an external MIDI device to the SK PRO will play.
Turn the VALUE knob to turn LOCAL “ON” or “OFF.”
From the above screen, press the DIRECTION “q” button once.
The box to the right of “NRPN” should be highlighted.
MIDI NRPN
This Parameter allows you to turn NRPN "ON" or "OFF.”
What Is “NPRN?”
"NRPN,” or Non-Registered Parameter Number, is an expanded control change message, each function of
which is implemented differently by different manufacturers. The Hammond SK PRO uses NRPN to
control parameters such as Percussion 2nd and 3rd Harmonic ON/OFF, Vibrato or Chorus ON/OFF, etc.
Most of the buttons on the SK PRO have NRPN Controller numbers assigned to them When NRPN is
“ON,” NRPN codes are transmitted and received along with other MIDI data. When NRPN is “OFF,” NRPN
codes will not be transmitted or received but other MIDI data such as Note On/Note Off, Note Velocity,
etc. will continue to be transmitted and received..
NOTE: To see a complete list of all NRPN codes transmitted and recognized by the SK PRO, consult the
APPENDIX.
Turn the VALUE knob to turn NRPN “ON” or “OFF.”

MIDI 11
From the screen shown at the bottom of the previous page, press the DIRECTION “q” button once.
The box to the right of “PROGRAM CHANGE” should be highlighted.
PROGRAM CHANGE
Program is the MIDI term for a particular sound or effect, such as Piano, Trumpet, Thunder, etc. Each
MIDI program is assigned a number from 1 through 127, and these numbers are transmitted to a
connected MIDI device such as a sound module. In this way, changes in sound, or what organists refer to
as registration, can be made.
This Parameter allows you to turn Program Change "ON" or "OFF.” When Program Change is "ON,” the
SK PRO will send and receive Program Changes out to or from a connected MIDI device. When Program
Change is "OFF,” Program Changes are not transmitted or received.
Turn the VALUE knob to turn PROGRAM CHANGE “ON” or “OFF.”
From the above screen, press the DIRECTION “q” button once.
The box to the right of “DB REGISTRATION” should be highlighted.
DB REGISTRATION
This Parameter allows you to decide whether you want to transmit the current Drawbar registration to a
connected MIDI device such as a sequencer, another Hammond Organ, etc. When this switch is is "ON,”
the SK PRO will send Drawbar Data out to a connected MIDI device. When this switch is "OFF,” Drawbar
Data will not be transmitted.
Turn the VALUE knob to turn DB REGISTRATION “ON” or “OFF.”

MIDI12
From the screen shown at the bottom of the previous page, press the DIRECTION “q” button once.
The Information Center Display should now look like this:
The box to the right of “EXTERNAL ZONE” should be highlighted.
EXTERNAL ZONE
This is a Master Parameter which allows you to decide whether you want to transmit External Zone data to
a connected MIDI device. When this switch is is "ON,” the SK PRO will send External Zone data out to a
connected MIDI device. When this switch is "OFF,” External Zone data will not be transmitted.
Turn the VALUE knob to turn EXTERNAL ZONE “ON” or “OFF.”

MIDI 13
From the screen shown on the previous page, press the PAGE “u” button once. The SYSTEM
EXCLUSIVE FUNCTION Mode Page should now display.
What Is “SYSTEM EXCLUSIVE?”
Most MIDI messages are ones that are universally recognized by all instruments which implement MIDI.
Examples are Note On/Note Off/Note Velocity data, Program Changes, Controller Changes, etc. However,
there is a provision within the MIDI standard called System Exclusive (often abbreviated SysEx or Sysx)
which allows for individual manufacturers to create MIDI messages to be sent and received which are
unique to that manufacturer. These messages are determined by each manufacturer; therefore they will
be different for each make, and sometimes they will differ from model to model from a particular
manufacturer.
The SYSTEM EXCLUSIVE FUNCTION Mode contains several different functions. Use the DIRECTION “p”
and “q” buttons to move up and down among the various functions.
MIDI Instrument ID
This Parameter allows you to set the Device ID when transmitting System Exclusive messages.
What Is a “Device ID?”
In order to facilitate communication between MIDI devices from different manufacturers, the MIDI
Manufacturer’s Association (MMA) assigns each maker of MIDI devices a unique ID number. This ID
number is treated as part of the System Exclusive information and is embedded in the firmware of each
device from a particular manufacturer. This allows different MIDI instruments to identify each other and
to transmit and receive MIDI information which may be unique to a particular maker.
Turn the VALUE knob to select the Device ID.
NOTE: Hammond’s Device ID number is “17.”
NOTE: If you perform a MIDI Dump to a non-Hammond instrument, you may be required to know the
Device ID of the device to which you are Dumping. As explained above, each manufacturer of MIDI
devices is assigned a unique ID number by the MMA.

MIDI14
From the screen shown on the previous page, press the DIRECTION “q”button once.
The box to the right of “RECEIVE DUMP” should be highlighted.
MIDI RECEIVE DUMP ENABLE / DISABLE
The MIDI Dump Advanced Features are for use when you want to record and save a musical performance
to a connected MIDI Data recorder.
On the SK PRO, the total onboard memory can be transmitted and received as a series of System Exclusive
(SysEx) messages called a Memory Dump. This Parameter allows you to select whether or not you want
System Exclusive messages received as part of a Sequence. When this Parameter reads Enable Sysx data
will be received. When it reads Disable, SysEx data will not be received.
Turn the VALUE knob to make your selection.
IMPORTANT NOTE: If you attempt to receive a Data Dump to the SK PRO when Disable is displayed,
the Information Center Display will flash, "Data Protect !" This ensures that you do not overwrite data
accidentally.

MIDI 15
From the screen shown on the previous page, press the DIRECTION “q” button once.
The box to the right of “TYPE” should be highlighted.
Temporary Dump Send
This Parameter allows you to transmit the current registration to a connected MIDI data recorder.
NOTE: A “MIDI data recorder” can be an external hardware device, or a Digital Audio Workstation or DAW,
which is a software program installed on a computer.
NOTE: It is recommended that you perform this operation prior to recording a sequence to ensure that your
sequence will play back with the correct settings.
1. Make sure that the MIDI recorder is ready to receive data (RECORD).
2. Press the DIRECTION “q” button. The “SEND DUMP” box should be highlighted.

MIDI16
3. Press the ENTER button to start the data dump to the MIDI Data recorder. The Information
Center Display will show:
When all information has been sent, the Information Center Display will display:
4. Press the MENU/EXIT button. The “Completed.” message will disappear.
5. Press the PLAY button to return to PLAY Mode.

MIDI 17
System Dump Send
From the previous screen, turn the VALUE knob so that the box to the right of “TYPE” displays
“System.”
This Parameter allows you to transmit all of the settings to a connected MIDI recorder.
To transmit your settings, do the following
1. Make sure that the MIDI recorder is ready to receive data (RECORD).
2. Press the DIRECTION “q” button. The “SEND DUMP” box should be highlighted.

MIDI18
3. Press the ENTER button to start the data dump to the MIDI Data recorder. The Information
Center Display will show:
When all information has been sent, the Information Center Display will display:
4. Press the MENU/EXIT button. The “Completed.” message will disappear.
5. Press the PLAY button to return to PLAY Mode.

MIDI 19
From the screen shown at the bottom of page 503, press the PAGE “u” button once. The CHANNEL
FUNCTION Mode Page should now display.
MIDI TRANSMIT - INTERNAL ZONES
This Menu Page allows you to select on which MIDI Channel each Part will transmit. You can select from
1 through 16 as well as OFF.
Use the DIRECTION “t” and “u” buttons to move back and forth among UPPER, LOWER and
PEDAL.
Turn the VALUE knob to make your selection.
From the above screen, press the PAGE “u” button once.
MIDI RECEIVE - INTERNAL ZONES
This Menu Page allows you to select on which MIDI Channel each Part will receive. You can select from 1
through 16 as well as OFF.
Use the DIRECTION “p” and “q” buttons to move up and down among UPPER, LOWER and
PEDAL.
Turn the VALUE knob to make your selection.
NOTE: As explained previously, Hammond’s standard protocol is to transmit and receive UPPER,
LOWER and PEDAL MIDI data on MIDI Channels 1, 2and 3respectively.

MIDI20
uINTERNAL and EXTERNAL ZONES
As explained on page 491, the Internal and External Channels of the instrument are referred to as Zones.
The features available for the Zones are found in the COMBINATION FUNCTION Mode. This is explained
starting below.
tINTERNAL ZONES
This FUNCTION MODE Page allows you to change the characteristics of the Internal or Keyboard Zones of
your SK PRO. All of these Parameters can be Recorded to a Combination.
TRY THIS:
1. From any of the PLAY Mode screens, press the MENU/EXIT button once. The Information
Center Display should now look like this:
2. Press the ENTER button. The COMBINATION FUNCTION Mode should be highlighted.
3. Press the PAGE “u” button three times. The Information Center Display should now look
like this:
You may now use the DIRECTION buttons in conjunction with the VALUE knob to make changes to
the Internal Zones of your SK PRO. These changes are explained starting on the next page.
Other manuals for Sk PRO
6
Table of contents
Other Hammond Synthesizer manuals
