Hammond Sk PRO User manual

INFORMATION
CENTER
DISPLAY

Information Center Display2
INFORMATION CENTER DISPLAY
The buttons, Drawbars, etc., are used to control the operations necessary for Registration set-ups, settings
for each voice, as well as MIDI information. The Information Center Display allows you to see and
regulate these changes.
uMENU/EXIT, PLAY, and ENTER buttons
These 3 buttons allow you to choose from among the various options for using the Information Center
Display. The following is a very brief explanation of each of these buttons.
MENU/EXIT
This button allows you to place the Information Center Display into the MENU display
mode, allowing you to access the FUNCTION Mode Pages.
PLAY
This button allows you to place the Information Center Display into the PLAY display
mode.
ENTER
This button allows you to confirm that you want to Record or overwrite a setting you have
edited.
NOTE: More information about editing Parameters and Recording edits will be covered extensively in
later chapters of this Guide.
Information Center Display 3
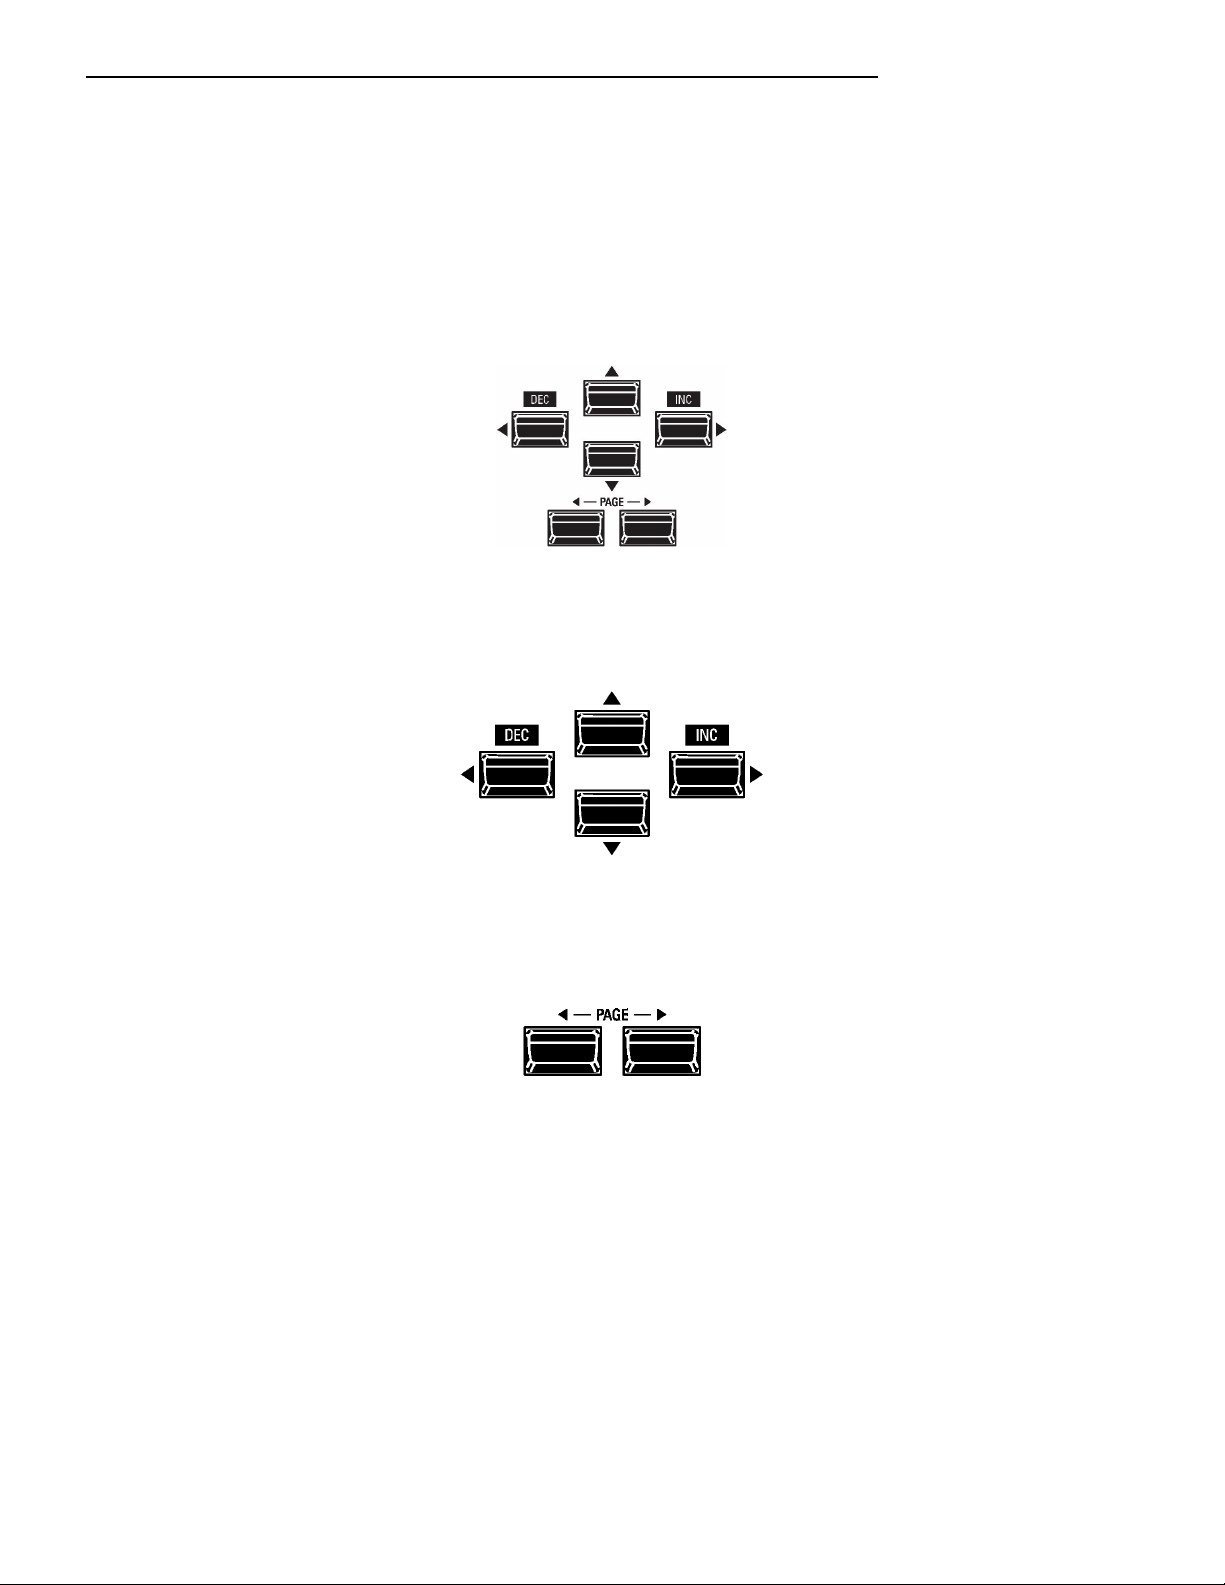
uDIRECTION and PAGE buttons
These buttons allow you to find the FUNCTION Mode Page Menus and features within each Menu quickly.
tDIRECTION (Cursor) buttons
The four top buttons UP (“p”), DOWN (“q”), LEFT (“t”) RIGHT (“u”) are the DIRECTION buttons.
They allow you to navigate among the main MENU Pages as well as the Parameters within each FUNCTION
Mode Page.
tPAGE buttons
The two PAGE buttons LEFT (“t”) and RIGHT (“u”) allow you to select FUNCTION Modes within each
MENU page.
NOTE: More information regarding how to use the DIRECTION and PAGE buttons will be covered later in this
section of the Guide.
Information Center Display4
uDISPLAY MODES
As stated in the INTRODUCTION, there are three Display Modes - PLAY Mode, MENU Mode and
FUNCTION Mode.
Within the PLAY Mode are five screens - COMBINATION Display, ORGAN Patch Display, PIANO Patch
Display, ENSEMBLE Patch Display and MONO SYNTH Patch Display. These will be explained starting
below.
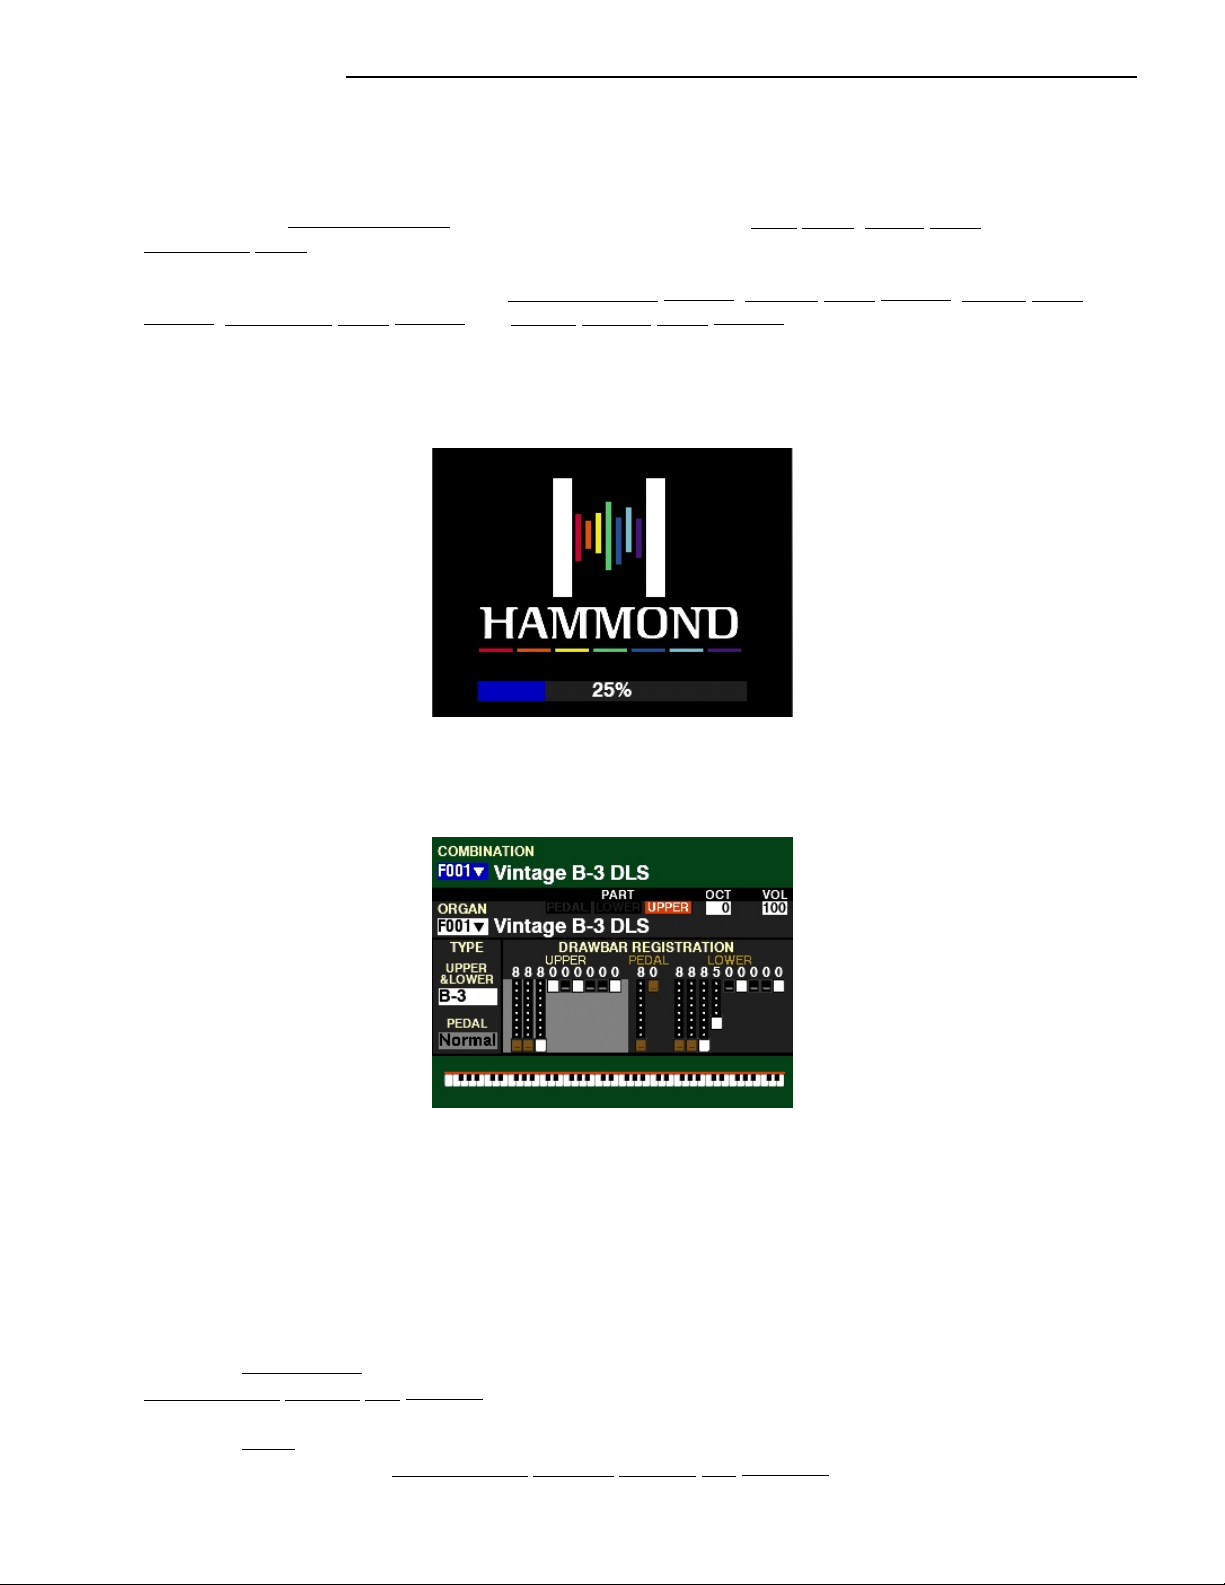
After the instrument is first turned “ON,” the Information Center Display should show a screen similar to
this:
While this screen is displaying, you will see a status bar which will scroll from left to right as the system
software loads. After approximately 55 seconds, the Information Center Display will show a screen similar
to this:
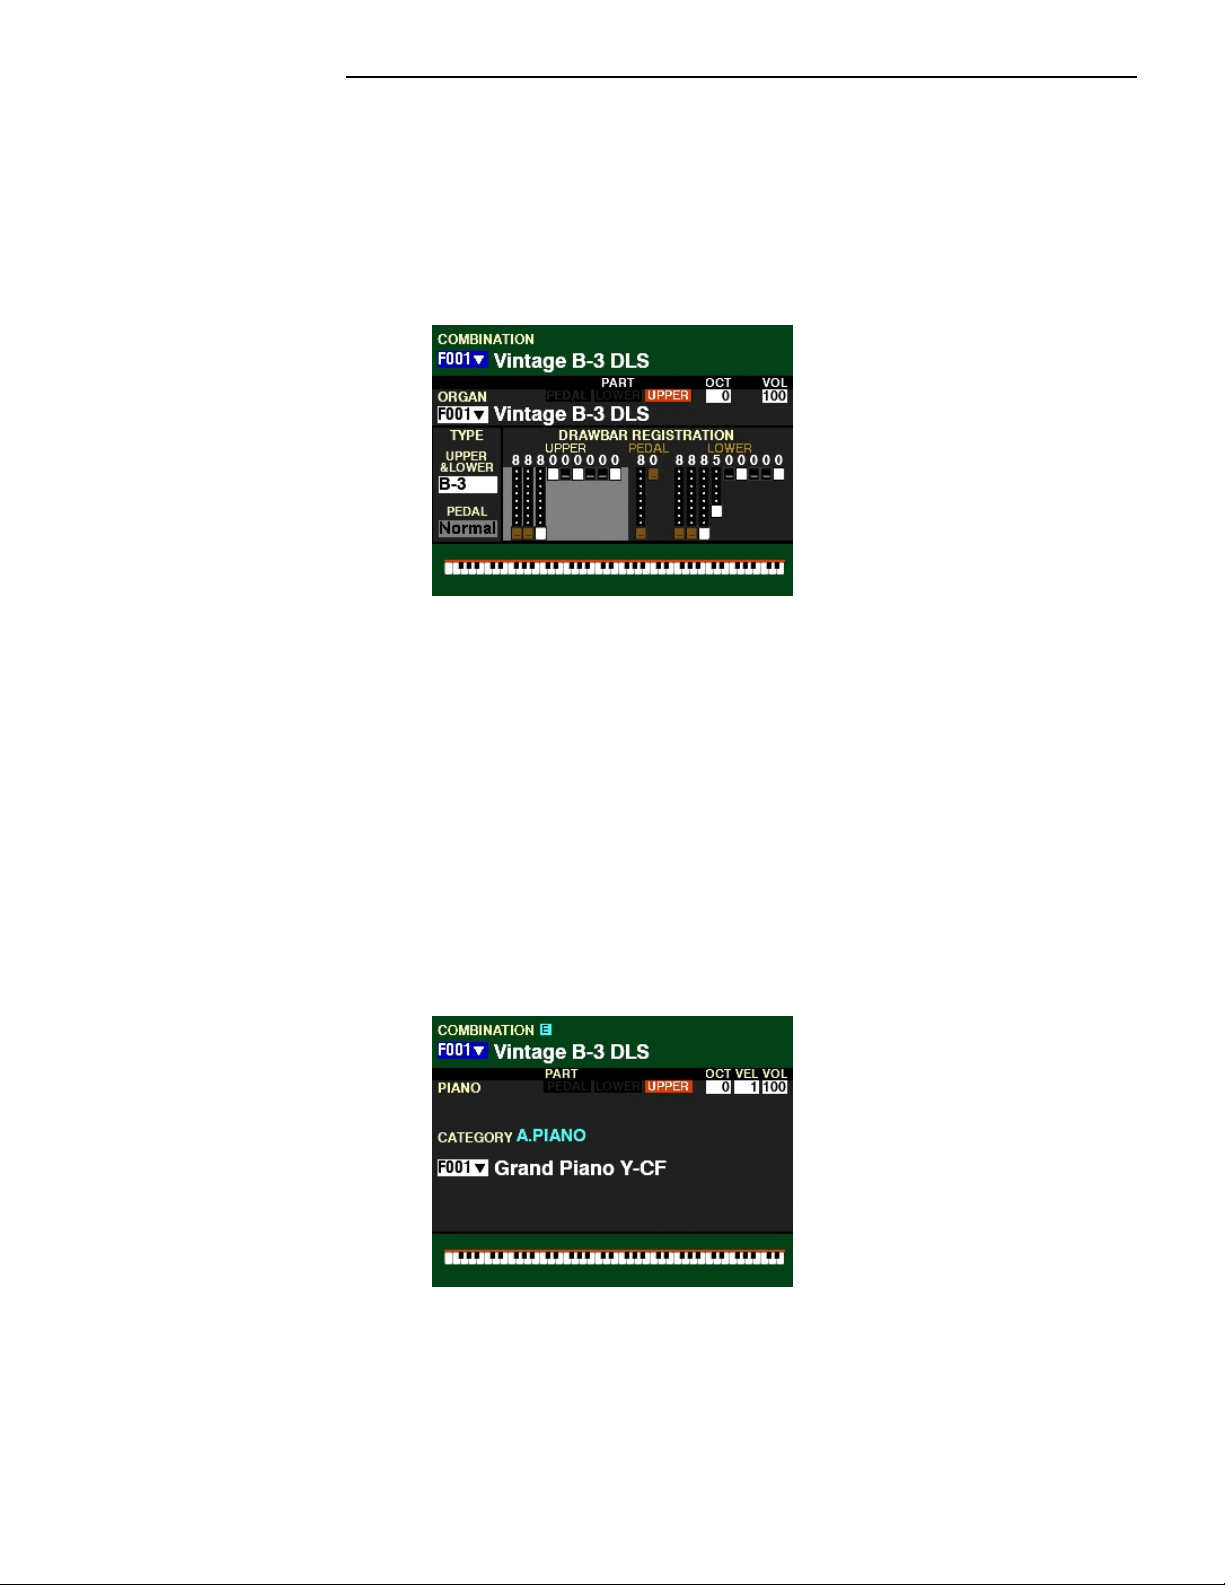
This screen will show:
1. The name and number of the selected Combination,
2. The Part, Octave and Volume settings for the ORGAN Section,
3. The name and number of the ORGAN Patch,
4. Drawbar registrations shown both graphically and numerically,
5. The ORGAN Types for UPPER, LOWER and PEDAL Parts,
6. The status of the SPLIT (either “ON” or “OFF,” and the SPLIT Point).
NOTE: A Combination is a preregistered group of Patches and effects. More information is covered in the
Combinations, Patches and Bundles section.
NOTE: A Patch is a preregistered group of sounds and effects unique to a particular Voice Section. More
information is covered in the Combinations, Patches, Bundles and Favorites Chapter.

Information Center Display 5
IMPORTANT: It is assumed at this point that you have just turned the SK PRO "ON" and have not Pressed
either the PLAY or MENU/EXIT button. If you have, press the PLAY button once. Also the Drawbars should
be "OFF" (pushed "in").
uPLAY Modes
There are five PLAY Mode Displays:
1. COMBINATION Display,
2. ORGAN Display,
3. PIANO Display,
4. ENSEMBLE Display,
5. MONO SYNTH Display.
The following paragraphs will explain each of the individual PLAY Mode screens.
tPLAY Mode - COMBINATION Display
TRY THIS:
1. Press all four ALLOCATE buttons simultaneously to turn them “ON.”
2. With all four ALLOCATE buttons “ON,” press the PLAY button until the Information Center
Display looks similar to this:
This screen will show:
1. The Combination Number and Name,
2. The Numbers and Names for all four Voice Sections,
3. The Part, Octave, Velocity and Volume settings for each Voice Section.
Information Center Display6
tPLAY Mode - ORGAN Display
TRY THIS:
With all four ALLOCATE buttons “ON,” press the PLAY button until the Information Center Display
looks similar to this:
This screen will show:
1. The Combination Number and Name,
2. The Drawbar registration for the ORGAN Section,
3. The Number and Name of the selected ORGAN Patch,
4. The TYPE settings for the ORGAN Patch,
5. The Part, Octave and Volume settings for the ORGAN patch.
6. The SPLIT Setting and Range on the Keyboard (if SPLIT is active).
tPLAY Mode - PIANO PATCH Display
TRY THIS:
With all four ALLOCATE buttons “ON,” press the PLAY button until the Information Center Display
looks similar to this:
This screen will show:
1. The Combination Number and Name,
2. The Category of the selected PIANO Patch,
3. The Number and Name of the selected PIANO Patch,
4. The Part, Octave, Velocity and Volume settings for the PIANO patch.
5. The SPLIT Setting and Range on the Keyboard (if SPLIT is active).

Information Center Display 7
tPLAY Mode - ENSEMBLE PATCH Display
TRY THIS:
1. With all four ALLOCATE buttons “ON,” press the PLAY button until the Information Center
Display looks similar to this:
This screen will show:
1. The Combination Number and Name,
2. The Category of the selected ENSEMBLE Patch,
3. The Number and Name of the selected ENSEMBLE Patch,
4. The Part, Octave, Velocity and Volume settings for the ENSEMBLE patch.
5. The SPLIT Setting and Range on the Keyboard (if SPLIT is active).
tPLAY Mode - MONO SYNTH PATCH Display
TRY THIS:
1. With all four ALLOCATE buttons “ON,” press the PLAY button until the Information Center
Display looks similar to this:
This screen will show:
1. The Combination Number and Name,
2. The Category of the selected SYNTH Patch,
3. The Number and Name of the selected SYNTH Patch,
4. The Part, Octave, Velocity and Volume settings for the SYNTH patch.
5. Other SYNTH Parameters displayed with violet-colored graphics
6. The SPLIT Setting and Range on the Keyboard (if SPLIT is active).
These are the PLAY Screens. See the following pages for an explanation of the MENU Mode.

Information Center Display8
uMENU Mode
The MENU Mode has 4 Screens.
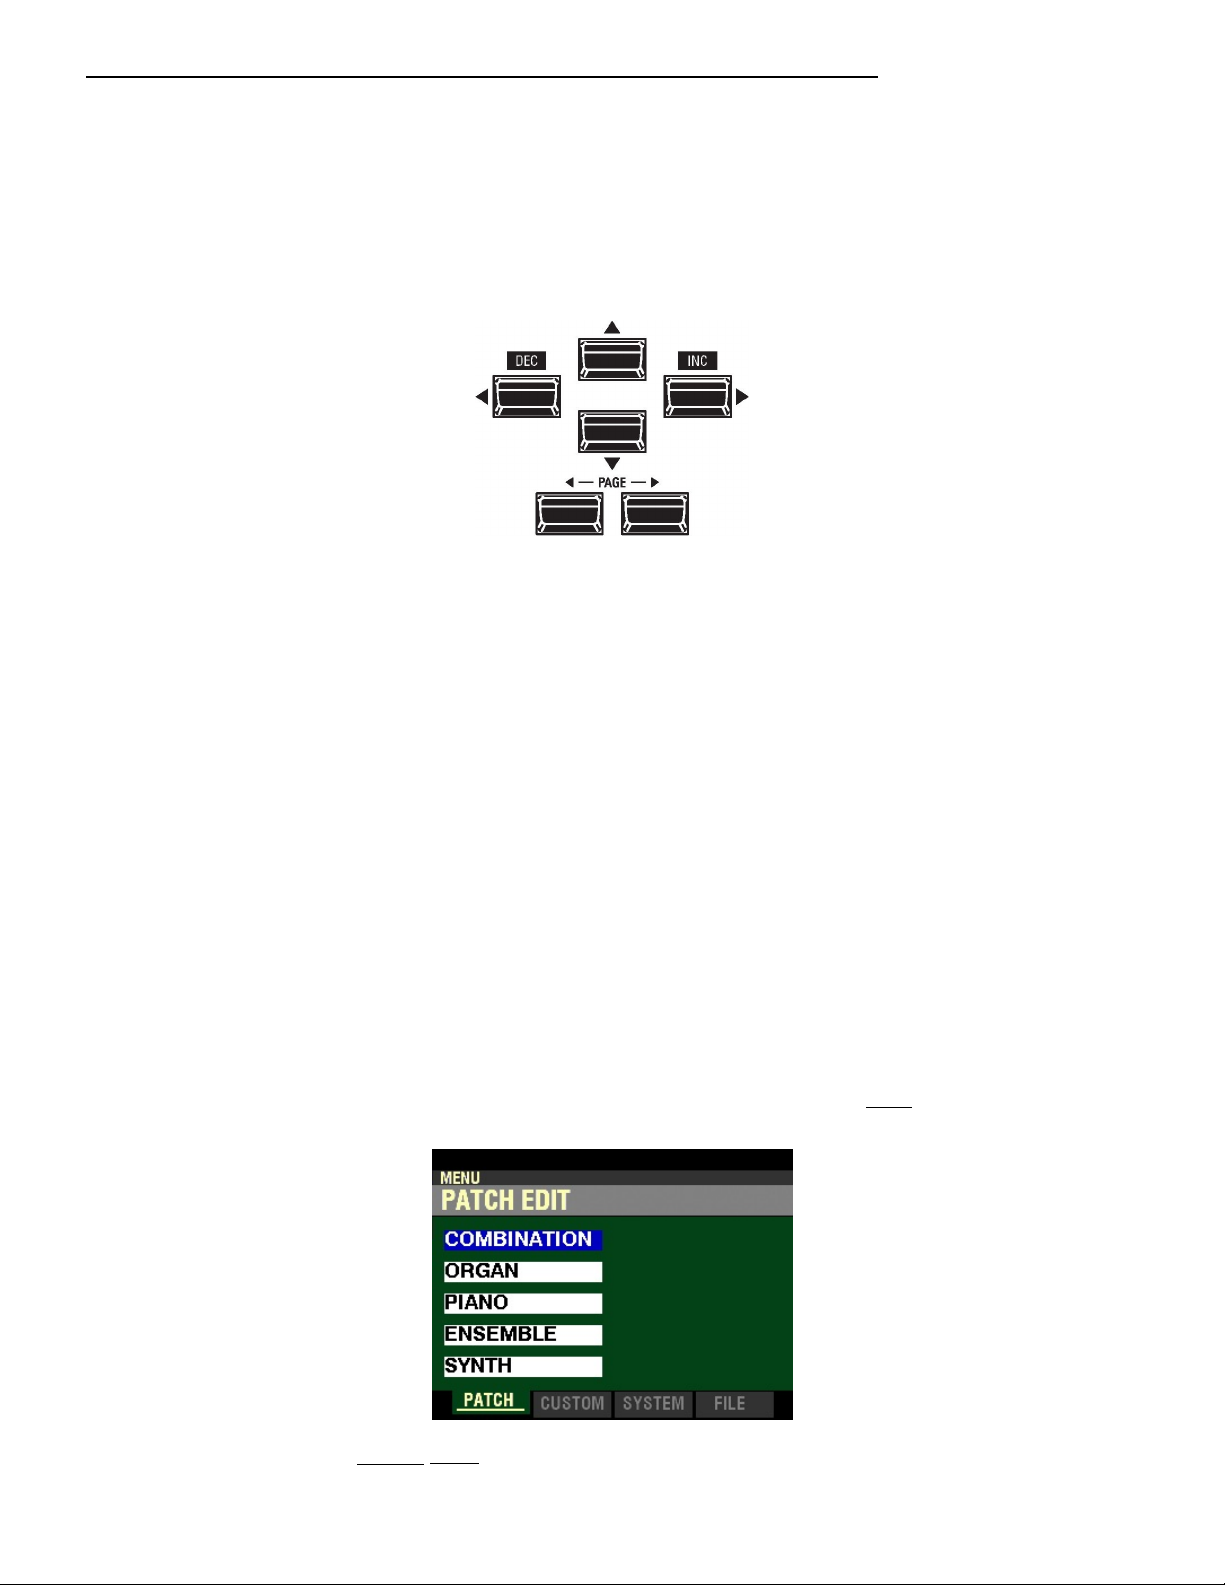
tMENU Mode - PATCH EDIT
If you Press the MENU/EXIT button once from any of the Play Mode screens, the Information Center
Display should look like this:
Five (5) choices should now appear in the display window.
Using the DIRECTION UP (“p”) and DOWN (“q”) buttons will allow you to select the FUNCTION Mode
Page you want to change.
COMBINATION - Allows you to edit Combination Parameters.
ORGAN - Allows you to edit ORGAN Patches.
PIANO - Allows you to edit PIANO Patches.
ENSEMBLE - Allows you to edit ENSEMBLE Patches.
SYNTH - Allows you to edit MONO SYNTH Patches.

Information Center Display 9
tMENU Mode - CUSTOM
From the PATCH EDIT Screen, press the PAGE “u” button once. The Information Center Display should
now look like this:
Four (4) choices should now appear in the display window.
Using the DIRECTION UP (“p”) and DOWN (“q”) buttons will allow you to select the FUNCTION Mode
Page you want to change.
TONE WHEEL - Allows you to customize the sound of the Drawbars.
LESLIE - Allows you to change the characteristics of the built-in digital Leslie.
PEDAL REG. - Allows you to change the registrations for the Pedal Drawbars.
PIPE - Allows you to change the characteristics of the Pipe Voices.
tMENU Mode - SYSTEM
From the CUSTOM EDIT Screen, press the PAGE “u” button once. The Information Center Display
should now look like this:
Ten (10) choices should now appear in the display window.
Using the DIRECTION UP (“p”), DOWN (“q”), RIGHT (“u”) and LEFT (“t”) buttons will allow you to
select the FUNCTION Mode Page you want to change.
SOUND - Allows you to adjust Master Tune, Transpose, and Master Equalizer.
AUDIO - This allows you to adjust the audio configuration between Voice Sections and output jacks.
CONTROL - This allows you to adjust the Parameters for the various controllers such as Foot Switch, Expression Pedal,
Display and Keyboard.
PATCH LOAD - This allows you to select which contents are loaded when a Combination is selected.
FAVORITE - Allows you select and edit Favorites.
MIDI - This allows you to adjust MIDI Channels, and various messages for the MIDI port and the USB MIDI.
GLOBAL - This allows you to adjust the Auto Power Off time and select USB Mass Storage.
DELETE - This allows you to delete “U” (User) contents.
DEFAULT - This allows you to return all or a portion of the instrument to factory settings.
INFORMATION - This allows you to see which jacks or portions of the instrument are active and to see and update the
software.

Information Center Display10
tMENU Mode - FILE
From the SYSTEM Screen, press the PAGE “u” RIGHT button once. The Information Center Display
should now look like this:
Four (4) choices should now appear in the display window.
Using the PAGE NAVIGATION and ENTER buttons will allow you to select the FUNCTION Mode Page you
want to change.
LOAD - Allows you to Load data from a USB Flash Drive or from the instrument’s Internal Memory.
SAVE - Allows you to Save data to a USB Flash Drive or the instrument’s Internal Memory.
DELETE - Allows you to Delete data from a USB Flash Drive or from the instrument’s Internal Memory.
FORMAT - Allows you to format a USB Flash Drive for use with your SK PRO.
u“Shortcuts”
Sometimes it may be desirable to access a FUNCTION Mode Page more quickly than can be done by using
the buttons on the Information Center Display. Because of this, your Hammond SK PRO has what are
called “Shortcuts” to many FUNCTION Mode Pages. You can “shortcut” to a FUNCTION Mode Page
associated with a particular function by pressing and holding a button controlling that function.
Many, but not all, of the FUNCTION Mode Pages can be accessed via Shortcuts. The different methods you
can use to access a particular FUNCTION Mode Page will be explained in each section before explaining
the FUNCTION Mode Page itself.
Information Center Display 11
uFUNCTION Mode
The FUNCTION Modes are the screens within each MENU Mode which allow you to adjust specific
Parameters within each Menu. The following pages will explain how to access the FUNCTION Modes to
make the changes you wish.
tUsing the DIRECTION and PAGE buttons
As stated earlier, the buttons marked with arrows - UP (“p”), DOWN (“q”), LEFT (“t”) RIGHT (“u”),
PAGE LEFT (“t”) and PAGE RIGHT (“u”) allow you to find the FUNCTION Mode Page Menus and
features within each Menu quickly.
The four top buttons UP (“p”), DOWN (“q”), LEFT (“t”) and RIGHT (“u”) are the DIRECTION buttons.
They allow you to navigate among the main MENU Pages as well as the Parameters within each FUNCTION
Mode Page.
The two PAGE buttons LEFT (“t”) and RIGHT (“u”) allow you to select FUNCTION Modes within each
MENU page.
The following example is designed to help you get used to using the DIRECTION and PAGE buttons to
find your way to the FUNCTION Mode Page you want to edit.
Selecting FUNCTION Mode Page Menus
IMPORTANT NOTE: If you followed the instructions on pages 5 through 7, you will have seen all four of the
MENU Mode screens as well as descriptions of the FUNCTION Mode screens within each. You will also have
noticed that one of the Menu choices will be “highlighted” - shown with a blue background with white lettering.
This is to let you know which Menu choice will be selected when you Press the ENTER button. The following
pages explain this more fully.
TRY THIS:
1. From any of the PLAY Mode screens, press the MENU/EXIT button once. The Information
Center Display should now look like this:
This is the PATCH EDIT Menu, which will be the first one displayed. The “COMBINATION”
box should be highlighted.

Information Center Display12
2. Press the DIRECTION “q” button once. The Information Center Display should now look
like this:
The “ORGAN” box will now be highlighted.
Use the DIRECTION “p” and “q” buttons to select FUNCTION Modes within the PATCH
EDIT Menu.
3. Now Press the PAGE “u” button once. The Information Center Display should now look like
this:
The CUSTOM EDIT Menu will now display. The “TONE WHEEL” box should be highlighted.
4. Press the DIRECTION “q” button once. The Information Center Display should now look
like this:
The “LESLIE” box will now be highlighted.
Use the DIRECTION “p” and “q” buttons to select FUNCTION Modes within the CUSTOM
EDIT Menu.

Information Center Display 13
5. Now press the PAGE “u” button once. The Information Center Display should now look like
this:
The SYSTEM Menu will now display. The “SOUND” box should be highlighted.
6. Press the DIRECTION “q” button two times. The Information Center Display should now
look like this:
The “CONTROL” box will now be highlighted.
7. Now press the DIRECTION “u” button once. The Information Center Display should now
look like this:
The “DELETE” box will now be highlighted.
Use the DIRECTION (“p”) (“q”) (“t”) (“u”) buttons to select FUNCTION Modes within the
SYSTEM Menu.

Information Center Display14
8. Now press the PAGE “u” button once. The Information Center Display should now look like
this:
The FILE Menu will now display. The “LOAD” box should be highlighted.
9. Press the DIRECTION “q” button once. The Information Center Display should now look
like this:
The “SAVE” box will now be highlighted.
Use the DIRECTION (“p”) and (“q”) buttons to select FUNCTION Modes within the FILE
Menu.
Information Center Display 15
Selecting FUNCTION Modes
Once you have selected the MENU you want, use the PAGE “t” and “u” buttons to select the specific
FUNCTION Mode you want to edit. This is explained starting below.
TRY THIS:
1. From any of the PLAY Mode screens, Press the MENU/EXIT button once. The Information
Center Display should now look like this:
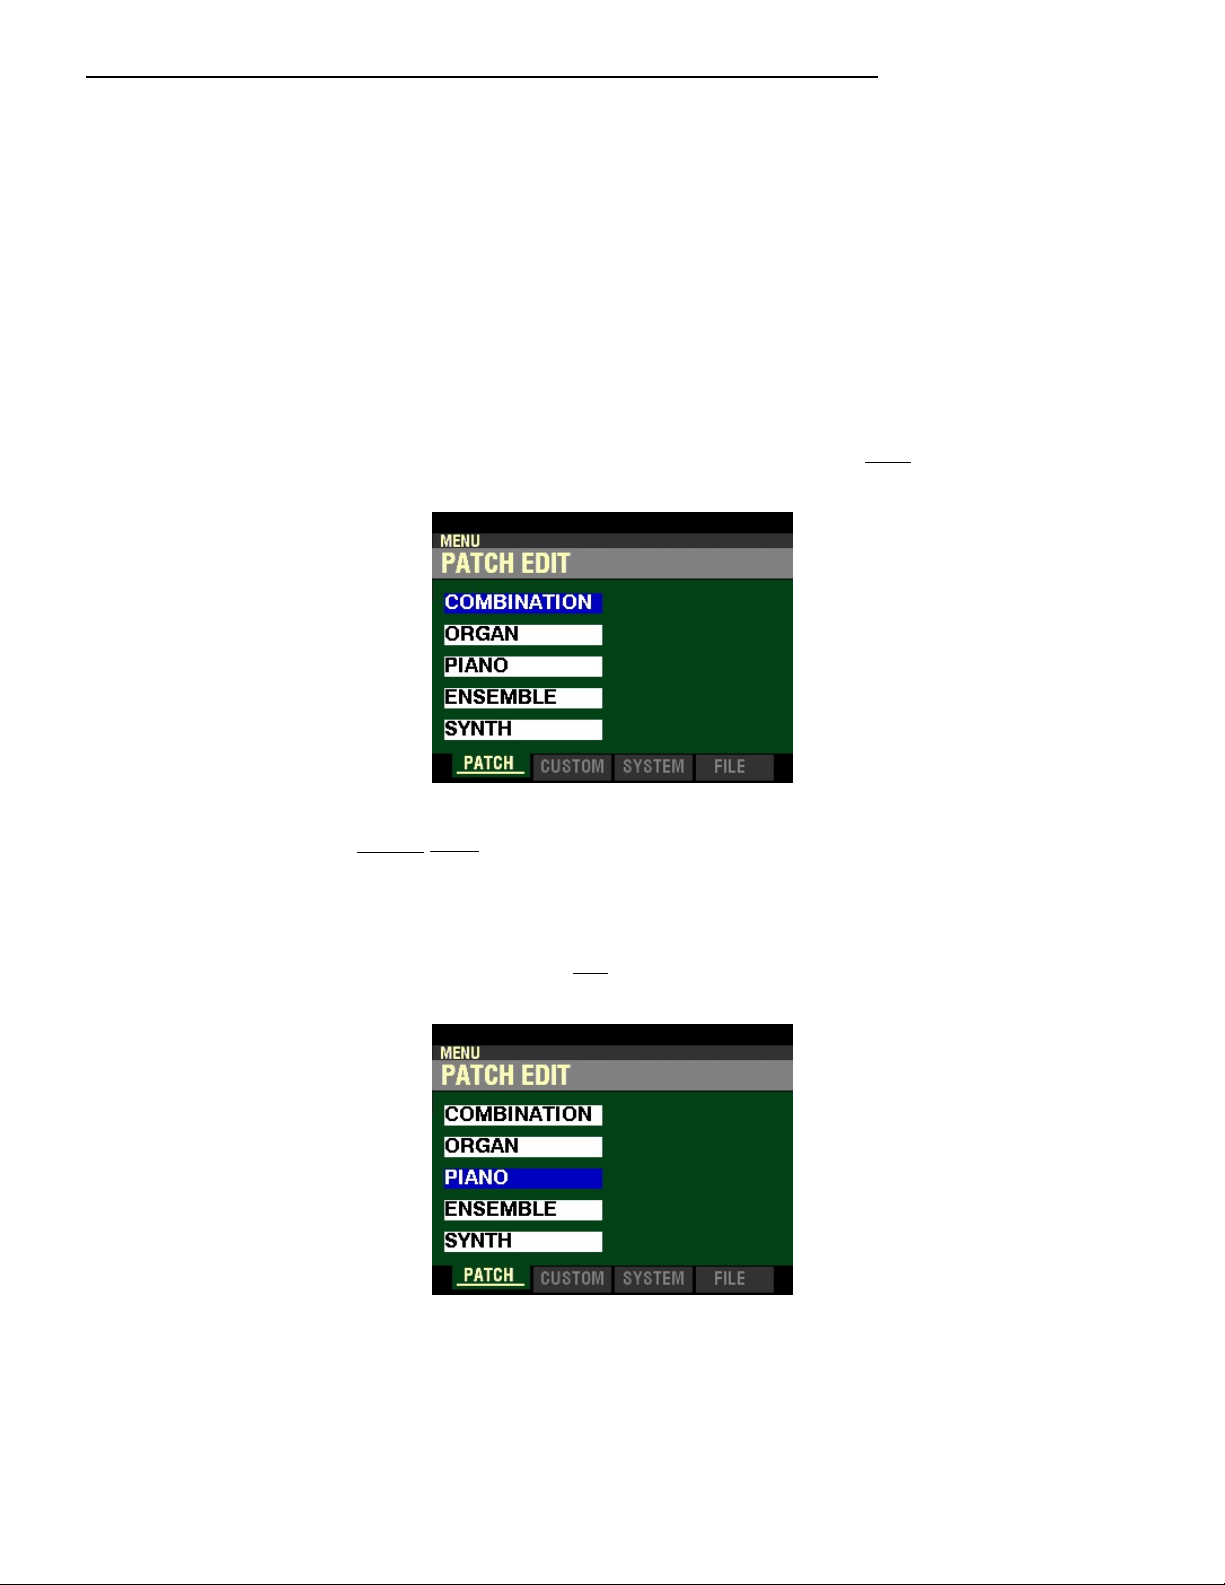
This is the PATCH EDIT Menu, which will be the first one displayed. The “COMBINATION”
box should be highlighted.
Now, let us assume you want to edit the current PIANO Voice.
2. Press the DIRECTION “q” button two times. The Information Center Display should now
look like this:
The “PIANO” box will now be highlighted.
Information Center Display16
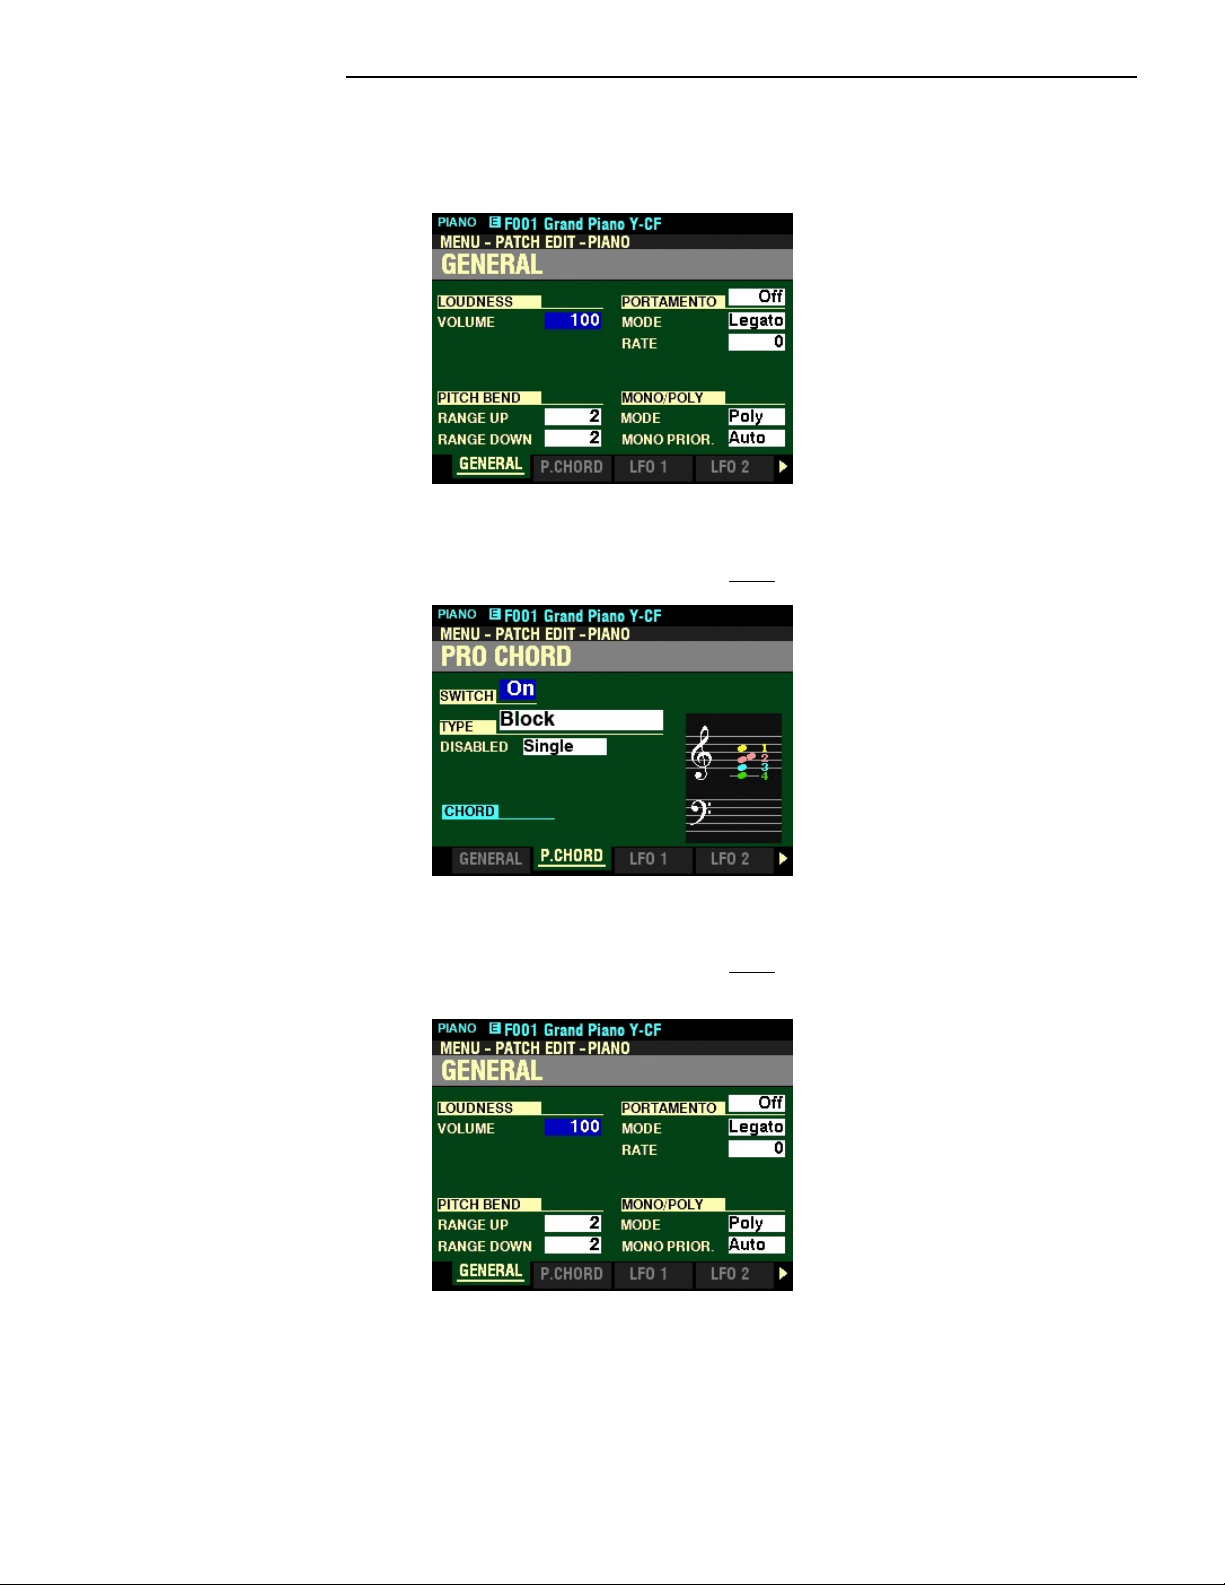
3. With “PIANO” now highlighted, press the ENTER button. The Information Center Display
should now look like this:
You have now selected the PIANO EDIT FUNCTION Mode.
4. From the above screen, press the PAGE “u” button once.
You have now selected Page 2 of the PIANO FUNCTION Mode.
5. From the above screen, press the PAGE “t” button once. The Information Center Display
should now look like this:
In the previous examples, you can see how to display the various Pages within a FUNCTION Mode by
using the PAGE “t” and “u” buttons.
When you have found the FUNCTION Mode Page you want, use the four DIRECTION (“p” “q” “t” “u”)
buttons to select the specific Parameter you want to edit.
To return to PLAY Mode, Press the PLAY button.
Other manuals for Sk PRO
6
Table of contents
Other Hammond Synthesizer manuals


