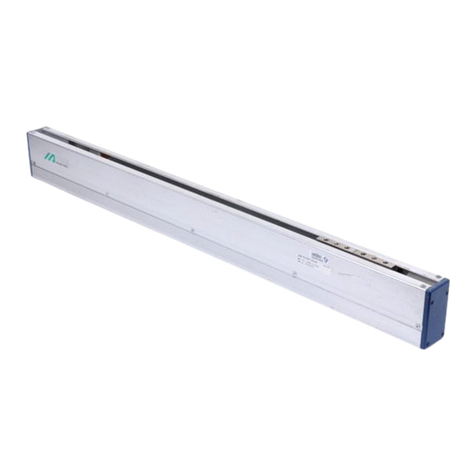
Hansen Technologies HA4A User manual

INSTRUCTIONS R429d
Dec 2003
HA4A MODULAR
PRESSURE REGULATORS
¾" THROUGH 6" PORT
(20 MM THROUGH 150 MM)
Specifications, Applications,
Service Instructions & Parts
Various Connection
Styles and Sizes
for Refrigerants
MATERIAL SPECIFICATIONS
Body:
¾" through 4": Ductile iron, ASTM A536
5" & 6": Cast steel, ASTM A352 LCB
Adapter: Ductile iron, ASTM A536
Piston: Steel, disc type, Teflon piston seal
V-Port/Seat: ductile iron, with Teflon seat
Main Seat: ¾" through 1¼": integral ductile iron
1½" through 6": stainless steel, removable
Gaskets: Nonasbestos, graphite composite
Manual Opening Stem: Steel, plated
Pilots: Stainless steel trim
Pilot Orifice: Stainless steel
Flanges: Forged steel, ASTM A105
Safe Working Pressure: 400 psig (27 bar)
Operating Temperature: –60F to +240F (–50°C to
+115°C), lower temperatures possible at pressure
downratings
INTRODUCTION
These advanced-design, strong-bodied, precision-
manufactured MODULAR regulators are superior in
their ability to overcome dirt and sticky oil during opening
and tight closing. Models are available for nearly every
control function requirement of industrial ammonia and
commercial halocarbon refrigeration. These regulators
are ideal for cold storage plants, poultry plants, meat
packing, fish processing, freezers, ice plants, breweries,
bottling plants, heat recovery units, petrochemical plants,
pharmaceutical plants, supermarkets, and many others.
APPLICATIONS
Evaporator Pressure Control
Defrost Pressure Control
Condensing Pressure Regulation
Receiver Pressure Control
Hot Gas Bypass Capacity Regulation
Suction Pressure Control
Air or Liquid Temperature Regulation
Internal System Pressure Relief
ADDITIONAL FEATURES
Tolerant of Dry Systems
For Ammonia, R22, R134a and other Hansen-Approved
Refrigerants
Wide Range of Options
Inlet, Outlet, or Differential Pressure
Wide Pressure Ranges
Electric Shut-Off, Dual, or Wide-Opening Available
Safe Working Pressure: 400 psig (27 bar)
CSA Certified, CRN for Canada
INSTALLATION
Regulators should be protected from dirt and moisture
during storage. The arrow on the body should be in the
normal direction of refrigerant flow. These valves will
not prevent reverse flow; use check valves where
necessary. Regulators are normally in horizontal pipe
lines with pilots and manual-opening stems on top. Do
not rotate the position of the valve adapter or the valve
will not operate.
The system should be free of dirt, weld slag, and rust
particles. Regulators can be equipped with separate,
close-coupled inlet strainers. No small, hidden, internal
screens are used. Gauges and gauge valves should
be installed on the inlet and outlet to help in system
diagnosis. Because of the many regulator pilot
combinations, during installation of a large job, the
regulator nameplates should be checked against piping
drawings to guarantee proper function for each location.
Where pilot solenoid control modules are used, the
nameplate coil voltage should be checked before wiring.
Pipe sizing, anchoring, valve rating, system design,
and other precautionary factors should be taken into
consideration to ensure “liquid hammer” will not occur
when the valve opens or closes.
The 5" and 6" valves are type HA4W with integral butt
weld end only. These steel-bodied regulators are
directly welded into the pipe line. During welding, the
manual-opening stem should be opened downward
several turns to protect the Teflon seat from weld heat.
Welds should be annealed as necessary in accordance
with good practice. Painting of valves and welds is
recommended for corrosion protection. Pipe covering,
where applied, should have proper moisture barrier.
Before putting valves into service, all pipe connections,
valve seats, cover seals, and stem seals should be
tested for leaks at pressure levels called for in appropriate
codes.

2
INSTRUCTIONS R429d
Dec 2003
ELECTRICAL
When the electric shut-off, wide-opening, or dual feature
is supplied, a Hansen low-wattage, molded electrical
coil is included. Standard coil voltages are 115V, 208/
230V, or 24V at 50/60Hz. Other voltages available.
The coil properly operates between 85% and 110% of
the rated voltage. Coils should only be energized while
on the pilot solenoid tube. Unless otherwise specified,
the standard coil with a ½" fitting for conduit is supplied
with valves.
A watertight solenoid coil with 18" (450 mm) long wire
pigtail leads and a steel frame housing with a ½" conduit
fitting is standard.
Optional DIN Plug Coils are for grounded cord
connections and include the necessary DIN plug socket
with gasket.
Coils with Junction Boxes are optional. Integral, steel
junction box for connection of the 18" (450 mm) long
wire pigtail leads.
Vibration-resistant, bright, long-life, neon pilot lights
are available. These pilot lights operate on primary
voltage; a special coil with secondary winding is not
necessary. Optional watertight pilot light assembly is
also available.
SERVICE AND MAINTENANCE
Failure to open:
Wrong coil or control module pilot; low line voltage;
controlling switch or thermostat not contacting; coil is
burned-out; adjacent shut-off valve closed; adapter
gasket hole not aligned with hole in body and adapter;
dirt packed under Teflon seal ring enabling excessive
blow by; large quantity of dirt particles in solenoid
module passages; dirt blocking internal pilot passages;
main valve seat is dirt jammed.
Failure to close:
Controlling switch or thermostat not opening contacts;
manual-opening stem is turned in; valve installed in
wrong direction; damage or dirt at main valve seat or
pilot seat; piston bleed hole plugged. Under extreme
conditions of liquid or oil “slugging” or pressure drops
exceeding 45 psi (3.1 bar), special construction may
be required. Contact the factory.
Before opening the regulator or disassembling the pilot
for service, be sure it is isolated from the system and
all refrigerant is removed (pumped out to zero pressure).
Follow usual refrigeration system safe servicing
procedures. Read the CAUTION section of this bulletin
on page 20.
To check solenoid pilot section of valve, disconnect
the electrical coil. Unscrew the coil nut and remove
washer. Lift coil housing away from valve. Remove the
four solenoid tube screws and remove solenoid tube
from valve. Inspect for dirt and damage to Teflon seat
and stainless steel pilot orifice. Clean, polish or replace
parts as necessary, then reassemble.
¾" THROUGH 1¼" (20 MM THROUGH 32 MM)
Use a 3/8" male hexagon wrench to loosen the four
adapter bolts, proceeding slowly to avoid refrigerant
which may still remain in the valve. If piston parts are
stuck, remove the 2" hex bottom cap in order to separate
the valve V-port/seat from the disc piston. Inspect disc
and piston bore for burrs, nicks, and other damage.
Remove burrs and nicks, clean or replace disc piston
and Teflon seal ring as necessary. Long-life seal on
disc piston need only be replaced when damaged or
severely worn. If replacing the disc piston seal, make
sure the seal is properly installed, with the edge up,
and does not “twist” during installation. Inspect V-port/
seat and main valve seat for nicks, marks, etc. The
main valve seat may be lapped by hand or power drill
to remove marks. Clean, polish or replace parts as
necessary. If necessary, the V-port tapered seat may
be reconditioned by removing up to 0.04" (1 mm) of
Teflon from it on a lathe. Lightly lubricate all parts and
gaskets with soft rag containing refrigerant oil. Align
hole in valve body, adapter gasket, and adapter to
assure proper operation. Reassemble valve. Carefully
check valve for leaks before returning it to service.
1½" THROUGH 6" (40 MM THROUGH 150 MM)
Loosen adapter bolts using a 12" adjustable wrench
(15" wrench for 5" and 6" valves), being careful to
avoid any refrigerant which may still remain in the
valve. If disc piston is difficult to remove, insert a ¼"-20
threaded screw (3/8"-16 for 5"& 6" valves) into center of
piston and lift straight-up. Inspect piston and piston
bore for burrs, nicks and other damage. Remove burrs
and nicks, clean or replace piston as necessary. Long-life
seal on disc piston need only be replaced when damaged
or severely worn. If replacing the disc piston seal,
make sure the seal is properly installed, with the edge
up, and does not “twist” during installation. These valves
also have a removable stainless steel main valve seat.
To remove seat ring for inspection, first remove small
hex head seat screw. Turn the seat ring counterclockwise
by turning it out with a wrench and a steel bar tool
positioned horizontally or by carefully tapping the seat
ring notch with a punch and a hammer. Inspect the V-
port/seat and main valve seat for nicks, marks, and
divots. The main valve seat may be lapped by hand or
power drill to remove marks. Grease and replace the
seat sealO-ring. Clean and polish, or replace the parts
as necessary. If necessary, the V-port tapered seat
may be reconditioned by removing up to 0.04" (1 mm)
of Teflon from it on a lathe. Lightly lubricate all parts
and gaskets with a soft rag containing refrigerant oil.
Align the hole in the valve body, adapter gasket, and
adapter to assure proper operation. Reassemble the
valve. Carefully check the entire valve for leaks before
restoring it to service

3INSTRUCTIONS R429d
Dec 2003
MAIN REGULATORS ONLY (AR1, AR3)
OPERATION OF REGULATORS
The regulator adapter (top cover) is available with one
control module port or three control module ports. One
control module port is often used for a solenoid valve
or a single pressure regulator. Three control module
ports are often used for a dual regulator and other
multiple function variations.
When the modular regulator has three control module
ports, two are in series (SI and SII) and one is in
parallel (P). Inlet pressure enters the internal
equalization passage and goes to both the P port and
the SI port. Inlet pressure enters the SII when the control
module SI port is open. When the control module in the
SI and SII port or the P port is open, pressure enters the
space above the piston which forces the main valve
seat to open and regulate flow.
Hansen regulators are normally furnished with control
modules (pilots) installed and tested (see page 3).
However, modular regulators less pilots and flanges
are available on order from ¾" to 6" (20 mm to 150 mm).
Each AR1 and AR3 includes flange gaskets, nuts and
bolts, and a plugged ¼" FPT outlet pressure access
port. The access port is for connecting outlet or differential
control module sensing lines or gauges.
AR1 is the main regulator body with ONE control module
(pilot) port, control module not included.
AR3 is the main regulator body with THREE control
module (pilot) ports, for a maximum of three control
modules, not included. The 5" and 6" (125 mm and 150
mm) AR3 regulators have a single control module port
with connection points for up to three total ports via
mounted pilot piping.
TO ORDER
(Main Regulators only) Specify port size and catalog
number (AR1 or AR3).
¾" through 6"
(20 mm through
150 mm)
¾" through 4"
(20 mm through
100 mm)
5" & 6"
(125 mm and 150 mm)
AR1 AR3

4
INSTRUCTIONS R429d
Dec 2003
HA4A STANDARD REGULATOR
OPERATION
Inlet pressure is channeled through the internal
equalization passage to the inlet pressure control
module. The valve modulates open when inlet pressure
exceeds the pressure setting on the control module.
The gas or liquid passes through the inlet pressure
control module to enter the space on top of the piston,
which forces the main valve seat to open and regulate
flow. As inlet pressure increases, the main valve seat
opens further to maintain the selected inlet pressure. A
minimum pressure difference of 2 psi (0.14 bar) is
adequate to fully open the main valve. When inlet
pressure decreases below the pressure setting on the
control module, the closing spring will cause the main
valve seat to throttle closed.
ADJUSTMENT
Connect a pressure gauge via a gauge valve at the
gauge port on the regulator adapter. Set the control
module range spring at minimum force (control module
stem turned counterclockwise). Operate the refrigeration
compressor system and achieve approximate desired
suction pressure. Turn the control module stem clockwise
until a slight increase in inlet pressure is detected by
the gauge. The inlet pressure setting can now be
increased by turning the control module stem clockwise
or decreased by turning it counterclockwise. The system
should be allowed to operate for a period of time before
the final adjustment is made. The inlet pressure control
module is available in Range A, 0 to 150 psig (0 to 10
bar); or Range B, 30 to 300 psig (2 to 21 bar). A
vacuum Range V, 20" to 130 psig (–0.67 to +9 bar) is
also available.
HA4AK RESEATING RELIEF REGULATOR
OPERATION
(Same as HA4A) Inlet pressure is channeled through
the internal equalization passage to the reseating relief
control module. When inlet pressure exceeds the relief
setting, the control module opens wide to allow pressure
to enter the space on top of the piston. This causes the
main valve seat to open and relieve the inlet pressure,
provided the outlet pressure is at least 2 psi (0.14 bar)
lower. A 5 psid (.35 bar) closing spring is standard on
¾" through 1¼" valves. See page 6 for M3K pilot details.
When used for defrost relief from low side to an
intermediate pressure, a check valve on the outlet is
required to prevent back flow during refrigeration.
ADJUSTMENT
The control module is nonadjustable, factory-set and
sealed. Available in Range A, 0 to 150 psig (0 to 10
bar); or Range B, 30 to 300 psig (2 to 21 bar).
HA4AL DIFFERENTIAL PRESSURE REGULATOR
OPERATION
Inlet pressure is channeled through the internal
equalization passage to the differential pressure control
module. Outlet pressure (or other) is introduced to the
space on top of the differential pressure control module
diaphragm via an external sensing tube. A range spring
on the top of the control module diaphragm allows the
control of the differential between inlet and outlet
pressure. Increased range spring force increases the
differential setting. Inlet pressure, counteracted by the
range spring plus outlet pressure, enters the space on
top of the piston which forces the main valve seat to
open and regulate flow. The external sensing tube on
the 5" & 6" valves must be customer supplied and field
installed.
ADJUSTMENT
Connect a pressure gauge via a gauge valve at the
gauge port on the regulator adapter for the inlet pressure
reading. A pressure gauge downstream is also required.
With the control module range spring force at the
minimum (control module stem turned fully
counterclockwise, at this point pressure differential is
at minimum), slowly turn the control module stem
clockwise until the desired pressure difference between
the two gauges is achieved. A final adjustment should
be made after system has operated for a period of time.
The system must be capable of generating the desired
pressure difference for the regulator to open. Range A,
0 to 150 psig (0 to 10 bar).

5INSTRUCTIONS R429d
Dec 2003
HA4AO OUTLET PRESSURE
REGULATOR
OPERATION
Outlet pressure is
channeled through an
external sensing tube to
the outlet pressure control
module. The outlet
pressure is introduced to
the space under the control
module diaphragm. When
outlet pressure decreases
below the outlet pressure
setting the range spring
forces the control module
to open further. As the
control module opens, more inlet pressure enters the
space on top of the piston forcing the main valve seat
to open further and regulate flow. As outlet pressure
rises the control module reduces the inlet pressure
to the piston and the main valve seat starts closing.
The external sensing tube on the 5" & 6" valves must
be customer supplied and field installed. A 5 psid (.35
bar) closing spring is standard on ¾" through 1¼"
valves. A lighter spring is available for applications
where a low pressure drop is required, such as
holdback or crankcase pressure regulators.
ADJUSTMENT
Connect a pressure gauge via a gauge valve to the
outlet gauge port located on the outlet pressure control
module or the pipe after the regulator. With the control
module range spring at minimum force (control module
stem turned counterclockwise) operate the
refrigeration compressor. Turn the control module
stem clockwise until the desired outlet pressure is
achieved. Ranges available: B, 30 to 300 psig (2 to 21
bar); or vacuum range V, 20" to 130 psig (–0.67 to +9
bar).
HA4AB REGULATOR WITH ELEC-
TRIC WIDE OPENING
OPERATION
When the solenoid
control module is
de-energized, this
control operates in
the same manner as
the HA4A Standard
Regulator or other
pilot functions.
When energized,
inlet pressure
bypasses the
constant pressure
control module and enters the space on top of the
piston which forces the main valve seat to open wide
to permit flow in the direction of arrow.
ADJUSTMENT
With solenoid control module de-energized, follow
adjustment procedures for the HA4A Standard
Regulator. See page 10.
HA4AS REGU-
LATOR WITH
ELECTRIC
SHUT-OFF
OPERATION
When the solenoid
control module is
energized, this
control operates in
the same manner as
the HA4A Standard
Regulator or other
pilot functions. When
de-energized, valve closes tight to stop flow in direction
of arrow regardless of pressure setting on the control
module.
ADJUSTMENT
Energize the solenoid control module and follow the
control module adjustment procedures for the HA4A
Standard Regulator. See page 10.
HA4AD DUAL PRESSURE
REGULATOR
OPERATION
When the solenoid
control module is
energized, this valve
operates in the same
manner as the HA4A
Standard Regulator
or other pilot
functions. When the
solenoid control
module is de-
energized, the inlet
pressure is chan-
neled to the
higher-setting inlet
pressure control module and operates in the same
manner as the HA4A regulator. When inlet pressure
rises above the higher setting, the control module
opens to allow inlet pressure to enter the space on
top of the piston which forces the main valve seat to
open and regulate flow. Typically used as a combined
evaporator pressure regulator and defrost internal
relief valve.
ADJUSTMENT
Connect a pressure gauge via a gauge valve at the
gauge port on the regulator adapter. With the solenoid
control module de-energized, adjust the constant
pressure control module in the P port for the high-
pressure setting. This may require a warm room or hot
gas supply to the evaporator. Then, energize the solenoid
control module located on the series SI port and adjust
the constant pressure module in the series SII port for
the low-pressure setting. For control module adjustment,
follow the adjustment procedures for the HA4A Standard
Regulator. See page 10.

6
INSTRUCTIONS R429d
Dec 2003
HA4AM ELECTRIC MOTOR
COMPENSATED REGULATOR
OPERATION
The regulator pressure setting is altered as the motor
receives a signal from a suitable temperature
controller. The motor responds to maintain the balance
in the electrical circuit. The rotation of the motor is
transmitted through a cam, valve stem, and range
spring to the top of the control module diaphragm. An
increase in temperature decreases the range spring
force on top of the control module diaphragm. This
decrease in force on the diaphragm allows inlet
pressure to pass through the control module to enter
the space on top of the piston which forces the main
valve seat open to reduce the evaporator pressure. A
decrease in temperature causes an increase in the
range spring force. This restricts the flow of inlet
pressure to the piston causing a reduction in the
opening of the main valve seat, reducing regulator
flow by raising the pressure setting.
APPLICATIONS
This motor compensated regulator is popular for fruit
storage, precision air temperature control, and liquid
chiller control.
ADJUSTMENT
Adjust the temperature controller as specified by the
manufacturer. Fully open the regulator manually by
turning in (clockwise) the manual-opening stem to
cool the product or room. Once the temperature at
the sensing device is approximately as desired, adjust
the controller output so that the cam is rotated to the
center position. Put regulator back in automatic
operation by turning the manual-opening stem out
(counterclockwise). Loosen the adjustment locking
nut. See the diagram to the right. Turn the adjustment
stem clockwise to raise the inlet pressure setting or
counterclockwise to lower the inlet pressure setting.
When the desired refrigerant pressure setting is
achieved, tighten the adjustment locking nut. A final
adjustment should be made after the system has
operated for a period of time.
Using a potentiometer slide wire type of controller
(typically 135 ohm), depending on product heat load, a
deviation from desired temperature of about +2F to +5F
(+1.1°C to +2.8°C) is normal to rotate the regulator cam
for maximum load satisfaction. As the load is reduced
or as the temperature becomes lower, the cam rotates
to create a higher evaporator pressure just adequate
to balance the load and maintain the desired temperature,
usually with ±1°F (0.5°C). Other controllers are available
to operate the motor/cam rotation.
The basic Electric Motor Compensated Regulator
consists of a nonremovable control module with a
motor bracket and cam. The control module is available
in either Range A, 0 to 150 psig (0 to +10 bar); or
EGNARMAC
EGNAHCERUSSERP
NNEPLLEWYENOH
VroA
WOL ESIR )rab1.3(gisp54)rab1.2(gisp03
HGIH ESIR )rab2.6(gisp09)rab1.4(g
isp06
Range V, 20" to 130 psig (–0.67 to +9 bar). The motor
bracket comes mounted on the control module and is
suitable for use with either PENN (standard) or
HONEYWELL motors. Two cams are available: Low
Rise (standard) and High Rise. The table below indicates
the pressure change possible for each cam and motor
combination.
The PENN motor (standard) has 270° of rotation travel
and the HONEYWELL motor has 160° of rotation travel.
Motors are available for either 135 ohm or
4–20 mA control signal input and require 24 VAC
power input. Electric proportional thermostat
controllers (135 ohm output), electronic PID controllers
(4–20 mA output) with sensor, and 24V transformers
are available accessories.

7INSTRUCTIONS R429d
Dec 2003
EZISTROP
)mm( HHHH LLLLLM *W
WS,TPFSDO,NW
3
/
4
1,"1,"
1
/
4
"
)23,52,02( "90.3 )87( "77.6 )271( "57.3 )59( "36.4 )711( "02.8 )802( "49.8 )722( "91.6 )751( "83.2 )06( "70.4 )301( "02.7 )381( "07.3 )49( "05.4 )411(
1
1
/
2
"2," )05,04( "78.2 )37( "48.8 )522( "09.4 )421( "27.5 )541( "93.21 )513( "93.31 )043( "88.9 )152( "53.2 )06( "40.4 )301( "98.01 )772( "38.9 )052( "05.4 )411(
2
1
/
2
"
)56( "26.3 )29( "96.9 )642( "75.5 )141( "35.6 )661( "10.31 )033( "30.41 )653( "88.9 )152( "53.2 )06( "40.4 )301( "10.11 )082( "38.9 )052( "26.5 )341(
"3 )08( "60.4 )301( "00.01 )452( "30.6 )351( "88.6 )571( "83.51 )193( "04.61 )714( "52.21 )113( "53.2 )06( "40.4 )301( "83.31 )043( "02.21 )013( "05.6 )561(
"4 )001( "96.4 )911( "65.01 )862( "85.6 )761( "64.7 )981( "10.71 )234( "15.02 )125( "21.41 )953( "96.2 )86( "83.4 )111( "10.51 )183( "70.41 )753( "60.8 )502(
INSTALLATION DIMENSIONS
1½" THROUGH 4" REGULATORS
¾" THROUGH 1¼" REGULATORS
M = Additional length for close-coupled strainer
*Maximum width of valve.
For ¾", 1", 1¼" valves add 3" (80 mm) to one side of the valve for external piping as found on HA4AO and HA4AL.
An alternate 4-bolt version of the 1¼" valve is available with face-to-face dimension (L1) same as R/S 1¼" for
replacements.
12431234
The above dimensions do not include seal cap and solenoid coil removal height, or motor-access clearance.
M3E25 = Less 4" (100 mm) long weld nipple. M3M = Electric motor compensated control module with motor.
GOLATAC3MW3MSMO3MK3MWK3ML3MP3MJ3MT3M52E3MM3M
eziS )mm( "5.6 )561( "21.5 )031( "52.3 )38( "57.7 )791( "5.6 )561( "21.5 )031( "5.6 )561( "5.6 )561( "36.4 )811( "5.4 )411( "1 )52( "9.41 )873(
“P” DIMENSION FOR CONTROL MODULES (MM)
(MM)

8
INSTRUCTIONS R429d
Dec 2003
INSTALLATION DIMENSIONS (MM)
5" AND 6" REGULATORS
FOR SERIES AND PARALLEL ARRANGEMENT (AD)
SI, solenoid; SII & P pressure pilots
FOR SERIES ARRANGEMENT (AS)
SI, solenoid; SII pressure pilot
5" AND 6" PILOT PIPING (TOP VIEW)
EZISTROPAT
"5 )521( "50.5 )821( "62.0 )6.6(
"6 )051( "60.6 )451( "82.0 )1.7(
WELD END DIMENSIONS (MM)
(See page 8.)

Table of contents
