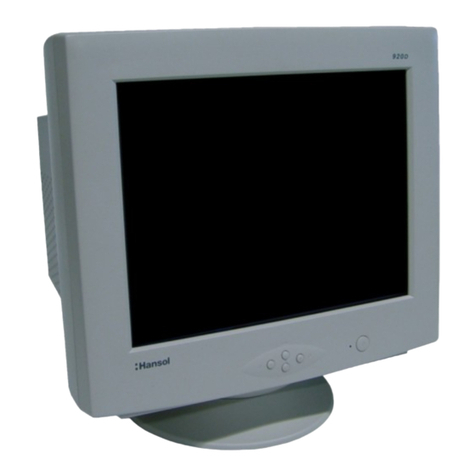
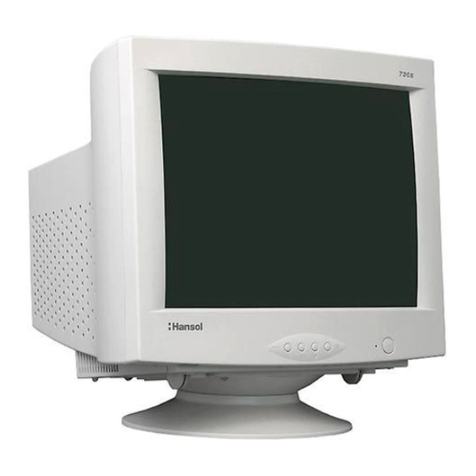
Hansol D19AL User manual

19Inch (Viewable size 18 )
High Resolution Color Monitor
(D19AL)
Printed on the recyclable paper
Printed in Korea
Part No. 942179060001 - 01
User s Manual

User’s Manual 3
FCC Information
This equipment has been tested and found to comply with limits for a class B digital device,
pursuant to Part 15 of the FCC Rules. These limits are designed to provide reasonable
protection against harmful interference in a residential installation.
This equipment generates, uses, and can radiate radio frequency energy and, if not installed
and used in accordance with the instructions, may cause harmful inteference to radio
Communications. However, there is no guarantee that interference will not occur in a particular
installation.
If this equipment does cause unacceptable interference to radio and television reception, which
can be determined by turning the equipment off and on, the user is encouraged to try to correct
the interference by one or more of the following measures.
Reorient or relocate the receiving antenna.
Increase the separation between the equipment and receiver.
Connect the equipment into an outlet on a circuit different from that to which the
receiver is connected.
Consult the dealer or an experienced Radio/TV technician for help.
DECLARATION OF CONFORMITY
PRODUCT NAME : 19" COLOR MONITOR
MODEL NUMBER : D19AL
FCC RULES : TESTED TO COMPLY WITH FCC PART 15, CLASS B
OPERATING ENVIRONMENT : FOR HOME OR OFFICE USE
FCC COMPLIANCE STATEMENT :
This device complies with part 15 of FCC Rules. Operation is subject to the following two
conditions : (1) This device may not cause harmful interference, and (2) this device must accept
any interference received, including interference that may cause undesired operation.
THE PARTY RESPONSIBLE FOR PRODUCT COMPLIANCE
HANSOL MULTITECH, INC.
7001, VILLAGE DRIVE, SUITE 255, BUENA PARK, CA. 90621, USA
TEL : (714)562-5151
User’s Manual2
Introduction
Package 4
Features 5
Safety Information 6
Power Management System 7
Installation
Connection to your computer 7
Pin assignment table D-Sub mini 15 pin connector 8
Controls
Function of controls 8
OSD Menu 9
Troubleshooting
Troubleshooting Guide 13
Specifications
Electrical specifications 14
Mechanical specifications 14
Environmental specifications 14
Appendix
Preset timings 15
English

Introduction
User’s Manual4
Caution
Changes or modifications not expressly approved by the party responsible for compliance
could void the user’s authority to operate the equipment.
Warning
If this equipment has more than one interface connector, do not leave cables connected to
unused interfaces.
Canadian Notice
This Class B digital apparatus meets all requirements of the Cannadian Interference Causing
Equipment Regulations.
Avis Canadien
Cet appareil numérique de la classe B respecte toutes les exigences du Règlement sur le
matériel brouilleur du Canada.
Notice
The information contained in this document is subject to change without notice.
Package
First, we would like to thank you for your purchase of this monitor. This monitor is 19inch, high
resolution, color display monitor. This manual covers the use, and points of caution, when
operating this monitor.
Please take the time to read this manual so that you will obtain the best performance and most
use from your monitor. After reading the manual, store it in a safe place for future reference.
This items illustrated below are contained in the carton.
First, be sure that your carton includes the following items.
If any items are missing or damaged, please contact your local dealer or supplier.
D19AL
- Color Monitor
- AC Power input cable
- User’s Manual (Warranty Registration Card)
- Signal Cable (15pin 3layer D-sub)
Introduction
User’s Manual 5
ENGLISH
Features
19-inch(18 inch visual)high performance display color monitor
Automatically scans frequencies from
- Horizontal frequency: 30 to 110KHz
- Vertical frequency: 47 to 160Hz
Compatible with VGA, SVGA, VESA, MAC Standards and maximum resolution modes up to
1600 1200 and BNC cable is optional.
Supports VESA flicker free modes including 85Hz refresh rate.
On Screen menu fingertip control system to visually select and adjust screen images using
Encode S/W on front panel and on screen menus.
Power supply operates on AC100~240Volt 60/50Hz for use all over the world.
Equipped with DDC 1/2B for Plug & Play capability.
Equipped with an energy-saving feature.
Power management circuit signaled by the computer system, will reduce power consumption
when the computer system is not in use.
Monitors with nonglare/antistatic screens are compliant with MPR
1990 Emissions standards and meets requirements for CE Marking.
TCO : (option)

Introduction
User’s Manual6
Safety information
Provided with this monitor is a detachable power supply cord with IEC320 style terminations.
It may be suitable for connection to any UL listed personal computer with similar
configuration. Before making the connection ensure that the voltage rating of the computer
convenience outlet is the same as the monitor and that the ampere rating of the computer
convenience outlet is equal to or exceeds the monitor current rating.
For 120Volt applications use only UL listed detachable power cord with NEMA configuration
5-15P type(parallel blades) plug cap.
For 240Volt applications use only UL listed detachable power cord with NEMA configuration
6-15P type(tandem blades) plug cap.
Use only a power source and connection appropriate for the monitor as indicated on the
marking label.
Slots and openings in the cabinet are provided for ventilation;
these openings must not be blocked or covered. Never push objects of any kind into cabinet
slots or other openings.
Never insert anything metallic into the monitor openings.
Doing so may create a danger of electric shock.
To avoid electric shock, never touch the inside of the monitor.
Only a qualified technician should open the monitor s case.
Unplug the monitor from the wall outlet before cleaning. Do not use liquid cleaners or aerosol
cleaners. Use a damp, lint-free cloth for cleaning.
Install the monitor near an outlet that you can reach easily. Disconnect the product by
grasping the plug firmly and pulling in from the outlet.
Never disconnect it by pulling the cord.
Introduction / Installation
User’s Manual 7
ENGLISH
Power management system
This monitor meets VESA(Video Electronics Standards Association) DPMS(Display Power
Management Signalling)standards. In order for the monitor s power saving feature to function,
the video board or computer must also meet VESA
®
DPMSTM standards.
Power management table
Note : The monitor automatically goes through the DPMS steps when it is idle.
To release the monitor from the DPMS condition, press any key on the keyboard.
Connection to your computer
CAUTION
Ensure that both the PC and the display monitor are switched off.
To attach the monitor to your system, as shown in
the following illustrations.
1. Connect the signal cable to the 15pin
graphics connector of the system and tighten
the fastening screws.
2. Insert the AC power cord into monitor and
then into an AC power outlet.
3. To turn on the monitor, push the power switch.
Note : To attach the monitor to the Macintosh system, please contact the signal cable to the
2layer 15pin graphics connector of the system. ( The connecting direction of signal
cable is opposite to the IBM compatible system)
Normal
Operation Standby Suspend Mode Power-Off Mode
Horizontal Active Inactive Active Inactive
Vertical Active Active Inactive Inactive
Video Active Blanked Blanked Blanked
LED Color Green Green/AMBER AMBER AMBER Blinking
Power 110W Less than Less than Less than
Consumption 80%ofMAX 15W 5W
Power saving function mode
State
Sync

User’s Manual8
Installation / Controls
Pin assignment table D-Sub Mini 15pin connector
Function of controls
OSD Controls
The OSD apears on the screen when you press MENU ( ) button.
“ON SCREEN MENU” controls include the following extended controls such as Size, Position,
Geometry Distortion, Color temp, Degauss, Moire on & off, Language, OSD-Position, Recall,
Cont & Brt, etc.
Function of OSD buttons on the front of the monitor
Pin No. Assignment
1 Red Video
2 Green Video
3 Blue Video
4 Frame Ground (brown)
5 Ground (blue)
6 Red Video Ground
7 Green Video Ground
8 Blue Video Ground
9 N.C
10 ID (green)
11 N.C
12 SDA (orange)
13 H-Sync (black)
14 V-Sync (yellow)
15 SCL (red)
(15 Pin D-Sub)
15
11 15
610
User’s Manual 9
ENGLISH
Additional front controls
Power Switch : Turn the monitor power on or off, When the power is on, the LED is lit.
Accessing OSD
Press MENU( ) Button.
: Direct Brightness access.
: Direct Contrast access.
EXIT from OSD
: Press this ( ) button in the main menu and submenu.
OSD Menus
Main Menu
OSD main menu allows you to adjust user controls.
Use the / : Control buttons to scroll through all of the menus.
Main Menu control guide
: Exits the OSD controls.
/ : Move the function to choose.
: Proceed to the selected menu.
Controls
Position Size Geometry Moire Language
OSD position Color-Temp Degauss Recall Zoom
The 15-Pin D-sub connector (male)
of the signal cable (IBM Systems)

User’s Manual10
Controls
Contrast Menu
: Exits the Contrast menu.
/ : Increase or decrease the Contrast.
Brightness Menu
: Exits the Brightness menu.
/ : Increase or decrease the Brightness .
Position Menu
After choosing , Push MENU( ) button.
MEUN( ) : Push this button again & again to change the H/V-position.
: Moves the image vertically up or down.
: Moves the image horizontally left or right.
Size Menu
After choosing , Push MENU( ) button.
MENU ( ) : Push this botton again & agiain to change the H/V-size.
: Increases or Decreases the vertical size of the image.
: Decreases or Increases the horizontal size of the image.
User’s Manual 11
ENGLISH
Controls
Position and size Menu control guide
: Exit to the main menu.
: Refer to
MENU( ) : Toggle position and menu directly.
Geometry Menu
The Geometry controls allow you to adjust the
curvature or angle of displayed image.
Atfer choosing , push MENU( ) button.
Pincushion : Increase or decrease the curvature of the sides either inward or outward.
Parallelogram : Increase or decrease the tilt of the sides either to the left or right.
Trapezoid : Increase or decreases the bottom of the screen to be the same as the top.
Pin Balance : Increase or decrease the curvature of the sides.
Top Corner : Increase or decreases the curvature of the top sides.
Bottom Corner : Increase or decrease the curvature of the bottom sides.
Rotation : Rotate the entire display to clockwise or counterclockwise.
Geometry Menu control guide
: Exit to the main menu.
: Move the function to choose.
MENU( ) : Function to choose.
: Move the bow in the or direction to increase or decrease the adjustment.
Moire Menu
After choosing , Push MENU( ) button.
Select ON or OFF with / key.
Select H.MOIRE or V.MOIRE with / key.
: Adjust the Moire.
BRIGHTNESS
PP
50%
31.5KHz 60Hz
50%
GEOMETRY
PINCUSHION
PARALLELOGRAM
TRAPEZOID
PINBALANCE
TOP CORNER
BOTTOM CORNER
ROTATION

User’s Manual 13
ENGLISH
User’s Manual12
Troubleshooting
Troubleshooting guide
If your monitor is not performing properly, please use the following troubleshooting chart for
quick solutions to common problems.
Controls
Problem
No Picture
Picture is
unstable
The display
image is not
centered, too
small or large.
The color of
image on screen
is abnormal.
Is the power cord connected?
Is the power switch on?
Is the signal cable properly
connected?
Is the monitor in the power save
mode?
Is the signal cable properly
connected?
Are there signals, which are
outside of the required frequency
range?
Is the signal connector pin
assigments correct?
Are there signals, which are
outside of the required frequency
range?
Is the magnetic object nearby?
Is the pin arrangement of the
signal connector correct?
Possible cause
Connect power cord.
Turn on power switch.
Connect signal cable properly
Press any key on the keyboard or
move the mouse.
Connect signal cable properly
Input signals which are within the
range of the monitor.
Use correct signal connector.
Use correct signal which within the
frequency range of the monitor(If
the signal is correct, adjust the
controls to desired image.)
Move object far away.
Use correct signal cable.
Use degauss control.
Remedy
Language Menu
After choosing , Push MENU( )button.
: Select the language.
OSD Position Menu After choosing , Push MENU( )button.
MENU ( ): Push this button again & again to
change the H/V-position.
: Move the OSD menu Vertical bottom or
Horizontal left.
: Move the OSD menu Vertical top or
Horizontal right.
Color Temp Menu
Presetting Select the desired color setting. The bar is replaced by the color setting choice.
" USER, 6500K, 9300K "
Color adjustment is available only in USER mode.
/ : Move the bar with or key to select the user
MENU( ) : Press MENU button for 5 seconds.
/ : Increcse or decrease the selected coldr adjustment.
: Exit to the main menu.
LANGUAGE
PRESS DO KEY
POSITION
PRESS KEY

Appendix
User’s Manual 15
User’s Manual14
Specifications
Preset Timings
This Monitor D19AL has preset modes for the 14 most popular industry standards for Plug and
Play capability.
Video
Sync
Vertical
Video
Sync
Horizontal
Electrical Specifications
Mechanical Specifications
Environmental Specifications
ITEM 920eF
CRT Type 19 , 90 deflection
CRT Dot pitch 0.25mm (0.20 in Hor.)
CRT Surface Non-glare, ARASC
H/V Separate, TTL, positive/negative
H/V Composite, TTL, positive/negative
RGB Analog (0.7Vp-p), positive
75 Terminated
30KHz~110KHz (Automatically)
47Hz~160Hz (Automatically)
Maximum Resolution 1792Dots 1344Lines (Non-interlace)
Pixel Clock(Max.) 270 MHz
Display Size (Standard) Horizontal 350mm, Vertical 262mm
Power Consumption 110 W
Power Supply AC 100~240Volt 60/50Hz 3Hz
Input Connector D-Sub, 15Pin Connectors (3layer)
Display Colors Unlimited
ITEM 920eF
18.5 (W) 18.4 (D) 18.3 (H)
470mm(W) 466.5mm(D) 466mm(H)
21.1 (W) 24.4 (D) 22.2 (H)
537mm(W) 620mm(D) 564mm(H)
23.3Kg (51.3Ibs)
26.7Kg (58.7Ibs)
ITEM 920eF
32 F to 104 F(0C to 40 C)
-4 F to 140 F (-20 C to 60 C)
10% to 85% R.H. Non-condensing
Input
Signal
Dimension
Sync
Video
Carton
Unit
Horizontal
Net
Vertical
Gross
Operating
Storage
Humidity
Scanning
frequency
Weight
Temperature
ENGLISH
VGA/70Hz VGA/60Hz 640/85Hz 800/75Hz 800/85Hz 1024/75Hz 1024/85Hz
720 400 640 480 640 480 800 600 800 600 1024 768 1024 768
Asec 31.777 31.777 23.111 21.333 18.631 16.660 14.561
Bsec 3.813 3.813 1.556 1.616 1.138 1.219 1.016
Csec 1.907 1.907 2.222 3.232 2.702 2.235 2.201
Dsec 25.422 25.422 17.778 16.162 14.222 13.003 10.836
Esec 0.636 0.636 1.556 0.323 0.569 0.203 0.508
Omsec 14.268 16.684 11.764 13.333 11.756 13.328 11.765
Pmsec 0.064 0.064 0.069 0.064 0.056 0.050 0.044
Qmsec 1.08 1.048 0.578 0.448 0.503 0.466 0.524
Rmsec 12.711 15.253 11.093 12.8 11.179 12.795 11.183
Smsec 0.413 0.318 0.023 0.021 0.019 0.017 0.015
H-Polarity Negative Negative Negative Positive Positive Positive Positive
V-Polarity Positive Negative Negative Positive Positive Positive Positive
Resolution
Timing
H-Freq 31.469 31.469 43.269 46.875 53.674 60.023 68.677
V-Freq 70.09 59.94 85.008 75 85.061 75.029 84.997
Pixel rate 28.322 25.175 36 49.5 56.25 78.750 94.5
IBM VESA
1280/75Hz 1280/85Hz 1600/75Hz 1600/85Hz 640/67Hz 832/75Hz 1152/75Hz
1280 1024 1280 1024 1600 1200 1600 1200 640 480 832 624 1152 870
Asec 12.504 10.971 10.667 9.412 28.571 20.11 14.560
Bsec 1.067 1.016 0.948 0.279 2.116 1.117 1.280
Csec 1.837 1.422 1.501 1.325 3.175 3.91 1.440
Dsec 9.481 8.127 7.901 6.972 21.164 14.524 11.520
Esec 0.119 0.406 0.316 0.279 2.116 0.559 0.320
Omsec 13.329 11.761 13.333 11.765 15 13.414 13.322
Pmsec 0.038 0.033 0.032 0.028 0.086 0.06 0.044
Qmsec 0.475 0.579 0.491 0.433 1.114 0.784 0.568
Rmsec 12.804 11.235 12.800 11.294 13.714 12.549 12.667
Smsec 0.013 0.011 0.011 0.009 0.086 0.02 0.044
H-Polarity Positive Positive Positive Positive Negative Negative Negative
V-Polarity Positive Positive Positive Positive Negative Negative Negative
VESA MACINTOSH
H-Freq 79.976 91.146 93.75 106.250 35 49.726 68.681
V-Freq 75.025 85.024 75.000 85.000 66.667 74.551 75.062
Pixel rate 135 157.5 202.5 229.500 30.24 57.284 100
Resolution
Timing

Memo
User’s Manual16 Bedienungsanleitung 17
Einleitung
Lieferumfang 18
Merkmale 19
Sicherheitshinweise 20
Powermanagement-System 21
Installation
Anschluß an den Computer 21
Belegung des 15-Pin-Mini-D-Sub-Steckers 22
Regler
Steuerungen 22
OSD Menü 23
Problemlösungen
Tips zur Lösung von Problemen 27
Technische Daten
Elektrische Daten 28
Mechanische Daten 28
Betriebsbedingungen 28
Anhang
Timing-Tabelle 29
Deutsch

Einleitung
Bedienungsanleitung 19
Einleitung
Bedienungsanleitung18
Merkmale
Hochleistungsmonitor der 19-Zoll-Klasse mit einer sichtbaren Diagonalen von 45.6cm
Automatisch erkannte Frequenzen:
- Horizontalfrequenz: 30 bis 110 kHz
- Vertikalfrequenz: 47 bis 160 Hz
Der Monitor ist kompatibel zu den Standards VGA, SVGA, VESA und Macintosh; er bietet
verschiedene Auflösungsmodi bis hinauf zu einem Maximum von 1600 x 1200.
Es werden die flimmerfreien VESA-Modi - auch mit 85 Hz Bildwiederholrate - unterstützt.
Leicht einstellbares On Screen-Menü-Kontrollsystem für visuelle Auswahl und Einstellung des
Monitorbiles.
Mit Onscreen-Menüs und drei leicht erreichbaren Reglern an der Monitorfront lassen sich alle
Darstellungsparameter mit wenigen Tastendrücken leicht einstellen.
Das Netzteil arbeitet mit 100 bis 240 Volt Wechselspannung bei 60/50 Hz und ist daher
weltweit einsetzbar.
Der Monitor ist mit Plug & Play-Funktionalität nach DDC 1/2B ausgestattet.
Der Monitor verfügt über einen Stromsparmodus.
Ein Powermanagement-Schaltkreis minimiert automatisch den Stramverbrauc entsprechend
den VESA-Standards.
Die Modelle mit antistatischer Entspiegelungsbeschichtung erfüllen die Emissionsschutznorm
MPR (1990) sowie die CE-Bestimmungen.
TCO : (optional)
Achtung
Mit dem optionalen Dreh-Kippfuß kann der Monitor aus verschiedenen Blickwinkeln
betrachtet werden.
Warnung
Wenn die Ausrüstung mehr als einen Schnittstellenanschluß besitzt, dürfen keine Kabel
and unbenutzte Schnittstellen angeschlossen sein.
Canadian Notice
This Class B digital apparatus meets all requirements of the Canadian Interference
Causing Equipment Regulations.
Avis Canadien
Cet appareil numÈrique de la classe B respecte toutes les exigences du Rëglement sur le
matÈrial brouilleur du Canada.
Hinweis
Alle Daten in dieser Anleitung können sich ohne besondere Ankündigung ändern.
Lieferumfang
Zunächst möchten wir uns dafür bedanken, daß Sie sich für diesen Monitor entschieden haben,
einen hochauflösenden Farbmonitor der 19-Zoll-Klasse. Diese Anleitung erläutert seine
Bedienung und enthält Sicherheitshinweise, die bei der Verwendung des Monitors zu beachten
sind.
Bitte nehmen Sie sich die Zeit, diese Anleitung sorgfältig zu lesen. So können Sie den größten
Nutzen aus Ihrem neuen Monitor ziehen. Verwahren Sie diese Anleitung nach dem Lesen gut,
um auch später darin nachschlagen zu können.
In der Verpackung sind folgende Artikelposttionen enthalten (Abbildungen siehe unten).
Vergewissern Sie sich zunächst, daß der Ihnen gelieferte Karton sämtliche Artikelposttionen
enthält. Falls Artikel fehlen oder beschädigt sind, wenden sie sich bitte an ihren ’drtlichen
Händler oder Lieferanten.
19AL
- Farbmonitor
- Netzkabel
- Bedienungsanleitung (Garantiekarte)
- Signal Kabel (15 Pin 3 Schicht D-Sub)
DEUTSCH

Einleitung
Bedienungsanleitung 21
DEUTSCH
Powermanagement-System
Dieser Monitor erfüllt die DPMS- (Display Power Management Signaling) Standards der VESA
(Video Electronics Standards Association). Zur Aktivierung der Stromsparfunktion des Monitors
muß die Videokarte bzw. der Computer ebenfalls den VESA
®
DPMSTM Standard erfüllen.
Powermanagement-Tabelle
Hinweis : Der Monitor durchläuft die DPMS-Modi automatisch, sobald er eine bestimmte Zeit
lang nicht benutzt wird. Um den Monitor wieder zu aktivieren, müssen Sie eine
beliebige Taste auf der Computertastatur betätigen.
Anschluß an den Computer
VORSICHT
Vergewissern Sie sich, daß sowohl der Computer als auch der Monitor ausgeschaltet sind.
Befolgen Sie beim Anschließen des Monitors
an Ihren Computer die folgenden Hinweise.
1. Stecken Sie das Videokabel in den 15-
poligen Videoausgang des Computers
und ziehen Sie die Befestigungsschrauben
an.
2. Stecken Sie das Netzkabel in die
Buchse am Monitor und dann in eine
Netzsteckdose.
3. Schalten Sie den Monitor mit dem
Netzschalter ein.
Hinweis : Wenn Sie den Monitor an ein Macintosh-System anschließen wollen, verbinden Sie
bitte das Signalkabel mit dem 15pin-Graphik-Stecker des Computers
(Der Anschluß des Signalkabels ist spiegelbildlich zu IBM-kompatiblen Personal
Computer durchzuführen.)
Einleitung
Bedienungsanleitung20
Sicherheitshinweise
Mit diesem Monitor wird ein separates Netzkabel mit IEC320-Stecker geliefert. Es kann
zusammen mit jedem UL-geprüften Computer verwendet werden, der entsprechend
ausgerüstet ist. Vergewissern Sie sich vor dem Anschluß, daß an der
Netzstromausgangsbuchse des Computers eine für den Monitor geeignete Spannung
anliegt und daß der angegebene Amperewert der Leistungsaufnahme des Monitors
entspricht bzw. sie übersteigt.
Für den Anschluß an 120V-Stromquellen dürfen nur UL-geprüfte steckbare Netzkabel mit
einem 5-15P-NEMA-Stecker (mit Parallelkontakten) verwendet werden. Für den Anschluß an
240V-Stromquellen dürfen nur UL-geprüfte steckbare Netzkabel mit einem 6-15P-NEMA-
Stecker (Doppelkontakte) verwendet werden.
Verwenden Sie nur für den Monitor geeignete Stromquellen und Kabel wie auf dem
Typenschild angegeben.
Die Schlitze und Gehäuseöffnungen gewährleisten die Luftzirkulation im Monitor. Sie dürfen
nicht verschlossen oder verdeckt werden. Stecken Sie auf keinen Fall Fremdkörper durch
die Schlitze im Gehäuse oder in andere Öffnungen.
Stecken Sie keine metallenen Gegenstände in die Monitoröffnungen. Dabei können Sie einen
elektrischen Schlag erleiden.
Zur Vermeidung von elektrischen Schlägen sollten Sie keine Bauteile im Inneren des
Monitors berühren. Nur qualifizierte Techniker dürfen den Monitor öffnen.
Ziehen Sie vor der Reinigung des Monitors den Netzstecker. Verwenden Sie zur Reinigung
keine Flüssigreiniger oder Sprays, sondern ein feuchtes, fusselfreies Tuch.
Stellen Sie den Monitor in der Nähe einer gut zugänglichen Netzsteckdose auf. Trennen Sie
den Monitor vom Netz, indem Sie das Kabel am Stecker fassen und aus der Steckdose
ziehen; ziehen Sie niemals am Kabel selbst.
Normaler
Betrieb Standby
Abgeschaltet(Suspend)
Aus
Horizontal Aktiv Inaktiv Aktiv Inaktiv
Vertikal Aktiv Aktiv Inaktiv Inaktiv
Bild Aktiv Keines Keines Keines
LED-Farbe Grün Grün Bernsteinfarbe Bernsteinfarbe
Bernsteinfarbe Blinkend
Leistung- 110W Weniger als Weniger als Weniger als
saufnahme 80% of Max 15W 5W
Stromsparmodus
Status
Sync

Bedienungsanleitung 23
DEUTSCH
Regler
Bedienungsanleitung22
Belegung des 15-Pin-Mini-D-Sub-Steckers
Steuerungen
OSD-Steuerungen
"ON SCREEN MENU"-Steuerungen schließen die folgenden erweiterten Funktionen ein: Größe,
Position, Geometrie, Farbjustierung, Degauss, Moire ein & aus, Sprache, OSD-Position, Reset,
Helligkeit und Kontrasteigenschaften.
Funktion der OSD-Drucktasten an der Vorderseite des Monitors
Regler
Zus tzliche Vorderseiten-Steuerungen
Stromschalter : Schaltet den Monitor ein oder aus. Wenn der Stromm eingeschaltet ist,
leuchtet eine LED
Zugriff auf das Bildschirm-Menüs
Drücken Sie “Menü( )” Taste
: Greift die Helligkeit zu.
: Greift die Kontrast zu.
Abschalten des Bildschirm-Menüs
Wenn Sie sich in einer der Untermenüs befinden, drücken Sie die Taste zweimal.
OSD Menüs
Das On-Screen-Hauptmenü
OSD-Menue dient zum justieren der Bedienungsfunktionen
Benutzen Sie : Rollt durch alle Menüs
Hauptmenü-Steuerungsführung
: Verläßt die OSD-Steuerungen.
: Springt zur ausgewählten Funktionsauswahl.
Menü( ): Springt zur ausgewählten Menüauswahl.
(15 Pin D-Sub)
15
11 15
610
Pin Nr. Belegung
1 Rot Video
2 Grün Video
3 Blau Video
4 Rahmen-Erde
5 Erde
6 Rot Video Erde
7 Grün Video Erde
8 Blau Video Erde
9 N/C
10 Erde
11 Erde
12 SDA
13 H.Sync
14 V. Sync
15 SCL
Der 15polige D-Sub-Stecker
des Signalkabels (IBM-Systeme) :
TASTE MEN BET TIGEN
LAGE

Lage und Größen-MenüSteuerungsführung
: Springt zum Hauptmen .
: Bezieht sich auf .
Menü( ) : Springt zwischen Positions- und Größen-Menü hin und her.
Geometrie-Steuerungsmenü
Die Geometriesteuerungen gestatten Ihnen, eine
Justierung der Rundungen oder Winkel an den Ecken
Ihres Bildschirmes vorzunehmen.
Nach Auswahl , Druecken der Menüetaste ( )
Kissenverz : Erhöht oder verringert die Rundung der Seiten entweder nach innen oder nach außen.
Parallelogram : Erhöht oder verringert die Neigung der Seiten entweder nach links oder rechts.
Trapez : Erhöht oder verringert den unteren Bildschirm, damit er genauso groß ist wie der
obere Bildschirm.
Kissenausgl. : Dieser Regler verändert die Geometrie des Bildschirms nach links oder nach rechts.
Topp Ecken : Erhöht oder verringert den oberen Bildschirm.
Ebene Ecken : Erhöht oder verringert den unteren Bildschirm.
Drehung : Dreht den gesamten Bildschirm im Uhrzeigersinn oder gegen den Uhrzeigersinn.
Geometriemenü-Steuerungsf hrung
: Springt zum Hauptmenü.
: Bewegt zu der ausgewählten Funktionsauswahl.
Menü( ) Bewegt zu der ausgewählten Funktionsauswahl.
: Bewegt den Balken in der oder Richtung, um die Justierung zu erhöhen oder zu
verringern.
Moire Menü
Nach Auswahl , Druecken der Menüetaste ( ).
Auswahl von ON oder OFF mit / Funktionstaste.
Auswahl von H-Moire oder V-Moire mit /
Funktionstaste.
Bewegt den Balken, um Moire einzustellen.
Bedienungsanleitung 25
DEUTSCH
Bedienungsanleitung24
Regler
Regler
Kontrast Menü
: Aufruf des Kontrast-Menües.
/ : erhoehen/erniedrigen des Kontrastes.
Helligkeits Menü
: Aufruf des Helligkeit.-Menües.
/ : erhoehen/erniedrigen des Helligkeit.
Position Menü
Nach Auswahl , Druecken der Menüetaste ( )
Menü( ) :Druecken Sie die Taste zum justieren der H/V-Position.
: Bewegt das Bild nach unten und nach links.
: Bewegt das Bild nach oben und nach unten.
Größen-Menü
Nach Auswahl , Druecken der Menüetaste ( )
Menü( ) :Druecken Sie die Taste zum justieren der H/V-size.
: Vergrößert oder verkleinert die vertikale Größe des Bildes.
: Vergrößert oder verkleinert die horizontale Größe des Bildes.
CONTRAST
99%
HELLIGKEIT
50%
H. LAGE
32%
V. LAGE
74%
H. GR §EN
43%
V. GR §EN
42%
50%
GEOMETRIE
KISSENVERZ
PARALLELOGRAM
TRAPEZ
KISSENAUSGL.
TOPP ECKEN
EBENE ECKEN
DREHUNG
50%
MOIRE STEUERUNG
H. MOIRE STEUERUNG
V. MOIRE STEUERUNG

Tips zur Lösung von Problemen
Bedienungsanleitung 27
DEUTSCH
Bedienungsanleitung26
Tips zur Lösung von Problemen
Wenn Ihr Monitor nicht korrekt arbeitet, konsultieren Sie bitte die folgende Tabelle, in der
einfachen Lösungen zur häufig auftretenden Problemen aufgeführt sind.
Problemlösungen
Problem
Kein Bild
Bild ist instabil
Bild ist nicht
zentriert oder zu
klein bzw. zu
groß
Falsche Farben
Ist das Netzkabel eingesteckt?
Ist der Netzschalter eingeschaltet?
Ist das Videokabel korrekt
eingesteckt?
Befindet sich der Monitor im
Stromsparmodus?
Ist das Videokabel korrekt
eingesteckt?
Liegen Signale außerhalb des
zulässigen Frequenzbereiches an?
Ist die Pinbelegung der Buchse
korrekt?
Liegen Signale außerhalb des
zulässigen Frequenzbereiches an?
Befinden sich Gegenstände mit
einem starken Magnetfeld in der
Nähe des Monitors?
Ist die Pinbelegung der Buchse
korrekt?
Mögliche Ursache
Stecken Sie das Netzkabel ein.
Schalten Sie den Netzschalter ein.
Stecken Sie das Videokabel korrekt ein.
Drücken Sie eine beliebige Taste auf der
Tastatur, oder bewegen Sie die Maus.
Stecken Sie das Videokabel
korrekt ein.
Sorgen Sie für ein Signal, das für
den Monitor geeignet ist.
Verwenden Sie eine geeignete
Buchse.
Sorgen Sie für ein Signal, das für den
Monitor geeignet ist. (Falls das
anliegende Signal korrekt ist, stellen
Sie das Bild mit den entsprechenden
Reglern wie gewünscht ein.)
Entfernen Sie den Gegenstand.
Verwenden Sie ein geeignetes
Videokabel.
Entmagnetisieren Sie den Monitor
manuell mit der
Entmagnetisierungstaste.
Lösung
Sprache Menü
Nach Auswahl , Druecken der Menüetaste ( ).
: Bewegt den Balken in der oder Richtung, um die
Sprachauswahl zu treffen.
OSD-Positions Menüe
Nach Auswahl , Druecken der Menüetaste ( ).
Menü ( ): Druecken Sie die Taste zum justieren der
H/V-OSD-Position.
: Bewegt das OSD-Menue nach unten und nach links.
: Bewegt das OSD-Menue nach oben und nach unten.
Farbjustierungsmenü-Steuerungsf hrung
: Bewegt den Balken in der oder Richtung, um die gew nschte Farbauswahl zu treffen
(USER, 6500K, 9300K).
Menü( ) : Springt zum ausgewählten Untermenü
(Drücken sie den Menü( ) knopf für 5 sekunden).
: Erhöht oder verringert die Justierung der ausgewählten Farbeinstellung.
:Springt zum Hauptmenü.
Voreinstellung : Wählt die gew nschte Farbeinstellung aus. Der Balken wird ersetzt durch die
Farbeinstellungswahl “USER, 6500K oder 9300K”. Jede Farbeinstellung ist im
Anwendungsmodus justiert, um Grad Kelvin auszuwählen.
SPRACHE
TASTE DO BET TIGEN
POSICIóN
POLSAR TECAL
50%
RB GB BB RG GG BG
USER
FARBE
USER 6500K 9300K

Bedienungsanleitung28
Elektrische Daten
Mechanische Daten
Betriebsbedingungen
Technische Daten
Merkmal 920eF
CRT-TYP 19 , 90 Ablenkung, FST
CRT Lochabstand 0.25mm (0.20 horizontal)
CRT-Beschichtigung Entspiegelt, ARASC
H/V separat, TTL, positiv/negativ
H/V composite, TTL, positiv/negativ
RGB analog (0.7 Vp-p), positiv
mit 75 terminiert
30 kHz~110 kHz (Automatisch)
47 Hz~160 Hz (Automatisch)
Maximale Auflösung 1792Pixel 1344Linien (Non-interlaced)
Pixelfrequenz (max.) 270 MHz
Die Größe von Bildschirm (Standard)
Horizontal 350mm, Vertikal 262mm
Leistungsaufnahme 110 Watt
Stromversorgung AC 100-240V 60/50Hz ±3Hz
Eingangsstecker D-Sub-15-Pin-Stecker (3 Schicht, 2 Schicht)
Farbspektrum Unbegrenzt
Eingangssignal Synchronisation
Video
Horizontal
Vertikal
Scanfrequenzen
Merkmal 920eF
23.3Kg (51.3Ibs)
26.7Kg (58.7Ibs)
Abmessungen Verpackung
Gerät 18.5 (L) x 18.4 (P) x 18.3 (H)
470 mm (B) x 466.5 mm (T) x 466 mm (H)
21.1 (L) x 24.4 (P) x 22.2 (H)
537 mm (B) x 620 mm (T) x 564 mm (H)
Netto
Brutto
Gewicht
Merkmal 920eF
32 F bis 104 F (0 C bis 40 C)
-4 F bis 140 F (-20 C bis 60 C)
10 % bis 85 % relative Luftfeuchtigkeit, nicht kondensierend
Betrieb
Lagerung
Luftfeuchtigkeit
Temperatur
Bedienungsanleitung 29
DEUTSCH
Anhang
Voreingestellte Timings
Dieser Monitor D19AL verfügt über voreingestellte Modi für die 14 am häufigsten verwendeten
Standardauflösungen. So ist die “Plug and Play” - Kompatibilität gewährleistet.
Video
Synchronisation
Vertikal
Video
Synchronisation
Horizontal
VGA/70Hz VGA/60Hz 640/85Hz 800/75Hz 800/85Hz 1024/75Hz 1024/85Hz
720 400 640 480 640 480 800 600 800 600 1024 768 1024 768
Asec 31.777 31.777 23.111 21.333 18.631 16.660 14.561
Bsec 3.813 3.813 1.556 1.616 1.138 1.219 1.016
Csec 1.907 1.907 2.222 3.232 2.702 2.235 2.201
Dsec 25.422 25.422 17.778 16.162 14.222 13.003 10.836
Esec 0.636 0.636 1.556 0.323 0.569 0.203 0.508
Omsec 14.268 16.684 11.764 13.333 11.756 13.328 11.765
Pmsec 0.064 0.064 0.069 0.064 0.056 0.050 0.044
Qmsec 1.08 1.048 0.578 0.448 0.503 0.466 0.524
Rmsec 12.711 15.253 11.093 12.8 11.179 12.795 11.183
Smsec 0.413 0.318 0.023 0.021 0.019 0.017 0.015
H-Polarity Negative Negative Negative Positive Positive Positive Positive
V-Polarity Positive Negative Negative Positive Positive Positive Positive
H-Freq 31.469 31.469 43.269 46.875 53.674 60.023 68.677
V-Freq 70.09 59.94 85.008 75 85.061 75.029 84.997
Pixel rate 28.322 25.175 36 49.5 56.25 78.750 94.5
IBM VESA
1280/75Hz 1280/85Hz 1600/75Hz 1600/85Hz 640/67Hz 832/75Hz 1152/75Hz
1280 1024 1280 1024 1600 1200 1600 1200 640 480 832 624 1152 870
Asec 12.504 10.971 10.667 9.412 28.571 20.11 14.560
Bsec 1.067 1.016 0.948 0.279 2.116 1.117 1.280
Csec 1.837 1.422 1.501 1.325 3.175 3.91 1.440
Dsec 9.481 8.127 7.901 6.972 21.164 14.524 11.520
Esec 0.119 0.406 0.316 0.279 2.116 0.559 0.320
Omsec 13.329 11.761 13.333 11.765 15 13.414 13.322
Pmsec 0.038 0.033 0.032 0.028 0.086 0.06 0.044
Qmsec 0.475 0.579 0.491 0.433 1.114 0.784 0.568
Rmsec 12.804 11.235 12.800 11.294 13.714 12.549 12.667
Smsec 0.013 0.011 0.011 0.009 0.086 0.02 0.044
H-Polarity Positive Positive Positive Positive Negative Negative Negative
V-Polarity Positive Positive Positive Positive Negative Negative Negative
VESA MACINTOSH
H-Freq 79.976 91.146 93.75 106.250 35 49.726 68.681
V-Freq 75.025 85.024 75.000 85.000 66.667 74.551 75.062
Pixel rate 135 157.5 202.5 229.500 30.24 57.284 100
Auflösung
Timing
Auflösung
Timing

Memo
Bedienungsanleitung30 Manuel de l’utilisateur 31
Introduction
Conditionnement 32
Caractéristiques 33
Informations de sécurité 34
Système d’économie d’énergie 35
Installation
Raccordement à l’ordinateur 35
Tableau d’affectation du connecteur mini sub-D 15 broches
36
Commandes
Fonctions des commandes 36
Menus d’OSD 37
Dépannage
Guide de dépannage 41
Spécifications
Spécifications électriques 42
Spécifications mécaniques 42
Spécifications de l’environnement 42
Annexe
Tableaux des modes graphiques 43
Français

Introduction
Manuel de l’utilisateur 33
Introduction
Manuel de l’utilisateur32
Caractéristiques
Moniteur haute performance 19 pouces (affichage 18 pouces)
Balaie automatiquement les fréquences suivantes :
- Fréquence horizontale : 30 à 110 kHz
- Fréquence verticale : 47 à 160 kHz
Compatible avec les normes VGA, SVGA, VESA, MAC et les modes de résolution maximale
allant jusqu’à 1600 x 1200.
Supporte les modes VESA sans scintillement, y compris à un taux de rafraîchissement de 85 Hz.
Système de contôle pour sélectionner visuellement et régler l’image en utilisant le “Encode”
sur le panneau et au menus à l’écran.
Sur l’écran, le menu “Contrôle Système pour visionner” fait sélectionner et ajuster des images
en utilisant 3 boutons se trouvant en face de panneau et au menu sur l’écran.
L’alimentation électrique fonctionne en AC 100-240 V 60/50 Hz pour une utilisation dans le
monde entier.
Equipé de DDC 1/2B pour la Prise de courant & la Marche.
Equipé d’une fonction d’économie d’énergie.
A la demande de l’ordinateur, le circuit de gestion d’alimentation réduit la consommation
d’énergie quand l’ordinateur n’est pas utilisé.
Les moniteurs à écrans anti-reflets / antistatiques sont conformes aux normes d’émissions
MPR 1990 et répondent aux exigences du label CE.
TCO : (en option)
Attention
Vous pouvez installer le socle de pivotement et d inclinaison en option pour fournit toute
une variété d angles de visualisation.
Avertissement
Si cet appareil a plus d’une prise interface, ne pas laisser de câbles branchés sur des
interfaces inutilisées.
Canadian Notice
This class B digital apparatus meets all requirements of the Canadian Interference Causing
Equipment Regulations.
Avis Canadien
Cet appareil numérique de la classe B respecte toutes les exigences du Règlement sur le
matériel brouilleur du Canada.
NBLes informations contenues dans ce document peuvent être modifiées sans avis préalable.
Conditionnement
Tout d’abord, nous vous remercions d’avoir acheté ce moniteur. Il s’agit d’un moniteur couleur
haute performance. Ce manuel concerne à la fois l’utilisation et les précautions à prendre pour
utiliser ce moniteur.
Veuillez prendre le temps de lire ce manuel afin d’exploiter au mieux les performances de votre
moniteur et de l’utiliser de manière optimale. Après l’avoir lu, conservez ce manuel dans un
endroit sûr afin de pouvoir vous y reporter ultérieurement.
Ce détail expliqué ci-dessous est contenu dans la boîte.
D’abord, assurez-vous si votre boîte incluye les détails suivantes.
19AL
- Moniteur couleur Hansol
- Cordon d’alimentation AC
- Manuel de l’utilisateur(Carte d’enregistrement de la garantic)
- Câble de signal de vidéo (15 broches 3couches D-sub)
FRANçAIS

Introduction
Manuel de l’utilisateur 35
FRANçAIS
Système d’économie d’énergie
Ce moniteur est conforme aux normes VESA (Video Electronics Standards Association) DPMS
(Display Power Management Signaling). Pour que le système d’économie d’énergie du
moniteur fonctionne, la carte graphique ou l’ordinateur doivent aussi être conformes aux
normes VESA DPMSTM.
Tableau de gestion d’énergie
NB : Le moniteur passe automatiquement par les phases DPMS quand il est inactif.
Pour sortir le moniteur de l’état DPMS, appuyez sur n’importe quelle touche du clavier.
Raccordement à l’ordinateur
ATTENTION
Assurez-vous que l’ordinateur et le moniteur sont mis hors tension.
Pour raccorder le moniteur à votre système,
suivez les instructions ci-dessous :
1. Connectez le câble de signal vidéo au
connecteur vidéo 15 broches du système
et serrez les vis de fixation.
2. Fixez le cordon d’alimentation au
moniteur et branchez-le ensuite sur une
prise de courant.
3. Mettez le moniteur sous tension en
appuyant sur l’interrupteur d’alimentation.
NB : Pour lier le moniteur au système Macintosh, connectez le câble de signal vidéo au
2layer connecteur vidéo 15 broches du systèmes. ( la direction de connecter du câble
de signal est opposé au système IBM)
Introduction
Manuel de l’utilisateur34
Informations de sécurité
Ce moniteur est fourni avec un cordon d’alimentation détachable muni de fiches de type
IEC320. Il convient au raccordement de tout micro-ordinateur agréé UL de configuration
similaire. Avant de procéder au raccordement, vérifiez que la tension secteur de la prise de
courant de l’ordinateur est la même que celle du moniteur et que la puissance nominale de
la prise de courant de l’ordinateur est identique ou supérieure à celle du moniteur.
Pour des applications en 120 V, utilisez uniquement un cordon d’alimentation détachable
agrée UL avec une fiche de configuration NEMA 5-15P (lames parallèles).
Pour des applications en 240 V, utilisez uniquement un cordon d’alimentation détachable
agréé UL avec une fiche de configuration NEMA 6-15P (lames tandem).
Utilisez uniquement une alimentation et un raccordement adéquats pour le moniteur comme
indiqué sur l’étiquette de fabrication.
Les fentes et ouvertures du boîtier sont prévues pour l’aération; ces ouvertures ne doivent
pas être obturées ni fermées. Ne jamais introduire d’objets dans les fentes ou autres
ouvertures du boîtier.
N’insérez jamais d’objet métallique dans les ouvertures du moniteur. Ceci peut créer un
risque d’électrocution.
Pour éviter tout électrochoc, ne touchez jamais l’intérieur du moniteur. Seul un technicien
qualifié doit ouvrir le boîtier du moniteur.
Débranchez le moniteur de la prise secteur avant le nettoyage. N’utilisez pas de nettoyants
liquides ou de nettoyants en aérosol. Utilisez un linge humide, non pelucheux pour le
nettoyage.
Installez le moniteur près d’une prise de courant facile d’accès. Déconnectez l’appareil en
saisissant fermement la fiche et en la sortant de la prise. Ne déconnectez jamais l’appareil
en tirant sur le cordon.
Fonctionnement
normal Attente Veille Hors tension
Horizontale Active Inactive Active Inactive
Verticale Active Active Inactive Inactive
Vidéo Active Vide Vide Vide
Coleur LED Vert Vert/AMBRE AMBRE Clignotement
Consommation 110W Moins de Moins de Moins de
d’énergie 80% of Max 15W 5W
Mode d’économie d’énergie
Etat
Synchronisation

Manuel de l’utilisateur 37
FRANçAIS
Commandes
Manuel de l’utilisateur36
Tableau d’affectation du connecteur mini sub-D 15 broches
Fonction des commandes
Commande OSD
Les commandes OSD incluent les commandes etendues suivantes, telles que des utilitaires pour
la taille, la position, la distorsion geometrique, le reglage des couleurs, la demagnetisation, les
Marche/Arret moire, le langage, la position d’OSD, la reinitialisation, le contraste & luminosite, etc.
Fonction des boutons d'OSD en facade du moniteur
Commandes
Autre commande en facade
Interrupteur : Tourner le moniteur en marche ou en arret. Quand l'interruupteur est en
marche, le LED est alume.
Acceder au menu sur l’ecran
Appuyez sur le bouton "Menu( )".
: Acces direct a la luminosite.
: Acces direct au contraste.
Eteindre le menu sur l’ecran
Quant aux sous-menus, appuyez deux fois sur le bouton .
Menus d’OSD
Menu principal
osd menu principal permet à l'utilisateur d'ajuster le contrôle
Utilisez ou : Boutons de commande pour se passer dans tous les menus.
Guide de commandes du menu principal
: Sortir des commandes OSD
: Mouvoir la fonction a choisir.
Menu( ) : Aller a la selection du menu choisi.
(15 Pin D-Sub)
15
11 15
610
No. Sub-D 15 broches
1 Vidéo rouge
2 Vidéo vert
3 Vidéo bleu
4 Terre de protection
5 Terre
6 Terre rouge
7 Terre vert
8 Terre bleu
9NC
10 Terre synch.
11 Terre
12 SDA
13 Synch. H
14 Synch. V
15 SCL
La prise á 15 broches D-Sub
(mâble) du cáble de signal
(systémes IBM) :
APPUYER TOUCHE MENU
LANGUE

Manuel de l’utilisateur 39
FRANçAIS
Manuel de l’utilisateur38
Commandes
Commandes
Menu de contraste
: Entrer dans le menu de contraste.
/ : baisser ou augmenter le degré de
contraste.
Menu d'Eclat
: Entrer dans le menu de eclat.
/ : baisser ou augmenter le degré de
eclat.
Menu de Position
Aprés avoir choisi , Appuyez le boutton ( ).
Menu( ) : Appuyez ce boutton pour ajuster la position-H/V.
: mouvoir l'image en bas à gauche.
: mouvoir l'image en haut à droite.
Menu de taille
Aprés avoir choisi , Appuyez le boutton ( ).
Menu ( ) : Appuyez ce boutton pour ajuster la taille-H/V.
: Augmenter ou reduire la taille de l’image en vertical.
: VAugmenter ou reduire la taille de l’image en horizonta.
CONTRASTE
99%
50%
LUMINOSIT
32%
POSITION H.
32%
POSITION H.
H. TAILLE
43%
H. TAILLE
43%
Menu de position et de taille
: Sortir au menu principal.
: Regler /
Menu( ) : Fermer directement le menu de position et de taille..
Menu de réglage de la géométrie
Le réglage de la géométrie vous permet de mettre au
point la courbe ou l´angle des côtés de votre image.
Aprés avoir choisi , Appuyez le boutton ( ).
Coussins : Augmente ou diminue la courbure des côtés soit vers l´intérieur soit vers l´extérieur.
Parallele : Augmente ou diminue l´inclinaison des côtés soit vers la gauche soit vers la droite.
Trapeze : Augmente ou diminue le bas de l´image pour le rendre identique au haut.
Equilibre : Augumenter ou diminuer la courbure des faces gauche ou dr oite.
Ford Coins : Augumenter ou diminuer la courbure des faces hautes.
Comble Coins : Augumenter ou diminuer la courbure des faces basses.
Rotation : Fait tourner l ensemble de lécran dans le sens des aiguilles d´une montre ou dans
le sens inverse.
Guide de menu des commandes geometriques
: Sortir au menu principal.
: Mouvoir la fonction a choisir.
fonction a choisir.
: Mouvoir la barre a la direction ou pour augmenter ou reduire le reglage
Menu d’Ondulation
Aprés avoir choisi , Appuyez le boutton ( ).
selectionner ON ou OFF avec la touche de
fonction / .
selectionner ondulation-H ou ondulation-V avec la
touche de fonction / .
: Adjust the Moire.
50%
G OM TRIE
COUSSINS
PARALLELE
TRAPEZE
EQUILIBRE
FORD COINS
COMBLE COINS
ROTATION
50%
CONTR LE MOIRE
CONTR LE MOIRE H.
CONTR LE MOIRE V.
Table of contents
Languages:
Other Hansol Monitor manuals
Hansol
Hansol 730E User manual
Hansol
Hansol H950 User manual
Hansol
Hansol H750D User manual

Hansol
Hansol E19AL User manual

Hansol
Hansol B19CL User manual
Hansol
Hansol D17DL User manual

Hansol
Hansol H550 User manual

Hansol
Hansol H750D User manual

Hansol
Hansol H750 User manual

Hansol
Hansol H950VI B19BF User manual
Hansol
Hansol B15BF User manual
Hansol
Hansol D17CL User manual

Hansol
Hansol 520f User manual

Hansol
Hansol 19Inch (Viewable size 18 ) High Resolution Color Monitor... User manual
Hansol
Hansol H700TD User manual
Hansol
Hansol D17CL User manual

Hansol
Hansol H550 User manual
Hansol
Hansol 730D User manual

Hansol
Hansol 700Fs User manual

Hansol
Hansol H530 User manual
