Hapi Ozy User manual

Manual de instructiuni / User’s manual /
Hasznalati utmutato
RO scaun auto, grupa 0+,I,II,III
GB car seat, group 0+,I,II,III
HU autosules, csoport 0+,I,II,II


A.
B.
C.
D.
E.
F.
G.
H.
I.
J.
K.
L.
M.
N.

ISOFIX
release
button
ISOFIX locking
display window
O.
P.
Q.
R.
S.
T.

Pull up
ISOFIX connector
?
Only use on this seat if ISOFIX
anchorage is equipped.
?
uninstallation position
Installation position
TOO LOW TOO HIGH CORRECT
① ② ③
RO: imaginile din acest manual au scop
ilustrativ. Produsul achizitionat de dvs
poate sa difere.
HU: Az útmutatóban bemutatott képek
szemléletes célt szolgálnak. Az Ön által
megvásárolt termék eltérő lehet.
EN: the images shown in this
instructions manual have illustrative
purpose. The product purchased by you
may look different.

Press the
ISOFIX release
button
Tighten
the straps
①
Loosen
the straps
②
Step 1 Step 2 Step 3

①
①②
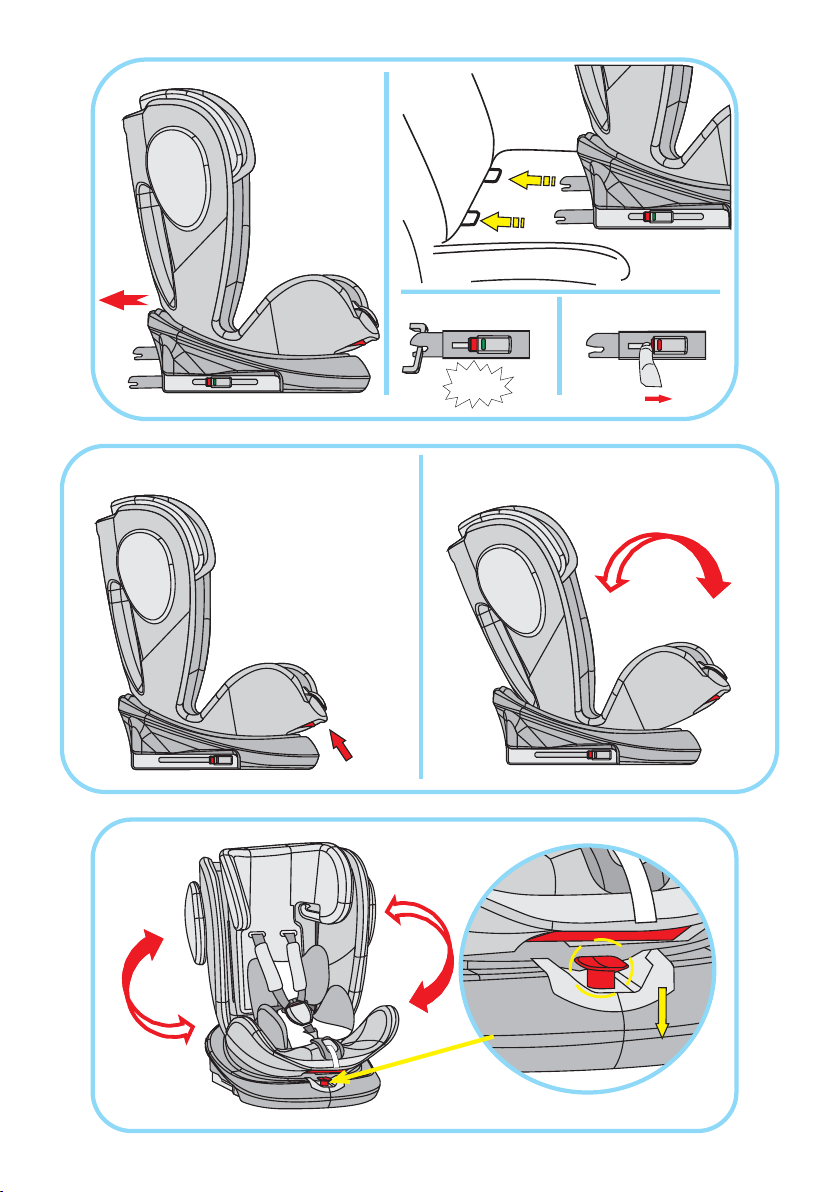
Click
LOCK RELEASE
Press
②
①
Pull out
the red
angle
adjusting
handle
pressing the red
rotary adjusting
button down
pressing the red
rotary adjusting
button down

500
500
596
② ③ ④

Table of contents
Languages:


