Mamas & Papas Vito User manual

Vito TT
VOTT_0118_1011_V1
Vito
instruction for safe use
- DICHIARAZIONE CONFORMITA' inclusa
2
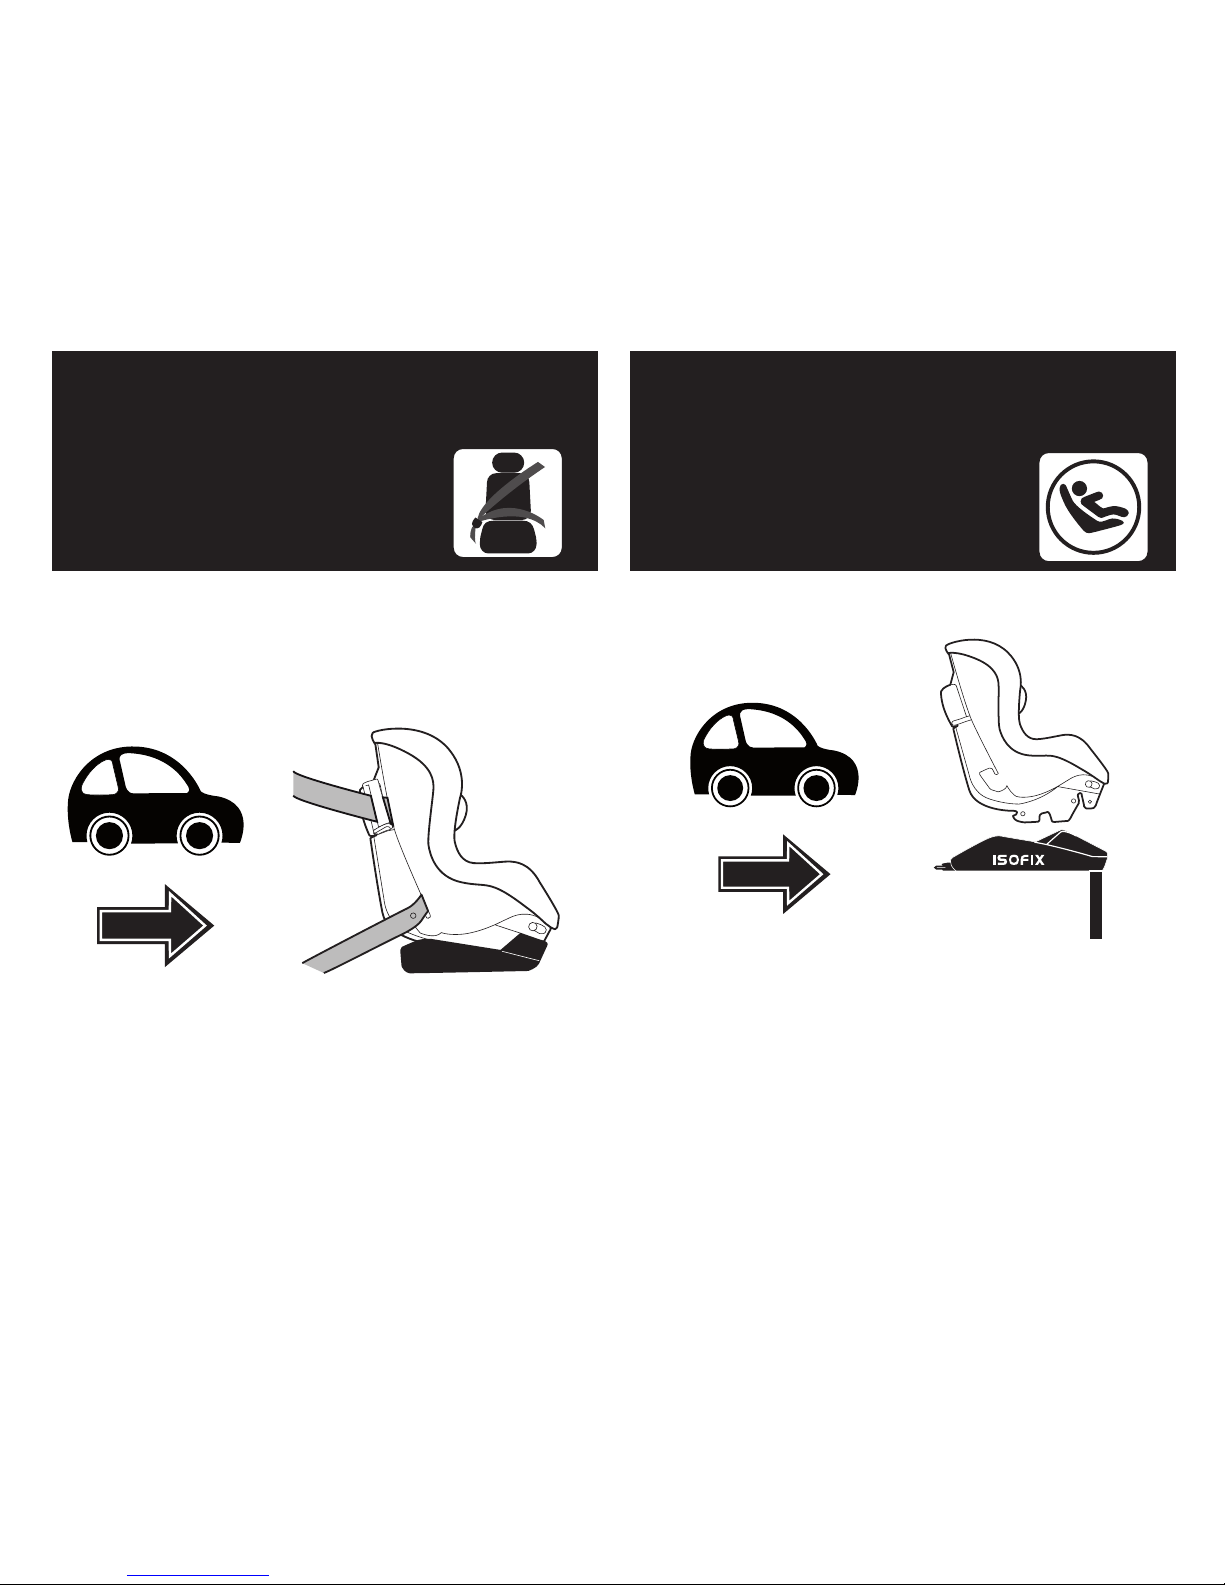
UNIVERSAL CATEGORY
9-18 Kg Y
BELTED
SEMI-UNIVERSAL
CATEGORY 9-18 Kg Y
ISOFIX
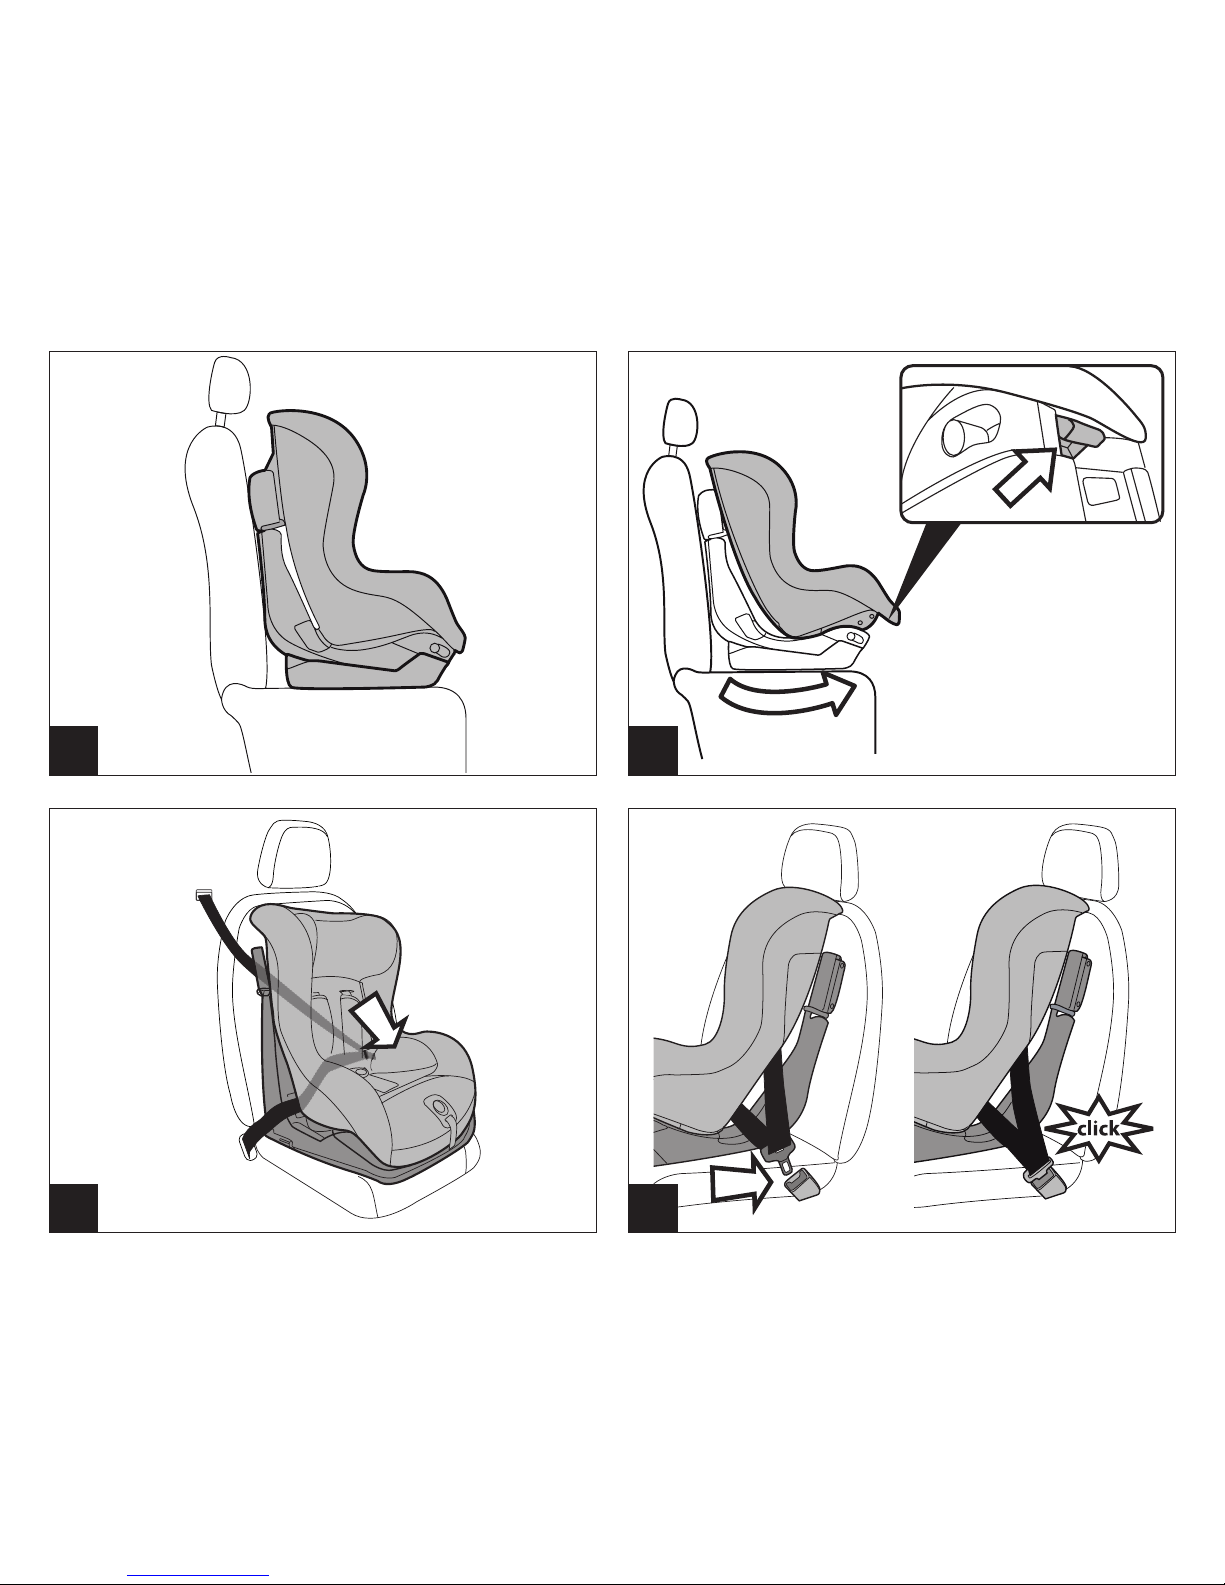
The "Vito" car safety seat is attached to the car using
a three-point seat belt.
The “Vito” car seat is secured in vehicles with
the ISOFIX system. See the “Isofix Base 0+1”
instruction manual for the vehicle installation
procedure.
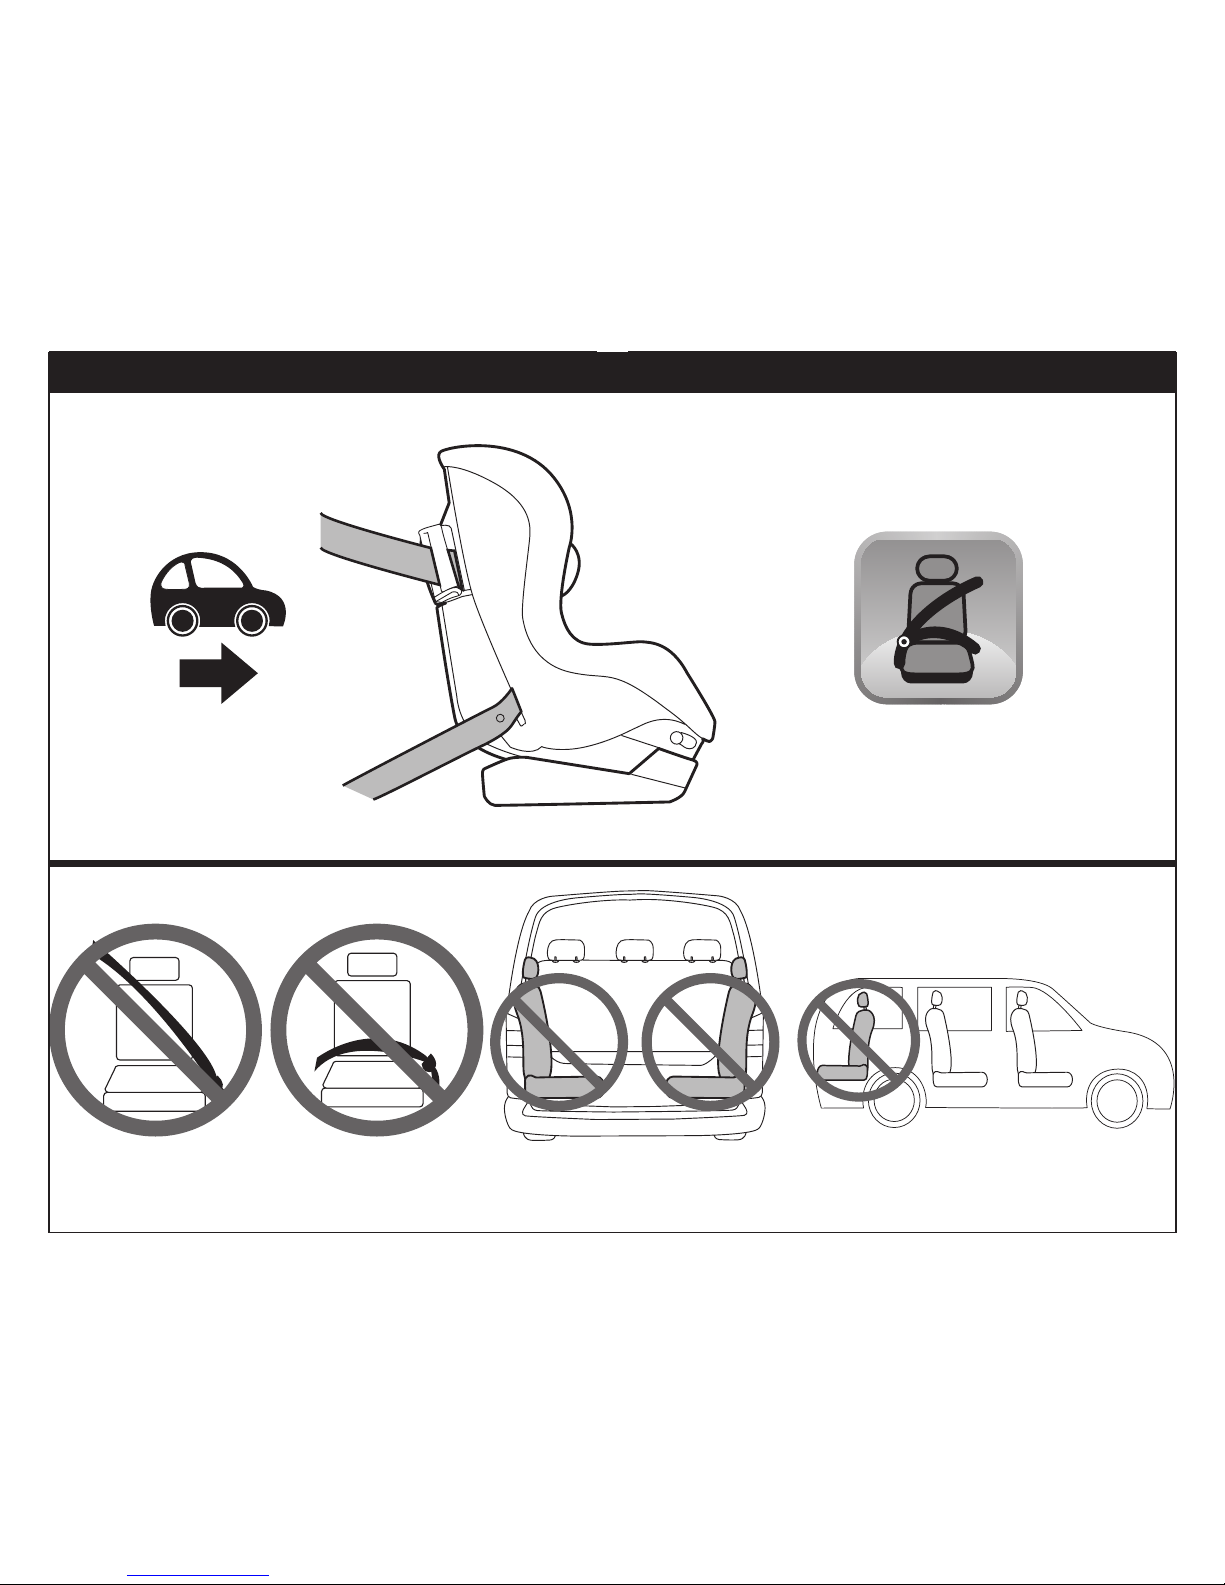
OK
NONO
NONO
NO
UNIVERSAL CATEGORY 9-18 Kg Y BELTED
B
A
1 2
3 4

B
C
A
D
5
7 8
6
Other manuals for Vito
1
This manual suits for next models
1
Table of contents
Other Mamas & Papas Car Seat manuals

Mamas & Papas
Mamas & Papas Viaggio Quick guide

Mamas & Papas
Mamas & Papas Vito Quick guide

Mamas & Papas
Mamas & Papas Mercury G 1 User manual

Mamas & Papas
Mamas & Papas Armadillo HD5 0RH User manual

Mamas & Papas
Mamas & Papas isofix base User manual

Mamas & Papas
Mamas & Papas Lusofix User manual

Mamas & Papas
Mamas & Papas Moto G123 User manual

Mamas & Papas
Mamas & Papas Vito TT Quick guide

Mamas & Papas
Mamas & Papas Vito TT Quick guide

Mamas & Papas
Mamas & Papas Moto G123 User manual


