HARDKORR 135AH LiFePO4 User manual

INSTRUCTION MANUAL
v1.5.0 - December 2021
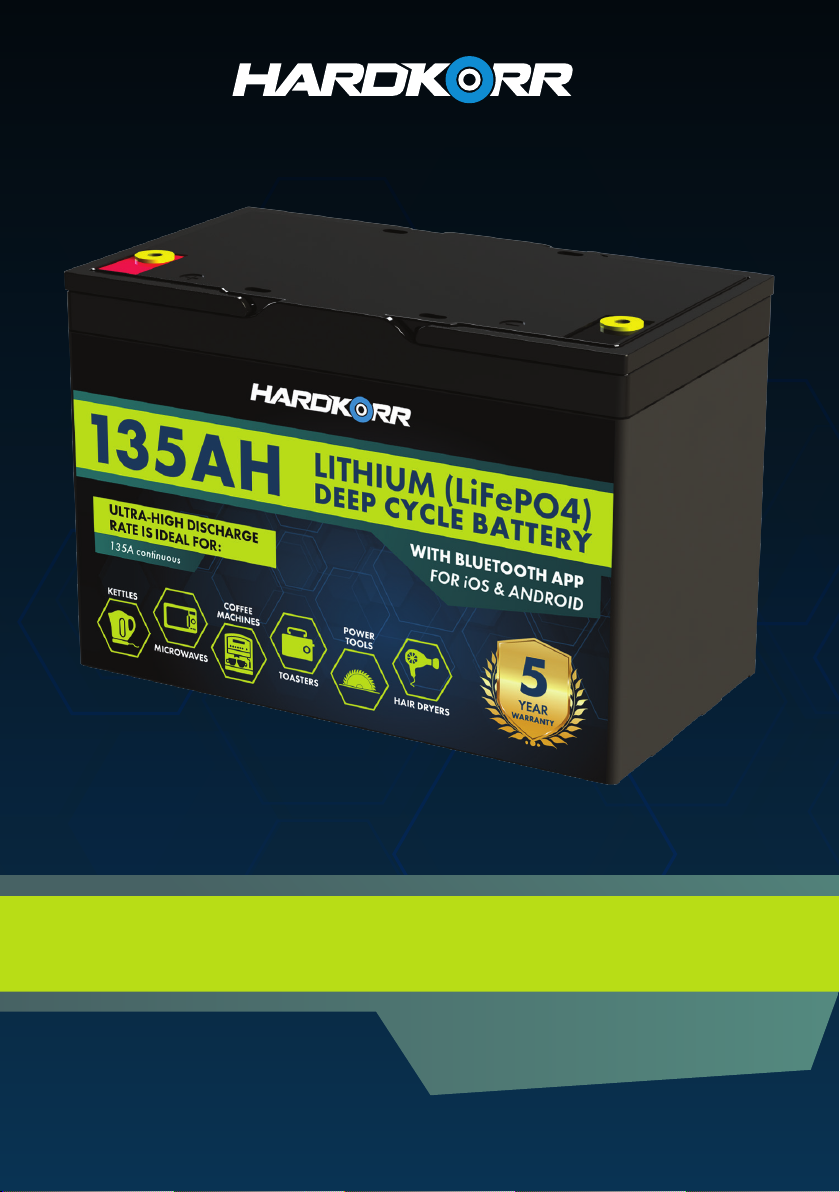
135AH LiFePO4DEEP CYCLE BATTERY

2
In doing so, you now have the assurance and peace of mind that comes
from purchasing a product that has been manufactured to the highest
quality standards.
Our aim is for you to be completely satisfied with your purchase, and
therefore your new Hardkorr product is backed by a comprehensive
5-year warranty and an outstanding after-sales customer service team.
We hope you will enjoy using this product for many years to come.
If you require technical support, or in the unlikely event your purchase
appears to be faulty, please contact our support team for immediate
assistance. You can find up-to-date contact details on our website
https://hardkorr.com.
General Information and Safety ...................................................
Contents and Specifications .........................................................
Setup and Storage ....................................................................
Charging ................................................................................
BMS and Remote Reset Switch .......................................................
Frequently Asked Questions ..........................................................
Bluetooth App .........................................................................
Warranty ..............................................................................
Congratulations on purchasing this high quality Hardkorr product.
INTRODUCTION
3-5
6-7
8-12
13-14
15
16
17 - 21
22-23

3
GENERAL INFORMATION
AND SAFETY
PLEASE KEEP THIS MANUAL FOR FUTURE REFERENCE
This manual contains important safety instructions for your lithium deep cycle
battery.
Do not operate the battery or modify the installation unless you have
read and understood this user manual. Pay particularly close attention to
CAUTION and WARNING statements.
Hardkorr recommends that the battery be installed by an appropriately
qualified professional.
DISCLAIMER
MODELS COVERED BY THIS MANUAL
While caution has been taken to ensure the accuracy of the contents of this
guide, Hardkorr assumes no responsibility for errors or omissions.
Please note that specifications and product functionality may change without
notice.
HKPBATL135B
135Ah LiFePO₄ BLUETOOTH DEEP CYCLE BATTERY
HKPBATL135BH
135Ah LiFePO₄ BLUETOOTH DEEP CYCLE BATTERY (COLD CLIMATE)

4
GENERAL INFORMATION
AND SAFETY (CONT.)
WARNING
Failure to follow these instructions may result in personal or property
injury, as well as reduced battery life or battery failure.
• Do not use this battery for cranking applications.
• Do not submerge the battery in water.
• Do not short circuit the battery terminals.
• Do not puncture, impact or drop the battery.
• Do not disassemble the battery. Opening the case may cause electric
shock or fire and will void your warranty.
• Do not expose the battery to fire, sparks, high voltage or
temperatures in excess of those stipulated in the specifications table
of this manual.
• Do not series or parallel connect more than six (6) of these batteries
together. Ensure that connections are made correctly as per the
“Usage and Storage” section of this manual. Do not connect this
battery to batteries with different chemistries.
• Do not store the battery at a voltage lower than 11.5V.
• Endeavour to keep the battery above 20% SOC where possible.
• Observe the limitations of this battery as stipulated in the
specifications table of this manual, paying particular attention to
maximum charge and discharge currents.
• To charge the battery, you must use a charger with a specific
charging profile for lithium batteries. Your warranty may be reduced
or voided if you use an unsuitable charger.
• If the battery emits any unusual smells, appears to be atypically hot,
shows signs of distortion or displays any other abnormality during
operation or storage, discontinue use immediately and contact
Hardkorr for assistance.

5
GENERAL INFORMATION
AND SAFETY (CONT.)
CAUTION
The battery should not be used by persons (including children) with
reduced physical, sensory or mental capabilities, or lack of experience and
knowledge, unless they are supervised or have been instructed on how to
use the appliance by a person responsible for their safety.
Cable and fuse sizes are specified by various codes and standards which
depend on the type of vehicle the battery is installed into.
Selecting the wrong cable or fuse size could result in harm to the installer
or user and/or damage to the battery or other equipment installed in the
system.
The installer is responsible for ensuring that the correct cable and fuse sizes
are used when installing this battery.

6
CONTENTS AND
SPECIFICATIONS
Nominal voltage 12.8V
Max series/parallel configurations 6S/6P
Discharge cut-off voltage 10.0V
Capacity (C20) 135Ah
Normal charge voltage 14.4 ± 0.2V
Optimum charge temp 0°C to 55°C
Optimum discharge temp -20°C to 60°C
Self-discharge <3% per month
Weight 14.0kg
Max discharge current (constant) 135A
Dimensions 305mm (l) x 169mm (w) x 210mm (h)
Peak current (300ms) 600A
Terminal type M8
Cycle life 3000 cycles (100% DOD) / 6000 cycles (80% DOD)
Optimum storage temp -5°C to 45°C
Standard charge current / fast charge current 27A / 67A
Certifications UN 38.3, UL 1642, IEC 62133-2:2017,
IEC 62619:2017, CE
SPECIFICATIONS

7
1x 135Ah deep cycle LiFePO₄ battery with Bluetooth®
1x Reset switch and cable
CONTENTS AND
SPECIFICATIONS (CONT.)
PACK CONTENTS

8
SETUP AND STORAGE
INSTALLATION
Ensure that the area in which you will be performing installation of the
battery is dry.
Secure the battery firmly to the mounting surface, ensuring that no movement
is possible even under significant force.
You may install the battery in any orientation, including upside-down.
Ensure that your proposed installation location will not cause the battery
to be exposed to temperatures in excess of the maximums stipulated in the
specifications table of this manual. If you believe heat may be an issue, you
may consider making use of mechanical ventilation such as fans.
Ensure you do not mount the battery in a way that could cause the terminals
to come into contact with any metal surface or object. This is to avoid the
possibility of short-circuiting the terminals. If you are intending to remove
the battery from its installed location periodically, ensure there is a clear
pathway free of metal surfaces and objects.
Do not install the battery in a wet area such as boat decks, open ute trays or
chassis mounts.
Do not install the battery in a compartment dedicated to gas storage.

9
SETUP AND STORAGE
(CONT.)
CONNECTION - GENERAL
We recommend that no more than four cable lugs be connected directly to
a battery terminal. If you do have more than 4 lugs, you should use a fuse
block and negative busbar instead.
Ensure the battery terminals are clean before connecting any cable lugs to
them.
Stack cable lugs on the battery terminals in order from heaviest draw
(thickest cables) to lightest draw (thinnest cables). Lugs connected to the
thickest cables should be positioned at the bottom and the thinnest at the top.
Where possible, make use of insulating terminal boots and lug protectors.
Ensure all termination lugs are well crimped (not soldered) and protected.
Always use the spring washers provided for the battery terminal bolts. This
ensures sufficient pressure is applied to the cable lugs for secure connection
without having to over-tighten the bolts. Stack the spring washer on top of
the cable lugs, not underneath.
Your battery is placed into protection mode after manufacture, to protect the
cells and BMS during transport. To prepare the battery for use, follow the
procedure in the “BMS and Remote Reset Switch” section of this instruction
manual.
IMPORTANT NOTE

10
SETUP AND STORAGE
(CONT.)
CONNECTION - MULTIPLE BATTERIES IN PARALLEL
+POS -NEG
+POS -NEG
+POS -NEG
+POS -NEG
+POS -NEG
+POS -NEG
+POS -NEG
+POS -NEG
+POS -NEG
+POS -NEG
+POS -NEG
+POS -NEG
Earth / battery monitor shunt
Main fuse
You may connect up to six (6) of these batteries in parallel. This will create
a single system in which the total capacity is the sum of the capacities of the
individual units and the nominal voltage is equivalent to the voltage of one
unit e.g. 3 x 135Ah 12.8V batteries in parallel gives a 405Ah 12.8V system.
When connecting batteries in parallel, you should take the negative
connection from the opposite end of the battery bank to the positive
connection, as per the below diagram. When wired this way, the effect of
resistance in the positive and negative wires cancel each other out, helping to
equalise charge and discharge rates for each unit.
Batteries connected in parallel should be disconnected and charged
individually on an annual basis.
Before connecting multiple batteries in parallel, ensure that all batteries
are fully charged. Do not connect batteries that are mismatched in voltage,
capacity, age or chemistry. Use cables of appropriate size for the system.
CAUTION

11
SETUP AND STORAGE
(CONT.)
CONNECTION - MULTIPLE BATTERIES IN SERIES
You may connect up to six (6) of these batteries in series. This will create a
single system in which the nominal voltage is the sum of the voltages of the
individual units and the system capacity is equivalent to the capacity of one
unit e.g. 3 x 135Ah 12.8V batteries in series gives a 135Ah 38.4V system.
As with parallel connections, when connecting batteries in series you should
take the negative connection from the opposite end of the battery bank to
the positive connection, as per the below diagram. When wired this way, the
effect of resistance in the positive and negative wires cancel each other out,
helping to equalise charge and discharge rates for each unit.
Batteries connected in series should be disconnected and charged
individually on an annual basis.
Before connecting multiple batteries in series, ensure that all batteries are
fully charged. Do not connect batteries that are mismatched in voltage,
capacity, age or chemistry. Use cables of appropriate size for the system.
CAUTION
+POS -NEG
+POS -NEG
+POS -NEG
+POS -NEG
+POS -NEG
+POS -NEG
+POS -NEG
+POS -NEG
+POS -NEG
+POS -NEG
+POS -NEG
+POS -NEG
Earth / battery monitor shunt
Main fuse

12
SETUP AND STORAGE
(CONT.)
STORAGE, SHIPPING AND DISPOSAL
Ensure that the battery is stored in a dry, clean, shaded and well-ventilated
environment, at a temperature range that does not exceed the maximum
storage temperature stipulated in the specifications table in this manual.
Where possible, endeavour to store the battery at around 40-50% state of
charge.
At no time should the voltage of the stored battery be allowed to drop below
11.5V.
Be aware that these batteries will self-discharge at a rate of about 3% per
month. We recommend the state of charge is checked regularly and topped
up if necessary.
If shipping the battery between locations, please be aware that lithium is
classified as Class 9 Dangerous Goods. Please ensure you comply with local,
national and international (if applicable) regulations for transportation of
these goods.
WARNING
Lithium batteries must never be disposed of with ordinary refuse, as this
can cause fires and significant environmental contamination. Contact an
authorised lithium battery recycling facility - you can find these at places
such as Battery World, Aldi and Officeworks.

13
CHARGING
CHARGE METHODS
Lithium batteries need to be charged slightly different to other batteries, to
ensure they live a long life and provide maximum capacity.
There are several charging devices you can utilise, but whichever device you
choose, it must have a lithium charge profile. Suitable devices include DC-DC
chargers, solar panels (with regulator) and AC (mains power) chargers.
It is recommended that the charging current should be 30% or less of your
battery capacity. You can charge at higher currents, but 30% is recommended
for optimum battery longevity.
CHARGE METHODS: DC-DC CHARGER
DC-DC chargers allow you to charge your auxiliary lithium battery from your
vehicle’s alternator.
You generally cannot charge a lithium battery directly from a vehicle
alternator, because lithium batteries have a very high maximum charge current
compared to lead-acid batteries. With nothing to intermediate between the
alternator and battery, the battery will draw its maximum charge current from
the alternator, which can lead to the alternator overheating and burning out.
A DC-DC charger will act to moderate the flow of current, protecting your
alternator from overheating. In addition, they have a multi-stage charging
algorithm which will ensure your battery is optimally charged and its service
life is maximised.
Some DC-DC chargers also include a second input allowing you to connect a
solar panel, and may even be able to prioritise the solar charge method when
it detects a panel is connected and providing current.

14
CHARGING (CONT.)
AC CHARGER
If you’re charging up your batteries at home before or after a trip, or if
you’re at a powered camp site, you can also use an AC (mains power)
battery charger. Mains battery chargers are available as portable devices
or can be built into your 12V system. Again, you should make sure that the
AC charger you wish to use contains a lithium charge profile.
WARNING
• DO NOT use a charge profile with a “Pulse” or “Equalisation” stage. This
will damage the battery and void the warranty.
• DO NOT charge your battery directly from an alternator or via VSR.
CHARGE METHODS: SOLAR PANEL WITH REGULATOR
12V solar panels harness the energy of the sun to charge your battery.
There are many solar panel options on the market, but they can be split
into two main categories: fixed and portable.
Fixed solar panels usually have a rigid metal frame. They are designed
to be permanently fixed to your vehicle and connected to a regulator or
DC-DC charger mounted inside. They are great for charging your vehicle
while on the go without consuming current from your alternator.
Portable solar panels (solar blankets, solar mats etc.) are designed to be
set up while the vehicle is stationary, such as when you’re at camp. They
are usually connected to the battery via a portable regulator.
Either type of solar panel is fine for charging these lithium batteries, but
as stated previously it is important to ensure that your regulator has a
lithium charge profile to maximise your battery’s service life.

15
CAUTION
Remote reset
switch & cable
BMS AND REMOTE
RESET SWITCH
Your battery comes equipped with an integrated advanced Battery
Management System (BMS). The BMS ensures there is an even energy
balance between cells and allows up to six of these batteries to be connected
in parallel or series.
The BMS contains an intelligent protection circuit module which protects
against overcharge, over-discharge, short-circuit and over-temperature, and
can shut off power to the battery if required.
It also contains a low-voltage disconnect, which will place the battery into
protection mode if it drops below 10.0V. If the low-voltage disconnect is
tripped, the battery will not accept a charge until it has been reset.
To reset the battery, you can use the included remote reset switch (pictured
below) which connects to the port on top of the battery. The switch can be
mounted somewhere in your 12V setup and the cable permanently connected,
or you can keep the switch and cable packed away and connected it when
required.
To use the switch, simply plug the cable it into the top port (if not permanently
connected) and hold down the button for five seconds.
You should now be able to charge the battery as normal.
By continuously tripping the low-
voltage disconnect you may cause
damage to sensitive electronic equipment
that is attached to the battery such as stereo
equipment. This is not covered under the
battery warranty.

16
Q. Do I need a specific charger for my battery?
A. Yes, you will need to ensure that the charging method that you choose
is suitable for use with lithium batteries. Please refer to the “Charging”
section of this manual for further details. Using a charging method other
than those we stipulate may void your warranty.
Q. My battery appears to be dead or asleep. What can I do?
A. You may find that your battery has been discharged below 10.0V
and the low-voltage disconnect protection has been activated. To wake
it up, refer to the instructions in the “BMS & Reset Switch” section of this
manual.
Q. Can I mount my battery inside of a car engine bay?
A. We don’t recommend putting lithium batteries inside the engine
bay; doing so will void the warranty. Additionally, this will significantly
reduce the service life of your battery, and at worst it may cause it to
fail.
Q. Can I mount my battery on its side?
A. Yes, you can mount your battery on its side provided that you secure
it in place.
Q. Can I use my battery with an inverter?
A. Yes you can, although you must take care not to exceed the maximum
discharge current stipulated in the “Contents & Specifications” section of
this manual.
Q. Is there anywhere I can’t install my battery?
A. You should not install your battery anywhere that is subject to water
ingress or is used for gas storage. Also take care not to place the
terminals near any metal surfaces.
FREQUENTLY
ASKED QUESTIONS

17
Navigate to the App Store for iOS devices or the Google Play store for
Android devices and search for “HK Battery”, or scan one of the QR
codes below:
Check the side of your battery for a label which contains your battery’s
device ID - it will start with “BT-HK” followed by a 7-digit number. We
suggest you write it down here:
BT-HK _ _ _ _ _ _ _
Open the app and click the Bluetooth logo in the top-right corner of the
screen to view available batteries:
Locate your battery’s device ID and click on it to initiate connection.
BLUETOOTH APP
DOWNLOADING THE APP
CONNECTING YOUR BATTERY
Click here to view
available batteries
GOOGLE PLAY
iOS APP STORE

18
BLUETOOTH APP (CONT.)
NAVIGATION
ERROR MESSAGES OR UNUSUAL BEHAVIOUR
BMS PROTECTION LOG
The information available in the app is broken up into four screens:
If the app stops working or displays any error messages or other
unusual behaviour, please contact us for assistance.
The app records a log of any instances where a BMS protection circuit is
activated, including over-charge, over-discharge, under-voltage, over-
current and over-temperature. You can find it by pressing the shield icon
in the top-right corner of any screen.
KEY INFORMATION
State of charge, current voltage, available capacity, status, health.
DETAILED INFORMATION
Current voltage, net current in/out, status, cycle life, temperature.
CELL STATUS
Current voltage of each individual cell to ensure they are balanced.
CONTACT DETAILS
Our website, address and email if you have a question or problem.
Click here to view
BMS protection log

19
BLUETOOTH APP (CONT.)
State of Charge
Real-time Battery Voltage
Battery Status
Real-time Battery Capacity
Battery Health
Pair Battery
BMS Protection Record
KEY INFORMATION SCREEN

20
BLUETOOTH APP (CONT.)
Battery Cycles
Battery Status
Pair Battery
BMS Protection Record
Real-time Temperature (°C)
Current Amps (A)
Current Voltage (V)
DETAILED INFORMATION SCREEN
Table of contents
Other HARDKORR Camera Accessories manuals