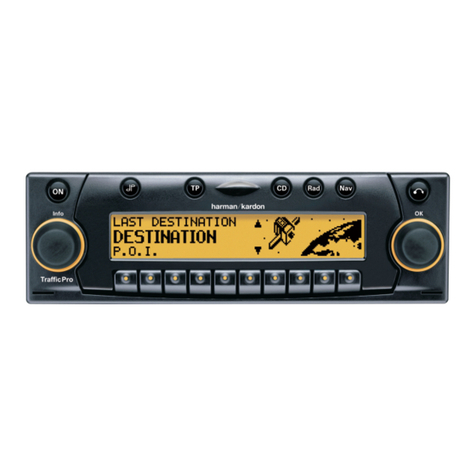
Harman Kardon 108TPRO User manual


1
US english
GWarning
Danger of accident
- Do not program the navigation unit while driv-
ing.
Destinations should only be entered when the ve-
hicle is stationary.
Use of the navigation unit is only advised if the
traffic conditions are suitable and you are abso-
lutely sure that its use presents no risk, distraction
or inconvenience to you, your passengers or oth-
er road users.
GWarning
Danger of accident
- Do not ignore traffic laws.
The requirements of the traffic laws take prece-
dence over instructions you may receive from the
navigation unit. It is possible that you may re-
ceive inaccurate or incorrect instructions due to
changes in traffic routes, e.g. due to road con-
struction or deviating data. Therefore, you must
always observe the actual road signs and traffic
regulations.
GWarning
Danger of accident
- Do not misuse the unit.
The navigation system serves solely as an aid to
navigation. In particular, the navigation system
must not be used as an orientation aid at times of
poor visibility. The volume of the radio and the
navigation system should be adjusted so that
noises external to the vehicle are still audible.
Turn the unit off immediately if a serious mal-
function occurs.

Table of contents
US english
US english
1. Keyboard Overview . . . . . . . . . . . . . . . . . . . . . 4
2. Anti-theft device . . . . . . . . . . . . . . . . . . . . . . . . 5
2.1. Entering the Code Number. . . . . . . . . . . . . . . 5
2.2. Removing the detachable faceplate . . . . . . . . .5
2.3. Inserting portable panel . . . . . . . . . . . . . . . . . 6
3. General Operation . . . . . . . . . . . . . . . . . . . . . . 7
3.1. Switching On/Off . . . . . . . . . . . . . . . . . . . . . . 7
3.2. Adjusting the volume . . . . . . . . . . . . . . . . . . . 7
3.3. Activating the Tone Menu . . . . . . . . . . . . . . .7
3.3.1. Adjusting the bass. . . . . . . . . . . . . . . . . . . . .7
3.3.2. Setting the treble. . . . . . . . . . . . . . . . . . . . . .7
3.3.3. Fader . . . . . . . . . . . . . . . . . . . . . . . . . . . . . . .7
3.3.4. Setting the balance . . . . . . . . . . . . . . . . . . . .8
3.3.5. Linear setting . . . . . . . . . . . . . . . . . . . . . . . .8
3.3.6. Switching loudness on / off . . . . . . . . . . . . .8
3.3.7. Setting the subwoofer level . . . . . . . . . . . . .8
4. Using Navigation. . . . . . . . . . . . . . . . . . . . . . . . 9
4.1. General instructions . . . . . . . . . . . . . . . . . . .10
4.2. Confirm Warning . . . . . . . . . . . . . . . . . . . . .10
4.3. Selecting Navigation . . . . . . . . . . . . . . . . . . 10
4.4. Main Navigation Menu . . . . . . . . . . . . . . . . .11
4.5. Entering a Destination . . . . . . . . . . . . . . . . . 11
4.5.1. Entering the Destination . . . . . . . . . . . . . . .12
4.5.2. Entering a street for the destination . . . . . .13
4.5.3. Entering the Destination
City/Town Center . . . . . . . . . . . . . . . . . . . . . . .14
4.6. Route Menu . . . . . . . . . . . . . . . . . . . . . . . . . .15
4.6.1. Entering street number for
destination street . . . . . . . . . . . . . . . . . . . . . . . .15
4.6.2. Selecting intersection for
destination street . . . . . . . . . . . . . . . . . . . . . . . . 16
4.6.3. Selecting the route settings . . . . . . . . . . . . 16
4.6.4. Storing specified destination in
destination memory. . . . . . . . . . . . . . . . . . . . . . 16
4.6.5. Deleting stored destinations. . . . . . . . . . . . 17
4.6.6. Destination memory full . . . . . . . . . . . . . . 17
4.7. Route guidance calculation . . . . . . . . . . . . . . 17
4.7.1. Recalculating route. . . . . . . . . . . . . . . . . . . 17
4.8. Stopover . . . . . . . . . . . . . . . . . . . . . . . . . . . . 18
4.8.1. Entering a stopover . . . . . . . . . . . . . . . . . . 18
4.8.2. Starting route guidance to stopover . . . . . . 18
4.8.3. Deleting a stopover . . . . . . . . . . . . . . . . . . 18
4.8.4. Stopover reached . . . . . . . . . . . . . . . . . . . . 18
4.9. Traffic jam . . . . . . . . . . . . . . . . . . . . . . . . . . 19
4.9.1. Entering length of traffic jam. . . . . . . . . . . 19
4.9.2. Cancel guidance around traffic jam . . . . . . 19
4.10. Canceling route guidance . . . . . . . . . . . . . . . 19
4.11. Notes on route guidance . . . . . . . . . . . . . . . . 20
4.12. Information during route guidance . . . . . . . . 21
4.12.1. Displaying route settings . . . . . . . . . . . . . 22
4.12.2. Requesting current time . . . . . . . . . . . . . . 22
4.12.3. Requesting trip duration and
miles traveled . . . . . . . . . . . . . . . . . . . . . . . . . . 22
4.12.4. Requesting current position . . . . . . . . . . . 22
4.12.5. Requesting road list . . . . . . . . . . . . . . . . . 23
4.13. Destination memory . . . . . . . . . . . . . . . . . . . 23
4.14. P.O.I. . . . . . . . . . . . . . . . . . . . . . . . . . . . . . . . 23
4.15. System settings . . . . . . . . . . . . . . . . . . . . . . . 25
4.15.1. Setting time . . . . . . . . . . . . . . . . . . . . . . . 26
4.15.2. Storing location . . . . . . . . . . . . . . . . . . . . 26
4.15.3. Requesting location . . . . . . . . . . . . . . . . . 26
4.15.4. Setting the language. . . . . . . . . . . . . . . . . 27
4.15.5. Animations . . . . . . . . . . . . . . . . . . . . . . . 27
4.15.6. Switching announcement of the
estimated time of arrival on /off. . . . . . . . . . . . 27
4.15.7. Selecting the units . . . . . . . . . . . . . . . . . . 28
5. Radio Mode . . . . . . . . . . . . . . . . . . . . . . . . . . . 29
5.1. Switching to radio mode. . . . . . . . . . . . . . . . 29
5.2. Switch on radio menu mode. . . . . . . . . . . . . 29
5.3. Selecting the FM waveband . . . . . . . . . . . . . 29
5.4. Selecting the AM waveband. . . . . . . . . . . . . 29
5.5. Setting options for station selection . . . . . . . 29
5.5.1. Dynamic auto store (FM-DAS). . . . . . . . . 29
5.5.2. Station search FM - DAS . . . . . . . . . . . . . 30
5.5.3. AM transmitter search. . . . . . . . . . . . . . . . 30
5.5.4. Scan search . . . . . . . . . . . . . . . . . . . . . . . . 30
5.5.5. Program type selection (PTY). . . . . . . . . . 30
5.5.6. Switching PTY display on / off. . . . . . . . . 31
5.5.7. Recalling/storing FM stations . . . . . . . . . . 31
5.5.8. Recalling/Storing AM station . . . . . . . . . . 31
5.5.9. AM autostore. . . . . . . . . . . . . . . . . . . . . . . 31
5.5.10. Manual FM tuning . . . . . . . . . . . . . . . . . 31
5.5.11. Manual AM tuning . . . . . . . . . . . . . . . . . 32
5.6. Regionalization . . . . . . . . . . . . . . . . . . . . . . 32
5.6.1. Switching regionalization on/off. . . . . . . . 32
5.6.2. Switching frequency display on / off . . . . 32
5.7. Switching radio text display on / off . . . . . . 33
5.8. Traffic Program (TP) . . . . . . . . . . . . . . . . . 33
5.8.1. Activating/Quitting the TP Menu . . . . . . . 33
5.8.2. Setting automatic tracking . . . . . . . . . . . . 34
5.8.3. Deactivating the TP. . . . . . . . . . . . . . . . . . 34
5.8.4. Switching Mute on/off . . . . . . . . . . . . . . . 34
5.8.5. Interrupting TP announcements . . . . . . . . 34
5.8.6. TP announcement volume. . . . . . . . . . . . . 35
Table of contents
US english
5.9. Telephone Muting . . . . . . . . . . . . . . . . . . . . 35
6. CD mode . . . . . . . . . . . . . . . . . . . . . . . . . . . . . . 36
6.1. Inserting / Ejecting CDs . . . . . . . . . . . . . . . . 36
6.2. Skipping to the next/previous track. . . . . . . . 37
6.3. Scan search . . . . . . . . . . . . . . . . . . . . . . . . . . 37
6.4. Fast Forward / Rewind . . . . . . . . . . . . . . . . . 37
6.5. Random Play . . . . . . . . . . . . . . . . . . . . . . . . 37
6.6. Repeating a track . . . . . . . . . . . . . . . . . . . . . . 37
6.7. Number of tracks and total playing time . . . 38
6.8. Temperature Protection Circuit . . . . . . . . . . . 38
7. CD Changer Mode . . . . . . . . . . . . . . . . . . . . . . 39
7.1. Playing CDs . . . . . . . . . . . . . . . . . . . . . . . . . 39
7.2. Naming a CD. . . . . . . . . . . . . . . . . . . . . . . . . 40
7.3. CD Filter Function . . . . . . . . . . . . . . . . . . . . 40
8. User menu . . . . . . . . . . . . . . . . . . . . . . . . . . . . . 41
8.1. Requesting/quitting user menu . . . . . . . . . . . 41
8.1.1. GAL (Gal) setting . . . . . . . . . . . . . . . . . . . 41
8.1.2. Telephone mute characteristics (Tel). . . . . 41
8.1.3. Display setting (Lcd) . . . . . . . . . . . . . . . . . 41
8.1.4. Flashing diode (LED) setting. . . . . . . . . . . 42
8.1.5. Setting reception optimization (M/S) . . . . 42
8.1.6. Setting navigation
announcements (Nav) . . . . . . . . . . . . . . . . . . . . 42
8.1.7. AUX input (Aux). . . . . . . . . . . . . . . . . . . . 43
8.1.8. Compass display . . . . . . . . . . . . . . . . . . . . 43
8.1.9. Signal tone volume . . . . . . . . . . . . . . . . . . 43
9. Service Menu . . . . . . . . . . . . . . . . . . . . . . . . . . 44
9.1. Requesting /Quitting the Service Menu . . . . 44
9.2. Triggering a Reset . . . . . . . . . . . . . . . . . . . . 44
10. General instructions . . . . . . . . . . . . . . . . . . . 45
11. Technical Data. . . . . . . . . . . . . . . . . . . . . . . . 46
NOTICE . . . . . . . . . . . . . . . . . . . . . . . . . . . . . . . . 47

11
34678
9
5
2
1
10
41. Keyboard Overview
US english
US english
1. Keyboard Overview
Left control knob (Info)
On / off switch ( )
Tone key ( )
Traffic program key ( )
Select CD mode ( )
Select radio mode ( )
Select navigation mode ( )
CD eject key ( )
Right control knob (OK)
Multifunction keys
Display
1
2ON
3
4TP
5CD
6Rad
7Nav
8
9
10
11

2. Anti-theft device 5
US english
2. Anti-theft device
2.1. Entering the Code Number
If the car radio is disconnected from the power sup-
ply, it will be theft-protected upon reconnection. Af-
ter turning on with the key, the display shows the
following text: Enter Code Number.
Use the multifunction keys 1- 7, to enter the five-dig-
it code number.
Enter the code number using the multifunction keys.
The unit automatically turns itself on once the fifth
digit is entered and if all other digits were entered cor-
rectly.
Note
It is essential that the CODE CARD be kept in a safe
place outside the vehicle. This will prevent unautho-
rized use. The provided stickers should be attached to
the inside of the vehicle windshield/windows.
If an incorrect code number is entered, the prompt
CODE will be displayed once again. If an incorrect
code number is entered three times in a row, the unit
will display WAIT, and it will be blocked for approx-
imately 60 minutes.
Three further incorrect entries block the unit for an
additional 60 minutes.
Note
The blocking time will elapse only while the unit is
turned on.
2.2. Removing the detachable faceplate
As an effective anti-theft device, the detachable face-
plate (A) may be removed from the unit. Press
briefly (CD remains in the unit). The display folds
forwards.
The portable component can then be removed by pull-
ing it forward and away from the unit.
The volume is limited to a certain level after the dis-
play is folded down. After 20 seconds, a tone indi-
cates that the control component is folded down. The
unit then switches itself off.
GWarning
Danger of accident
Do not remove detachable faceplate while driv-
ing for safety reasons!
ON
Enter Code Number
1234 567 Wait
1234 567 A

62. Anti-theft device
US english
US english
Note
After removal, please insert the detachable faceplate
in the accompanying protective cover.
Do not touch the metal contacts on the detachable
faceplate or on the radio.
2.3. Inserting portable panel
Insert the detachable faceplate into the lower left
catch and then engage it in the lower right catch. Then
fold up the detachable faceplate and engage it in the
upper catches.
The detachable faceplate can also be placed flat
against the unit and pushed into place.
To ensure proper operation, ensure that the detach-
able faceplate is firmly engaged in all four catches.
If a new detachable faceplate or one from another unit
is used, the code number must be entered as described
above to activate the unit.

3. General Operation 7
US english
3. General Operation
3.1. Switching On/Off
Press the key.
Additional options for switching on / off: Ignition.
To turn the unit on through the ignition key, the unit
must have been switched off via the ignition.
After
switching off the ignition, the unit can be prevented
from switching off by pressing within 3 seconds.
Note
With the ignition off, the unit can be turned on using
the key. However, the unit turns itself off auto-
matically after 1 hour.
3.2. Adjusting the volume
Turn the left control knob . The volume increases
or decreases.
GWarning
Danger of Accidents – Health Warning
- Excessive volume poses dangers and risks.
Adjust the volume to a level that will allow you
to still hear traffic noises (horns, sirens, etc.).
3.3. Activating the Tone Menu
Press . This activates the tone menu.
The following parameters may be adjusted: Bas
(Bass), Trb (Treble), Fad (Fader), Bal (Balance),
Flt (linear setting) Sub (Subwoofer) and Ldn
(Loudness).
Settings for the bass, treble, fader, balance and loud-
ness are saved separately for wavebands AM, SW,
FM, for traffic reports, navigation messages, for tele-
phone, CD and CDC use.
Adjusting the bass
Press followed by the multifunction key .
Set the desired bass level using the right control
knob .
Setting the treble
Press followed by the multifunction key .
Set the desired treble level using the right control
knob .
Fader
Press followed by the multifunction key .
Use the right control knob to set the desired fader
setting.
ON
ON
ON
FM Bass 0
BasTrb Fad Bal Flt Sub Ldn
Bas
FM Bass 0
BasTrb Fad Bal Flt Sub Ldn
Trb
FM Treble 0
BasTrbFad Bal Flt Sub Ldn
Fad
FM Fader 0
BasTrb FadBal Flt Sub Ldn

83. General Operation
US english
US english
Setting the balance
Press followed by the multifunction key .
Set the desired balance level using the right control
knob .
Linear setting
Briefly press .
Press multifunction key briefly- Tone flat
will appear. By pressing the multifunction key
again you can set the tone for the currently selected
signal source (e.g. FM) to an average value.
Switching loudness on / off
When Loudness is enabled, bass and treble frequen-
cies will be boosted at low listening levels.
Press followed by the multifunction key .
Use the multifunction key to select loudness On
(ON) or loudness Off (OFF).
For wave bands AM and SW, Loudness is turned off.
Setting the subwoofer level
Press followed by the multifunction key .
Use the right rotary control to set the desired sub-
woofer volume level.
Note
The subwoofer output is a full-range, non fading out-
put
Bal
FM Balance 0
BasTrb Fad Bal Flt Sub Ldn
FM Tone flat?
BasTrb Fad Bal FltSub Ldn
Flt
Flt
Ldn
FM Loudness ON
BasTrb Fad Bal Flt Sub Ldn
Ldn
Sub
FM Subwoofer 0
BasTrb Fad Bal Flt Sub Ldn

4. Using Navigation 9
US english
4. Using Navigation
What is navigation?
The term "navigation" (lat. navigare = to travel by
sea) is generally understood to mean the determina-
tion of a vehicle’s location, the determination of its di-
rection and its distance from the desired destination
and the required route. Stars, prominent landmarks,
compasses and satellites etc. are used as navigation
tools.
TrafficPro uses a comparison of its sensor system
with the data of a digital map and the help of the GPS
(Global Positioning System) receiver to determine lo-
cation. It determines the direction and distance from
the destination by means of a digital street map, a nav-
igation computer and sensors. A speedometer and re-
verse signal are also used to calculate the route.
For safety reasons, route guidance is provided pre-
dominantly in spoken form , supported by a direction
indicator on the display.
Safety Instructions
- All traffic rules must be observed at all times.
- Observation of traffic signs and local traffic regu-
lations must always take precedence over instruc-
tions given by TrafficPro.
- Traffic guidance is restricted to passenger vehicles.
Special driving recommendations and regulations
for other vehicles (e.g. commercial vehicles) are
not included.
- Destinations may only be entered when the vehicle
is stationary.
Navigation CD
Your TrafficPro is shipped with two navigation CDs.
One CD contains data for the western half of the USA
and the other contains data for the eastern half of the
USA.
Data for North Dakota, South Dakota, Nebraska,
Kansas, Oklahoma, and Texas are contained on both
CDs (the striped area on the illustration).
The navigation CDs contain a digitized street map.
Highways, state and county roads, as well as local
streets are detailed in this street map. Larger cities and
communities are mapped in detail. For smaller towns
and communities, the regional and unclassified roads
or through-roads and the town centers are included.
One-way streets, pedestrian zones, no-turn intersec-
tions and other traffic regulations are taken into ac-
count as much as possible. There may be discrepan-
cies between the data on the navigation CD and the
actual local situation, due to continuous changes to
road systems and traffic regulations.

10 4. Using Navigation
US english
US english
4.1. General instructions
• Radio or CD operation continues in navigation
mode.
The distance to the next message and estimated
time of arrival are shown on the right side of the
display.
• When route guidance is active, press to enter
radio mode. Press to switch to CD mode.
The Navigation menu automatically displays when
navigation announcements are given.
• When entering the address, only those letters, dig-
its and symbols needed to make a coherent address
are displayed.
The entries are automatically completed.
Spaces (e.g. as in New York) must be entered using
the underscore character (_).
Letters, numbers and symbols can be selected by
pressing the multifunction keys to . Se-
lect the individual symbols by pressing the appro-
priate multifunction keys repeatedly.
You can also use the right control knob for your
selection. This mode of selection will be used in
the remainder of this guide.
• quits the current menu and displays the previ-
ous menu.
• The system recalculates the route if a deviation is
made.
• Press the left control knob to hear the current
navigation announcement.
• During a navigation announcement, you can adjust
the volume with the left control knob and the
tone by pressing the key (see also page 9).
• Briefly press the left control knob to request ad-
ditional information during route guidance, or the
current position when route guidance is not active.
See “Information during route guidance” on
page 21.
• You can interrupt the current navigation announce-
ment by pressing the left control knob .
• If you press and hold the left control knob for
more than 2 seconds during a navigation message,
the navigation audio messages are deactivated and
route guidance will only be shown on the display.
Briefly press the left control knob to reactivate
the navigation audio announcements.
• The scroll marks and indicate a selection list
through which you can scroll using the right con-
trol knob .
You can select the entry displayed in bold type by
pressing the right control knob .
4.2. Confirm Warning
Before you can use the navigation system, a warning
appears.
When you confirm the receipt of this warning you
state that you have read and understood the user guide
and that you are aware of the dangers associated with
the use of this navigational equipment.
Press the right control knob to confirm the selec-
tion.
4.3. Selecting Navigation
Press .
If necessary, confirm the warning as described above.
Next, the main navigation menu appears.
Rad
CD
1 9
Nav
DO NOT PROGRAM W ILE DRIVING.
PRESS OK IF YOU UNDERSTAND
INSTRUCTIONS IN MANUAL
Nav
NAVIGATION IS BEING ACTIVATED!
PLEASE OBSERVE TRAFFIC LAWS

4. Using Navigation 11
US english
Note:
When starting navigation mode for the first time, you
must load the navigation CD.
If calibration of the navigation system is not yet com-
pleted, the system will prompt you to take a drive for
calibration (see Installation Guide).
Navigation mode requires the navigation CD contain-
ing the data for the destination.
When you enter a destination, the navigation CD is re-
quired. During route calculation, the prompt CD will
flash on the display. Once calculation is completed,
the prompt CD will disappear, you can remove the
navigation CD and insert an audio CD.
4.4. Main Navigation Menu
Select
DESTINATION,
DEST. MEMO Y,
P.O.I.,
LAST DESTINATIONS,
by turning the right control knob , and confirm by
pressing the control knob.
•DESTINATION
Accesses the destination entry menu.
See “Entering a Destination” on page 11.
•DEST. MEMO Y
Contains previously stored destinations.
See “Destination memory” on page 23.
•P.O.I.
Menu for selecting regional and interregional des-
tinations of special interest and local points of in-
terest. Points of interest include gas stations, air-
ports or hospitals, for example. See “P.O.I.” on
page 23.
•LAST DESTINATIONS
A list of the last 50 destinations is displayed. Select
your destination with the right control knob . Be-
fore you confirm your selection with the right con-
trol knob , you may request destination informa-
tion by pressing the left control knob . Stopovers
are not saved as final destinations.
4.5. Entering a Destination
In the Main Navigation Menu, select DESTINATION
with the right control knob and press it to confirm.
The navigation data for the USA is stored on two CDs
(see page 9).
When you calculate a route from a place contained on
the USA West CD (A) to a destination stored on the
USA East CD (B), you need to enter a useful destina-
tion in one of the following states: North Dakota,
South Dakota, Nebraska, Kansas, Oklahoma or Tex-
as. Once you have reached this intermediary destina-
tion, or once you reach one of the aforementioned
states, you may switch CDs and enter your final des-
tination (C).
DEST. MEMORY
DESTIN TION
P.O.I.
B
A
C

12 4. Using Navigation
US english
US english
Note:
If you switch navigation CDs you will see a display
similar to this:
Using the right control knob , select EXECUTE
UPDATE and press the control knob to confirm.
The system checks the radio and navigation software
and loads all data required for navigation.
The display shows a progress bar.
When switching CDs, the ignition should be on and
the vehicle should be stationary. After a short time the
system restarts the navigation software and you need
to confirm the warning message (see ”Confirm
Warning” on page 10).
Entering the Destination
The name of the town of the last destination entered is
displayed.
If you wish to select a destination within the displayed
location, immediately select ST EET (Street) or
CENTE .
If your destination lies in another town, press the right
control knob to enter the name of the town where
the new destination is located.
Select the letters one by one with right control
knob and press it to confirm. The selected letter
appears enlarged on the right side of the display.
Use multifunction key to delete the last con-
firmed letter.
If necessary, delete the complete entry by pressing
multifunction key for more than 2 seconds.
Entered letters are displayed inversely. To speed up
selection, the display shows the name of the location
most similar to the letters you have entered so far. Al-
so, the unit offers only letters for your selection that
make sense in completing the location name. If all
other possibilities are eliminated, the unit completes
the place name automatically.
To accept the entry, press and hold the right control
knob for more than 2 seconds or select the small
check mark and briefly press the right control
knob .
If the complete place-name was previously entered or
was automatically completed, the program moves ei-
ther to the place-differentiation list or to the entry of
road or center.
If the desired location offers no streets or only the
center for selection, the program switches directly to
the route menu.
EXECUTE UPD TE
BACK
TPE0500
TPE0400
CENTER
UPPER S DDLE R
STREET
TOWN:
ABCDEFG IJKLMNOPQRSTUVWXYZ H
...................
TOWN: BOSTIC
........I.....O.......W.... W
.......................

4. Using Navigation 13
US english
If an incomplete location entry was confirmed, the lo-
cation selection list appears.
The location name most similar to the entry appears
in bold type in the location selection list.
The scroll marks indicate that more places are avail-
able in an alphabetically sorted list.
Make your selection by turning the right control
knob and press the knob to confirm. (See “General
instructions” on page 10.)
If the entry is unique, the program switches to street
or center entry. If the desired city/town offers no
streets or only the center for selection, the program
switches directly to the route menu.
The location differentiation list is displayed if the se-
lection is ambiguous.
Select the required state name using the right control
knob and press it to confirm.
The program switches to street or center entry.
If the desired location offers no streets or only the
center for selection, the program switches directly to
the route menu.
Entering a street for the destination
Note:
Geographic designators (N, S, etc.) always follow the
street names (e.g. E. Carson St. will be displayed as
CA SON ST E).
Select ST EET with the right control knob and
press the control to confirm.
Select the letters one by one with right control
knob and press the control to confirm. The selected
letter appears enlarged at the right of the display.
Use multifunction key to delete the last con-
firmed letter.
If necessary, delete the complete entry by pressing
multifunction key for more than 2 seconds.
Entered letters are displayed inversely. To help, the
street name most similar to the entry so far is dis-
played. Also, the unit offers only letters for your se-
lection that make sense in completing the location
name.
If no other entries are available, the unit completes the
street name.
To accept the entry, press and hold the right control
knob for more than 2 seconds or select the small
check mark and briefly press the right control
knob .
If the complete road-name was previously entered or
was automatically completed, the program switches
either to the road differentiation list or to the route
menu.
If an incomplete location entry was confirmed, the
street selection list is displayed.
The street name most similar to the entry appears in
bold type in the street selection list.
BOSTIC
BOSTON
BOSTON EIG TS
IN INDIANA
IN M SS CHUSETTS
STREET
CENTER
STREET:
ABCDEFG IJKLMNOPQRSTUVW..Z H
.....123456789........
STREET: WAS BURN ST
.B......I................. I
.....................
WAS INGTON SQ
W SHINGTON ST
WAS INGTON ST N

14 4. Using Navigation
US english
US english
The scroll marks indicate that more streets are avail-
able in an alphabetically sorted list.
Select the street by turning the right control knob
and press the control to confirm.
If the entry is unique, the program switches to the
route menu.
The street differentiation list appears if the selection
is ambiguous.
Select the desired street with the right control knob
and press it to confirm.
The program switches to the route menu.
Entering the Destination City/Town Center
Select CENTE with the right control knob and
press the control to confirm.
If the place you chose only has one center, the pro-
gram switches immediately to the route menu.
If there are fewer than 10 centers, the center list is dis-
played.
Select the center by turning the right control knob
and press the control to confirm.
If there are more than 9 centers, the program switches
to center entry.
Select the letters one by one with right control
knob and press the control to confirm. The selected
letter appears enlarged at the right of the display.
Use multifunction key to delete the last con-
firmed letter.
If necessary, delete the complete entry by pressing
multifunction key for more than 2 seconds.
Entered letters are displayed inversely. For your help,
the system displays the center name most similar to
the entry so far. Also, the unit offers only letters for
your selection that make sense in completing the lo-
cation name. If no other entries are available, the unit
completes the name of the center.
To accept the entry, press and hold the right control
knob for more than 2 seconds or select the small
check mark and briefly press the right control
knob .
If the complete center name was previously entered or
was automatically completed, the program will
switch to the route menu.
The program switches to the list of centers if your se-
lection is ambiguous.
IN BRIG TON
IN CH RLESTOWN
IN DORC ESTER
CENTER
STREET
LLSTON
BOSTON
CENTER:
ABCDE.. .J..MN...RS...W... H
.....................
CENTER: BOSTON
..............O..R........ O
.....................
ALLSTON
BOSTON
BRIG TON

4. Using Navigation 15
US english
The center name most similar to the entry appears in
bold type in the center list.
The scroll mark indicates that more centers are avail-
able in an alphabetically sorted list.
Select the center by turning the right control knob
and press the control to confirm.
The program moves to the route menu.
Note:
If you press the right control knob for longer than
2 seconds without previously entering a letter, the list
of the possible location centers will immediately ap-
pear.
4.6. Route Menu
Select
SAVE DESTINATION,
STA T_FAST ., (STA T_SHO T .)
HOUSE NO.:,
INTE SECTION
OUTE SETTINGS
by turning the right control knob , and confirm by
pressing the control.
•SAVE DESTINATION
accesses the input menu for the destination memo-
ry (Page 16).
•STA T_FAST . or STA T_SHO T .
begins route guidance. Simultaneously, a prompt
appears indicating the currently selected route op-
tion (_SHO T . for a short route and _FAST
. for a fast route).
•HOUSE NO.:
Here, you can enter the house number for the spec-
ified destination street.
This function is only available if the information is
stored on the navigation CD.
•INTE SECTION
An intersecting street may also be defined as the
destination here.
This function is only available if the information is
stored on the navigation CD.
•OUTE SETTINGS
Select specifications such as fast route, short route,
freeway, ferries and toll roads here.
Entering street number for destination street
Select HOUSE NO.: in the route menu with the right
control knob , and press the knob to confirm.
Using the right control knob , enter the street num-
ber for the destination street and press for more than
2 seconds to confirm the entry. To confirm, you may
also select the small check mark , then briefly
press the right control knob .
Due to system characteristics, route guidance is only
available into the specified street number range dis-
played in parentheses in the illustration above.
Select STA T_ to start route guidance.
Select SAVE DESTINATION to jump to the destina-
tion memory menu.
SAVE DESTINATION
ST RT-F ST R.
OUSE NO.:
OUSE NO.: (1 _ 99):
........................... 5
... 0123456789......
SAVE DESTINATION
ST RT-F ST R.
ROUTE SETTINGS

16 4. Using Navigation
US english
US english
Select OUTE SETTINGS to choose the route set-
tings.
Choose by turning the right control knob and press
to confirm the selection.
Selecting intersection for destination street
If the house number is not available on the digitized
map, you may enter a nearby intersection for guid-
ance.
In the route menu, use the right control knob to se-
lect INTE SECTION, then press the control to con-
firm.
Select the intersection for the destination street by
turning the right control knob and press the control
to confirm.
Select STA T_ to start route guidance.
Select SAVE DESTINATION to jump to the destina-
tion memory menu.
Select OUTE SETTINGS to change the route set-
tings.
Choose by turning the right control knob and press
the knob to confirm the selection.
Selecting the route settings
Select OUTE SETTINGS in the route menu with
the right control knob , and press the knob to con-
firm.
•FAST OUTE
If selected, the program calculates the shortest pos-
sible journey time.
•SHO T OUTE
If selected, the program calculates the shortest pos-
sible distance.
Note:
The setting “SHO T OUTE” is often recom-
mended for larger cities or metropolitan areas.
•EST ICTIONS
Provides options for avoiding highways, ferries or
toll roads.
Make your selection by turning the right control
knob, and change any settings by pressing the right
control knob .
Press the control for more than 2 seconds to accept
all settings and quit the menu.
Note:
It is possible that routes without the use of inter-
state highways may not be calculable. In this case,
you will receive a message.
Storing specified destination in destination memo-
ry
It is not absolutely necessary to store a destination in
the destination memory for route guidance. However,
it saves repeated manual entry if the destination is re-
quired again at a later date.
Select SAVE DESTINATION in the Route Entry
menu and press the right control knob to confirm.
Any name of your choice consisting of up to 14 char-
acters may be entered for the specified destination
and then automatically stored in the destination mem-
ory after pressing the right control knob for more
than 2 seconds. See “Destination memory” on
page 23.
To store, you may also select the small check
mark and briefly press the right control knob .
RROW ST
CAMBRIDGE ST
SAVE DESTINATION
ST RT-F ST R.
ROUTE SETTINGS
S ORT ROUTE
F ST ROUTE
RESTRICTIONS
IG WAY W WIT / WIT OUT
FERRIES WIT / WIT OUT
TOLL WIT / WIT OUT
NAME:
ABCDEFG IJKLMNOPQRSTUVWXYZ H
! 0123456789,/() .

4. Using Navigation 17
US english
If you do not wish to enter a name of your choice,
press and hold the right control knob for more than
2 seconds to store the previously entered destination
in the destination memory.
The last destination entered can be filed at any posi-
tion by turning the right control knob . The memory
position is confirmed by briefly pressing the right
control knob .
A total of 50 destinations can be saved.
For final storage in the destination memory, either
start route guidance or switch the program to new des-
tination entry by selecting NEW DESTINATION.
Deleting stored destinations
Select destination memory (see page 23).
Select the destination to be deleted using the right
control knob and press .
Destination memory full
Occurs, when the destination memory is full.
Select either DELETE by pressing the right control
knob to jump to the destination memory to delete
a destination or BACK by pressing the button to
cancel saving.
4.7. Route guidance calculation
The message "Calculating route" indicates that the
distance is being calculated. This may take several
seconds.
After the first route guidance announcement, the
prompt CD will continue to flash on the display until
the route is completely calculated. When a distant
destination is entered, it is recommended that you
wait until CD has stopped flashing before departing.
Recalculating route.
If
the current route is not followed due to road blocks,
detours, unintentionally driving in the wrong direction
or failing to observe the recommendations, the system
immediately calculates a new route. During this re-cal-
culation, the display shows
NEW ROUTE
.
NEW DESTINATION
ST RT-F ST R.
ROUTE SETTINGS
UNT M RY, W SHINGTO
COMPANY , NEW YORK CITY, W
DEL
DEL
DEST. MEMORY FULL!
DELETE = OK
BACK = NAV
Nav
M INSTREET
+,
M INSTREET

18 4. Using Navigation
US english
US english
4.8. Stopover
If, on your way to your destination you must make a
stopover (e.g. find a gas station), this function will al-
low you to navigate to a stopover while route guid-
ance is active.
Entering a stopover
Press multifunction key .
Using the right control knob , make a selection and
press the control to confirm.
•DEST. MEMO Y
(see page 23) Selecting a stopover from the desti-
nation memory.
•DESTINATION
(see page 11) allows the entry of a stopover with
the precise specification of the address.
•P.O.I.
(see page 23) enables the selection of special desti-
nations as stopovers via LOCAL A EA, NEA BY
DESTINATION and TOWN, e.g. gas stations or air-
ports.
•LAST DESTINATIONS
Selecting a stopover from the “Last Destination”
memory.
Starting route guidance to stopover
To start route guidance to the stopover, press the right
control knob .
The route is calculated and route guidance begins.
Note:
During route guidance to a stopover, is dis-
played inversely.
Deleting a stopover
Press multifunction key .
To delete the stopover, press the right control knob
within 8 seconds.
Stopover reached
After the message YOU HAVE EACHED YOU
STOPOVE , route guidance to the main destination
begins automatically.
After this message you need to insert the navigation
CD.
3.0
MI
10:23
M INSTREET
DESTINATION
P.O.I.
LAST DESTINATIONS
ST RT
M INSTREET
3.0
MI
10:23
DELETE STOPOVER?
BACK = NAV
YOU AVE REAC ED YOUR STOPOVER
Table of contents
Other Harman Kardon Car Navigation System manuals

Harman Kardon
Harman Kardon guide+play GPS-500 Instruction Manual

Harman Kardon
Harman Kardon TRAFFIC PRO-R User manual

Harman Kardon
Harman Kardon guide + play GPS-500 User manual

Harman Kardon
Harman Kardon guide+play GPS-500 User manual

Harman Kardon
Harman Kardon guide+play GPS-500 User manual

Harman Kardon
Harman Kardon guide+play GPS-810 User manual

Harman Kardon
Harman Kardon guide + play GPS-410 EU User manual

Harman Kardon
Harman Kardon AVR 310 User manual

Harman Kardon
Harman Kardon GPS-810 User manual

Harman Kardon
Harman Kardon guide+play GPS-910NA User manual