manuals.online logo
Brands
  1. Home
  2. •
  3. Brands
  4. •
  5. Harman Kardon
  6. •
  7. Cassette Player
  8. •
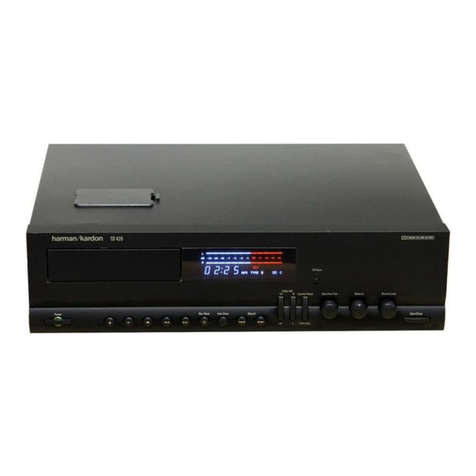
  9. Harman Kardon TD420 User manual

Harman Kardon TD420 User manual

since
CD
Transcription
Quality
Cassette
Deck
OWNER’S
MANUAL
CAUTION
RISK
OF
ELECTRIC
SHOCK
DO
NOT
OPEN
CAUTION:
TO
REDUCE
THE
RISK
OF
ELECTRIC
SHOCK,
DO
NOT
REMOVE
COVER
(OR
BACK).
NO
USER-SERVICEABLE
PARTS
INSIDE.
REFER
SERVICING
TO
QUALIFIED
SERVICE
PERSONNEL.
The
lightning
flash
with
arrowhead
symbol,
within
an
equilateral
triangle,
is
intended
to
alert
the
user
to
the
presence
of
uninsulated
"dangerous
voltage”
within
the
product's
enclosure
that
may
be
of
sufficient
magnitude
to
constitute
a
risk
of
electric
shock
to
persons.
The
exclamation
point
within
an
equilateral
triangle
is
intended
to
alert
the
user
to
the
presence
of
important
operating
and
maintenance
(servicing)
instructions
in
the
literature
accompanying
the
appliance.
WARNING:
TO
REDUCE
THE
RISK
OF
FIRE
OR
ELECTRIC
SHOCK,
DO
NOT
EXPOSE
THIS
APPLIANCE
TO
RAIN
OR
MOISTURE.
CAUTION:
TO
PREVENT
ELECTRIC
SHOCK,
MATCH
WIDE
BLADE
OF
PLUG
TO
WIDE
SLOT,
FULLY
INSERT.
ATTENTION:
POUR
EVITER
LES
CHOCS
ELECTRIQUES,
INTRODUIRE
LA
LAME
LA
PLUS
LARGE
DE
LA
FICHE
DANS
LA
BORNE
Power
Supply
Plug
this
cassette
deck
only
into
domestic
120
Volt
AC
outlets.
Connecting
it
to
an
outlet
supplying
a
higher
voltage
may
create
a
fire
hazard.
Handle
the
Power
Cord
Gently
HM
To
disconnect
the
plug
from
the
AC
outlet,
pull
on
the
plug
itself,
not
on
the
cord.
Pulling
the
cord
may
break
the
wire.
Harman
Kardon
1TD420
Date
of
purchase
Purchased
f
rom
Address
of
business
purchased
from
Installed
by
Date
installation
Serial
No.
HM
Disconnect
the
plug
from
the
AC
outlet
whenever
the
unit
is
to
be
left
unused
for
an
extended
period
of
time.
M@
Do
not
place
furniture
or
other
heavy
objects
on
the
cord,
and
avoid
dropping
heavy
objects
on
it.
Also
do
not
make
a
knot
in
the
cord;
this
can
damage
it
and
cause
a
fire
hazard.
Place
of
Installation
Place
the
cassette
deck
on
a
firm
and
level
surface.
Avoid
installing
it:
Hi
In
moist
or
humid
places;
MH
Close
to
heating
equipment
or
in
places
exposed
to
direct
sunlight;
@
In
a
direct
draft
from
an
air
conditioner
or
in
other
very
cold
locations;
M@
In
places
subject
to
excessive
vibration
or
dust;
M@
In
poorly
ventilated
places;
Moving
the
Unit
Before
moving
the
unit,
be
sure
to
unplug
the
power
cord
and
disconnect
all
wires
to
other
stereo
components.
Do
Not
Open
the
Cabinet
Except
for
performing
routine
maintenance
(see
page
8),
do
not
attempt
to
service
this
unit.
Tampering
with
internal
components
can
cause
fire
or
shock,
and
may
void
your
guarantee.
If
water
or
small
objects
enter
the
unit,
unplug
the
power
cord
immediately
and
consult
an
authorized
Harman
Kardon
service
center.
Using
the
unit
under
such
conditions
may
cause
a
fire
or
shock
hazard.
Cleaning
Remove
dust
by
wiping
the
unit
with
a
soft,
dry
cloth.
If
necessary,
use
a
soft
cloth
lightly
dampened
with mild
soapy
water;
then
wipe
with
a
dry
cloth.
Never
use
benzine,
thinner,
alcohol
or
other
volatile
agents,
and
avoid
spraying
insecticides
near
the
unit.
Thank
you
for
choosing
a
Harman
Kardon
cassette
deck.
And
congratulations.
Your
new
unit
is
an
exceptionally
well-engineered
product
that
will
give
you
years
of
superb
performance.
General
Instructions
The
special
features
of
this
cassette
deck
include:
@
CD
Transcription
Quality
The
TD420
has
been
engineered
for
wide,
flat
frequency
response,
low
noise,
and
low
distortion,
so
as
to
produce
high
fidelity
recordings
from
compact
discs
and
other
high-quality
sound
sources.
M@
Discrete
circuitry
For
maximum
design
flexibility
and
highest
possible
performance,
Harman
Kardon
designs
a
playback
circuitry
using
discrete
electronic
components,
not
off-the-shelf
integrated
circuits.
M@
Large
Fluorescent
Display
Function
settings
and
signal
levels
are
indicated
in
bright,
clear
alphanumerics
and
easy-to-read
format.
@
Advanced
Ergonomic
Design
Controls
are
engineered
and
positioned
for
simple,
error-free
recording
and
playback.
HM
Music
Search
Skip
Forward
and
Reverse
buttons
rapidly
locate
the
start
of
any
desired
segment
on
a
pre-recorded
tape.
TABLE
OF
CONTENTS
Panel
Controls
and
Displays
Operating
Instructions
Installation
Troubleshooting
Specifications
Dolby
HX
Pro
Special
recording
circuitry
automatically
monitors
signal
levels
and
adjusts
bias
in
the
presence
of
momentary
high
frequency
peaks.
This
allows
you
to
record
at
higher
input
levels
(for
better
signal
quality)
without
distortion.
Dolby
HX
Pro
operates
automatically
whenever
recordings
are
made,
and
the
resulting
higher-fidelity
tape
can
be
played
back
on
any
cassette
deck.
To
get
the
most
from
your
new
cassette
deck,
please
read
this
manual
carefully
and
follow
its
instructions.
Save
the
manual
for
future
reference.
Dolby
noise
reduction
and
HX
Pro
headroom
extension
manufactured
under
license
from
Dolby
Laboratories
Licensing
Corporation.
HX
Pro
originated
by
Bang
&
Olufsen.
"Dolby",
the
double-D
symbol
DU
and
"HX
Pro"
are
trademarks
of
Dolby
Laboratories
Licensing
Corporation.
Harman
Kardon
TD420—
Cassette
Deck
Controls
and
Displays
i
1.
Power
Switch
Press
to
turn
unit
on/off
2.
Record/Pause
Puts
cassette
deck
in
Record
ready
or
pause
mode.
3.
Play
Begins
playback
or
recording.
4.
Stop
Stops
tape
transport
in
any
mode.
5.
Rewind/Fast
Forward
Rapidly
rewinds/advances
tape.
6.
Record
Mute
Inserts
blank
space
when
recording.
7.
Intro
Scan
Previews
each
segment
on
a
pre-recorded
tape.
8.
Search
Foreward
and
Reverse
Locates
the
start
of
any
desired
segment
on
a
pre-recorded
tape.
(See
page
#5)
9.
Doiby
NR
Activates
Dolby
Noise
Reduction
circuitry
for
playing
or
recording
tapes.
Controls
and
Displays
10.
B/C
|
20)
Selects
Dolby
B
or
Dolby
C
Noise
Reduction.
11.
MPX
Filter
Press
when
recording
FM
stereo
broadcasts
using
Dolby
noise
reduction.
12.
Bias
Fine
Trim
“35
-20
-10
-7
Adjust
when
recording.
(See
page
#6)
—
a a
|
n.0
13.
Balance
ood
Adjusts
balance
between
left
and
right
channels
when
recording.
14.
Record
Level
Adjusts
recording
level.
15.
Open/Close
Press
to
load/remove
tape
cassette.
19.
D0
BC
Shows
if
Dolby
B
or
C
circuits
are
on.
16.
Cassette
Compartment/Drawer
20.
Counter
Indicates
tape
position
in
minutes
and
17.
Counter
Reset
seconds.
Resets
Tape
Counter
to
00:00.
21.
Level
Shows
signal
level.
18.
CD
Sync
Engage
when
synchronizing
recording
with
a
Harman
Kardon
CD
Player.
|
INTRO
REC
PLAY
<<
a
MPX
TYPE
IIIIV
mBCS
(9)
22.
Intro
Indicates
Intro
Scan
is
engaged.
23.
REC,
PLAY,
Displays
operating
mode:
Record,
Play,
Rewind
or
Fast
Forward.
24.
TYPE
I
IIV
Automatically
indicates
type
of
tape
in
use.
Inserting
a
Tape
1.
Check
cassette
tape
for
excessive
slack.
If
necessary,
insert
a
pencil
into
one
of
the
cassette
hubs
and
rotate
to
take
up
the
slack.
2.
Press
Open/Close.
3.
Insert
cassette,
tape
side
toward
rear
of
unit,
and
close
compartment
door.
Operating
Instructions
NOTE:
The
cassette
deck
determines
the
type
of
tape
in
use
and
sets
Bias/Equalization
circuitry
automatically.
Playing
a
Tape
1.
If
tape
was
recorded
with
Dolby
Noise
Reduction,
press
Dolby
NR
button.
DD
and
"B"
or
"C"
will
appear
on
the
display
panel.
Choose
B
or
C
by
pressing
the
B/C
button.
2.
Press
»™
to
begin
play.
Previewing
a
Tape
1.
Press
Intro
Scan.
Cassette
deck
locates
the
beginning
of
recorded
material
and
plays
for
15
seconds.
Tape
is
then
advanced
to
the
beginning
of
each
successive
recorded
segment,
or
track,
playing
for
15
seconds
before
automatically
advancing
to
the
next
track.
2.
To
stop
Intro
Scan,
press
mm.
Or,
press
™
during
any
15-second
play
segment,
and
tape
will
continue
to
play.
Locating
Places
on
a
Tape
1.
To
move
quickly
to
the
beginning
of
any
desired
selection,
use
the
Search
Reverse
and
Search
Forward
buttons
(<<
and
>>:
at
lower
left
corner
of
the
deck).
To
skip
to
the
beginning
of
the
previous
track,
press
'«<
again
quickly
before
the
present
track
begins
playing.
2.
Use
the
Counter.
The
Linear
Time
Counter
indicates
approximate
tape
position
in
minutes
and
seconds.
Press
Counter
Reset
at
the
start
of
a
cassette
to
identify
any
desired
point
on
the
tape.
(Elapsed
time
is
maintained
in
Fast
Forward
and
Rewind.)
When
counter
is
reset
to
00:00
at
the
beginning
of
a
cassette,
the
approximate
time
remaining
can
be
determined
by
subtracting
the
counter
reading
from
the
total
tape
time.
The
Linear
Timer
Counter
accuracy
is
typically
within
1
minute
of
the
tape’s
actual
running
time.
Recording
a
Tape
1.
Bias
Fine
Trim
knob
to
middle
position
or
to
previously
determined
proper
position
for
the
tape
(refer
to
following
section
for
details).
2.
Press
the
Dolby
NR
button
to
turn
Dolby
NR
circuitry
on/off,
and
press
B/C
button
to
select
Dolby
B
or
C
as
follows:
A.
To
record
a
tape
without
Dolby
Noise
Reduction,
turn
the
Dolby
NR
switch
off.
B.
To
record
a
tape
with
Dolby
Noise
Reduction,
turn
the
Dolby
NR
switch
on,
and
select
Dolby
B
or
C
NR
with
the
B/C
switch.
C.
When
recording
with
Dolby
Noise
Reduction,
consider
the
equipment
on
which
you
will
play
your
tape.
If
playback
equipment
is
not
equipped
for
Dolby
NR,
turn
the
Dolby
NR
switch
Off.
If
it
is
equipped
for
Dolby
NR,
turn
the
Dolby
NR
switch
On;
then
select
B
if
playback
device
is
equipped
only
for
Dolby
BNR;
otherwise
select
C.
3.
If
you
are
recording
an
FM
stereo
broadcast
using
Dolby
B
or
CNR,
turn
on
MPX
Filter.
Otherwise
turn
the
MPX
Filter
Off.
4.
Press
@.
("REC"
will
flash
on
and
off
on
display
panel.)
5.
Play
one
of
the
louder
segments
of
the
material
to
be
recorded.
6.
Check
the
signal
levels
indicated
by
the
bars
marked
L
and
R
on
the
display.
If
levels
are
constantly
unequal,
turn
the
Balance
knob
left
or
right
to
correct
the
imbalance.
7.
Check
the
Display
Panel
to
determine
the
tape
Type
(I,
ll
or
IV),
and
set
Input
Level
accordingly:
a.
For
Types
|
and
Il,
the
loudest
material
should
illuminate
the
colored
bars
at
+1
or
+3dB;
b.
For
type
IV,
the
loudest
material
should
illuminate
the
bars
at'+3
or
+50B.
8.
Return
to
the
beginning
of
the
material
to
be
recorded.
9.
Press
»
to
begin
recording.
(REC
will
be
continuously
displayed.)
10.At
end
of
material
to
be
recorded:
a.
Press
mm
(Stop);
or
b.
Press
Rec
Mute.
This
records
4
seconds
of
silence
on
the
tape
and
returns
the
deck
to
Record.
Press
@
to
continue
recording.
Setting
Bias
Fine
Trim
Bias
Fine
trim
enables
you
to
get
optimal
wideband
recordings
by
adjusting
the
bias
setting
for
the
specific
tape
you
are
using.
You
locate
the
correct
setting
by
making
a
test
recording,
with
the
Bias
Fine
trim
knob
in
different
positions,
as
follows:
1.
Turn
Dolby
NR
off.
2.
Start
with
Bias
Fine
Trim
knob
at
extreme
counter-clockwise
position.
3.
Choose
a
sound
source
(CD
player,
tuner
or
turntable)
and
set
the
Source
Selector
on
your
receiver/pre-amp/integrated
amplifier
accordingly.
4.
Play
the
source
material.
5.
Load
the
cassette
you
are
using
into
the
deck,
and
press
>>
to
advance
partway
onto
the
tape.
6.
Press
mm
(Stop)
and
then
@
(Record/Pause).
7.
Set
the
Input
Level
knob
so
that
the
signal
level
meter
indicates
-3dB.
8.
Press
Counter
Reset.
9.
Press
™
to
begin
recording.
10.When
the
tape
counter
reaches
00:10,
immediately
turn
the
Bias Fine
Trim
knob
clockwise
by
1/8
turn.
11.When
the
tape
counter
reaches
00:20,
again
turn
the
knob
clockwise
again
by
the
same
amount.
12.Continue
turning
the
knob
by
the
same
amount
at
10-second
intervals
until
the
extreme
clockwise
position
is
reached.
13.Press
mm
(Stop)
and
rewind
the
tape
to
00:00
on
the
Counter.
14.Select
Tape
Monitor
on
your
receiver/pre-amp/integrated
amplifier.
Turn
up
the
volume
to
a
high
level
(or
use
headphones).
15.Press
».
16.Compare
the
sound
on
the
tape
to
the
sound
from
the
original
source
by
pressing
the
Tape
Monitor
switch
on
your
receiver/pre-amp/integrated
amp
in
and
out.
Find
the
place
on
the
tape
where
the
sound
is
most
similar
to
the
original
sound.
17.Note
the
reading
on
the
Tape
Counter.
This
will
tell
you
which
Bias Fine
Trim
setting
produces
the
best
sound
for
the
tape
you
are
using.
18.Make
a
note
of
the
correct
setting
for
this
brand
and
formulation
of
tape.
To
find
the
ideal
setting
for
other
tape
brands
of
formulations,
repeat
this
test.
Recording
Using
the
CD
Sync
Feature
To
use
the
CD
Sync
feature
first
be
sure
that
th
TD
420
is
correctly
connected
through
it’s
rear
panel
remote
out
jacks
to
the
remote
in
jacks
on
a
Harman
Kardon
CD
player
(refer
to
page
7).
Once
connected,
the
cassett
deck
will
control
the
PLAY,
PAUSE,
and
STOP
functions
of
your
Harman
Kardon
CD
player.
To
activate
the
CD
Sync
function
press
the
CD
Sync
button
on
the
front
panel
of
the
TD
420.
The
green
LED
will
illuminate.
NOTE:
Anytime
the
STOP
button
on
the
cassette
deck
is
pressed
the
Sync
function
will
turn
off
automatically.
DOOLEY
NOISF
REDUCTION
ANO
HX
PRO
HEADROOM
EXTENSION
MANUFACTURED
UNDER
LICENSE
FROM
001
AY
1
ABORATORIFS
LICENSING
CORPORATION.
HX
PRO
ONIGNATED
BY
BANG
&
OLUFSEN,
“DOLBY,
THE
OOUSLE-D
SYMBOL
C1
AND
‘1K
PRO"
ARE
TRADEMARKS
OF
DOLBY
LABORATORIES
LICENSING
COHPORATION,
INPUT.
OUTPUT
REMOTE
To
Record
an
entire
disc
First
make
sure
that
you
have
selected
the
CD
input
on
your
Pr-Amp,
Amplifier
or
Receiver.
Set
record
and
bias
levels
(refer
to
Recording
a
Tape
Pg.
5).
Put
the
CD
Player
in
the
STOP
mode.
To
begin
recording
push
the
CD
Sync.
button.
The
cassette
deck
will
begin
recording
as
the
CD
player
begins
to
play
the
disc.
To
Record
a
selected
CD
track
or
a
pre-programmed
sequence
of
tracks
Preset
the
track
to
be
recorded
or
program
the
CD
player
as
you
normally
would,and
press
the
CD
Sync
button
on
the
cassette
deck.
NOTE:
Pressing
the
PLAY,
STOP,
or
PAUSE
buttons
on
the
CD
player
will
have
no
effect
on
the
operation
of
the
cassette
deck.
Installation
ahd]
MODEL
NO:
TD420
HARMAN
KARDON:
WOODBURY
NEW
YORK
AC
(~)
120V
GOHz
MADE
IN
KOREA
Rec/Pause:
or
in
the
event
the
unit
ever
needs
When
in
the
CD
Sync
Mode,
the
repair.
REC/PAUSE
o
button
on
the
cassette
Placement
deck
is
pressed,
the
CD
player
will
automatically
pause.
When
th
PLAY
=
button
on
the
cassette
deck
is
subsequently
pressed,
the
CD
player
will
resume
playing
as
the
cassette
Unit
may
be
placed
on
top
of
or
beneath
other
stereo
components,
so
long
as
its
placement
meets
the
cooling
requirements
of
the
component
deck
resumes
recording.
beneath
it.
Stop:
Hook-up
When
you
are
finished
recording
press
1.
Make
sure
all
stereo
the
STOP
=
button
on
the
cassette
components
are
turned
off.
deck.
The
CD
player
will
also
stop.
Pressing
the
STOP
button
will
also
de-activate
the
CD
Sync
mode.
2.
Use
the
cable
provided
to
connect
the
left
and
right
input
jacks
of
the
cassette
deck
to
the
"Tape
Monitor
Output"
jacks
(sometimes
labeled
"Record")
of
your
pre-amplifier,
integrated
amplifier
or
receiver.
Packaging
Save
all
packing
material.
It
is
essential
for
shipping
should
you
move
3.
Connect
the
left
and
right
Output
jacks
on
the
deck
to
the
"Tape
Input"
jacks
(often
labeled
"Play"
or
"Monitor")
on
your
receiver/pre-amp/integrated
amplifier.
NOTE:
/f
you
are
using
an
equalizer
and/or
other
external
signal
processing
components,
which
are
now
connected
to
the
Tape
Monitor
loop
of
your
receiver/pre-amp/integrated
amplifier,
you
have
two
choices:
a.
Connect
the
deck
to
the
Tape
Monitor
loop
provided
on
the
last
outboard
component;
or
b.
If
your
receiver/pre-amp/iritegrated
amplifier
has
two
Tape
Monitor
loops,
you
may
connect
the
cassette
deck
to
the
unused
loop.
(In
this
case,
the
cassette
deck
will
be
unaffected
by
the
external
signal
processing
components.)
AC
Power
Plug
the
cord
into
a
polarized
wall
socket,
polarized
extension
cord,
or
AC
convenience
outlet
on
another
stereo
component.
Remote
Control
if
you
wish
to
control
your
deck
with
an
external
infrared
remote
control
sensor,
connect
the
wire
from
the
remote
sensor
to
your
cassette
deck’s
"Remote
Input"
jack.
(A
control
wire
may
then
be
run
from
the
deck’s
"Remote
Output"
jack
to
the
"Remote
Input"
of
another
stereo
component.)
Alternatively,
if
you
have
a
stereo
component
with
a
built-in
infrared
remote
sensor
and
a
"Remote
Output"
jack,
it
may
be
possible
to
connect
this
jack
to
the
"Remote
input"
jack
of
your
cassette
deck.
Not
all
components
are
compatible,
but
it
will
not
hurt
to
experiment.
Once
your
deck
is
connected,
you
will
need
a
compatible
remote
control
commander.
One
such
commander
is
the
remote
control
unit
from
Harman
Kardon’s
TD450
cassette
deck,
available
through
Harman
Kardon’s
Parts
Department.
In
addition,
most
Harman
Kardon
Receivers
include
a
System
Remote
Control
which
will
control
the
functions
of
the
cassette
deck.
CD
Sync
Connection
Connect
the
TD420
"Remote
Out"
jack
to
the
“Remot
In”
jack
on
a
Harman
Kardon
Cd
Player.
Cleaning
the
Tape
Heads
Tape
heads
must
be
cleaned
periodically
to
remove
tape
particles,
which
gradually
build
up
on
the
heads,
impairing
sound
quality
and
increasing
wear
on
tapes.
Heads
may
be
cleaned
in
either
of
two
ways:
1.
Slightly
dampen
a
cotton
swab
in
isopropyl
alcohol
and
gently
rub
the
-Surfaces
of
each
tape
head.
Use
a
second
dampened
swab
to
clean
other
surfaces
coated
with
tape
material.
Repeat
this
cleaning
every
30
tapes.
The
TD420
is
equipped
with
an
access
hole
on
the
top
of
the
unit
to
facilitate
cleaning
of
the
heads.
Be
careful
not
to
lose
the
cover
to
this
access
hole.
2.
Use
a
tape
head
cleaning
kit,
which
comes
in
the
form
of
a
tape
cassette,
and
is
simply
inserted
into
the
deck.
Follow
the
instructions
included
with
the
kit.
Demagnetization
Tape
heads
and
other
internal
parts
gradually
pick
up
magnetic
fields,
which
can
add
noise
to
your
tapes
and
even
partially
erase
them.
To
prevent
this
problem,
tape
heads
should
be
periodically
demagnetized.
A
battery-powered
demagnetizer
is
easiest
to
use.
It
comes
in
the
form
of
a
tape
cassette
and
is
simply
inserted
into
the
deck.
Be
certain
to
use
this
demagnetizer
as
frequently
as
its
instructions
recommend.
Care
of
Tape
1.
Store
cassettes
in
their
cases,
in
a
location
away
from
direct
sunlight,
excessive
heat
and
high
humidity.
2.
Avoid
placing
a
tape
near
a
television
set
or
loudspeaker;
their
magnetic
fields
can
partially
erase
the
tape.
3.
To
prevent
accidental
erasure
of
a
tape,
use
a
small
screwdriver
to
remove
the
two
square
tabs
located
—
on
the
side
of
the
cassette
opposite
the
exposed
tape.
With
these
tabs
removed,
the
tape
cannot
be
recorded.
If
you
later
wish
to
record
an
erasure-protected
tape,
simply
cover
the
smail
holes
with
adhesive
tape.
4.
Do
not
use
old
cassettes
whose
tape
no
longer
moves
smoothly
from
reel
to
reel.
They
may
jam
and
damage
your
deck.
Troubleshooting
This
unit
is
designed
for
trouble-free
operation;
most
problems
users
encounter
are
due
to
operating
errors.
So
if
you
have
a
problem,
first
check
the
chart
below
for
a
possible
solution.
If
the
problem
persists,
consult
your
authorized
Harman
Kardon
service
center.
If
the
Problem
Is:
Make
Sure
That:
The
Display
Panel
does
not
illuminate
when
the
Power
switch
is
pressed.
Oo
The
power
cord
is
plugged
in
securely.
The
outlet
is
live.
No
sound
is
heard
when
Play
is
pressed
The
cassette
deck
does
not
record.
oojo
oO
The
tape
is
not
at
its
end.
The
tape
is
not
blank.
(Level
indicators
on
the
Display
sare
will
flash
if
sound
is
recorded
on
the
tape.)
The
receiver/pre-amp/integrated
amplifier
is
on,
and
its
Source,
Tape
Monitor,
and
Speaker
switches
are
set
correctly.
The
tape
deck
is
connected
properly.
The
hookup
wires
are
unbroken.
The
erase-prevention
tabs
have
not
been
removed
from
the
tape
cassette.
The
Input
Level
knob
is
set
high
enough.
The
tape
deck
is
connected
properly.
The
hook-up
cables
are
unbroken.
When
a
tape
you
have
recorded
is
played
back,
the
sound
is
distorted.
OHyOooo0|o0
0
The
Input
Level
was
not
set
too
high
during
recording.
A
DolbyNR-encoded
source
tape
was
copied
with
the
Dolby
NR
and
B/C
properly
set.
The
tape
is
not
worn
out.
The
tape
head
is
not
dirty
or
magnetized
(see
Page
#8).
When
a
tape
you
have
recorded
is
played
back,
the
sound
is
muffled,
with
reduced
high
frequencies.
The
Dolby
Noise
Reduction
switches
were
set
incorrectly
during
recording.
The
tape
head
is
not
dirty
or
magnetized
(see
Page
#8).
The
CD
Sync
feature
does
not
activate
the
CD
player.
Ooa;oo0
oa
A
Harman
Kardon
CD
player
is
being
used.
The
remote
cable
is
connected
between
the
TD420
and
the
CD
player.
Tape
Speed
(i.p.s.):
Heads:
Record/Play
Head
Type:
Frequency Response,
-20dB
(IHF
std):
Typical
Large
Signal
Response
(0dB):
Wow-and-Flutter:
NAB,
WRMS:
DIN:
Signal-to-Noise
Ratio
(Type
I!
Tape):
Dolby
NR
off:
Dolby
B
NR
on:
Dolby
C
NR
on:
Total
Harmonic
Distortion
1kHz,
metal
tape,
Dolby
level:
Channel
Separation:
Channel
Crosstalk:
Erase
Ratio:
Bias
Frequency:
Fast
Forward
and
Rewind
Time:
Peak
Reading
Meter
Range:
Output
Level,
0dB,
10k
Ohm
load:
Input
Sensitivity
(OdB)
Line:
Input
Impedance
Line:
Dimensions
(w
x
h
x
d):
Weight:
Specifications
TD420
1-7/8
2
Hard
Permalloy
20Hz-20kHz
+/-3dB
w/metal
tape
20Hz-18kHz
+/-3dB
w/Dolby
C
NR
&
metal
tape
0.05%
0.08%
570B
65dB
73dB
1.0%
45dB
70dB
60dB
105kHz
90
sec
(C-60)
-35dB
to
+8dB
640mV
45mV
22k
Ohms
17-3/8"
x
5"
x
12-5/8"
442mm
x
126mm
x
320mm
11.9
Ibs./5.4
kg
10

Other manuals for TD420

2

Other Harman Kardon Cassette Player manuals

Harman Kardon TD262 User manual

Harman Kardon

Harman Kardon TD262 User manual

Harman Kardon CD91 User manual

Harman Kardon

Harman Kardon CD91 User manual

Harman Kardon VCD1000 User manual

Harman Kardon

Harman Kardon VCD1000 User manual

Harman Kardon TD420 User manual

Harman Kardon

Harman Kardon TD420 User manual

Harman Kardon HK1000 User manual

Harman Kardon

Harman Kardon HK1000 User manual

Harman Kardon CD191 User manual

Harman Kardon

Harman Kardon CD191 User manual

Harman Kardon CH161 User manual

Harman Kardon

Harman Kardon CH161 User manual

Harman Kardon CD91C User manual

Harman Kardon

Harman Kardon CD91C User manual

Harman Kardon TD4800 User manual

Harman Kardon

Harman Kardon TD4800 User manual

Harman Kardon TD470 User manual

Harman Kardon

Harman Kardon TD470 User manual

Harman Kardon DC520 User manual

Harman Kardon

Harman Kardon DC520 User manual

Harman Kardon DC5300 User manual

Harman Kardon

Harman Kardon DC5300 User manual

Harman Kardon TD292 User manual

Harman Kardon

Harman Kardon TD292 User manual

Harman Kardon TD302 User manual

Harman Kardon

Harman Kardon TD302 User manual

Harman Kardon CD491 User manual

Harman Kardon

Harman Kardon CD491 User manual

Harman Kardon TD4400 User manual

Harman Kardon

Harman Kardon TD4400 User manual

Harman Kardon TD420 User manual

Harman Kardon

Harman Kardon TD420 User manual

Harman Kardon DC520 User manual

Harman Kardon

Harman Kardon DC520 User manual

Harman Kardon HK1000 User manual

Harman Kardon

Harman Kardon HK1000 User manual

Harman Kardon CD401 User manual

Harman Kardon

Harman Kardon CD401 User manual

Harman Kardon DC5300 User manual

Harman Kardon

Harman Kardon DC5300 User manual

Harman Kardon TD4600 User manual

Harman Kardon

Harman Kardon TD4600 User manual

Harman Kardon CH141 User manual

Harman Kardon

Harman Kardon CH141 User manual

Harman Kardon HK1500 User manual

Harman Kardon

Harman Kardon HK1500 User manual

Popular Cassette Player manuals by other brands

Philips AQ6542 Manual do usuário

Philips

Philips AQ6542 Manual do usuário

Rotel RD-15F owner's manual

Rotel

Rotel RD-15F owner's manual

Aiwa HS-TA164 operating instructions

Aiwa

Aiwa HS-TA164 operating instructions

Panasonic RQ-L470 operating instructions

Panasonic

Panasonic RQ-L470 operating instructions

Aiwa HS-TX591 YU operating instructions

Aiwa

Aiwa HS-TX591 YU operating instructions

Tascam 302 owner's manual

Tascam

Tascam 302 owner's manual

Sanyo VHR-550 instruction manual

Sanyo

Sanyo VHR-550 instruction manual

Aiwa HS-PS11 Service manual

Aiwa

Aiwa HS-PS11 Service manual

Sony Walkman WM-EX372 operating instructions

Sony

Sony Walkman WM-EX372 operating instructions

Toa BA-800 Specifications

Toa

Toa BA-800 Specifications

Sony Walkman WM-FX281 Specifications

Sony

Sony Walkman WM-FX281 Specifications

Panasonic RQ-SW30 operating instructions

Panasonic

Panasonic RQ-SW30 operating instructions

Sony Walkman WM-EX552 Service manual

Sony

Sony Walkman WM-EX552 Service manual

Sony Walkman wm-FX105 operating instructions

Sony

Sony Walkman wm-FX105 operating instructions

Sony TC-WE625 - Dual Auto Reverse Cassette Service manual

Sony

Sony TC-WE625 - Dual Auto Reverse Cassette Service manual

Sony CFM-10 Operating Instructions  (primary... operating instructions

Sony

Sony CFM-10 Operating Instructions (primary... operating instructions

Califone Califone 5272AV  5272AV 5272AV Specifications

Califone

Califone Califone 5272AV 5272AV 5272AV Specifications

Philips AZ 8110 user manual

Philips

Philips AZ 8110 user manual

manuals.online logo
manuals.online logoBrands
  • About & Mission
  • Contact us
  • Privacy Policy
  • Terms and Conditions

Copyright 2025 Manuals.Online. All Rights Reserved.