Harpo BraillePen12 User manual

BraillePen12
Bluetooth Braille keyboard
User Guide
© Harpo Sp. zo. o.
Poznań, Au ust 2009

Contents
What’s in the box?............................................................................................................................................ 1
Re ulatory information.....................................................................................................................................................1
Trademark information.....................................................................................................................................................1
Your BraillePen12 at a lance...........................................................................................................................2
Explorin the BraillePen12...............................................................................................................................................2
Switchin BraillePen12 on and off....................................................................................................................................2
BraillePen12 sound si nals..............................................................................................................................................2
Connectin the BraillePen12............................................................................................................................................ 3
Bluetooth Adapter Types.............................................................................................................................................3
Under Windows XP.....................................................................................................................................................3
Under Windows Vista or Windows 7............................................................................................................................4
BraillePen12 with the Dolphin Pen....................................................................................................................5
To set up the BraillePen12 as a keyboard and display for Supernova:............................................................................5
BraillePen12 keystrokes for use with Supernova.............................................................................................................5
Usin BraillePen12 with MobileSpeak.............................................................................................................. 7
Pairin the BraillePen12 with your MobileSpeak phone...................................................................................................7
BraillePen12 keystrokes for MobileSpeak........................................................................................................................7
Joystick Commands:...................................................................................................................................................7
Other Commands:.......................................................................................................................................................7
Usin BraillePen12 with Talks........................................................................................................................... 8
Settin Talks up to connect..............................................................................................................................................8
BraillePen Write................................................................................................................................................ 9
Installin BraillePen Write.................................................................................................................................................9
Runnin BraillePen Write................................................................................................................................................11
The Main Window......................................................................................................................................................11
Keyboard Emulation..................................................................................................................................................12
Special behaviour for Alt............................................................................................................................................12
Confi urin A New Keyboard Map.................................................................................................................................12
The Main BPConfi Window......................................................................................................................................12
BraillePen12 and 6-key entry into Braille files.................................................................................................15
The US-ASCII Keymap..................................................................................................................................................15
Duxbury Braille Translator.............................................................................................................................................. 15
Appendix A: Care and Resources...................................................................................................................17
Makin the Bluetooth Connection..................................................................................................................................17
Pairin your BraillePen12 with the Toshiba Bluetooth Adapter......................................................................................17
Pairin with the Broadcom WIDCOMM® Bluetooth Adaptor.........................................................................................20
Special note for potential problems with the Broadcom WIDCOMM drivers:............................................................22
Pairin with the BlueSoleil drivers..................................................................................................................................24
BraillePen12 Settin s and Test Menu............................................................................................................................25
To reset the BraillePen12 do the followin :....................................................................................................................26
Updatin BraillePen Write..............................................................................................................................................26
Braille ASCII or computer Braille....................................................................................................................................26
Appendix B: Windows Keymaps.....................................................................................................................29
Polish keymap (pl.kmf)................................................................................................................................................... 29
US-ASCII keymap (us-ascii.kmf)....................................................................................................................................29
UK Keymap (uk.kmf)......................................................................................................................................................30
Table of Illustrations
The BraillePen12, with all features labelled..........................................................................................................................2
The first dialo in the BraillePen Write install process..........................................................................................................9
Step 2 in the BraillePen Write install process.......................................................................................................................9
Step 3 in the BraillePen Write install process.....................................................................................................................10
Final step in the BraillePen Write install process................................................................................................................10
The main BraillePen Write window......................................................................................................................................11
No Bluetooth error dialo .................................................................................................................................................... 11
MAC address showin , ready to connect............................................................................................................................11
BraillePen12 connected, showin Disconnect button.........................................................................................................11
BPConfi main window....................................................................................................................................................... 12
BPConfi Interactive Mode Error - no keymap loaded........................................................................................................13
BPConfi Bluetooth search screen.....................................................................................................................................13
BPConfi ready to connect................................................................................................................................................. 14
Duxbury Braille Translator's openin dialo ........................................................................................................................15
Duxbury Braille Translator showin Braille typed from the BraillePen12............................................................................16
Bluetooth icons and the ri ht-click menu............................................................................................................................17
Toshiba Bluetooth Add New Device window.......................................................................................................................18

Toshiba Bluetooth Wizard, Step 1.......................................................................................................................................18
Toshiba Bluetooth Device Search.......................................................................................................................................18
BraillePen12 showin in Device List...................................................................................................................................19
Connectin to BraillePen12.................................................................................................................................................19
Setup Complete, and COM port notification........................................................................................................................19
Bluetooth Settin s Window showin BraillePen12..............................................................................................................20
The details shown when the Details button is clicked.........................................................................................................20
Windows XP Menu showin Bluetooth Confi uration.........................................................................................................20
The first screen of the WIDCOMM setup............................................................................................................................21
WIDCOMM Setup searchin for devices............................................................................................................................21
BraillePen12 showin in the WIDCOMM Devices window..................................................................................................21
Widcomm window askin for Passcode..............................................................................................................................22
Turnin off WIDCOMM security sta e 1.............................................................................................................................22
Turnin off WIDCOMM Security - sta e 2...........................................................................................................................23
WIDCOMM Service Discovery............................................................................................................................................23
Final screen of WIDCOMM setup.......................................................................................................................................23
My Bluetooth Places window showin BraillePen12, ready to connect..............................................................................24
Graphical connection screen of BlueSoleil software...........................................................................................................24

What’s in the box?
Your new BraillePen12 comes in its own carton, and it is packa ed carefully for transport in
foam packa in . Please keep the carton and foam packa in safe; if you ever need to ship
your BraillePen12 anywhere, this packa in will help to keep it from dama e in transit.
•The BraillePen12
•BraillePen12 Pouch
•BraillePen12 lanyard
•The AC adapter, with appropriate mains lead for your country
•This User Guide in Print and Electronic formats
•BraillePen Write software on CD
•Optional: 1 USB Bluetooth adapter
Please check the contents of the box carefully as soon as you receive it. If anythin is
missin or appears dama ed, please contact your distributor immediately.
Regulatory information
This equipment has been developed and tested in order to comply with the EMC and safety requirements of the
followin directives:
EN 300 328
EN 301 489-1
EN 301 489-1
EN 55022
EN 61000-4-2
EN 61000-4-3
EN 60950-1
EN 60601-1
This device complies with Part 15 of the FCC Rules. Operation is subject to the followin two conditions: (1) this
device may not cause harmful interference, and (2) this device must accept any interference received, includin
interference that may cause undesired operation.
This device bears the CE and FCC approval mark.
Trademark information
BluetoothTM is a trade mark of the Bluetooth Special Interest Group,
www.bluetooth.com.
Microsoft® and Windows® are re istered trademarks of Microsoft Corporation.
WIDCOMM® is a trademark of Broadcom Corporation.
BlueSoleil® is a trademark of IVT Inc.
1

Your BraillePen12 at a glance
xploring the BraillePen12
Your BraillePen12 has a 6-dot Braille keyboard, with the keys from left to ri ht: dot 3, dot
2, dot 1, dot 4, dot 5, dot 6. Below the Braille keys there are three function keys, from
left to ri ht: shift, space and control. In the centre of the keyboard area, between the
Braille keys and the function keys there is a joystick with 5 directions of movement: left, ri ht,
up, down (towards you) and enter, which is activated by pressin the joystick towards the
keyboard until it clicks.
Below the keyboard area is the Braille area. In the centre of the Braille area you will find the
12-cell refreshable Braille display, with one round Braille navi ation key either side of the
display. These keys are known as left pan and right pan, or left nav and right
nav.
On the rear ed e, the connector for the battery char er is situated at the ri ht-hand side; on
each side towards the front are two loops for attachin the lanyard.
To use the BraillePen12 pouch, open the pouch and locate the velcro patches inside. This is
the base of the pouch; place your BraillePen12 on these, keys uppermost, so that the velcro
dots on the base of the BraillePen12 attach to the velcro patches on the pouch. Close the
pouch snu ly with the velcro strip.
Switching BraillePen12 on and off
Switch your BraillePen12 on by pressin the followin keys simultaneously: space, dot 1
and dot 3.
When the BraillePen12 is on, the display will show braillepen12
Use the same key combination to switch the unit off. You will hear beeps to tell you whether
you have switched off or on.
2
Illustration 1: The BraillePen12, with all features la elled.

BraillePen12 sound signals
BraillePen12 communicates its status usin hi h-pitched beeps. When you first turn your
BraillePen12 on, it ive several beeps.
First you hear a sin le short beep to let you know that the BraillePen12 is on.
Then you hear a set of beeps to tell you the battery status.
The third set of beeps tells you that the BraillePen12's Bluetooth interface is active and can
make a connection with another device.
The sound for "BraillePen12 on" and the sound for "Bluetooth active" don't chan e; the
battery sounds will chan e dependin on how much char e there is. Here is the full list of
battery status beeps:
One lon beep, pause, three short beeps means that the unit is not connected to the power
and the battery is fully char ed.
One lon beep, pause, two short beeps means that the unit is not connected to the power,
and the battery is char ed to half its capacity.
One lon beep, pause, one lon beep means that the unit is not connected to the power, and
that the battery is drained and needs to be rechar ed immediately.
Two mid-len th beeps means that the unit is connected to power and the battery is char in ,
but doesn't report on the state of the battery.
Two mid-len th beeps, pause, three short beeps means that the unit is on char e, and the
battery is already fully char ed.
Connecting the BraillePen12
Before switchin your BraillePen12 on, make sure you first turn on the device you want to
connect to. When your device is on, then turn the BraillePen12 on by pressin Space and
dots 1 and 3 to ether.
Sometimes the connection can take up to 20 seconds to complete, after both devices have
been switched on. Listen for the triple-beep that tells you BraillePen12's Bluetooth interface is
active, and allow up to 20 seconds from there.
If you are connectin to a PC or netbook for the first time, you will need to discover the
BraillePen12 as a Bluetooth device. Once discovered, the connection will be made
automatically every time after that.
If your BraillePen12's battery is ettin a little low, you mi ht notice that it's more difficult to
connect to other devices, or to stay connected. Rechar e the battery, and then consult the
Care and Resources section of this manual to find out how to reset your BraillePen12.
Bluetooth Adapter Types
BraillePen12 is compatible with four adaptor types: WIDCOMM, Toshiba, Microsoft and
BlueSoleil. The instructions here apply to those Bluetooth adapters usin the Microsoft
Bluetooth drivers. If your Bluetooth doesn't work as described, check in the Care and
Resources section for connection information for other Bluetooth discovery methods.
Under Windows XP
First turn on your BraillePen12, and wait for the triple-beep. Next o to the Control Panel and
choose Bluetooth. Select Add a Device and wait while Windows discovers the device.
3

The MAC address of the BraillePen12, a series of letters and numbers be innin with BP, will
appear in the window; there could also be other devices such as other computers or phones.
You should select the BraillePen12's identifier as your device and click Next.
You will be asked whether you want to enter a pairin code or allow the device to pair without
a code. We su est pairin without a code if you are pairin for the first time; you can
remove the BraillePen12 from the list of devices and pair a ain with a code later if you wish.
Once you have chosen and clicked Next, the BraillePen12 and your computer will be paired.
Under Windows Vista or Windows 7
First, turn on your BraillePen12 and wait for the triple-beep.
Go to Control Panel and select Devices and Printers. Choose Add a Device.
So lon as you have Bluetooth on the computer and your BraillePen12's Bluetooth is active,
the MAC address of your BraillePen12 will appear in the window. Select this and click Next.
You will then have three choices; enter a code you already know, have Windows assi n a
code, or pair without a code.
Navigating using BraillePen12
Usin your BraillePen12 to navi ate is made easier with the use of the Joystick.
We have used these conventions for namin the keystrokes:
joystick left Push the joystick horizontally, so it bends towards the left
joystick right Push the joystick horizontally, so it bends towards the ri ht
joystick up Push the joystick horizontally, so it bends away from you
joystick down Push the joystick horizontally, so it bends towards you
joystick enter Push the joystick, with your fin er on the top, strai ht down towards
the BraillePen12.
These keystrokes perform the followin actions:
joystick left Move the cursor left one character or one tab or menu item
joystick right Move the cursor ri ht one character or one tab or menu item
joystick up Move the cursor up one line or one menu item
joystick down Move the cursor down one line or one menu item
joystick enter Enter: confirm or activate a selection.
In some software you will use, joystick enter can't be used to end a para raph in text;
for that keystroke you mi ht need to use the keyboard-based Enter, which is usually space
+ control. Check the keystrokes for your software to make sure.
Moving the Cursor in your Applications
Because BraillePen12 is so compact, we haven't provided Cursor Routin buttons. The
requirements for cursor movement vary between the applications you will use, on your
phone, PDA or PC, but we have included some cursor movement and text selection
keystrokes to et you started.
To move the cursor in text, you will usually find that these keystrokes will work:
control + dot 1 Left
control + dot 4 Ri ht
4

control + dot 5 Up
control + dot 2 Down
These keystrokes have the same effect in BraillePen Write, for instance, as if you used the
Joystick to move the cursor.
To move word by word, press control while you move the Joystick: control + joystick
left will move the cursor one word to the left, while control + joystick right will
move the cursor one word to the ri ht.
To select text, press shift + control + joystick right to select from the cursor to
the end of the word.
Always check the keystrokes for your application to make sure.
5

BraillePen12 with the Dolphin Pen
To set up the BraillePen12 as a keyboard and display for Supernova:
•In Supernova, Select Control Panel, Popup Menu, Confi uration, SAM Setup.
•Select BraillePen12 from the list box
•Press the Confi ure button
•Select Manual Confi uration radio button
•Turn on your BraillePen12 usin Space and dots 1 and 3.
•Press the Bluetooth Find button in the SAM dialo and wait for a minute.
•When detected press the OK button.
•In the SAM dialo , press the Detect All Devices Now button.
•Click OK to accept the hardware chan e dialo s.
•Your SAM dialo should now show BraillePen12 Braille Display 1
•Tab usin Space and dots 5 and 6, or use the BraillePen12 joystick to move to the
close button and press Joystick Enter to select.
For questions about the Dolphin Pen, please contact support@dolphinuk.co.uk
For questions about BraillePen12 please contact your distributor.
BraillePen12 keystrokes for use with Supernova
Action BraillePen12 Braille key
Open Control Panel Space and dots 1 3 5 (o)
Popup Menu Space and dots 1 2 3 4 (p)
Mute Speech Control
List System Tray Shift, Space and dots 2 3 4 5 (t)
Application Hotkey Information Space and dots 125 (h)
To le Key Describe Mode on/off Space and dots 1456
Speak Keys
Speak PDA Battery Status Space and Dots 2 3 4 (s)
Speak current time/date Space and Dots 1 4 5 (d)
Speak Status Bar Shift, Space and Dots 2 3 (2)
Speak Selection Shift, Space and Dot 2 (1)
Speak Focus Shift, Space and Dots 3 5 6 (0)
Speak Headin s Shift, Space and Dots 2 5 (3)
Speak Control Shift, Space and Dots 4 6
Speak Window Shift, Space and Dots 3 5 (9)
Where am I? (Application, file &
focus)
Space and Dots 2 4 (i)
Describe Focus position Shift, Space and Dots 2 3 6 (8)
Navigation
Press Ok/Close Icon Shift, Space and Control
Enter Space and Dots 4 6 or Joystick
Enter
Space Space
Pa e Up Space and Dots 1 2 6
Pa e Down Space and Dots 3 4 5
6

Tab Space and Dots 5 6
Shift Tab Space and Dots 2 3
Escape Space and Dots 1 5 (e)
BackSpace Space and Dots 1 2 (b)
Delete Space and Dots 1 3 4 6 (x)
Start Menu (Windows Key) Space and Dots 2 4 5 6 (w)
Cursor Up Space and Dot 1 or Joystick Up
Cursor Down Space and Dot 4 or Joystick Down
Cursor Left Space and Dot 3 or Joystick Left
Cursor Ri ht Space and Dot 6 or Joystick Ri ht
Home Shift, Space and Dots 1 2 3
End Shift, Space and Dots 4 5 6
Control Home Space and Dots 1 2 3
Control End Space and Dots 4 5 6
Alt Control and Space
Alt tab Shift and Space
Virtual Focus (VF)
Choose Virtual Focus (VF) Control and dots 3 6
VF Activate Press Space
VF Interact with control Space and dots 4 6
VF Interact with control Space and Control
VF Next Line Space and dot 4
VF Previous Line Space and dot 1
VF Ri ht Space and dot 6
VF Left Space and dot 3
VF Ri ht Word Space and dot 5
VF Left Word Space and dot 2
VF Choose Live Focus Control and dots 3 6
VF Next Object Space and dots 5 6
VF Previous Object Space, Shift and dots 5 6
7

Using BraillePen12 with MobileSpeak
Pairing the BraillePen12 with your MobileSpeak phone
Connectin your BraillePen12 to MobileSpeak requires you to first pair with your phone, and
then to o into MobileSpeak's Confi uration Menu and choose the Braille device and connect
to it. MobileSpeak has drivers built in for the BraillePen12; choose the EasyLink12 drivers
from the list.
BraillePen12 keystrokes for MobileSpeak
Some of these keystrokes only apply when you are usin a smartphone with Windows
Mobile; others apply to both Windows Mobile and SymbianOS phones.
Joystick Commands:
Previous line Joystick Up
Next line Joystick Down
Previous character Joystick Left
Next character Joystick Ri ht
Enter Joystick Enter
ther Commands:
Previous line Space and dot 1
Next line Space and dot 4
Previous character Space and dot 3
Next char Space and dot 6
Pa e up Space and dots 1 2 6
Pa e down Space and dots 3 4 5
Home Space and dots 1 2 3
End Space and dots 4 5 6
Backspace Space and dots 1 2
Delete Space and dots 4 5
Escape Space and Shift
Tab Space and Control
Shift Shift
Stop Speech Control
Enter Space, Shift and Control
Menu Space and dots 2 4 5 6
Menu bar Space and dots 1 3 4
Context menu Space, Shift and dots 1 3 4
Close window Space and dots 1 3 4 6
Edit Mode / Read Mode to le Space and dots 2 4
Read screen Space and dots 1 2 4
Status information Space and dots 2 3 4
Open MSP control panel Space and dots 1 4
Display date and time Space and dots 1 4 5
Mute Speech to le Space and dots 1 3 6
Move focus to Taskbar Space and dots 2 3 4 5
Stylus Mode on/off Space and dots 1 2 4 5
8

Using BraillePen12 with Talks
Setting Talks up to connect
First turn Talks off, and then set Bluetooth on your phone to On. Make sure your phone is in
discoverable mode.
Now turn your BraillePen12 on, and wait to hear the triple-beep that tells you Bluetooth is
active. Pair your phone with BraillePen12 usin the passcode 1234.
If your phone asks: "Authorise device to make connections automatically?" answer yes.
Once the two devices are paired, install the BP12 Braille driver on your phone. We
recommend that you install the driver on your phone's memory card.
Now restart Talks. Check on the Braille tab that "Braille" is set to "BP12 Driver" and "Keep
Braille on" is set to "Yes".
Your phone's output will now show on the BraillePen12.
The main keystrokes you will need are:
Soft key left Space and shift
Soft key ri ht Space and Control
Star key Dots 3 4
Hash or Pound key Dots 3 4 5 6
BackSpace Space and dot 6
Call Control and dot 5
End call Control and dot 4
Menu Space and dots 1 3 4
Repeat the last phrase Space, Control and dots 3 4 5 6
Read the names of the soft keys Shift and Control
Give battery and network status information Space and dots 2 4 5 6
Switch between key echo modes Space, Control and dot 1
Uppercase letter announcement on or off Space, Control and dots 1 2
Turn the NATO spellin alphabet on or off Space, Control and dots 1 4
Switch between punctuation modes Space, Control and dots 1 4 5
Volume down Space, Control and dots 1 5
Volume up Space, Control and dots 1 2 4
Slower speech Space, Control and dots 1 2 4 5
Faster speech Space, Control and dots 1 2 5
Speak time and date Space, Control and dots 2 4
Open TALKS&ZOOMS Settin s dialo Space, Control and dots 3 5
Turn speech off or on Space, Control and dot 6
If you are usin the BraillePen12 to input numbers into your Contacts, text into your Notes or
other inputs such as appointments and to-do reminders, type in Grade Zero Braille, since the
Talks driver does no translation. You will have spoken feedback to assist with this; it can be
confusin on first use, since the Grade Zero Braille numbers are the lower letters with no
number si n, and punctuation in this mode is often different from the normal Braille
characters.
There is a section in the Care and Resources appendix showin the full Computer Braille /
Braille ASCII table.
9
BraillePen Write
BraillePen12 can act as a fully-functionin Windows keyboard, usin BraillePen Write.
Your computer must have a Bluetooth adapter, either internally or usin a USB Bluetooth
don le.
BraillePen Write requires Windows® XP or hi her.
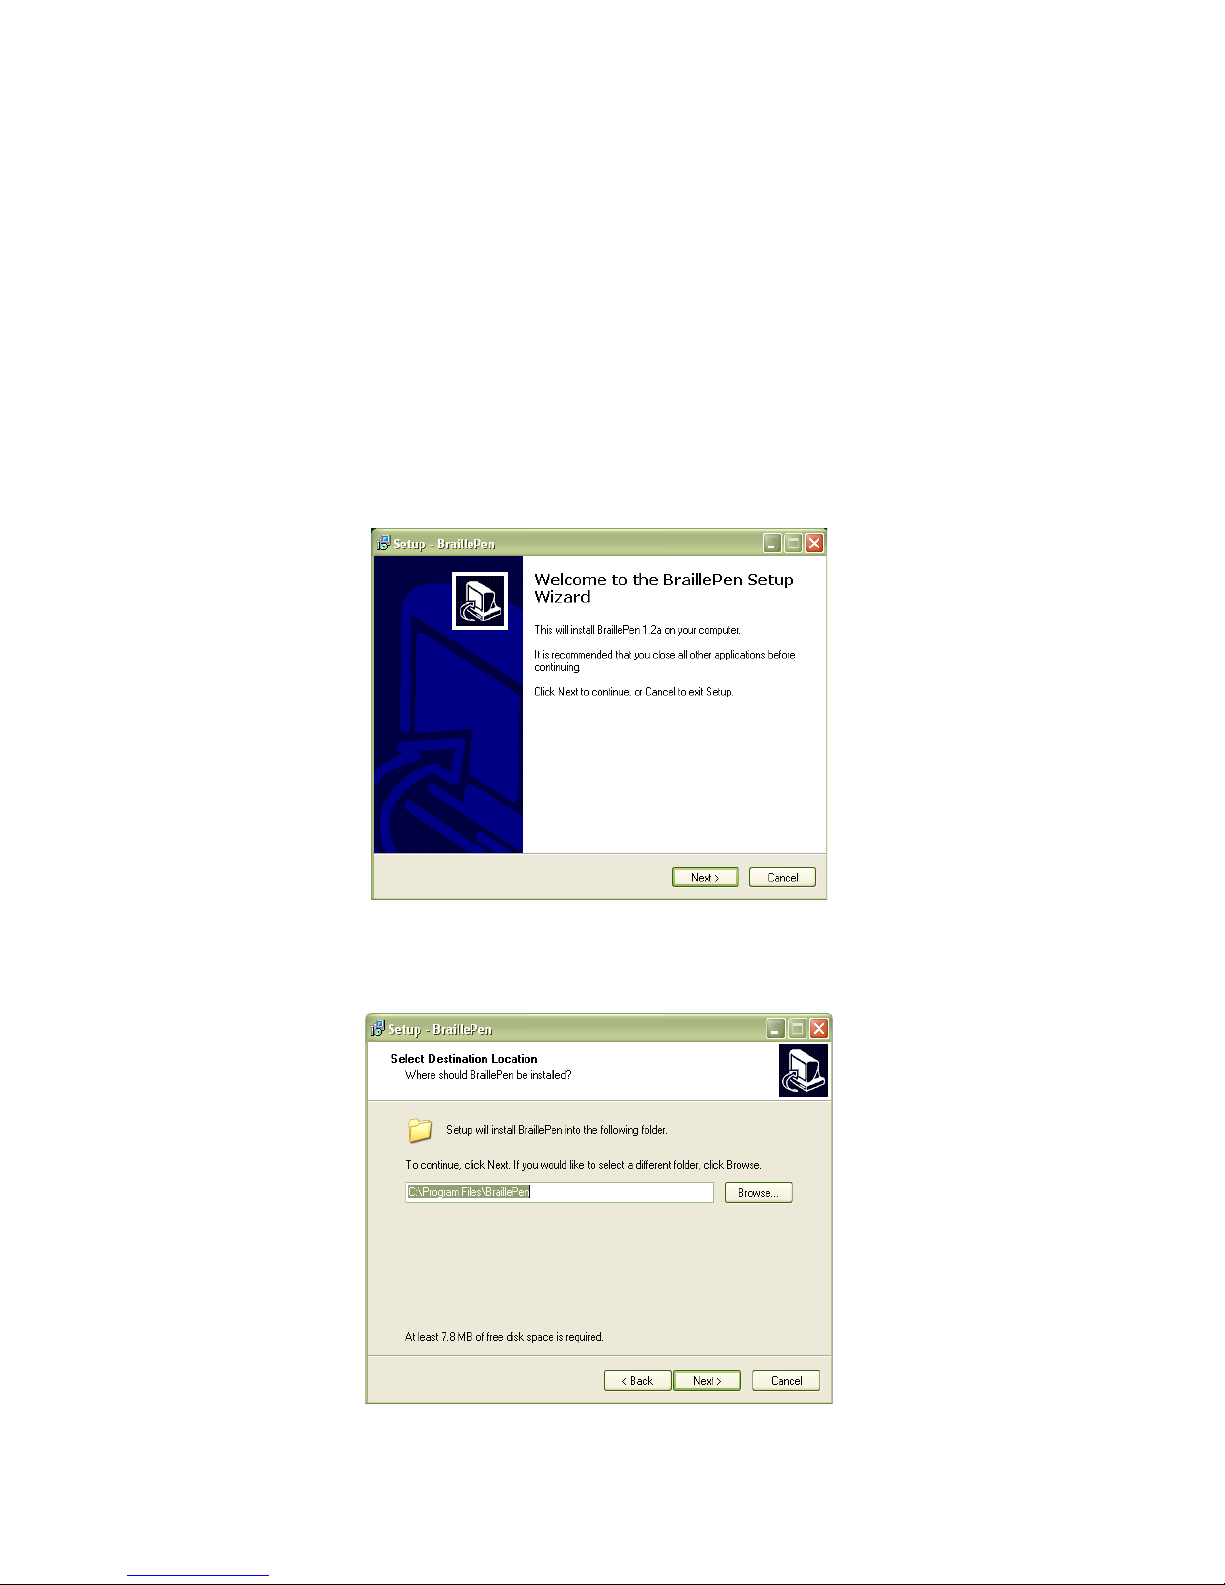
Installing BraillePen Write
The BraillePen Write installer is supplied to you on a CD. When you insert the CD, either
allow it to auto-run, which will brin up the installer automatically, or navi ate to the CD and
double-click on the file called BP-setup.exe or similar. The filename of the installer may
contain other information such as lan ua e and version number.
The first dialo of the installation process tells you the version of the software you are
installin .
The next dialo offers you the chance to chan e the installation location, althou h the
standard location usually works well.
10
Illustration 2: The first dialog in the BraillePen Write install process.
Illustration 3: Step 2 in the BraillePen Write install process.
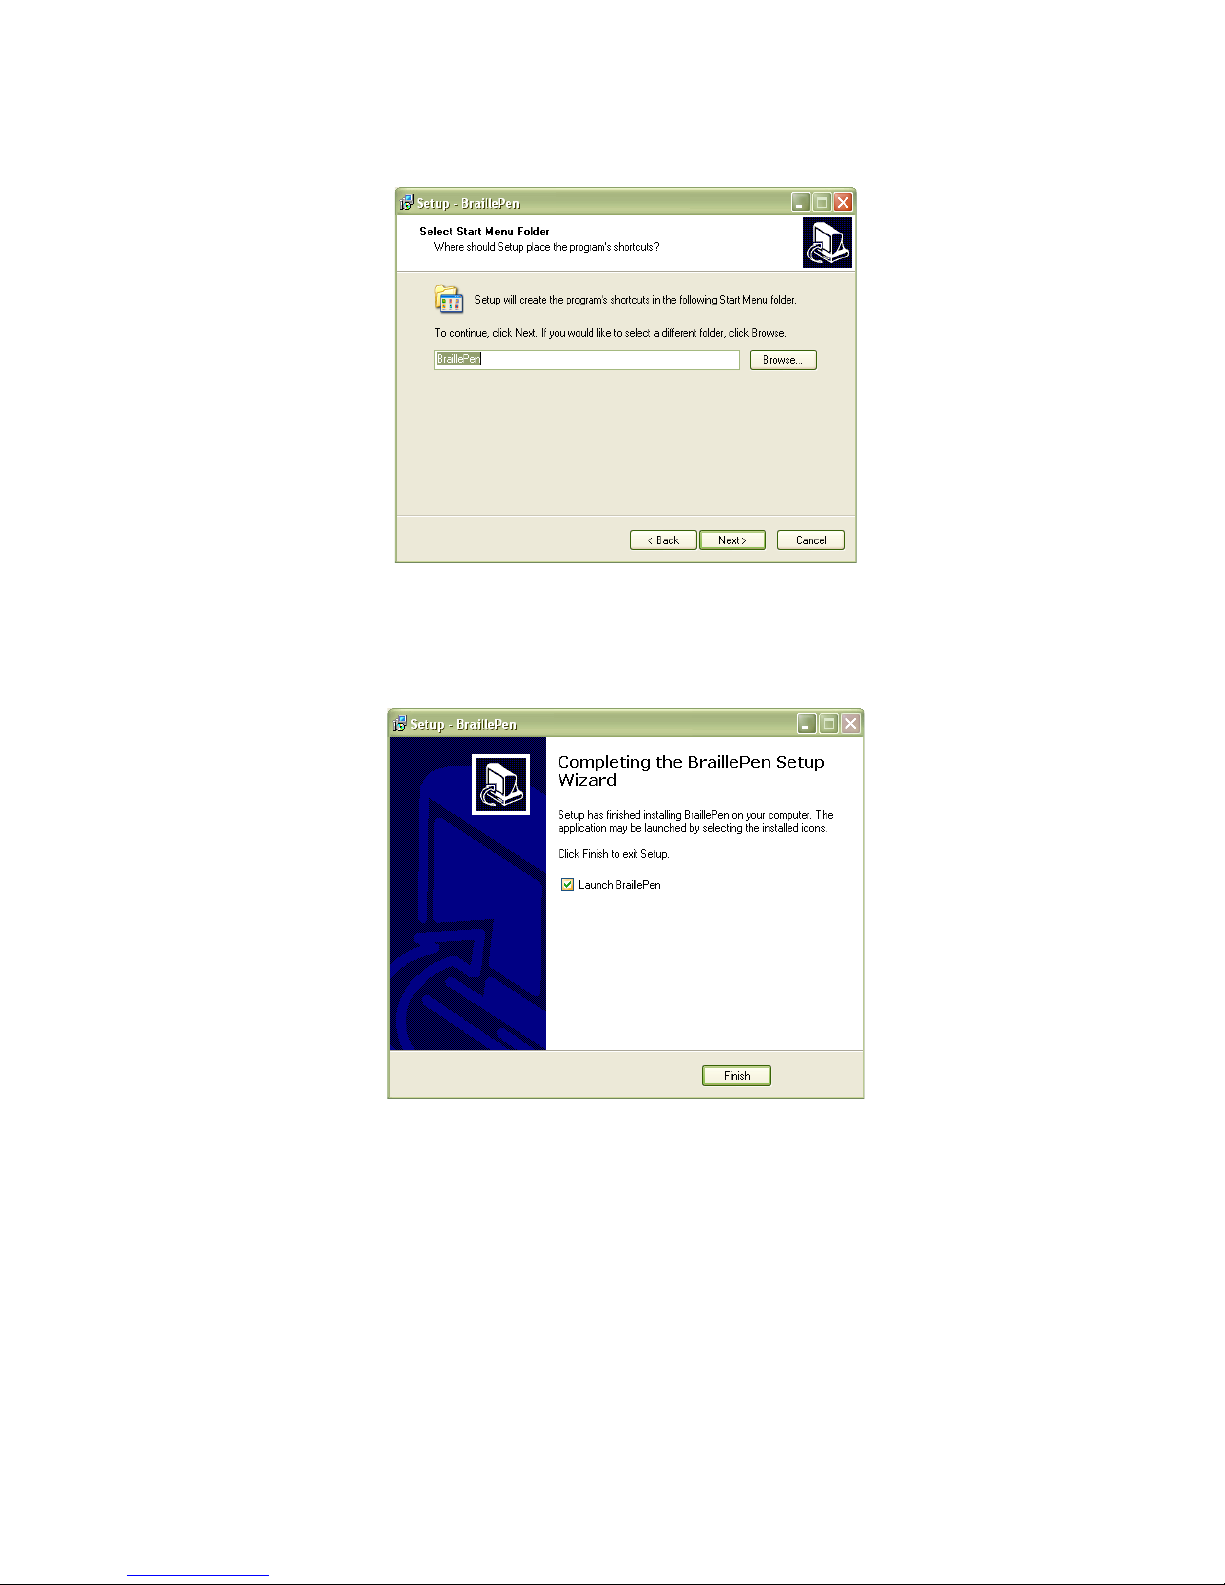
The third dialo offers you the chance to nominate the pro ram's shortcut location in your
Pro rams menu.
The fourth dialo asks if you would like a desktop icon or a quick launch icon or both; and the
fifth dialo ives you the chance to review your choices and o back to chan e them.
The sixth step is the actual installation, where you can monitor the installation pro ress.
The final dialo of the installation asks whether you want to launch the software when you
click Finish to exit the installation process.
If you leave "Launch BraillePen" checked, then once you click Finish, the software will run.
11
Illustration 4: Step 3 in the BraillePen Write install process.
Illustration 5: Final step in the BraillePen Write install process.

Running BraillePen Write
The Main Window
When you launch BraillePen Write, the main window appears:
If you don't have a Bluetooth adapter installed, instead of this window you will see the
followin error messa e:
If you see this messa e, you need to add a Bluetooth adapter to your computer. Consult your
distributor about a suitable adapter.
The main window has three buttons: Connect, Search and Exit. If your BraillePen12 is on and
Bluetooth is active, the MAC address will appear in the window; if you have not yet turned on
your BraillePen12, turn it on now, and once you hear the triple-beep, click Search.
When the address appears in the window, select it and click Connect.
12
Illustration 6: The main BraillePen Write
window.
Illustration 7: No Bluetooth error dialog.
Illustration 8: MAC address showing,
ready to connect.
Illustration 9: BraillePen12 connected,
showing Disconnect utton.

Once connection is established between your BraillePen12 and the computer, the Connect
button chan es to Disconnect.
You can now minimise the window and use your BraillePen12 as a Bluetooth keyboard in any
Windows application.
If you want to load a different keymap, for instance for Braille entry into a translation pro ram,
click the Load Keymap button and browse to the new keymap file and click OK. The new
keymap will load, and you are a ain ready to use the BraillePen12.
Keyboard Emulation
The BraillePen Write can emulate any kind of PC keyboard. We have made several keymaps
ready for you to use; you can make others, and we will make new ones available as they are
made. You mi ht like to share yours with other users, too!
When you first use the BraillePen Write, it loads the default keymap for your location. The
table for this keymap can be found in Appendix B, Windows Keymaps.
Special behaviour for Alt
Each keymap contains two keystrokes representin the Alt key on the Windows keyboard.
The first, Shift-dot 3, activates Alt for use with menus, and behaves as thou h Alt has been
pressed and released; the next keystroke is expected to be a letter from a menu item, an
arrow key or Enter.
The second, Shift-dot2, activates Alt for use with a second key, and behaves as thou h Alt
has been pressed and held down. Use this for such combinations as Alt-F4 to close a
pro ram, or Alt-Tab to cycle throu h open applications.
Configuring A New Keyboard Map
It is now possible to add new keyboard maps to the BraillePen Write, or edit existin maps so
that they suit your needs.
The keyboard map, or keymap, is a file stored in the BraillePen12 folder, containin
information about keystrokes on the BraillePen12 and their correspondin keystroke
combinations on the keyboard. When you build a new map file, or edit an existin one, you
can save the map to a file so that you can choose it any time you use BraillePen12; you can
save it either to the BraillePen12 pro ram folder or to another folder.
The pro ram is called BPConfi . It can be found on the Pro rams menu under BraillePen12.
You cannot run both the BraillePen Write and BPConfi to ether. If you should try, you will
see an error dialo tellin you that another instance of either BraillePen12 or BPConfi is
runnin .
The Main BPConfig Window
When you run BPConfi , the main window opens with a
number of choices.
There are three buttons across the top of the window,
ivin you the choice of startin a new keymap, readin
in an existin keymap from a file, or savin a keymap you
have been editin .
Below these buttons are two display spaces; on the left is
the Space which displays the existin key mappin s for a
file you have loaded, and on the ri ht is the Space where
the keymap you are editin is displayed.
13
Illustration 10: BPConfig main window.

Below each of the display spaces there are three buttons, each of which acts on the Space
above it. The buttons for the left Space are Edit combination, Add combination and Erase
combination; for the ri ht Space, Edit keystroke, Add keystroke and Erase keystroke. In
either case, before you can edit or erase, you must select the relevant combination inside the
Space.
If you be in a new keymap, nothin appears in either of these Spaces; if you load a keymap,
the contents of that keymap are loaded in the left display space, and then any combination
you select in the left Space is displayed in the ri ht display space.
When you are editin , either in Interactive Mode or in the editin window, if you enter a new
key combination for an existin keymap, the previous keymap is overwritten with the new
one.
The last button on the main window is Interactive mode. This allows you to build a new
keymap, or edit an existin keymap, by usin the BraillePen12 keyboard and the PC
keyboard to type the BraillePen12 keystrokes and their correspondin PC keyboard
keystrokes.
Before you can use the Interactive mode, you have to either choose to start a new keymap or
load an existin keymap; if you don't remember to do that, you will see an error messa e
remindin you:
Once you have loaded a keymap or chosen to be in a new keymap, the Interactive window
will appear, and BPConfi will be in searchin for your BraillePen12 - make sure it is turned
on and Bluetooth is active.
14
Illustration 11: BPConfig Interactive Mode Error -
no keymap loaded
Illustration 12: BPConfig Bluetooth search screen.

First there is a flashin Bluetooth icon in the centre of the left panel, and then when BPConfi
has discovered your BraillePen12, it will put the MAC address in the left-hand side of the
window, and you can then click Connect.
On the ri ht side of the window is a display space to list the key mappin s as you build them
up. Under that display space is a pair of buttons: Add keystroke and Erase keystroke.
When you click Add keystroke, a new window appears invitin you first to press the keystroke
on one or other of the keyboards - it doesn't matter whether you be in with the BraillePen12
or the PC keyboard.
When you have pressed that keystroke, the messa e then invites you to press the
correspondin keystroke on the other keyboard. When you have done that, the new window
disappears, and your new combination is displayed in the ri ht-hand display space.
If you should enter a combination in error, you can use the Erase keystroke button to delete
that keymap from the list, and then use Add keystroke to do it afresh.
The two buttons at the bottom of the Interactive Mode window are OK and Cancel. Cancel
takes you back to the main BPConfi window, without makin any chan es to the keymap
you have loaded; OK takes you back to the main window and writes your chan es into the
file you have loaded - you can check the display space for your chan es and additions, which
will appear at the bottom of the list.
Remember to save the keymap file from the main window to write it to the disk as a file; use
the Save keymap button in the main window to do this.
15
Illustration 13: BPConfig ready to connect.

BraillePen12 and 6-key entry into Braille files
BraillePen12 with the Windows Keyboard software can be used for 6-key entry into Braille
files from Duxbury Braille Translator or other translators. Note that 6-key or direct Braille entry
is only available after the file has been translated. Before translation, your BraillePen12 will
enter text into the editor part of your translation software in the same way as your standard
keyboard.
The US-ASCII Keymap
This keymap has been specially developed to allow 6-key entry into Braille files, so that the
Braille character entered corresponds exactly to the Braille which will be embossed. This
keymap is supplied with every BraillePen12. Generally the US ASCII keymap will be correct;
ask your dealer to supply you with the correct keyboard map for 6-key entry into your chosen
Braille translation software if you find that US-ASCII doesn't work for you.
Duxbury Braille Translator
To install BraillePen Write, see the previous section. Once you have the driver installed,
select and load the US-ASCII keymap file. This keymap file ives you keyboard emulation
functionality while makin sure that the Braille dots you press are echoed exactly on the
screen. Consult the Keymap Appendix for information about the available keystrokes.
For Braille entry directly into a Duxbury Braille file, you can either open a new Braille file or
open an existin Braille file. For illustration purposes, we have opened a new file, usin File,
Open from the menu. Duxbury displays the followin dialo :
Make sure that you click the radio button next to Braille in Document Type. The template you
select is not so important, as you will not be translatin this file; it will be sent directly to the
embosser.
Once the file is open, you can type Braille directly into the editin window.
Use the other available keystrokes in the keymap to access all the Duxbury menus and
commands. Remember you have two Alt keystrokes for different purposes.
16
Illustration 14: Dux ury Braille Translator's opening dialog

Load a standard keymap if you wish to edit a text file in Duxbury.
17
Illustration 15: Dux ury Braille Translator showing Braille typed from the BraillePen12
Other manuals for BraillePen12
1
Table of contents
Other Harpo Keyboard manuals


