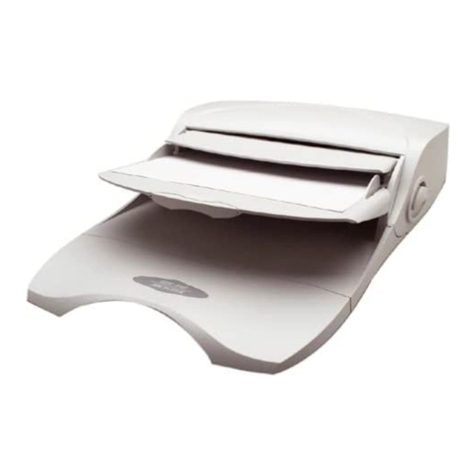
Harpo Auto-Lektor User manual

Auto-Lektor
Independent Reader
User Guide
© Harpo Sp. z o. o.
Poznań, Novem er 2009

Contents
What's in the box............................................................................................................................................ 4
Setting up your Auto-Lektor ......................................................................................................................... 4
Connecting to the power............................................................................................................................... 4
Connecting to the Internet............................................................................................................................ 4
Introduction..................................................................................................................................................... 5
Exploring the external features of your Auto-Lektor......................................................................................5
The Auto-Lektor Key oard............................................................................................................................ 8
Getting Started.............................................................................................................................................. 13
Scanning and Reading............................................................................................................................... 13
Getting Help................................................................................................................................................ 13
Essential Keys............................................................................................................................................ 13
Some things to remem er..........................................................................................................................14
Using More of your uto-Lektor..................................................................................................................15
Scanning documents and loading text from a CD.......................................................................................15
Reading and Pausing................................................................................................................................. 16
Titles........................................................................................................................................................... 16
Scanning in colour or lack and white........................................................................................................16
Selecting the Language.............................................................................................................................. 16
Changing Voice Parameters....................................................................................................................... 16
Saving text.................................................................................................................................................. 16
Loading text from a file............................................................................................................................... 17
Reading we pages.................................................................................................................................... 17
Reading RSS feeds (Internet Newsfeeds)..................................................................................................18
Reading and creating e-mail....................................................................................................................... 19
Checking recognition status........................................................................................................................19
Connecting uto-Lektor............................................................................................................................... 20
Using an External Key oard....................................................................................................................... 20
Primary keys on the External Key oard.....................................................................................................20
External Key oard keystrokes.................................................................................................................... 20
Additional Keystrokes.................................................................................................................................21
Setting up your internet connection for We rowsing and RSS Feeds.....................................................22
Using Auto-Lektor to send and receive email.............................................................................................23
BraillePen Bluetooth Braille Keyboard.......................................................................................................27
BraillePen Key Layout................................................................................................................................ 27
BraillePen: Switching On, Switching Off and Resetting..............................................................................27
Charging the BraillePen.............................................................................................................................. 28
Using the BraillePen with Auto-Lektor........................................................................................................28
BraillePen Keystrokes................................................................................................................................ 28
Tutorials......................................................................................................................................................... 30
Navigating through your text....................................................................................................................... 30
Black And White Scanning......................................................................................................................... 30
Colour Scanning......................................................................................................................................... 31
Reading text from a CD.............................................................................................................................. 31
Reading we sites....................................................................................................................................... 32
Reading Email with the Integrated Key oard..............................................................................................33
Using Auto-Lektor as an Audio Player........................................................................................................ 34
Writing text to a CD or DVD........................................................................................................................35
Caring for your uto-Lektor......................................................................................................................... 36
Cleaning the Scanner Glass....................................................................................................................... 36
Updating the Auto-Lektor Software.............................................................................................................36
ppendix - uto-Lektor Primary Keystrokes..........................................................................................37
ppendix B -The User Menu........................................................................................................................ 38
One Menu for Each Text Source................................................................................................................. 38
Scanning as text source............................................................................................................................. 38
C drive as text source................................................................................................................................. 39
Working folder as text source..................................................................................................................... 40
CD Drive as text source .............................................................................................................................41
Pen Drive as text source............................................................................................................................ 41
Internet as text source................................................................................................................................ 42
RSS Feeds as text source.......................................................................................................................... 44
1

E-mail as text source.................................................................................................................................. 45
Table of Illustrations
Auto-Lektor front panel. Primary keys are marked in red..................................................................................5
Auto-Lektor left side, showing CD drive and shelf mounting.............................................................................6
Auto-Lektor right side, showing ports and headphone socket...........................................................................6
Auto-Lektor rear, showing power connector...................................................................................................... 7
Auto-Lektor integrated key oard showing two-letter key names.......................................................................8
2

What's in the box
•The Auto-Lektor
•A power ca le suita le for your location
•This User Guide in print and on CD
•The BraillePen Bluetooth key oard
•The BraillePen AC Power adapter and power ca le
•The BraillePen User Guide in print and on CD
Please check that everything has een included. If any items are missing or appear
damaged, please notify your distri utor immediately.
Setting up your uto-Lektor
Auto-Lektor should e placed on a firm, level surface out of direct sunlight, and close to a
power source. If you will e using Auto-Lektor's internet connection capa ility, make sure
you place it close enough to your router so that an Ethernet ca le can reach from one unit
to the other, and e placed safely where it won't create a hazard.
Connecting to the power
Connect the socket end of the power cord to the power connector on the ack end of your
Auto-Lektor, and the plug end to a suita le wall socket.
Beside the power connector on the Auto-Lektor, you will find a switch. When the top of this
switch is pressed in to the Auto-Lektor, it is in the Off position; when the ottom of the
switch is pressed in, it is in the On position.
Turning this switch on doesn't actually start Auto-Lektor up; it simply provides power.
Turning Auto-Lektor on is done on the front panel.
Connecting to the Internet
It is not necessary to connect to the internet to use Auto-Lektor as a self-contained reading
machine; this connection is only used for emailing, reading we pages, reading RSS feeds
and listening to internet radio.
To connect physically to the internet, first the Ethernet ca le must e plugged in to the side
panel on the right side of the Auto-Lektor. The other end of the ca le should e plugged in
to a free port in your router. If you are not sure how to do this, or if you need assistance in
o taining a suita le Ethernet ca le, please contact your distri utor for assistance.
Setting up Auto-Lektor with the parameters for your internet connection and email is
discussed in the section Connecting Auto-Lektor.
3

Introduction
Auto-Lektor is a stand-alone reading device, self-contained in a single unit. It has an
integrated key oard on the front panel, through which you have access to all the functions.
Auto-Lektor incorporates a scanner, key oard, hard disk, CD drive and then gives you
access to multiple devices and sources of text: USB, serial and network or the internet. It
can scan large or heavy ooks; it can save or email the text it has recognised. The
integrated key oard on the front panel has high-contrast colours, and each utton has a
Braille la el as well as a text la el.
Exploring the external features of your uto-Lektor
Your Auto-Lektor has features on all four sides and on the top. This tour will help you to
ecome familiar with these features.
With the Auto-Lektor on the ta le in front of you, with the front panel towards you, use the
following explanations to identify the features as you explore.
The Front Panel
This panel contains the power utton, the volume kno and the integrated key oard.
The power utton is located at the ottom left corner of the front face. On the ottom right
corner you will find the volume control. Between them is the key oard.
The key oard has three rows of nine keys each. Each key has a two-character Braille
identifier, to help you to find the key you want. There is a full explanation of the key oard in
the next section.
To get you started, the four keys you need to egin reading are Scan, Read, Pause and
Clear. These keys are la elled SC, RE, PA and CB. You will find them as follows:
Scan, SC, is on the ottom row, second key in from the left.
Read, RE, is next to Scan, on the right.
Pause, PA, is the leftmost key on the top row.
Clear, CB, is the rightmost key on the ottom row.
Next, we go through the features on each side of your Auto-Lektor.
4
Illustration 1: Auto-Lektor front panel. Primary keys are marked in red.

The Left Side
If you run your hand along the left side, down towards the ase, first you will find some
small slots in the case; these are air vents for cooling. Next you will find the CD drive,
where you can load CDs for reading; then, eginning at a out the centre of the left side
and going all the way to the ack corner, is the support for the reading shelf.
Your Auto-Lektor is supplied with a remova le shelf, so that if you have larger ooks,
magazines or newspapers to scan, they can sit flat; this prevents them from sliding off the
scanner, and helps to give the scanner the est picture. The shelf has a flat top around the
same width as the scanner, and a shorter section at a right-angle, which can e slotted
into the support.
The Right Side
On the right-hand side of your Auto-Lektor, going from front to ack, you will first find the
headphone socket; this socket takes a standard 3.5mm headphone plug. Then you will
find another set of small ventilation slots, just like those on the left side.
Further down towards the ack you will find a panel with many connectors. The first two,
one elow the other, are for a PS/2 external key oard and mouse. The next two, one
elow the other, are the Serial port, COM1,for connecting a serial device, and a VGA port
so that a monitor can e connected.
Next you will find two USB ports, for connecting external USB drive or a USB pen-drive.
Then there is a column of 3 ports. The top one is an RJ45 Ethernet port, for connecting to
a network or to the Internet. Below this there are two more USB ports.
The next two ports, one elow the other, are RCA and S-Video, followed y three audio
sockets; Audio in, Audio out and Microphone.
5
Illustration 2: Auto-Lektor left side, showing C drive and shelf mounting
Illustration 3: Auto-Lektor right side, showing ports and headphone socket

These ports allow you great freedom of access to texts of all kinds; as you read through
this User Guide you will discover how Auto-Lektor makes use of them.
Now let's take a look at the ack of the Auto-Lektor.
The Rear Panel
Although you will generally use the power utton on the front panel, there is another power
switch on the rear panel. This will turn off all power to the Auto-Lektor, so that you will
know it is using no power. As well as saving electricity when the Auto-Lektor is not in use,
this is a safety feature; if you will e out for the day or away for several days, you should
switch the Auto-Lektor off at this switch.
On the rear panel you will also find more ventilation slots and a fan.
And finally, the all-important top: the scanner.
The Top of the Auto-Lektor
The Auto-Lektor's top is the scanner. The lid opens from the left side, with its hinge on the
right. Lift the lid from the left, and you will find that the hinge feels quite loose; this is
ecause the hinge can open quite widely, to accommodate larger ooks. When you set the
lid down again, the hinge returns to its proper position.
The next step in getting to know your Auto-Lektor is finding out about all the
available functions. The place to begin is the integrated keyboard.
6
Illustration 4: Auto-Lektor rear, showing power connector

The uto-Lektor Keyboard
The Auto-Lektor key oard located on the front panel has three rows of nine uttons. Each
utton is la elled with two Braille characters to remind you of what it does. In this Guide,
we will use the two-letter names for the keys throughout, after this explanation of the keys.
All the keys are grouped according to their function, and all the keys in a group have the
same colour.
The groups and their colours and positions are:
Reading, green; these keys are along the ottom row, with one key on the centre row, third
in from the left.
Clear Buffer, red. This group has only one key, which is on the ottom row, far right.
Voice Parameters, lue; these keys are in the middle row, from positions fourth from the
left to second from the right.
Navigation, yellow; these keys take up all of the top row and the two right-most positions of
the middle row.
Function keys, purple; these keys are the two left-most keys on the middle row.
The Reading Group:
Most of the reading group uttons are on the ottom row. The following explanations take
the keys in order from left to right.
Help (HP)
This key puts you in Help mode; once that is on, you can press any other key and Auto-
Lektor will tell you what it does. When you press HP, Auto-Lektor says "Entering context
help mode. Press a key to hear its function." To leave Help Mode, press HP again.
Scan (SC)
Pressing this key starts the scan of the document on the glass, or, if the source text is set
to an external source such as a CD, the hard drive or a USB device, to load the text from
the external source into the Buffer.
If you are reading text from a CD, first you need to choose from the list of the files on the
CD. Choose a title using PT and NT, and then press SC again to load the file. For we
pages and RSS feeds, you work in a similar way. The User Menu section has detailed
information a out how each of these text sources works.
7
Illustration 5: Auto-Lektor integrated keyboard showing two-letter key names

Read (RE)
Pressing RE causes Auto-Lektor to egin reading from eginning of the first page in the
Buffer. If there is no text in the Buffer, ecause you haven't scanned a document yet, Auto-
Lektor will say "Buffer is empty."
Once you egin reading, if you have more than one page of text in the Buffer, Auto-Lektor
will read it all in sequence. Any time you press RE after pausing, reading will egin again
at the top of the first page in the Buffer.
Change language (CL)
CL changes the language Auto-Lektor uses to read and recognise. Use this utton
etween scans or in Pause Mode, to change the recognition and reading language for the
next scan or for the rest of the current text.
Auto-Lektor can have multiple languages installed. This means that Auto-Lektor will
recognise and read the text in any of the languages that are installed on the device, and
the CL key allows you to choose from the list of installed languages.
Source (SR)
SR determines where the text is to come from, to e read. You have the choice of:
•Black and white scanning;
•Colour scanning;
•C drive (the Auto-Lektor's hard drive);
•Work folder (an area set aside on the C drive);
•CD, for text files on the CD;
•Pen drive, for text files on an external USB device;
•Internet;
•RSS channel;
•Email
Once you have chosen a Source, the text will come from that source; for anything except a
scan, you will need to use PT and NT to choose a file or ookmark from a list. The Source
setting also determines which User Menu is availa le to you when you press F1.
Destination (DE)
DE determines where the text will e sent after pressing TR, the next utton along this
row. Your choices are.
•CD drive;
•Pen drive;
•C drive;
•Working folder on the Auto-Lektor hard disk.
Transfer (TR)
sends the recognised text from the Buffer to the destination you have selected in DE. Auto-
Lektor will tell you if there is no text to e sent, and prompt you as needed.
8

Configure Punctuation (CP)
specifies how Auto-Lektor is to read punctuation. If you select None, the punctuation will
not e spoken, ut Auto-Lektor will change intonation and pause, where there is
punctuation. If you select All, every punctuation sign will e named. If you select Some,
you will only hear the following punctuation and special characters spoken; all other
punctuation will instead cause intonation changes and pauses, just as with None.
The characters spoken in Some punctuation mode are:
& ampersand ` apostrophe ) right parenthesis ; semi-colon
/ slash ^ caret { left race " dou le-quote
> greater than _ underscore } right race ' single quote
< less than | vertical ar [ left square racket ? question mark
@ at \ ackslash ] right square racket ! exclamation mark
# hash ( left parenthesis : colon
~ tilde * asterisk + plus
Information (IN)
IN is one of the most important keys, ecause it tells you what is happening. If you are not
sure where you are in a process, or if you just want to find out what Auto-Lektor is doing,
press IN.
IN is on the middle row, the third key in from the left. Pressing it tells you how many pages
are already in the Buffer, and how many remain to e recognised; it tells you the current
language setting; and your Source Text and Destination settings.
The IN key can only e used in Pause mode; if Auto-Lektor is reading, press PA to go into
Pause Mode, and then you can press IN.
The Clear Buffer Key
Clear Buffer (CB)
Clear Buffer can e found on the ottom row, the right-most key. If you press it once, Auto-
Lektor asks you for confirmation that you would like to clear any text from the Buffer; if you
want to clear the Buffer, press CB again. If you press any other key, the first keypress is
cancelled.
The Speech Para eters Group
These keys are availa le for use at any time, except when you are in Help Mode, where
you will hear what each key does. They alter the speed and volume of the speech output.
They are on the middle row, eginning at the fourth key from the left. From left to right, the
keys are:
•Louder (LO)
•Softer (SO)
•Slower (SL)
•Faster (FA)
You can also use the Volume control on the front panel to control the volume of speech.
However, to control the volume of audio play ack, use LO and SO.
9

F1 and F2: the User Menu keys
These keys are responsi le for handling the user menu. These menus are explained in
detail in their own section.
The Text Navigation Group.
Pause (P )
This key pauses reading, and stops the cursor at the eginning of the most recently
spoken word.
When reading has een paused using PA, we say Auto-Lektor is in Pause Mode. While
Auto-Lektor is in Pause Mode, it is possi le to navigate around in text, and change voice
parameters and language settings.
Use PA again to leave Pause Mode, and egin reading from the current cursor position.
Previous letter (PL)
PL moves the cursor in the Buffer to the previous character and speaks it.
Next letter (NL)
NL moves the cursor in the Buffer to the next character and speaks it.
Previous word (PW)
PW moves the cursor in the Buffer to the first character in the previous word and speaks
the word.
Next word (NW)
NW moves the cursor in the Buffer to the first character in the next word and speaks the
word.
Previous sentence (PS)
PS moves the cursor in the Buffer to the first character of the first word in the previous
sentence and speaks the sentence.
Next sentence (NS)
NS moves the cursor in the Buffer to the first character of the first word in the next
sentence and speaks the sentence.
Previous title (PT)
PT can e used for navigating in text; in Pause Mode, PT moves the cursor in the Buffer to
the previous title and speaks the title.
PT is also used to step ackwards through lists of files, internet radio stations or audio
tracks in any of the Source settings other than Scanning,
Next Title (NT)
NT can e used for navigating in text; in Pause Mode, NT moves the cursor in the Buffer to
the next title and speaks the title.
NT is also used to step forwards through lists of files, internet radio stations or audio tracks
in any of the Source settings other than Scanning,
10

Previous page (PP)
PP moves the cursor in the Buffer to the first character of the first word on the previous
page and speaks the word.
Also, in multi-level lists like internet radio stations, use PP to move to the previous
category; use PP also to move to the previous folder on a pen drive, an MP3 CD or DVD,
or the C: drive.
Next Page (NP)
NP moves the cursor in the Buffer to the first character of the first word on the next page
and speaks the word.
Also, in multi-level lists like internet radio stations, use NP to move to the next category;
use PP also to move to the next folder on a pen drive, an MP3 CD or DVD, or the C: drive.
In the next section we cover the primary use of Auto-Lektor as a scanner and
reader.
11

Getting Started
Scanning and Reading
Turn Auto-Lektor on with the power utton. You will find this utton to the left of the
key oard on the front, towards the ottom left-hand corner of the front panel.
In addition to the power utton on the front panel, there is also a switch on the rear panel,
to shut off all power to Auto-Lektor. Make sure this switch is in the "on" position efore
pressing the power utton.
Auto-Lektor will take a few moments to e completely ready to scan; when it is ready, you
will hear it say "Hello. Auto-Lektor system version 1 5. Press Help utton at any time to
enter Context Help."
Lift the lid, and put a document or ook face down on the glass. Close the lid. If you have
chosen to scan a ook, you will notice that the hinge opens up widely, so that the lid can
still close over the ook. When there is only a single sheet on the glass, this hinge folds
ack down into the scanner.
Press the Scan utton. This is on the ottom row, second utton from the left.
You will hear the scanner head move along the glass, as Auto-Lektor scans the page; then
you will hear the scanner head return. If you rest your hand on the lid, you can feel the
changes as the scanner head moves forward and ack.
Once the first page has een scanned, Auto-Lektor will say "Starting recognition". You can
continue scanning while recognition is taking place, if you have more than one page to e
read.
As soon as the first page has een recognised, the text is loaded into the Buffer, and Auto-
Lektor says "New text in Buffer".
Now press the Read utton, and Auto-Lektor will read the text aloud.
Getting Help
When you turn Auto-Lektor on, the first message you hear is "Press Help utton at any
time to enter context help".
The Help utton is at the ottom left-hand side of the Auto-Lektor key oard, the left-most
utton on the ottom of the three rows of uttons.
Pressing the Help utton gives you a way to hear what each individual utton does,
without activating it. If you press the Help utton once,you enter Context Help Mode; Auto-
Lektor says "Entering Context Help Mode. Press a key to hear its function". Now if you
press any other utton, Auto-Lektor will give you a spoken explanation of its function. For
instance, if you press Help and then press Scan, Auto-Lektor will say "Scan and
Recognise, or fetch text from other source". This descri es what the Scan utton does in
normal use.
To leave Context Help Mode, press the Help utton again. Auto-Lektor then returns to
normal key oard mode.
Essential Keys
There are some important uttons on the key oard to give you access to the primary
functions of Auto-Lektor. These uttons are:
12

Scan
This utton is in the ottom row of keys, one key in from the left - just to the right of the
Help utton. Use this utton to scan a document on the glass, or to load text from a CD or
the hard disk, or to fetch a document from the internet.
Read
Once a document has een recognised or fetched, and is safely in the Buffer, Auto-Lektor
will say "New text in Buffer". Now the Read utton can e used to read the document.
Auto-Lektor will read from the eginning to the end.
Pause
The Pause utton is at the top left of the Auto-Lektor key oard; on the top row, the left-
most utton. Pressing Pause will stop Auto-Lektor reading. To re-start reading from the
place where you paused, press Pause again. To return and start reading from the
eginning, press Read.
Clear Buffer
This key is at the ottom right of the Auto-Lektor key oard. If you press it in Context Help
Mode, Auto-Lektor will say "Clear Buffer". In use, it will say "Erase Buffer. Press again to
confirm". Using the Clear Buffer utton will clear any previous text from the Buffer so that
you can start afresh with a new document.
Some things to remember
Scanning and reading operate independently of each other. Once the first document has
een scanned and you have heard the scanning head return, you can start scanning the
second and su sequent pages, even efore the announcement that there is new text in
the Buffer. You can start reading as soon as Auto-Lektor tells you there is new text, and
continue with recognition of su sequent pages during the scan.
Now that you have the primary functions working, we invite you to read on and
discover more of your Auto-Lektor's features.
13

Using More of your uto-Lektor
Scanning documents and loading text from a CD
Auto-Lektor does three tasks: it scans, it recognises the scanned image and it reads the
recognised text.
The Buffer
Once the text has een recognised, it is placed into a memory area called the "Buffer". as
more pages are recognised, they are added at the end of text which is already in the
Buffer.
When you read or navigate around in the recognised text, you are working in the Buffer.
If you want to read text you have saved, or read text you have loaded from a CD, Auto-
Lektor will load the text directly into the Buffer. If there was already some text in the Buffer,
the new text will e added to the end of the existing text. If you want the new text not to e
added to the previous text, you must clear the Buffer using CB efore scanning or loading
the new text.
Pages
When you load text from a CD or from the Auto-Lektor hard disk, Auto-Lektor will check for
page reaks. If there are no page reaks in the file, Auto-Lektor will divide the text into
pages for you.
To start reading you do not need to wait for the recognition to finish, ut only for the first
page of text to e loaded into the Buffer. Auto-Lektor will tell you that there is new text in
the Buffer.
Auto-Lektor scans a document y passing the scanner head along under the scanner
glass, to take a picture of the page lying on the glass. The scanner head passes twice
along the glass; once to scan the page, and once to return to the start position ready for
the next page. You can hear and feel when the scanning mechanism egins to return to
the start position; as soon as it egins to return, you can put a new page on the glass
ready to e scanned.
The Cursor
The cursor is the term for your place in the document in the Buffer. As you read through a
document, the cursor moves from word to word; as you navigate around the document, the
cursor moves up, down, left or right. When you leave the Buffer or shut Auto-Lektor down,
the position of the cursor is saved, so you can egin reading again at the same place. The
cursor position is only saved for text in the Buffer; Auto-Lektor doesn't save the cursor
position for a file on the hard disk or on CD.
The contents of the Buffer are saved automatically when you shut Auto-Lektor down.
The cursor can e moved around in your text using the navigation keys on the front panel
or on an external key oard. When you navigate, you move y character (a letter or Space
or punctuation mark), y word, y sentence, y paragraph or y page.
14

Reading and Pausing
To navigate around in the text in the Buffer, first press PA to stop reading. Your cursor in
the Buffer will e at the last word spoken; you can check this y pressing PW and then
NW.
While you are in Pause Mode, you can move the cursor to any place in the document; you
might want to re-read a particular sentence, for instance. Navigate to that place in the
Buffer, and use PA again to re-start reading from the cursor.
If you press RE (Read) to re-start reading, the cursor will return to the eginning of the
Buffer and reading will egin again from the start.
Titles
Auto-Lektor uses Titles to navigate through text, filenames, audio tracks and radio stations.
For lists such as filenames, radio stations and audio tracks, the Previous Title and Next
Title keys take you to the previous or next item in the list.
In text, Title can refer to short paragraphs such as headlines, or where there are no
headlines, the NT or PT key will jump to the eginning of the next or previous paragraph.
The kind of text Auto-Lektor will recognise as a title will depend on the text you have
scanned.
Scanning in colour or black and white
Auto-Lektor has the a ility to scan in two modes: lack and white and colour. Black and
white is faster and allows you to work with ooks, newspapers and other printed media, so
long as the contrast etween the ackground and the text is good. If the text is written on a
dark ackground, is printed in the negative, or is in colour, you will generally get etter
results scanning in colour. Black-and-white scanning can e more effective for poor quality
print.
Selecting the Language
The language used when Auto-Lektor egins reading will e whatever language was
chosen previously, or the default language if your Auto-Lektor is new, or the installed
language if you only have one language installed.
To change the language, first press PA to pause reading. Then press CL as many times as
you need to, until Auto-Lektor announces the correct language. Then you can resume
reading, using the new language, y pressing PA to come out of Pause Mode.
Changing Voice Parameters
Voice parameters can e adjusted at any time and in any mode of Auto-Lektor, with the
exception of Help mode; in that mode, when you press each key you will receive an
explanation of its function. The Voice Parameter keys are Louder, Softer, Slower and
Faster; the parameters you choose will apply to all the languages you have installed.
Saving text
Any text in the Buffer, whether you have scanned and recognised it, or loaded it from an
external source, can e saved as a file.
You can save to several places: a standard file on Drive C called al.txt; the working folder
on Drive C; a CD; or a USB device such as a memory stick or USB hard drive.
Before you save a file, remem er to press the DE key to set the destination you want.
15

To save a file, press the TR or Transfer key.
Text saved to the C: drive is written to a file with a standard name, al.txt, in plain text
format. If you save to the C: drive at a later time, this file will e overwritten with the new
text.
By contrast, when you save to CD, into the working folder, or to your USB device, the
filename can e created in one of two ways: with the first twenty characters from the
Buffer, or using the filename you have entered from the external key oard. So, you can
save multiple files at a given location. Use the User Menu to change the way the filename
is created.
The working folder is a folder set aside on the hard disk for saving files.
Loading text from a file
Auto-Lektor can read text into the Buffer from a file. The source of the file can e the CD,
al.txt on the C: drive, a file in the working folder or a file on a pen drive. The only thing to
remem er is: it must e plain text with a txt extension to the filename.
At the time of loading the text, Auto-Lektor will check for page reaks. If the text is not
divided into pages, Auto-Lektor will set page reaks into the text as it is read into the
Buffer.
If you set the Source to the CD, the working folder or external memory, the PT and NT
keys ena le you to select a file to load.
Reading web pages
Auto-Lektor can read we pages, and if you connect an external key oard or the
BraillePen, you can also edit form fields on a we page. This allows you to go to a search
site, enter the text to search for and rowse the search results.
if you have selected the internet as your text source with SO, the list of availa le
ookmarks is immediately accessi le; use PT and NT to step through the list and use SC
to confirm your ookmark selection and load the page.
You will hear the sound of a ticking clock while the page loads, and then Auto-Lektor will
egin reading.
When you are reading a we page, the following keys have special functions:
Scan (SC) Go to a we page from the ookmarks list, follow a
link on a we page, or enter an edita le field on the
current we site; change the status of a radio utton
or check ox on a we page.
Previous title (PT) Move to the previous link, utton or field when on a
page, or to the previous ookmark.
Next Title (NT) Move to the next link, utton or field on a we page,
or to the next ookmark.
Previous page (PP) Return to the previous level; if you are in the first we
page, PP takes you ack to the ookmarks list.
If you have followed a link, press PP to go up one
level to the page you just came from, efore you are
returned to the ookmark list.
Numeric Keypad Enter the num er of the element on the page, that
16

you want to jump to. Elements include links, uttons,
text fields, check oxes and radio uttons, and they
are num ered in order from the top of the page.
Enter Move to the item num er chosen with the num er on
the Numeric keypad.
If there is a large num er of links on the page, and you would like to speed up reading, you
can use the "ignore the link" setting located in the user menu. When this setting is active,
Auto-Lektor will read only the text on the we page, and disregard any links.
Note: In this mode, pressing Scan (SC) also clears the Buffer; we pages are not added to
previous text in the Buffer.
Reading RSS feeds (Internet Newsfeeds)
When you choose RSS feeds as your Source, you have immediate access to the list of
saved addresses of the most popular sites with RSS feeds.
Use PT and NT to step through the list of availa le RSS services, and press SC to go to
the service; you will hear the ticking clock again while Auto-Lektor reads that service's
channels list.
When the list is loaded, use PT and NT to step through the list of availa le channels, and
press SC to choose the channel. Each channel has several RSS newsfeeds, which you
can step through using PT and NT.
When you find a newsfeed that interests you, press SC to go to the page with the
extended information.
As with reading we pages, RSS reading mode changes the meaning of some keys:
Scan (SC) Load the services or channels list, or to go to the we
page of the selected RSS feed.
Previous title (PT) Move to the previous newsfeed, channel or service.
Next Title (NT) Move to the next service, channel or newsfeed.
Previous page (PP) Return to the previous RSS category, or transfer to
your ookmarks.
Next page (NP) Move to the next RSS category.
Reading information from RSS feeds is divided into four stages:
•Choosing the RSS site from the list.
•Choosing the category of information you're interested in from the list of categories
on the RSS site, and going to that category.
•Stepping through the list of RSS link from the list of links for that category, listening
to the rief information, and then choosing a link and following that link.
•Reading the we page with the full information.
In each of these stages, use PT and NT to move etween items and SC to select. To go
ack one step, use PP. The fourth stage, reading a page, switches Auto-Lektor into the
mode for reading we pages; use PP to return to selecting from RSS feeds and reading
the short information.
Note: In this mode, as with we pages, pressing Scan also clears the Buffer.
17

Reading and creating e-mail
Auto-Lektor can read and send e-mail.
First, you must configure your mail account parameters in the User Menu. There is
detailed information on how to do this in the section Connecting Auto-Lektor.
Once you have successfully set up your email account, you can check whether there are
any messages waiting, through the User Menu. After downloading all the messages, you
can move etween them using PT and NT.
As with reading we pages, e-mail reading mode changes the meaning of some keys:
Scan (SC) Read the selected message
Previous title (PT) Move to the previous message
Next Title (NT) Move to the next message
Note: In this mode, pressing Scan also clears the Buffer.
Checking recognition status
If you are scanning multiple pages, you can egin reading as soon as the first page has
een recognised. However, ecause you are reading, you won't hear a message to tell
you whether or not recognition has een finished.
When you press IN, among the other information you will hear is whether there are any
pages remaining to e recognised.
Now that you know about the way each feature works, the next section
introduces you to what Auto-Lektor can do when you connect to external
devices and to the Internet.
18

Connecting uto-Lektor
Your Auto-Lektor is an independent reader; it doesn't require connection to any other
device to scan, read or save. However, you can connect to your Auto-Lektor in many ways,
to ring text in from external sources or to save to external sources.
Using an External Keyboard
Auto-Lektor is a le to take your commands from an external PC key oard.
Make sure that you plug the key oard into the PS/2 key oard port or one of the 4 USB
ports on the right side of Auto-Lektor efore switching on. If Auto-Lektor is already on, and
you wish to change to an external key oard, switch off first and connect the key oard, and
then switch on again.
All the functions of the uilt-in key oard are availa le with an external key oard, plus other
features not availa le through the uilt-in key oard.
Primary keys on the External Keyboard
The four primary keys are Scan, Read, Pause and Clear Buffer. These keys on the
external key oard are: Ins, C, Esc or Space, and O.
For Context Help, press F1.
External Keyboard keystrokes
The following ta le shows the keys on the Auto-Lektor uilt-in key oard and their
counterparts on the external key oard:
uto-Lektor External Keyboard
Help (HP) F1
Scan (SC) Ins
Read (RE) C
Change Language (CL) L
Source of text to read (SR) S
Destination of saved text (DE) D
Transfer (TR) T
Configure Punctuation (CP) K
Information (IN) I
Clear the Buffer (CB) O
User Menu (F1) F11
User menu (F2) F12
Louder (LO) G
Softer (SO) H
Faster (FA) W
Slower (SL) E
Pause (PA) Esc or Space ar
19
Table of contents
Popular Scanner manuals by other brands
Xerox
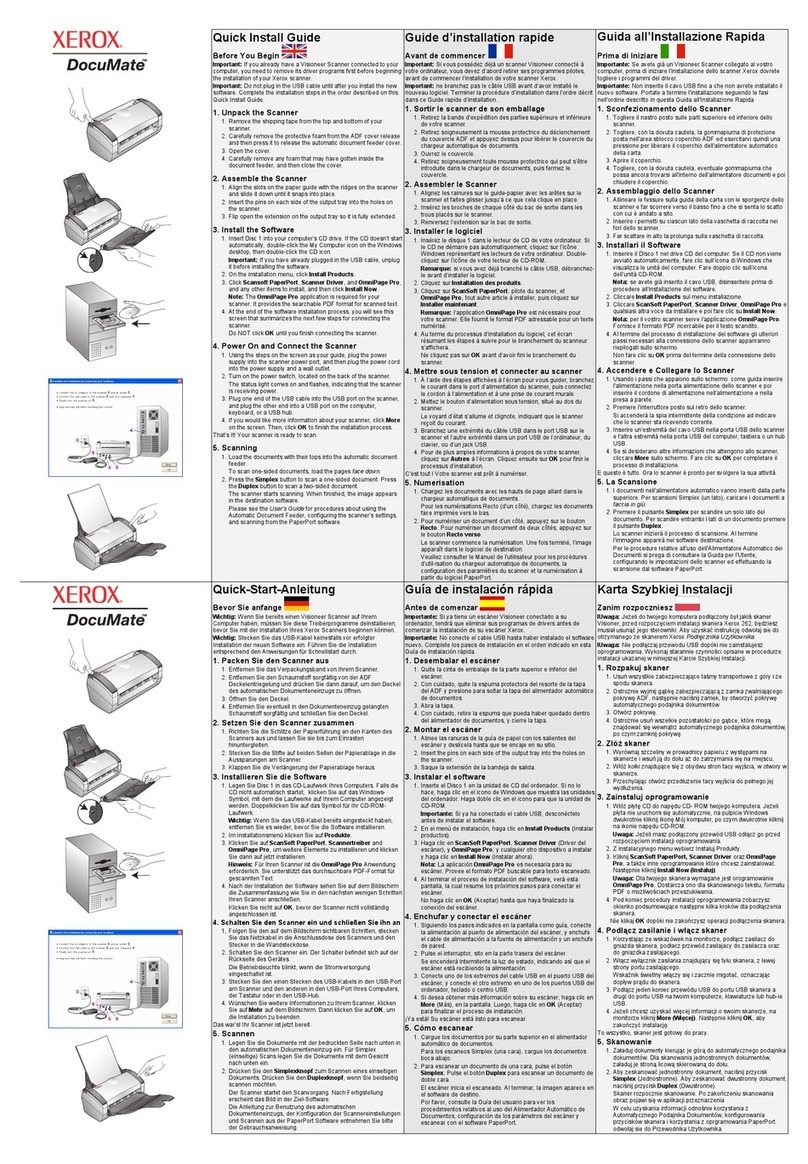
Xerox XDM2525D-WU - DocuMate 252 Quick install guide
Visioneer
Visioneer OneTouch 9650 installation guide
Canon
Canon 5600F - CanoScan - Flatbed Scanner quick start guide
Epson
Epson 1250 - Perfection Photo Flatbed Scanner Declaration of conformity

Canon
Canon imageFORMULA CR-190i Brochure & specs
Conrad
Conrad 884059 operating instructions
