HARWI HVS User manual

--1--
MANUAL
HVS
Harwi Holland BV
Lage Dijk 28
5705 BZ Helmond
the Netherlands
Tel. 31 (0)492 543355
Fax 31 (0)492 522305

--2--

--3--
APPLIANCE
The saw bench type HVS is only to be used
for cutting wood and wood-like materials.
The cutting of other materials is not
allowed.
Maximum panel sizes are:
Height: 120 mm
Between saw-blade and fence: 760 mm
Length (not supported): 1000 mm
Cutting of material, which needs removal of
protections, is not allowed.
All other appliances except for the above
are improper use of the machine and
therefore prohibited. The producer cannot
be held responsible for damage as a result
of improper use. Damage will be recovered
from the user.
Proper use of the machine also implicates
following the instructions of the
manufacturer concerning use, maintenance
safety, replacing spares and electrics etc.
The machine may not be operated, used or
maintained by persons not acquainted with
the risks of the machine.
Permission for operating, using and
maintaining the machine have to be clearly
described by a person or persons
responsible within the organisation.
Maintenance has to be performed by the
manufacturer or customer service.
One has to be informed about and comply
with the country’s safety regulations.
Only original Harwi parts are to be used,
except the saw-blade. We cannot give
warranty or be held responsible for damage
caused by using non-original Harwi parts.
The manufacturer cannot be held
responsible for damage caused by changes
made to the machine by the user.
REMAINING RISKS
If the machine is used completely
according to all safety regulations there
still will remain some risks.
- Touching of the saw-blade
- Touching of the saw-blade when the
guard is removed.
- Breaking of the saw-blade or parts of it
hurtling out of the guard.
- Touching of parts under voltage while
junction box or switch is opened.
- Damage to the hearing by constant use
of the machine without ear protection.
- Throw out of harmful dusts or vapours
by using a dust extractor with bad
performance of no dust extractor at
all.

--4--
SAFETY REGULATIONS
Harwi Holland B.V. has bestowed great care
on compiling this manual.
Before operating the machine read the
complete manual carefully. Persons under
the age of 18 are not allowed to work on or
with the circular sawing machine, except for
a training program on a legal basis. The
machine may only be operated by educated
personnel or under supervision of educated
personnel.
To avoid touching with rotating saw-blades
make sure that:
- Clothing fits tightly to the body
- Work with closed fingers
- No rings or jewelry are worn
- A hairnet is used by long hair
Be careful when changing saw-blades. They
are sharp and cause injuries.
Do not remove woodchips when the blade
is running. Stop the machine first. Broken
saw-blades or deformed blades are not to
be used. Neither are HSS blades.
The applied saw-blade is to be used and
sharpened according to the directions of the
manufacturer. Sharpening only by
competent craftsmen. Stick to the max.
admissible r.p.m. mentioned on the blade.
Preferably use noise reduced saw-blades.
When cutting long pieces of wood take care
of support of the material. The safety guard
and other safety devices may not be
removed or put out of order. The riving
knife has to be used all the time and
adjusted correctly.
Mounting or repairs to the machine may
only be performed when the machine
cannot be switched on. Pull out the plug or
secure the main switch with a padlock.
On the lid of the dust collector a safety
door switch is mounted. This switch avoids
activating the machine when changing the
saw-blade or removing wood chips.
Repairs to the electricity supply are only to
be executed by skilled craftsmen.
When leaving the working area make sure
that the machine cannot be switched on
by incompetent persons. It is obligatory to
wear dust-mask, ear protection and safety
glasses.
Take care of a clean working area. The
machine has to be lighted. When using
strip lighting take into account the
stroboscopic effect. A rotating saw-blade
seems to be standing still.

--5--
GENERAL INFORMATION
MANUFACTURER
HARWI Holland B.V.
Lage dijk 28
5705 BZ Helmond Nederland
Tel: 04920 - 4 33 55
Fax: 04920 - 2 23 05
MACHINE
Building site machine
Type: HVS
Machine number:.................... (at the guiding strips of the height adjustment)
Manufactured:............................
EU DECLARATION OF CONFORMITY FOR MACHINERY
(according to Annex II A of the Machinery Directive)
We HARWI Holland B.V. Lage Dijk 28, 5705 BZ Helmond, the Netherlands herewith declare, on
our own responsibility, that the product:
HARWI BUILDING SITE MACHINE TYPE HVS.............. , MACHINE NUMBER..........................,
which this declaration refers to, is in conformity with:
Machinery Directive 89/392/EEG, 91/368/EEG.
In accordance with obligations of appendix 4 of the machine directive towards
TNO Certification, Laan van Westenenk501, Apeldoorn, Nederland.
EU type investigation number: 95 MI/01363/WAL
R. Visser

--6--
TECHNICAL SPECIFICATIONS
MEASURES AND WEIGHT
Height of cut mm 0-120
Width of cut mm 650
Saw-blade diameter mm Ø 400
Saw-blade bore mm Ø 30
Angle adjustment 0-45º
Table measures mm 945*715
Table height mm 850
Motor power kW 3
hp 4
Voltage V 380
Speed rpm 2800
Weight kg 120
NOISE INFORMATION
Used saw-blade: Leuco proline 101420/10005 ∅400 Z=28 d=30.
A-weighed Equivalent Continuous Noise Pressure
Idle dB(A) :80.7 dB(A)
Loaded dB(A) :83.3 dB(A)
Measuring performed according to DIN 45635 part 1659. Measured when cutting soft wood
thickness 75 mm, length 1.4 meter.
Safe deviation can be approx. 3 db(A).
The above mentioned values are radiated noise pressures and not necessarily noise pressures
to work safely with this machine. Supplementary measures for ear protection can be
necessary. The following can be of influence:
duration of operations
working area
other noises
Maximum value may vary per country. Above information can be used for better valuation of
dangers and risks subsequent to using this machine.

--7--
SETTING UP THE MACHINE
MOVING
The machine can easily be moved by two
persons. Turnable grips are mounted at the
sides of the frame (fig. 1).
If the machine needs to be moved with a
crane, adjust the strops to the snap hooks
welded to each leg of the machine (fig. 2).
Also the machine can be easily transported
with a forklift truck (fig. 3).
INSTALLING THE MACHINE
The machine has to be put on a solid floor,
which has to be flat, dry and not slippery.
DUST EXTRACTION
The machine has to be connected to a dust
extraction. Connection for dust extracting
hose of 80 mm. The extracting capacity has
to be calculated in such a way that a
minimum air speed of 20 m/s is reached at
the connection. Air speed is 1500 m3 at a
depression bigger than 450 Pa. Preferably
simultaneously switched on with the
machine.

--8--
CONNECTING THE ELECTRIC SUPPLY
CONNECTING THE MACHINE
400v phase
1 Take a 5 core earthed cable suitable for
the power mentioned on the
identification plate.
2 Push female plug into CE-switch box of
the main switch box (fig. 4).
3 Connect to the mains supply.
Notice: use cartridges of minimum 16
ampere.
Notice: If you leave the machine
unattended, disconnect the machine and
lock it for instance with a padlock.
--9--
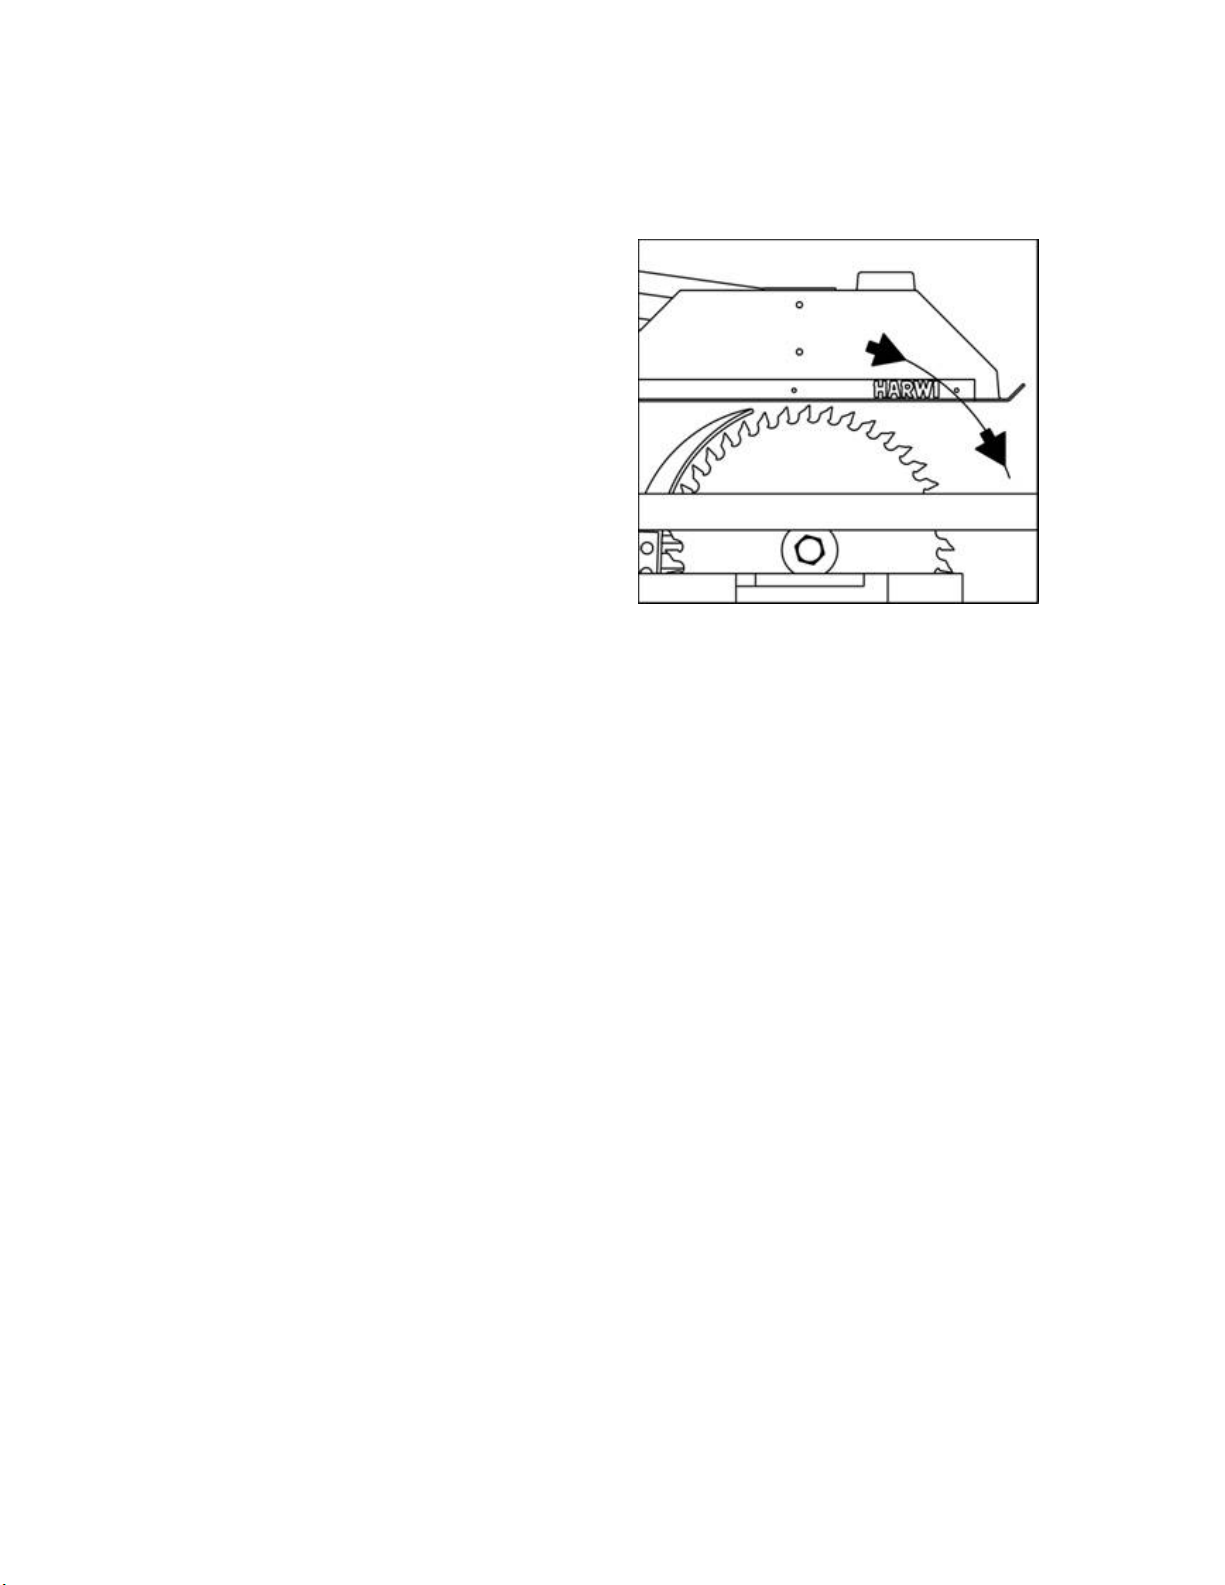
DIRECTION OF SPINDLE ROTATION
Open the lid of the saw guard and remove
the nut, the flanges and the saw-blade (see
chapter CHANGING THE SAW-BLADE)
Put the motor in the highest position. And
close the lid.
PROPER DIRECTION IS
CLOCKWISE (looking from the spindle to
the motor housing (fig. 5).
1 Switch motor on and off.
2 Check if direction is clockwise.
3 Assemble saw-blade, flanges and nut
(see chapter CHANGING THE SAW-
BLADE).
WRONG DIRECTION IS ANTI
CLOCKWISE (looking from the spindle to
the motor housing)
1 Switch motor on and off.
2 Direction is anti clockwise.
3 Disconnect the mains supply.
4 Open the switch box.
5 Interchange two phases.
6 Close the switch box.
7 Connect the mains supply.
8 Check rotation again before mounting
the saw-blade.
9 Assemble saw-blade, flanges and nut.
10 Close the lid of the saw-guard.

--10--
CHANGING THE SAW-BLADE
Notice: See to it that when changing the
saw-blade the machine cannot be switched
on. Disconnect the plug.
Noise reduced saw-blades are preferred.
Use the proper saw-blade. Enquiries at your
supplier or the manufacturer.
1 Open the saw-guard.
2 Block the saw-blade by putting an 8 mm
allen key in the spindle (fig. 6).
3 Loosen the nut of the spindle with the
30 mm flat spanner clockwise.
4 Remove the front flange.
5 Remove the saw-blade.
6 Assemble new saw-blade, flange and nut
in reversed order.
Notice: direction is clockwise.
7 Check position and thickness of the
riving knife.
8 Close the lid of the saw-guard.
Sharpening of the saw-blade has to be
performed by skilled craftsmen

--11--
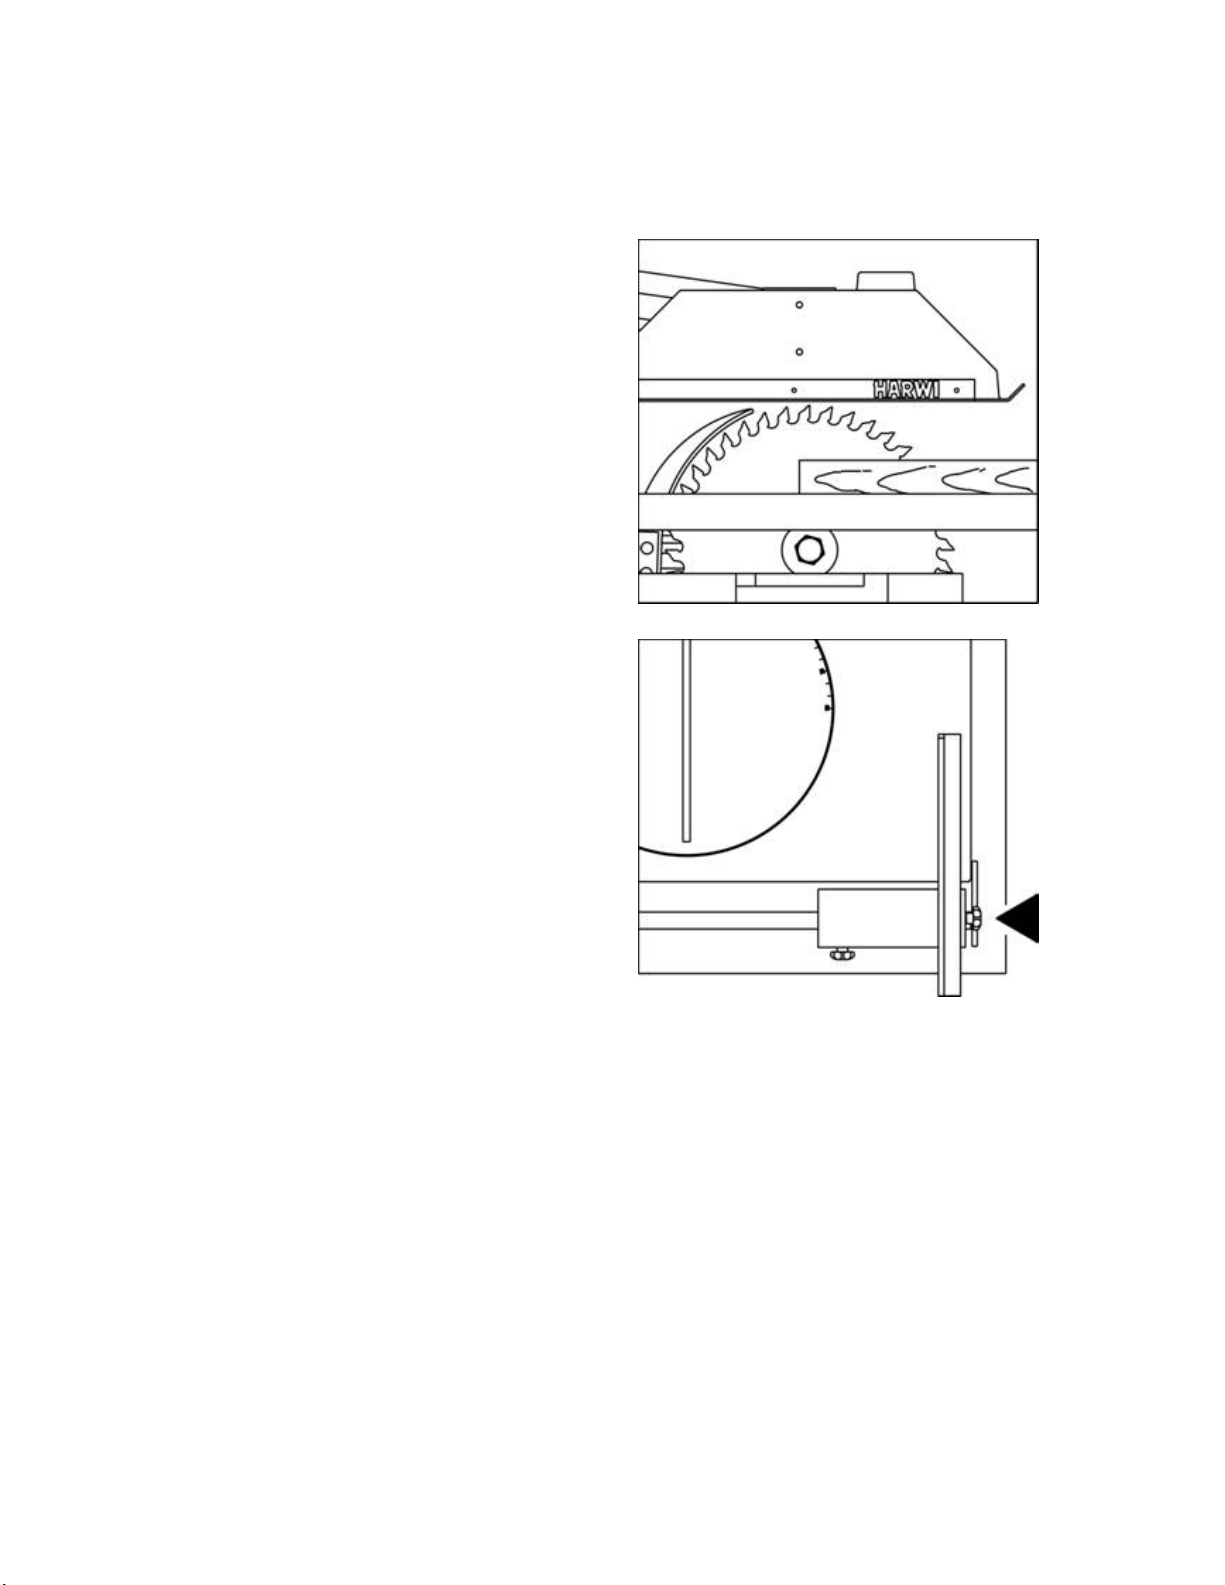
ADJUSTING THE RIVING KNIFE
Security
Check the thickness and dimensions of the
riving knife. The riving knife has to be
thicker than the mother blade but thinner
that the teeth of the saw-blade.
1 Disconnect the machine.
2 Put the saw-blade in the highest
position.
3 Open the lid of the saw-guard.
4 Slightly loosen the nut of the riving
knife.
5 Adjust the riving knife in such a way that
the distance of the inner circle and the
teeth of the saw-blade which rise above
the table top, is max. 3 mm. The highest
point of the riving knife has to be 3 to 5
mm below the highest point of the saw-
teeth (fig. 7).
6 Tighten the nut of the riving knife firmly
7 Close the lid of the saw-guard..
8 Connect to the mains supply.
--12--
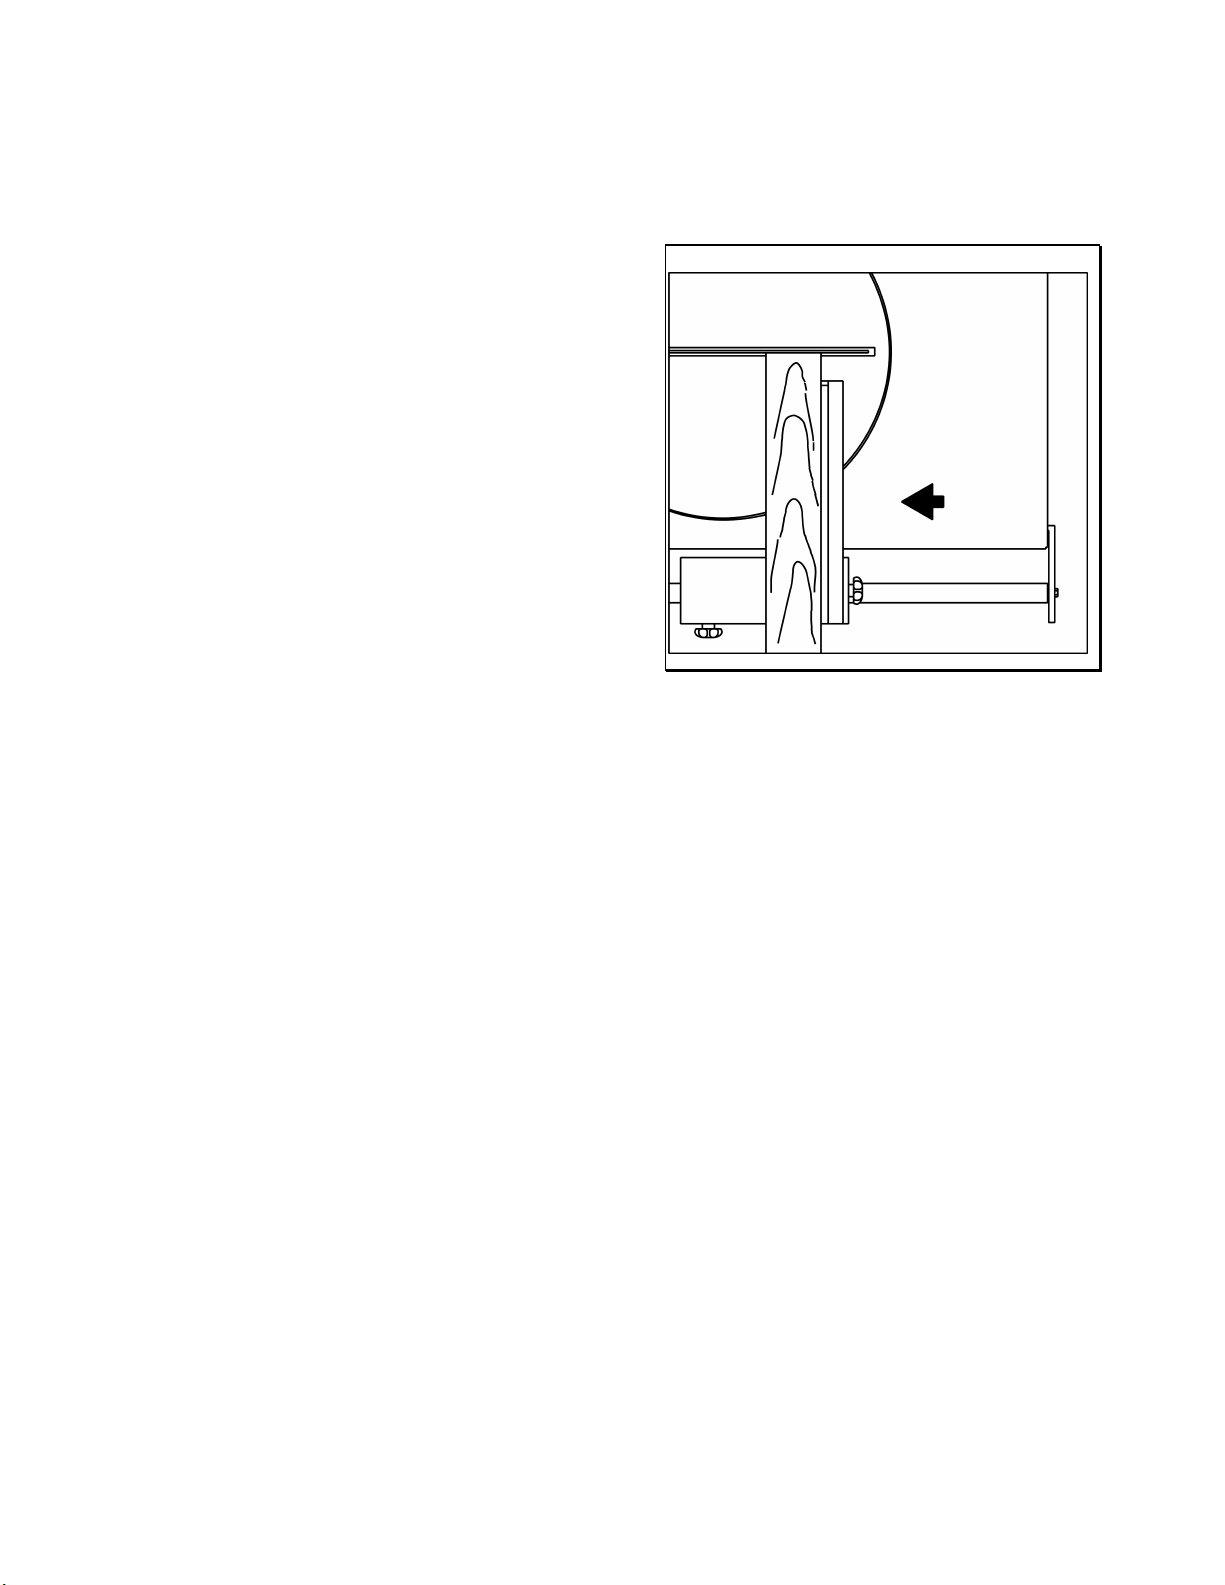
OPERATING THE MACHINE
RIPPING
SAFETY
When ripping solid wood, put het saw-
blade as high as possible (fig. 8).
The sub-fence max. 10 mm pas the point
where the blade cuts the wood at full
height.
Adjusting the sub-fence properly prevents
the return shock of the wood or a part of
it.
Good support of the parts to be cut or
already cut is necessary.
When cutting small wood use a pushing
stick.
Adjusting the saw-guard.
1 Adjust the rip fence with the sub-fence
at the desired measure (fig. 9).
2 Check if the saw-blade can rotate freely.
3 Switch on the motor.
4 After cutting switch off the motor
immediately.
5 Remove the material after the saw-blade
has stopped.
Notice: When cutting small wood use a
pushing stick (fig. 10).
Notice: If the saw-blade stops because of
clamping of the wood, switch off the motor.
Hold the piece of wood tightly.
Notice: Never stand in the line of the saw-
blade. In case of a return shock you might
get hit.
--13--
OPERATING THE MACHINE
MITRING WITH THE MITRE
FENCE
1 Turn the rotating table in such a position
that the saw-blade is square to the fence
and block the table with the knob
underneath the table top.
2 Put the saw-blade in the highest
position.
3 Put the material on the machine.
4 Push the wood against te fence.
5 Check if the wood does not touch the
saw-blade when starting the motor.
Notice: Support the wood properly.
6 Switch on the motor.
7 Move the fence and the wood forward at
a constant speed and cut the material
(fig. 11(.
8 Remove the material after the saw-blade
has stopped.
Notice: If the saw-blade stops because of
clamping of the wood, switch off the motor.
Hold the piece of wood tightly.
Notice: Never stand in the line of the saw-
blade. In case of a return shock you might
get hit.
--14--
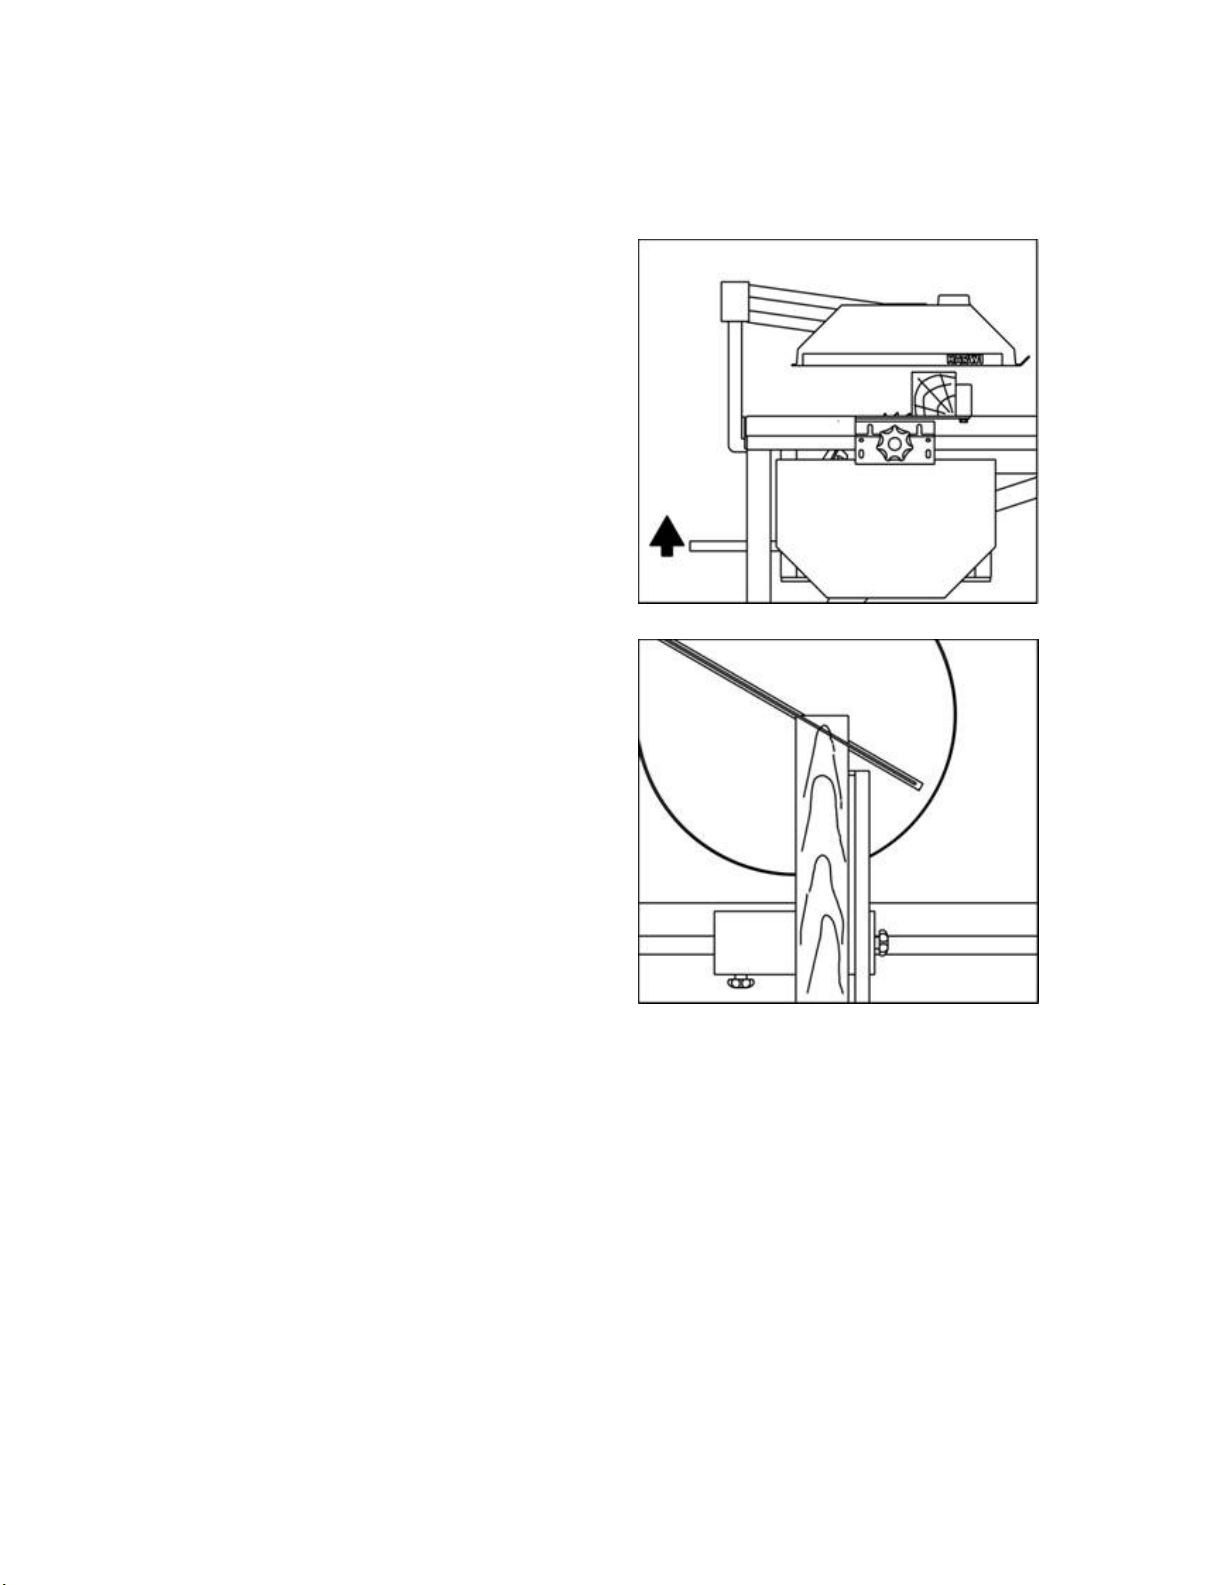
OPERATING THE MACHINE
CUTTING AT AN ANGLE WITH
THE HEIGHT ADJUSTMENT
1 Put the saw-blade in the lowest position.
2 Turn the rotating table in such a position
that the saw-blade is square to the fence
and block the table with the knob.
3 Position the fence in such a way that the
wood is placed in the center of the saw-
blade.
4 Block the fence.
5 Push the material with the right hand
against the fence..
Notice: Support the material to be cut and
already cut properly.
6 Switch on the motor.
7 Move the saw-blade slowly and with a
constant speed upwards by means of the
lever (fig. 12)
8 If the material is cut lower the saw-blade
under the table top by means of the
lever.
9 Switch off the motor.
10 Remove the material.
CUTTING AT DIFFERENT ANGLES
B.M.O. THE HEIGHT
ADJUSTMENT
1 Put the saw-blade in the lowest position.
2 Adjust the rotating table at the proper
angle towards the fence. Angle scale
engraved in table top.l
3 Position the fence in such a way that the
wood is placed in the centre of the saw-
blade (fig. 13).
4 Block the fence.
5 Push the material with the right hand
against the fence.
Notice: Support the material to be cut and
already cut properly.
6 Switch on the motor.
7 Move the saw-blade slowly and with a
constant speed upwards by means of
the lever (fig. 12).
8 If the material is cut lower the saw-
blade under the table top by means of
the lever.
9 Switch off the motor.
10 Remove the material.
Notice: Saw-blade may not touch
aluminium sub-fence.

--15--
PUTTING SAW-BLADE AT AN
ANGLE
1 Adjust the right angle b.m.o. the handle
and the knob at the bottom of the
machine (fig. 14).
2 Check the angle adjustment with a
bevel. (90 E and 45E
are fixed stops).
3 Block the angle
adjustment with the
knob.
Notice: Support the
material to be cut and
already cut properly.
Notice: Adjust the sub-
fence in such a way that
it cannot touch the saw-
blade.
Notice: Use a pushing
stick when cutting small
wood.
Notice: If the saw-blade stops because of
clamping of the wood, switch off the motor.
Hold the piece of wood tightly.
Notice: Never stand in the line of the saw-
blade. In case of a return shock you might
get hit.
--16--
MALFUNCTIONS
SAFETY
Disconnect the machine of the mains
supply before adjusting the machine or
removing malfunctions.
See to it that all damagerd parts are
replaced before operating the machine.
MALFUNCTION:
-STOPS FOR CUTTING 90º AND 45º ARE
OUT OF ADJUSTMENT.
ADJUSTING THE TURN TABLE
ADJUSTING STOPS 0-90º
1 The table top is marked.
2 Rotate the turntable in such a way that
90º exactly aligns with the notch in the
top (fig. 15).
3 Adjust the bolt with the counter nut at
the stop (fig. 16).
4 Check the adjustment.
5 lmmediately adjust the sub-fence.
(see chapter checking
malfunctions, adjusting sub-fence.
6 Block the sub-fence.
7 Put a square against the sub-fence langsgeleider
8 Adjust the saw-blade b.m.o. the turn
table against the square.
9 Adjust the bolt with the counter nut at
the stop.
10 check the adjustment.

--17--
MALFUNCTIONS
SAFETY
Disconnect the machine of the mains
supply before adjusting the machine or
removing malfunctions.
See to it that all damaged parts are
replaced before operating the machine.
MALFUNCTION:
- BURN OF SAW-BLADE AT THE FENCE
SIDE
- WOOD CLAMPS BETWEEN SAWBLADE
AND FENCE
- WOOD CLAMPS ON RIVING KNIFE
CHECKING AND RE-ADJUSTING
OF THE SUB-FENCE.
1 Check if turn table is adjusted at 0º. If
not, see chapter adjusting turn table
first.
2 Put the saw-blade in the highest position
an square on the table.
3 Put a lath against the saw-blade.
4 Push the sub-fence against the lath and
block the fence.
5 Check the distance between the saw-
blade and the sub-fence at two positions
(fig. 17).
6 Loosen the two bolts of the fence (fig.
18).
5 Adjust the sub-fence parallel to the lath.
6 Tighten the nuts firmly.
7 Check if the sub-fence is parallel tot the
lath.
8 Remove the lath.
CHECKING OF RIVING KNIFE
Check thickness, measure and position of
riving knife (see chapter adjusting riving
knife).
--18--
MALFUNCTIONS
SAFETY
Disconnect the machine of the mains
supply before adjusting the machine or
removing malfunctions.
See to it that all damaged parts are
replaced before operating the machine.
MALFUNCTION:
- STOPS OF ANGLE ADJUSTMENT OF
THE SAW-BLADE FOR CUTTING AT 0º
& 90º ARE OUT OF ADJUSTMENT.
ADJUSTING STOP 0º
1 Put the saw-blade in the highest
position.
2 Adjust the saw-blade with a square.
3 Loosen the counter nut of the bolt and
4 Block the bolt with the counter nut.
5 Check the adjustment.
AJUSTING STOP 45º
1 Put the saw-blade in the highest
position.
2 Adjust the saw-blade with a square
3 Loosen the counter nut of the bolt
and adjust it against the stop (fig. 20).
4 Block the bolt with the counter nut.
5 Check the adjustment.

--19--
MALFUNCTIONS
SAFETY
Disconnect the machine of the mains supply
before adjusting the machine or removing
malfunctions.
See to it that all damaged parts are
replaced before operating the machine.
MALFUNCTION:
- BRAKE DOES NOT WORK
1 Put the machine out of order and contact
a skilled electrical engineer.
- SAW-BLADE DOES NOT ROTATE
1 Disconnect the machine.
2 Check if the saw-blade can run freely.
3 Check if the saw-blade is mounted
correctly (see chapter changing saw-
blade).
4 Check if the lid of the guard is closed.
5 If the problem is not solved after
checking the above contact a skilled
electrical engineer.

--20--
MAINTENANCE
CLEANING, LUBRICATING AND
GREASING
Perform following maintenance every 40
productive hours.
1 Clean height adjustment and lubricate
slightly.
2 Clean tube of fence.
3 Clean angle adjustment.
4 Brush the air inlet and parts of the motor
and check if not obstructed
Perform following maintenance every 160
productive hours.
5 Wear and tear of cables.
6 Broken or torn parts of the electric
circuit.
7 Brake time of the saw-blade (has to be
less than 10 seconds).
8 Operation of micro switch on dust
collector.
9 Operation and condition of safety guard.
Perform following check every 1000
productive hours.
10 The bolt connections of height and angle
adjustment.
11 Saw-spindle on excessive play.
Table of contents


