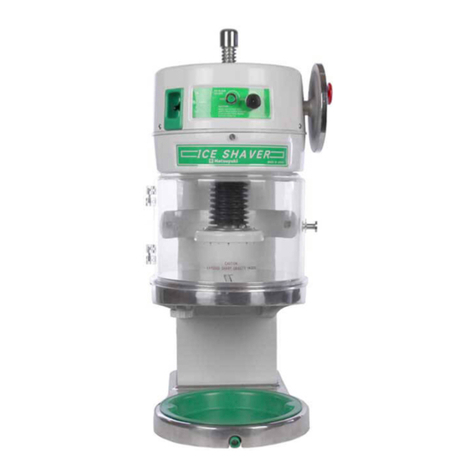
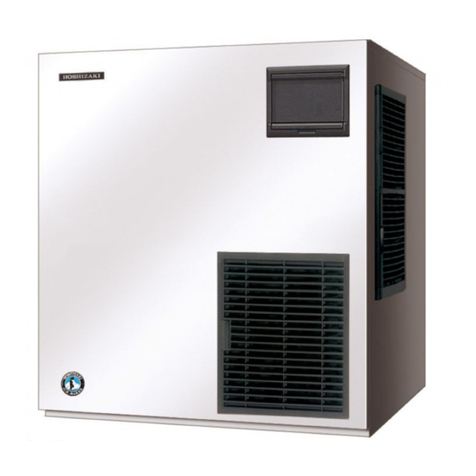
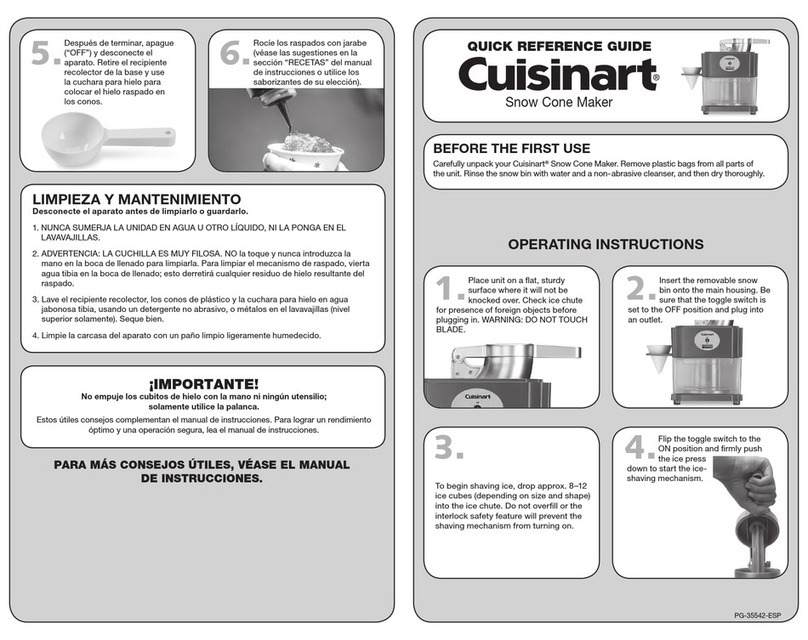
Hatsuyuki HB310B2 User manual

USER'S MANUAL
㻹㼛㼐㼑㼘㻌㻴㻮㻟㻝㻜㻮㻞
㻮㼘㼛㼏㼗㻌㻵㼏㼑㻌㻿㼔㼍㼢㼑㼞
Shouldyousellorgivethemachinetoa3rdparty,makesurethatthis"OPERATIONMANUAL"goeswithitforsafeandcorrectoperation.
TRANSFER(RE-SALE)OFMACHINE
*Beforeoperatingthismachine,pleasereadandunderstandtheinstructionsspecifiedinthismanualforproperandsafetyuse.*Retainthismanualforyourimmediateandfuturereferences.*Formaintenanceandrepairs,pleasecontactthemanufacturer(ChubuCorporation)orthelocaldistributorsfromwhomyoupurchasedtheproducts.

FORSAFETY
WARNING
CAUTION
WARNING
Unplug
Do Not Disassemble
Electric Shock
Plug
Note: "Material damages "means damages to buildings, furniture and effects, pets, etc.
Examples of Mark / Pictograph:
△represents"CAUTION"(includingdangerandwarning).Thespecificcontentsofcautionareshownnearthe△markbypictographorletters.Themarkillustratedleftrepresents"ELECTRICSHOCK".◯represents"PROHIBITEDOPERATION".Thespecificcontentsof"Prohibited"areshownwithinornearthis◯markbypictog-raphorletters.Themarkillustratedatleftrepresents"DONOTDISASSEMBLE".●represents"ENFORCEMENT"(Thingstodo).Thespecificcontentsof"Enforcement"areshownwithinornear●themarkbypict-ographorletters.Themarkillustratedatleftrepresents"Unplugfromoutlet".●Do not operate the machine outside.
Operating the machine outside or in the rain will cause electric bleed-
ing or electric shock.
●Dedicated (Exclusive-use) outlet.
Always use an outlet dedicated to each machine. Never use exten-
sion cords or connect the unit to other power supply cords. Never
connect several or many plugs into the same outlet. It may cause
power supply cord to overheat and melt/burn or electric shock or
fire.
●Be sure to ground (earth) the machine.
Never connect a ground wire (earthing) to gas pipes, water pipes,
lightening rods or telephone cord/grounding wires. An incomplete
grounding (earthing) is dangerous and can cause severe electric
shock.
●Before operating the machine, please read the following "Instructions for Safety" in the manual very carefully,
and operate the machine correctly.
●Each instruction specified in the manual is very important for safety, so be sure to follow eachinstruction as
specified.
●Attention marks and their meanings are as follows:
Incorrect operation of machine is dangerous and can cause serious injury or death.
Incorrect operation of machine is dangerous and can cause injury of person or
material damages.

Attention
to Dust.
WARNING
●Do not install the machine in a damp or wet place.
It can cause electric bleeding or electric shock.
●Do not install/place the machine close to any heating appli-
ance.
Never install/place the machine close to any heating appliance such
as a gas burner. It can cause melting and/or burning of plastic cover.
●This machine is for "COMMERCIAL USE".
Be sure to keep the machine away from children to avoid electric
shock or injury.
●Do not pour water over the machine or immerse machine in
water.
It can cause a short circuit or electric shock, as well as rust and other
water related problems.
●Do not damage power supply cord.
Never work on power cord and never pull, twist or bundle it. Do not
place a heavy things on it. It can damage the power cord and can
cause electric shock or fire.
●Keep plug clean and plug into outlet correctly.
Always keep plug clean and plug into outlet correctly. Dirty plugs or
imperfectly connected plugs can cause electric shock or fire.
●Do not touch any electrical parts (such as plug or switch) with
wet hands.
It can cause electric shock.
●In the event of circuit breaker moving to "OFF" position, please
contact the machine vendor. Switching breaker to "ON" position
incorrectly or by force can cause electric shock or fire.
VENDOR

1
WARNING
FOR SAFETY
●Should accidents or irregular operation occur, TURN OFF the main
switch and unplug from outlet. Immediately contact your machine
vendor for a correct repairs. Continued operation of a faulty
machine can/will cause electric shock or fire.
●For cleaning inside the ice hopper or changing blades, be sure to
TUNE OFF the main switch and always put on gloves while
cleaning/changing blade works. Never touch blades directly. They
are very sharp and can cause injury.
●Never try to disassemble or repair the machine by yourself. Always
call a qualified technician. Incorrect repair will likely cause irregular
operation or electric shock, fire or injury.
●Do not attempt to alter the machine in any way. It can cause electric
shock or fire.
●Do not open the sliding door or put your hand into the chamber
during operation. Lower the blade tip below the shaving table when
cleaning the inside of the chamber. Wipe the shaving table counter-
clockwise to the blade direction. Otherwise, injuries could occur.
VENDOR

OFF
●Keep the machine away from direct sunlight. It can cause a damage
to plastic parts.
●When cleaning, be sure to switch OFF and unplug the unit before
doing so. Cleaning with the power or switch on is very dangerous
and can cause electric shock or injury.
●Never use inflammable sprays near the machine and never place
volatile or inflammable materials close to the machine. Sparks from
the switch could possibly cause fire.
CAUTION
●Always install the machine on a stable and flat surface. Irregular or
imperfect installation can cause the unit to tip or fall and is therefore
dangerous.
●Install the machine in a location unaffected by occasional dripping
of water. Melting ice will drip and can, therefore, drip onto things
surrounding the machine.
●When you unplug the unit, be sure to hold the plug while you pull it
out of the outlet. Never pull the power cable. It may damage the
plug/cable and can cause electric shock or fire.
●For disposal of disused unit, please contact local disposal experts or
the nearest vendor. Abandoned machines are dangerous. Treat
blade on machine as a dangerous item when disposing machine.
●After the day's business is finished, be sure to switch OFF and unplug
the unit for safety.

1
FOR SAFETY
●Donottouchtherotaryparts(mainshaftandcrankhandle)duringoperation.●Cleanthefoodzoneareaintheshavingchamberbeforeuse.Notcleaningitcouldincreasethechanceofcontaminationandcouldbethecauseofillness.●Griptheiceblockfirmly.Theicecouldjumpoutifitisnotpositionedfirmly.●Donottouchtheprongswithyourfingers.Doingsocouldcauseinjury.●Adjustthetensionboltproperlysothatwhenyoudonotsupportitwithyourhand,theiceholderdoesnotdescend.●Whenyousellorgivethemachinetoa3rdparty,makesurethatthis"OPERATIONMANUAL"goeswiththeunitforsafetyandcorrectoperation.CAUTION

2
PARTNAMESANDFUNCTIONS
●Thismachineiscommercialblockiceshavertoproduceshavedicefroma blockofice-adiceof13cmapprox.Useablockoficeandneveruseother items.Shaving Chamber
Hose Connector
Blade
Blade Adjustment
Knob
Shaving Table
Main Shaft
Power Switch
Crank Handle
Crank Handle
Fixing Screw
Sliding Cover
Ice Holder
Power Cord
Drip Tray
Tension Adjustment
Bolt

HOWTOUSE3Remarks
・Connect the drain hose to the drip tray. Place a bucket to
receive drip water through the drain hose.
・Plug the unit into an appropriate socket (voltage is
specified on the machine plate). Refrain from using a
generator as this is not covered by the warranty.
・Clean the food zone, such as the ice shaving area, upon
first use. There could be dust in the chamber.
CHECK BEFORE OPERATION
・Attach the enclosed crank handle
in the followingmanner:
1)Ice that is very cold or smoky in color is not suitable for
shaving because it is too cold and hard. Use
transparent ice of an appropriate temperature. Ice that
is smoky in color will not produce soft and fluffy
shaved ice. It could damage the blade tip and the
blade will not shave the ice. Use transparent ice for
soft and fluffy shaved ice.
2)Do not put things on the unit. The main shaft turns
when the unit starts and it could be dangerous.
2) In attaching the crank handle in paragraph 1,
connect them aligning the cut of the worm shaft
with the cut of the crank handle.
3) Put the crank handle to the body using Phillips
bolt and fasten it by screwdriver firmly. Check the
handle if it raises the main shaft upwards and
downwards smoothly. ●Mount the shaft cover on the top
of the unit.
2) Turn the shaft cover clockwise until it stops with
a clicking sound.
1) Place the shaft cover in the position that 3 hooks
meet the holes of the body top.
1) There is a hole on the right of the head cover.
Push the crank handle shaft through this.

・Placeablockoficeonthecenteroftheshavingtable.Theiceshouldnotexceedtheareaoftheshaverblade.Otherwise,theicewillnotbeshavedwelloritwillbeshavedimproperlyandmightjumpout.Keepyourhandsaway.・Turnthecrankhandlecounter-clockwisetolowertheiceholderandletitsprongsgriptheicefirmly.Iftheiceisnotfirmlygripped,itcouldjumpout.・Movetheslidingcover(shavingshield)totherighttocloseitsecurely.Ifitisnotclosedproperly,theunitwillnotworkeventhoughithasbeenturned
OPERATION INSTRUCTIONS
1)Pluginthemachine.Makesurethepowerswitchisturnedtotheoffpositionbeforepluggingintheunit.2)Placeablockoficeontheshavingtable.・Movetheslidingcovertothelefttoopen.3)Prepareacupundertheshavingtabletoreceivethetheshavedice.4)SwitchON.Shavingicebegins.・Turnthecrankhandleclockwisetoraisethecrankhandle.・Confirmtheiceholderdoesnotdescendwhenyouremoveasupportinghandfromthecrankhandle.-Ifitfallsdown,itcouldcauseinjury.Turnthetentionboltclockwisetoholdtheposition.HOWTOUSE

HOWTOUSE
3
9)Unplugtheunitwhenyouarefinished.5)Placeacupundertheshavingtabletoreceivethefallingshavedice.6)SwitchON.Themachinewillbegintoshavetheice.8)Turntheunitoff.7)Adjustthetextureoftheshavedice.Turnthebladeadjustmentknobforthedesiredicetexture.Standardshavedicetextureis1millimeter(mm),asthisisthepitchbetweenthebladetipandtheshavingtable.・Turntheknobclockwiseforafinertextureorcounterclockwiseforacoarsertexture.・Turntheknobonefullrotationtoraisetheblade1mm(approx)abovetheshavingtable.Theknobcanbeturnedtwoorthreetimes.

Donottouchtheprongsoftheiceholder.Theycouldcauseinjury.TAKING THE ICE OFF THE
SHAVING TABLE
ABOUT THE SAFETY SWITCH
Inordertoavoidinjury,donottouchthebladetipwhenputtingiceontheshavingtableorwhenremovingicefromtheshavingtable.WARNING
CAUTION
●Followthesesteps:1)Switchtheunitoffandturnthecrankhandleclockwisetoraisetheiceholder.
2)Confirmtheiceholderdoesnotdescendwhenyouremoveasupportinghandfromthecrankhandle.3)Movetheslidingcover(shavingshield)totherighttoopen.4)Taketheiceofftheshavingtable.5)Turnthecrankhandlecounterclockwisetolowertheiceholder.Closetheslidingcover(shavingshield).Thisisforsafetyreasons.・Whentheslidingcover(shavingshield)isopen,theunitwillnotwork.Thisisasafetyfeature.・Neverusethesafetyswitchtoturnoffthemachine.Thiscouldturndownthemachine.Crank Handle
HOWTOUSE

ABOUTTHETENSIONADJUSTMENTBOLTABOUTTHEPROTECTOR(NotapplicabletoHB320A)3
HOW TO USE
Adjustthetensionadjustmentboltfortheiceblockholdernottodescendwhenyouremoveasupportinghandfromthecrankhandle.Otherwise,injurycouldoccur.Adjustingtheboltadjuststhepowerusedtoholdtheice.CAUTIONUseaslottedscrewdriver.・Turntheboltclockwiseforstrongertensionofgrippingiceorcounterclockwiseforweaker.・Confirmtheadjustmentbyturningthecrankhandle.Recommendedtensionissuchthattheiceblockholderdoesnotdescendwhenyouremoveasupportinghandfromtheholder,yetitdoesn'tfeelheavyortightwhenthehandleismovedtolifttheholder.・Whenthemotorisoverloaded,theprotectorcausesthemachinetostopautomatically.・Aprotectorisinstalledinthemotor.・Followtheinstructionsbelowwhentheprotectorisactivated(theredbuttonpopsout).(1)Turntheunitoffandunplugit.(2)Removethecauseoftheoverload(e.g.,thebladecatchestheicetoodeeplyandpreventsrotationoftheice).Repositiontheice.(3)Theprotectorstopstheunitwhenexcessivelyhightemperaturesaredetected.Operationshouldberestartedoncethemotorcoolsdown(about1hour).Note:Contactthedistributororanauthorized
20℃
ShavingTableBladeTheicemeltsanditcatchesthebladetoodeeply

REMOVINGTHEBLADEANDATTACHINGTHEBLADE
4
HOW TO CHANGE BLADES
SwitchOFFandunplugtheunitwhenchangingbladesorduringcleaningandmaintenance.Useglovesanddonottouchthebladetipdirectly.Otherwiseitcouldcauseinjury.WARNING1)Switchoffandunplugtheunit.2)Movetheslidingcovertothelefttoopen.3)Raisethecrankhandleclockwisetoraisetheiceholder.5)SlightlyloosenthetwoPhillipsscrewsthatfastentheblade.Butdonottakeoffthescrews.6)Removethebladeupwardsthroughtheopeningoftheshavingtable.4)Turnthebladeadjustmentknobcounterclockwisesothatthebladetipcomesoutslightlyovertheshavingtable.7)Positionanewbladethatitsengravedmark"初雪(HatsuyukiinJapanese)“facestheguideplate,andinsertitinbetweenthebladeholderandtheguideplatefromtheopeningoftheshavingtable.8)Positionthebladesothatitsbottomtouchesthebladeholderandthenfastenitbythescrewsfirmly.9)Turnthebladeadjustmentknobclockwisetolowerthebladenottobeovertheshavingtable.Engraved「初雪」

DAILYMAINTENANCE
5
MAINTENANCE
Besuretheunitisswitchedoffandunpluggedbeforecleaning.Wearprotectivegloveswhencleaningtheinsideofthechamberandwhenchangingblades.Donottouchthebladetipdirectly.Lowerthebladebelowtheconicalcasesurfacewhencleaningtheinsideofthechamber.Wipetheshavingtablecounterclockwise(againstthebladetipdirection).Donotimmersetheunitinwater.Thiscouldcauseanelectricalshortcircuit,rust,orpermanentdamagetotheunit.WARNINGDonottouchthepowerswitch,plug,orotherelectricpartswithwethands.Remarks●InsideIceShavingChamber(includingtheshavingtable,slidecoveretc.):1)Turnthebladeadjustmentknobcompletelyclockwisetolowerthebladebehindthesurfaceoftheshavingtable.Withthebladeabovetheshavingtable,itcouldinjureyourfingers.2)Turntheslidecovercounterclockwisetoopenit.3)Cleantheshavingtableusingadampclothinacounterclockwisedirection.Donotcleaninaclockwisedirection;thiscouldcauseinjuryinflictedbytheblade.4)Cleantheinsideoftheslidecoverusingadamp・Donotusewaterover40°Celsiuswhencleaning.Thiscouldcausetheplasticpartstobecomedistorted.・Donotusethefollowingsonplasticparts:benzine,alcohol,petroleum,powderedsoap,polishingpowder,alkalinedetergent,acid,hypochlorousacid,scrubbrushes,etc.Whenachemicalclothisusedforthismachine,followtheinstructionmanualofthechemicalcloth.

CLEANING(COVERS)
MONTHLY MAINTENANCE
4)Insert the crank handle to the worm shaft temporarily
(Ref. Page 7 Fixing Crank Handle). Turning the crank
handle, lubricate the 2 small holes of the wormshaft
holder top and the contact of Y-brake and the
wormwheel.
5)Attach the head cover and then attach the crank
handle to the crank handle shaft. Lubricate the main
shaft and the shaft holder while moving the shaft up
and down. Put the shaft cover after lubricaton.
(Refer Page 7 Mounting the Shaft Cover)
・Wipe covers using a soft, dry cloth.
・Clean hardened dirt using a damp cloth and warm
water. A gentle dish detergent can be used. Be sure to
completely remove any traces of detergent with a
damp cloth.
・Lubrication - Use the gear oil included as a standard
accessory.
1)Turn the crank handle counter-clockwise to lower the
ice holder to the bottom. And remove the Philips
screw that fastens the crank handle.
2)Turn the shaft cover counter-clockwise and lift it
to remove it.
3) Remove two philips screws ①②fastening the head
cover by (+)screw driver. Take out the round sticker
hiding the screw and remove the screw. Remove the
screw ③fastening the crank handle by (+)screw driver.

5MAINTENANCEYEARLYMAINTENANCE
MAINTENANCEOFGROUNDINGTHEMACHINE
CHECKTHEPLUGPRESERVATION
Periodically confirm there is no dust on the
plug prongs or blade attachments.
Periodically plug in the unit to check it
works. An improper connection could
cause a fire or electric shock.
Do not damage the power cord. Keep it
clean. If it is stretched, folded, placed under
a heavy object, pinched, stained, or
otherwise mistreated, it could be damaged.
This could cause a fire or electric shock.
WARNING・Check that the earth wire is not cut or disconnected
from the terminal. * Should there be any defects,
contact the distributor or an authorized mechanic.
・Use an exclusive socket.
・Confirm there is no dust on the plug prongs or the
socket.
・Do not use a power cord that is damaged in any way.
Should there be anything irregular, contact the
distributor or an authorized mechanic.
・To warehouse or store the machine for more than one
week, dry it completely and keep the machine in a
place free from moisture.

TROUBLESHOOTING
TRANSFERANDDISPOSAL
The machine does not
start.
Problems Things To Check What To Do
The machine works, but
does not shave ice well.
Ice moves away from the
ice holder during shaving.
Is the plug connected to the socket?
Is the protector working?
Is the belt mounted properly?
Is the slide cover (shaving shield)
open?
Is the motor loaded heavily?
Is the blade dull?
Is the blade adjusted properly?
Is the tension bolt loose?
Is the tension too loose?
Do the prongs of the ice holder not
catch the ice?
Connect to the socket.
See page 11 - About the Protector.
Contact the distributor.
Close the slide cover (shaving shield)
completely.
Switch OFF. Remove the cause.
Replace the blades (see Page 12).
Turn the blade adjustment knob
clockwise to raise the blade.
Turn the bolt clockwise for increased tension.
Turn the tension adjustment bolt clockwise.
Drop the ice holder a bit more so the prongs
grip the ice firmly.
●When selling or transferring this product to a third
person, tape this instruction manual to the machine.
This will ensure the new owner has all the instructions.
●Refer to a qualified service or your local dealer when
discarding the product. Abandoned products are
dangerous and can result in injury. Blades are
dangerous and require proper disposal.
●The machine should be serviced by the distributor or an authorized mechanic.

6
SPECIFICATIONS
Checkthemachineplate.(230V,1Ph,50/60Hz)
230W(50Hz)/205W(60Hz)
1.8kgs(50Hz)/2.2kgs(60Hz)
200mmdia.
347×396×609(+180)mm
17.0
Remarks
Theshavingcapacityisshownunderthestandardshavingconditions.
(Thebladetiparises1mmabovetheshavingtable.)
ExtraBlade…………1
DripHose……………1
GearOil ………………1
CrankHandle………1
ShaftCover…………1
CrankHandleFixingBolt(M6x16withlock)…1
DrainHose(ExceptHF-300P)…………………1
IceFlag…………………………………………1
InstructionManual……………………………1
RatedPower
Consumption
ShavingCapacity
(kg/minute)
EffectiveDiameter
forShaving
UnitDimensions
(W×D×H)
NetWeight
(kg)
Electrical
Standard
Accessories
Model HB-310B2BlockIceShaver
Table of contents
Other Hatsuyuki Ice Maker manuals
Popular Ice Maker manuals by other brands
Electrolux
Electrolux 730173 Brochure & specs

Follett
Follett Horizon Elite HCC710AJS installation instructions
ITV ICE MAKERS
ITV ICE MAKERS NG Series Technical manual

Princess
Princess 82700 yOnanas user manual

Xo
Xo XOUIM1565O Installation and Use and Care Guide

Dometic
Dometic Eskimo Ice Remote Ice Crushing System Installation and operation
