HAUSSLER Barbecue User manual

Operang instrucons
Häussler barbecue
Original operang instrucons

2
Contents
1 Welcome… .........................................................................................................3
to the world of milling, kneading, baking, and pasta-making! ............................... 3
2 For your safety ...................................................................................................4
Table of symbols...................................................................................................... 4
Intended use............................................................................................................ 4
Basic rules................................................................................................................ 4
Safety informaon................................................................................................... 4
3 Product guide .....................................................................................................7
Product descripon ................................................................................................. 7
Technical data.......................................................................................................... 7
4 Scope of delivery ................................................................................................9
Seng up the device............................................................................................... 9
Cleaning the device for the rst me .................................................................... 10
Assembling the device........................................................................................... 10
5 Fuel to be used .................................................................................................12
6 Filling and ring up...........................................................................................14
Filling capacity ....................................................................................................... 15
7 Grilling with/without ame splier ..................................................................18
Flame splier installaon ...................................................................................... 18
8 Good to know: Helpful hints around grilling .....................................................19
9 Cleaning ...........................................................................................................20
10 Maintenance ....................................................................................................21
11 Troubleshoong ...............................................................................................22
What to do if the barbecue unexpectedly goes out.............................................. 23
12 Disposal ...........................................................................................................25
13 Accessories ......................................................................................................26
14 Warranty ..........................................................................................................32
15 For your notes ..................................................................................................33

3
1 Welcome…
to the world of milling, kneading, baking, and pasta-making!
Häussler stands for doing it yourself. With our devices, you can create wonderful
delicacies with a second-to-none taste. Immerse yourself in the world of milling,
kneading, baking, barbecuing, and pasta-making.
Häussler stands for uncompromising quality – Made in Germany. Decades of
experience and thousands of devices shipped worldwide speak for themselves.
Häussler stands for customer service. Even aer you’ve made a purchase, we will not
hesitate to provide you with support. We want you to be happy with your device for
a long me, receive new helpful hints now and again, and discover fresh recipe ideas
at Häussler.
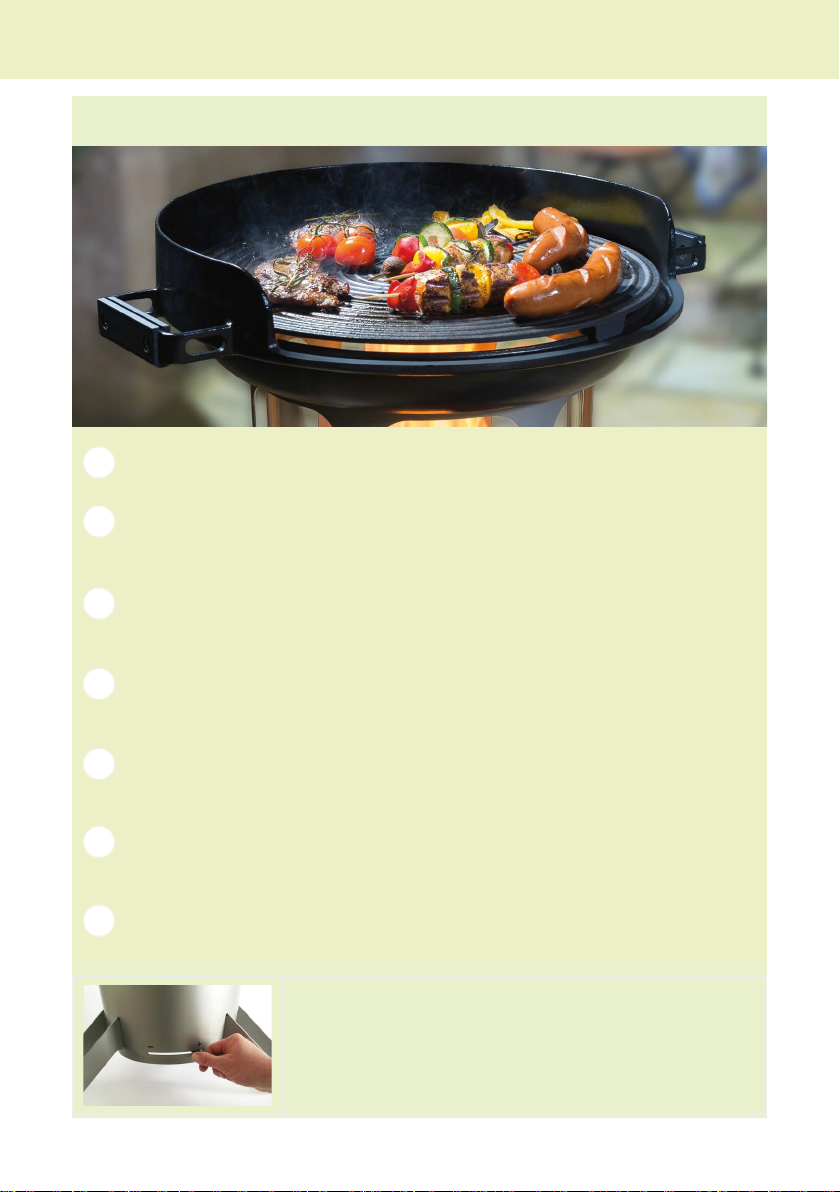
You have decided to purchase the Häussler barbecue, which can be used as both a
barbecue and a light pillar. With its contemporary look and the ame generated, the
light adds an unforgeable, appealing atmosphere to any environment.
Plenty of pleasure and always successful.
Welcome…

4
2 For your safety
Table of symbols
Symbol descripon
⚠Danger symbol
Prompt to acon
iInformaon
Bullet point
Tab. 1: Table of symbols
Intended use
The Häussler barbecue meets the prescribed, product-specic safety regulaons.
The Häussler barbecue is only intended to be used as a barbecue and a landscape
light. The use of any fuel other than wood pellets is prohibited. Any other use shall
be considered improper use. Karl-Heinz Häussler GmbH shall not be liable for any
damage to property or persons resulng from improper use of the product.
The supplementary products recommended by Häussler are the only ones that may
be used.
Basic rules
Carefully read the operang instrucons before you commission the device.
Observe the safety informaon and warnings in the operang instrucons.
Only operate the device when it is in perfect condion.
Keep the operang instrucons available in the vicinity of the device.
Always include these operang instrucons when selling this device to a third party.
Conduct a visual inspecon before commissioning every me the device is used.
Safety informaon
iIf the display of operang instrucons or parts of them is too small,
you can view the operang instrucons on our website www.back-
dorf.de and enlarge them there.
For your safety

5
⚠Risk of fatality from explosion
Never use easily and highly ammable liquids such as denatured alcohol, etc.
Never use an accelerant on pellets that have been red up and are warm.
⚠Risk of fatality from smoke
Only use the Häussler barbecue outdoors.
⚠Risk of injury due to high weight
Transport the device with care due to its high weight.
Before picking it up, make sure that you can handle the weight.
Two people should carefully li the device.
Only set the device down on a stable surface.
⚠Risk of burns from heated components
Do not leave the device unaended during and aer operaon.
Set up the device out of the reach of children under 14 and always supervise child-
ren in the vicinity of the device. Do not leave infants, children, or animals unaen-
ded in the vicinity of the barbecue.
Let the barbecue cool down completely before touching it.
When handling the barbecue, wear barbecue mis.
Use proper barbecue tools with long, heat-resistant handles.
Let the barbecue aachment cool down completely before cleaning it.
⚠Risk of burns from high ames
Do not wear loose-ng clothes.
Persons with long hair should e it back.
⚠Risk of re from high ames
Only operate the barbecue in areas without roofs.
Maintain a minimum distance of 1.5 m from ammable materials when using the
barbecue.
⚠Risk of re from hot components
Please note that the barbecue also radiates heat down-
wards. Protect the surface beneath the landscape light
by covering it with a heat-resistant plate.
For your safety

6
Place the hot cover and barbecue aachment on a heat-resistant surface only.
Keep ammable materials away from the barbecue surface.
⚠Risk of crushing from falling parts
Ensure that the barbecue aachment is properly seated on the light pillar.
Ensure that the griddle insert is properly posioned in the barbecue aachment.
For your safety

7
3 Product guide
Product descripon
With the Häussler barbecue, you have purchased a very high-quality pellet grill. This
barbecue is simple to operate, easy-care, and requires virtually no maintenance. It
can also be used as a landscape light.
Impressive technology at a convenient working height. The place next to the Häussler
barbecue is the heart of the party. Well-engineered elements from premium
materials turn barbecuing into a passion.
The Häussler barbecue consists of a basic body, a short glass insert (can also be used
as a landscape light), and the barbecue aachment: a grill support, two outer rings,
two-sided griddle insert, and barbecue cover.
Technical data
Product guide

8
Name Value
Pillar diameter 323 mm
Height 1,050 mm
Base diameter 600 mm
Weight 39 kg
Filling capacity Max. 9 kg
Tab. 2: Dimensions
Firing values Value
Rated thermal input 5.2 kW/kg
Carbon content 3.49%
Exhaust mass ow rate 31.3 g/s
Dust 2.80 mg
Tab. 3: Output and emissions
Product guide

9
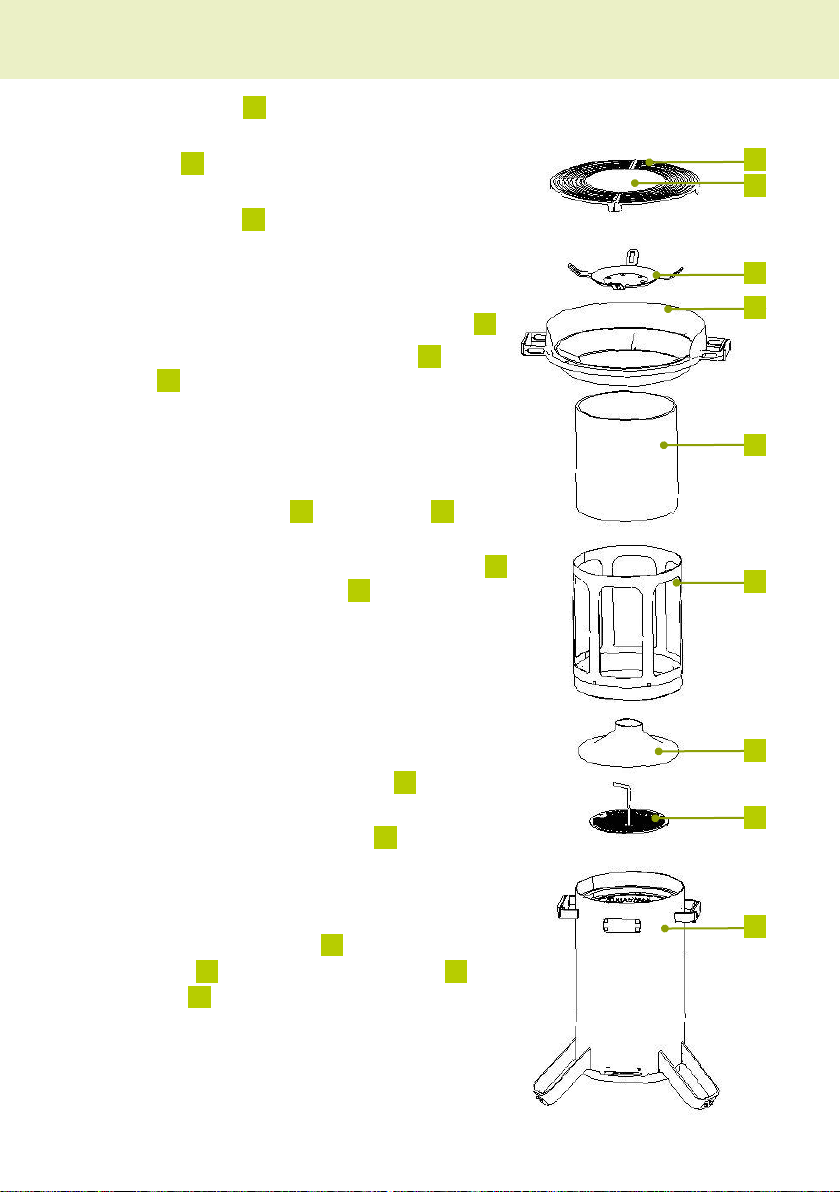
4 Scope of delivery
1
2
6
3
4
7
8
9
5
No. Designaon No. Designaon
1Base 6Round insert
2Griddle insert 7Fluted insert
3Flame splier 8Glass insert
4Grate 9Upper secon
5Burner cover
Tab. 4: Scope of delivery
iDepending on the selected item, the scope of delivery may vary. Also observe the
operang instrucons supplied with the accessory.
Seng up the device
Use Table 4 “Scope of delivery” on page 9 to help you check the delivery for com-
pleteness.
Two people should carefully li the device due to its high weight. Always set it
down on a stable, even work surface.
Scope of delivery

10
Create enough room to work on the device.
Cleaning the device for the rst me
iFor reasons of hygiene, all parts that come into contact with the food to be barbe-
cued must be removed and cleaned before inial commissioning.
Clean all parts, see Chapter 9 „Reinigen“ auf Seite 20.
Assembling the device
Assemble the light pillar or the barbecue once without ring it up.
iThis will help you become pracsed in handling the light pillar or barbecue when
it is cold.
Scope of delivery
11
Pick up the base 1 and place it on a solid, even
surface.
The grate 2 is already inside the base, in the bur-
ner head.
The burner cover 3 is already on the burner head
in the base. Push the burner cover back and forth
to check whether or not it completely covers the
burner.
Unpack the separately packaged upper secon 4.
iTo smoothly place the upper secon 4 on the
base, 1 use mul-purpose grease for high
temperatures.
Use a cloth or your nger to apply a thin coat of
mul-purpose grease for high temperatures to the
notch in the frame.
Place the upper secon 4 onto the base 1.
Press down onto the base unl it stops.
Unpack the separately packaged glass insert 5
and put it on the upper secon 4 . Cauon: Fragile
iYour light pillar is now set up and ready to use.
iTo grill, you’ll need the separately packaged barbe-
cue aachment.
Remove the individual parts of the barbecue
aachment from the packaging and remove all
packing materials.
Now place the barbecue aachment 6 on the
centre of the light pillar.
If required, place the ame splier 7 in the barbe-
cue aachment.
iYou can also barbecue without the ame splier.
See p. 18
Place the two uted inserts 9 in the barbecue
aachment 6 and centre the round insert 8in
the inserts 9.
iYour Häussler barbecue is now set up and ready
to use.
9
8
6
5
4
3
2
1
7
Scope of delivery
12
5 Fuel to be used
⚠WARNING
Risk of fatality from explosion
Darng ame
Never use easily and highly ammable liquids such as denatured alcohol,
etc.
Never use an accelerant on pellets that have been red up and are warm.
⚠CAUTION
Risk of burns from catching re
Severe burns on enre body
Do not wear loose-ng clothes.
Persons with long hair should e it back.
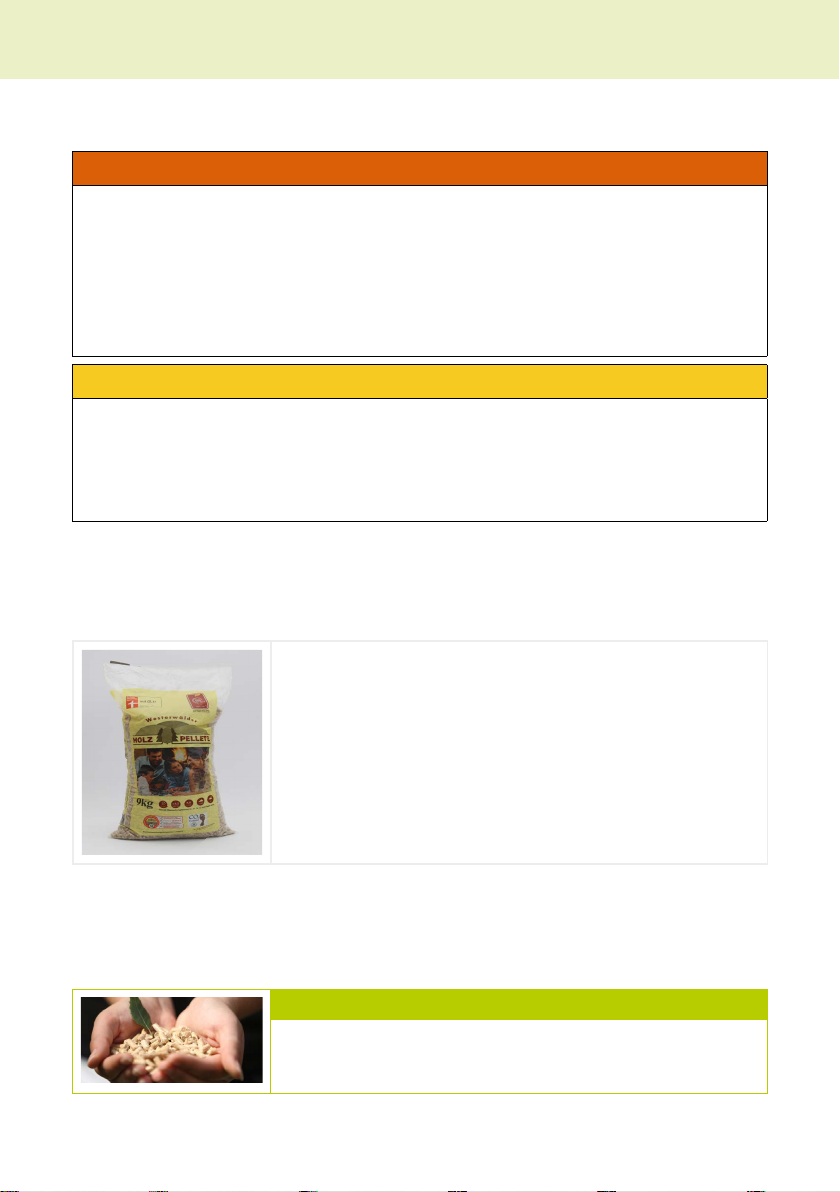
Use only class A1 and A2 wood pellets for private households in accordance with
European standard EN 14961-2.
What are wood pellets?
Wood pellets are standardised, cylindrical products of
compression made from dried, untreated residual wood
(sawdust, shavings, residual wood from forests) with a
diameter of approx. 6 mm. They are produced under high
pressure without the addion of any chemical binding
agents, and have a caloric value of approx. 5 kWh/kg. In
other words, the energy content of one kilogram of pellets
is approximately equal to one-half litre of heang oil.
iThe use of any other fuel is prohibited.
iThe burning of waste with this product is prohibited.
Helpful hint: Pellet class selecon
Häussler recommends that you use class A1 wood pellets,
since they leave less residual ash aer burning.
Fuel to be used

13
Burning aids
Only use burning aids that are cered for barbecues and wood shaving bundles so-
aked in wax, which are toxin-free, have a neutral odour and taste, and burn without
leaving residue behind.
Helpful hint: Opmal ame ignion
With Häussler pellet starter, you can opmally ignite the
ame.
Fuel to be used

14
6 Filling and ring up
⚠WARNING
Risk of fatality from explosion
Darng ame
Never use easily and highly ammable liquids such as denatured alcohol,
etc.
Never use an accelerant on pellets that have been red up and are warm.
⚠WARNING
Risk of fatality from smoke
Poisoning from smoke inhalaon
Only use the Häussler barbecue outdoors.
⚠CAUTION
Risk of burns from catching re
Severe burns on enre body
Do not wear loose-ng clothes.
Persons with long hair should e it back.
⚠CAUTION
Risk of burns from heated components
Severe burns on arms and legs
Do not leave the device unaended during operaon.
Set up the device out of the reach of children under 14 and always supervise
children in the vicinity of the device. Do not leave infants, children, or
animals unaended in the vicinity of the barbecue.
Let the barbecue cool down completely before touching it.
When handling the barbecue, wear barbecue mis.
Use proper barbecue tools with long, heat-resistant handles.
iEnsure that the light pillar is in a stable, even upright posion.
iBefore lling it with pellets, make sure that the grate is in the ring chamber.
iBefore relling with wood pellets, make sure that the residual ashes from the previous
re has been removed from the ring chamber and the grate is clean.
Filling and ring up

15
Filling capacity
A
B
C
Level Filling capacity Burning period
Aapprox. 3 kg approx. 1 hour
Bapprox. 6 kg approx. 2 hours
Capprox. 9 kg approx. 3 hours
iThe mes are only approximate since the burning period may vary with the slider
seng and weather condions.
iWhen the tall glass insert is used, the burning period is shorter due to the natural
draught.
To adjust the lling height, slightly turn the grate and li or lower it to the required
posion.
Now ll pellets to the top edge of the grate guide. (marked in red at the top of the
illustraon)
Filling and ring up

16
1. Seng the burning period
By shiing the grate, you can set the
burning period in accordance with the
table on page 15.
2. Regulang the air supply
For the rst 15 minutes, set the air sup-
ply to maximum to opmally ignite the
pellets. Aerwards, the grilling tempera-
ture can be set individually.
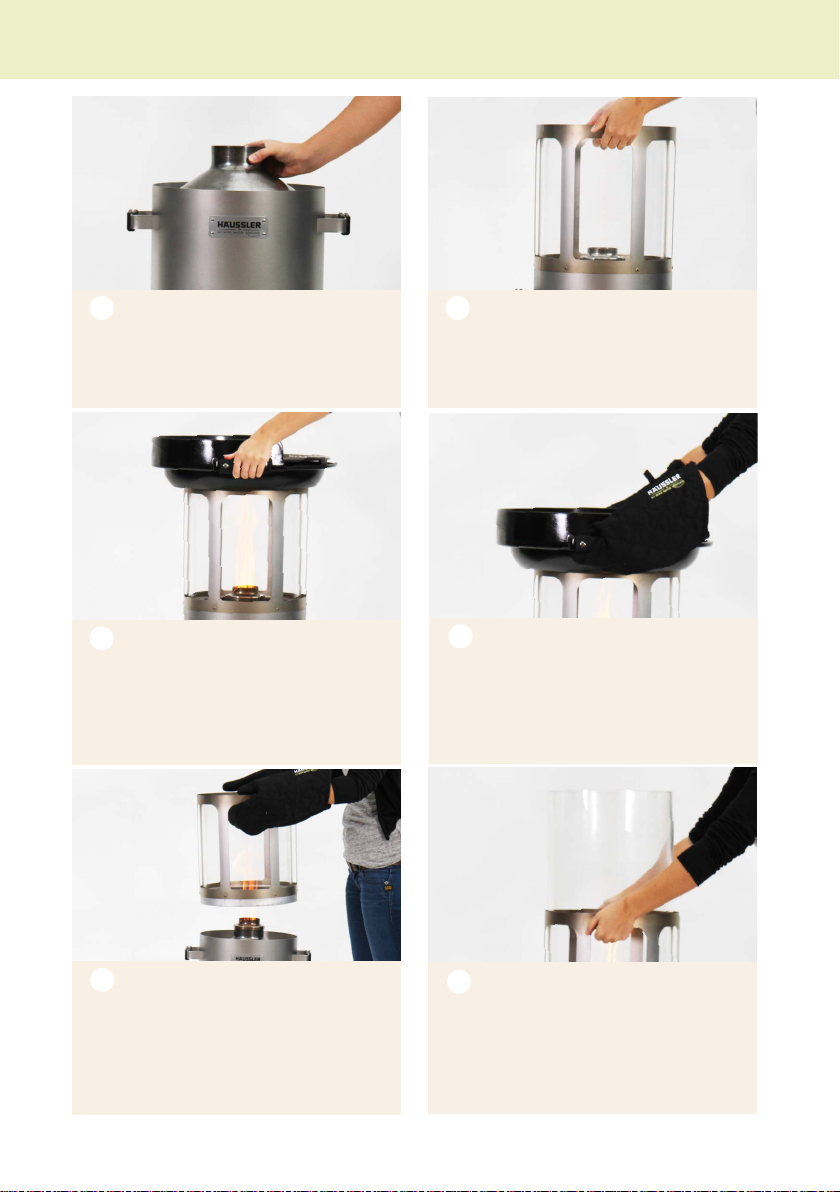
3. Filling
Remove the upper secon and burner
cover from the light pillar and store them
out of the way.
4. Filling capacity
Fill the ring chamber with pellets to the
top edge of the grate guide.
5. Adding starter
Pour some Häussler pellet starter
(approx. 20 - 30 ml) over the wood
pellets.
6. Firing up
Ignite a wood shaving bundle and put it
on the pellets.
Filling and ring up
17
7. Covering
Immediately place the burner cover in
the middle of the ring chamber.
8. Short light pillar
By pung on the short glass insert and
the upper secon, you will create an
aracve outdoor lighng ambience.
9. Add the barbecue aachment
First insert the barbecue aachment
insert. Next, place the barbecue aach-
ment on the light pillar. Make sure that
the barbecue aachment is centred and
stable.
10. Remove the barbecue aachment
Never remove the barbecue aachment
from the light pillar without wearing
barbecue mis.
11. Expanding to the tall light pillar
Only touch the short glass insert when
wearing barbecue mis. Place the hot
short glass insert on a heat-resistant
surface only.
12. Tall light pillar
Carefully put on the tall glass insert.
If you’ve just used the barbecue or short
light pillar, be careful with hot compo-
nents and use barbecue mis.
Filling and ring up
18
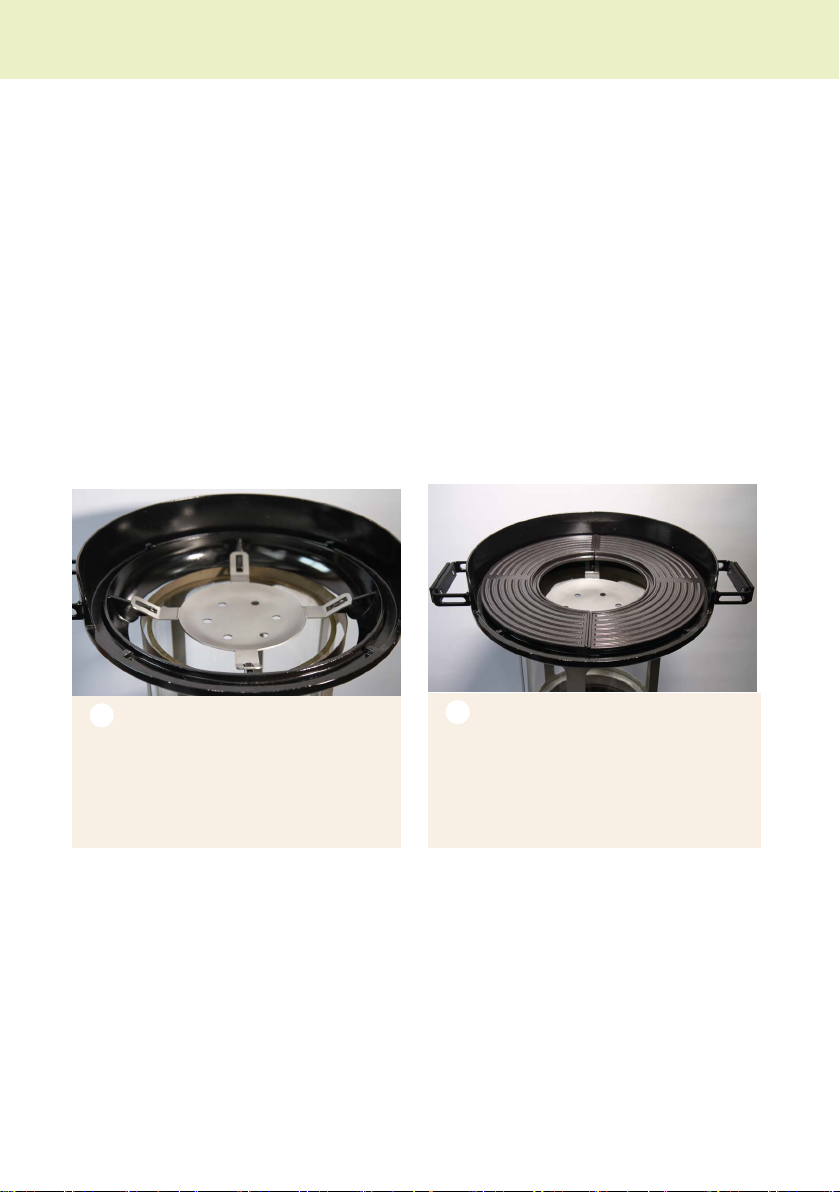
7 Grilling with/without ame splier
iYou have the choice of grilling with or without the ame splier. The ame splier
changes the temperature distribuon.
iWithout the ame splier, you will have a 3-zone temperature distribuon. At the
centre of the round insert, there is a HOT spot. It is perfect for grilling seared steaks
quickly. At the rear of the barbecue, the temperature is somewhat lower and op-
mal for grilling sausages, cheese, etc. At the front of the barbecue, there is a quiet
zone. The temperature there is lower than in the rear areas and it is perfect for
grilled vegetables or keeping cooked steaks warm.
iWith the ame splier, the heat is evenly distributed across the enre grilling sur-
face. For example, you can put steaks on the enre grilling surface and they will
typically be done at around the same me.
Flame splier installaon
1. Insert the ame splier
Place the barbecue aachment on
the light pillar.
Place the ame splier in the bar-
becue aachment.
2. Insert the uted inserts
Place the uted inserts in the barbe-
cue aachment.
iThe ame splier is required for the pizza stone and grill grate to enable the op-
mal temperature distribuon.
Grilling with/without ame splier
19
8 Good to know: Helpful hints around grilling
1. It is important to cut meat for grilling in thick slices to prevent it from drying
out easily.
2. Brush a light coat of oil onto the food to help it brown evenly and prevent
it from scking to the grill grate. But do not coat the grill grate with oil.
3. For healthy enjoyment, use heat-stable olive or vegetable oil for oiling and
marinang meat, since these oils retain their composion and taste while
grilling.
4. Always make sure that the food ts on the barbecue and t beneath the
barbecue cover. Also be aware of the thermometer that protrudes from the
barbecue cover.
5. Avoid piercing the meat with a fork since that causes juice and aroma to
escape and may dry out the meat. Use a spatula or tong.
6. Resist the temptaon to li the cover in order to check the food’s progress
too oen. This leads to unnecessary heat loss, which extends the cooking
me.
7. Unless otherwise necessary, only turn the food once.
iWhile you grill, you have the opon to regulate the
temperature of the griddle insert to arrive at opmal
grilling results.
Good to know: Helpful hints around grilling
20
9 Cleaning
⚠CAUTION
Risk of burns from heated components
Severe burns on arms and legs
Let the barbecue aachment cool down completely before cleaning it.
Let the barbecue cool down completely before touching it.
When removing the barbecue aachment, always re-
member to guide the barbecue aachment towards
your body. Do not li it to the side.
Aer each use of the light pillar or the Häussler barbecue, remove the ashes from
the ring chamber.
Always let the ring chamber cool down before emptying the ashes.
Aer each use, clean the ring chamber, housing, and the glass insert if necessary.
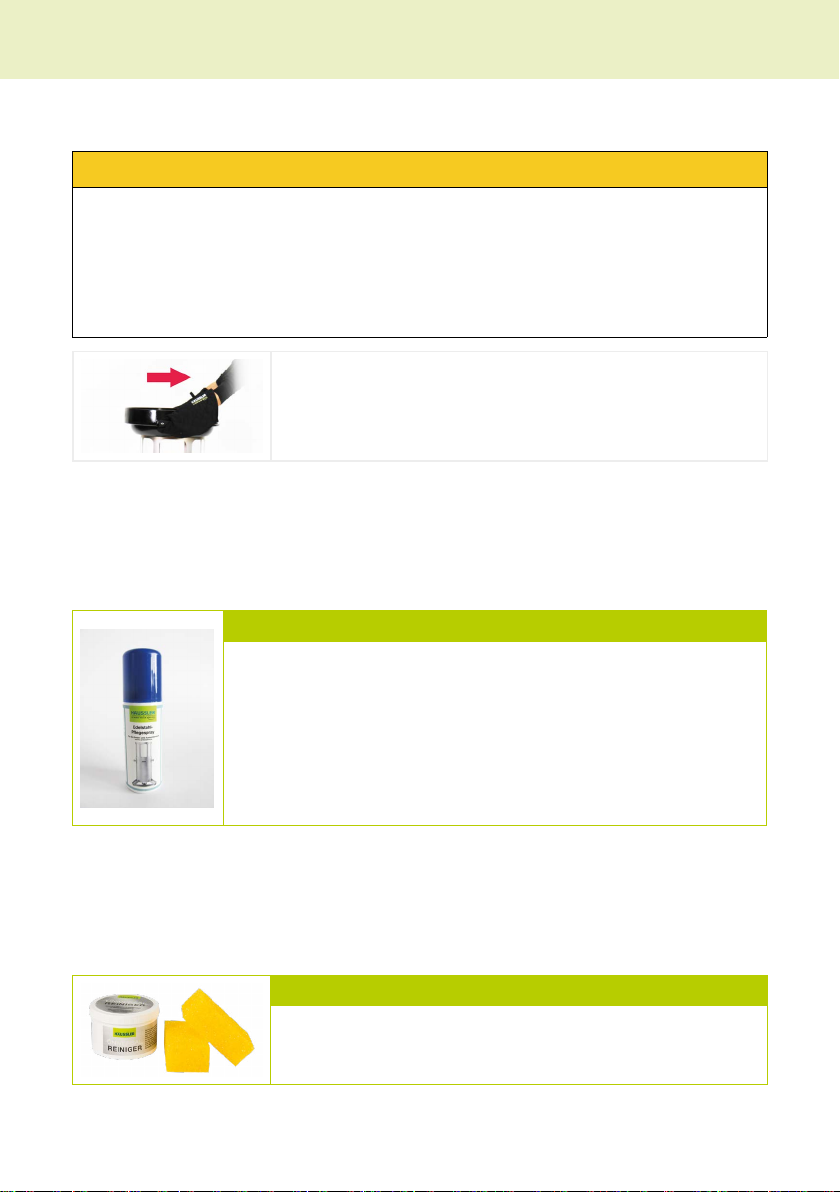
Helpful hint: Stainless steel maintenance spray
Developed specically for the cleaning, maintenance, and protec-
on of ma and polished stainless steel surfaces both indoors and
outdoors. An-stac eect. Removes and prevents ngerprints and
greasy lms. Also cleans larger surfaces without leaving stripes, makes
treated surfaces look like new, and leaves a long-lasng protecve lm
behind that makes water drip o.
Contents 50 ml
Item number: 101186
Aer each use of the barbecue, clean the barbecue aachment and the inserts.
Aer grilling, use a brush to remove coarse soiling.
Clean the barbecue inserts with water and a suitable cleaning agent.
Use a metal sponge if necessary.
Helpful hint: Cleaning
We recommend using Häussler universal cleaning agent.
Item number: 302251
Cleaning
Table of contents
Popular Grill manuals by other brands

Silvercrest
Silvercrest STGH 2000 A1 operating instructions

Twin Eagles
Twin Eagles TPBQ-30G Installation, use & care manual

Twin Eagles
Twin Eagles TE1BQ42RS Installation use and care manual

Silvercrest
Silvercrest SRGS 1400 A1 User manual and service instructions

Members Mark
Members Mark BQ05046-6-A Product guide

MasterChef
MasterChef RSH-015050 user guide


Chef-Master
Chef-Master HEB079 instruction manual

Range Master
Range Master ER-8102P-3 user guide

Members Mark
Members Mark GR2210601-MM-OO Assembly & operating instructions

Calflame
Calflame BBQ19875CTG owner's manual

Char-Griller
Char-Griller AKORN Kamado Kooker 6719 owner's manual

MasterChef
MasterChef 85-1027-0 Safe use, care and assembly manual