Havener Enterprises BRADLEY MOWERS 36 User manual

Bradley Stand-On Compact Mower Owner’s Manual
1
Sep. 10th 2023
Stand-On Compact Hydro Drive
Commercial Mower
36"
Stand-On Compact Hydro Drive
Commercial Mower
36"

Bradley Stand-On Compact Mower Owner’s Manual
IMPORTANT MESSAGE
This machine comes with an Owner’s Manual and List. The useful life and good service you receive from this machine
depends to a large extent on how well you read and understand this manual . Treat your machine properly, lubricate
and adjust it as instructed, and it will give you many years of reliable service.
Your safe use of this product is one of our prime objectives. Many safety features are built in,but we also rely on your
good sense and care to achieve accident-free operation. For best protection, study the manual thoroughly. Learn the
proper operation of all controls. Observe all safety precautions. Follow all instructions and warnings completely. Do not
remove or defeat any safety features.
See a Havener Enterprises, Inc. dealer for any service or parts needed. Havener Enterprises, Inc. service ensures that
you continue to receive the best results possible from Havener Enterprises, Inc. products. You can trust Havener
Enterprises, Inc. replacement parts because they are manufactured with the same high precision and quality as the
original parts.
Havener Enterprises, Inc. designs and builds its equipment to serve many years in a safe and productive manner. For
longest life, use this machine only as directed in the manual, keep it in good repair and follow safety warnings and
instructions.
TABLE OF CONTENTS .........................................................................................................................................PAGE
SAFETY ........................................................................................................................................................................1
SAFETY INFORMATION ...........................................................................................................................................2-3
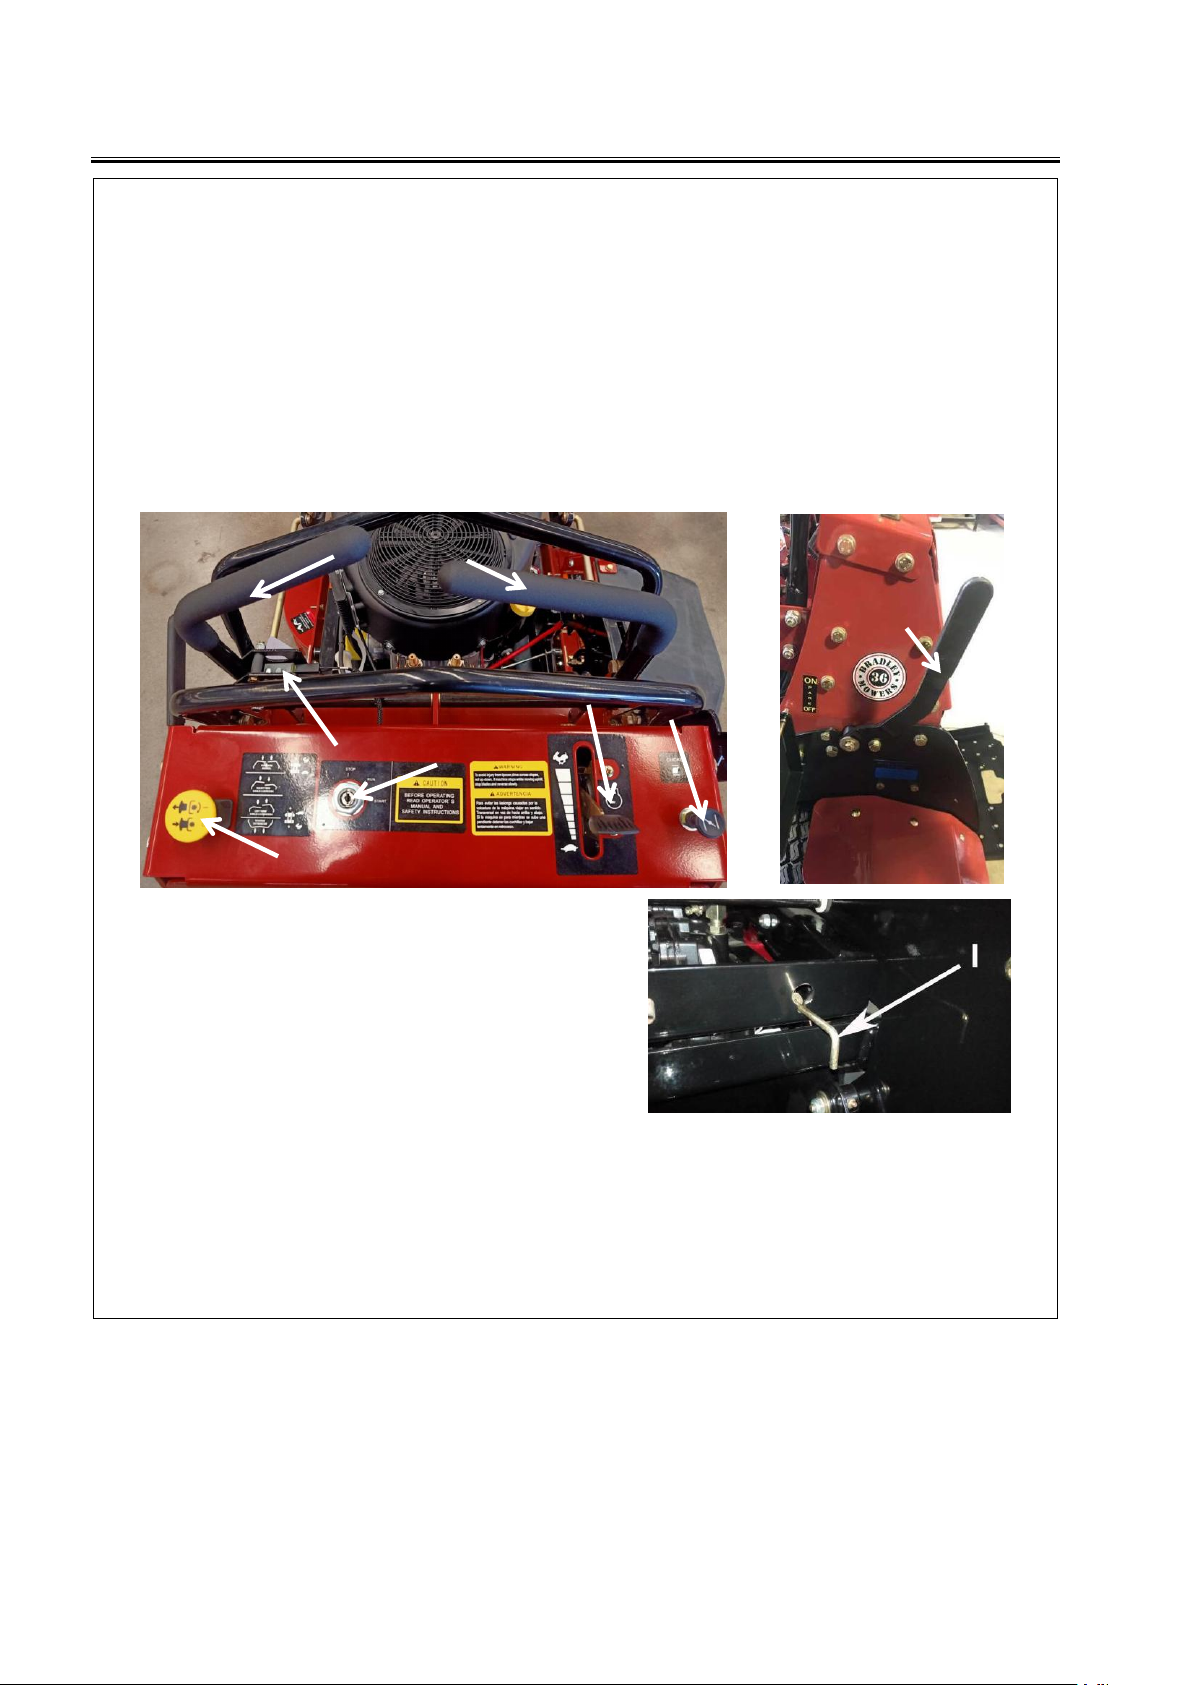
OPERATING THE MOWER .......................................................................................................................................4-6
ASSEMBLY AND SETUP ............................................................................................................................................. 7
MAINTENANCE CHART .............................................................................................................................................. 8
MAINTENANCE RECORD ........................................................................................................................................... 9
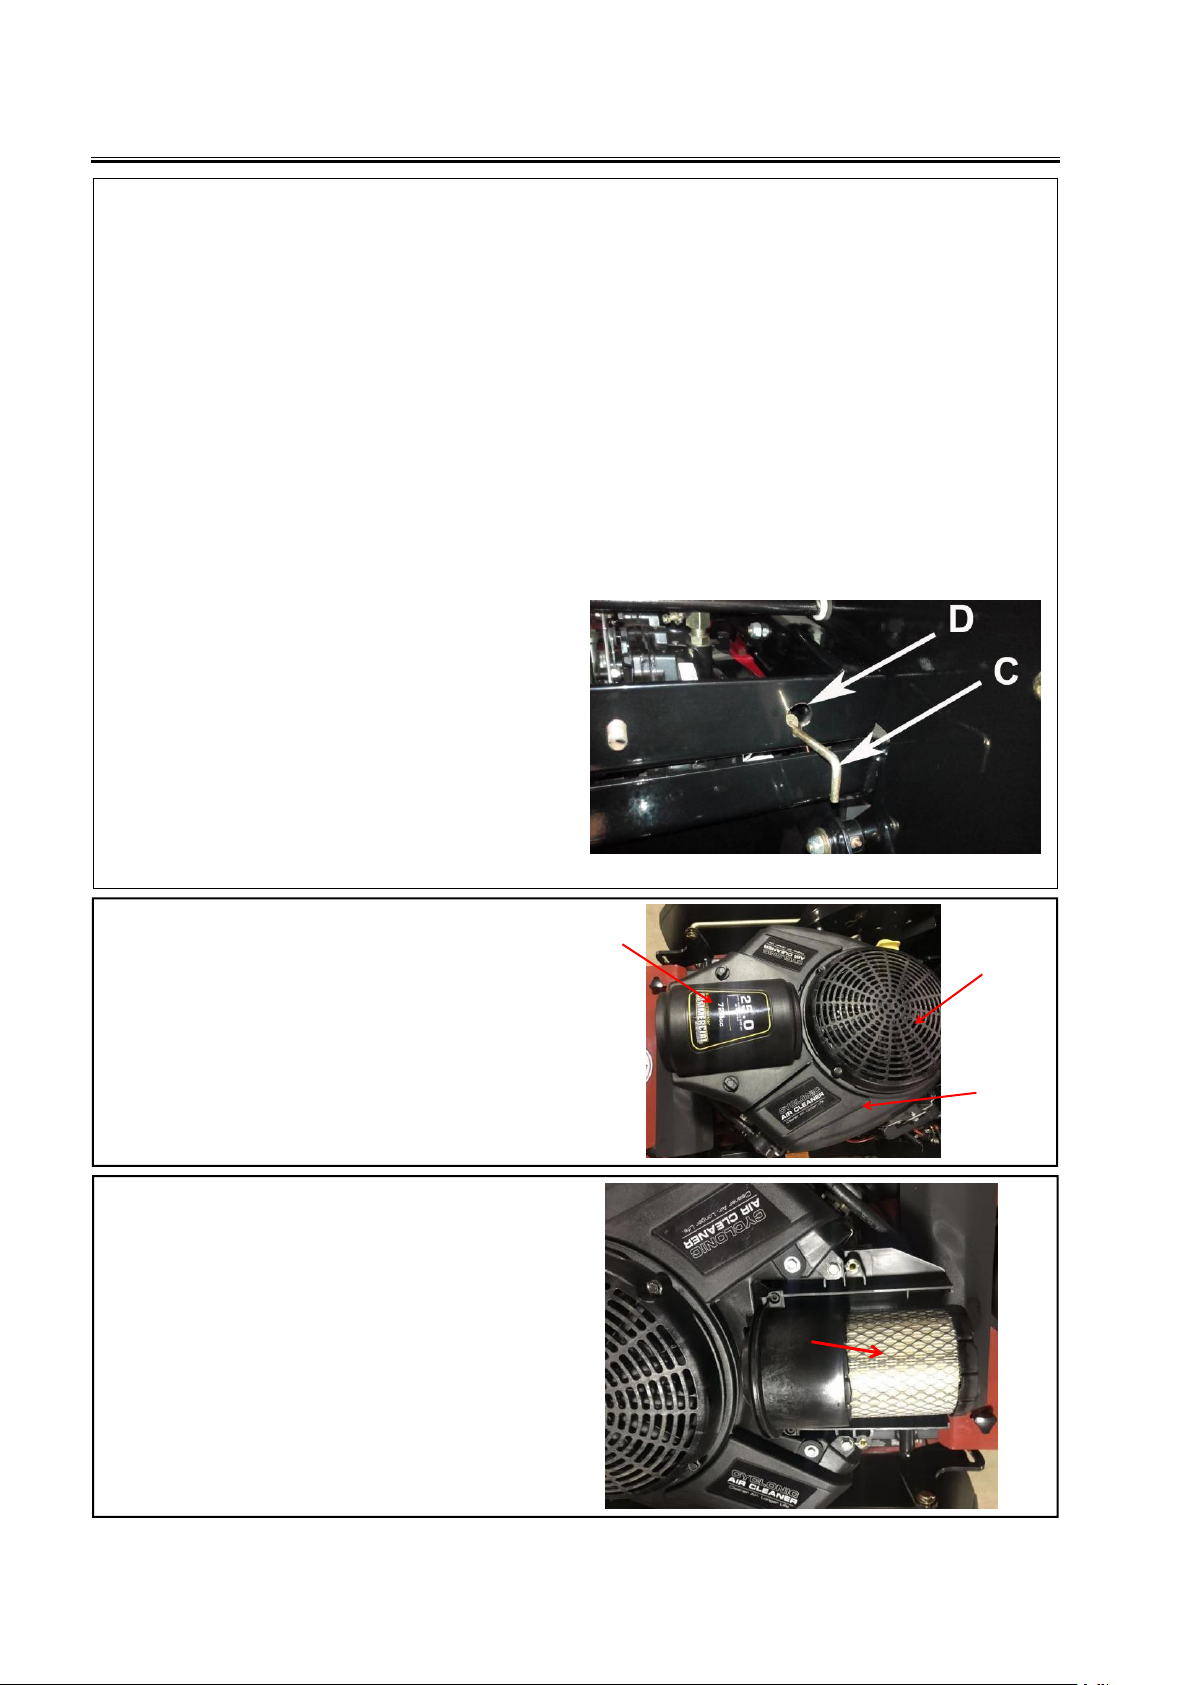
MAINTENANCE ......................................................................................................................................................10-16
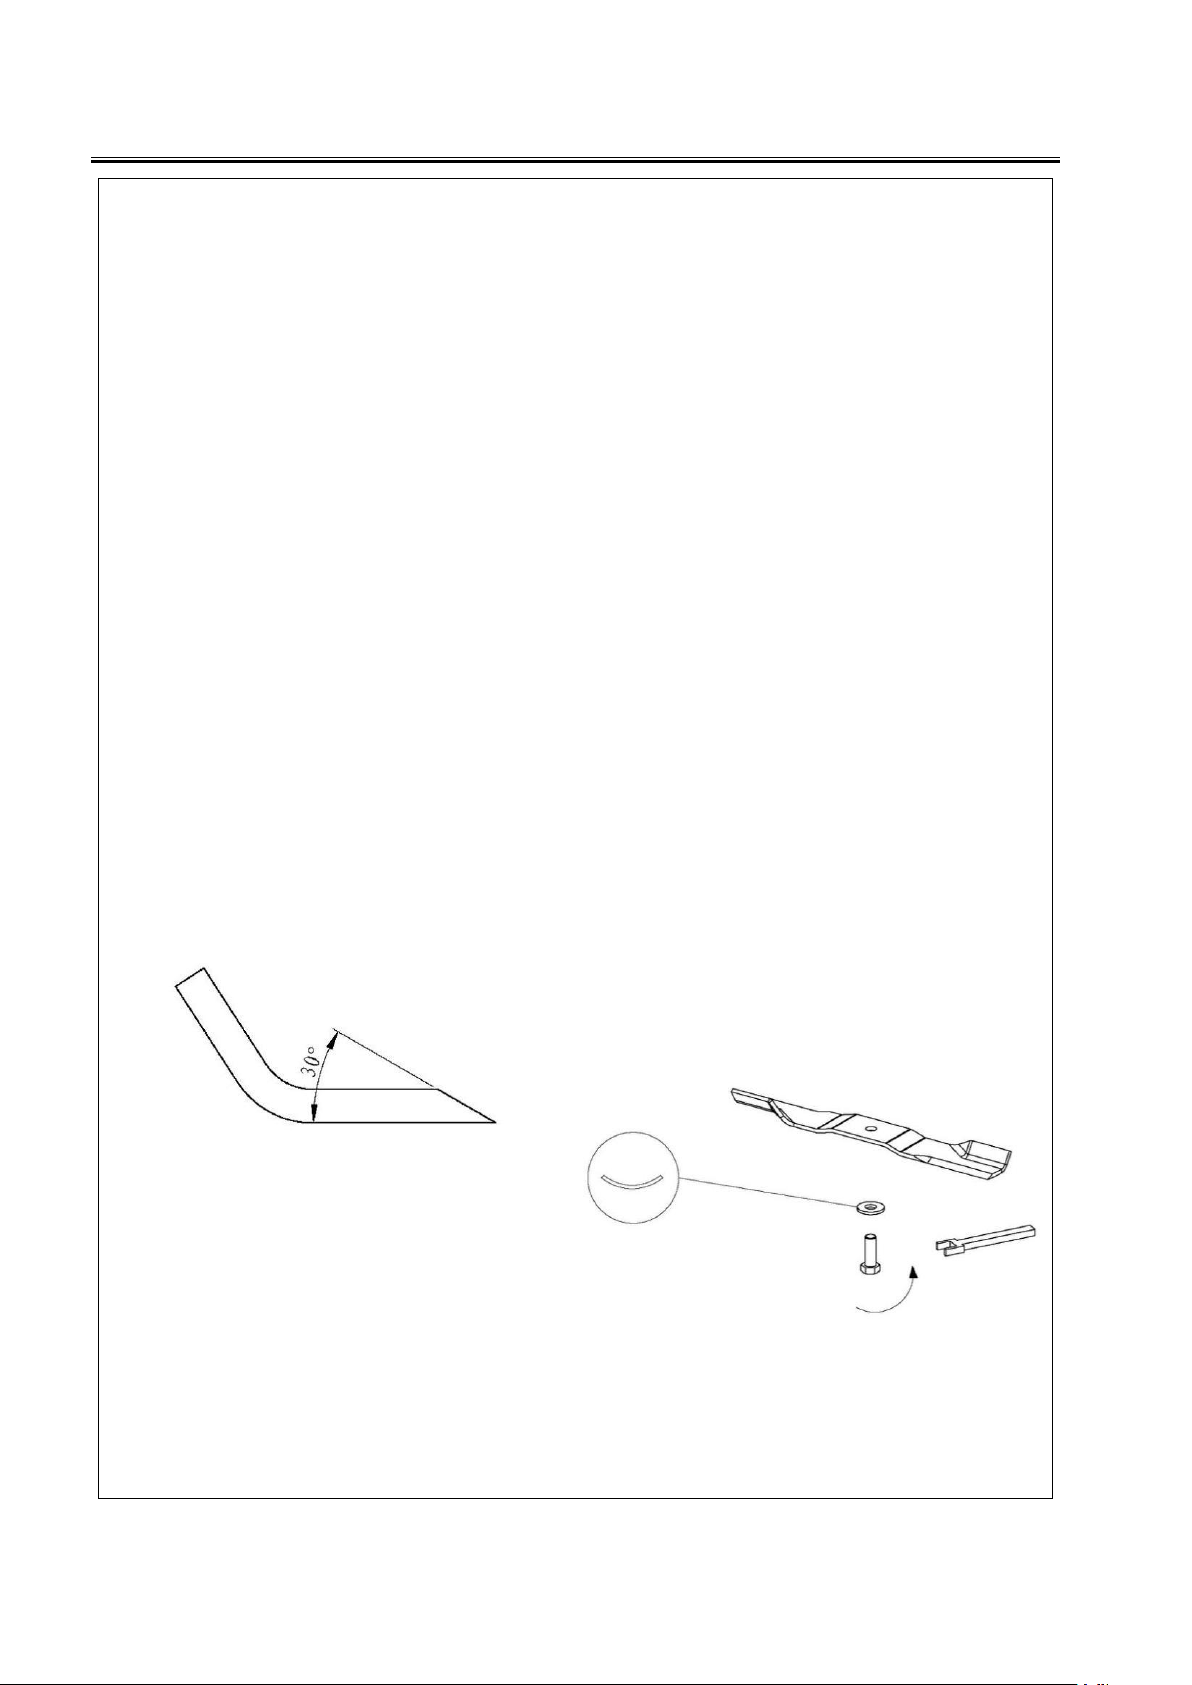
ADJUSTMENTS .....................................................................................................................................................17-18
BELT REPLACEMENT ................................................................................................................................................19
SPECIFICATIONS ..................................................................................................................................................20-21
UNPACKING INSTRUCTION..................................................................................................................................22-27
PARTS SECTION ........................................................................................................................................................28
ENGING ASSEMBLY ..............................................................................................................................................29-30
LIFTING ASSEMBLY ............................................................................................................................................. 31-32
DASHBOARD PLATE ASSEMBLY...........................................................................................................................33-34
HANDLE CONTROLS ASSEMBLY......................................................................................................................... 35-38
DECK ASSEMBLY ..................................................................................................................................................39-41
DECK IDLER ARM ASSEMBLY ....................................................................................................................... .....42-43
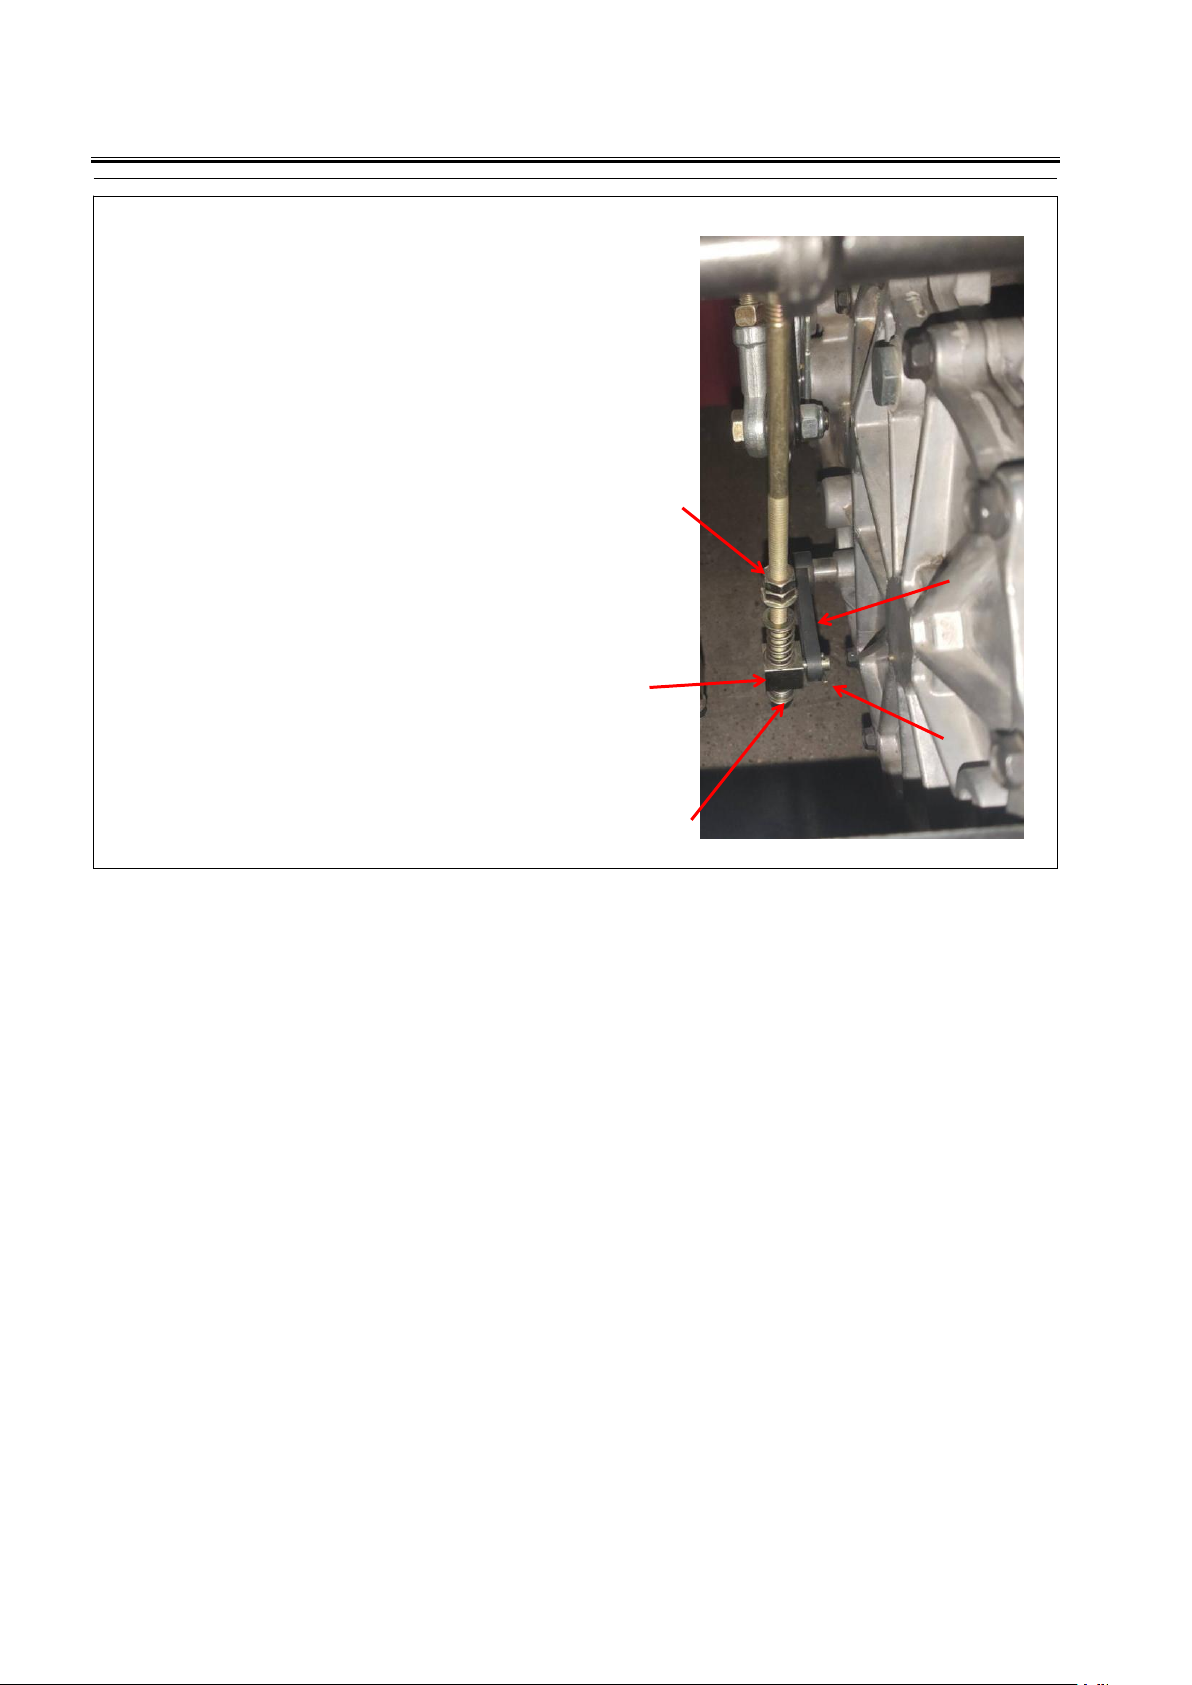
TRANSMISSION ASSEMBLY ............................................................................................................................. 44-46
FRONT WHEEL ASSEMBLY.................................................................................................................................47-48
PARKING & BATTERY ASSEMBLY........................ ....................................... ....................................................... 49-50
BATTERY BOX & ANGLE GAS TANK BRACKET COMPARISON......................................................................... 51-52
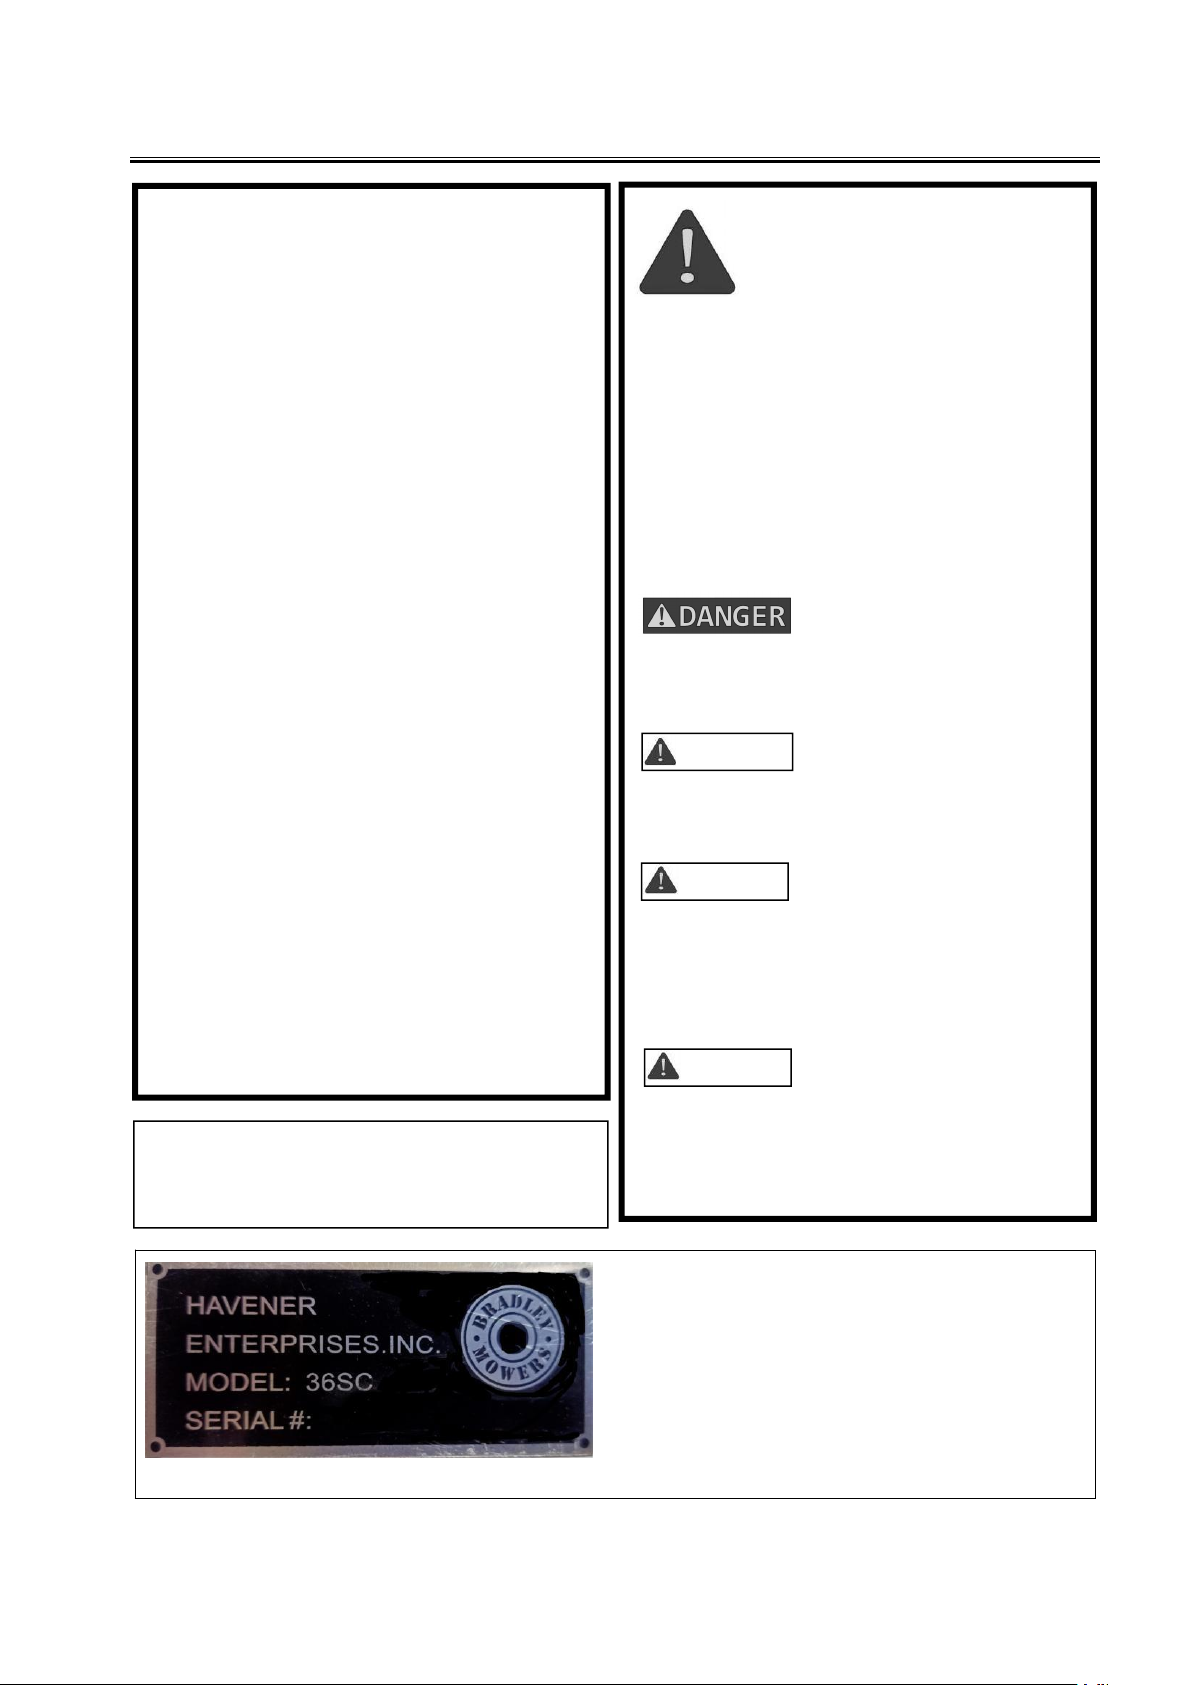
36SC SAFETY AND INFORMATION DECALS........................................................................................................... 53
BRIGGS & STRATTON WIRING DIAGRAM ............................................................................................................... 54
BRADLEY MOWERS PRODUCT REGISTRATION ................................................................................................ .. 56

Bradley Stand-On Compact Mower Owner’s Manual
1
MODEL NUMBER: This number appears on sales
literature, technical manuals and price lists.
SERIAL NUMBER: This number appears only on
your mower. It contains the model number followed
consecutively by the serial number. Use this number
when ordering parts or seeking warranty information.
Located behind rider pad on frame of unit.
This Operator’s Manual should be regarded as part of
the machine.Suppliers of both new and second-hand
machines must make sure that this manual is provided
with the machine.
This symbol means:
ATTENTION!
Your safety and the safety of others is involved.
Signal word definitions:
The signal words below are used to identify levels
of hazard seriousness. These words appear in
this manual and on the safety labels attached to
Havener Enterprises, Inc.machines. For your
safety and the safety of others, read and follow
the information given with these signal words
and/or the symbol shown above.
DANGER indicates an imminently hazardous
situation which, if not avoided, WILL result in
death or serious injury.
WARNING
WARNING indicates a potentially hazardous
situation which,if not avoided,COULD result in
death or serious injury.
CAUTION
CAUTION indicates a potentially hazardous
situation which. if not avoided. MAY result in
minor or moderate injury. It may also be used
to alert against unsafe practices or property
damage.
CAUTION
CAUTION used without the safety alert symbol
indicates a potentially hazardous situation which,
if not avoided, MAY result in property damage.
NOTICE!!!
Unauthorized modifications may present extreme
safety hazards to operators and bystanders and
could also result in product damage.
Havener Enterprises, Inc. strongly warns against
rejects and disclaims any modifications, add-on
accessories or product alterations that are not
designed, developed, tested and approved by
Havener Enterprises, Inc.Engineering Departme-
nt. Any Havener Enterprises, Inc.product that is
altered, modified or changed in any manner not
specifically authorized after original manufacture-
including the addition of "after-market" accessori-
es or component parts not specifically approved
by Havener Enterprises, Inc.-will result in the
Havener Enterprises, Inc.Warranty being voided.
Any and all liability for personal injury and/or
property damage caused by any unauthorized
modifications, add-on accessories or products not
approved by Havener Enterprises, Inc.will be
considered the responsibility of the individual(s)
or company designing and/or making such
changes Havener Enterprises, Inc.will vigorously
pursue full indemnification and costs from any
party responsible for such unauthorized post-
manufacture modifications and/or accessories
should personal injury and/or property damage
result.

Bradley Stand-On Compact Mower Owner’s Manual
2
SAFETY INFORMATION
Read This Manual Carefully and Thoroughly Before Operating Your Mower!
1. Carefully and thoroughly read the owner's manual. Allow adequate time to fully understand the
controls and operation of the equipment. Never allow anyone to operate the mower that has not read
and fully understood the owner's manual.
2. Never allow anyone to operate the mower who is not old enough, large enough, and strong enough to
safely handle the machine.
3. Do not carry passengers. Avoid mowing while people, especially children, and pets, are nearby since
rotating blades can throw rocks and other items with enough force to cause serious injury.
BEFORE USING EQUIPMENT
OPERATOR
Wear protective clothing while mowing. Long trousers and safety glasses will help reduce the risk of
injury from thrown objects. It is recommended that steel toe shoes with aggressive soles or some other
type of substantial footwear be worn to help protect your feet and maintain traction on slopes or uneven
ground.
MOWING AREA
Thoroughly inspect the area where the equipment is to be used. Look for items such as stones, sticks,
bones, wire, and other objects. When struck by the mower, these and other objects may become
projectiles that could lead to serious injury and/or death.
MOWER
For your safety and the long life of your mower, always inspect the mower before each use. Before
inspection, make sure the mower is on a flat and level surface, the blades are disengaged, the ignition
switch off with the key removed, and the spark plug wire is off of the spark plug(s) and hidden so that
accidental contact cannot be made.
GENERAL CONDITION
Walk around the mower looking for any fluid spills or leaks on or underneath the mower.
Remove any and all excessive debris, dirt, and/or fluids.
Look for signs of damage or excessive wear. Check the tightness of all nuts, bolts, pins, and
screws. Tighten any that may be loose and replace any that may have been lost during use.
Be sure the safety interlock controls are operating properly so that the engine cannot be started
unless the ground speed control lever is in neutral and the blades disengaged.
Check the mower blades for any damage or abnormal wear and replace in sets so that they are
balanced.
Check the mower cutting height to assure a high quality and even cut.
Check the tire pressure on all four (4) tires.
Check all belts for proper wear and correct tension.
Check engine oil and air filter as recommended in the engine manufacturer's operators manual.

Bradley Stand-On Compact Mower Owner’s Manual
3
OPERATION OF EQUIPMENT
1. DANGER: Gasoline is highly flammable and explosive. Do not add fuel while engine is running or is
hot. Keep open flames,sparks,and heat away from the fuel and store fuel in containers specifically
designed for that purpose.Add fuel outdoors only and if the fuel is spilled, Do not start the engine.
Manually push the mower away from the spill and immediately wipe up.
2. DANGER: Gases emitted by a charging battery are explosive.Keep heat,sparks and open flames
away from a charging battery.
3. Do not operate the engine in a confined space where dangerous carbon monoxide fumes can
collect. Carbon monoxide is odorless, tasteless, and can be fatal.
4. Mow only in daylight.
5. Make sure the mower is in neutral and the blades are disengaged before attempting to start the
engine.
6. Do not stop or start suddenly when going uphill. Never use riding attachments on slopes since
there is an increased risk that they might roll over.
7. Avoid steep slopes and use extreme caution when changing directions or speed when operating on
a slope.
8. Be extremely careful when operating on a slope or when the grass is damp or wet. Reduced traction
could cause sliding. Never mow by pulling the mower back towards you as you might slip.
9. Watch for traffic when crossing surfaces other than grass (i.e. transporting), loading a trailer or
vehicle, or when the mower is not in use.
10. Never operate the mower with defective guards, shields, or without the safety devices securely
mounted in place.
11. Never direct discharge of material toward bystanders or allow anyone near the mower while in
operation.
12. Do not change the engine governor settings or over-speed the engine.
13. Always stop the engine whenever you leave the mower, even for a moment.
14. To help reduce the risk of a fire hazard, keep the engine and the area around the engine free of grass,
leaves, or any other type of foreign material.
15. Beware of cutting edges. Always wear gloves for safety when performing blade maintenance
activities. Beware on multiple blade units since the rotation of one blade may cause the rotation of
the other blades.
16. Keep body and hands away from pin holes or nozzles that eject hydraulic fluid since fluid escaping
under pressure may have sufficient force to penetrate skin and cause serious injury. If foreign fluid is
injected into the skin, it must be surgically removed within a few hours by a doctor familiar with this
form of injury. Always use paper or cardboard and not hands to search for leaks.

Bradley Stand-On Compact Mower Owner’s Manual
4
OPERATING THE MOWER
It is recommended that before you operate the mower, you allow adequate time to fully understand the
controls and operation of the equipment. When reading this manual, it is recommended that you do so
with the equipment nearby for quick orientation, to reference the controls, and understand maintenance
adjustments.
OPERATING CONTROLS
Before continuing to read the manual, it is recommended that you take adequate time to identify the
controls of the mower.
A PTO Switch
B Safety Switch
C Left Control Lever
D Right Control Lever
E Throttle Control
F Choke Control
G Parking Brake Lever
H Ignition/Key Switch
I Neutral Lever
A
H
F
E
D
C
B
G

Bradley Stand-On Compact Mower Owner’s Manual
5
STARTING THE ENGINE (Make Sure Battery Is Fully Charged)
DANGER: Do not operate the engine in a confined space where dangerous carbon monoxide fumes can
collect .Carbon monoxide is odorless,tasteless,and can be fatal .
After going through the steps on pages 3 and 4, you are ready to start the engine.
NOTE: This unit was shipped without gas,Be sure to add fresh gas and double check the oil in the engine
before attempting to start the mower.
1. Make sure the Parking Brake Lever is in the "ON" position.
2. Make sure the Neutral lever is disengaged.
3. Make sure the PTO switch is not engaged.
4. Slide the Throttle Control to position, "Choke" if the engine is cold.
5. For Electric Start engines, turn the key clockwise to the "Start" position. Once started, the key will
return to the "Run" position. Note: Do not keep the key in the "Start" position more than a few
seconds. If engine does not start, wait 15 seconds before trying again.
6. Once the engine is running, slowly move the Throttle Control to the desired engine speed.
MOVING THE MOWER FORWARD
Caution: Become completely familiar with the operation characteristics of the mower before attempting
to use it.
1. Make sure the Left Control Lever is down out of the Neutral Lock position.
2. Gently push the controls forward. Push the Left and Right Control Levers away from you an equal
amount to go straight. It is recommended you start slow and increase your speed as you increase
your comfort with the controls.
3. Allowing the Left and Right Control Levers to return to a center neutral position allows the mower to
stop moving. Note: if the operator lets go of the Left Control Lever while the blades are engaged
And/or the mower is moving, the safety interlock system will stop the engine. To restart the mower,
reset the Blade Control Lever to "Off "and the parking brake to the "On" position.
NOTE: Top speed is suggested only for transport.
MOVING THE MOWER IN REVERSE
Slowly and evenly pull the Left and Right Control Levers toward you. The more the Control Levers are
pulled toward you, the faster you will move. It is recommended to move in reverse slowly.
NOTE: When moving in reverse, be aware of your surroundings by looking down and behind.

Bradley Stand-On Compact Mower Owner’s Manual
6
STOPPING THE MOWER
Gently let the Left and Right Control Levers return to their neutral, at rest position. If the operator is
leaving the operator position for any reason, disengage the blades, shut off the engine, engage the
parking brake, and remove the key.
NOTE: Park the mower on level ground. If it is not possible to do so, be sure to the block the wheels to
prevent the mower from rolling away.
TURNING THE MOWER
To turn the mower in the desired direction, gently pull the chosen direction's Control Lever toward you
(i.e. to turn right, pull the Right Control Lever toward you). The more a particular Control Lever is pulled
toward you, the sharper the turn the mower will make.
MOWING
DANGER: Thoroughly inspect the area where the mower the mower is to be used.Look for items such as
stones, sticks,wire,and other objects. When struck by the mower,these and other objects may become
projectiles that could lead to serious injury and /or death.Clear area of all debris and keep people and pets
away.
DANGER: Do not operate the mower with defective guards or shields. Do not operate the mower without
the safety devices securely in place.
For the highest quality of cut and performance, mow with the engine at full throttle. Quality of cut may
be determined by the ground speed and speed of the mower. Generally, the slower the mower travels
across the terrain. the better the cut.
1. With the engine running and the mower placed at the beginning of the area to be mowed, make
sure the left control lever is down and out of the neutral lock position.
2. Pull the PTO switch to engage the blades.
3. To disengage blades, come to a complete stop and pull the Blade Control Lever to the "Off" Position.
MOVING THE MOWER WITH THE ENGINE OFF
1. Engage the Parking Brake Lever by moving it to the "On" position.
2. Engage the Neutral Lever by moving it in the direction of the arrow.
3. Disengage the Parking Brake Lever by moving it to the "Off " position.
4. Move the mower.
NOTE: Be careful of the weight of the mower as you move it without using the engine.
5. Before starting the mower,make sure the driving controls are in neutral with left control in "up"
position,the parking brake is engaged and the neutral lever is disengaged.
PARKING THE MOWER
Pull the Parking Break Lever to the "On" position.
NOTE: Gently engage the braking mechanism.Excessive force may cause damage.
Caution: If you are not familiar with the operation of the Hydro drive and zero turn feature,practice turning
and maneuvering with the controls before engaging the blade.

Bradley Stand-On Compact Mower Owner’s Manual
7
TOOLS REQUIRED FOR ASSEMBLY
Ratchets: 16mm, 17mm
Sockets: 16mm, 17mm
Wrenches: 16mm, 17mm
Tire pressure gauge
Blocks (for deck leveling)
NOTE: All references below to the "right" or "left" are with respect to an operator at the controls.
1. UNCRATE UNIT
Discard packing materials. Remove and discard shipping brackets. Tighten caster wheel axle bolts
against caster axle spanner bushings.
2. Set rear tire pressures to 20 p.s.i. Tires are overinflated for shipping. Front tires should be 40 p.s.i.
FINAL PREPARATIONS
Check the engine and hydraulic oil levels. Top up with the correct oil if necessary. Use SAE 5W30
motor oil for the engine. Use fresh, clean SAE 20W50 motor oil for the hydraulic system. After running
for one hour, let hydraulic system oil cool. When cold, check levels.
WARNING: Battery acid is caustic and fumes are explosive and cause serious injury or death.
Use insulated tools, wear protective glasses or goggles and protective clothing when working with
batteries. Read and obey the battery manufacturer's instructions.
Be certain the ignition switch is OFF and the key has been removed before servicing the battery.
a) Verify battery polarity before connecting or disconnecting the battery cables.
b) When installing the battery, always assemble the RED, positive (+) battery cable first and the ground,
BLACK, negative (-) cable last.
c) Tighten cables securely to battery terminals and apply a light coat of silicone dielectric grease to
terminals and cable ends to prevent corrosion. Keep terminal covers in place.
Read Operation and Safety Manual before starting.
Deck can be adjusted to allow for the best horsepower, best quality of cut, or best striping.
See deck leveling procedure in the Adjustments Section in this manual to set as desired.
Run engine at full RPM for 5 minutes before engaging blades to allow the engine to be fully lubricated
before load is applied.
Check the hydro stat neutral adjustment. Neutral is set at the factory but may require readjustment if
air trapped during the initial oil fill has worked out of the system. See Adjustments Section later in this
manual.
Do not use the machine without an approved grass collector, the grass discharge chute or mulching
plates correctly fitted.

Bradley Stand-On Compact Mower Owner’s Manual
8
MAINTENANCE
OPERATION
Maintenance is an ongoing job. These intervals are maximum times between
maintenance operations. Perform more often under severe conditions.
FIRST 5
HOURS
BEFORE
EACH
USE
EVERY
25
HOURS
EVERY
50
HOURS
EVERY
100
HOURS
EVERY
200
HOURS
YEARLY
ENGINE
Consult the engine manual for additional information and instructions
Check/Top Up
Oil Level
X
Check For Leaks
X
Clean Air Intake
Screen
X
Clean Air Cleaner
Precleaner
X
Clean Air Cleaner
Element
X
Clean Cooling Fans
X
Change Oil And
Filter
X
See engine manufacturer’s manual
Check/Replace
Spark Plugs
X
TRANSAXLE
Check Oil Level
X
X
Check For Leaks
X
X
Change Oil And
Filter
X
MACHINE
Check Interlock
Operation
X
Check Tire
Pressures
X
Check/Top Up
Battery
X
Lubricate All Points
X

Bradley Stand-On Compact Mower Owner’s Manual
9
NOTES
GENERAL
DATE
HRS
DATE
HRS
DATE
HRS
DATE
HRS
DATE
HRS
DATE
HRS
Check Tire Pressures
Lubricate All Points
Check Nuts &Bolts
ENGINE
Check Oil Level
Change Oil
Clean
Air Cleaner Element
Clean Cooling Fans
Replace
Air Cleaner Element
Clean &Gap
Spark Plugs
TRANSAXLE
Change Oil And Filter
NOTE: After first 5 hours of operation change engine oil and filter

Bradley Stand-On Compact Mower Owner’s Manual
10
CHECK DAILYMAINTENANCE RECORD
Operator Presence Interlock System-Start Operation
For the engine to crank, the parking brake must be ON, the PTO (blades) OFF. Stand on the operator
platform and check, one by one, if the engine will crank with the parking brake OFF or the PTO (Blades)
ON.
Operator Presence Interlock System-Run Operation
In order for the engine to run, the operator must either be standing on the platform, or walking behind the
unit with the platform up, the parking brake in the OFF position and the LH control handle held down out of
the neutral position.
The engine may also run if the parking brake is in the ON position, the LH control handle is in the
NEUTRAL position rotated up, and the PTO (blades) are OFF.
To check:
1. Start the engine and run at 1/2 throttle.
2. With the LH control handle in the NEUTRAL position rotated up, move the parking brake lever to OFF
and turn the PTO (Blades) ON. Each check should kill the engine after 1/2 second delay. (A 1/2 second
delay is built into the system to prevent engine cut-out when traversing rough terrain.)
Repair machine before using if the Operator Presence Interlock System does not operate correctly in start
or run. Contact your authorized Bradley dealer.
Hardware
Tighten any nuts and bolts found loose. Replace any broken or missing cotter pins. Repair any other
problems before operating.
Tire pressure
Rear Tires should be kept inflated at 20p.s.i. Improper tire inflation can cause rapid tire wear and poor
traction. Uneven inflation can cause uneven cutting. Front tires should be 40p.s.i.
BATTERY-AGM TYPE BATTERY SUPPLIED
WARNING: Battery acid is caustic and fumes are
explosive and can cause serious injury or death.
Use insulated tools, wear protective glasses or
goggles and protective clothing when working with
batteries. Read and obey the battery manufacturer' s
instructions.
Be certain the ignition switch is OFF and the key has
been removed before servicing the battery.
1. Verify battery polarity before connecting or
disconnecting the battery cables.
2. When installing the battery, always assemble
the RED, positive(+)battery cable first and the
ground, BLACK, negative(-)cable last.
3. When removing the battery, always remove the
ground, negative(-) cable first and the red,
positive(+)cable last.
4. AGM type battery. Use AGM charger when
charging.
5. Clean the cable ends and battery posts with
steel wool. Use a solution of baking soda and
water to clean the battery. Do not allow the
solution to enter into the battery cells.
6. Tighten cables securely to battery terminals
and apply a light coat of silicone dielectric
grease to terminals and cable ends to
prevent corrosion. Keep terminal covers in
place.

Bradley Stand-On Compact Mower Owner’s Manual
11
LUBRICATION
Every 50 hours of operation, lubricate the following points (1-4) with grease:
1. Deck lift pivots (4 points)
2. Pull arm pivots (4 points)
3. Deck idler pivot (1 point)
4. Caster wheel pivots (2 points)
Every 500 hours or once a year:
5. The pedal pivots (2 points)
NOTE ON BLADE SPINDLES 一The blade spindles on these machines use a superior sealed bearing
that does not require re-lubrication
5
3
4
2
1
1

Bradley Stand-On Compact Mower Owner’s Manual
12
D
ENGINE OIL
Do not perform engine maintenance without the
engine off, spark plug wires disconnected and
PTO disengaged.
AFTER FIRST FIVE (5) HOURS
While the engine is warm:
1. Release the oil drain hose assembly from the engine
clip J. Lay hose assembly over the frame edge.
2. Remove the screwed plug Dfrom the tip of the hose
assembly to allow oil to drain from the engine.
Dispose of used oil in accordance with local
requirements.
3. Clean plug connector and screwed plug D. Replace
screwed plug back into plug connector. Replace
hose assembly back into engine clip.
4. Change oil filter.
5. Fill the crankcase with fresh oil to the full mark. Do
not overfill. See engine manual for oil specifications.
DAILY
1. Check oil level with the dipstick.
2. If oil is needed, add fresh oil of proper viscosity
and grade. See engine manual for oil specifications.
Do not overfill.
3. Replace dipstick before starting engine.
PERIODIC OIL CHANGES
1. See engine manual for oil and filter change intervals
after the break-in period .
2. Follow instructions for first oil change, above.
SPARK PLUGS
Remove each plug and check condition.
Good operating conditions are indicated if the plug has a light coating of grey or tan deposit.
A white blistered coating indicates overheating. A black coating indicates an “over rich” fuel mixture.
Both may be caused by a clogged air cleaner or improper carburetor adjustment.
Do not sandblast, wire brush or otherwise attempt to repair a plug in poor condition. Best results are
obtained with a new plug.
Set plug gap as specified in engine manual.
FUEL FILTER
An in line fuel filter is located in the fuel supply line. Inspect at every oil change to make sure it is clean and
unobstructed. Replace if dirty.
D
J

Bradley Stand-On Compact Mower Owner’s Manual
13
TRANSAXLES
WARNING
Inattention to proper safety, operation, or maintena-
nce procedures could result in personal injury, or
damage to the equipment.
Perform transaxle maintenance with the engine
off, spark plug wires disconnected and PTO
disengaged .
TRANSAXLE FLUID CHANGE
Change the transaxle fluid every 200 hours of oper-
ation. It is essential that the exterior of the transaxle
be free of debris, prior to fluid maintenance.
1. Remove the three 1/4" filter guard screws and
filter guard A. Remove the oil filter Bfrom the
transaxle and discard. Dispose of used oiI in
accordance with local requirements.
2. Wipe the filter base surface off and apply a
film of new oil to the gasket of the new
replacement filter. Install the new filter by
hand, turn 3/4 to one full turn after the filter
gasket contacts the filter base surface.
3. Re-install the filter guard and torque the three
screws to 65 in. lbs. each.
4. Remove cap C, fill the transaxles through the
expansion tank Dwith approximately 2 quarts
of SAE 20W-50 engine oil PER TRANSAXLE .
CAUTION
Do not overfill! If you overfill the transaxle while
the unit is "cold", it may overflow as it reaches
normal operating temperatures. The oil level should
not be above the manufacturer's suggestions. The
oil level should be filled to the full cold line on the
overflow tank. This will allow the space needed for
the oil to expand as it warms up.
5. After starting engine, check the fluid level and
continue to add oil to overflow tank Dto fill line
on tank.
6. Purge the transaxles, following the purging
procedures.
C
D
A
B

Bradley Stand-On Compact Mower Owner’s Manual
14
PURGING TRANSAXLES
Due to the effects air has on efficiency in hydrosta-
tic drive applications, it is critical that it be purged
from the system.
These purge procedures should be implemented
any time a hydrostatic system has been opened to
facilitate maintenance or any additional fluid has
been added to the system.
Purging may be required if the unit shows any of
the following symptoms:
- Noisy operation.
- Lack of power or drive after short term use.
- High operation temperature, excessive oil
expansion.
1. Check the transaxle fluid, fill to proper level, if
required. Should be to the FuII Cold Line.
2. Raise the drive wheels off the ground. Support
unit with Jack stands or other suitable means.
3. Open bypass valves. To open the bypass
valves, move the parking brake to any OFF
position, then lift and pull bypass control rod C
through the large opening D, until the control
rod stop is past the opening. Drop rod Cinto
the small opening to lock in place. Repeat for
the other bypass control rod. Start engine,
slowly move the control levers in both forward
and reverse directions 5 to 6 times. As air is
purged from the unit, the oil level will drop.
4. With the bypass valve closed, and the engine
running, slowly move the control levers in both
forward and reverse directions 5 to 6 times
5. Stop engine. Check the transaxle fluid level,
add fluid as required.
6. It may be necessary to repeat steps 3-5 until
all the air is completely purged from the
system. When the transaxle moves forward
and reverse at normal speed, purging is
complete.
HEAVY DUTY CYCLONIC AIR CLEANER
Clean and replace the air cleaner element as
specified in the service chart. Uneven running,
lack of power or black exhaust fumes may
indicate a dirty air cleaner.
To replace air cleaner elements:
1. Remove end cover Xand remove existing
cleaner elements.
2. Insert new elements Yand replace cover.
ENGINE COOLING
Continued operation with a clogged cooling system
will cause severe overheating and can result in en-
gine damage.
Daily: Clean air intake screen Son air cooled
engines.
Every 100 hours: Clean cooling fins beneath
blower housing Hwith reference to inform-
ation in the engine manufacturer's manual.
Y
S
H
X

Bradley Stand-On Compact Mower Owner’s Manual
15
SPECIFIC TORQUES
BLADE BOLTS
110 FT-LBS(150 Nm)
WHEEL LUG NUTS
75-100 FT-LBS(102-136 Nm)
CLUTCH MOUNTING BOLT
50 FT-LBS(68 Nm)
TRANSAXLE PULLY BOLT
28-41 FT-LBS(38-56 Nm)
TRANSAXLE DRAIN PLUG
15-20 FT-LBS (20-27 Nm)
TRANSAXLE FILTER
8-12FT-LBS(11-16 Nm)
CLEANING MACHINE
Clean the machine after use. Compressed air is
recommended. Do not use a pressure washer. The
machine will run cooler and last longer if kept free
of clippings and other debris. A clean machine also
reduces the risk of fire due to accumulation of
combustible debris and chaff.
Brush or blow clippings and debris off the cutter-
deck and engine deck. Clippings and debris should
be kept from accumulating around the exhaust
system and under the exhaust guards. This can be
done by using compressed air. DO NOT use a
pressure washer.
WASHING MACHINE
CAUTION: Improperly washing a machine can
cause water to enter bearings and other
components. This can greatly reduce component
life
Do not use a pressure washer. Do not direct
water at bearings or seals. High pressure
water can blow past seals and enter sealed
bearings.
Allow the machine to cool down before
washing. Water on a warm machine can be
sucked into sealed bearings as they cool.
Avoid getting electrical connections wet. Water
can cause electrical faults and corrosion of
electrical components.

Bradley Stand-On Compact Mower Owner’s Manual
16
BLADE REMOVAL
Follow these instructions to prevent injury during
blade removal :
1. Loosen with box wrench or socket and long
breaker bar. To gain additional leverage, slip
long pipe or thick-walled tube over breaker
bar or wrench.
2. Clamping the spindle with a wrench as
shown, to prevent blade from turning
when loosening.
3. Wear thickly padded gloves. Keep hands
clear of blade path. Blades may rotate when
bolt releases.
SHARPENING
Blades may be sharpened by filing or grinding.
Inspect blades before sharpening.
Replace bent or cracked blades.
Replace blades when the lift portion has worn
thin.
Maintain cut angle at 30°.
Do not overheat blades when sharpening.
Always use Bradley blades. Use of another
manufacturer’s blades may be dangerous.
BLADE BALANCE
Blade balance must be maintained at 5/8 oz-in
(1 9.4 g-cm) or less. Failure to keep blades
balanced causes excess vibration, wear, and
shortened life of most components of the
machine.
To balance a blade:
1. Sharpen blade first.
2. Balance the blade at the center.
3. Attach a 1/8 oz (3.9 g) weight at a distance
5" (127 mm) from center on the Iight end.
This should make the light end the heavy
end :
If it does, the blade is balanced .
If does not, file or grind the heavy end
until the addition of the weight makes the
light end the heavy end.
BLADE INSTALLATION
1. Wear thickly padded gloves to prevent cuts
from the sharp blade.
2. Insert the blade bolt, in order, through the
spring washer (cup side toward the blade,
as shown), the plain washer, the blade, and
the blade spacer.
3. Install assembly on the blade spindle.
4. Torque the blade bolt to 110 ft-lbs.

Bradley Stand-On Compact Mower Owner’s Manual
17
BELTS
All belts are tensioned by spring loaded idlers. No adjustment is required.
DECK LEVELING
The deck roller needs to be installed at the top hole
1. Park the machine on a smooth, level surface, pull the
cut lever E to the highest slot.
2. Place two 1-3/16" block under the rear deck and a
1-1/16" blocks under the front deck .
3. Remove the pin B to the lowest cutting height, and
then lower the deck onto the blocks.
So that the deck top is pitches forward 1/8".
4. Loosen nuts on bolts G. Move bolts in slot to remove
slack in chain.
5. Tighten nuts on bolts G.
NOTE: The front and rear of the deck are at different
heights.
A 1/8" forward pitched deck provides the best horsepower.
A level deck provides the best quality of cut.
A 1/8" rearward pitched deck provides the best striping.
Certain grass types and conditions may vary.
CUTTING HEIGHT
The cutting height is set by moving height of cut pin B
to the hole designated for the height of cut desired.
To change the height of cut:
1. Lift the deck to the highest position using the lift
handle E.
2. Move pin Bto the selected hole.
3. Lower the deck until the lift handle Eis stopped by the
pin.
NOTES
Height of cut may vary due to the amount of tread on
the tires, tire diameter or inflation pressure.
For best results, adjust the deck rollers for the height
of cut to be used (see below).
E
1-1/16"
B
E
G
B
1-3/16"
BLADE
HEIGHT

Bradley Stand-On Compact Mower Owner’s Manual
18
Note: Use belts designed for commercial mowers.
PARKING BRAKE
NOTE: There are 2 brakes, 1 on each transaxle.
The parking brake should keep the machine from
Moving . To check the parking brake, park the
machine on a level surface, open the bypass
valves (See purging transaxles section for
instruction) and set the parking brake to ON.
Attempt to move the machine forward and
backward by pushing it. If the machine moves,
adjust the parking brake linkage as follows:
1. Move the machine to a flat horizontal surface.
2. Move the parking brake handle to the OFF
position.
3. Insure that the brake Iinks Kare rotated
toward the front of the machine. If not, remove
cotter pin Pfrom each brake link Kand brake
rod R. Slide brake rod Rout of each brake
link K. Reinsert rod Rinto each link Kand
secure with cotter pin P.
4. Loosen nut Mand tighten brake nut Nas
needed. Then tighten nut M.
5. Retest to insure the machine does not move.
M
P
R
K
N
Other manuals for BRADLEY MOWERS 36
2
Table of contents
Other Havener Enterprises Lawn Mower manuals

Havener Enterprises
Havener Enterprises BRADLEY MOWERS 36 User manual

Havener Enterprises
Havener Enterprises BRADLEY MOWERS 48 User manual

Havener Enterprises
Havener Enterprises BRADLEY MOWERS 61SC User manual

Havener Enterprises
Havener Enterprises BRADLEY MOWERS 32 User manual

Havener Enterprises
Havener Enterprises BRADLEY MOWERS 36 User manual

Havener Enterprises
Havener Enterprises EVEN CUT 22DP User manual