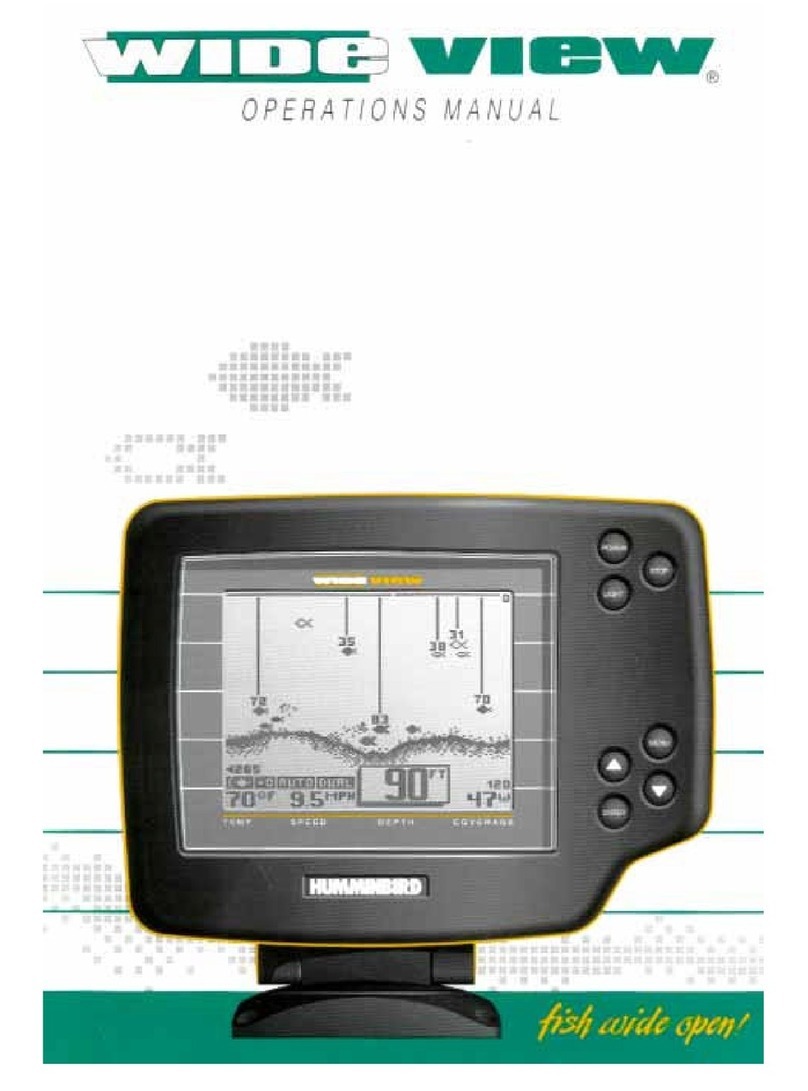
Hawkeye Mfg FF3300P User manual

SEN
SAVE
SEN
BAT.
˚C
˚F
LOW
Ft
M
HI
FF3300P
PORTABLE FISH FINDER
SETUP
ENTER
SEN
SAVE
SEN
BAT.
˚C
˚F
LOW
Ft
M
HI
Installing the Batteries
1. Use a screw driver to open
the battery door by turning
the locking screw counter
clockwise until the door
can be removed (Figure 1)
2. Install 4 “AA” batteries. Be
certain to align the batteries
as per the diagram within
the battery compartment.
3. Close the battery door com-
pletely, and turn the locking
screw clockwise until snug
before continuing.
1. Plug the transducer connector
in the display housing (Figure 4).
Be sure the plug pins are
aligned properly to match the
display plug port.
2. Once the connector is plugged
in, slide the fastener housing
flush against the display and
lock it by turning the locking
screws clockwise until tight (be
certain to align the screws prop-
erly to prevent stripping and do
not over tighten).
1. To Remove, turn the locking screw
on the belt clip
until the slot on
the screw is
unlocked (Figure
3) Pull the belt
clip straight off by
grasping the the
belt clip by the
locking screw
(Figure 2).
Installing the Neck/Safety Strap
Fasten the neck/safety strap
to the hook built into the dis-
play housing by using the
included clip. (Figure 5). Use
the strap to hang the fish find-
er from your neck, fasten it to
your body, or any object that
will prevent accidental dam-
age during operation.
Connecting the Transducer Cable
Adjusting the Transducer Float
The transducer float must be
adjusted so that it is between
a minimum of 6 inches away
from the transducer but can be
further (Figure 6).
1. Pull out the rubber stopper.
2. Adjust float so that it is 6 to
10” from the transducer.
3. Replace the rubber stopper.
6”
Using the Transducer
1. Toss the transducer and float assem-
bly into the water at your desired fish-
ing location. To toss, place the trans-
ducer and float in your hand, and pitch
underhand. Do not throw the trans-
ducer by the cable as this will
cause unrepairable damage. Before
tossing, be certain that the cable is
free from tangles and is not wrapped
around anything.
2. Use a pole to guide
the transducer to
a desirable posi-
tion (Figure 7) or
add floats on the
cable to allow the
cable to float on
top of the water
(Figure 8).
3. To retrieve the transducer and
float simply pull in the cable
being certain to neatly wind up
the excess cable.
Figure 7:
Setup Key
Enter Key
ON/OFF,
Reset, &
Simulator Key
LED Indicator
Setup
Indicators
Window
Refer to Figure 10 to Set the Following Features:
Turning the Power ON/OFF
• To turn the Power ON, PRESS the ON/OFF Key (the LED indi-
cator will light up).
• To turn the Power OFF, PRESS and HOLD the ON/OFF Key for
3 seconds.
• During normal operation the screen can be reset by pressing
the ON/OFF Key
Turning the Simulation Mode ON/OFF
• To turn the simulation mode ON, press and hold the
ON/OFF button for 3 seconds while the screen is OFF.
• To turn the simulation mode off, turn the power off and
back on again as per the instructions in the “Turning the
Power ON/OFF Section.
(The simulation mode will indicate variable depth, bottom
contour, and fish readings on the screen)
Accessing the Feature Setup
• Press and Hold the SETUP Key for 3 seconds.
• The BAT. SAVE indicator will blink in the Setup Indicators
Window.
• Cycle through the features by pressing the SETUP key.
(the indicator will blink for the current feature to be set)
• To activate or deactivate a feature press the ENTER key.
(When a feature is activated, the indicator will appear.
When a feature is deactivated, the indicator will not appear)
• The screen will automatically return to normal operation
after 5 seconds if no keys are pressed.
Battery Save Feature
• Battery Save activated will update the display every 10
seconds, which will greatly increase the battery life of the
fish finder.
Sensitivity Feature
• Low Sensitivity – use this feature to eliminate clutter from
the screen when fishing in muddy water, heavy vegetation,
or water which contain a lot of debris
• High Sensitivity – use this feature to detect small fish, fish in
deep water, or fish hiding near the bottom
Backlight Feature
• Turning the backlight feature ON will keep the screen illumi-
nated all the times. This feature will greatly reduce the bat-
tery life of the fish finder, so it should only be used during
low light conditions.
• When the backlight feature is OFF, the backlight will still illu-
minate for 3 seconds when a key is pressed.
Fish Alarm Feature
• The fish alarm sounds when a group of fish are indicated.
• Two distinctive alarm patterns indicate the size of the fish
• 2 alarm tone bursts indicate small fish.
• 4 alarm tone bursts indicate large fish
ABCDEFG
H
I
J
K
L
ATemperature Readout (FF3300PX Only)
BBattery Save Feature ON
CSensitivity set to Hi
DSensitivity set to Low
EBacklight ON
FFish Alarm ON
G( ) – Full Battery
( ) – Low Battery
( ) – Very Low Battery
H Fish Depth Scale
IDepth Readout
JBottom Contour Indicators
KFish Indicators
LSmall Fish Indicators
FF3300P & FF3300PX
Instruction Manual
Thank you for purchasing
the HawkEyeTM Portable Fish
finder, and welcome to the
innovations of NorCross
Marine Products, Inc.
EENNJJOOYYYYOOUURRFFRREEEEDDOOMM......
Before You Fish
Get to know the fishing regulations and habits of
the fish that you are targeting by visiting your local
tackle center, bait shop, library, or website. A little
research can be a valuable lesson, that will allow you
to utilize the features of your fish finder, to make fish-
ing more enjoyable for you, and your fishing buddies.
The FF3300PX’s temperature sensor is located in the trans-
ducer housing. Adjusting the float level will allow you to view
temperature readings at variable depths. Knowing your preys
feeding habits in relation to water temperature will allow you
to fish at the exact depth that is optimal for strikes.
Installing/Removing the Belt Clip
Locked
Unlocked
Figure 1:
Figure 2:
2. To Replace repeat step 1 in the reverse order.
Figure 3:
Figure 4:
Figure 5:
Figure 6:
Figure 8:
Figure 9:
Figure 10:
Figure 11:
Using the Fish Finder for Ice Fishing
1. Clear away snow to expose the ice surface, making sure the
surface is smooth.
2. Place a small amount of liquid water on the ice and set the
transducer on the water allowing the transducer to freeze to
the ice. If there are any air pockets between the transducer
and ice, or the water below the ice, the fish finder will not work
properly and will require you to cut a hole in the ice to use.
3. (a) To remove the transducer from the frozen ice, gently tap the
transducer at the base with your hand. (b) If it will not come
loose, spray a small amount of water on the ice surface around
the transducer repeat steps (a) and (b) until the transducer is
easily removed. Never use a blunt object to strike the trans-
ducer as this will cause damage to the transducer.
Using the Fish finder Thru a Boat Hull?
The FF3300P(PX)’s advanced sonar capabilities allows the trans-
ducer to “shoot thru” the bottom of a boat or canoe. The hull
must be made out of solid fiberglass, or a maximum of 1/8” alu-
minum, and be in direct contact with the water, with no air pock-
ets. The transducer will not work thru wood, plastic, or any com-
posite material.
1. To “Shoot Thru” the hull of a boat, use one of the following:
a) place the transducer in .5 inches of water against the hull
bottom.
b) place the transducer in a plastic bag that is full of water and
place against the hull bottom.
c) coat the face of the transducer with petroleum jelly and
press it against the hull bottom with a twisting motion.
d) refer to our website for more advanced instructions.
If you have questions about the opera-
tion of this unit please visit our website
at www.norcrossmarine.com. If you
need further assistance please call us at
888–NorCross Monday—Friday 8 a.m. to
5:30 p.m. Eastern Time
Do not allow the cable to sink to the bottom as
it may become entangled in debris (Figure 9).

SEN
LOW
SEN
LOW
SEN
LOW
NORCROSS 2 YEAR LIMITED WARRANTY
To be eligible for warranty coverage your fish
finder must have a copy of the Warranty
Registration Card on file with NorCross Marine
Products, Inc., so be sure to submit the included
registration card within 10 days of purchase.
You may also register on our website.
NorCross Marine Products, Inc. warrants, to the orig-
inal purchaser, this product to be free from defects in
materials and workmanship for Two (2) Years from
the date of purchase. If the unit fails to perform as
described in the product’s written specifications, due
to a defect in materials or workmanship, we will
repair it free of charge to the customer for parts or
labor. The customer, however, is responsible for any
costs associated with returning the unit to NorCross.
This warranty is void if damage or malfunction is due
to abuse, misuse, accident, failure to reasonably
maintain, improper installation or use, or unautho-
rized alteration or repairs. Norcross retains the
exclusive right to repair or replace the unit at its sole
discretion, and holds this right as the exclusive rem-
edy available to the customer against NorCross for
any defect, malfunction, or non-conformity concern-
ing the product, or for any loss or damage resulting
from any other cause whatsoever. Norcross will
respond to all warranty claims within a reasonable time
after receipt of the unit from the original purchaser, with
such response time not to exceed thirty days without
written notification of delay to customer.
To obtain warranty service, securely pack the unit, and
mail prepaid via insured post to: NorCross Marine
Products, Inc., Warranty Department, 1629 Prime Court
- Suite 800,Orlando, FL 32809. A copy of the original
sales receipt is required as the proof of purchase for
warranty repairs. A copy of the Warranty registration
card must also be on file with NorCross Marine
Products, Inc., so be sure to submit the included regis-
tration card within 10 days of purchase. Please be sure
to include your name, address, email address, and a
daytime phone number within the package.
1629 Prime Court, Suite 800
Orlando, FL 32809
PH: (407) 581-2614
Fax: (407) 422-0501
Toll Free: 888-NorCross
Email: [email protected]
The bottom contour, composition, and
landscape will be indicated on screen
as a series of “rock” indicators. The
more “rock” indicators that appear, the
rougher the bottom is.
• Rough bottom indicators represent
heavy rock or vegetation covering
the bottom (Figure 12). To avoid
being snagged on the bottom, be
careful not to get your lure or bait
too close to the bottom.
• Variable indicators may indicate
random rocks, stumps, grass, or
logs (Figure 13). Random blinking
indictors may represent a bottom
scattered with rocks, stumps, or
grass patches and should be fished
more aggressively, as this may indi-
cate prime hiding places for prey.
• Smooth bottom indicators represent
sandy or muddy bottom with no veg-
etation (Figure 14). Generally, this is
not the best place to target your prey
unless the fish that you are chasing
prefer this type of landscape.
Understanding the Bottom Contour
Rough Bottom
Contour
Variable Bottom
Contour
Smooth Bottom
Contour
LED
The indicator LED on the FIsh Finder will be lighted when
the power is on (Figure 10)
Depth Readout
The depth readout on the right bottom corner (Figure 11) will
appear after the power is turned on and the transducer is
placed in water between 2.5’ and 120’. If the depth exceeds
these parameters, the depth meter will indicate “---”. This
reading may also be frequent in water that is extremely
dirty, or where heavy silt or mud bottoms occur.
Understanding the On-Screen Images Understanding the On-Screen Images
Care of Your Fish Finder
1. Unscrew the transducer plug screws and remove the plug
from the fish finder.
2. Clean the transducer and cable with fresh water and dry-off
before storing. Do not submerge and/or spray the fish finder
screen/housing with water or use chemicals to clean. If nec-
essary, wipe with a damp cloth.
3. Remove the batteries from the fish finder to prevent battery
leakage and corrosion.
5. Store the fish finder in the storage bag in a cool, dry place.
Never leave it in temperatures over 120 degrees Fahrenheit
as the extreme temperatures can damage the electronic
components.
5. Cold weather is extremely hard on the electrical components
within the display housing. It is suggested that you keep the
unit in temperatures above 14 degrees Fahrenheit (-10
degrees Celsius) during operation.
I’m Having a Problem, What Do I Do?
Do not attempt to repair the unit yourself. There are no user
serviceable parts inside, and opening the unit will void the war-
ranty. Before contacting NorCross to return the unit please visit
our website at www.norcrossmarine.com for troubleshooting
information.
1. Nothing Happens When I Turn the Power On.
Make sure that you have installed a good set of batteries and
aligned them as per the diagram within the battery compart-
ment. You may also need to test the batteries in another
device to insure they are charged. If in doubt, replace the
batteries with a set from a newly opened package.
2. The Depth Reading Is “---”
Make sure the transducer is connected properly and that
the connector pins are not damaged. Also make sure that
you are operating the unit in depths between 2.5 and 120
feet. Be aware that the depth is measured from the trans-
ducer, not the float. Also make sure that the water is not
overly choppy, causing the transducer to move around sig-
nificantly. The transducer must remain relatively stable to
achieve optimal readings. When necessary, lower the
transducer to hang further from the surface of the water,
providing more stability in rougher water.
3. I See Fish Under the Transducer, but Nothing
Appears on the Display
As with the depth reading, the FF3300P(PX) will not detect
any objects that are closer than 2.5 feet from the transducer.
If you’re fishing in water that is less than 3 feet deep, it is
recommended to discontinue use of the fish finder.
Frequently Asked Questions?
1. What Type of Floats Can I use for the Transducer
Cable?
1 inch regular fishing bobbers have proven effective. A
bright color is also helpful at alerting any boaters of the
cable in the water.
2. Why does the float need to be 6-10 inches from the
transducer? Can it be more than that, or less?
SEN
HI
• Depth of water is 7.3 feet
• Large fish return at 2.8 feet
• Bottom contour is ROUGH
• Battery save is OFF
• Sensitivity is set to HIGH
• Backlight is ON
• Fish alarm is ON
• Battery level is full
SEN
LOW
• Depth of water is 110 feet
• Large fish return at 100 feet
• Bottom contour is VARIABLE
• Battery save is OFF
• Sensitivity is set to LOW
• Backlight is ON
• Fish alarm is OFF
• Battery level is LOW
Figure 12:
Figure 13:
Figure 14:
Figure 16: Figure 17:
Understanding the On-Screen Images
SEN
HI
BAT.
SAVE
• Depth of water is 39 feet
• Large fish return at 5 feet
• Bottom contour is smooth
• Battery save is ON
• Sensitivity is set to HI
• Backlight is OFF
• Fish alarm is ON
• Battery level is VERY LOW
Figure 18:
WARNING:
Disassembly of the electronic components within this unit may result in
exposure to lead in the form of solder, which is known to the state of
California to cause cancer, birth defects, and other reproductive harm.
The recommended distance of 6-10 inches allows the
transducer head to remain stable below the surface, even in
rougher waters. The float can be adjusted to set the trans-
ducer deeper if desired, to get in below an layer of ice per-
haps, but the the difference in depth must then be added to
what the unit displays.
3. How Long Will the Batteries Last?
Total usage life of one set of batteries depends on the oper-
ational settings. The Battery Save Feature will extend bat-
tery life considerably, but will not give up to the second
readings. The Backlight Feature, however, will significantly
reduce the battery life and therefore should be limited to
nighttime use only. The average overall life based on nor-
mal use is between 25 and 30 hours of operation.
4. Is My Fish Finder Waterproof?
Although the FF3300P(PX) is made to be water resistant, it is
not made to withstand submersion in water. Follow the Care
of Your Fish Finder Section to prevent accidental damage.
5. I’m Not Getting A Reading While Trying to “Shoot-
Thru” My Boat Hull or Ice?
Shooting-Thru the hull of a boat/canoe or ice can be a dif-
ficult, as hidden air pockets will prevent you from obtaining
a reading. Make certain that the hull or ice is solid from the
surface to the water with no air bubbles and/or gaps.
Shooting thru composite hulls (plastic) or cloudy ice is not
possible as the tiny air bubbles are usually present in these
situations. Refer to our website for more comprehensive
instructions.
SEN
LOW
Fish Location Scale Indicator
Use the Fish Depth Scale to measure the fish’s depth location
(Figure 15). This can be done by dividing the depth reading by
10. This number represents the value of each box.
(example, the depth is 10 feet, the fish symbol appears
between the first and second box from the bottom. This
means the fish is 1 foot from the bottom)
Fish
Depth
Scale
Fish Location Scale Indicator
Figure 15:
This manual suits for next models
1
Table of contents
Other Hawkeye Mfg Fish Finder manuals

Hawkeye Mfg
Hawkeye Mfg FF3000P User manual

Hawkeye Mfg
Hawkeye Mfg F33P User manual

Hawkeye Mfg
Hawkeye Mfg FF3350P User manual

Hawkeye Mfg
Hawkeye Mfg FishTrax FT1PXC User manual

Hawkeye Mfg
Hawkeye Mfg FF3355P User manual

Hawkeye Mfg
Hawkeye Mfg FishTrax 1X User manual

Hawkeye Mfg
Hawkeye Mfg FP5X User manual
Popular Fish Finder manuals by other brands

Humminbird
Humminbird 110 Fishin' Buddy Operation manual

Furuno
Furuno FCV-2100 Operator's manual

Humminbird
Humminbird Wide Optic Operation manual

Humminbird
Humminbird Helix Series Mounting installation guide

Navman
Navman TRACKFISH 6500 Installation and operation manual

Garmin
Garmin Fishfinder 100 owner's manual