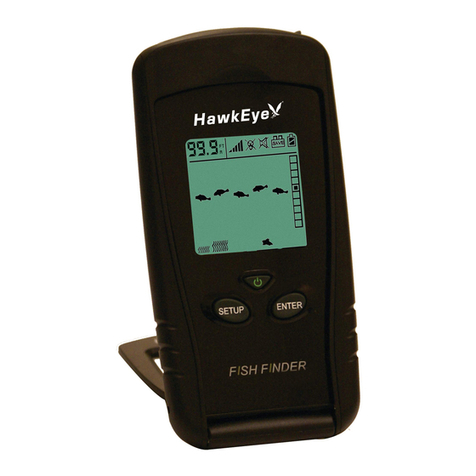
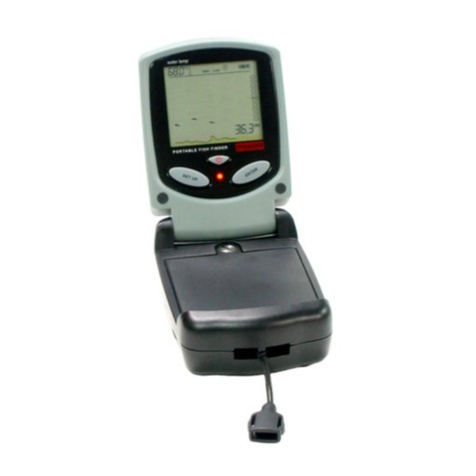
Hawkeye Mfg FF3355P User manual

Installing the Batteries
1. Slide the Battery Door towards
the bottom of the unit and
remove it from the main hous-
ing.
2. Install 4 “AAA” batteries. Be
certain to align the batteries
as per the diagram within the
battery compartment.
3. Close the battery door com-
pletely by reversing step one.
Refer to Figures 2 and 3 to Set the Following Features:
The POWER Button
• To turn the Power On, press the POWER Key.
• To turn the Power Off, Press and Hold the POWER Key for 3
seconds.
• During normal operation the screen can be refreshed by
pressing the POWER Key. Use this feature if inconsistent
readings are evident.
• To enter the simulation mode hold the POWER key down for 5
seconds while the power is off. Release the POWER key
once the display turns on. The unit is now in Simulation
mode and must be turned off to enter normal operation.
The SETUP and ENTER Buttons (Feature Setup)
• Press and Hold the SETUP Key for 3 seconds.
• The Sensitivity Indicator ( ) will blink.
• Cycle through the features by pressing the SETUP key. (the
indicator will blink for the current feature to be set)
• To activate or deactivate a feature press the ENTER key.
• The screen will automatically return to normal operation after 5
seconds if no keys are pressed.
Portable Fish Finder FF3355P
Fishing Guide
Thank you for purchasing
the HawkEye®Portable
Fish Finder, and wel-
come to the Innovations
of NorCross Marine
Products, Inc.
Before You Fish Figure 2:
Figure 1:
Adjusting the Sensitivity ( )
Fishing at Night ( )
• Turning the backlight feature ON will keep the screen illuminat-
ed all the time. This feature will greatly reduce the battery life
of the unit, so it should only be used during low light conditions.
• When the backlight feature is set to OFF, the backlight will illu-
minate for 3 seconds whenever a key is pressed.
ENJOY YOUR
FREEDOM...
NOTE: The fish finder has an automatic power off fea-
ture to prevent battery drain if you accidentally leave
the unit on. When the depth display reads “---” con-
tinuously for 5 minutes, the display will shut off auto-
matically.
FISHING TIP
There are 4 user selectable sensitivity settings to choose
from. So, which setting is the right setting? It greatly depends
on the clarity and/or depth of the water. Very clear water
allows for a moderate sensitivity setting. Conversely, dirty
water requires a higher sensitivity setting to target detail but
will increase the irritating false readings. Targeting deep water
fish generally requires greater sensitivity, especially in stained
or dirty water. Salt and brackish water also require a compar-
atively higher sensitivity setting. While this analysis may seem
confusing, the concept is simple. As the unit's sensitivity is
elevated, a broader view and smaller details show on the
screen. But, with a broader and stronger view comes more
clutter and debris. The clearer the water, the less sensitivity
needed to get accurate details and vice-versa.
FISHING TIP
Get to know the fishing regulations and habits of
the fish that you are targeting by visiting your local
tackle center, bait shop, library, or website. A little
research can be a valuable lesson that will allow you
to utilize the features of your fish finder, to make fish-
ing more enjoyable for you, and your fishing buddies.
NOTE: Alkaline batteries lose a considerable amount
of their power below 20oF (-7oC). If you’re using your
fish finder in Sub-Zero temperatures, you may have to
keep the unit warm (above 20oF (-7oC) for optimal
performance.
POWER
ENTER
SETUP
A
BCD
G
J
ADepth Readout
BSensitivity Setting
CBacklight On/Off
DFish Alarm On/Off
E Battery Save On/Off
FBattery Strength Indicator
GFish Depth Indicator
HBottom Contour Detector
IWeedIDTM Weed Detector
JFish Location Indicator
Figure 3:
VirtuViewTM LCD ICON DISPLAY
EF
H
I
SONAR
SENSOR
PLUG
NOTE: When a feature is activated, the indicator will
appear. When a feature is deactivated, the indicator
will not appear or it will have an “X” over it.

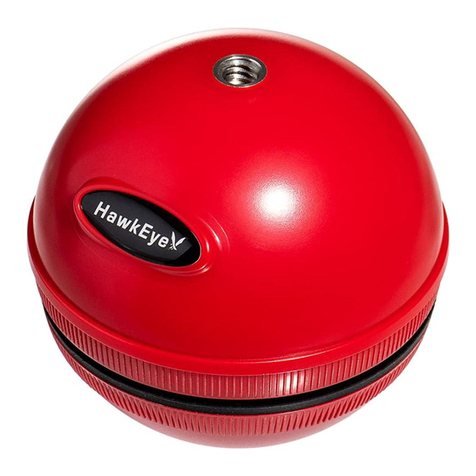
Removing the Sonar Sensor Float
If you find that you do not have a need for the sonar sensor float,
it can be removed as follows:
1. Remove the rubber stopper from the cable by sliding the safe-
ty strap toward the headphone-style plug and gently working
it over plug.
2. Slide the cable through the center of the float toward the plug
and gentle work the plug through the center of the float in a
rocking motion.
FISHING TIP
By attaching the SideScanTM Adapter
to an ordinary broom stick or paint
roller handle purchased from a local
hardware store, you can scan for fish
suspended in the water column with-
in 99.9 Ft (30.4 M) of your location.
Attach the sensor to a handle, lower
the sensor into the water as per figure
10, and slowly move the sensor in a manner that will allow
the signal to search the desired location (a sweeping motion
similar to using a flashlight is most effective). Keep in mind
the sonar signal is emitted from the base of the sensor. Scan
down, sideways, or any combination of the two. Remember,
to get depth and bottom contour and composition readings
you will have to aim the signal at a solid object within 99 Ft
(30.4 M), however FISH readings will be accurate, even if
the depth readings is “---”.
Using The Sonar Sensor From A Boat
There are four methods that the fish finder can be used from a
boat.
1. Toss the sensor and float into the water as per the previous
instructions.
2. “Shoot Thru” the hull as per the instructions in the next section.
3. Attach the SideScanTM adapter to handle and scan for fish as
per the fishing tip below.
4. Attach the SideScanTM Adapter to the boat hull using the mount-
ing tabs.
NOTICE: Using method 4 will make the fish finder inop-
erable at boat speeds over 5 mph (8 kph).
Using The SideScanTM Adapter
Your fish finder includes a combination SideScanTM adapter,
mounting bracket for the Sonar Sensor (Figure 9).
(A) The Adapter is threaded to easily attach it to a standard broom
stick or paint roller handle purchased from a local hardware
store.
(B) The Adapter includes mounting taps so that you can attach it
to any flat surface or boat hull.
(C) The Adapter is removable and adjustable up to 180 Degrees.
FISHING TIP
Here are Some Ideas for Maximizing the Usefulness of the
SideScanTM Adapter: • Attach it to a dock piling and scan
sideways for fish swimming by. • Attach it to a boat, kayak,
or canoe hull and slow troll for fish, all the while keeping a
look out for fish behind or in front of you. • Attach it to a
broom stick handle and search for the best fishing location.•
Attach it to a broom stick and seek out the fish hiding away
from your fishing hole while ice fishing.
(a)
(b)
(c)
Figure 9:
Figure 10:
Adjusting the Sonar Sensor Float
The Sonar Sensor float must be
adjusted so that it is a minimum
of 6 inches away from the sen-
sor (it can be further depending
upon water conditions see Note
below) (Figure 5).
1. Pull out the rubber stopper.
2. Adjust float so that it is 6 to
10 inches from the sensor,
or at your desired depth.
3. Replace the rubber stopper
by pressing it firmly into the
float.
Using the Sonar Sensor with the Float
1. Toss the sonar sensor and float
assembly into the water at your
desired fishing location. To toss,
place the sonar sensor and float in
your hand, and pitch underhand. Do
not throw the sensor by the cable
as this will cause unrepairable
damage. Before tossing, be certain
that the cable is free from tangles
and is not wrapped
around anything.
2. Use a pole to guide
the sonar sensor to
a desirable position
(Figure 6) or add
floats on the cable
to allow the cable
to float on top of the
water (Figure 7).
3. To retrieve the sonar sen-
sor and float simply pull in
the cable being certain to
neatly wind up the excess
cable.
Figure 5:
Figure 7:
Figure 8:
WARNING: Do not allow the cable to sink to the bottom
as it may become entangled in debris (Figure 8).
Float
Sonar
Sensor
NOTE: In calm water the sonar sensor can be set at
which will provide the maximum amount of sonar cov-
erage. In rougher water, the sonar sensor may need
to be lowered into the water further to provide stabi-
lized readings.
NOTE: To prevent accidental loss of the stopper
always press the rubber stopper firmly into the float
before tossing the sonar sensor into the water.
Figure 6:
Audible Notification of the Presence of Fish ( )
• An audible alarm sounds when a group of fish are detected. It will
NOT sound if just one fish is detected.
Changing the Units of Measure for Depth Readings
• Press and Hold SETUP and ENTER (at the same time) for more than
5 seconds. The display will flash the current units setting next to the
depth readout.
• Press either key to toggle the unit of measure (Ft = Feet or M =
Meters). The selected unit of measure will blink.
• The screen will automatically return to
normal operation after 5 seconds if
no keys are pressed.
Plugging In The Sonar Sensor
• Insert the Senor Plug into the socket
on the top of the unit.
• To prevent the plug from inadvertent-
ly coming out you can feed the plug
through the plug holder before
inserting into the socket (Figure 4).
FISHING TIP
Leave the alarm on if you are using a crank bait so that you do
not have to steadily watch for fish on the screen. If you hear
the alarm, gently toss your bait at least 20 feet beyond the
sonar sensor, allow the bait to drop to the depth of the fish
alarm, and retrieve as recommended for the targeted species.
Figure 4:

Depth Readout
The depth readout on the upper left corner (Figure 14) will appear
after the power is turned ON and the sonar sensor is placed in
water between 1.5 feet and 99.9 feet (.5 to 30.4 Meters). If the
depth exceeds these parameters, the depth meter will indicate “---
”. This reading may also occur in water that is extremely dirty, or
where there are heavy silt or mud bottoms. Sonar is a sound sig-
nal that travels through water. Sonar will not travel through air.
Keep this in mind when using the fish finder, as the smallest air bub-
ble between the sonar sensor and the water, will cause the unit to
not operate correctly.
Fish Indicators
If the fish finder determines that sonar has detected a fish, the dis-
play will show a fish shaped icon (Figure 14). The first column of
fish indicators on the right of the display shows the most current
information. This column is then moved to the left as a new read-
ing is displayed. That is, fish indicators “swim” away from the right
to the left at a constant speed. This motion in no way reflects
actual movement of the fish.
Fish Depth Indicator
Use the Fish Depth Indicator to measure the fish’s depth from the
Sonar Sensor (Figure 15). This can be done by dividing the
depth reading by 10. This number represents the value of each
box.
(example, the depth is 70.0 feet, the fish symbol appears in the
5th box from the top. This means the fish is 35 feet from the the
surface)
Fish
Depth
Indicator
Depth
Readout
Fish
Indicators
Figure 14:
Figure 16:
The WeedIDTM feature incorporated
into the fish finder depicts the
amount of weed at the bottom of the
water body.
The display indicates the presence
of short weeds by turning on the
smallest WeedIDTM indicator (Figure
16).
Moderately tall weeds are depicted
by turning on the second WeedIDTM
indicators (Figure 17).
Tall weeds are depicted by turning on
the third WeedIDTM indicator (Figure
18).
Targeting Prey In The Weeds
Figure 15:
Figure 17:
Figure 18:
FISHING TIP
If the prey that you are targeting
prefers a weed habitat you should
try to fish your bait as close to the
top of the weeds as possible
(installing a weed guard on your
hook will prevent accidental snag-
ging of the weed).
NOTICE: In an area where tall and
short weeds are present, all 3 icons
will be lit.
4. To remove the Sonar sensor from the frozen ice, gently tap the
sonar sensor at the base with your hand. If it will not come loose,
spray a small amount of water on the ice surface around the base
and repeat step 4 until the sonar sensor is easily removed.
Understanding How the Fish Finder Finds Fish
Greatly simplified, this fish finder is just a combination of a speaker,
microphone and stopwatch; it transmits as sound pulse from the sonar
sensor, and then measures the time it takes for the “echoes” to return
to the sonar sensor (The fish finder "knows" that the speed of sound
through water is about 4800 feet per second).
Fish, rocks, logs, weed, debris, the bottom, etc all “echo” the pulse at
a different intensity. A built-in computer then organizes all of this infor-
mation and shows it on a display screen in a manner that is easy for
the user to understand.
WARNING: Never use a blunt object to strike the sonar
sensor as this may cause damage to the sensitive internal
electronics.
FISHING TIP
Use the fishing tip in the “Using the
Sonar Sensor from a Boat” section
while ice fishing. This method will
give you an accurate indication of
where the best fishing location for
suspended fish is within 99.9 ft
(30.4 M).
Figure 13:
To achieve the best performance for ice fishing, it is highly rec-
ommended that you cut a hole through the ice and place the sonar
sensor directly in the water. If you would like to check the area for
depth or fish before cutting the hole, please follow steps 1 - 4 pre-
cisely.
1. Clear away snow to expose the ice surface, making sure the
surface is smooth.
2. Place a small amount of liquid water on the ice and set the
sonar sensor on the water allowing the unit to freeze to the ice
(Figure 12).
3. If there are any air pockets
between the sonar sensor and
ice, or the water below the ice,
the unit will not work properly
and will require you to try
another spot, or cut a hole in
the ice to use. You can also
use the instructions in sections
(b) or (c) of the “To Shoot-Thru
the Hull of a Boat” section. Be
certain not to allow the water to
freeze around the sensor if you
use the “plastic bag” (c)
method.
Figure 12:
Using the Fish Finder for Ice Fishing
NOTE: Do to various environmental condi-
tions,this process may not work in all situations.
Figure 11:
(a) (b) (c)
Using the Fish Finder Thru a Boat Hull?
The fish finders advanced sonar capabilities allows it to “shoot
thru” the bottom of a boat or canoe. The hull must be made out
of solid fiberglass, or a maximum of 1/8” aluminum, and be in
direct contact with the water, with no air pockets. The unit will
not work thru wood, plastic, or any composite material.
To “Shoot-Thru” the hull of a boat,
do one of the following (Figure 11)
a) place the sonar sensor in .5 inches of water against the hull
bottom.
b) coat the face of the sonar sensor with petroleum jelly and
press it against the hull bottom with a twisting motion.
c) place the sonar sensor in a plastic bag that is full of water
and place against the hull bottom.
If depth readings appear as “---” while using one of these meth-
ods, place the sonar sensor directly in the water to verify that the
fish finder is operating properly. If it operates properly while
directly in the water, reposition the sensor in a new location in
the hull, and repeat methods A, B, or C. These methods DO
NOT work on all hulls and you may have to place the sensor
directly in the water for proper operation. Spray
Water
Here
Ice Surface

4. Is My Fish Finder Waterproof?
Although the display housing is made to be water resistant, it
is not made to withstand submersion in water. Follow the
Care of Your Fish Finder Section to prevent accidental dam-
age.
5. I’m Trying to “Shoot-Thru” Ice or a Boat Hull, and the
Depth Display Only Reads “---”?
Shooting-Thru the hull of a boat/canoe or ice can be difficult,
as hidden air pockets will prevent you from obtaining a read-
ing. Make certain that the hull or ice is solid from the surface
to the water with no air bubbles and/or gaps. Shooting thru
composite hulls (plastic) or cloudy ice is not possible as there
are tiny air bubbles present in these situations. ALWAYS use
a small amount of water to attach the sonar sensor to an
ice surface.
6. I’m Using the Unit for Ice Fishing, but the Depth Just
Reads “---”?
The sonar components in the sonar sensor will not pulse
below an ambient air temperature of -4º F (-20 ºC). When
operating the unit in temperatures at or below this level, keep
the sonar sensor warm until it can be placed directly into the
water.
7. The Unit Keeps Shutting OFF Automatically?
The display has an automatic power off feature to prevent
battery drain if you accidentally leave the unit on. If the depth
display reads “---” continuously for 5 minutes, the display will
shut off automatically.
3. I See Fish Under the Sonar sensor, but Nothing Appears
on the Display
As with the depth reading, the fish finder will not detect any
objects that are closer than 1.5 feet from the sonar sensor. If
you’re fishing in water that is less than 3 feet deep, it is rec-
ommended to discontinue use of the fish finder.
Frequently Asked Questions?
1. What Type of Floats Can I use for the Sonar sensor
Cable?
1 inch regular fishing bobber have proven effective. A bright
color is also helpful at alerting any boaters of the cable in the
water so it is not damaged by a passing boat.
2. Why does the float need to be 6-10 inches from the Sonar
Sensor? Can it be more than that, or less?
The recommended distance of 6-10 inches allows the Sonar
Sensor to remain stable below the surface, even in rougher
waters. The float can be adjusted to set the sonar sensor
deeper if desired, to get in below a layer of ice perhaps, but
the the difference in depth must then be added to what the
unit displays.
3. How Long Will the Batteries Last?
Total usage life of one set of batteries depends on the opera-
tional settings. The Backlight Feature will significantly reduce
the battery life and therefore should be limited to nighttime
use only. The average overall life based on normal use is
between 25 and 30 hours of operation.
1. Nothing Happens When I Turn the Power On.
Make sure that you have installed a good set of batteries and
aligned them as per the diagram within the battery compart-
ment. You may also need to test the batteries in another device
to insure they are charged. If in doubt, replace the batteries
with a set from a newly opened package.
2. The Depth Reading Is “---”
Make sure that you are operating the unit in depths between 1.5
and 99.9 Feet (.5 to 30.4 Meters). Be aware that the depth is
measured from the sonar sensor, not the float.
Also make sure that the water is not overly choppy, causing the
sonar sensor to move around significantly. The sonar sensor
must remain relatively stable to achieve optimal readings.
When necessary, lower the sonar sensor to hang further from
the surface of the water, providing more stability in rougher
water.
If you’re using the unit for Ice Fishing, please refer to the FAQ
section for more help.
NOTE: Below freezing temperatures are extremely harsh on
the electronic components within the fish finder. It is important
that you keep the unit in temperatures above -4 degrees
Fahrenheit (-20 degrees Celsius) during operation. This may
require you to keep the display head in a jacket pocket or other
warm place during and in-between uses.
Uncovering The Best Hiding Places
The VirtuViewTM display on your Fish Finder
depicts bottom structure with a series of rock
indicators. If the species that you are tar-
geting prefers to ambush prey as per the
above Fishing Tip, pay close attention to the
bottom structure indicators when searching
for fish.
• No rock indicators identifies a structureless
bottom. Figure 15 depicts a bottom that is
most likely sandy or muddy with no debris or
contour. A good habitat for some fish, but
not very desirable for ambush feeders.
Care of Your Fish Finder
1. Clean the sonar sensor and cable with fresh water and dry-off before
storing. Do not submerge and/or spray the fish finder screen/hous-
ing with water or use chemicals to clean. If necessary, wipe with a
damp cloth.
2. Remove the batteries from the fish finder to prevent battery leakage
and corrosion.
3. Store the fish finder in the storage bag in a cool, dry place. Never
leave it in temperatures over 120 degrees Fahrenheit as the extreme
temperatures can damage the electronic components.
4. Cold weather is extremely hard on the electrical components
within the display housing. It is suggested that you keep the unit
in temperatures above 0 degrees Fahrenheit (-17 degrees
Celsius) during operation. The sonar sensor cable also becomes
very stiff under cold conditions. Excessive winding or unwinding
under these conditions may cause unrepairable damage. DO
NOT WIND OR UNWIND THE CABLE IN TEMPERATURES
BELOW 32º F (0º C).
I’m Having a Problem, What Do I Do?
Do not attempt to repair the unit yourself. There are no user serv-
iceable parts inside, and opening the unit will void the warranty.
Before returning the fish finder to the place of purchase, please read
the following section or visit our website at www.norcrossmarine.com
for troubleshooting information.
If you still can’t figure out your problem, give us a call. We love to
hear from our customers and appreciate the opportunity to help you
catch more fish.
Figure 19:
Figure 20:
FISHING TIP
Experienced fisherman will tell you that
many fish choose to hide along the bot-
tom and ambush their prey as it swims
by. Logs, Tree Stumps, Rocks,
Ledges, etc. all provide excellent
ambush locations. Uncovering these
hiding places will prove invaluable to
your fishing trips. Remember to keep
an eye on the depth of your bait while
fishing bottom structure as you do not
want to snag it on the structure.
FISHING TIP
If your targeting fish that prefer weed or structure try this: If
you’re fishing from a boat establish accurate readings by
using the techniques in this manual. Next, slowly move the
boat around the fishing area while paying close attention to
the bottom structure and WeedIDTM. Do not begin fishing until
you discover the optimal spot for fishing (using your knowl-
edge about the desired prey’s feeding habitat and the fish
finder readings). This may take a considerable amount of
time, but if you find a secret spot it will be well worth it. This
can also be done from shore by walking along the bank and
tossing and retrieving the sensor out into the water in 5 foot
intervals. IMPORTANT: When you find that secret spot, keep
it to yourself. There is nothing that ruins a secret spot quick-
er than word of mouth.
• One Rock Indicator identifies limited structure (Figure 19). You
would most likely find a small rock, a small pile of rocks, or uneven
bottom contour. This is not a bad place for hiding fish, but due to
the limited amount of structure, there may not be a lot.
• Two Rock Indicators identifies a considerable amount of bottom
structure, but scattered (Figure 20). A considerable amount of time
needs to be spent fishing this area as each piece of structure could
be hiding a prize catch.
• Three Rock Indicators indicates a large amount of bottom structure
in a confined area. This bottom may consist of a large rock(s),
stump(s), tree(s), or a ledge(s). Read the following tip to protect
this spot (Figure 21).
Figure 21:
WARNING!!!!
This fish finder should not be used as a navigational aid to
prevent grounding, boat damage, or personal injury. Always
operate the boat at slow speeds in unfamiliar water, or if you
suspect shallow water or submerged objects, as water
depth may change too quickly to allow time for you to react.
11. I Tried Everything in this Manual, and I am Still Having
Trouble. What Do I Do?
If fish finder does not function under any circumstance or “locks-
up”, remove the batteries, let the unit sit for 60 seconds, and then
re-install the batteries. If that doesn’t work, refer to the next 3
paragraphs.
Amajority of the fish finders that we receive from customers for
service are not defective and the problems are easily solved by
contacting customer support. If you have a problem with your unit
or have technical questions, first visit our website at www.nor-
crossmarine.com for valuable problem/solution troubleshooting.
The best way for us to assist you is by sending us a detailed
description of the problem via email to customerservice@nor-
crossmarine.com.
If your questions cannot be answered in this manner, please con-
tact our customer service department between 8:30 AM and 5:30
PM, Eastern Standard Time at 888-667-2767. We do not waste
our customer’s time by keeping them on hold, so please be confi-
dent that if you leave a message for a customer support repre-
sentative, they will get back to you in a timely manner.
If after contacting our customer service department it is deter-
mined that your fish finder is in need of service and or replace-
ment, securely pack the unit and mail prepaid via insured post to:
NorCross Marine Products, Inc.. A copy of the original sales
receipt is required as the proof of purchase for warranty repairs.
Acopy of the Warranty registration card must also be on file with
NorCross Marine Products, Inc., so be sure to submit the includ-
ed registration card within 10 days of purchase. Please be sure
to include your name, address, email address, and a daytime
phone number within the package.
WARNING: Disassembly of the electronic components within
this unit may result in exposure to lead in the form of solder,
which is known to the state of California to cause cancer, birth
defects, and other reproductive harm.
6450 Kingspointe Pkwy, Ste 6
Orlando, FL 32819
PH: (407) 370-3600
Fax: (407) 422-0501
Toll Free: 888-NorCross
Email: [email protected]
© 2004 NorCross Marine Products, Inc.
Specifications Subject to Change Without Notice
Display Type VirtuViewTM Liquid Crystal Icon
Backlighting Green SoftGlowTM LED
Power Requirement 4 - “AAA” Alkaline Batteries
Power Output 800 Watts, Peak to Peak
Units of Measure Feet and Meters
Depth Range Max. 99.9 feet (30.4 Meters)
Depth Range Min. 1.5 feet (.5 Meter)
Sonar sensor Frequency 200 kHz
Sonar sensor Beam Angle 45 degrees
Operational Temperature Range -4º F to 158º F (-20 to 70 ºC)
SPECIFICATIONS
NORCROSS 2 YEAR LIMITED WARRANTY
To be eligible for warranty coverage your fish finder must have a
copy of the Warranty Registration Card on file with NorCross Marine
Products, Inc., so be sure to submit the included registration card
within 10 days of purchase. You may also register on our website.
NorCross Marine Products, Inc. warrants, to the original purchaser,
this product to be free from defects in materials and workmanship for
Two (2) Years from the date of purchase. If the unit fails to perform
as described in the product’s written specifications, due to a defect
in materials or workmanship, we will repair it free of charge to the
customer for parts or labor. The customer, however, is responsible
for any costs associated with returning the unit to NorCross. This
warranty is void if damage or malfunction is due to abuse, misuse,
accident, failure to reasonably maintain, improper installation or use,
or unauthorized alteration or repairs. NorCross retains the exclu-
sive right to repair or replace the unit at its sole discretion, and holds
this right as the exclusive remedy available to the customer against
NorCross for any defect, mal-function, or non-conformity concerning
the product, or for any loss or damage resulting from any other
cause whatsoever. NorCross will respond to all warranty claims
within a reasonable time after receipt of the unit from the original pur-
chaser, with such response time not to exceed thirty days without
written notification of delay to customer.
To obtain warranty service, securely pack the unit, and mail prepaid
via insured post to: NorCross Marine Products, Inc., Warranty
Department, 6450 Kingspointe Pkwy, Ste 6, Orlando, FL 32819. A
copy of the original sales receipt is required as the proof of purchase
for warranty repairs. A copy of the Warranty registration card must
also be on file with NorCross Marine Products, Inc., so be sure to
submit the included registration card within 10 days of purchase.
Please be sure to include your name, address, email address, and
a daytime phone number within the package.
8. The Depth Reading is Incorrect
Make sure the sonar sensor is perpendicular to the water
when trying to obtain depth readings. Extremely heavy veg-
etation may confuse the sonar signal, causing it to misinter-
pret the depth. If you are certain that the readings are incor-
rect under these conditions, discontinue use.
9. I’m Getting False Fish Indications
The most common cause of false fish indications is extreme-
ly tall weed growth. If weeds grow taller than 50% of the total
water depth in a particular area, the sonar will mistake it for
fish. Trash & debris may also give false readings. Adjusting
the sensitivity setting to the lowest level may reduce these
false readings, but if they do not go away, it is suggested that
you discontinue use of the fish finder under these conditions.
10. How Much Underwater Area Does the Fish Finder Cover
(Cone Coverage) (Figure 22)
DEPTH
Ft (M)
100 (30.5)
90 (27.5)
80 (24.4)
70 (21.3)
60 (18.3)
50 (15.2)
40 (12.2)
30 (9.1)
20 (6.1)
10 (3.1)
COVERAGE
AREA
Ft (M)
35 (10.5)
32 (9.7)
28 (8.6)
25 (7.5)
21 (6.5)
18 (5.4)
14 (4.3)
11 (3.2)
7 (2.2)
4 (1)
COVERAGE AREA
Figure 22:
Table of contents
Other Hawkeye Mfg Fish Finder manuals

Hawkeye Mfg
Hawkeye Mfg FF3350P User manual

Hawkeye Mfg
Hawkeye Mfg FF3000P User manual

Hawkeye Mfg
Hawkeye Mfg FishTrax FT1PXC User manual

Hawkeye Mfg
Hawkeye Mfg FF3300P User manual

Hawkeye Mfg
Hawkeye Mfg F33P User manual

Hawkeye Mfg
Hawkeye Mfg FishTrax 1X User manual

Hawkeye Mfg
Hawkeye Mfg FP5X User manual