HBA 27-WF697 User manual
Operating Instructions
Wi-Fi camera with Built-in Battery and Magnet
Please read this manual thoroughly before operating the unit
V1.0
HBA Fordonsteknik AB

Contents
1. Instructions for Wi-Fi Camera ............................................................. 1
1.1 Product Features ........................................................................... 1
1.2 Product Introduction ...................................................................... 2
2. Instructions for APP of Wi-Fi Camera (for Android System)............... 3
2.1 Software Installation ...................................................................... 3
2.2 Wi-Fi Hotspot Connection ............................................................. 4
2.3 Software Operation........................................................................ 5
2.4 Upgrade of Camera Software........................................................ 8
3. Instructions for APP of Wi-Fi Camera ( for iOS System).................. 13
3.1 Software Installation .................................................................... 13
3.2 Wi-Fi Hotspot Connection ........................................................... 14
3.3 Software Operation...................................................................... 16
3.4 Upgrade of Camera Software...................................................... 19

1
1. Instructions for Wi-Fi Camera
1.1 Product Features
1. Long press the power button to turn on or off;
2. Twice double-click the power button to restore the defaults;
3. Battery capacity indicator;
4. Overcharging protection;
5. Over discharging protection;
6. Short-circuit protection;
7. Overheat and low temperature protection;
8. Load detection when over-voltage is detected;
9. Strong magnetic base;

2
1.2 Product Introduction
Adapter C
onnector
ON / OFF
Magnet (bottom)
0%-25%
25%-50%
50%-75%
75%-100%

3
Attention !
1. To protect the battery from damage, please charge it to 75% of
capacity before storaging it for a long period of time, and charge it
again to 75% within the next 150 days.
2. After stored for a long time, the initial charging current might be
relatively low, but it will recover after a while.
2. Instructions for APP of Wi-Fi Camera
(for Android System)
2.1 Software Installation
http://183.233.190.23:6061/tmp/android/StreamVis_1.2.4.181
122_alpha.apk
Firstly, to open the link above with the browser in your mobile phone or
computer browser or use your mobile phone to scan the qr code, and
then you can download the installable package of the APP to the
browser, Lastly locate the downloaded installation package and
complete the installation of the APP (In order to avoid the flashbacks
when you open the APP, please make sure the storage and location
permissions of StreamVis are enabled).

4
2.2 Wi-Fi Hotspot Connection
Methods / steps:
Long press the power button of the Wi-Fi camera to turn it on.
Open “Settings” on your phone and enter the "WLAN" interface. If
WLAN is off, please turn it on. Then Connect to the camera
corresponding hotspot (such as the initial hotspot name: “WFC-xxx”).
If you use “StreamVis” without successfully connecting to a hotspot
named “WFC-xxx”, the APP main interface will not display images and
will prompt you to check Wi-Fi connection.
The Power Button

5
2.3 Software Operation
Methods / steps:
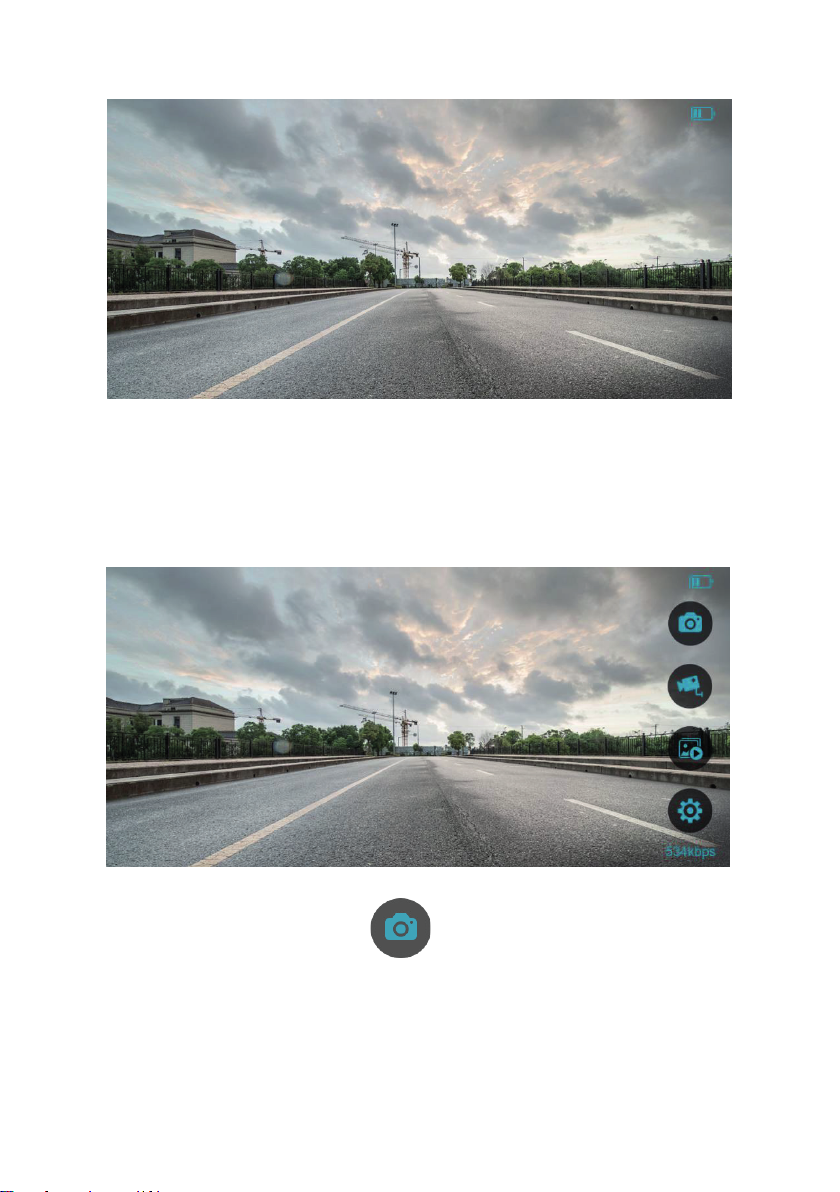
Press the icon on the phone’s desktop to enter StreamVis,
and then the main interface will display(see picture below).
6
You can tap on the screen of the mobile phone, then you can see that
there are four main configuration items displayed on the right function
area of the main interface.
Press the "Capture" button to take screenshot and save it in
the album.

7
Press the "Video" button to record the current video and save
it in the album.
Press the "Album" button to review the screenshots and videos
that have been saved in album before.
Press the "Settings" button to open the Main Settings interface.
There are four configurable items on this interface, including Quality,
Mirror, Flip and Audio.
A detailed description of the configuration items is shown in the
following table.

8
Configuration items Instructions
Quality
(Resolution)
HD (1280*720) SD (704*480)
CIF (352*240)
Mirror
ON (To open the mirror image)
OFF (To close the mirror image)
Flip
ON (To flip the screen vertically)
OFF (To stop flip the screen
vertically)
Audio
ON (To turn on the audio)
OFF (To turn off the audio)
2.4 Upgrade of Camera Software
Firstly, open StreamVis and then press the button to enter the
Main Settings interface. Press the "Upgrade" button at the bottom of
the configuration list (see red mark below) to start to upgrade the
program .

9
First of all, it will search and check whether the network is available or
not.
If the network is not available, there will be a pop-up showing on the
screen to ask you to get internet available.Then click the button"OK"
and the interface will jump to the "WLAN" interface. where you can add
an available network to continue to upgrade, or you can open the
mobile data network of the mobile phone to make it available for
network connection.

10
If the network is available, the application will connect to Server and
then is consistent with the version of current software package of the
camera. If so, the interface will prompt that the current version is the
latest version.
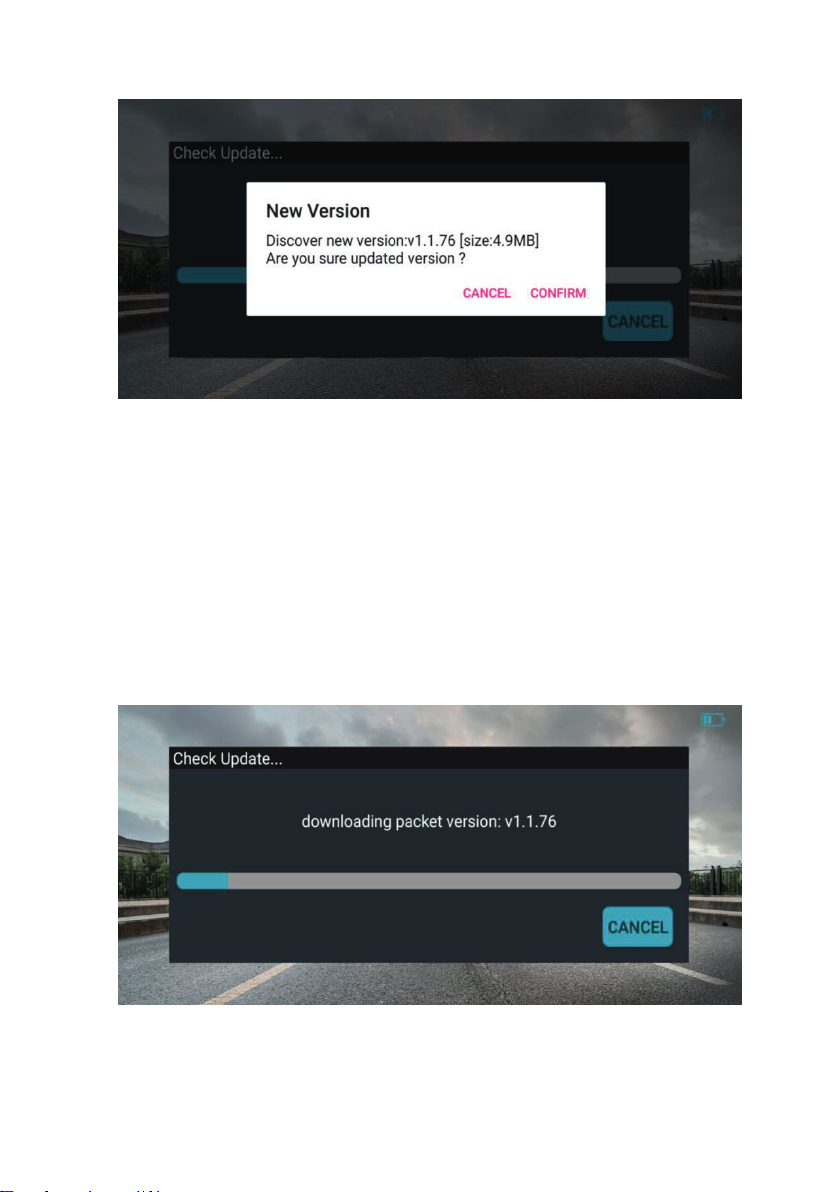
and if it is not consistent, the interface will prompt that that a new
version is available for downloading.
11
If you click “CANCEL”, the upgrade process will stop.
And if you click “CONFIRM”, the application will connect to Server and
check whether the version of the upgrade package on the Server is
consistent with the version of upgrade package which downloaded and
saved in the mobile phone.
If not, it will start downloading the latest upgrade package from server.

12
After downloading is finished, Wi-Fi will automatically connect to the
camera hotspot. and then push the upgrade package to the camera.
If it is consistent, start to push the upgrade package directly to the
camera.
After the upgrade package is pushed successfully, It will take some
time for the camera. Please wait patiently for a moment.
After the camera software upgrading is finished, the upgrade interface
will prompt "update successfully",then Click the "cancel" button and

13
then the upgrade process is finished. And the version number
displayed in the bottom right corner of the interface has changed from
the original version V1.1.73 build 181120 to the current version V1.1.76
build 181120.
In addition, the upgrade function needs to be further improved. If you
encounter an upgrade failure caused by an abnormal upgrade during
the upgrade process, please upgrade repeatedly. We will improve the
upgrade function in the later stage, and we are very sorry for the
inconvenience.
3. Instructions for APP of Wi-Fi Camera
(for iOS System)
3.1 Software Installation
Method / steps:
Open the "App Store" and search “streamvis” in the search bar, and
then press ”GET” to download and install StreamVis.

14
3.2 Wi-Fi Hotspot Connection
Methods / steps:
Long press the power button of the Wi-Fi camera to turn it on.

15
Open “Settings” on your mobile phone and enter the "WLAN" interface.
If WLAN is off, please turn it on. Then Connect to the camera
corresponding hotspot (such as the initial hotspot name: “WFC-xxx”)
The Power Button

16
3.3 Software Operation
Methods / steps:
Press the icon on the phone’s desktop to enter StreamVis,
and then the main interface will display(see picture below).

17
You can tap on the screen of the mobile phone, and you can see that
there is one main configuration item displayed on the interface.
Press the "Settings" button in the function area to open the
Main Settings interface. There are two configurable item on this
interface, including Mirror and Flip.

18
A detailed description of the configuration items is shown in the
following table.
Configuration items Instructions
Mirror
ON (To open the mirror image)
OFF (To close the mirror image)
Flip
ON (To flip the screen vertically)
OFF (To stop flip the screen
vertically)
Table of contents


