HC-HOBBY Mosquito User manual

www.hc-hobby. corn
+2
tH%iRN*
Assembly Instructions
I
TRANSMITTER' S MODES AND CONSTRUCTION----------------------
81

A
ZE!
:
kkR%%%:
?Ei&$Bll\~t~f&B%j!$
Q
E!Stft!!A%~~~~o
a
WARNING
!
:this symbol indicateswhere caution is essentialtoavoid injury
toyourself orothers
.
Zk:
~R~s%?E*E3#aE~~~+u%%*?lGs3l@s~o
PROHIBITED: this symbol points out actions that you should NOT do
toavoid possibledamage or accidents.
%%%~H~Z@tE?EG~~+~#Z~~-%~J\#E$US~&o
The "arrow" icon indicates special tips and notes on operation.
1
.Do notfly inthunderstorm ,strong winds or badweather.
1
2.igBG$ntz,%%,*%,BE@%MZ71'i.
2
.Never fly the Modelwhere are crowds of power lines
overhead ,automobiles or near highways ,subways.
3.im-+s~mt3if&, mwi+ngeuisinl'io
iZ2:
!~&~B%~~Amz~B~o
3
.Never fly theModelwhere are crowds of people.
Give yourself plenty of roomflying ,as the plane can
travel ata high rateof speed .Remember you are responsible
for thesafetv of others.
4.iSBGMZGA@H@lqB%S@S&3GSXE&
i&=f%mi!!!S7$70
4.
Do notfly inwhere the same frequency model
plane isflying nearby.
5.X7i3,
5B211X&Z7+n$nBWiS&fi3E%#50
5.
Make sure that themodelas wellas the controlsystem is
inthe good state beforethe plane takes off.
6.i%i28];4;2El~En"n~I!iY%~~~EG~S~~Yo
6.0nly use HC-Hobby's genuine accessories as replacment for
damaged parts.
a

7.iSBXS&lflXli'iEP HX~JtO
7.Do not attempt tocatch the modelwhile flying.
8.;l;G(E12% UTWJLf
)$NItt:$Pa"a,
12-14%WtllI\B3
i2GB%kS%WAfinIXli'i,&~JmGGXli'iS%Af
W%%TXli'iO
8.Not recommended for children under 12years old, Children
under 12-14years oldshould onlyoperate this modelunder
theguidance of a responsible adult.
9.
$~f-~~~.a+~-~~~\s(la~~~mwi~l$,
iw~
F
IL~M+F~B
mitbz%~~u$-ti~~k~
!
9.
As the product includes small and sharp parts
,
assemble and store this product only in places out of
the reach of children.
10. Never disassemble the polarity required for installation
This may lead to damage and leakage.
II
.i3&~~$2~BE%$n$A&~E,
~~mitb~s~~g
PH%T@ElE!
11. Do not store this model in a high-temperature or
humidity area or in direct sunlight.
12
.i~;l;IE#$3!iEHEH39!S%S?2
Ei
E0
12. Do not direct your model towards spectators or
towards you.
A

SE/Wingspan: 1355mm(53. 35in)
f
*/Length: 950mm (37. 35in)
f
f
/Weight: 17009
@fl/ESC: 3OAx2
Rt$Jl,/Servo
:
9gx8
S%Z/
Radio
:
5-channel
@$A
(-3
2)
/Motor: Brushless motorx2
@$&/
Battery: Li
-
po 11
.
1V 2200mah 20C
9b32,
9bz':gE,
gii%;E%I\
$nBwA4\,
ffiga&EO
This plane model is nice inappearance and design,gliding lines,less flying
resistance ,and with high biofidelity hyge.
Z%%Z#i7RMB$&%E%$AH#3$%hS,5,
G%&B$,
@!Zlfi$H,
@$&%$a
%~t!kt!?>
G?3TE7+34T&JE,
mHE9%1t!k3?2D
It
owns the technology of retract landing gears and two cabin doors,with simple
stru~ture~fashnessand durable,good rigidityfor the whole structure,good for
promotingthe flying quality,strong crash resistance.
+2iA1ti5tit, tkPU$AR,
WR,
Z$t%,
%gN%44-$AffE%3+nk%%Z%%dIJ1YI
+fPRSS+fi%,
Et&ZE0
Modular design means easy to replace damaged parts,such as mainwing,tail
wing,landing gear,control wire,nose cone,propeller,etc.lt can be easily
repairedand changed.
Itonly needs
4-5
procedures toassemble the whole unit.
The retract landinggears and twocabin doors makes
it
Less resistance
when flying ,and benefit for promotingthe qualityof theaerobatic actions.
The vivid contra-rotatingpropeller make the Anti-torquemuch less,which
make
it
easy tocontroland benefit the flying performance a lot.
With two powerfulmotors,it requiresjust a short distance to do the take-off
and a lotof aerobatics.

?zB%Ei,
i~sTH~~B-T?E@zumFfiG&~3~m3i+o
Beforestarting, please use the Contents List totake an inventory and make sure
it
is
complete.
Pn"nBB/Products constitution
:
1
+AA/Fuselage
2
&%/Main wing (left
&
rightwing)
3
TE/Horizontal wing
4
@E/Vertical wi
5
B&EX/Cl&ing propeller
0
&+A/Motor

This manualwill help you to assemble your modelstep-by-step. Itdoesassumethat
this isnotyour first airplane. If you needassistance, pleaseask a localflyer.
is~t~r~~~xl~stz~i~s~~m
sq
@aggi;
oms
~tnsszsz~m
B;fnEEl.is
g-%%o ~G4s~~~~s~zsE~l~isg@go
Let'sget started to assemblethe engines of the mainwing, and insert the line (Ifthe
engine rotates reversely when youtest it, pleasetakeapart anytwo linesandthen
exchange them). Insert the engine intothecorrect positionof the base. Tighten the
engine.(The assembly steps of the left side isthe sameas the last step). Install the
set of the engine cowl intothe right positionof the nacelle's end.Assembly must be
absolutely correct.

%%+JlE%%T*TtE4
~9
&JC,
%G@
El,
4?t@gT*TiLPA%5tSfG
IQ,
7Z+JtE%~Jt%3$3%3&2!Pi%
8"
''
xirn,
%Gfr~THdQ?%3$;1.%,EG2EEBlJRE~A$l42k,
PATH
Gelatinize the groove.lnsert the carbon fiber lever intothe groove.Gelatinize the
corresponding parts of the main wing shown in the figure.Gelatinize the relative parts
ofthe fuselage.lnsert wiring harness ofthe main wing intothe relative partsof the
fuselage and insert the left wing into the right positionof the fuselage.Repeat the
above steps on the other side.Connect the steel wire
of
the aileron.(The connected
leftaileron isshowninfigure. Assembly ofthe other side isthe same).
://
Notice: theoutside hole

Notice:
the
outside hole
I
Baasf
RN%&*R(Om%a),
&G%SE)Sfl
A~~~sE~~#~,
%Zn#&%BA%SAZ
~~#i!~iE~fR!?L.
Conneotion asshown in the figure.Gelatlnize the
relative partof the fuselage. Insertthe vertical
wing intothe relative part of thefuselage.
Connectthe rudder' ssteel wire, and connect
the steel wire with the hole of the outside rudder
control horn. Connection
&:
i!k$ba3z+.
as shown inthefigure.
Notice: the
outside
L
hole
-

Plug&connectthe power lineof the left and&right engine.(Connection as shown
in
figure,red-red,black-black).Plug&connect
the ESC's signal line of the left
&
right
engine.Please insertthe plug marked 1,2,3,4,5,7 with the receiver's CHI,CH2,CH3,
CH4,CHS,CH7 respectively.(Pay attentionto the direction) .Put the receiverwith
plugged lines intothe cabin.Cover the cabinand attach it.

I
.a~n6!4a41u!
umoqs sehlquassv.a6elasnja4140 1JedIueAalaJa41olu! un6~alle3spazau!gela6
a41IJasu!uaql'l!az!u!gela6 uaqlpueISJ!~1!y aql
UOJJ
sun6-~a)le3saq1Ile aye1
O~~~~%mY~~~THm'%M#%~%xs#~w
+-
.de3 Jallado~d
aq1ua146!1pueJ~A!J~M~J~Se asn -(s!qlay!lalquasse osle plnoqsJalladoJd
ap!s 146!~aql)~!ua146!1uaq1puede3 Ja((ado~daq1alquassv'lnu aq1ua1q6!1pue
Jauueds aqlasnun1u!14e4s a41olu!1nu'~aqsem6u!ds'layse6 )el4 a41alquassv
'Ueqs a41u!JalladoJd aql1aS '~oloua4140 Ueqsaqlolu!aseq~allado~da411nd

#zt
I
Mode
I
*EETE
Elevator down
EnE
Rudder
:
A
EkRZ
left
-.
Rudder rlght
*BRk*
Elevator up
EiaRBB
Trim
Il
Mode
II
SIR
eron
i7
tA@
Throttle Max
s
an5
left
-*
Aileron ri
Ail
Bi7fBAB
Throttle Max
%AX&
nlra
.won left
C*
Aileron right
?A
iJEfJ\E
Throttle h4in
EnRmfl
Trim
?A
I-IR~B
Throttle P,in
@!S%*
Power switch
-
-
-
-.
-
-
--
-
R&nEkRX
Servo reverse
-
-
-
-
-
-
.
*E#€FE
Elevator down
A
fin
Rudde
*EE+*
Elevator up
EE!E%Z$J
Power indicator
-
-
-
-
-
-
-
eaT*
Power switch
R&
,r right
EiflEIaRX
Servo reverse

i8;S=/Please
note:
Fs-l
.
E%l%iiCBB+,B?%mETE%amEzEBo
~~!%U-FT~mi..~~~~?~i~o
-
In the operating instructions, the numbers in the text always refer to the
figure opposite or the figures within the section. Cross references to other
figures are indicated with the respective figure number.
a)
~A@%~EEJE@&%/lnsertingthe Batteries or Rechargeable Batteries
XiHiFnZB@M8TZ%@%3$EVUE@mZ%@%o
kIiTfXF~B3E2;KfiE~E
HE,
M,
H%Az+m%?70
W
iE%a-Fm$REi'F:
For the power supply of the transmitter you will need eight mignon alkaline
batteries or rechargeable batteries(AA). For ecological and also economical reasons
it
is
recommended to use rechargeable batteries, since they can be recharged in the
transmitter via a built-in charging socket. To insert the batteries or rechargeable
batteries, proceed as follows.
mmzEFzHtnmmo
s~e~mw~~~
B-F-B,
3tV~)TR~~O
n
The battery compartment lid
(1)
Is located
u
on the rear side of the transmitter. Please
press the corrugated triangle and push off
the lid downward.
Now insert the eight batteries or
rechargeable batteries in the battery
compartment. Observe the correct polarity of the individual cells.
A
corresponding
note(3) is located on the bottom of the battery compartment.
.
%&,
f2_t&%EO
Afterwards, slide the lid of the battery compartment back on from the bottom
and let the locking mechanism click into place.
-
.
G2BNmlzm, FrUB3-%~ll%%,?z&El%?7~#m~~*~~-t~~o
.-
Either a teacher/student cable with a
3.
5mm jack connector or an interface
cable for flight simulator can be connected can be connected to the student
socket.

b)
tTRf-%
%
EHfl/Switching the Transmitter Onloff
;ZZ/Attention
!
'
--
,-I
a
EE%F$~~EGZP~&EH@B,'~~~LX~E!%~ST&Z~~~I~
The flight control system in the model is equipped with an effective
protective circuit which later prevents the unintentional start-up of the
drive motor.
However, before each operation of the transmitter, you must ensure that
the control stick for the motor rotation speed is in
the Motor off position.
For this purpose, the control stick has to be pushed down completely or
pulled towards you as far as possible. Sine unlike with the control functions
of the rudder, there is no reset spring for the stick function for the motor
rotation speed, the control stick always remains in the previously set position.
When the rechargeable batteries are charged or when new batteries are inserted,
pullout the antenna of the transmitter all the way and, for test purposes, switch
the transmitter on via the function switch. The
LED
display.
glows green and signals an adequate power supply to the transmitter.
If the power supply does not suffice for the transmitter to work properly(lower
than 8V)ihe
LED
changes from green to red. In this case, you should stop operating
your model as quickly as possible.
B%@&HE!2e,f7T%
(
iR38V
,
LED!kJ$$EBSE41,
SI~BJ%~E%@Z!~;M~
For further operation o'f the transmitter the rechargeable batteries are to be
recharged or new batteries must be inserted.

ZEBSB~~G,
ismmem-ttnez$mmm
T%%,
~U3l;tlfi@&o
Before the final assembly of the model. You should
charge the flight battery
(1).
An appropriate plug-in
battery charger
(2)
is included in the delivery.
Connect the flight battery with the connectors(3)of
the plug-in charger.
QEE2!$%AstlZl4 @EElOOV-240V, 50Hzo
Then connect the plug-in charger to a 100V-240V,'50Hz mains socket.
GtZ!Zi3E$,
Si3?%R3l
XH%EBE-EI?~~
%-2@HW,
3%W%3F3
The connector or socket of the plug-in charger has to be connected to the socket
or connector on the battery cable.
For photo-technical reasons, the charging cable of the plug-in
charger is illustrated in wound up state. Before the first use, the cable
-
retainer should be opened and the cable be unwound.
EhFB%#*mJ!zm,
%e#m%@@%~%e%E-E,
%-;A@flE,
i3%@
%E##EZTo
@&%EM%SSIEl/Safety Instruction of Li-Poly battery
1. Slt#fEPSZBE!3it!?! /Do not disassemble or reconstruct the battery.
2.
%k@%E%! /Do not short-circuit the battery.
3.
Zlt$E%ES@M! /Do not use or leave the battery nearby the fire, stove or
heated place(more than 80%).
4.
Zlt%~2hBA7)<3%7)<$,E~B! /Do not immerse the battery in water or sea water,
do not get
it
wet.
5.
ZkGZA3.k33Z%R#TE@! /Do not charge the battery under the blazing
sunlight.
6.
Zlt%9'f%A@%!$,
H%BE$FJ~MBt9a!
/Do not drive a nail into the battery,
strike it by hammer or tread it.
I
7.
ZltFPSE!!ifi)5#3! /Do not impact or toss the battery.
8.
~k@APEEE~E!!iE!Z%~@%!/Do not use the battery with conspicuous damage
or deformation.
9.
ZkE@%lZEE%! /Do not make the direct soldering on the battery.
lO.$ZltE6lE@3i3B!@! /Do not reverse charge or over discharge the battery.

11
.SkE
I3
E&SEBi?E%! /Do not reverse charge or reverse connect.
12.S@%JE,&!/Donot connect the battery to the
ordinary charger socket or car cigarette jack.
13.Skfl3~F%JZi~~Jz!/Donot use the battery for unspecified equipment.
14.SltZE%5?%E@%@&! E&%Eh%flSi2iJz@%, %H%*%%! /Do not touch the
leaking battery directly, please wash your skin or clothes with water if they are
bedewed by liquid leaking from the battery.
15.Sk#-;A%@&@@@%iB.S;@A!
/Do not mix the Li-Poly battery with other
un-chargeable battery in using.
16.ZkEZ83EE&WiiJ! /Do not continue charging the battery over the prescribed
time.
17.Zlt#&%E3B;X$3SE8#$! /Do not put the battery into the microwave
oven or high-pressure container.
18.%k@HTiEA1?3@%! /Do not use the abnormal battery.
19.S~t?Zlrs3t~~T~iS@~&&!
/Do not use or keep the battery under the sunlight.
20.%ltG@@
(
BZ64V t5J%E@R! /Do not use the battery nearby the place where
generates static electricity(over
64V)
.
21.%k?Zo"C LATRl45"c 12Jzr;f;EEH
!
/Do not charge the battery when the
environmental temperature is under
0%
orover
45%.
22.&&@fl!H,
8GE%,
SEJ%RSfi;liE%3i!R, Ek@H#%!Xl
a@,&!
/If youfindthe
battery
leaking,smelling or abnormal,stop using
it
and return
it
totheseller.
23.EE1J\T%%*7T73$9i&?i
!
/Keep thebatteryawayfrom thechildren.
24.@flEEE@B, B!%E@Z%
J
E@@;XTFrA31A
)
!
/Use the
specific-'
chargerand
observe chargingrequirement(under
1A).
25.%&qAS@fl
@&W,
K@Z#R#ETWW2!3l%3X@fl%%! /When usingbyminors,
parentsshould show them tothecorrectinstruction.
s*EZ/Safety Tips
HEE$9E&#Sf H$9%&#%%&3&%&, E@@;ET%A31.5A0
Be fully charged under no more than
1.5A
voltage by using the specified charger.

2&%m%@@%Z811\BVLY$ZlJHfiEo
Keep batteries 'rechargeable batteries out of reach of children.
Do not let batteries rechargeable batteries lie around openly. There is a risk of
batteries being swallowed by children or pets. In such a case, seek instant medical
care
!
&%hT%&&%Gf3mE;RT$PTi%%E%.
#%3#531A!l!
8YIJ
231EE@o
Batteries 'rechargeable batteries must never be short-circuited, taken apart or thrown
into fire. They might explode!
E%SE9H@%rnS&&%5&%%M$H&%ZI;ti%So
HlklBEH~?3$%#P@~%HT
Eo
Leaking or damaged batteries/'rechargeable batteries may cause acid burns when
coming into contact with skin. therefore use suitable protective gloves.
-&I~&%TFJCY-S;!CE&~R?~R~E&@%?~WS;!CE~O%&MEB#.S;i&13%&%lIEIM
BfE&EA~W~~WH2zYO
Conventional batteries must not be re-charged. Danger of fire and explosion!Only
chargerechargeable batteries, which are intended for this purpose;use suitable
rechargeable battery chargers.
When inserting batteries rechargeable batteries or when connecting a battery pack
observe correct polarity (note plus Land minus
-).
If the device is not used for a longer period of time(e. g. storage), remove the
inserted batteries(or rechargeable batteries) from the remote control to avoid
damage from leaking batteries rechargeable batteries.
Recharge the rechargeable battery about every
3
months, as otherwise, there may a
so called deep discharge due to the self-discharge, which can make rechargeable
batteries useless.
5#~?2#m@%B;f&a-;~%#%%Gm&%o
Ts~Me~~~T-md3%0
s@Flm-
aOaBFJ-rzm@%o
'a
Always exchange the entire set of batteries or rechargeable batteries. Do not mix full
batteries, rechargeable batteries with half-full ones. Always use batteries or
rechargeable batteries of the same type and manufacturer.

TZS?3@%o 23E%!%&%&T%ZHo
Never mix batteries and storage batteries!Either use batteries or rechargeable
batteries for the remote control transmitter.
-
flGYHZ@H&%Bft:ZE8$%*!%@%o
-
It is possible to operate the remote control (transmitter) with rechargeable
batteries instead of standard batteries.
However, the low voltage (batteries-1. 5V:'cell, rechargeable
batteries-1. 2V;cell) and the lower capacity of rechargeable batteries does
lead to a decrease of the operating time. However, normally this does not
matter, since the operating time of the transmitter is far beyond of the
model airplane.
HFBE#E@fltO@%,
%f17Bi3!?2i%HE&Eh3@fk@%~
If you use batteries in the remote control, we recommend the use of
hight-quality alkaline batteries.
flT%@&*Hl B@E%fl%&E-,60
When using rechargeable batteries there can be a decrease in range.

E%>t7E@B9f-ti8tHS~i\oT~~~i~E~~~~~;r~~~i~~i10
n,ii-o
%aJo
C!Z
TBEGPJqE;RT
T%Z~i\&GE88tEm@H25%-30%2rq~
?dI%EEZ,
FTLYiN
~~~fis~fi~~fim~ss~~rnss~~sx*n~li\~
Pleasecheck the
CG
beforeheadingtotheflying field. The center of gravity of this
modelshouldfallinthe positionas shown inthe below picture.
Ifyou're a beginner, we sincerelysuggest you that you can adjust the
center
of
gravity
of
the
modelplane intothefront edge of thewing a little. When you're familiar with the
operations, you can move the
center
of
gravity
of the model planeintothe tailof the plane.
However, inany case ,the center ofgravityshould fallwithin
25-30%
of thefront edge ofthe
wing. Ifyou have any requests, you canadjustthe receiver or increase the
weight of the model planes' head or tailtochange the
center
of
gravity
of the modelplane.

-
-
--
-
SZ@&,)S%#LM,
#MMfi$X@B%,
Openthe cabin and then take out the
power line.
-
r
----
-7
%%%!&BA#l.M,SBE&E%o
Putthe battery intothe cabinfirst, andthen
connect the power line.
-
%=:
~*-Z~rnti@~~~~
6
,
Notice: The batterymust touch the
front of the batterycabin.
SAmnfle
Coverthe cabin.
Turn on the power of the transmitter and make sure the trim for aileron .elevator
,
rudder in the neutral position
.
the trim for throttle in the bottom position and then
insert the battery.

Remember: Throttle rodand fine-tuning must bepulled into
the lowest position.
*TEE0
The aileron should be levelwhen thejoy
stick isinthe neutralposition.
EIJEET?Zo
When you pushthejoy stick of the aileronto th
left side, the left aileron goes upandthe right
ailerongoes down.
R!EIJEE%!AREE&+Jl2iBElJE?ET?ZlFlH&B
EIJSEkBo
When you pushthejoy stick of the aileron to
the rightside, the left aileron goes down and
the right ailerongoes up.
3+EEEt?A"l *"'G"EEl
?t%K@F*
TBEO
-
-
\
,;4
1
-.
+'
bdL
--
Movingthe elevatorjoy stick down will make
the airplane elevator move up.
Popular Toy manuals by other brands
Faller
Faller 180330 manual
Robinson
Robinson R22 Series Maintenance manual and instructions for continued airworthiness
The Learning Journey
The Learning Journey Techno Gears Marble Mania Crankster 3.0 instruction manual
Eduard
Eduard Fw 190A-3 1/48 Assembly instructions

goliath
goliath Mad Dog quick start guide
Eduard
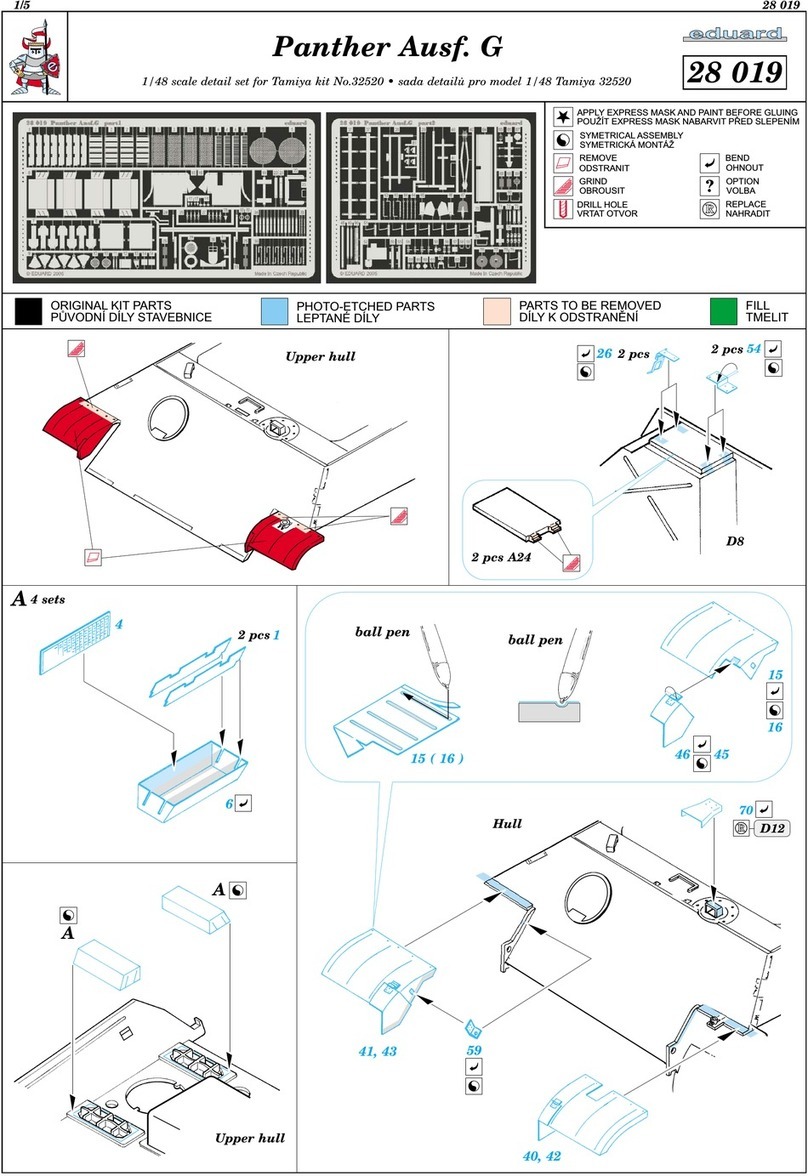
Eduard Panther Ausf. G manual
