9Hearth & Home Technologies • HEAT-OUT-GAS Instructions • 2310-939 • 3/17
NOTICE: It is imperative that the HEAT-OUT-BEK kit be
installed squarely or the HEAT-OUT-BEK may not fit into
opening left once finishing has occurred. Also care should
be taken to ensure that HEAT-OUT-BEK is secured flat to
wall.
11. The wall is now ready to be finished. Finishing
materials such as stone, marble or brick can then be
applied up to the flanges of the HEAT-OUT-BEK that
protrude perpendicular to the wall. This will ensure that
the cap will fit into the opening after finishing has been
completed.
NOTICE Outside flanges of the HEAT-OUT-BEK must not
have any pressure on them from the finishing materials.
This could cause the opening left after finishing to be too
small.
12. After HEAT-OUT-BEK has been installed and the
finishing of the wall has taken place, apply a bead
of silicone (with a minimum of 300° F continuous
exposure rating) to the HEAT-OUT-BEK around the
entire metal flange, as shown in Figure 2.20 with the
dotted line.
APPLY SILICONE (with a
minimum of 300°F continu-
ous exposure rating) TO
FLANGE
APPLY SILICONE (with a
minimum of 300°F continuous
exposure rating) TO PERFO-
RATED HOLES.
OUTSIDE
FLANGE
(SECURE FIRST)
OUTSIDE
FLANGE
(SECURE FIRST)
APPLY SILICONE (with a
minimum of 300°F continuous
exposure rating) TO TOP
CORNERS
Figure 2.10 HEAT-OUT-BEK Attached to Wall
Formed Tabs
Formed Tabs
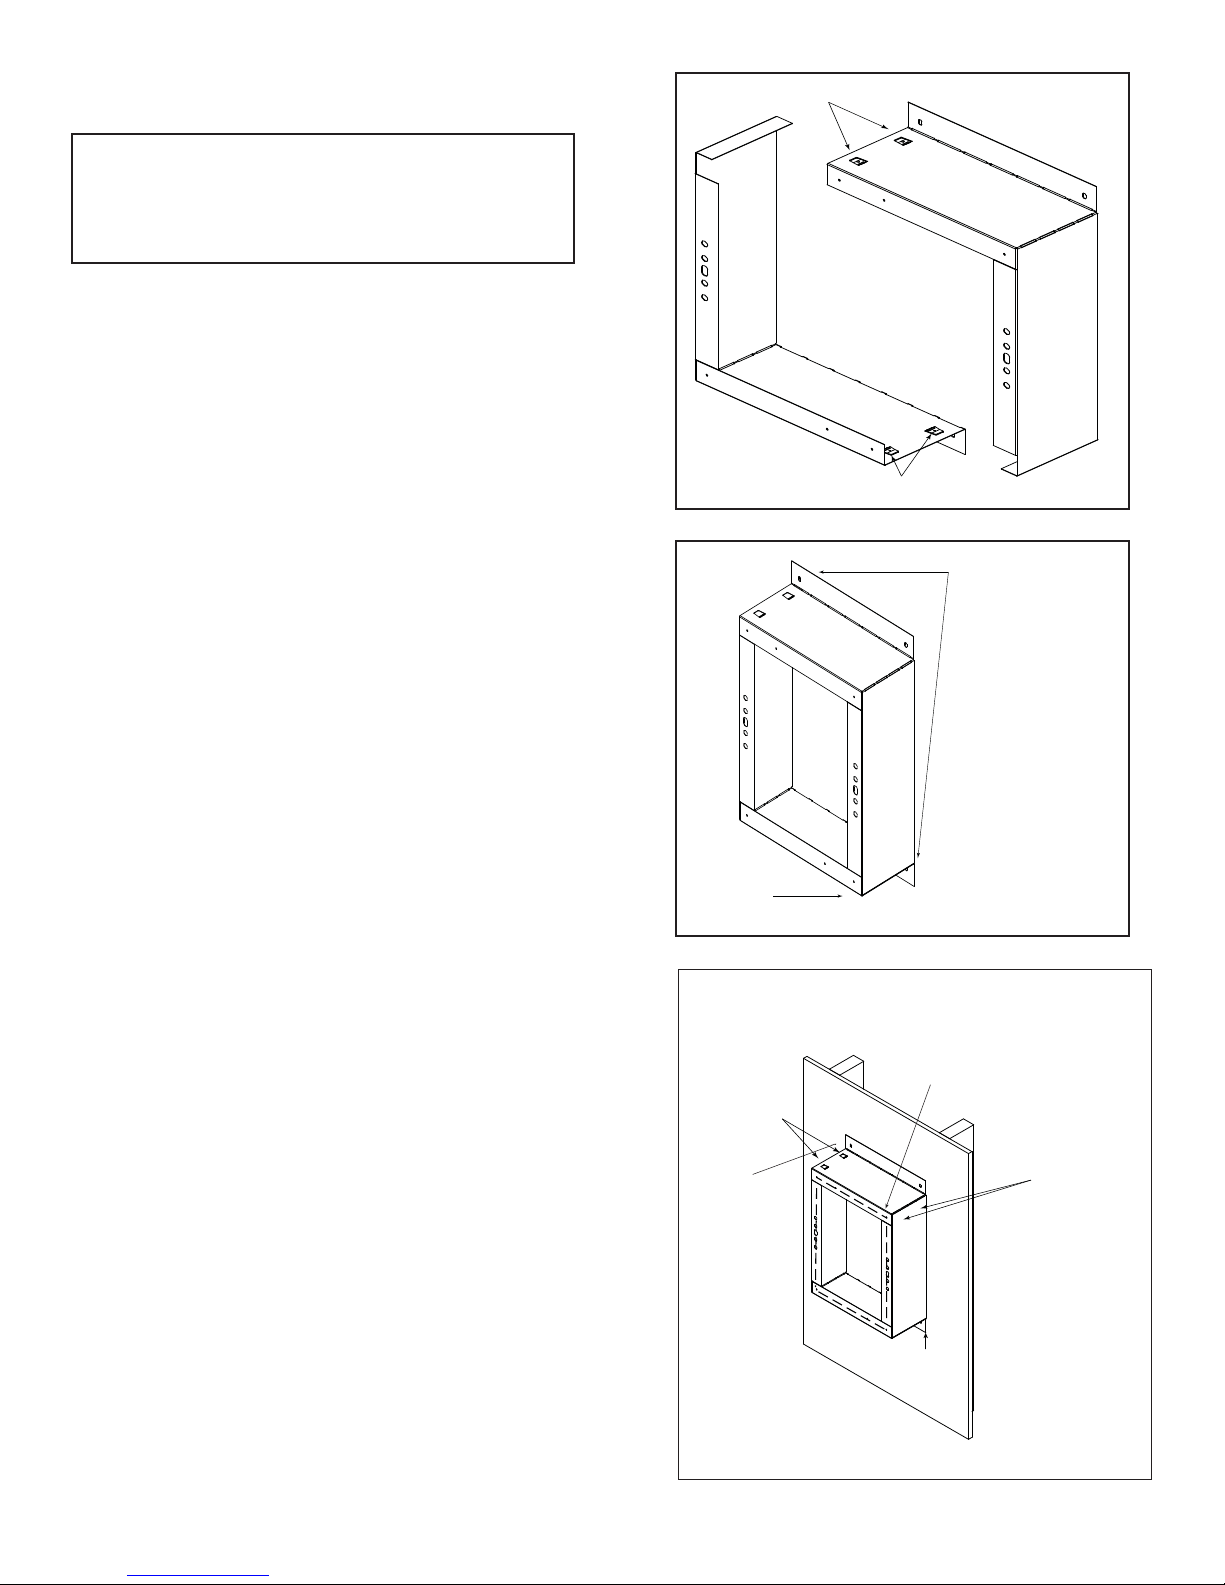
Figure 2.8 Bend BEK Sections
SECTION A
SECTION B
SECURE TO BUILDING
EXTERIOR USING TOP (2) AND
BOTTOM (2) MOUNTING HOLES
(#8 X 3 INCH SCREWS)
RETURN BEND ON
SECTION A LOCATED
ON OUTSIDE OF
SECTION B.
Figure 2.9 BEK Assembled
5. Assemble the Heat-Out-BEK kit. Bend the two sections
of the Heat-Out-BEK kit as shown in Figure 2.8.
6. Use the formed tabs to assemble the box as shown
in Figure 2.9. The return bend on section A should be
located on the outside of section B.
7. Place assembled box over the framed opening in the
wall with outside flanges oriented vertically and held
tight to the building exterior. See Figure 2.10.
Note: A HEAT-OUT-BEK kit will be needed for installations
with exterior finishing materials greater than 1 in. thick.
Order with the appliance and venting system. It will be used
to ensure that the finishing is done to the appropriate size for
the HEAT-OUT-GAS to be installed properly.
If installing with finishing material less than
1 inch thick go to step 15.
8. Drive two of the supplied #8 X 3 inch screws through
opposite ends of the two outer flanges. This will secure
the Heat-Out-BEK extension box to the building and
allow for squaring of the Heat-Out-BEK. See Figure
2.10.
9. Seal all corners, joints and bend lines with silicone
(with a minimum of 300° F continuous exposure rating)
caulk. Ensure all gaps and holes are filled so a sealed
envelope is formed.
10. If finishing material extends past the cap extension
box (BEK) more than one inch, an additional BEK is
required. Cap extension boxes may be stacked for
thicker wall applications:
• Attach first box to the wall.
• Assemble second box.
• Bend the two outside flanges of the second box
around to the inside of the box. See Figure 2.11.
• Secure the second box to the first using four #8 x 1/2
sheet metal screws included in the HEAT-OUT-BEK
kit. See Figure 2.11.


