Heat & Glo LifeStyle Cerona-36 Configuration guide
Valencia Doors
Models: Cerona-36 & Cerona-42
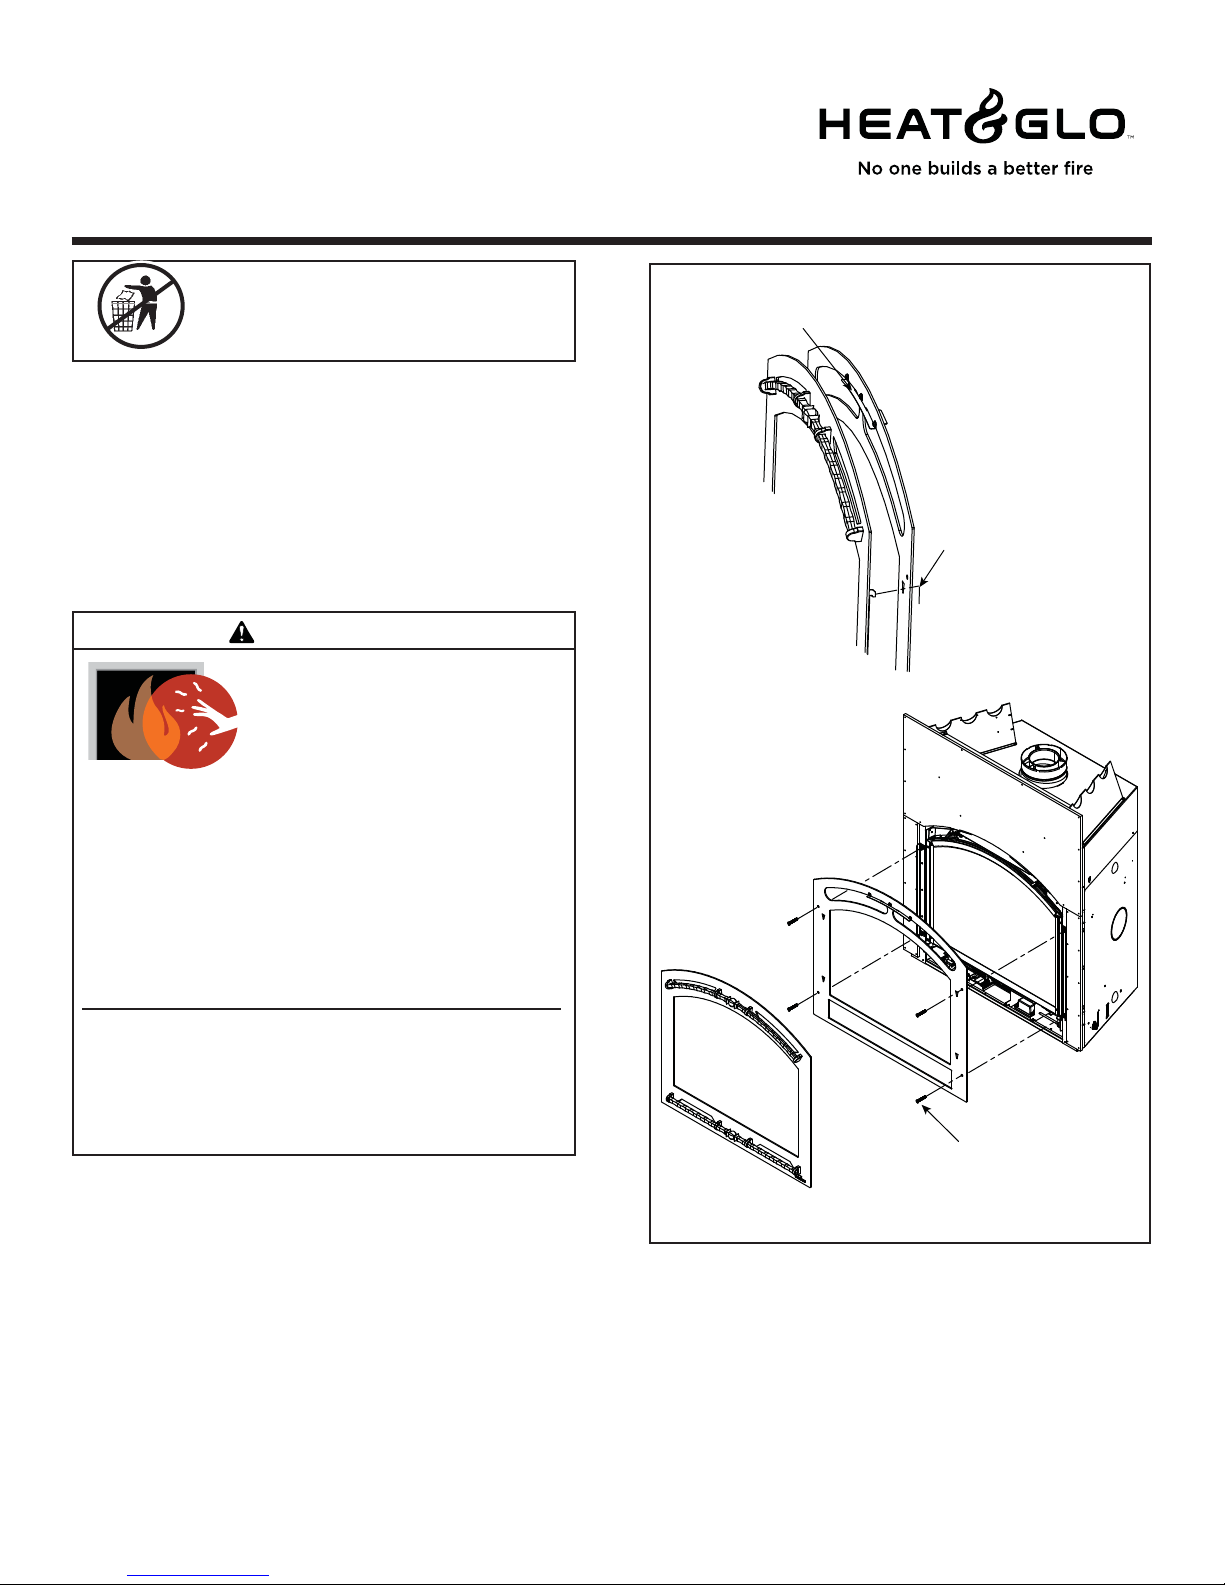
HOOK DOOR
INTO V-SLOTS
MOUNTING BOLTS
HEAT SHIELD SIDE WITH NUTS
FACE SECOND DOOR PANEL
Leave this manual with party responsible
for use and operation.
Please see Figure 1 for assembly instructions.
Please contact your Heat & Glo dealer with any questions
or concerns.
For the location of your nearest Heat & Glo dealer,
please visit www.heatnglo.com.
Heat & Glo, a brand of Hearth & Home Technologies Inc.
7571 215th Street West, Lakeville, MN 55044
www.heatnglo.com
Cleaning Instructions for Doors
Use a microfiber cloth and Windex® Original Glass
Cleaner or 03M003 Stove Bright® Glass Cleaner to clean
the door immediately after installation to remove acids
deposited by the installer or technician. Spray the cleaner
onto the microfiber cloth and carefully wipe the entire
surface. The door should be cleaned in this manner
annually by the homeowner to remove fingerprints or
other contaminants. Once oxidation of the paint pigment
has occurred, cleaning will not restore the original color.
Heat & Glo • Valencia Doors • 2106-936 Rev. B • 5/11
This appliance has been supplied with an integral barrier
to prevent direct contact with the fixed glass panel. DO
NOT operate the appliance with the barrier removed.
Contact your dealer or Hearth & Home Technologies if the
barrier is not present or help is needed to properly install one.
HOT SURFACES!
Glassandothersurfacesarehotduring
operation AND cool down.
Hot glass will cause burns.
• DO NOT touch glass until it is cooled
• NEVER allow children to touch glass
• Keep children away
• CAREFULLY SUPERVISE children in same room as
fireplace.
• Alert children and adults to hazards of high temperatures.
High temperatures may ignite clothing or other flammable
materials.
• Keep clothing, furniture, draperies and other flammable
materials away.
CAUTION! Risk of Cuts or Abrasions. Wear protective
gloves and safety glasses during installation.
CAUTION! Do not install damaged components.
Figure 1.
WARNING
This manual suits for next models
1
Popular Door manuals by other brands

Ives
Ives Heavy Duty Top Center Pivot 7259 installation instructions

Johnson Hardware
Johnson Hardware 1836 installation instructions

Pella
Pella 818T0101 installation instructions

Ives
Ives Casement Operator 394 installation instructions

Petsafe
Petsafe SmartDoor PPA11-10709 operating guide

Pella
Pella 81DU0100 installation instructions


