Heatmiser IQ User manual

1
HEATMISER
IQ
EN IT FR DE NL
Ref. IQ1
Revision 1 - 06/09

2
USER INSTRUCTIONS
INDEX
SUBJECT PAGE No.
Contents Pages .......................................................... 2
Language Option....................................................... 3
Standard Terms .......................................................... 3
Normal RUN Mode
• Override ................................................................... 4
• Summer Mode ........................................................ 4
• Heater Lockout & Reset ........................................... 4
• Summer Fan............................................................ 5
Program Mode
• Temperature Setting................................................. 5
• Data Settings ........................................................... 5
• Time Settings............................................................ 6
• Code Setting ........................................................... 7
Technical
• Override (maximum) ............................................... 8
• Optimisation Configuration...................................... 8
• Code Setting ........................................................... 8
• Calibration............................................................... 9
• Reset ....................................................................... 9
• Service Mode.......................................................... 9
• Service Alarm Activated .......................................... 9
• Resetting The Service Alarm..................................... 10
• Constant Fan........................................................... 10
• Specification/Fuse Rating ........................................ 10
• Wiring Diagrams ...................................................... 11
EN

3
LANGUAGE OPTION
To select the required language press PROG and enter the code 2305 and press Enter.
Then select the required language from the selection.
STANDARD TERMS
Self Learning Optimisation is a system whereby the Heatmiser Control will automatically calculate the
start-up time to ensure the building is up to temperature for the programmed switching time. It does
this by monitoring the internal temperature readings, so that for example, in milder weather conditions
heat up times are reduced – thus saving energy.
Preheat is the number of hours the control can come on before the programmed switching time (when
in optimising mode). This is set under the Engineers code and can be set to no more than 8 hours.
Rate of change is the time it takes to raise the building 1.0°C. The factory default for this setting is 20
minutes but the control will automatically adjust this according to the fabric of the building.
Override: Using the Override button on the Heatmiser Keypad allows the user to override the zone for
a selected number of hours, to allow for unscheduled use of the system. A maximum can be set to
stop users entering long override periods.
Switching period status:
• Day is when the control is being controlled to an actual switching time. (For example between
07.00 - 08.00 the control would be in a DAY condition. Outside of those hours the control would
be in a NIGHT condition).
• Night is when no switching times have been programmed. At these times the control is set back
to the night temperature.
Heater Lockout & Reset is standard on the Heatmiser IQ and allows a signal to be fed into the Heatmiser
from the heater when the heater goes to lockout (overheat etc.). Once the fault on the heater has
been rectified a reset signal can be sent to the heater resetting lockout status.
Normal RUN mode is when the control is operating normally and is not being programmed (i.e.
showing the Time/Day or the Info screen). It is important to remember that when any alterations have
been made to the Heatmiser's program, the RUN button is pressed to return the control to the RUN
mode.
NORMAL MODE
There is one main Normal (RUN) mode screen, and one Info Screen on the Heatmiser IQ. These are
explained below:
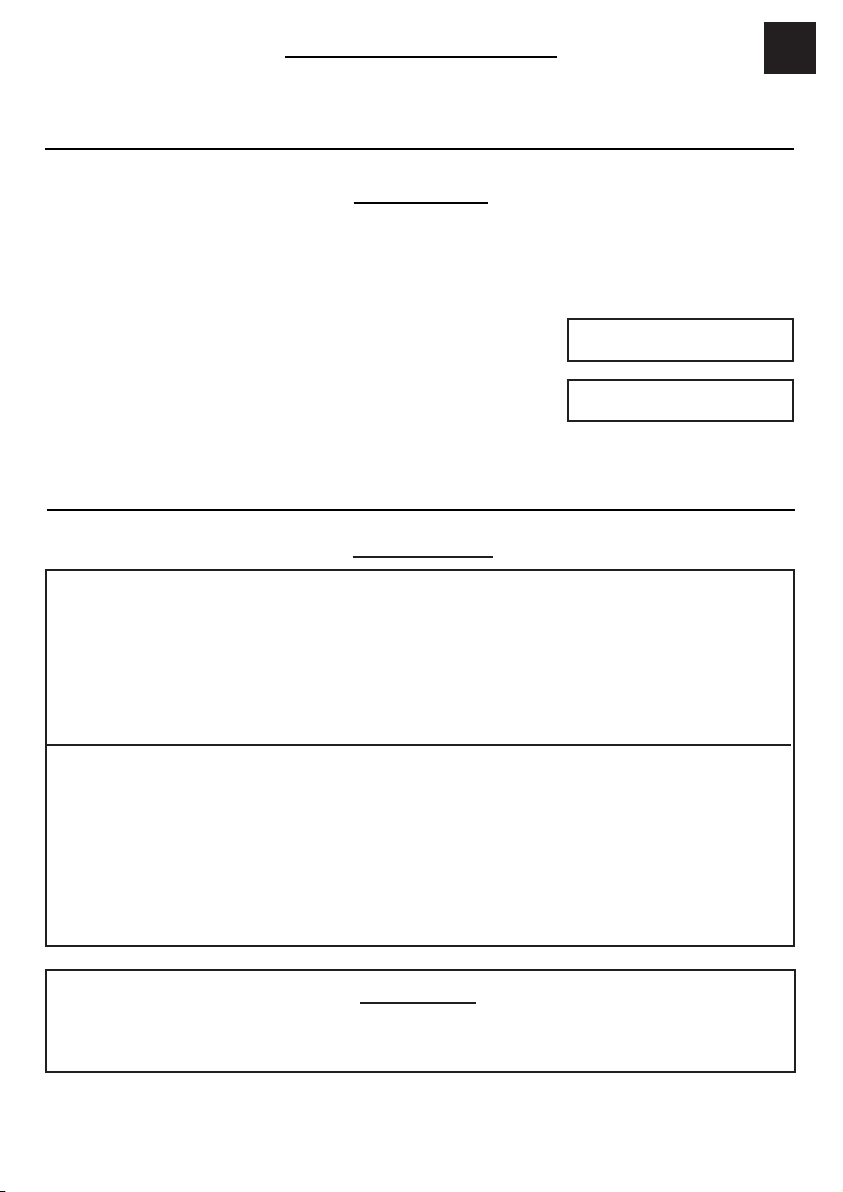
The Normal (RUN) mode screen shows information such as
Current Time, Current temperature and the relay status.
The Information screen shows the target temperature
along with the switching period.
To view the Information screen, press INFO and select 1 for Information.
EN
MON 13:06 20.0C
Status: HEAT OFF
TARGET TEMP: 21.0C
TIME CLOCK: DAY

4
OVERRIDE
The Heatmiser IQ can be overridden into a day or night condition to allow for any unscheduled
operation of the system. The maximum time that the unit can be overridden will have been set by
the installer.
To program an override period
• From the Normal RUN mode
Press the Override button and enter your security code if required.
• Then choose 1) to enter the override mode.
• Then select either 1 or 2 to override the zone ON(1) or OFF(2).
• You are now prompted to enter the length of the override period.
• Should the zone be above temperature, the control will show the
following screen. Remember that the Override function only
overrides time and not temperature. This error message will also
appear if the override time programmed exceeds the maximum
override setting
• The status screen then indicates the zone has been put into an
override condition.
To cancel an override period repeat the steps above, choosing 2 for OFF
and then reduce the length of the override period to 00.
SUMMER MODE
To enable the Summer mode facility press the Override/Summer
button and select 2 for Summer.
The control is then put in to Summer mode, which means that the temperature is controlled to the
Night Setback setting.
To cancel repeat the above operation.
HEATER LOCKOUT/RESET
A supply can be wired into the Heatmiser from the heater lockout connection allowing for remote
indication of a fault. Once the fault has been rectified on the Heater, pressing RESET on the keypad
sends a reset signal to the heater to clear the lockout status.
This feature is highly beneficial on heaters installed out of reach.
HEATER RESET
(No Lockout Indication)
On heaters where there is no heater lockout, the Heatmiser can be used to send a reset signal.
To send a Reset signal in this case:
Press the Reset button.
Press 2 for Reset.
The Reset relay will be energised for a second.
Mon 13:06 20.0C
Time Clock: DAY
1> OVERRIDE MODE
2> SUMMER MODE
OVERRIDE TO
1>ON or 2>OFF
OVERRIDE SETTING
MAXIMUM (04) : 03
Mon 13:06 20.0C
Status: OVERRIDE
** WARNING **
INVALID DATA
!
1> OVERRIDE MODE
2> SUMMER MODE
EN
1> INFORMATION
2> LOCKOUT RESET

5
MANUAL SUMMER FAN
Providing the installed heaters are equipped with a summer fan facility, the Heatmiser can enable
the fan to give ventilation in summer months.
• Pressing the FAN key displays the following screen.
• At this point you must press ENTER or if you wish to abort this operation press the DELETE key.
To disable the fan, repeat the above operation.
PROGRAM MODE
From the Normal (RUN) mode screen, pressing the PROG button
will display the following screen:
Before you can access the Heatmiser you must enter the passcode. This passcode is set to 0000
as a factory default but may be changed at any time by the user to ensure security. This process is
explained under section 4 (Code).
1) TEMP
This section is used to change the temperature settings.
Pressing 1 for TEMP displays the following screen:
• You are now prompted to enter the required temperature for
the DAY periods. (EG - 22.0). This must be entered as three digits.
• When complete, press Enter.
• You are now able to select whether you require Frost Protection.
Selecting OFF returns you to the DATA menu.
• Selecting ON enables you to select a NIGHT setback temperature.
• Press Enter when you have set the required night temperature,
and then press RUN to return to the Normal RUN Mode.
2) DATA
The DATA section is where you are able to set the daily switching periods. There are 3 periods per day
available.
• Press PROG and enter the security code.
• Now select 2 to enter the DATA menu.
You can see on screen now that we are prompted to enter the
switching period 1 for Monday. So, using 24 clock notation,
enter the required Start Time. (EG 08:00).
FAN ON?
ENTER TO CONFIRM
!
** WARNING **
ENTRY CODE: ????
1>TEMP 2>DATA
3>TIME 4>CODE
This is the DATA menu
SET DAY PERIOD
TEMP: 22.0 C
FROST PROTECTION
1>ON OR 2>OFF
SET NIGHT PERIOD
TEMP: 05.0 C
1) TEMP 2) DATA
3) TIME 4) CODE
MON PERIOD : 1
S:HH:MM E:HH:MM
EN

6
Now Press Enter to accept the Start Time and to move the cursor to the End Time setting.
We are able to program the required End Time, for example 17:00.
Don't forget to use 24 hour clock notation. When complete,
press Enter to accept the programmed switching
time and to move onto Period 2 Monday.
Programming further periods
You are now able to program Period 2 Monday in just the same way.
Press Enter when complete.
Should you not require all three switching periods – simply leave
the times at HH:MM and this period will be ignored.
At this point Press the Enter key to move onto Tuesday's switching periods.
You are able to enter the switching periods for Tuesday
in just the same way.
Should the switching periods be the same on Tuesday, you can press the COPY button and this copies
all of the switching times from the previous day. So, for example, if you were to press the COPY button
on Tuesday period 1 all of the switching times from Monday would be copied, and then the Heatmiser
would move onto Wednesday.
A screen is displayed similar to this . . .:
To correct any mistakes made, use the DEL key.
If Enter is pressed at any display then the current settings will be retained.
3) TIME
This is the section used to set the current Time & Day.
• Press PROG and enter security code.
• Then select option 3 for Time.
• The time currently set is displayed on screen along with a
prompt asking for the new time. Simply enter the new time
remembering to use 24 hour clock notation. (EG: 14.23)
• As the Heatmiser IQ does not have a calendar,
the current day must now be set. So for example,
if today is Wednesday press 3.
• The control will then return to the DATA menu.
• Press RUN to return to the Normal RUN mode, you will now notice the correct time and day has
been set.
MON PERIOD : 1
S:HH:MM E:HH:MM
MON PERIOD : 2
1) S:21:00 E:23:00
MON PERIOD : 3
1) S:HH:MM E:HH:MM
TUE PERIOD : 1
1) S:HH:MM E:HH:MM
COPYING ALL DATA
MON TO TUE
!
TIME NOW: 13:23
NEW TIME: HH:MM
SET DAY OF THE WEEK
1 = MON = > 7 = SUN
EN

7
!
1> MANAGER CODE
2> OPERATORS CODE
CODE NOW: 0000
NEW CODE ????
EN
4) CODE
• Press Prog and enter security code.
• Pressing 4 for Code prompts you to select the code you wish to alter.
1>Manager Code - This code gives access to all data settings.
2>Override Code - This code gives access to the Override
and Summer functions.
• To change the code, simply enter the new code when
prompted.
• Press Run to return to the Normal RUN mode.
Setting the Manager and Operations code to the same disables the Operators code.
(i.e. No code is required to access the operators section)

8
OVERRIDE SETTING
MAXIMUM TIME: 08
OPTIMISATION?
1> ON or 2> OFF
RATE OF CHANGE
MINUTES /C :20
SET PRE HEAT
MAXIMUM TIME :03
1> OVERRUN 2> OPT 1
3> CODE 4> SETUP
1> CAL 2> RESET
3> SERVICE 4> C.FAN
EN
TECHNICAL INFORMATION – ENGINEERS SET UP
To enter the engineers section, press the program button and enter the Engineers Code. (This will be
found on a label stuck to the facia or on the reverse side of the keypad. This label should be removed
after the control has been commissioned.
A display like the one shown will now be displayed.
1) OVER
This section allows us to enter a limit for the override.
Enter two digits (eg 08, for 8 hours) and then press enter to accept the setting.
2) OPTI
With the Heatmiser IQ you are able to set whether optimisation is required. (Refer to Terms for further
information).
Should you require optimisation select 1 for ON and then continue
to set the following parameters.
Selecting OFF returns you to the Setup Menu and turns off optimisation. This means that the control
will switch the heating ON at the programmed switching time and will not allow for any warm up
period.
This is the amount of time the heating system takes to raise the
building temperature by 1.0
O
C. An average starting point would be
20 minutes but because the unit is self learning, it will alter itself by
1 minute per day to adjust itself to the correct setting.
This is the maximum number of hours before the entered switching
time that the unit could come on to raise the building up to the
temperature. The maximum setting is 8 hours but an average
setting is 3 hours.
3) CODE
The code section will work as normal and is used to set the User's code.
4) SET UP
This section allows us to set the service mode, calibrate the
sensors, reset the system to factory defaults and enable or
disable the constant fan facility.

9
CURRENT: 22.0
ACTUAL: XX.X
1> CAL 2> RESET
3> SERVICE 4> C.FAN
RESET ALL DATA
ENTER TO CONFIRM
1> CONFIGURATION
2> RESET DATA
SERVICE MODE
1> ON or 2> OFF
SERVICE MODE
HOURS RUN: 0000
SERVICE MODE
CALL: 000000000
EN
1> CAL 2> RESET
3> SERVICE 4> C.FAN
CALIBRATION
Selecting 1 for calibration enables the engineer to calibrate the sensor if required.
• To calibrate the sensor, simply enter the actual temperature
you have recorded in the zone. Be sure to take the
temperature from next to the Heatmiser control.
• Press RUN to return to the Normal Run Mode
• The temperature will then be displayed on the screen.
RESET
This function resets the Heatmiser IQ's settings back to the factory defaults.
To put the control through a reset:
• Press 4 for Setup
• Press 2 for Reset
• Pressing ENTER at this point will erase all
data. To abort press the DELETE key.
SERVICE MODE
• Enter the Engineers code and press 3 for service.
• You are now prompted to:
1> Configure the service mode or
2> Reset the current hours run total held in the unit.
• Pressing 1 to configure the unit will display the following
screen and will ask you to turn the service mode On or Off.
• You are now required to enter the number of hours the system
may run before the Service Alarm should be activated.
Press Enter to accept the programmed setting.
• You should now enter the full phone number that you want
displayed when a Service Alarm is activated.
SERVICE ALARM ACTIVATED.
When a Service Alarm has been activated a warning screen will be displayed for 5 seconds every
minute. You are able to cancel this warning by pressing RESET whilst the warning display is on screen.
Remember that you will not receive further Service Alarms until the control has been reset by an
engineer.

10
EN
1> CAL 2> RESET
3> SERVICE 4> C.FAN
CONSTANT FAN
1> ON OR 2> OFF
RESETTING THE SERVICE ALARM
After a service alarm has been activated you are able to reset the hours setting without the need to
reprogram the telephone number by selecting Reset from the Configuration/Reset screen.
CONSTANT FAN
On the Heatmiser IQ there is an option to have a Constant Fan output. If enabled the Fan Relay will be
permanently ON during the programmed switching times and will operate to the optimiser setting.
• To enable the constant fan enter the Engineers code
and press 4 for setup.
• Then press 4 for C.FAN and select 1 for ON.
This will enable the constant fan facility.
• Select 2 to disable this feature.
SPECIFICATION
Zones: 1 Control Zone
Time-bases: 1 Time-base can be programmed with a maximum
of 3 switching periods per day, 7 days a week.
Outputs: IQ = 3 Single pole normally open contact (10 amp 230v AC Resistive)
Sensor Type: Built in sensor only
Battery Backup: 3 Years
Supply: 230v ± 10% 50Hz
Relay Output: Normally open contacts
maximum rating 230v AC 10 Amp Resistive
Dimensions: 158mm x 62mm x 199mm
Weight: 0.85kg
Enclosure: ABS
Designed to comply with IEE regulations
FUSE RATING
F1 = 800ma AS
F2 = 500ma QB

11
HEATMISER IQ WIRING DIAGRAMS
99$
7UDQVIRUPHU
5(/$<
Y
5(/$<
DPS
5(/$<
DPS
5(/$<
DPS
+HDWPLVHU,4
)$1+($7 1(/
5HVHW
/RFN
RXW
�� �
� �
0DLQV
,Q
+HDW
2Q2II
+($70,6(5&21752/6+($70,6(5,4
/9)ZLULQJGLDJUDP 'UDZLQJ1R
(/
+HDWPLVHU,4
2SWLRQ/LYHORFNRXWVLJQDOYROWIUHHUHVHW
&
12
1
/
�
9ROW)UHH+HDWHU
5HVHW
/RFNRXW6LJQDO/LYH
2SWLRQV$YDLODEOH
/LYH/RFNRXWVLJQDOJLYLQJDYROW
IUHHUHVHW
/LYH/RFNRXWVLJQDOJLYLQJDOLYH
UHVHW
/LYH/RFNRXWVLJQDOJLYLQJDQHXWUDO
UHVHW
1HXWUDO/RFNRXWVLJQDOJLYLQJDYROW
IUHHUHVHW
1HXWUDO/RFNRXWVLJQDOJLYLQJDOLYH
UHVHW
1HXWUDO/RFNRXWVLJQDOJLYLQJD
QHXWUDOUHVHW
99$
7UDQVIRUPHU
5(/$<
Y
5(/$<
DPS
5(/$<
DPS
5(/$<
DPS
+HDWPLVHU,4
)$1+($7 1(/
5HVHW
/RFN
RXW
��
� �
0DLQV
,Q
+HDW
2Q2II
+($70,6(5&21752/6+($70,6(5,4
/9)ZLULQJGLDJUDP 'UDZLQJ1R
(/
+HDWPLVHU,4
2SWLRQ1HXWUDOORFNRXWVLJQDOYROWIUHHUHVHW
&
12
1
/
9ROW)UHH+HDWHU
5HVHW
/RFNRXW6LJQDO
1HXWUDO
2SWLRQV$YDLODEOH
/LYH/RFNRXWVLJQDOJLYLQJDYROW
IUHHUHVHW
/LYH/RFNRXWVLJQDOJLYLQJDOLYH
UHVHW
/LYH/RFNRXWVLJQDOJLYLQJDQHXWUDO
UHVHW
1HXWUDO/RFNRXWVLJQDOJLYLQJDYROW
IUHHUHVHW
1HXWUDO/RFNRXWVLJQDOJLYLQJDOLYH
UHVHW
1HXWUDO/RFNRXWVLJQDOJLYLQJD
QHXWUDOUHVHW
��
�
� �
EN

12

13
IT
ISTRUZIONI PER L’USO
INDICE
ARGOMENTO N. PAG.
Indice ........................................................................ 13
Scelta della lingua......................................................... 14
Terminologia standard .............................................. 14
Modalità di funzionamento (RUN) normale
• Override (Intervento manuale) ................................ 15
• Modalità Estate ...................................................... 15
• Blocco e resettaggio del riscaldatore ..................... 16
• Ventilazione estiva .................................................. 16
Modalità programma
• Impostazione della temperatura............................. 16
• Impostazione dei dati ............................................. 17
• Impostazione dell’ora e del giorno.......................... 18
• Impostazione del codice ....................................... 18
Dati tecnici
• Override (valore massimo)....................................... 19
• Configurazione di ottimizzazione............................. 19
• Impostazione del codice ........................................ 19
• Taratura .................................................................. 20
• Resettaggio............................................................. 20
• Modalità manutenzione.......................................... 20
• Allarme di richiesta intervento attivato..................... 20
• Resettaggio dell'allarme di richiesta intervento ....... 21
• Ventilazione costante .............................................. 21
• Caratteristiche tecniche/Taratura dei fusibili ............ 21
• Schemi circuitali ...................................................... 22

14
IT
SCELTA DELLA LINGUA
Per scegliere la lingua desiderata, premere il tasto PROG, digitare il codice 2305 e premere il tasto
di invio. Poi scegliere la lingua desiderata dall’elenco.
TERMINOLOGIA STANDARD
L’ottimizzazione ad autoapprendimento è un sistema con il quale il regolatore Heatmiser calcola
automaticamente l'ora di avvio per fare in modo che il fabbricato sia alla temperatura voluta
all'ora programmata. Questa operazione viene eseguita monitorando i valori di l ettura
della temperatura interna in modo tale che, ad esempio, in condizioni atmosferiche più miti
i tempi di riscaldamento vengano ridotti – effettuando così un buon risparmio
energetico.
Preriscaldamento è il numero di ore per cui il regolatore può entrare in funzione prima del tempo
di accensione programmato (quando si trova in modalità di ottimizzazione). Questo valore viene
fissato per mezzo del codice Tecnico e non può superare le 8 ore.
Velocità di cambiamento è il tempo che occorre per aumentare di 1.0°C la temperatura del
fabbricato. Il valore preimpostato in fabbrica è 20 minuti, ma il regolatore lo varia automaticamente
in funzione della struttura del fabbricato.
Override (Intervento manuale): Il tasto Override sulla tastierina Heatmiser serve all'utente
per escludere la zona prescelta per il numero di ore desiderato ed utilizzare l'impianto senza
programmazione. Si può fissare un tempo massimo per impedire agli utenti di impostare lunghi
periodi di esclusione manuale.
Periodi di accensione:
• Giorno significa che sul regolatore viene impostata un'ora effettiva di accensione. (Ad esempio,
tra le 7 e le 8 di mattina il regolatore sarebbe nella condizione GIORNO. Al di fuori di queste ore
il regolatore sarebbe nella condizione NOTTE).
• Notte significa che non sono state programmate ore specifiche di accensione. Durante questi
periodi il regolatore è impostato sulla temperatura notturna.
Sul modello Heatmiser IQ è di serie la funzione di Blocco e resettaggio del riscaldatore,
che consente al riscaldatore di inviare un segnale all'Heatmiser quando si blocca (in
occasione di un surriscaldamento, ecc.). Una volta rettificato il guasto sul riscaldatore, si
può inviare a quest'ultimo un segnale di resettaggio annullando la condizione di blocco.
Modalità di funzionamento normale significa che il regolatore funziona normalmente
e non è programmato (vale a dire visualizza Ora e Giorno sullo schermo Informazioni). è
importante ricordare che quando si sono apportate modifiche al programma
dell'Heatmiser, occorre premere il tasto RUN per tornare alla modalità di funzionamento
normale.

15
LUN 13:06 20.0C
Stato: RISC. OFF
TEMP TARGET: 21.0C
OROLOGIO: GIORN
Lun 13:06 20.0C
Orologio: GIORN
1> MODO OVERRIDE
2> MODO ESTATE
OVERRIDE SU
1>ON o 2>OFF
IMPOST. OVERRIDE
MASSIMO (04) : 03
**ATTENZIONE **
DATI NON VALIDI
Lun 13:06 20.0C
Stato: OVERRIDE
!
1> MODO OVERRIDE
2> MODO ESTATE
IT
MODALITÀ NORMALE
L'Heatmiser IQ è dotato di uno schermo principale di modalità di funzionamento (RUN)
Normale e di uno schermo Informazioni, spiegati in dettaglio qui di seguito:
Lo schermo di modalità di funzionamento (RUN) Normale
visualizza informazioni come Ora e Temperatura attuali e la
condizione dei relè.
Lo schermo Informazioni
indica la temperatura che si vuole raggiungere ed il periodo di accensione.
Per visualizzare la schermata Informazioni premere INFO
e selezionare 1 per Informazioni
OVERRIDE (INTERVENTO MANUALE)
Sull'Heatmiser IQ si può operare una sovrapposizione manuale nella condizione giorno o notte per
consentire il funzionamento dell'impianto senza programmazione. La durata di tempo massima
d'intervento manuale sull'apparecchio deve essere impostata dall'installatore.
Per programmare un periodo di sovrapposizione manuale
• Dalla modalità di funzionamento (RUN) Normale Premere il
tasto Override e digitare il codice di sicurezza, se necessario.
• Poi premere 1) per accedere alla modalità di Override
(Sovrapposizione manuale).
• Poi selezionare 1 o 2 per eseguire una sovrapposizione
manuale sulla zona prescelta: ON (1) oppure OFF (2).
• Adesso occorre inserire la durata del periodo di
sovrapposizione manuale.
• Se la zona prescelta dovesse essere ad una temperatura superiore
sullo schermo apparirà la dicitura che segue. Ricordare che con
la funzione Override si sovrappone manualmente il tempo e non
la temperatura. Questo messaggio di errore appare anche se il
tempo programmato di sovrapposizione manuale supera il
valore massimo d'impostazione.
• A questo punto lo schermo di stato indica che la zona in
questione è stata messa in una condizione di sovrapposizione
manuale.
Per cancellare un periodo di sovrapposizione manuale ripetere le operazioni appena
descritte, scegliendo 2 per disattivare (OFF) e ridurre poi a 00 la durata del periodo di override.
MODALITÀ ESTIVA
Per attivare il programma Estivo, premere il tasto Override/Estate
e la posizione 2 per selezionare Estate.
In questo modo si porta il regolatore nella modalità operativa Estate, il che significa che la temperatura
viene regolata sui valori impostati per la Notte.
Per cancellare, ripetere l'operazione appena descritta.

16
IT
BLOCCO E RESETTAGGIO DEL RISCALDATORE
All Heatmiser si pu collegare un cavo dalla connessione di blocco del riscaldatore, in modo
da avere un indicazione a distanza di un guasto. Una volta rettificato il guasto sul riscaldatore,
premendo RESET sulla tastiera si invia a quest'ultimo un segnale di resettaggio per annullare la
condizione di blocco.
Questa funzione presenta notevoli vantaggi nel caso di riscaldatori installati in posizioni difficili da
raggiungere.
RESETTAGGIO RISCALDATORE
(Senza indicazione di blocco)
Per i riscaldatori senza blocco a distanza, si pu usare l Heatmiser per inviare un segnale di resettaggio
a distanza.
Per inviare un resettaggio in questo caso.
Premere il pulsante RESET.
Premere 2 per RESET.
Il relé del resettaggio si attiver per un secondo.
VENTILAZIONE ESTIVA MANUALE
Purché i riscaldatori installati siano muniti di ventilazione estiva, l'Heatmiser può attivare la ventola
nei mesi estivi.
• Premendo il tasto FAN (VENTILATORE) sullo schermo appare la dicitura che segue.
• A questo punto occorre premere il tasto di INVIO o, se lo si
desidera, si può interrompere l'esecuzione di questa
operazione premendo il tasto DELETE (ELIMINA).
Per disattivare la ventola, ripetere l'operazione appena descritta.
MODALITÀ PROGRAMMA
Dallo schermo di funzionamento (RUN) Normale, premendo il
tasto PROG sullo schermo appare la dicitura che segue:
Per poter accedere all'Heatmiser occorre anzitutto inserire l'opportuno codice. Questo codice è
impostato su 0000 in fabbrica, ma l'utente lo può cambiare in qualsiasi momento per avere la
massima garanzia di sicurezza. Questo procedimento viene spiegato al paragrafo 4 (Codice).
1) TEMPERATURA
Questa sezione serve a cambiare i valori d’impostazione della
temperatura.
Premendo 1 per avere la TEMPERATURA sullo schermo appare la dicitura che segue.
• Adesso occorre inserire la temperatura richiesta per il
GIORNO. (Esempio: 22.0). Questa temperatura deve essere
inserita utilizzando tre cifre.
• Una volta completato, premere il tasto d'invio (Enter).
• A questo punto si può scegliere di avere la funzione di Protezione
dal Gelo. Selezionando OFF si viene ricondotti al menu dei DATI.
• Selezionando ON si può scegliere un valore di temperatura
impostato per la NOTTE.
• Quando si è impostata la temperatura desiderata per la notte, premere il tasto di invio e
successivamente il tasto RUN per tornare alla modalità di funzionamento normale.
VENTOLA ON
INVIA CONFERMA
!
** ATTENZIONE **
INSER.COD.: ????
Questo Ë il menu dei DATI
1>TEMP 2>DATI
3>ORA 4>COD.
IMPOSTA GIORNO
TEMP: 22.0 C
PROTEZIONE GELO
1>ON O 2>OFF
IMPOSTA NOTTE
TEMP: 04.0 C
1> INFORMAZIONI
2> RESET BLOCCO

17
IT
2) DATI
La sezione DATI è quella in cui si possono impostare i periodi di accensione quotidiani. Sono disponibili
3 periodi di accensione al giorno.
• Premere il tasto PROG e digitare il codice di sicurezza.
• Poi premere 2 per inserirsi nel menu dei DATI.
A questo punto si può vedere sullo schermo che occorre
impostare il periodo di accensione 1 per il lunedì. Utilizzando
l'orologio di 24 ore, digitare l'Ora di Inizio desiderata.
(Esempio: 08:00).
Adesso premere il tasto di invio per accettare l'Ora di Inizio e per spostare il cursore sull'impostazione
dell'Ora di Arresto.
Si può programmare l'Ora di Arresto desiderata, ad esempio le
17:00. Non dimenticare di usare l'orologio di 24 ore. Una volta
ultimato, premere il tasto di invio per accettare il periodo di
accensione programmato e per spostarsi sul Periodo 2 di lunedì.
Per programmare altri periodi
A questo punto si può programmare il Periodo 2 di lunedì
esattamente allo stesso modo. Una volta completato,
premere il tasto d'invio (Enter).
Se non occorrono tutti e tre i periodi di accensione, basta lasciare
l'indicazione delle ore su HH:MM e questo periodo verrà ignorato.
A questo punto premere il tasto di invio per spostarsi sui periodi di accensione del martedì.
Si possono programmare i periodi di accensione del martedì
esattamente allo stesso modo.
Se i periodi di accensione dovessero essere identici per il martedì, si può premere il tasto COPY che
provvederà a copiare tutti i tempi di accensione del giorno precedente. Così, ad esempio, se si
dovesse premere il tasto COPY sul Periodo 1 del martedì, verrebbero copiati tutti i tempi di accensione
del lunedì, e il programma dell'Heatmiser si sposterebbe sul mercoledì.
Sullo schermo appare una dicitura simile a questa . . .:
Per correggere eventuali errori commessi, usare il tasto CANC. Se in qualsiasi momento
si preme il tasto d'invio, vengono conservati i dati d'impostazione correnti.
1) TEMP 2) DATI
3) ORA 4) COD.
LUN PERIODO : 01
I:HH:MM A:HH:MM
LUN PERIODO: 01
I:HH:MM A:HH:MM
LUN PERIODO: 02
1) I:21:00 A:23:00
LUN PERIOD : 3
1) I:HH:MM A:HH:MM
MAR PERIODO: 01
1) I:HH:MM A:HH:MM
COPIA OGNI DATO
DA to MAR
!

18
IT
3) ORA E GIORNO
Questa è la sezione che serve a impostare l'Ora e il Giorno attuali.
• Premere il tasto PROG e digitare il codice di sicurezza.
• Poi selezionare 3 per inserire l'Ora.
• Sullo schermo appare l'ora attualmente impostata assieme alla
richiesta dell'ora nuova. Inserire l'ora nuova ricordandosi di
usare l’orologio di 24 ore. (Esempio: 14.23)
• Poiché l'Heatmiser IQ non ha un calendario,
occorre impostare il giorno in corso. Così, ad esempio,
se oggi è mercoledì premere 3.
• Il regolatore ritornerà poi al menu dei DATI.
• Premere il tasto RUN per tornare alla modalità di funzionamento normale. Notare che sono stati
impostati l'ora e il giorno esatti.
4) CODICE
• Premere il tasto PROG e digitare il codice di sicurezza.
• Se si preme 4 per inserire il Codice, viene richiesto di selezionare il codice che si desidera
modificare.
1>Codice Manager - Questo codice permette di accedere
a tutti i valori d’impostazione.
2>Codice Operatore - Questo codice permette di accedere
alle funzioni Override ed Estate.
• Per cambiare il codice, basta digitare il nuovo codice
quando viene richiesto.
• Premere RUN per tornare alla modalità di funzionamento normale.
Impostando il codice Manager e quello Operatore sullo stesso valore si disabilita il codice
Operatore. (vale a dire, per accedere alla sezione Operatore non occorre codice)
ORA ATT.: 13:23
NUOVA : HH:MM
IMPOSTA GIORNO
1 = LUN = > 7 = DOM
1> COD. MANAGER
2> COD.OPERATORE
COD. CORR.: 0000
NUOVO COD.: ????
!

19
IT
1> OVER 2> OTTI
3> COD. 4> SETUP
IMPOST. OVERRIDE
TEMPO MAX: 08
OTTIMIZZAZ.IONE?
1> ON o 2> OFF
VELOC. CAMBIAM.
MINUTI
°
/C :20
IMP. PRERISCALD.
MASSIMO (ORE) :03
1> TARAT 2> RESET
3> MANUT 4> VENT
I
NFORMAZIONI TECNICHE - CONFIGURAZIONE
Per immettersi nella sezione tecnica, premere il tasto del programma e digitare il Codice Tecnico.
(Questo codice si trova su un'etichetta affissa sul pannello frontale o sul retro della tastierina. L'etichetta
deve essere rimossa dopo che il regolatore è stato messo in esercizio).
A questo punto sullo schermo appare una dicitura come quella
qui illustrata.
1) OVER
Questa sezione consente di impostare un limite per la
sovrapposizione manuale.
Digitare due cifre (es. 08 per 8 ore) e premere il tasto di invio per accettare questo valore.
2) OTTI
Con l'Heatmiser IQ è possibile decidere se si vuole l'ottimizzazione. (Per ulteriori informazioni vedere
il paragrafo Terminologia).
Se si desidera l'ottimizzazione selezionare 1 per ottenere ON e
continuare poi a impostare i parametri che seguono.
Selezionando OFF si viene ricondotti al menu di Configurazione e l'ottimizzazione viene disattivata.
Questo significa che il regolatore accenderà il riscaldamento all'ora programmata e non consente
alcun periodo di preriscaldamento.
Questo è il tempo che occorre per aumentare di 1.0°C la temperatura
del fabbricato. Un valore medio di questo tempo è 20 minuti
ma, poiché l'apparecchio è ad autoapprendimento, modifica
questo parametro di 1 minuto al giorno per portarsi al valore corretto.
Questo è il numero massimo di ore prima dell'ora di accensione
programmata, per cui l'apparecchio potrebbe entrare in funzione
per portare il fabbricato alla temperatura voluta. Il valore massimo
è di 8 ore, ma un valore medio è in genere di 3 ore.
3) CODICE
La sezione del codice funziona come di consueto e serve ad impostare il codice Utente.
4) CONFIGURAZIONE
Questa sezione consente di tarare il sensore e di ripristinare il
regolatore sui valori preimpostati in fabbrica

20
IT
ATTUALE: 22.0
EFFETT.: XX.X
RESET DATI?
INVIA CONFERMA
1> TARAT 2> RESET
3> MANUT 4> VENT
1>CONFIGURAZIONE
2>RESET DATI
MOD. MANUTENZ.
1> ON o 2> OFF
MOD. MANUTENZ.
ORE FUNZ.: 0000
MOD. MANUTENZ.
TEL.: 000000000
1> TARAT 2> RESET
3> MANUT 4> VENT
TARATURA
Con il tasto 1 il tecnico è in grado di tarare il sensore, se necessario.
• Per questa operazione, basta immettere la temperatura
effettiva registrata nella zona in questione. Accertarsi di
rilevare la temperatura vicino al regolatore Heatmiser.
• Premere RUN per tornare alla modalità di funzionamento normale
• Sullo schermo viene visualizzata la temperatura.
RESETTAGGIO
Questa funziona ripristina i parametri dell’Heatmiser IQ sui valori preimpostati in fabbrica.
• Per questa operazione, premere il tasto PROG e inserire il
Codice Tecnico.
• Poi selezionare 4 per consentire la Configurazione, e a questo
punto sullo schermo appare la scritta:
• Premere 2 per Reset
• A questo punto, se si preme il tasto di invio, si cancellano
tutt i dati. Per interrompere l’esecuzione di questa operazione
premere il tasto CANCELLA.
MODALITÀ MANUTENZIONE
• Digitare il codice tecnico e premere 3 per portarsi in
modalità manutenzione.
• A questo punto all'operatore viene chiesto di:
1> Configurare la modalità di manutenzione, oppure
2> Azzerare il numero di ore complessive di funzionamento
memorizzate nell'apparecchio.
• Premendo 1 per configurare l'apparecchio, sullo schermo
appare la dicitura che segue, con la possibilità di scegliere
tra l'attivazione (On) o la disattivazione (Off) della modalità
di Manutenzione.
• A questo punto viene chiesto di inserire il numero di ore per
cui il sistema può girare prima che venga attivato l'allarme
che richiede un intervento di manutenzione. Premere il tasto
di invio per accettare il valore programmato.
• Adesso occorre digitare il numero telefonico completo che
si desidera visualizzare quando viene attivato l'allarme di
richiesta di intervento.
ALLARME DI RICHIESTA INTERVENTO ATTIVATO.
Quando è stato attivato un allarme di richiesta intervento, per 5 secondi ogni minuto viene
visualizzato uno schermo di avvertimento. Si può cancellare questo avvertimento premendo il
tasto RESET mentre l'avvertimento è ancora sullo schermo.
Da ricordare che non si riceveranno altri allarmi di questo tipo sino a quando il comando non è
stato resettato da un tecnico.
Table of contents
Languages:
Other Heatmiser Control Unit manuals
Popular Control Unit manuals by other brands

Valeo
Valeo SC1000 OTOKAR operating instructions

Casit
Casit EQSER30E manual

Task Force Tips
Task Force Tips ER Bubble Cup Instructions for installation, safe operation and maintenance

SMART Embedded Computing
SMART Embedded Computing RTM-ATCA-F140 Series Installation & use

BlackVue
BlackVue CM100GLTE user guide

WAGNER
WAGNER VM 500 Translation of the original operating manual