Heatrae Sadia Aquatap Assembly Instructions

INSTALLATION & USER INSTRUCTIONS (BOIL)

the nation’s favourite for
PLUMBING & HEATING SUPPLIES
SECURE PAYMENTS
shop online with confidence
FREE SHIPPING
on all orders over £100 to mainland UK
FINANCE AVAILABLE
spread the cost with low interest rates
PRICE MATCH
always get the best deals available
Boilers
Radiators
Heating controls
Cylinders
Fires
Renewable energy
Bathroom suites
Kitchen sinks & taps
Showers
Wet rooms
Towel warmers
Bathroom furniture
& much more
HUGE REDUCTIONS
we have
ON THOUSANDS OF ITEMS
0844 800 3460
CALL US ON
visit our website
plumbnation.co.uk

CONTENTS
SECTION PAGE
1.0 INTRODUCTION 3
2.0 TECHNICAL SPECIFICATION 4
3.0 INSTALLATION - IMPORTANT INSTALLATION POINTS 7
4.0 INSTALLATION - MOUNTING THE WATER HEATING UNIT 8
5.0 INSTALLATION - WATER SUPPLY 9
6.0 INSTALLATION - VENT PIPE 10
7.0 INSTALLATION - DISPENSING TAP MOUNTING 10
8.0 INSTALLATION - DISPENSING TAP CONNECTION 12
9.0 INSTALLATION - ELECTRICAL REQUIREMENTS 14
10.0 COMMISSIONING 14
11.0 USER INSTRUCTIONS 17
12.0 MAINTENANCE 18
13.0 FAULT FINDING 20
14.0 SPARE PARTS 22
GUARANTEE 27
ENVIRONMENTAL INFORMATION 27
15.0 COMMISSIONING RECORD 28
16.0 SERVICE RECORD 29
17.0 SPARES STOCKISTS 32
2

BOILING WATER MODEL
1.0 INTRODUCTION
Thank you for purchasing a Heatrae Sadia AQUATAP unit. This unit is manufactured to the
highest standards and has been designed to meet all the latest relevant constructional and safety
TheAQUATAP unit must be installed (see Sections 3.0, page 7 to 9.0, page 14), commissioned (see
Section 10.0, page 14 ) and maintained (see Section 12.0, page 18) by a competent person. Please
read and understand these instructions prior to installing your AQUATAP unit. Following installation
and commissioning of the unit, the operation of the AQUATAP should be explained and demonstrated
to the user. Instructions for use are explained in Section 11.0, page 17. These instructions should
be left with the user for future reference.
This appliance is not intended for use by persons (including children) with reduced physical, sensory
or mental capabilities, or lack of experience and knowledge, unless they have been given supervision
or instruction concerning the use of the appliance by a person responsible for their safety. Children
should be supervised to ensure that they do not play with the appliance.
IntelliboilTMPlus
It regularly brings the contents of the water container to boil in response to ongoing user demand.
However, when there has been no draw off for a period of one hour, IntelliboilTMPlus steps back the
stored water temperature. This avoids unnecessary boiling - possibly for a number of hours or even
days - until there is renewed user demand. When this occurs, the boiling cycle resumes.
The appliance is intended to be used in commercial applications such as:
COMPONENT CHECKLIST
Before commencing installation please check that all the following components have been supplied
in the packaging:
3

2.0 TECHNICAL SPECIFICATION
AQUATAP HEATER
Model reference 95200261
Electrical rating 2.3kW @ 230 V ~
2.5kW @ 240 V ~
Nominal capacity 5.0 litres
Weight (full) 17.5kg
Rated pressure 0 MPa ( 0 bar )
Minimum supply pressure 0.05 MPa ( 0.5 bar )
Maximum supply pressure 1.0 MPa ( 10 bar )
Enclosure rating IPX2
Nominal commissioning 24
time (minutes) to temperature
ready
FIGURE 1 : AQUATAP HEATER
INLET
MAINS (ELECTRICAL SUPPLY)
TAP ELECTRICAL CONNECTION
VENT
OUTLET
480mm
269mm
150mm 150mm
150mm
Minimum clearance needed around the heater unit
150mm
Minimum clearance needed around the heater unit
350mm
4

HEATING ELEMENT
TRANSFORMER
MAIN PCB
STEAM
CONDENSING TRAP
PUMP
INLET SOLENOID
FIGURE 2: AQUATAP HEATER - IMPORTANT FEATURES
LEVEL SENSOR ASSEMBLY
THERMAL CUT-OUT
DRAIN
5

6
FIGURE 3: AQUATAP WATER HEATER SCHEMATIC
INLETOUTLET VENT
STEAM CONDENSING TRAP
HEATING ELEMENT
HOT WATER STORE
PUMP
OVER
TEMPERATURE
SENSOR
LEVEL
SENSOR
SOLENOID
VALVE

3.0 IMPORTANT INSTALLATION POINTS
Regulations (England and Wales), The Building Regulations (Scotland) or
The Building Regulations (Northern Ireland). In territories other than those listed
the local regulations in force must be complied with.
Ireland) or The Water Byelaws in Scotland.
3.2 The AQUATAP stores and dispenses water at or close to boiling point whilst
switched on. Due caution must be taken when choosing a location for the product to
minimise any possible misuse. The dispenser tap should be located such that it
discharges over a sink or mounted on its own purpose designed drip tray (available as
an accessory, Product Code 95970138).
3.3 The AQUATAP is a vented water heater. The vent pipe must never be blocked,
obstructed or removed. Warning, in the event of a unit malfunction, steam may vent
from the vent pipe for a short period of time (see FIG. 5, page 11 for position of vent
pipe).
3.4 Wherever possible the AQUATAP should be supplied directly from the cold mains
supply. If fed from a cold water feed cistern, the cistern must comply with the
be reduced when supplied from a cistern and additional pre-treatment of the water
NOTE: In order to meet the minimum supply pressure requirements of the
AQUATAP, any cold feed cistern must be a minimum of 5 metres above the unit.
3.5 In hard water areas, heated water will produce limescale which will be deposited in
the heater. If this is not regularly removed it will impair the operation of the AQUATAP
unit. Where rapid and excessive scale build up is likely to occur the use of a
3.6 The AQUATAP unit will adjust for ambient air temperatures of between 1°C and 40°C
3.7 The unit must not be installed where it is liable to freeze. If the unit is thought to be frozen
it must not be switched on. It should be allowed to thaw and must then be thoroughly
inspected to ensure it is undamaged.
3.8 The unit is not suitable for installation in an area where a water jet could be used.
7

4.0 INSTALLATION – MOUNTING THE WATER HEATING UNIT
4.1 The AQUATAP water heating unit is free standing and must be mounted on a level
surface. If being mounted in a cupboard, on a shelf or false base, ensure that
the supporting surface can carry the full weight of the unit (see TECHNICAL
SPECIFICATIONS Section 2.0, page 4)
4.2 Refer to FIG. 1, page 4 for details of the dimensions of the AQUATAP water heating unit
and the relative positions of the water and electrical connections.
4.3 The AQUATAP heater unit must be located beneath the dispensing tap. It must be
dispensing tap to the OUTLET and VENT connections on the AQUATAP unit. The pipes
must not be lengthened. The dispenser tap can be positioned so it discharges into a sink
or mounted on its own purposed designed drip tray (available as an accessory, Product
Code 95970138).
top rear edge of the unit, it must be ensured that these can be accessed in order to
facilitate removal of the front cover for maintenance and servicing.
cable. It is recommended that this is connected to a fused double pole isolating switch
electrician. Refer to Section 9.0, page 14 INSTALLATION – ELECTRICAL
REQUIREMENTS for full details of the electrical installation.
8

5.0 INSTALLATION - WATER SUPPLY
5.1 The INLET connection to the AQUATAP water heating unit is located on the top rear
to make a compression connection directly to the INLET connection.
facilitate servicing the heater.
5.5 The hot OUTLET connection from the AQUATAP water heating unit is located on the top
hot supply hose to the dispensing tap is attached. Refer to section 8.0 INSTALLATION –
DISPENSING TAP CONNECTION, page 12 for full details of how to mount and connect
the dispensing tap to the water heating unit.
FIGURE 4: PLUMBING DIAGRAM
9
ISOLATING
VALVE
CLAMP
HOT TAP
OUTLET
HOSE
FLEXIBLE
HOSE
MAINS
WATER
SUPPLY
CLAMP
TAP
VENT
HOSE

6.0 INSTALLATION – VENT PIPE
6.1 The VENT connection from the AQUATAP water heating unit is located on the top rear
hose OF the dispensing tap is attached. Refer to section 7.0 INSTALLATION –
DISPENSING TAP MOUNTING below for full details of how to mount and connect the
dispensing tap to the water heating unit.
6.2 The VENT will ensure that any excess steam or pressure is safely vented to
atmosphere in the event of a fault with the unit. IT MUST NOT BE BLOCKED,
OBSTRUCTED, DISCONNECTED OR REMOVED.
7.0 INSTALLATION – DISPENSING TAP MOUNTING
7.1 The dispensing tap supplied is suitable for mounting onto a worktop or counter
surface. It should be positioned such that it discharges into a sink or drip tray (FIG. 6,
page 11 for tap dimensions). A purpose designed drip tray is available as an
accessory (order Product Code 95970138). If this is used, then the instructions
supplied with the drip tray accessory should be followed.
7.2 Cut a 35mm diameter hole in the position selected through the worktop or counter
surface or use the template provided if using the drip tray. NOTE: Do not mount the
dispenser directly onto a stainless steel sink.
hoses to the dispenser tap with the clips provided.
7.4 Ensure the sealing washer provided is correctly located on the base of the tap. A light
application of clear silicon sealant on the base of the tap and the sealing washer will
the top and position the tap base onto the worktop.
If necessary adjust the position of the dispenser tap and then tighten the securing nut.
7.8 Make sure all pipe work is bonded and the earthing clamps conform to BS 951 and
REMOVE”.
10

11
WORK TOP
35mm HOLE35mm HOLE “C” CLAMP
SECURING NUT
SEALING WASHER
FIGURE 5 : TAP MOUNTING
HOT PIPE VENT PIPE
309
235
181
60.0
FIGURE 6 : DISPENSER DIMENSIONS
61.0
55 MAX

12
8.0 INSTALLATION – DISPENSING TAP CONNECTION
8.1 The hot supply hose should be connected to the OUTLET hose spigot of the AQUATAP
water heating unit. The hose should rise continuously from the heater to the tap without
kinks or twists. If necessary it can be cut to a shorter length, but it should never be
lengthened. The hose should be secured in place on the spigot using the clips provided.
Warning, only use the hose supplied with the unit or a temperature rated WRAS
approved hose. Spare hose and clips can be ordered, part number 95 607 364.
8.2 The VENT hose should be connected to the VENT hose spigot of the AQUATAP water
heating unit. The hose should rise continuously from the heater to the tap without kinks
or twists. If necessary it can be cut to a shorter length, but it should never be lengthened.
The hose should be secured in place on the spigot using the clips provided.
ISOLATING
VALVE
CLAMP
HOT TAP
OUTLET
HOSE
FLEXIBLE
HOSE MAINS
WATER
SUPPLY
TAP
VENT
HOSE
FIGURE 7 : TAP MOUNTING (BOIL ONLY)
CLAMP
DISPENSER CABLE
FUSED SPUR
1.5mm 3 CORE HOFR
SHEATHED CABLE
(NOTE: DRIP TRAY/SINK NOT SHOWN FOR CLARITY)

13
FIGURE 8: WIRING DIAGRAM
PUMP
TRANSFORMER
SOLENOID VALVE
LEVEL
SENSOR
(TOP)
LEVEL
SENSOR
(BOTTOM)
LEVEL
SENSOR
(EARTH)
TERMINAL BLOCK
CONTROL PCB
P2
P3
J13 J5 P1
J
10 6 4 3 12 9 2 1
J5 - PIN 1
J5 - PIN 2
09V
THERMAL CUT-OUT
L
N
230V
10 9 8 7 6 5 4 3 2 1
- LEVEL SENSOR (TOP)
- LEVEL SENSOR (BTM)
- SPARE
- SPARE
- THERMISTOR (TOP)
- THERMISTOR (BTM)
- ANTI-SCALE LOOP
- THERMISTOR (TOP)
- THERMISTOR (BTM)
}
10 9 8 7 6 5 4 3 2 1
- LEVEL SENSOR (TOP)
- LEVEL SENSOR (BTM)
- SPARE
- SPARE
- THERMISTOR (TOP)
- THERMISTOR (BTM)
- ANTI-SCALE LOOP
- THERMISTOR (TOP)
- THERMISTOR (BTM)
}
J5
8
7
6
5
4
3
2
1
TOP
P2
65
43
21
TOP
LINK BETWEEN PINS 1 & 6
J13
4
3
2
1
TOP - POWER LED ORANGE
- POWER LED BLACK
- READY LED BLACK
- READY LED BLUE
P3
ELEMENT
NOTE: SOME INTERNAL EARTH LINKS
NOT SHOWN FOR CLARITY. ALL EARTH
LINKS MUST BE SECURELY FASTENED
TO AN EARTHING POINT
230 - 240V~
P1 - TRANSFORMER 9v CONNECTION
P2 - TAP DISPENSER CONNECTIONS
P3 - LED WIRING CONNECTOR
J5 - TEMPERATURE & LEVEL CONTROL
CONNECTOR
J13 - LINK CONNECTOR
PCB PLUG FUNCTIONS
- RED
- PURPLE
- BLACK
- BROWN
- WHITE
- YELLOW
- BLUE
- GREEN

14
9.0 INSTALLATION – ELECTRICAL REQUIREMENTS
9.1 Warning: This appliance must be earthed. It is suitable for 230/240V~ supply only.
9.2 Installation must be carried out by a competent electrician in accordance with the latest
edition of BS 7671 (the IEE Wiring Regulations).
electrician using 3 core cable with a minimum conductor cross sectional area of 1.5 mm².
The electrical supply cable must be connected to the electrical supply via a double pole
isolating switch with a contact separation of at least 3mm in both poles. The electrical
supply should be fused 13 amp.
9.4 The AQUATAP dispensing tap must be connected to the water heating unit by means of
the black sheathed control cable. The cables from each unit are terminated in a mating
9.5 A schematic wiring diagram of the AQUATAP installation is shown in FIG. 8, page 13.
be reduced by switching the unit off. It is recommended that this is done automatically by
incorporating a suitable time switch in the electrical supply to the unit. A suitable time
switch is available as an accessory (order Product Code 95970124) which can be
set to switch the unit on for a suitable period of time to allow it to reheat before it is next
used. NOTE: If selecting an alternative time switch it must be capable of switching
a 13 amp resistive load.
10.0 COMMISSIONING
10.1 The AQUATAP heater incorporates an electronic controls system which has a self
commissioning and calibration function. No installer or user adjustment is necessary
before use.
10.2 Check that all electrical, water and vent pipe connections have been correctly made and
are secure.
10.3 To remove the main cover, unscrew the fascia securing screw and remove the fascia,
remove two top cover securing screws and four cover securing screws. The cover
can now be pulled back from the heater assembly. Caution should be taken here as the
wires, make sure the LED with the orange wire is at the top and the LED with the
blue wire is at the bottom.
10.4 If the cover has been removed, this should be replaced and secured with the supplied
AQUATAP heater.
10.5 Once commissioned it is advisable to insulate both hot and cold hoses.

15
unit is in the self commissioning mode. Whilst in this mode the water will not be hot
enough for use. DO NOT DRAW ANY WATER OFF DURING THE SELF-
COMMISSIONING MODE.
BOILING WATER
LED
READY LED
FIGURE 10 : LED POSITIONS (DISPENSER)
SAFETY BUTTON
HOT WATER
BUTTON
FIGURE 9 : FRONT COVER REMOVAL
FASCIA
SECURING
SCREW
COVER
SECURING SCREWS
HOOK TOP EDGE
OF FASCIA INTO
COVER
APERTURE
TOP COVER
SECURING
SCREWS
MAIN COVER

16
after a short delay but may result in the calibration temperature being too low. Should this
occur the electrical supply should be switched off for several seconds. When switched on
DO NOT DRAW
ANY WATER OFF DURING THE SELF COMMISSIONING MODE.
residues and pasteurise the surfaces in contact with the water.
by the hot water button. The hot water dispensing button must remain
If released it will be necessary to press
water can be dispensed.
power is switched off and the AQUATAP casing
removed to check for any internal leaks.
ALWAYS DISCONNECT THE ELECTRICAL
SUPPLY BEFORE REMOVING THE COVER.
If there are no leaks evident, replace and secure
the front casing. Switch on the electrical supply.
AQUATAP unit will be ready for use.
10.11 Following commissioning, the following should be explained to the user:
malfunction of the unit or dispenser tap any maintenance or servicing must only be
carried out by a competent installer.
the correct use of the system.
10.12 The commisioning record should be completed (see Section 15.0, page 28).
10.13 These instructions should be left with the user for future reference.
SAFETY BUTTON
HOT WATER
DISPENSING BUTTON
FIGURE 11 : OPERATING BUTTONS

17
11.0 USER INSTRUCTIONS
completely automatic.The indicator lights on the dispensing tap will indicate the status
self-calibrating, the AQUATAP will enter this mode after any period the electrical supply
dispense boiling water.
11.2 Hot water drawn from the dispensing tap will at all times
be close to boiling point so due caution must be taken
when using the product, especially if it is likely to be
11.3 Hot water cannot be dispensed unless the safety
should be pressed before the hot water dispensing
button. The dispensing button must be held in the
pressed position to continue dispensing. If it is
again before more hot water can be dispensed.
11.4 In the unlikely event that the full store of hot water is completely drawn off from the
prevent air being drawn through the pump and it possibly air locking, it does not indicate
BOILING WATER
LED
READY LED
FIGURE 12 : LED POSITIONS
SAFETY BUTTON
HOT WATER
DISPENSING BUTTON

18
12.0 MAINTENANCE
NOTE: Any maintenance on the AQUATAP water heater and dispensing tap must be carried out
with this type of appliance.
ALWAYS DISCONNECT THE ELECTRICAL SUPPLY BEFORE REMOVING THE COVER
ANY WATER CONTAINED IN THE WATER HEATER MAY BE VERY HOT, EXERCISE
CAUTION WHEN REMOVING
WARNING: THE ELECTRONICS CONTROL BY SWITCHING THE NEUTRAL (N), IN SOME
INSTANCES NEUTRAL TERMINATIONS WILL BE AT 230 - 240V WITH RESPECT TO EARTH
rate of scale deposition in hard water areas. However, some deposits may still occur in
the storage tank; these should be periodically removed.
regular inspection of the tank every 6 to 12 months will provide longer life of the product
and maintain optimum performance (removal of steam plate assembly will give access to
the storage tank).

19
FIGURE 13: EXPLODED VIEW FOR STEAM TRAP REMOVAL AND DESCALING
Other manuals for Aquatap
2
Table of contents
Other Heatrae Sadia Water Dispenser manuals
Popular Water Dispenser manuals by other brands

Kool Tek
Kool Tek FCCW2 user manual
Delta Water Engineering
Delta Water Engineering Escalda installation guide

Pentair
Pentair FOLEO 5800 XTR user guide

Aquion
Aquion Micro Chrono Installation & operating instructions

KYOWA
KYOWA KW-1503 instruction manual
Clean Water Systems
Clean Water Systems 5900S Installation & start?up guide

Pelican Water Technologies
Pelican Water Technologies PSE1800 owner's manual
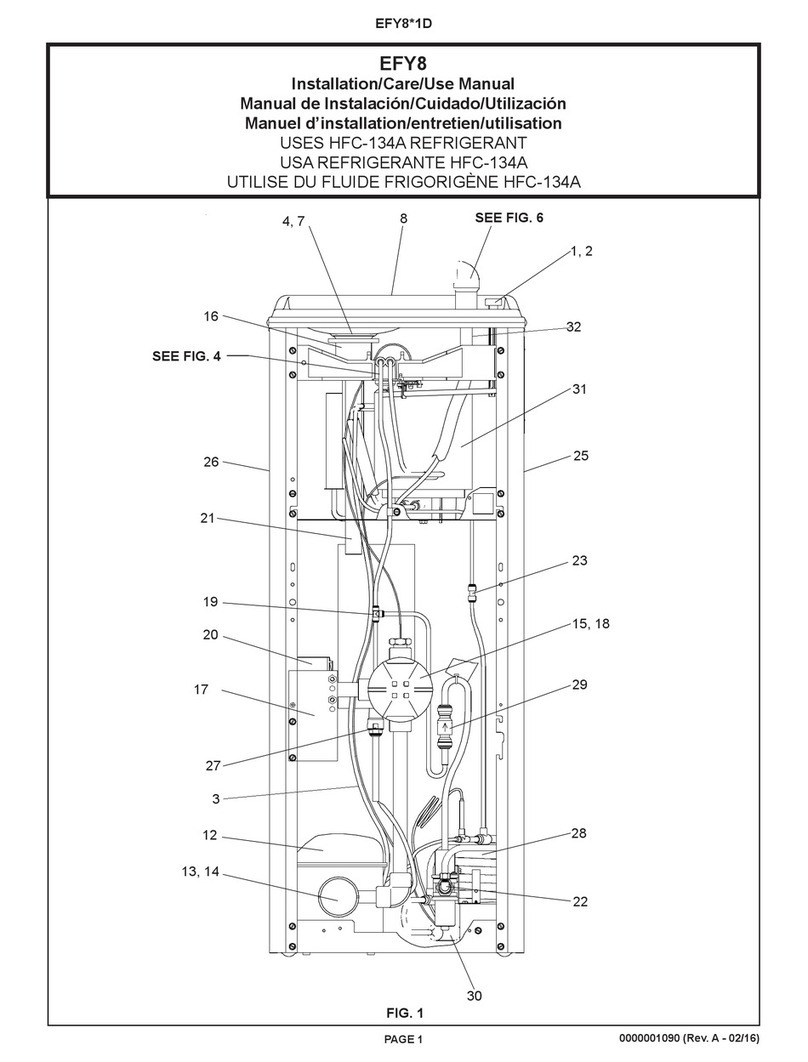
Elkay
Elkay EFY8 Series Installation, care & use manual
VEVOR
VEVOR 10707 Installation & maintenance instructions

Elkay
Elkay EBFATL8 1C Series Installation, care & use manual

BRIO
BRIO CL500CV Setup manual
GE
GE GXSS17Z01 Installation and owner's manual


