Heico Quell EESeal User manual

505.243.1423
EESeal@Quell.US
www.eeseal.com
Quell Corporation | A HEICO® Company
5639 Jefferson NE Albuquerque, NM 87109 USA
EESeal
® Insertion Instructions
for Circular connectors
The design and construction of EESeal® FilterSeals makes them easy to install by hand
and without special tools. However, care is needed to ensure proper insertion.
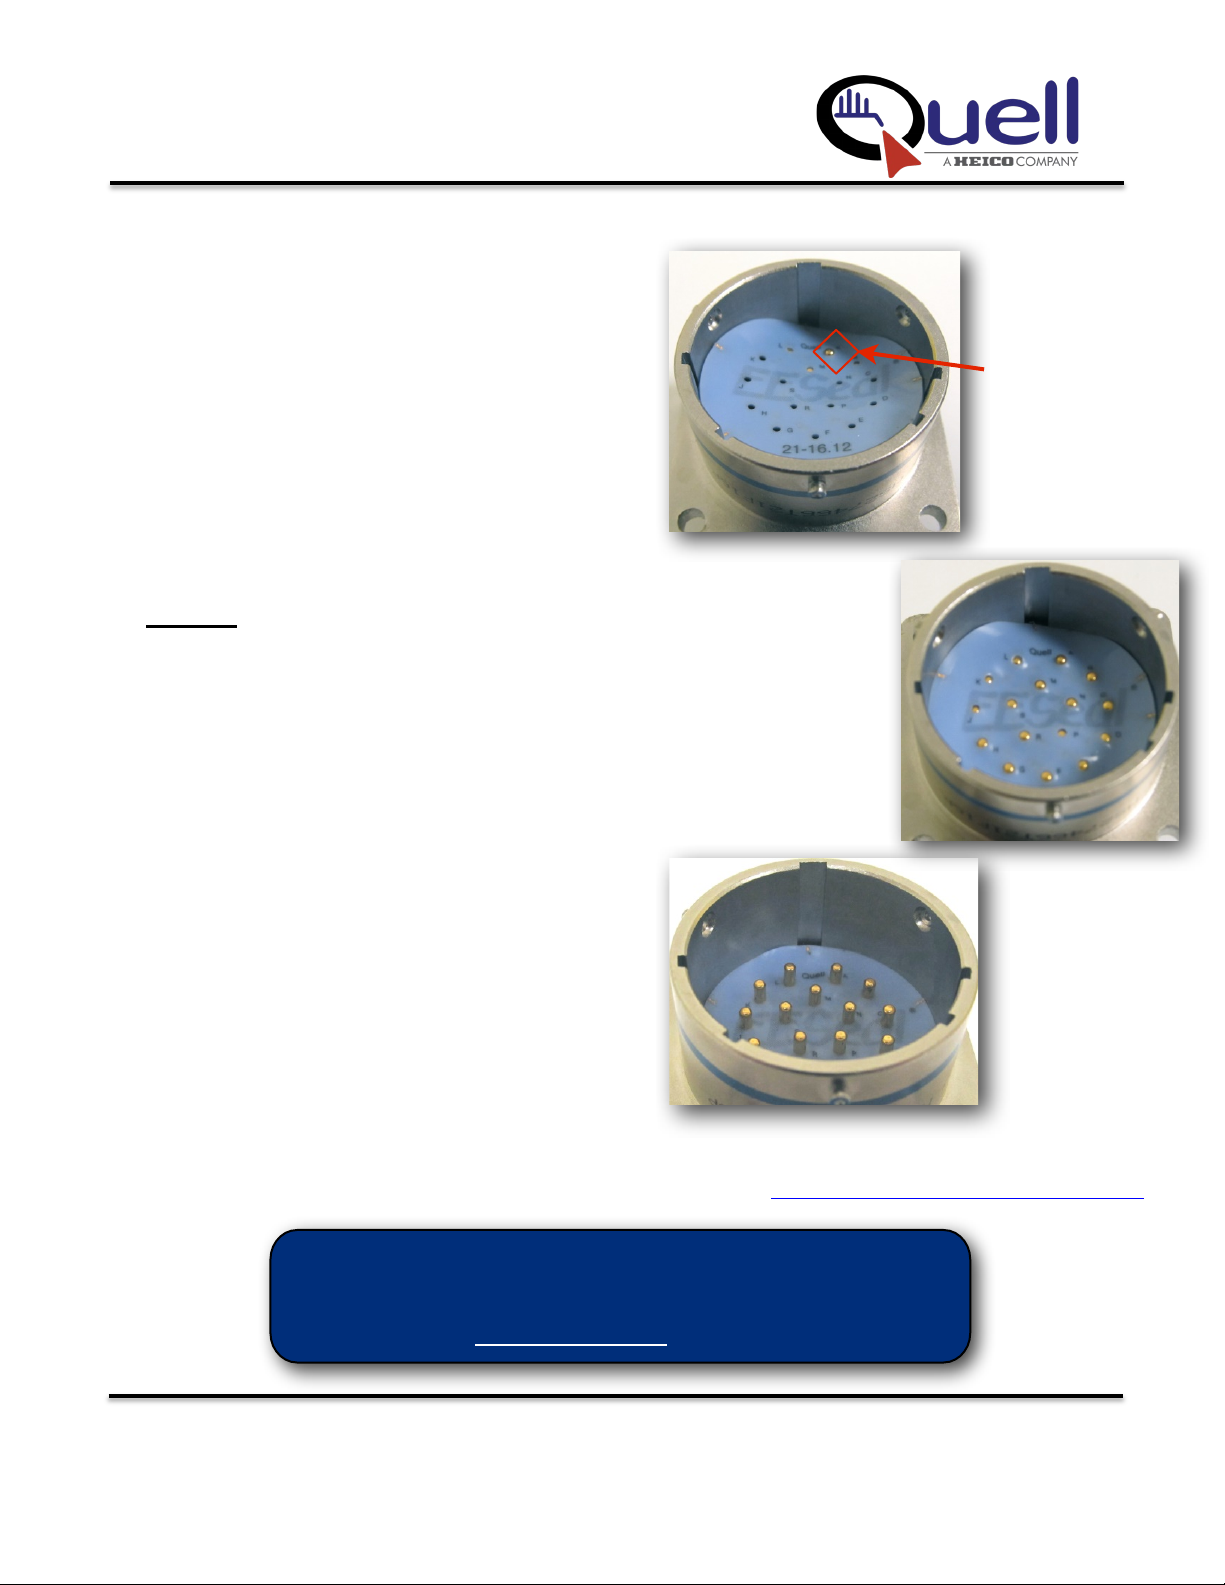
Step 1 - Which side is UP?
The side with the EESeal® logo is facing up
and visible after the EESeal®is inserted.
Important Note: It is imperative that the
EESeal®be inserted “right side up”. Failure to
do so will prevent the EESeal® from working
as it is intended and may cause functional
problems.
Step 2 - Orient the EESeal®
With the correct side up, orient the EESeal®
so its pinholes roughly align to the
corresponding pins in the host connector.
Most EESeal®have at least pin A (or pin 1 if
your connector has numbers) marked to
assist you in this orientation.
Important Note: It is imperative that the EESeal®be inserted so its pinholes are aligned with the
matching pins in the connector – pin A to pin A, or pin 1 to pin 1, and so on. Your EESeal®may have a
different treatment for each pin, and proper orientation will ensure each pin gets the correct circuit
connection.
“A” Pinhole
EESeal Logo
Top
“right side up”
“Bottom”
Connector
Shell
Pin A
EESeal®Circular Insertion
Step 3
PARTIALLY Insert the EESeal®
Slightly cup the EESeal®so that Pinhole A (or pin
1) can be easily slipped onto the corresponding
pin in the host connector. Double-check that the
corresponding EESeal®pinholes are going over
the correct pins in the connector. Gently use
your fingertip to push the EESeal®down just over
the tip of the pin, no further. Now simply press the
rest of the pins into the EESeal®pinholes in the
same manner. To make the EESeal®go on
easily, notice that the EESeal®is intentionally
oversized, so your pressing action should be
towards (not away from) the pins already
completed. Do not attempt to push the EESeal®
down any further than just over the tip of the pins.
Step 4
Fully Insert & Seat the EESeal®
First, confirm that you can see the tip of each,
and every pin slightly poking through its
corresponding EESeal®pinhole (if not,
complete step 3 before proceeding).
The EESeal®can be fully inserted and
permanently seated by simply mating the
connector pair. Do not use your finger or any
tool to seat the EESeal®, doing so may cause
damage to the EESeal®. Now check the EESeal®
to ensure it is flat at the bottom of the connector,
with no folds along its edge or interior. It should
appear like it belongs there. If you notice
anything unusual, please contact us.
For additional information or to see an instructional video, Visit: https://eeseal.com/installation-circular/
Lightly push the “A”
pinhole onto
just the
tip of pin A
Partially insert just
the tip of the pins
into the pinholes
Mate the connector
pair to seat the
EESeal®so all the
pins are fully
exposed
Questions?
Please call (505) 243-1423 or
Email EESeal@Quell.us for Assistance
Table of contents
Popular Industrial Equipment manuals by other brands


ABB
ABB HT586931 Operation manual

Zimmer
Zimmer GPP5000IL Series Installation and operating instructions

OEZ
OEZ Varius PNA Instructions for use

Prozone
Prozone ProR221J installation guide

Thern Stage Equipment
Thern Stage Equipment DW1M1-S4 owner's manual

Conductix-Wampfler
Conductix-Wampfler 0815 Series manual


