Helping Hand SymmetriKit User manual
PAGE 16
If you would like to help and information about Postural
management or manual handling issues , visit our website at
www.helpinghand.co.uk.
There, you can also view the other products available in our range,
some of which are illustrated below:
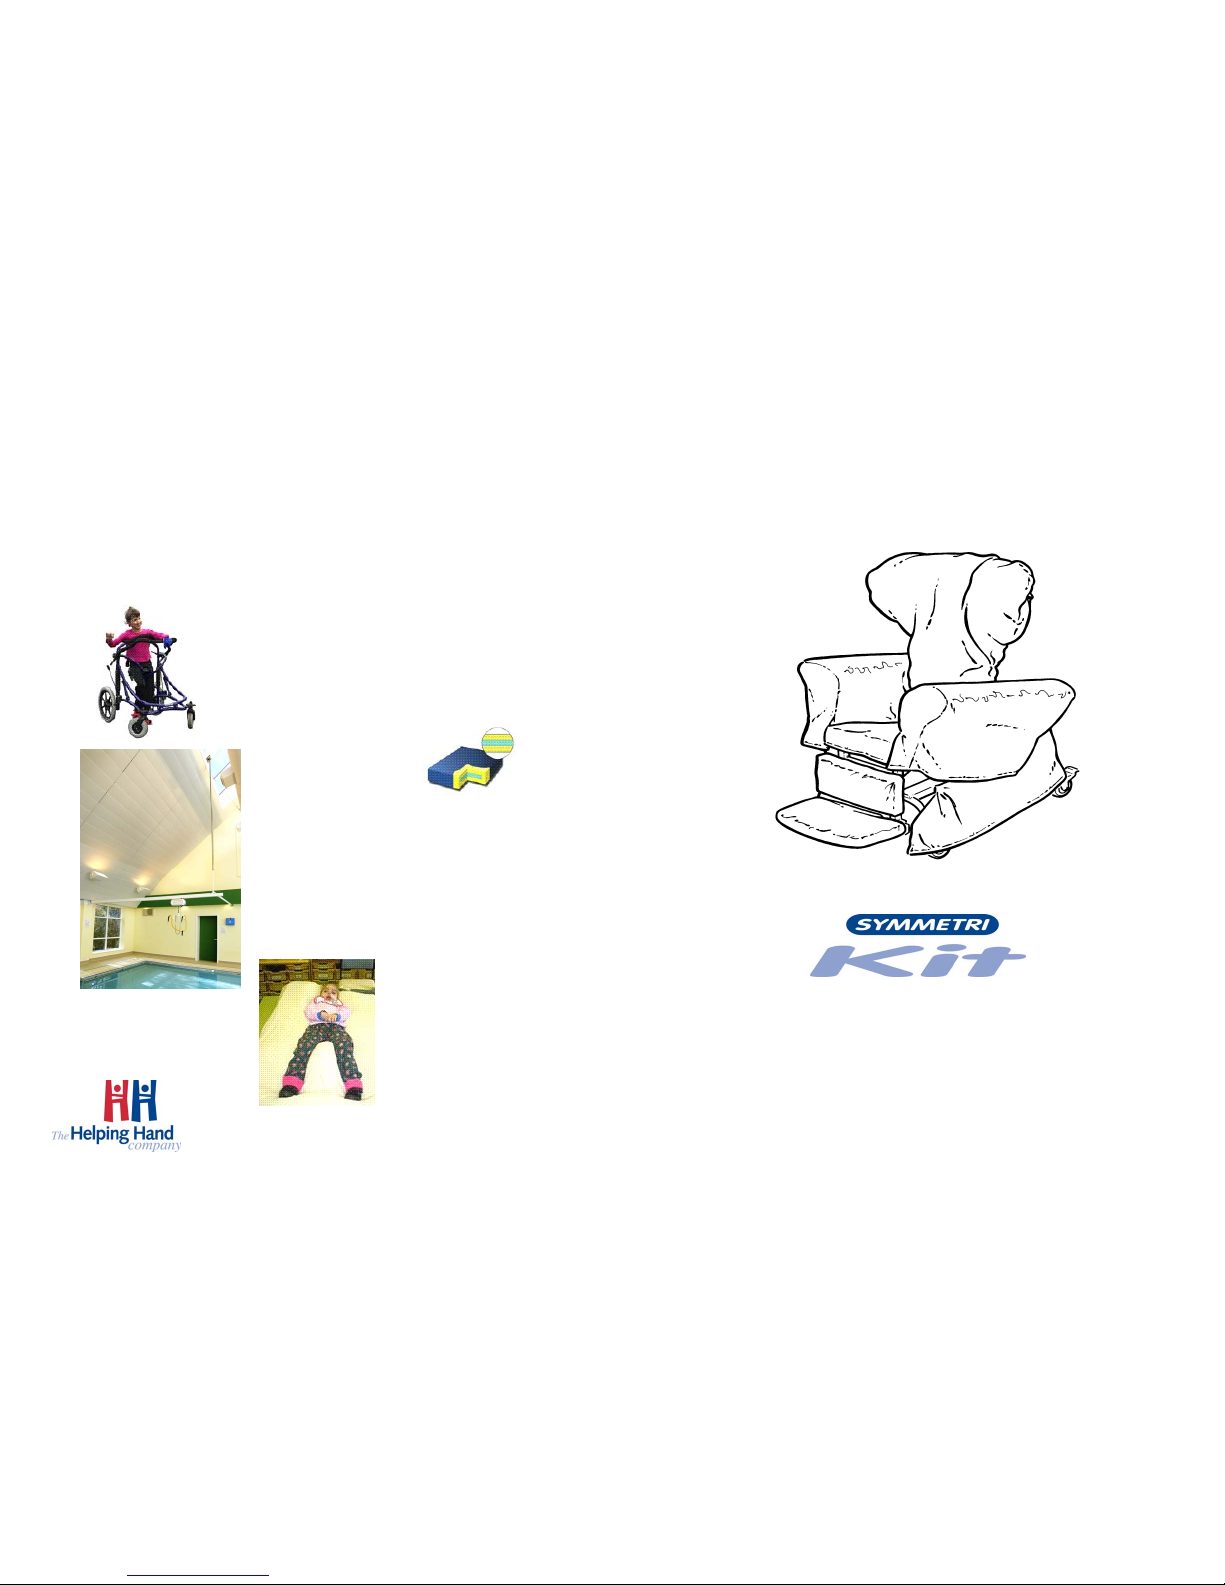
Meywalk–
Goes anywhere you can safely go
in a wheelchair –standing up
Skyframe Hoists-easier
sling fitting, better positioning,
less hassle all round.
Symmetrisleep
Helping children to learn to lie
straight.
www.helpinghand.co.uk
Lowzone– Supportive, comfortable
cushions and mattresses
PAGE 1
SYMMETRIKIT Small Tiltrite CHAIR
INSTRUCTION MANUAL
Unit 9L, Bromyard Road Trading Estate, Ledbury,. HR8 1NS 01531 635388
Fax: 01531 638059

PAGE 2
INDEX
Introduction 3
Guarantee 4
SafetyNotes 5
Adjustments - Operational 6
-Growth 11
- Special Positions 12
Upholstery & Covers 13, 14
Cleaning Instructions 14
Accessories 15
Exploded View 15
PAGE 15
ACCESSORIES
A full range of accessories is available to compliment your chair. Special compo-
nents can also be designed to meet a particular need.
Standard accessories include the following:
Symmetriform back
Table, with or without padded top
Lumbar roll
Lap Strap
Pommel
General purpose cushions
ROHO pressure redistributing cushions
Leg extensions
Extra large castors.
Chest or Groin harnesses
EXPLODED VIEW
SAFE WORKING LOAD IS 80KGS

PAGE 14
Backrest cover
Leg-rest cushion and foot plate cover
Cleaning.
Velour or washable cotton covers: warm wash, 40’c. DO NOT USE HOTTER TEMPERATURES, DO NOT
TUMBLE DRY. Hang to dry overnight.
Wipe clean covers: DO NOT WASH. Wipe down with soapy water & wipe dry.
If necessary, any upholstery or metalwork should be wiped down with dilute detergent & thoroughly dried be-
fore refitting loose covers.
PAGE 3
INTRODUCTION, SYMMETRIKIT Small TILTrite CHAIR & Small
SCHOOL CHAIR
Your Symmetrikit chair has been designed specifically for the use of
those who require maximum support in order to maintain their comfort
and posture. Great care has been taken to ensure that your chair is
simple to use and easy to maintain. Should you have any questions
about positioning, please contact your therapist.
Your chair is the most versatile chair available and has many
adjustments including:
♦ Arms which can be independently adjusted in height. They can also
be tilted backwards or forwards, inwards or outwards.
♦ Removable arms for side access.
♦ The seat width and seat length can be altered.
♦ Adjustable back height.
♦ Adjustable recline
♦ Hinged headrest and adjustable wings.
♦ Adjustable footrest height and angle.
♦ True Tilt in Space. (The chair can be tilted back or forward without al-
tering ankle/knee/hip/back angles).
♦ Your chair can be used flat for side lying, prone, and supine posi-
tions. Combined with the tilt in space, ‘Head Down’ positions can be
used for postural drainage.
♦ Depending on the model covers can be removed for machine wash-
ing or wiped clean in situ.

PAGE 4
GUARANTEE
SYMMETRIKIT Small TILTrite Chair/ Small School Chair
Serial No: .................…
Date of Manufacture: .................…
The above chair, including upholstery and covers, is guaranteed against faulty
materials and faulty workmanship for a period of TWELVE MONTHS from the date
of manufacture.
The guarantee is valid for fair wear and tear only. It is not valid in cases of misuse,
or uses other than those specified in the manufacturer's Instruction Manual. We
do not guarantee fabrics against shrinkage so please pay careful attention to
washing instructions.
Should spare covers be ordered subsequent to the purchase of this chair, we can-
not guarantee an exact colour match for velours as dye strengths vary. We re-
serve the right to withdraw patterns or colours from the range, but will always en-
deavour to find the closest match available.
Footplate covers are not covered in the warranty.
Certain movement patterns and behaviours my accelerate fabric wear. This
cannot be covered by guarantee.
Please note :-
Modifications to increase the length of the leg rest will restrict the amount of
forwards tilt available.
Non standard specifications may affect the stability of the chair.
Wide arm settings may cause difficulty in moving the chair through narrow
doorways.
This chair is not intended for outdoor use.
Safe use of your Symmetrikit Chair
Using the chair in transit is not recommended and the warranty will be void.
Please ensure the chairs are transported WITHOUT seated clients.
When selecting and issuing a piece of equipment it is the responsibility of
the Therapist to carry out a risk analysis on its use. This particularly pertinent
for non-ambulant users who may require assisted transfers.
PAGE 13
UPHOLSTERY & COVERS-MEDIUM TILT CHAIR
Fitting Loose Covers.
Seat Cover & Valances

PAGE 12
3 SPECIAL POSITIONS
Side Lying
Use the adjustable back angle mechanism to drop the back of the chair into the horizontal position. Then raise
the leg rest. You may need to use the tilt in space handle to make the final adjustment
Prone Lying and Postural Drainage
Put the chair into the horizontal bed position as described above. It is possible to lie with the head at either
end of the chair. The tilt in space handle can then be used to angle the chair so that the head is slightly above
the feet for prone lying, or slightly below the feet for postural drainage.
Poor Muscle Tone
If there is a tendency to fall sideways or forwards, try raising the arms at the back of the chair to give extra
upper body support, while tilting the chair back slightly.
PAGE 5
Seating requirements may change. The user should be regularly reassessed to ensure
that the chair is adjusted appropriately.
It is recommended that therapists and carers complete the following checklist when as-
sessing the appropriate use of Symmetrikit chairs.
1. Is the users posture acceptable in the chair?
2. Are there concerns about pressure and are they being
addressed?
3. Is the user considered to be safe in the chair or would
harnessing be needed to keep them safe? A posture belt is recommended at
all times.
4. Does the user or others around them have any behaviours which would
render the chair unsafe?
5. Is the chair appropriate for the proposed environment?
6. When using the chair to provide different postures always check the user’s
respiratory competence.
Safety restrictions
Great care is taken in the design of this product to ensure that it complies with all the
appropriate safety legislation.
Please ensure that all staff are familiar with the following restrictions.
Incorrect use of this product can cause accidents.
Do not allow anyone sit, kneel or stand on the leg rest, arms or back rest of this
chair.
The user must always be positioned within the wheel base of the chair. A posture belt
may be necessary to achieve this at all times.
PAGE 6
ADJUSTMENTS
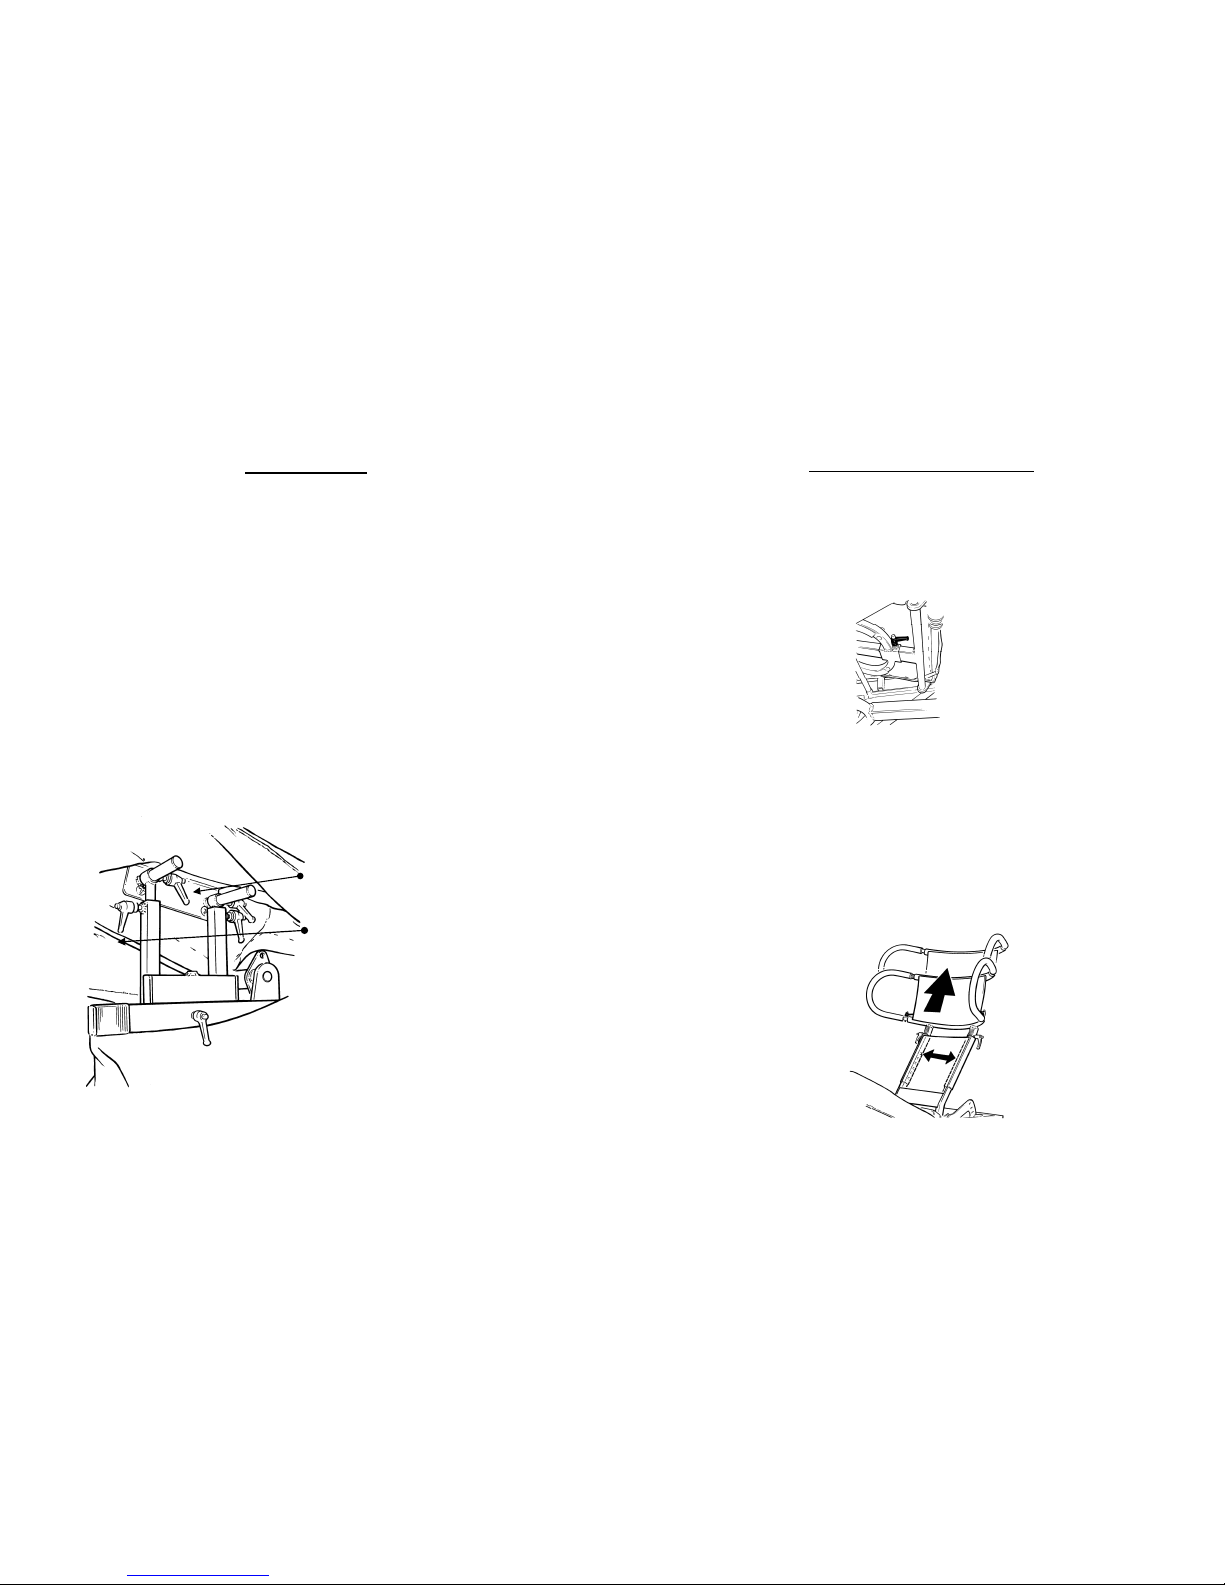
Arm Adjustments
Remove one of the arm covers. Underneath you will see four locking levers. Two of
these control the upward and downward movement of the arms, to achieve the desired
level of trunk support. The other two control the inward and outward movement - allow-
ing the width of the seat to be adjusted.
Note: Arm adjustments are most easily made if all four levers are slackened at the same
time. In this condition the arms can be tilted or pointed to give extra support where
needed, for instance, high trunk support at the back of the arm.
Important: All levers on the chair have are spring loaded arms which, if they rest in an
awkward position can be pulled and twisted to a more convenient position without re-
leasing the lever body.
Figure 1
HEIGHT ADJUSTMENT LEVER
WIDTH ADJUSTMENT LEVER
PAGE 11
2 ADJUSTMENTS FOR GROWTH
Seat Depth
One release lever is located underneath the seat, on the right hand side of the seat frame and about 2/3 of the
way back. Loosen to adjust seat depth then re-tighten. To further reduce the seat depth, a wedge cushion can
be located behind the back cushion. The relationship between the seat depth and the leg-rest cushion is
maintained automatically.
Figure 7
Leg Length (see figure 5)
The knee to footrest length can be adjusted using the levers on the back of the footplate assembly.
Back Height
nzip the back cushion cover surrounding the two upright tubes which form the back of the chair. You will see
two spring buttons and a number of locating holes. Depress the spring buttons & adjust the back height as
required. Re-zip the cover.
F igure 8

PAGE 10
of all other functions simply pull this handle upwards. Once the chair is at the required angle release the lever
to lock the position.
Figure 6
TILT IN SPACER
LEVER
PAGE 7
Arm Release Mechanism (See Figure 2)
This enables the complete arm to be removed so that side transfer can be
achieved or a sling can be put in position.
To release the arm, rotate the locking lever in the side frame, directly below the
arm, anti clockwise until arm is released then pull the arm assembly upwards.
Figure 2 (arm covers removed for clarity)
ARM RELEASE
LEVER

PAGE 8
Reclining the backrest
At the back of the chair, towards the top of the back you will finds two T-handled levers. To recline the
backrest pull the right hand lever upwards, the back can now be moved to any position from 90 degrees to
horizontal. The backrest will lock in place as soon as the lever is released. If it is intended to lower the
back down to (or near to) the horizontal from a vertical position it may be more convenient to take the user
out of the chair during this operation. This may also apply when raising the back from the horizontal.
Figure 3
RECLINE
PAGE 9
Hinged Headrest and Adjustable Wings
Inside the top of the back cushion cover there are two levers on each side of the chair. One pair of levers
allows the side wings to be adjusted to give lateral head support. The other pair allows the top of the chair
back to be tilted forwards or backwards. Figure 4 (cover omitted for clarity)
Adjustable Leg and Foot Rest
At the front corners of the seat are two levers, these are released by turning anti clockwise, this allows the
legrest to be set to the desired angle. Once in position the angle is locked by re-tightening the levers.
The angle of the footplate is similarly adjusted using the lever marked below.
Tilt in space
Locate the tilt handle on the left hand side of the chair back. To tilt the whole chair in space independently
FOOTPLATE
ADJUSTER
LEGREST ADJUSTER
Figure 5
Other Helping Hand Indoor Furnishing manuals

Popular Indoor Furnishing manuals by other brands

Regency
Regency LWMS3015 Assembly instructions

Furniture of America
Furniture of America CM7751C Assembly instructions

Safavieh Furniture
Safavieh Furniture Estella CNS5731 manual

PLACES OF STYLE
PLACES OF STYLE Ovalfuss Assembly instruction

Trasman
Trasman 1138 Bo1 Assembly manual

Costway
Costway JV10856 manual


