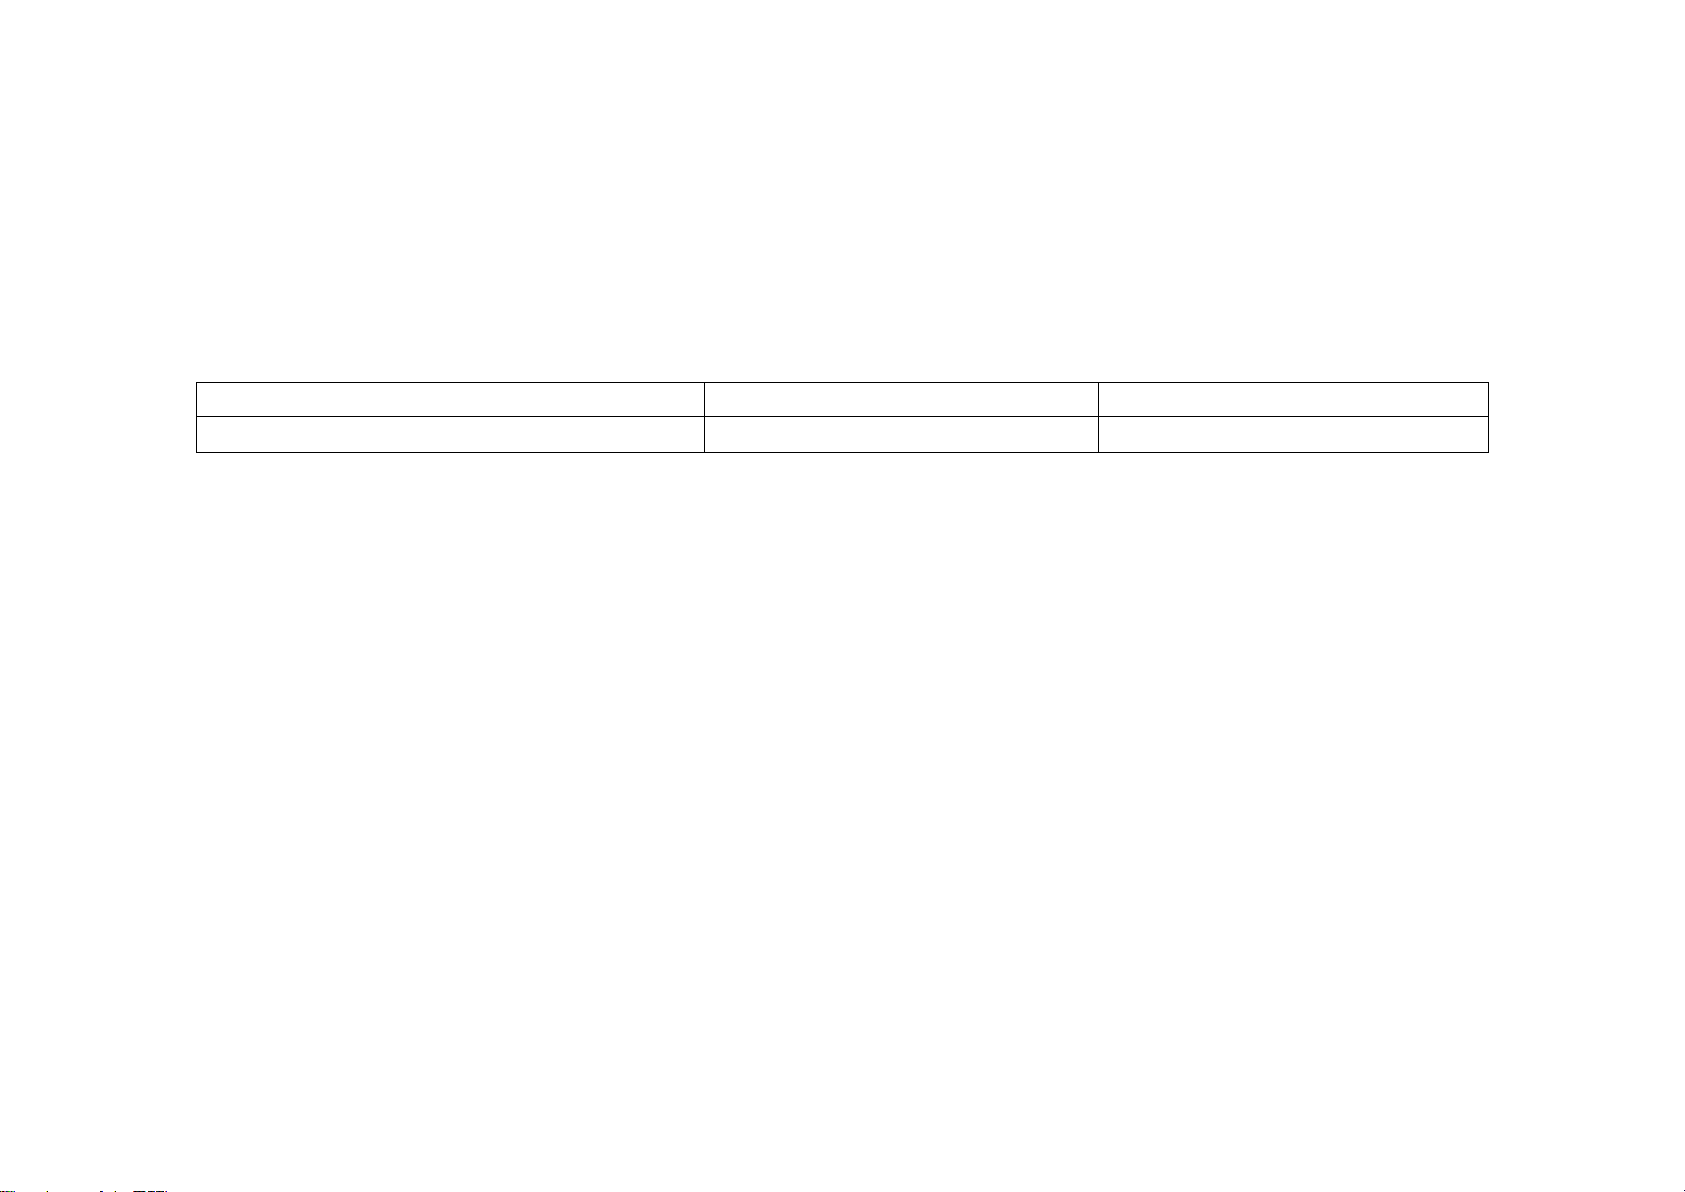
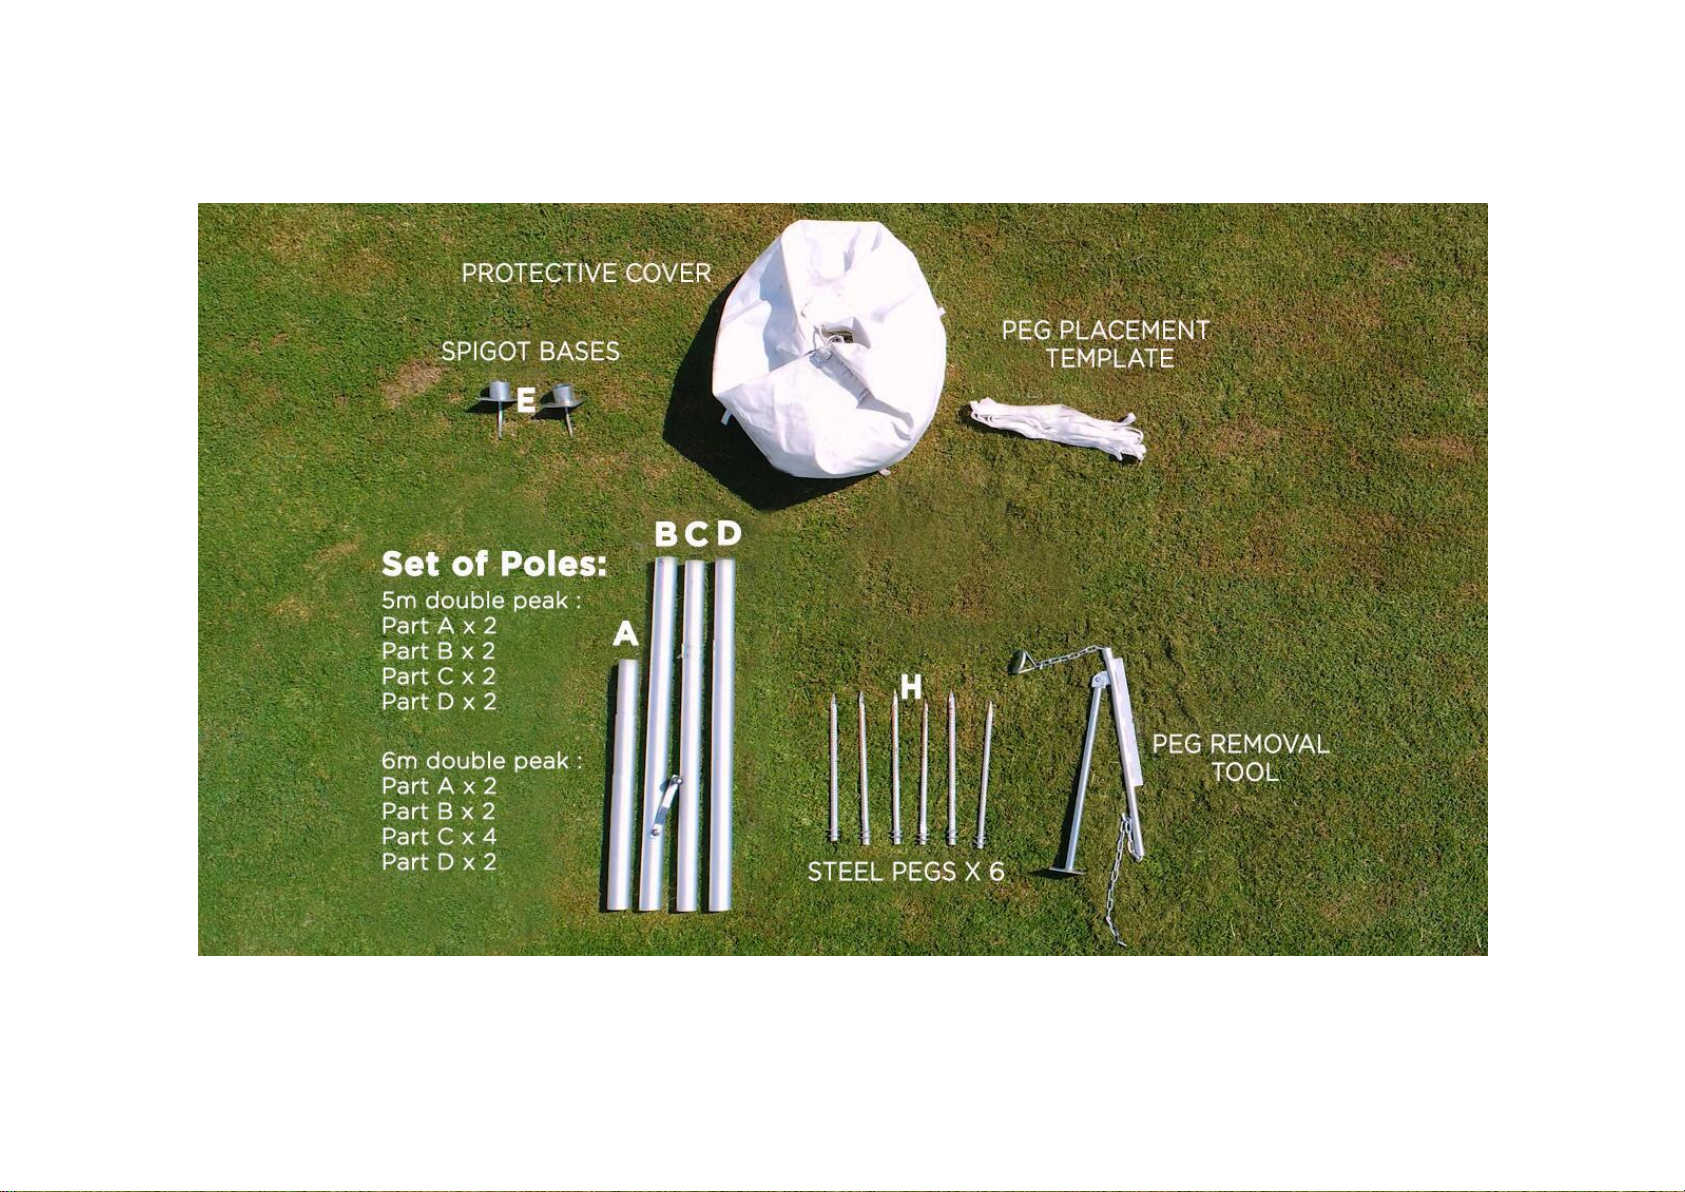
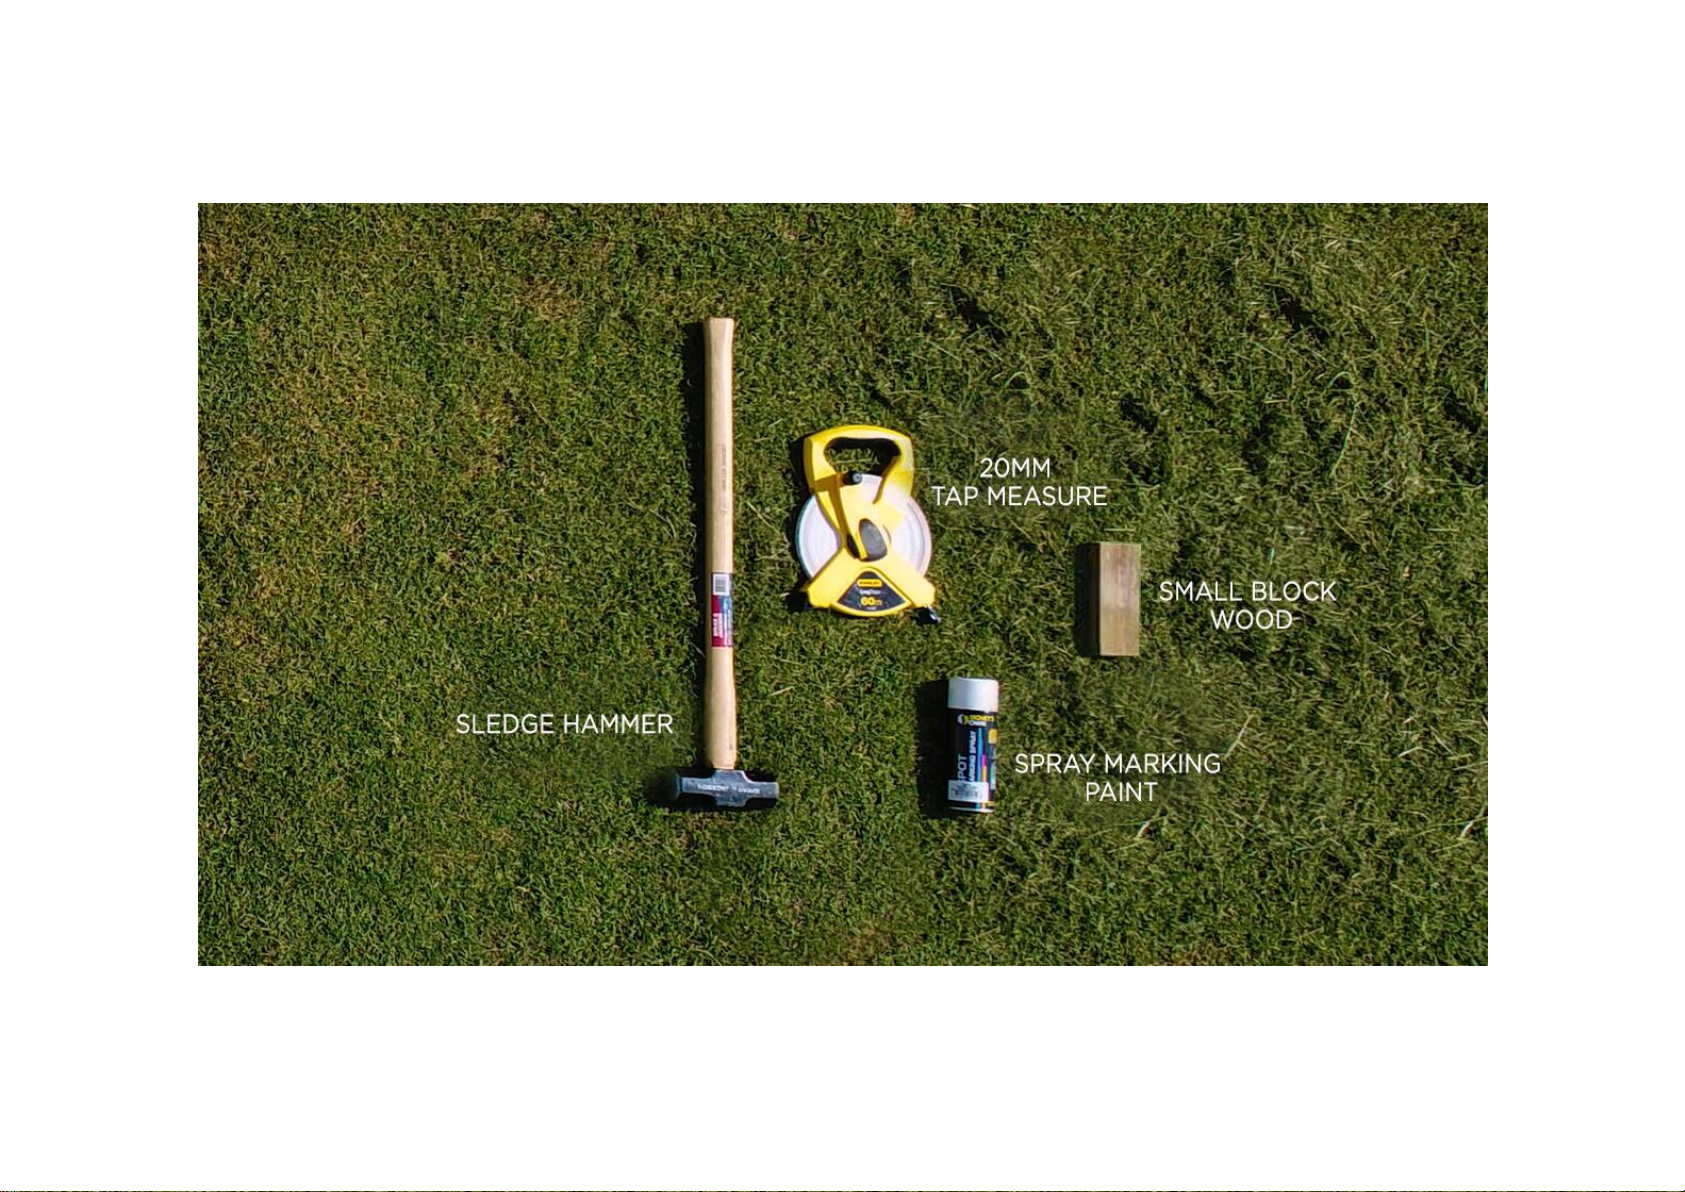
21.85m(L)x13.85m(W)x6m(H) Star Marquee Instruction Manual www.herculesgazebo.co.nz info@herculesgazebo.co.nz 0800 810 910
CONDITIONS OF WARRANTY
Hercules™ Instant Shelter provides a limited manufacturing warranty on all products from the date of original
purchase that the product will be free from defect in material and workmanship. The length of the limited warranty
may vary by product. The warranty is valid for the original purchaser from the date of initial purchase and is not
transferable.
21.85m(L)x13.85m(W)x6m(H)
Hercules™ Instant Shelter will not be responsible for the damage of your product caused by adverse weather
conditions, incorrect assembly, dismantling, improper storage or accidental damage. Colour fading and UV
breakdown of any fabric from exposure to sunlight is not covered by the manufacturer’s warranty. We advise you
seek a private insurance to protect yourself against these possibilities. Please check the contents of the boxes in
advance of using your product for the first time, we would recommend that you check if you have all the
components within 14 days of receiving the products. Ensure that you are familiar with the erecting of the product
and that all parts are accounted for. You should familiarise yourself with the structure including any restriction it
may have for your particular use.
Should your marquee roof or frame be damaged, please contact a nearest Hercules store for warranty claim or
replacement parts purchase (www.herculesgazebo.co.nz/contact-us).