Heston Blumenthal Sage Duo-Temp Pro BES810 User manual

Registered in England & Wales No. 8223512. Due to continued product improvement, the products illustrated or
photographed in this document may vary slightly from the actual product.
Copyright BRG Appliances 2017.
BES810 UKM Issue - E17
Freephone (UK Landline): 0808 178 1650
Mobile Calls (National Rate): 0333 0142 970
www.sageappliances.com
customerservice@sageappliances.co.uk
Register your product and
get more from your purchase
Product registration takes only a few
minutes and ensures a record of your
purchase. Registration also makes it
easier to get support and advice on any
questions or issues that you might have
in the future. If you wish, we can also
send you free recipes and additional
hints and tips on making the best of
your appliance.
Go to www.sageappliances.com
and click on ‘Product Registration’.
What’s on your mind?
Our constant aim is to improve the
quality and features of our appliances.
We welcome your comments and ideas
in assisting our ongoing development.
Go to www.sageappliances.com
and click on ‘Support’.
Sage®by Heston Blumenthal®
Customer Service Centre
20172069 P1 BES810BSS_UKM_IB_E17_HiRes.pdf color:1C PANTONE 518C ZB2382 DC:- SIZE:148X210MM August 18, 2017 14:04:40

BES810
the Duo-Temp™Pro
Instruction Booklet
20172069 P2 BES810BSS_UKM_IB_E17_HiRes.pdf color:2C K+PANTONE 518C ZB2382 DC:- SIZE:148X210MM August 18, 2017 14:05:13

2
20172069 P3 BES810BSS_UKM_IB_E17_HiRes.pdf color:1C PANTONE 518C ZB2382 DC:- SIZE:148X210MM August 18, 2017 14:05:40

3
CONTENTS
4We recommend safety first
9Features of your new appliance
10 Getting to know your new appliance
12 Operating your new appliance
16 Coffee making tips & preparation
20 Care & cleaning
23 Troubleshooting
27 Coffees to try
20172069 P4 BES810BSS_UKM_IB_E17_HiRes.pdf color:2C K+PANTONE 518C ZB2382 DC:- SIZE:148X210MM August 18, 2017 14:06:22

4
WE RECOMMEND SAFETY FIRST
READ ALL INSTRUCTIONS
BEFORE USE AND SAVE FOR
FUTURE REFERENCE
• Before using for the first
time please ensure that
your electricity supply is the
same as shown on the rating
label on the underside of the
appliance. If you have any
concerns please contact your
local electricity company.
• Your Sage®by Heston
Blumenthal®appliance
includes a BS 13 amp
moulded mains plug on the
supply cord.
• Should you need to change
this plug, please complete
the rewiring as follows
(after safe disposal of the
moulded plug).
• Please note that a cut off plug
inserted into a socket is a
serious danger risk.
• Allow the espresso machine
to cool for 2 minutes between
each coffee making cycle.
• Wires are coloured as follows:
−Blue = Neutral
−Brown = Live
−Green & Yellow = Earth
• As the colours of the wire
may not correspond with the
coloured markings which
identify the terminals in
your plug, please refer to
the following:
−The Blue wire must be
connected to the terminal
which is marked ‘N’.
−The Brown wire must be
connected to the terminal
which is marked with the
letter ‘L’.
−The Green & Yellow wire
must be connected to the
terminal which is marked
with the letter E or the
earth symbol .
• Please note that if a 13 amp
plug is used, a 13 amp fuse
should be used.
IMPORTANT SAFEGUARDS
20172069 P5 BES810BSS_UKM_IB_E17_HiRes.pdf color:2C K+PANTONE 518C ZB2382 DC:- SIZE:148X210MM August 18, 2017 14:08:03

5
5
WE RECOMMEND SAFETY FIRST
• Remove and safely discard
any packaging material and
promotional labels before use.
• To eliminate a choking
hazard for young children,
remove and safely discard the
protective cover fitted to the
power plug of this appliance.
• Always ensure the appliance
is properly assembled before
use. Follow the instructions
provided in this book.
• Do not touch hot surfaces.
Appliance surfaces are hot
during and after operation.
To prevent burns or personal
injury, always use protective
hot pads or insulated oven
mitts, or use handles or knobs
where available.
• Do not place the appliance
near the edge of a bench
or table during operation.
Ensure that the surface is dry,
level, clean and free of any
liquid and other substances.
• Always operate the appliance
on a stable and heat resistant
surface. Do not use on a cloth-
covered surface, and position
the appliance at a minimum
distance of 20cm away from
walls, curtains, cloths and
other heat sensitive materials.
• Do not place this appliance
on or near a hot gas or
electric burner, or where it
could touch a heated oven.
• Do not operate the appliance
on a sink drain board.
• When operating the
appliance, ensure the power
cord is kept away from any
heat source including the
surface of the appliance.
Ensure the power cord does
not become trapped between
the upper and lower hot
plates of the appliance during
use and storage.
• Do not place anything,
other than cups for warming,
on top of the Sage
Duo-Temp™ Pro.
• Do not use harsh abrasives,
caustic cleaners or oven
cleaners when cleaning this
appliance. Keep the appliance
clean and refer to care and
cleaning section.
• Do not attempt to operate
the appliance by any method
other than those described in
this booklet. Do not leave the
appliance unattended when
in use.
20172069 P6 BES810BSS_UKM_IB_E17_HiRes.pdf color:2C K+PANTONE 518C ZB2382 DC:- SIZE:148X210MM August 18, 2017 14:08:37

6
WE RECOMMEND SAFETY FIRST
IMPORTANT SAFEGUARDS FOR
ALL ELECTRICAL APPLIANCES
• Fully unwind the power cord
before use.
• Connect only to 220V - 240V
power outlet.
• Do not let the power cord
hang over the edge of a
bench or table, touch hot
surfaces or become knotted.
• To protect against electric
shock do not immerse the
power cord, power plug or
appliance in water or any
other liquid.
• This appliance can be used
by children aged 8 years and
above if they have been given
supervision or instruction
concerning use of the
appliance in a safe way and
they understand the hazards
involved.
• Cleaning and user
maintenance should not be
made by children unless they
are aged 8 years and above
and are supervised.
• Keep appliance and its cord
out of reach from children.
• This appliance is not
intended for use by
persons with reduced
physical, sensory or mental
capabilities, or lack of
experience or knowledge,
unless they have been
given supervision or
instruction concerning use
of the appliance by a person
responsible for their safety.
• Children should be
supervised to ensure that
they do not play with
the appliance.
• The appliance should
be positioned in a stable
situation with the handles
positioned to avoid spillage
of oil.
• Surfaces are liable to get hot
during use.
• Do not use the appliance if
power cord, power plug or
appliance becomes damaged
in any way. If damaged or
maintenance other than
cleaning is required, please
contact Sage Customer
Service on 0808 178 1650
or 0333 0142 970 or go to
sageappliances.com.
20172069 P7 BES810BSS_UKM_IB_E17_HiRes.pdf color:2C K+PANTONE 518C ZB2382 DC:- SIZE:148X210MM August 18, 2017 14:08:49

7
WE RECOMMEND SAFETY FIRST
• This appliance is for
household use only. Do
not use this appliance for
anything other than its
intended use. Do not use in
moving vehicles or boats. Do
not use outdoors. Misuse may
cause injury.
• The installation of a residual
current device (safety switch)
is recommended to provide
additional safety protection
when using electrical
appliances. It is advisable that
a safety switch with a rated
residual operating current not
exceeding 30mA be installed
in the electrical circuit
supplying the appliance.
See your electrician for
professional advice.
• Always turn the appliance
to the OFF position, switch
off at the power outlet and
unplug at the power outlet
when the appliance is not
in use.
• Before cleaning, always turn
the appliance to the OFF
position, switch off at the
power outlet, unplug at the
power outlet and remove the
power cord, if detachable,
from the appliance and allow
all parts to cool.
• The appliance is not intended
to be operated by means of an
external timer or a separate
remote control system.
• Regularly inspect the
supply cord, plug and actual
appliance for any damage.
If found damaged in any
way or maintenance other
than cleaning is required,
immediately cease use of
the appliance and contact
Sage Customer Service
on 0808 178 1650 or
0333 0142 970.
IMPORTANT
Fully unwind the cord before
use. Ensure appliance is fully
cooled before storing power
cord inside the control box.
20172069 P8 BES810BSS_UKM_IB_E17_HiRes.pdf color:2C K+PANTONE 518C ZB2382 DC:- SIZE:148X210MM August 18, 2017 14:09:01

8
WE RECOMMEND SAFETY FIRST
SAVE THESE INSTRUCTIONS
• Do not place this appliance
on or near a heat source, such
as hot plate, oven or heaters.
• Position the appliance at a
minimum distance of 20cm
away from walls, curtains and
other heat or steam sensitive
materials and provide
adequate space above and on
all sides for air circulation.
SPECIFIC INSTRUCTIONS FOR
WATER FILTER
• Filter cartridge should be
kept out of reach of children.
• Store filter cartridges in a
dry place in the original
packaging.
• Protect cartridges from heat
and direct sunlight.
• Do not use damaged filter
cartridges.
• Do not open filter cartridges.
• If you are absent for a
prolonged period of time,
empty the water tank and
replace the cartridge.
The symbol shown
indicates that this
appliance should not be
disposed of in normal
household waste. It should be
taken to a local authority waste
collection centre designated
for this purpose or to a dealer
providing this service.
For more information, please
contact your local council office.
20172069 P9 BES810BSS_UKM_IB_E17_HiRes.pdf color:2C K+PANTONE 518C ZB2382 DC:- SIZE:148X210MM August 18, 2017 14:09:12

9
FEATURES OF YOUR NEW APPLIANCE
PID TEMPERATURE CONTROL
Electronic PID temperature control for
increased temperature stability.
AUTO PURGE
Automatically adjusts water temperature
after steam for optimal coffee temperature.
THERMOCOIL HEATING SYSTEM
Integrated stainless steel water coil
accurately controls water temperature.
LOW PRESSURE PRE-INFUSION
Applies low pressure at the start of the
extraction to gently expand grinds for an
even extraction.
SWIVEL STEAM WAND
Easily adjusted to the ideal position for
texturing milk.
THE RAZOR™ PRECISION DOSE
TRIMMING TOOL
Trims the puck to the right level for a
consistent extraction
20172069 P10 BES810BSS_UKM_IB_E17_HiRes.pdf color:2C K+PANTONE 518C ZB2382 DC:- SIZE:148X210MM August 18, 2017 14:09:24

10
I
K
J
L
GETTING TO KNOW YOUR NEW APPLIANCE
A
C
D
E
F
G
H
B
20172069 P11 BES810BSS_UKM_IB_E17_HiRes.pdf color:2C K+PANTONE 518C ZB2382 DC:- SIZE:148X210MM August 18, 2017 14:09:35

11
GETTING TO KNOW YOUR NEW APPLIANCE
A. POWER button surround illuminates
when machine is switched on.
B. Thermocoil heating system accurately
controls water temperature.
C. Integrated removable tamper for
tamping control.
D. Group head for easy positioning of
the portafilter.
E. 54mm stainless steel portafilter with
commercial style spouts.
F. Extra-tall cup height for coffee mugs
G. Drip tray full indicator
H. Removable drip tray
I. Cup warming tray
J. SELECT button for steam or hot water
K. Control Dial for espresso, steam
and hot water.
L. Swivel steam wand easily adjusts to
perfect position for texturing milk.
NOT SHOWN
• Removable 1.8L water tank filled from
the top with integrated water filtration.
• Storage tray located behind the drip tray
for storage of accessories.
CUSTOM DESIGNED ACCESSORIES
• Razor™ Precision Dose Trimming Tool
• Single wall filter baskets for freshly
ground coffee.
• Advanced dual wall filter baskets for
pre-ground coffee.
• Water filter
• Stainless steel milk jug
CLEANING ACCESSORIES
• Cleaning tool
• Silicon cleaning disk
• Cleaning tablets
20172069 P12 BES810BSS_UKM_IB_E17_HiRes.pdf color:2C K+PANTONE 518C ZB2382 DC:- SIZE:148X210MM August 18, 2017 14:09:51

12
PAGE HEADER.....
OPERATING YOUR NEW APPLIANCE
BEFORE FIRST USE
Machine Preparation
Remove and discard all labelling and
packaging materials attached to your
espresso machine. Ensure you have removed
all parts and accessories before discarding
the packaging. Clean parts and accessories
(water tank, portafilter, filter baskets and
jug) using warm water and a gentle dish
washing liquid and rinse well. Wipe the
outer housing and drip tray with a soft damp
cloth and dry thoroughly. Do not immerse
the outer housing, power cord or power plug
in water or any other liquid.
Conditioning the Water Filter
• Remove filter from the plastic bag and
soak in a cup of water for 5 minutes.
• Rinse filter under cold running water.
• Wash the stainless steel mesh in
the plastic filter compartment with
cold water. Insert the filter into the
filter holder.
• Set the dial date 3 months ahead.
• To install filter, push down to lock
into place.
• Slide the water tank into position and
lock into place.
NOTE
Do not clean any of the parts or
accessories in the dishwasher.
FIRST USE
Initial Start Up
• Fill tank with water
• Press POWER button
• A pumping sound will be heard.
The machine will reach operating
temperature and go into ‘Standby’ mode.
Flushing the Machine
It is recommended to complete a water
flushing operation, without ground coffee, to
ensure the machine has been conditioned.
When the machine has reached ‘Standby’
mode, run the following 2 steps.
• Turn the Control Dial to the ‘Espresso’
position for 30 seconds.
• Turn the Control Dial to the
‘Steam’ position to activate steam
for 10 seconds.
• Repeat this cycle several times.
NOTE
To purchase water filters contact
Sage‰Customer Service on
0808 178 1650 | 0333 0142 970 or go
to sageappliances.com.
20172069 P13 BES810BSS_UKM_IB_E17_HiRes.pdf color:3C K+PANTONE 518C+PANTONE Process Black C ZB2382 DC:- SIZE:148X210MM August 18, 2017 14:11:58

13
OPERATING YOUR NEW APPLIANCE
FILLING THE WATER TANK
• Ensure the water filter is securely fitted
inside the tank.
• Fill the water tank with cold tap water
to the maximum mark on the side of the
tank and slide the water tank back into
position at the back of the machine.
• Plug the power cord into power outlet
and switch On at power point.
• Press the POWER button. The POWER
button surround will flash while the
machine is heating. When the correct
temperature has been reached, all the
button surrounds on the control panel
will illuminate.
NOTE
Check the water level before use and
replace the water daily. The water
tank should be filled with fresh, cold
tap water before each use. Do not use
de-mineralised or distilled water or
any other liquid.
COFFEE PREPARATION
Dosing & Tamping the Ground Coffee
If using whole bean coffee ground directly
before extracting, use the Single Wall Filter
Baskets. If using Pre-ground coffee, use
the Dual Wall Filter Baskets. Insert the
correct Filter Basket into the portafilter.
Fill the Filter Basket with ground coffee,
tap down to collapse the coffee, then using
the integrated tamper, tamp down firmly
(approx. 15-20kg of pressure).
It’s important to apply consistent pressure
every time.
• As a guide to dose, the top edge of the
metal cap on the tamper should be level
with the top of the filter basket AFTER
the coffee has been tamped. This will
minimise under or over dosing the
coffee.
• Wipe excess coffee from the rim of the
filter basket to ensure a proper seal in
the group head is achieved.
TRIMMING THE DOSE
The Razor™ precision dose trimming tool
allows you to trim the puck to the right
level for a consistent extraction.
the Razor™
Precision dose trimming tool
Refer to Coffee Making Tips & Preparation,
page 17 for more details.
20172069 P14 BES810BSS_UKM_IB_E17_HiRes.pdf color:2C K+PANTONE 518C ZB2382 DC:- SIZE:148X210MM August 18, 2017 14:13:18

14
OPERATING YOUR NEW APPLIANCE
EXTRACTING ESPRESSO
Insert the Portafilter into the Group Head
& lock into position. Turn the Control Dial
to the ‘Espresso’ position. A pumping noise
will be heard. After a few seconds, coffee will
begin to brew into the cup.
When sufficient coffee has flowed into
the cup, turn the Control Dial to ‘Standby’.
This will stop the flow of coffee. Sage
recommends approx. 30 sec of extraction.
NOTE
For optimal flavour when using a
1 CUP filter, you should extract approx.
30ml. When using a 2 CUP filter, you
should extract approx. 60ml.
LOW PRESSURE PRE-INFUSION
The low pressure pre-infusion gradually
increases water pressure to gently expand
grinds for an even extraction before
increasing to full pressure.
WARNING
The metal parts of the portafilter
will be very hot.
NOTE
If machine is run continuously for
30 minutes, allow machine to cool for
5 minutes before each use.
AFTER EXTRACTING ESPRESSO
Insert the Portafilter into the Group Head &
lock into position.
20172069 P15 BES810BSS_UKM_IB_E17_HiRes.pdf color:2C K+PANTONE 518C ZB2382 DC:- SIZE:148X210MM August 18, 2017 14:13:30

15
OPERATING YOUR NEW APPLIANCE
TEXTURING MILK
The Duo Temp™ Pro is equipped with
a commercial style steam wand.
• Before inserting the steam wand into
the milk, it is recommended to purge
the steam wand.
• Set the Control Dial to the ‘Steam’
position.
• The ‘Steam’ LED will illuminate.
• It may take a few moments before the
steam appears.
• Pause the steam by returning the dial
back to the ‘Standby’ position. This will
avoid the milk splashing out of the jug.
• The Steam will Pause for 8 secs.
• Insert the wand into the milk and set the
Control Dial to the ‘Steam’ position to
texture milk.
• To stop the steam set the Control Dial
to the ‘Standby’ position and remove the
jug.
NOTE
When the espresso machine creates
steam, a pumping noise can be heard.
This is the normal operation of the
15 bar Italian pump.
HOT WATER
The machine features a separate Hot
Water function that dispenses hot water
from the Steam Wand.
To use the Hot Water function:
• Press the ‘SELECT’ button and the
Hot Water LED will illuminate.
• Turn the Control Dial to ‘Steam’.
To turn the hot water off, turn the Control
Dial to the ‘Standby’ position.
NOTE
The machine will automatically default
to ‘Steam’ when the appliance is first
switched on.
Both Steam and Hot Water functions
cannot be operated at the same time.
AUTO PURGE
For extracting espresso immediately after
using the steam function, this machine
features an auto-purge function.
The auto purge function ensures the
ground coffee will not be burnt by the initial
water flow from the thermocoil being too
hot. The water is automatically released
internally into the drip tray ensuring that
the thermocoil is at optimal temperature
for extracting espresso. Your espresso
will always be extracted at the optimal
temperature ensuring only the best flavours
are extracted.
20172069 P16 BES810BSS_UKM_IB_E17_HiRes.pdf color:2C K+PANTONE 518C ZB2382 DC:- SIZE:148X210MM August 18, 2017 14:13:51

16
COFFEE MAKING TIPS & PREPARATION
PRE-HEATING
Heating your cup or glass
A warm cup will help maintain the coffee’s
optimal temperature. Preheat your cup by
rinsing with hot water and place on the cup
warming tray.
Heating the portafilter and filter basket
A cold portafilter and filter basket can
reduce the extraction temperature enough
to significantly affect the quality of your
espresso. Ensure the portafilter and filter
basket are preheated with hot water before
initial use. Wipe the filter and portafilter
dry before dosing with ground coffee as
moisture can encourage channelling
where water by-passes the ground coffee
during extraction.
Single Wall Filter Baskets
The Single Wall filters (1 & 2 CUP) are
designed to be used with freshly ground
coffee and allow you to experiment with
grind, dose, and tamp to create a more
balanced espresso.
2 Cup1 Cup
The Single Wall filters have no markings
on the underside of the filter.
Advanced Dual Wall Filter Baskets
The Dual Wall filters (1 & 2 CUP) are
designed to be used with pre-ground coffee
and regulate the pressure to help optimise
extraction and crema regardless of the
grind, dose or tamp pressure.
2 Cup1 Cup
The Dual Wall filters have DUAL WALL
stamped on the underside of the filter.
The Grind
When grinding coffee beans, the grind size
should be fine but not too fine. The grind
size will affect the rate at which the water
flows through the ground coffee in the filter
basket and the taste of the espresso.
If the grind is too fine (looks like powder
and feels like flour when rubbed between
fingers), the water will not flow through the
coffee when under pressure. The resulting
espresso will be OVER EXTRACTED, dark
in colour and bitter in flavour.
Coffee Dose and Tamping
• Wipe coffee basket with a dry cloth.
• If using Single Wall filter baskets,
grind enough coffee to fill the coffee
basket. You may need to experiment
with the amount of coffee to achieve
the correct dose.
• Tap the portafilter several times to
distribute the coffee evenly in the
filter basket.
20172069 P17 BES810BSS_UKM_IB_E17_HiRes.pdf color:2C K+PANTONE 518C ZB2382 DC:- SIZE:148X210MM August 18, 2017 14:14:08

17
COFFEE MAKING TIPS & PREPARATION
• Tamp down firmly (using approx.
15-20kgs of pressure). It’s important to
apply consistent pressure every time.
• As a guide to dose, the top edge of the
metal cap on the tamper should be level
with the top of the filter basket AFTER
the coffee has been tamped. This will
minimise under or over dosing the
coffee.
• Wipe excess coffee from the rim of the
filter basket to ensure a proper seal in
the group head is achieved.
TRIMMING THE DOSE
The Razor™ precision dose trimming tool
allows you to trim the puck to the right
level for a consistent extraction.
Dose the Portafilter with freshly ground
coffee and tamp down with between
15-20kg of pressure.
the Razor™
Precision dose trimming tool
Insert the Razor™ into the coffee basket until
its shoulders rest on the rim of the filter
basket. The blade of the dosing tool should
penetrate the surface of the tamped coffee.
Rotate the Razor™ dosing tool back and forth
while holding the portafilter on an angle over
the knock box to trim off excess coffee.
Your coffee filter basket is now dosed with the
correct amount of coffee.
NOTE
When using the 1 CUP Single Wall
Filter basket, you may need to make
the grind finer and also decrease the
grind amount to ensure a correct
dose and extraction.
OPTIMUM 8-10g (1 CUP)
15-18g (2 CUP) 25-35 SECBALANCED
GRIND TAMPDOSE SHOT TIME
TOO FINE TOO MUCH
USE RAZOR TO TRIM
TOO LITTLE
INCREASE DOSE &
USE RAZOR TO TRIM
OVER 40 SEC
OVER EXTRACTED
BITTER •ASTRINGENT
TOO COARSE UNDER 20 SEC
UNDERDEVELOPED •SOUR
UNDER EXTRACTED
30-40lbs
(15-20kg)
TOO HEAVY
TOO LIGHT
EXTRACTION GUIDE
20172069 P18 BES810BSS_UKM_IB_E17_HiRes.pdf color:3C K+PANTONE 518C+PANTONE Process Black C ZB2382 DC:- SIZE:148X210MM August 18, 2017 14:14:59

18
PAGE HEADER.....
COFFEE MAKING TIPS & PREPARATION
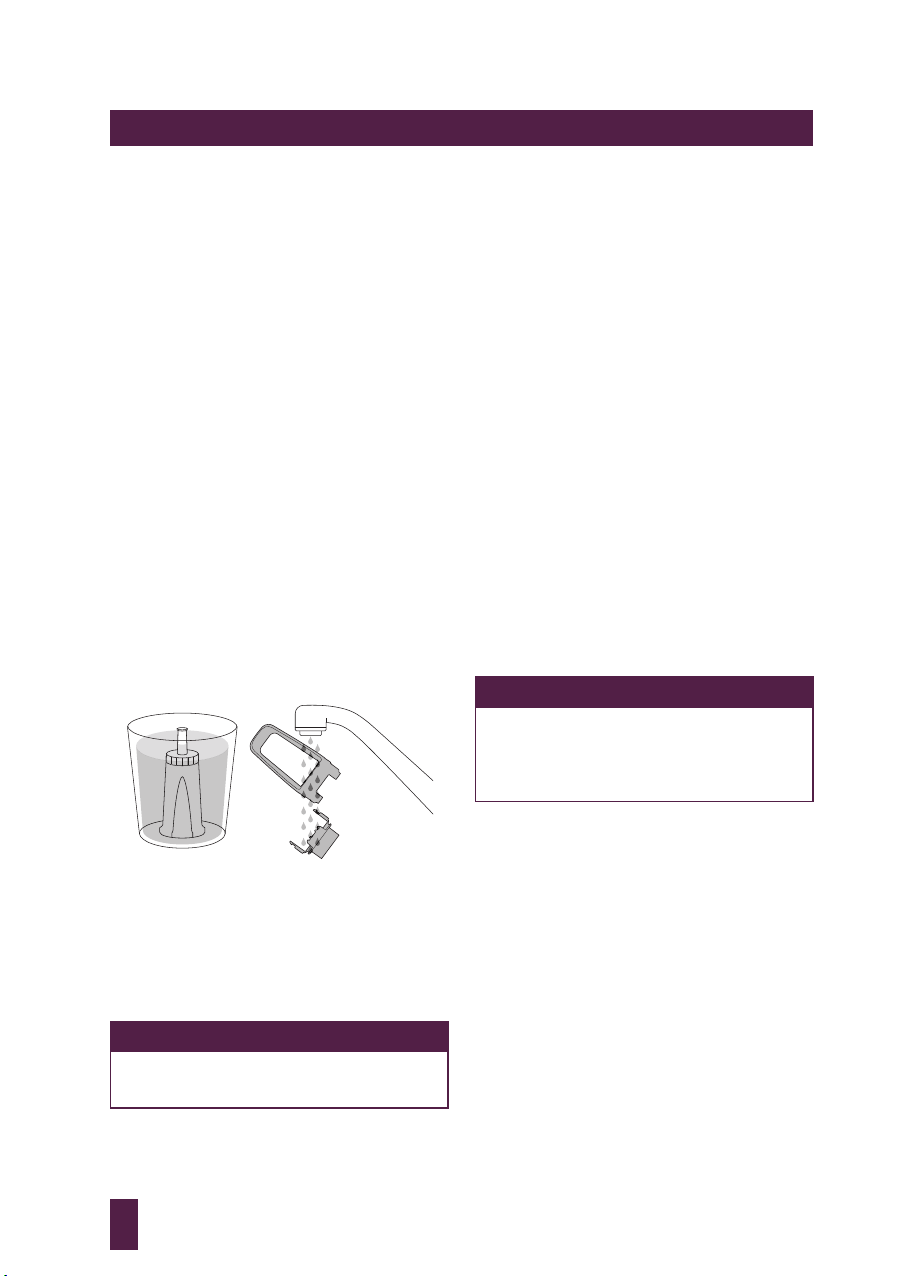
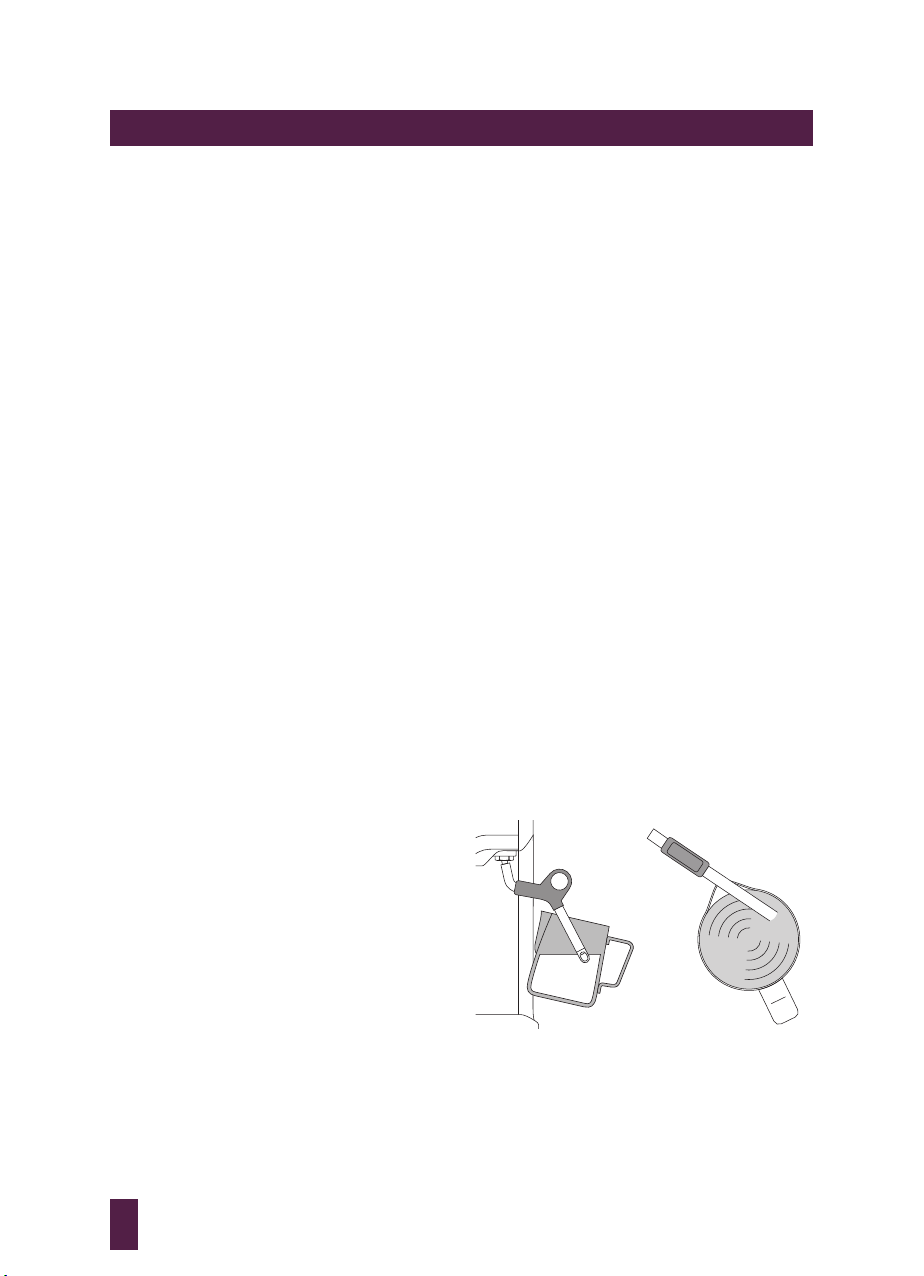
PURGING THE GROUP HEAD
Before placing the portafilter into the group
head, run a short flow of water through
the group head, turning the Control Dial
to the ‘Espresso’ position. This will purge
any ground coffee residue from the group
head and stabilise the temperature prior to
extraction.
INSERTING THE PORTAFILTER
Place the portafilter underneath the group
head so that the handle is aligned with the
INSERT position. Insert the portafilter
into the group head and rotate the handle
towards the centre until resistance is felt.
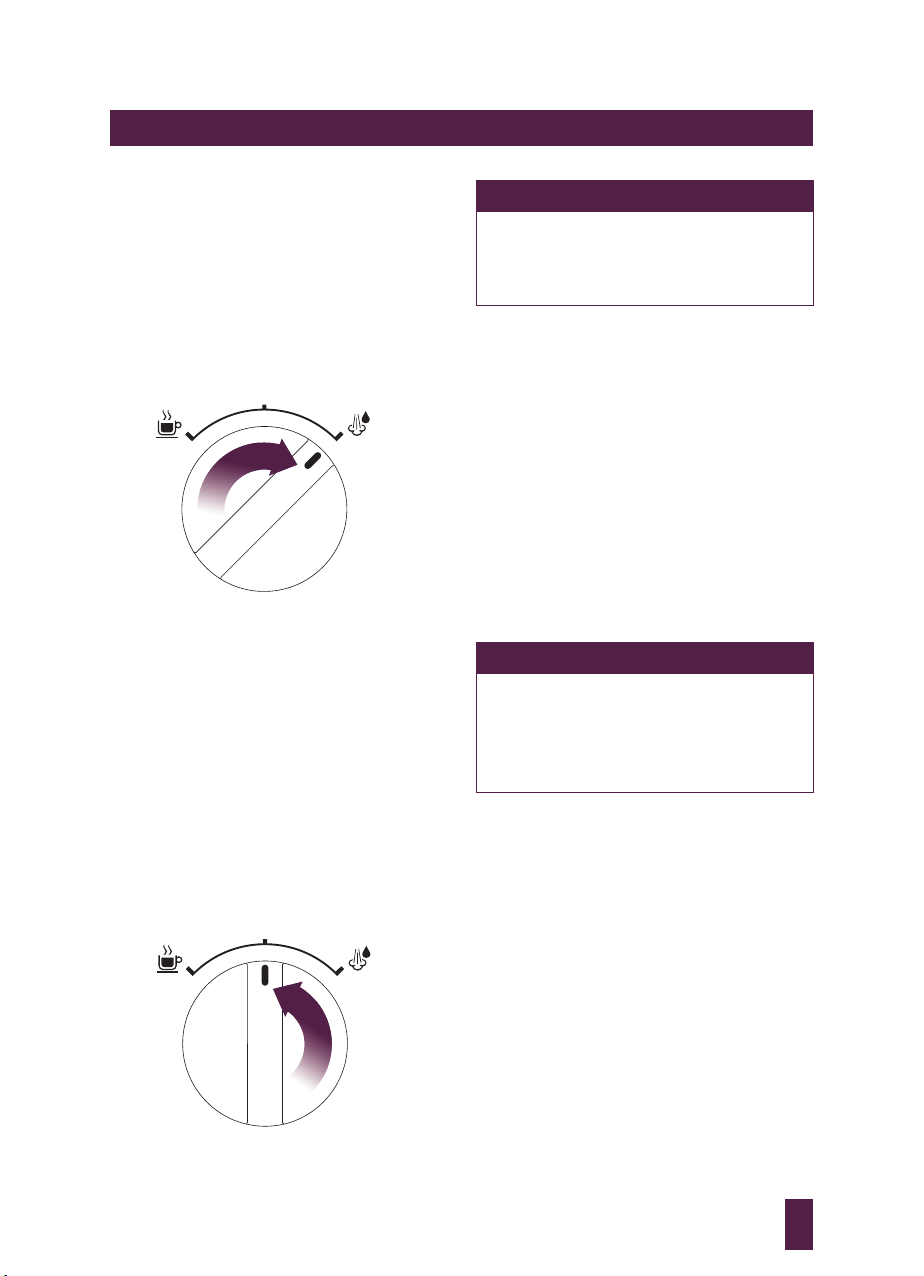
EXTRACTING ESPRESSO
• Place pre-warmed cup(s) beneath the
group head and turn the Control Dial to
the ‘Espresso’ position until the required
volume is reached.
• As a guide, the espresso should start to
flow after 8-10 seconds (infusion time)
and should be the consistency of
pouring honey.
• If the espresso starts to flow before
6 seconds you have either under dosed
the filter basket and/or the grind is too
coarse. This is an UNDER EXTRACTED
shot.
• If the espresso starts to drip but doesn’t
flow after 15 seconds, you have either
over dosed the filter basket and/or
the grind is too fine. This is an
OVER EXTRACTED shot.
• A great espresso is about achieving
the perfect balance between sweetness,
acidity and bitterness.
• The flavour of your coffee will depend
on many factors, such as the type of
coffee beans, degree of roast, freshness,
coarseness or fineness of the grind and
dose of ground coffee.
• Experimenting by adjusting these
factors just one at a time can help to
achieve the taste of your preference.
TEXTURING MILK
There are two phases to texturing milk. The
first is stretching the milk to aerate it and the
second is swirling the milk to make it silky
smooth. These two operations should blend
into one.
• Always start with fresh cold milk.
• Fill the jug just below the V at the
bottom of the spout.
• Position the steam tip over the drip tray
and turn the Control Dial to STEAM
position, purging any condensed water.
• Turn the Control Dial to ‘Standby’
position to pause the steam, insert
steam wand tip into milk and turn dial to
STEAM position.
• Insert the steam tip below the surface
close to the right hand side of the jug at
the 3 o’clock position.
• Keep the tip just under the surface
until the milk is spinning clockwise,
producing a vortex (whirlpool effect).
20172069 P19 BES810BSS_UKM_IB_E17_HiRes.pdf color:3C K+PANTONE 518C+PANTONE Process Black C ZB2382 DC:- SIZE:148X210MM August 18, 2017 14:15:20

19
COFFEE MAKING TIPS & PREPARATION
• With the milk spinning, slowly lower the
jug. This will bring the steam tip to the
surface of the milk and start to introduce
air into the milk. You may have to gently
break the surface of the milk with the tip
to get the milk spinning fast enough.
• Keep the tip at or slightly below the
surface, continuing to maintain the
vortex. Texture the milk until sufficient
volume is obtained.
• Lower the tip beneath the surface,
but keep the vortex of milk spinning.
The milk is at the correct temperature
(60-65°C) when the jug is hot to touch.
• Turn the Control Dial to the ‘Standby’
position before taking the tip out of the
milk.
• Set the jug to one side, turn steam on
to purge out any residual milk from the
steam wand and wipe steam wand with
a damp cloth.
• Tap the jug on the bench to collapse
any bubbles.
• Swirl the jug to polish and integrate
the texture.
• Pour milk directly into the espresso.
• The key is to work quickly, before the
milk begins to separate.
BEAN FRESHNESS
Sage recommends quality 100% Arabica
beans with a ‘Roasted On’ date stamped on
the bag, not a ‘Best Before’ or ‘Use By’ date.
Coffee beans are best consumed between
5-20 days after the ‘Roasted On’ date.
Store coffee beans in an airtight container.
Vacuum seal if possible. Grind immediately
before brewing as ground coffee quickly
loses its flavour and aroma.
20172069 P20 BES810BSS_UKM_IB_E17_HiRes.pdf color:2C K+PANTONE 518C ZB2382 DC:- SIZE:148X210MM August 18, 2017 14:16:11
Table of contents
Other Heston Blumenthal Coffee Maker manuals

Heston Blumenthal
Heston Blumenthal Sage the Barista Express BES875UK User manual

Heston Blumenthal
Heston Blumenthal Sage SES990 User manual

Heston Blumenthal
Heston Blumenthal Sage the Barista Touch SES880 User manual

Heston Blumenthal
Heston Blumenthal Sage Barista Express User manual

Heston Blumenthal
Heston Blumenthal Sage the Oracle BES980UK User manual

Heston Blumenthal
Heston Blumenthal Sage the Dual Boiler BES920UK User manual