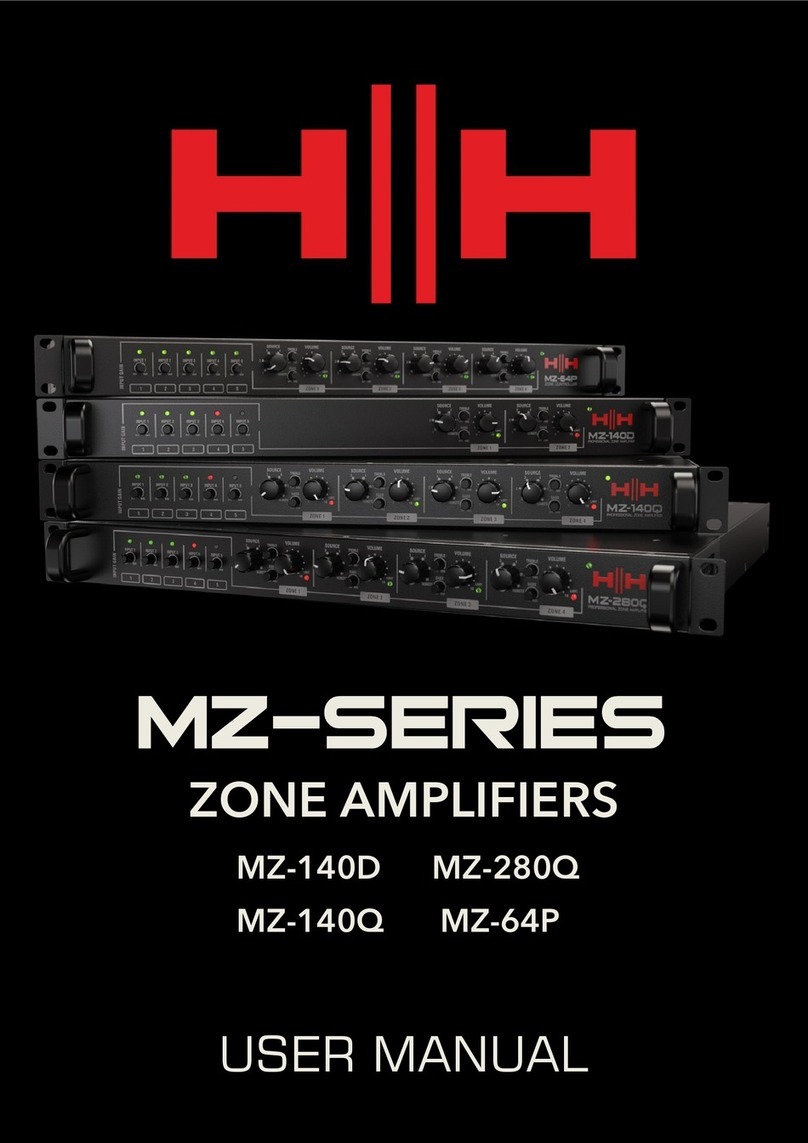
HH Electronics M Series User manual

USER MANUAL
DESIGNED AND ENGINEERED IN THE UK
WWW.HHELECTRONICS.COM
PROFESSIONAL POWER AMPLIFIER
0
-dB-dB
PROFESSIONAL POWER AMPLIFIER
CH1 CH2
FLT
CLIP
SIG
PWR
0ON/OFF
0
-dB-dB
CH1 CH2
FLT
CLIP
SIG
PWR
0ON/OFF
PROFESSIONAL POWER AMPLIFIER
0
-dB-dB
PROFESSIONAL POWER AMPLIFIER
CH1 CH2
FLT
CLIP
SIG
PWR
0ON/OFF

Designed and Engineered in the UK by HH Electronics LTD.
© 2022 HH Electronics Ltd
PROFESSIONAL POWER AMPLIFIER
7._______________________________ INPUTS AND OUTPUTS
9-12.____________________________ LANGUE FRANÇAISE
5._______________________________ INTRODUCTION / FRONT PANEL
6._______________________________ REAL PANEL
8._______________________________ SPECIFICATIONS
1._______________________________ COVER PAGE
3._______________________________ SAFETY WARNINGS
2._______________________________ CONTENTS
4._______________________________ GENERAL INSTRUCTIONS
21-24.___________________________ IDIOMA PORTUGUES
17-20.___________________________ LENGUA ESPAÑOLA
29-32.___________________________ 중국어
13-16.___________________________ DEUTSCHE SPRACHE
25-28.___________________________ 中文
EN
EN
FR
EN
EN
EN
EN
EN
EN
EN
EN
PT
ES
KR
DE
CN
CONTENTS / CONTENU / INHALT / CONTENIDO / CONTEÚDO /
2

Designed and Engineered in the UK by HH Electronics LTD.
© 2022 HH Electronics Ltd
PROFESSIONAL POWER AMPLIFIER
CAUTION:
WARNING:
PRECAUCION:
ADVERTENCIA:
ATTENTION:
ADVERTISSEMENT:
VORSICHT:
ACHTUNG:
To reduce the risk of electrical shock, do not remove the cover. No user serviceable parts inside. Refer servicing to
qualified personnel.
Riesgo de corrientazo - no abra
Afin de reduire le risque de choc electrique, ne pas enlever le couvercle. II ne se trouve a l’interieur aucune piece
pouvant etre reparee par l’utilisateur. Confier l’entretien a un personnel qualifie.
Risk of electrical shock - DO NOT OPEN.
Risques de choc electrique - NE PAS OUVIRIR.
Um das Risiko eines elektrischen Schlages zu vermeiden, nicht die Abdeckung enfernen. Es befinden sich keine Teile darin,
die vom Anwender repariert werden Konnten. Reparaturen nur von qualifiziertem Fachpersonal durchfuhren lassen.
Para disminuir el risego de carrientazo, no abra la cubierta. No hay piezas adentro que el pueda reparar. Deje todo
mantenimiento a los tecnicos calificadod.
Risiko - Elektrischer Schlag! Nicht offen!
Dieses Symbol soll den Benutzer auf wichtige Instruktionen in der Bedienungsanleitung aufmerksam machen, die
Handhabung und Wartung des Produkts betreffen.
Intended to alert the user of the presence of important operating and maintenance (Servicing) instructions in the
literature accompanying the product.
Dieses Symbol soll den Anwender vor unsolierten gefahrlichen Spannungen innerhalb des Gehauses warnen, die von
Ausrichender Starke sind, um einen elektrischen Schlag verursachen zu konnen.
Este simbolo tiene el proposito de la alertar al usario de la presencis de instrucccones importantes sobre la operacion y
mantenimiento en la literatura que viene conel producto.
Para evitar corrientazos o peligro de incendio, no deja expuesto a la lluvia o humedad este aparato Antes de usar este
aparato, lea mas advertcias en la guia de operacion.
Um einen elektrischen Schalg oder Feuergefahr zu vermeiden, sollte dieses Gerat nicht dem Regen oder Feuchtigkeit
ausgesetzt werden. Vor Inbetriebnahme unbedingt die Bedienungsanleitung lesen.
Afin de prevenir les risques de decharge electrique ou de feu, n’exposez pas cet appareil a la pluie ou a l’humidite. Avant
d’utiliser cet appareil, lisez les advertissments supplentaires situes dans le guide.
To prevent electrical shock or fire hazard, do not expose this appliance to rain or moisture. Before using this
appliance please read the operating instructions for further warnings.
Intended to alert the user to the presence of uninsulated ‘Dangerous Voltage’ within the products enclosure that may be
sufficient to constitute a risk of electrical shock to persons.
Ce symbole est utililise pur indiquer a l’utilisateur de ce produit de tension non-isolee dangereuse pouvant etre
d’intensite suffisante pour constituer un risque de choc electrique.
Este simbolo tiene el proposito de alertar al usuario de la presencia de ‘(voltaje) peligroso’ que no tiene aislamiento
dentro de la caja del producto que puede tener una magnitud suficiente como para constituir riesgo de corrientazo.
Dieses Symbol soll den Anwender vor unsolierten gefahrlichen Spannungen innerhalb des Gehauses warnen, die von
Ausrichender Starke sind, um einen elektrischen Schlag verursachen zu konnen.
After unpacking your amplifier check that it is factory fitted with a three pin
'grounded' (or earthed) plug. Before plugging into the power supply ensure you are
connecting to a grounded earth outlet.
If you should wish to change the factory fitted plug yourself, ensure that the wiring
convention applicable to the country where the amplifier is to be used is strictly
conformed to. As an example in the United Kingdom the cable colour code for
connections are shown opposite.
NEUTRAL - BLUE
LIVE - BROWN
EARTH or GROUND - GREEN/YELLOW
SAFETY WARNINGS
EN
3

Designed and Engineered in the UK by HH Electronics LTD.
© 2022 HH Electronics Ltd
PROFESSIONAL POWER AMPLIFIER
CAUTION:
WARNING:
In order to take full advantage of your new product and enjoy long and trouble-free performance, please read this owner's manual carefully, and keep it in a safe place for future reference.
1) Unpacking: On unpacking your product please check carefully for any signs of damage that may have occurred whilst in transit from the HH factory to your dealer. In the unlikely event that
there has been damage, please re-pack your unit in its original carton and consult your dealer. We strongly advise you to keep your original transit carton, since in the unlikely event that your unit
should develop a fault, you will be able to return it to you dealer for rectification securely packed.
2) Amplifier Connection: In order to avoid damage, it is advisable to establish and follow a pattern for turning on and off your system. With all system parts connected, turn on source
equipment, tape decks, cd players, mixers, effects processors etc, BEFORE turning on your amplifier. Many products have large transient surges at turn on and off which can cause damage to your
speakers.
4) Servicing: The user should not attempt to service these products. Refer all servicing to qualified service personnel.
3) Cables: Never use shielded or microphone cable for any speaker connections as this will not be substantial enough to handle the amplifier load and could cause damage to your complete
system.
By turning on your bass amplifier LAST and making sure its level control is set to a minimum, any transients from other equipment should not reach your loud speakers. Wait till all system parts
have stabilised, usually a couple of seconds. Similarly when turning off your system always turn down the level controls on your bass amplifier and then turn off its power before turning off other
equipment
GENERAL INSTRUCTIONS
FCC COMPLIANCY STATEMENT
Note: This equipment has been tested and found to comply with the limits for Class B digital device, pursuant to Part 15 of the FCC Rules. These limits are designed to provide reasonable
protection against harmful interference in a residential installation. This equipment generates, uses and can radiate radio frequency energy and if not installed and used in accordance with the
instructions, may cause harmful interference to radio communications. However, there is no guarantee that interference will not occur in a particular installation. If this equipment does cause
harmful interference to radio or television reception, which can be determined by turning the equipment off and on, the user is encouraged to try and correct the interference by one or more
of the following measures.
Reorient or relocate the receiving antenna.
Increase the separation between the equipment and receiver.
--------------------------------------------------------------------------------
CE Mark (93/68/EEC), Low Voltage (2014/35/EU), EMC (2014/30/EU),
Connect the equipment into an outlet on a circuit different from that to which the receiver is connected.
Consult the dealer or an experienced radio/TV technician for help.
RoHS (2011/65/EU), ErP (2009/125/EU).
In order to reduce environmental damage, at the end of its useful life, this product must not be disposed of along with normal household waste to landfill sites. It must be taken to an approved
recycling centre according to the recommendations of the WEEE (Waste Electrical and Electronic Equipment) directive applicable in your country.
This product conforms to the requirements of the following European Regulations, Directives & Rules:
Warning: Changes or modification to the equipment not approved by HH Electronics Ltd. can void the user's authority to use the equipment.
---------------------------------------------------------------------------------
---------------------------------------------------------------------------------
This device complies with Part 15 of the FCC rules Operation is subject to the following two conditions:
1) This device may not cause harmful interference
2) This device must accept any interference received, that may cause undesired operation.
http://support.hhelectronics.com/approvals
c) The wire that is coloured brown must be connected to the terminal that is marked with the letter L or the colour red.
18.This electrical apparatus should not be exposed to dripping or splashing and care should be taken not to place objects containing liquids, such as vases, upon the apparatus.
Risk of electrical shock - DO NOT OPEN. To reduce the risk of electrical shock, do not remove the cover. No user serviceable parts inside. Refer servicing to qualified personnel.
To prevent electrical shock or fire hazard, do not expose this appliance to rain or moisture. Before using this appliance please read the operating instructions.
19. Exposure to extremely high noise levels may cause a permanent hearing loss. Individuals vary considerably in susceptibility to noise-induced hearing loss, but nearly everyone will lose some
hearing if exposed to sufficiently intense noise for a sufficient time.
4. Follow all instructions.
9. An apparatus with Class I construction shall be connected to a mains socket outlet with a protective connection. Do not defeat the safety purpose of the polarized or grounding-type plug. A
polarized plug has two blades with one wider than the other. A grounding type plug has two blades and a third grounding prong. The wide blade or third prong is provided for your safety. If the
provided plug does not fit into your outlet, consult an electrician for replacement of the obsolete outlet.
12. Use only with a cart, stand, tripod, bracket, or table specified by the manufacturer, or sold with the apparatus. When a cart is used, use caution when
moving the cart/apparatus combination to avoid injury from tip-over.
14. Refer all servicing to qualified service personnel. Servicing is required when the apparatus has been damaged in any way, such as when power-supply
cord or plug is damaged, liquid has been spilled or objects have fallen into the apparatus, the apparatus has been exposed to rain or moisture, does
not operate normally, or has been dropped.
17. Note for UK only: If the colours of the wires in the mains lead of this unit do not correspond with the terminals in your plug‚ proceed as follows:
7. Do not block any of the ventilation openings. Install in accordance with manufacturer’s instructions.
11. Only use attachments/accessories provided by the manufacturer.
Intended to alert the user to the presence of high ‘Dangerous Voltage’ within the products enclosure that may be sufficient to constitute a risk of electrical shock to persons.
15. Never break off the ground pin. Connect only to a power supply of the type marked on the unit adjacent to the power supply cord.
b) The wire that is coloured blue must be connected to the terminal that is marked with the letter N or the colour black.
The U.S. Government’s Occupational Safety and Health Administration (OSHA) has specified the following permissible noise level exposures: According to OSHA, any exposure in excess of the
above permissible limits could result in some hearing loss. Earplugs or protectors to the ear canals or over the ears must be worn when operating this amplification system in order to prevent
a permanent hearing loss, if exposure is in excess of the limits as set forth above. To ensure against potentially dangerous exposure to high sound pressure levels, it is recommended that all
persons exposed to equipment capable of producing high sound pressure levels such as this amplification system be protected by hearing protectors while this unit is in operation.
5. Do not use this apparatus near water.
a) The wire that is coloured green and yellow must be connected to the terminal that is marked by the letter E‚ the earth symbol‚ coloured green or
10. Protect the power cord from being walked on or pinched, particularly at plugs, convenience receptacles, and the point they exit from the apparatus.
8. Do not install near any heat sources such as radiators, heat registers, stoves or other apparatus (including amplifiers) that produce heat.
6. Clean only with a dry cloth.
16. If this product is to be mounted in an equipment rack, rear support should be provided.
20. Symbols & nomenclature used on the product and in the product manuals, intended to alert the operator to areas where extra caution may be necessary, are as follows:
3. Heed all warnings.
coloured green and yellow.
Intended to alert the user of the presence of important operating and maintenance (Servicing) instructions in the literature accompanying the product.
13. The mains plug or appliance coupler is used as the disconnect device and shall remain readily operable. The user should allow easy access to any
mains plug, mains coupler and mains switch used in conjunction with this unit thus making it readily operable. Unplug this apparatus during lightning
storms or when unused for long periods of time.
.
2. Keep these instructions safe.
1. Read these instructions.
4
Sound Level dBA,
slow response
or less
EN

Designed and Engineered in the UK by HH Electronics LTD.
© 2022 HH Electronics Ltd
PROFESSIONAL POWER AMPLIFIER
0
-dB-dB
PROFESSIONAL POWER AMPLIFIER
CH1 CH2
FLT
CLIP
SIG
PWR
0ON/OFF
12
3
4
The function of the Level Control is determined by the amplifier mode set via the rear panel Mode Switch.
If the amplifier is rack mounted, there MUST be a free un-restricted flow of air to prevent potential overheating. There should be a
clearance of at least 20cm between the rear face of the amplifier and any other structures and a means of the exhaust air to escape.
3: VENTILATION HOLES: To keep your amplifier cool, air passes through the front panel punching, through a filter and finally
exiting to the rear of the unit.
It is vital that the flow of air IS NOT restricted in any way.
1: RACK MOUNT FIXING HOLES: Allows for installation into a standard 19" rack case.
The onboard compressor / limiter is active and prevents overload or signal distortion.
Shows signal is present.
2: POWER SWITCH: Turn off amplifier when not in use.
Indicates the onboard protection circuit is active, thus preventing damage to the amplifier.
4: LEVEL CONTROL AND INDICATORS: All amplifiers in the M-Range have dedicated Level control and Signal Level
monitors for each channel. The meter provides the following information:
Indicates the amplifier is powered up and ready for use.
LEVEL CONTROL: This provides continuous adjustment from -80dB to 0dB. Set to 0dB for normal operation.
Heavy Gauge 2U chassis.
HH M-Series power amplifiers are high power, 2U rack amplifiers designed to provide maximum performance for demanding
applications. Three models are available all featuring heavy duty linear toroidal power supply units and rugged construction. Suitable
for bars, pubs, clubs, houses of worship, musicians, or indeed anywhere you need high power amplification. HH has over five decades
of experience designing quality power amplifiers, and indeed was one of the pioneers in this area.
Key Features:
High Quality Heavy Duty, Toroidal Power supply.
INTRODUCTION
Two Channel Audio Power Amplifier.
Ultra-reliable linear power stage.
Comprehensive Protection System.
FRONT PANEL CONTROLS AND FEATURES
M2600D front panel shown, but all modes in the range have the same controls and layout.
5
EN

Designed and Engineered in the UK by HH Electronics LTD.
© 2022 HH Electronics Ltd
PROFESSIONAL POWER AMPLIFIER
6
REAR PANEL CONTROLS AND FEATURES
The amplifier will drive a minimum speaker impedance of 4Ω in Stereo or Parallel mode and 8Ω in Bridge mode.
2: RESET: A protection device for the amplifier output stage. It is activated if the amplifier is driven into a short circuit or any
prolonged over-current situation, such as driving into impedances too low, at too high power for too long.
5: COOLING FANS: Two variable speed fans to cool the unit. DO NOT OBSTRUCT!
Disconnect the power connector when the amplifier is not in use!
Normal operation will resume once the fault has been removed and the Reset button pressed.
6: INPUT SECTION: Two XLR Input connectors accepting single ended and balanced inputs - Pin 2 hot. Balanced signals are
recommended for improved signal to noise ratio.
4: OUTPUT SECTION: Two SpeakON output connectors and 4mm binding post terminals corresponding to the two channels
of the amplifier. Connect loudspeakers to either the SpeakON Outputs or the Terminal Posts.
LINK OUTPUTS: Internally routed from the Input XLR’s, the Link Outputs (Pin 2 hot) can be used to daisy-chain an additional
device.
SENSITIVITY CONTROL: Two options available: 0.775V and 1.4V. The setting used will depend on the level of the source
device.
The 4mm binding posts are located behind a safety cover. To access, first remove the screw securing the plastic cover.
Please DO NOT use instrument or microphone cables to connect your amplifier and speaker cabinet!
3: SAFETY INFORMATION.
1: IEC POWER INLET: Before the initial power up, ensure the Supply Voltage Rating (located above the power socket) is
compliant with your local mains supply.
The unit must be earthed under all circumstances!
Channel 1 Input Channel 2 output - level adjustment via Channel 2 Gain control.
BRIDGE: Channel 1 Input Channel 1 output - level adjustment via Channel 1 Gain control.
STEREO: Channel 1 Input Channel 1 output - level adjustment via Channel 1 Gain control.
Channel 2 Input, Gain Control and output is disabled.
(SpeakON is a registered trademark of Neutrik AG.
All other trademarks are the property of their respective owners.)
MODE SWITCH: Provides three operating modes:
PARALLEL: Channel 1 Input Channel 1 output - level adjustment via Channel 1 Gain control.
Channel 2 Input Channel 2 output - level adjustment via Channel 2 Gain control.
Please see the wiring diagrams on the following page.
1
2364 5
The M2600D rear panel is shown, but all modes in the range have the same controls and layout.
EN

Designed and Engineered in the UK by HH Electronics LTD.
© 2022 HH Electronics Ltd
PROFESSIONAL POWER AMPLIFIER
INPUTS AND OUTPUTS
In all instances, uses either the SpeakON outputs or the binding post terminals - not both types at the same time.
7
EN
SpeakON WIRING:
1-
(2+) LOUDSPEAKER -
(1+) LOUDSPEAKER +
(1+) LOUDSPEAKER +
SpeakON WIRING:
(1-) LOUDSPEAKER -
1-
SpeakON WIRING:
(1-) LOUDSPEAKER -
(1+) LOUDSPEAKER +
1-
1: STEREO MODE
2: PARALLEL MODE
3: BRIDGE MODE
CH1
CH1
BRIDGE
CH1
CH2
CH2
CH1
CH2
CH1
CH2
CH1
CH1
CH1
CH2

Designed and Engineered in the UK by HH Electronics LTD.
© 2022 HH Electronics Ltd
PROFESSIONAL POWER AMPLIFIER
SPECIFICATIONS
FOR ADDITIONAL DATA, PLEASE CHECK WWW.HHELECTRONICS.COM
1. Measured at 1 Watt Output
2. 60Hz, 7kHz at 4:1 -30dB
8
EN
Model M-750D M-1500D M-2600D
Output Power RMS : 8 Ohm Stereo
2x500W 2x1250W 2x1500W
Output Power RMS : 4 Ohm Stereo
2x750W 2x1500W 2x2600W
Output Power Bridge RMS : 8 Ohm Mono
1500W 2900W 5150W
Direct Drive High Impedance
70V (100V in Bridge) 70/100V 70/100V
Frequency response1
THD%
≤0.5% 20Hz-20kHz
IMD2=/<0.35%
S/N
≥100dB
Damping Factor
>200 (8 ohms, 10Hz-400Hz)
Slew Rate
≥20V/µS
Crosstalk (1kHz/20kHz)
-75dB/-58dB
Input Sensitivity
0.775V/1.4V
Input Impedance (Bal/Unbal) 20KΩ/10KΩ
Voltage Gain (8Ω)
36dB 37dB 37dB
Cooling
Variable Speed Fan, Air flow from front to rear
Protection
Soft start, VHF, RF, short circuit, over load, clip limit, over heat
PSU Type
Low Noise Toroidal Transformer, fixed voltage (Factory Set)
Amplifier Type
Class H High Performance Professional linear design
Rear Panel
Input Connector
Balanced XLR-F
Output Connector
NL4 SpeakON® per channel, 4mm Binding posts with safety cover, Balanced XLR-M link out
Power Connector 10A Removeable IEC Power Cord C14 (3x1.5mm2)
Other
Input Sensitivity Switch, Bridge/Routing Mode
Switch
Front Panel
Controls Volume Control knobs (per channel), Power switch
Indicators
Signal/Clip/Protection/Power leds
Unit dimensions (HWD) 88 x 482 x 239mm, 3.5 x 19 x 9.4" 88 x 482 x 297mm, 3.5 x 3.5 x 11.7" 88 x 482 x 297mm, 3.5 x 19 x 11.7"
Unit weight
12.5Kg/pc, 27.6 lbs/pc 19.2Kg/pc, 42.3 lbs/pc 24.2Kg/pc, 53.4 lbs/pc
Carton dimensions (HWD) 160 x 580 x 540mm, 6.3 x 22.8 x 21.3" 160 x 580 x 540mm, 6.3 x 22.8 x 21.3" 160 x 580 x 540mm, 6.3 x 22.8 x 21.3"
Gross Weight
14.8Kg/pc, 32.6 lbs/pc 21.5Kg/pc, 47.4 lbs/pc 26.6Kg/pc, 58.6 lbs/pc
Shipping Cube (M3)
0.05 0.05 0.05
EAN Code
5060109457926 5060109457933 5060109457940
In the interest of continued development, HH reserves the ri ght to amend product specifi cation without prior notification.
20Hz - 20KHz (+0, -1dB)

Designed and Engineered in the UK by HH Electronics LTD.
© 2022 HH Electronics Ltd
PROFESSIONAL POWER AMPLIFIER
CONSIGNES DE SÉCURITÉ IMPORTANTES
CAUTION:
WARNING:
ATTENTION: L'utilisation de tout appareil électrique doit être soumise aux précautions d'usage incluant:
1. Lisez ces instructions
2. Gardez ce manuel pour de futures références.
12. Lors de l'utilisation sur pied ou perche de support, assurez dans le cas de déplacement de l'ensemble enceinte/support de prévenir tout
basculement intempestif de celui-ci.
8. Ne positionnez pas votre appareil à proximité de toute source de chaleur.
3. Prêtez attention aux messages de précautions de ce manuel.
5. N'utilisez pas cet appareil à proximité de plans d'eau.
9. Un appareil avec la construction de la classe I sera relié à une prise munie d'une liaison à la terre. Branchez toujours votre appareil sur une
alimentation munie de prise de terre utilisant le cordon d'alimentation fourni.
6. N'utilisez qu'un tissu sec pour le nettoyage de votre appareil.
7. N'obstruez pas les systèmes de refroidissement de votre appareil et installez votre appareil en fonction des instructions de ce manuel.
13. La fiche secteur est utilisée pour couper l'alimentation de l'appareil et doit rester facilement accessible. Débranchez cet appareil pendant les
orages ou s'il est inutilisé pendant de longues périodes.
4. Suivez ces instructions.
10. Protégez les connecteurs de votre appareil et positionnez les câblages pour éviter toutes déconnexions accidentelles.
11. N'utilisez que des fixations approuvées par le fabriquant.
17. Note pour le Royaume-Uni : Si les couleurs des fils du câble d'alimentation ne correspondent pas aux fiches de la prise secteur, procédez
comme suit:
20. Symboles utilisés sur les produits et dans les manuels des produits, destinés à alerter l'opérateur des zones ou des précautions supplémentaires
pouvant être nécessaires:
c) Le fil marron doit être branché sur la borne repérée par la lettre L, ou par la couleur rouge.
L'organisme de la santé américaine (OSHA) a produit le guide ci-dessous en rapport à l'exposition autorisée
aux niveaux de bruit:
18. Cet équipement électrique ne doit en aucun cas être en contact avec un quelconque liquide et aucun objet
contenant un liquide, tels qu'un vase ou autre récipient.
19. Une exposition à de hauts niveaux sonores peut entraîner des dommages irréversibles de l'audition. La
sensibilité au bruit varie considérablement d'un individu à l'autre, mais la majorité de la population ressentira
une perte d'audition après une exposition à une forte puissance sonore pendant une durée prolongée.
15. Ne déconnectez jamais la prise de terre de votre appareil.
Ce symbole est utilisé pour prévenir l'utilisateur de la présence d'une tension non isolée dangereuse à l'intérieur du boîtier de l'appareil, et pouvant être
suffisante pour constituer un risque de choc électrique.
Ce symbole est utilisé pour prévenir l'utilisateur de la présence d'instructions d'utilisation et de maintenance dans le mode d'emploi
accompagnant l'appareil.
D'après les études menées par l'OSHA, toute exposition au delà des limites décrites ci-dessous entraînera des
pertes de audition chez la plupart des sujets. Le port de système de protection (casque, oreillette de filtrage,
etc…) doit être observé lors de l'utilisation de cet appareil sans quoi des dommages irréversibles peuvent être
occasionnés. Le port de ces systèmes doit être observé par toutes personnes susceptibles d'être exposées à des conditions au delà des limites
décrites ci-dessous.
b) Le fil bleu doit être branché sur la borne repérée par la lettre N, ou par la couleur noire.
Risque de choc électrique – NE PAS OUVRIR Afin de réduire les risque de choc électrique, ne pas ouvrir le capot. Il n'y a aucune pièce à
l'intérieur pouvant être réparée par l'utilisateur. Veuillez confier la maintenance à un personnel qualifié.
16. Si votre appareil est destiné à être monté en rack, des supports arrière doivent être utilisés.
Afin de prévenir tout risque de choc électrique et d'incendie, n'exposez pas cet appareil à la pluie ou à l'humidité. Avant d'utiliser cet
appareil, lisez attentivement les instructions d'utilisation de ce mode d'emploi.
14. Seul un technicien agréé par le fabriquant est à même de réparer/contrôler votre appareil. Celui-ci doit être contrôlé s'il a subi des dommages
de manipulation, d'utilisation ou de stockage (humidité, …).
a) Le fil vert et jaune doit être branché sur la borne repérée par la lettre E, ou le symbole de terre, ou par les couleurs vert ou verte et jaune.
9
FR

Designed and Engineered in the UK by HH Electronics LTD.
© 2022 HH Electronics Ltd
PROFESSIONAL POWER AMPLIFIER
1 : TROUS DE FIXATION POUR MONTAGE EN RACK : Permet l'installation dans un boîtier de rack standard de 19
pouces.
2 : INTERRUPTEUR D'ALIMENTATION : Éteignez l'amplificateur lorsqu'il n'est pas utilisé.
3 : TROUS DE VENTILATION : Pour garder votre amplificateur au frais, l'air passe à travers les perforations du panneau avant, à
travers un filtre et enfin en sortant à l'arrière de l'appareil.
Il est essentiel que le débit d'air NE SOIT PAS restreint de quelque façon que ce soit.
Si l'amplificateur est monté en rack, il DOIT y avoir un flux d'air libre et sans restriction pour éviter une éventuelle surchauffe. Il doit
y avoir un dégagement d'au moins 20 cm entre la face arrière de l'amplificateur et toute autre structure et un moyen d'évacuer l'air
d'échappement.
4 : CONTRÔLE DE NIVEAU ET INDICATEURS : Tous les amplificateurs de la gamme M ont un contrôle de niveau dédié et
des moniteurs de niveau de signal pour chaque canal. Le compteur fournit les informations suivantes :
Indique que le circuit de protection intégré est actif, évitant ainsi d'endommager l'amplificateur.
Le compresseur/limiteur intégré est actif et empêche la surcharge ou la distorsion du signal.
Indique que le signal est présent.
Indique que l'amplificateur est sous tension et prêt à l'emploi.
CONTRÔLE DE NIVEAU : Ceci permet un réglage continu de -80 dB à 0 dB. Réglez sur 0 dB pour un fonctionnement normal.
La fonction de la commande de niveau est déterminée par le mode d'amplification réglé via le commutateur de mode du panneau
arrière.
0
-dB-dB
PROFESSIONAL POWER AMPLIFIER
CH1 CH2
FLT
CLIP
SIG
PWR
0ON/OFF
12
3
4
Panneau avant du M2600D illustré, mais tous les modes de la gamme ont les mêmes commandes et la même disposition.
Principales caractéristiques:
Alimentation toroïdale de haute qualité.
INTRODUCTION
Les amplificateurs de puissance HH M-Series sont des amplificateurs rack 2U haute puissance conçus pour fournir des
performances maximales pour les applications exigeantes. Trois modèles sont disponibles, tous dotés d'unités d'alimentation
toroïdales linéaires à usage intensif et d'une construction robuste. Convient pour les bars, les pubs, les clubs, les lieux de culte, les
musiciens ou même partout où vous avez besoin d'une amplification haute puissance. HH a plus de cinq décennies d'expérience dans
la conception d'amplificateurs de puissance de qualité et a en effet été l'un des pionniers dans ce domaine.
Amplificateur de puissance audio à deux canaux.
Châssis 2U de gros calibre.
Etage de puissance linéaire ultra-fiable.
Système de protection complet.
COMMANDES ET FONCTIONS DU PANNEAU AVANT
10
FR

Designed and Engineered in the UK by HH Electronics LTD.
© 2022 HH Electronics Ltd
PROFESSIONAL POWER AMPLIFIER
Entrée du canal 2 sortie du canal 2 - réglage du niveau via le contrôle du gain du canal 2.
Les bornes de fixation de 4 mm sont situées derrière un capot de sécurité. Pour y accéder, retirez d'abord la vis de fixation du
couvercle en plastique.
PONT : Entrée du canal 1 Sortie du canal 1 - réglage du niveau via le contrôle de gain du canal 1.
Débranchez le connecteur d'alimentation lorsque l'amplificateur n'est pas utilisé ! L'appareil doit être mis à la terre en toutes
circonstances !
4 : SECTION DE SORTIE : deux connecteurs de sortie SpeakON et bornes de raccordement de 4 mm correspondant aux deux
canaux de l'amplificateur. Connectez les haut-parleurs aux sorties SpeakON ou aux bornes.
1 : ENTRÉE D'ALIMENTATION CEI : Avant la mise sous tension initiale, assurez-vous que la tension d'alimentation (située au-
dessus de la prise d'alimentation) est conforme à votre alimentation secteur locale.
Veuillez NE PAS utiliser de câbles d'instrument ou de microphone pour connecter votre amplificateur et votre enceinte !
L'amplificateur pilotera une impédance de haut-parleur minimale de 4 en mode stéréo ou parallèle et de 8 en mode pont.Ω Ω
3 : INFORMATIONS DE SÉCURITÉ.
!
SORTIES LINK : Acheminées en interne à partir des XLR d'entrée, les sorties Link (Pin 2 hot) peuvent être utilisées pour connecter
en guirlande un appareil supplémentaire.
Le fonctionnement normal reprendra une fois le défaut supprimé et le bouton de réinitialisation enfoncé.
6 : SECTION D'ENTRÉE : Deux connecteurs d'entrée XLR acceptant des entrées asymétriques et symétriques - Broche 2 chaude.
Des signaux équilibrés sont recommandés pour un meilleur rapport signal/bruit.
COMMUTATEUR DE MODE : Fournit trois modes de fonctionnement :
2 : RESET : Dispositif de protection de l'étage de sortie de l'amplificateur. Il est activé si l'amplificateur est entraîné dans un court-
circuit ou dans toute situation de surintensité prolongée, telle que l'entraînement dans des impédances trop basses, à une puissance
trop élevée pendant trop longtemps.
CONTRÔLE DE SENSIBILITÉ : Deux options disponibles : 0,775 V / 0 dBu et 1,4 V. Le réglage utilisé dépendra du niveau de
l'appareil source.
5 : VENTILATEURS DE REFROIDISSEMENT : Deux ventilateurs à vitesse variable pour refroidir l'unité. NE PAS OBSTRUER
STÉRÉO : Entrée du canal 1 sortie du canal 1 - réglage du niveau via le contrôle du gain du canal 1.
PARALLÈLE : Entrée du canal 1 sortie du canal 1 - réglage du niveau via le contrôle du gain du canal 1.
Entrée du canal 1 sortie du canal 2 - réglage du niveau via le contrôle du gain du canal 2.
L'entrée du canal 2, le contrôle du gain et la sortie sont désactivés.
(SpeakON est une marque déposée de Neutrik AG.
Veuillez consulter les schémas de câblage à la page suivante.
Toutes les autres marques sont la propriété de leurs propriétaires respectifs.)
1
2364 5
COMMANDES ET CARACTÉRISTIQUES DU PANNEAU ARRIÈRE.
Le panneau arrière du M2600D est illustré, mais tous les modes de la gamme ont les mêmes commandes et la même disposition.
11
FR

Designed and Engineered in the UK by HH Electronics LTD.
© 2022 HH Electronics Ltd
PROFESSIONAL POWER AMPLIFIER
ENTRÉES ET SORTIES
12
FR
(1-) HAUT-PARLEUR –
(1+) HAUT-PARLEUR +
SpeakON WIRING:
1-
(1-) HAUT-PARLEUR –
(1+) HAUT-PARLEUR +
SpeakON WIRING:
1-
SpeakON WIRING:
1-
(2+) HAUT-PARLEUR –
(1+) HAUT-PARLEUR +
1: STEREO MODE
2: PARALLEL MODE
3: BRIDGE MODE
CH1
CH1
BRIDGE
Dans tous les cas, utilise soit les sorties SpeakON soit les bornes de la borne de liaison - pas les deux en même temps.
CH1
CH2
CH2
CH1
CH2
CH1
CH2
CH1
CH1
CH1
CH2

Designed and Engineered in the UK by HH Electronics LTD.
© 2022 HH Electronics Ltd
PROFESSIONAL POWER AMPLIFIER
WICHTIGE SICHERHEITSHINWEISE
CAUTION:
WARNING:
12. Verwenden Sie nur einen Wagen, Stativ, Dreifuß, Träger oder Tisch, der den Angaben des Herstellers entspricht oder zusammen mit dem Gerät
verkauft wurde. Wird ein Wagen verwendet, bewegen Sie den Wagen mit dem darauf befindlichen Gerät besonders vorsichtig, damit es nicht
umkippt und möglicherweise jemand verletzt wird.
3. Beachten Sie alle Warnungen.
Gefahr eines elektrischen Schlags - NICHT ÖFFNEN. Um die Gefahr eines elektrischen Schlags zu reduzieren, darf die Abdeckung
entfernen. Keine zu wartenden Teile im Inneren. Überlassen Sie die Wartung qualifiziertem Fachpersonal.
5. Setzen Sie dieses Gerät nicht in der Nähe von Wasser ein.
2. Bewahren Sie diese Anweisungen auf.
8. Betreiben Sie das Gerät nicht neben Wärmequellen wie Heizungen, Heizgeräten, Öfen oder anderen Geräten (auch Verstärkern), die Wärme
erzeugen.
10. Schützen Sie das Netzkabel, sodass niemand darauf tritt oder es geknickt wird, insbesondere an Steckern oder Buchsen am Gerät.
13. Der Netzstecker bzw. Gerätestecker wird zum Trennen vom Stromnetz verwendet und muß immer leicht zugänglich sein.
Ziehen Sie den Netzstecker bei Gewitter heraus oder wenn das Gerät längere Zeit nicht benutzt wird.
19. Belastung durch extrem hohe Lärmpegel kann zu dauerhaftem Gehörverlust führen. Die Anfälligkeit für durch
Lärm bedingten Gehörverlust ist von Mensch zu Mensch verschieden, das Gehör wird jedoch bei jedem in
gewissem Maße geschädigt, der über einen bestimmten Zeitraum ausreichend starkem Lärm ausgesetzt ist. Die
US-Arbeitsschutzbehörde (Occupational and Health Administration, OSHA) hat die folgenden zulässigen Pegel für
Lärmbelastung festgelegt:
11. Verwenden Sie nur die vom Hersteller erhältlichen Zubehörgeräte oder Zubehörteile.
15. Schließen Sie das Gerät nur an eine Stromquelle an, die am Gerät neben dem Netzkabel angegeben ist.
Laut OSHA kann jede Belastung über den obenstehenden zulässigen Grenzwerten zu einem gewissen
Gehörverlust führen. Sollte die Belastung die obenstehenden Grenzwerte übersteigen, müssen beim Betrieb
dieses Verstärkungssystems Ohrenstopfen oder Schutzvorrichtungen im Gehörgang oder über den Ohren
getragen werden, um einen dauerhaften Gehörverlust zu verhindern. Um sich vor einer möglicherweise gefährlichen Belastung durch hohe
Schalldruckpegel zu schützen, wird allen Personen empfohlen, die mit Geräten arbeiten, die wie dieses Verstärkungssystem hohe Schalldruckpegel
erzeugen können, beim Betrieb dieses Geräts einen Gehörschutz zu tragen.
ACHTUNG: Beim Einsatz von Elektrogeräten müssen u.a. grundlegende Vorsichtsmaßnahmen befolgt werden:
Sollen den Benutzer auf das Vorhandensein von "gefährlicher Hoch- Spannung" im Gerätegehäuse hinweisen, um die Gefahr eines elektrischen
Schlages für Personen zu vermeiden..
6. Reinigen Sie es nur mit einem trockenen Tuch.
7. Blockieren Sie keine der Lüftungsöffnungen. Führen Sie die Installation gemäß den Anweisungen des Herstellers durch.
20. Symbole und Nomenklatur, die auf dem Produkt und in den Handbüchern stehen, sollen den Bediener auf die Bereiche, in denen besondere
Vorsicht notwendig sein kann, alarmieren und sind wie folgt:
14. Lassen Sie sämtliche Wartungsarbeiten von qualifizierten Kundendiensttechnikern durchführen. Eine Wartung ist erforderlich, wenn das Gerät in
irgendeiner Art beschädigt wurde, etwa wenn das Netzkabel oder der Netzstecker beschädigt wurden, Flüssigkeit oder Gegenstände in das Gerät
gelangt sind, das Gerät Regen oder Feuchtigkeit ausgesetzt wurde, nicht normal arbeitet oder heruntergefallen ist.
Sollen den Benutzer auf das Vorhandensein wichtiger Betriebs-und Wartungsanweisungen in der begelegten Dokumentation
aufmerksam machen.
9. Verwenden Sie nur Kaltgeräte-Netzkabel aus dem Fachhandel.
16. Wenn dieses Produkt in ein Geräte-Rack eingebaut werden soll, muss eine Versorgung über die Rückseite eingerichtet werden.
4. Befolgen Sie alle Anweisungen.
1. Lesen Sie sich diese Anweisungen durch.
Der Benutzer sollte auf einfachen Zugang zu allen Netzsteckern,Gerätesteckern und Netz-Schaltern achten
18. Dieses Gerät darf nicht ungeschützt Wassertropfen und Wasserspritzern ausgesetzt werden und es muss
darauf geachtet werden, dass keine mit Flüssigkeiten gefüllte Gegenstände, wie z. B. Blumenvasen, auf dem Gerät
abgestellt werden.
Gefahr eines elektrischen Schlags - NICHT ÖFFNEN. Um die Gefahr eines elektrischen Schlags zu vermeiden, darf die Abdeckung nicht
geöffnet werden.. Überlassen Sie die Wartung qualifiziertem Fachpersonal.
13
DE

Designed and Engineered in the UK by HH Electronics LTD.
© 2022 HH Electronics Ltd
PROFESSIONAL POWER AMPLIFIER
1: BEFESTIGUNGSLÖCHER FÜR RACKMONTAGE: Ermöglicht die Installation in einem standardmäßigen 19-Zoll-
Rackgehäuse.
Zeigt an, dass die integrierte Schutzschaltung aktiv ist und somit eine Beschädigung des Verstärkers verhindert.
Der eingebaute Kompressor/Limiter ist aktiv und verhindert Überlastung oder Signalverzerrung.
Zeigt an, dass ein Signal vorhanden ist.
Zeigt an, dass der Verstärker eingeschaltet und betriebsbereit ist.
2: NETZSCHALTER: Schalten Sie den Verstärker aus, wenn er nicht verwendet wird.
3: LÜFTUNGSÖFFNUNGEN: Um Ihren Verstärker kühl zu halten, strömt Luft durch die Frontplatte, durch einen Filter und tritt
schließlich an der Rückseite des Geräts aus.
Es ist wichtig, dass der Luftstrom NICHT in irgendeiner Weise eingeschränkt wird.
Wenn der Verstärker in einem Rack montiert ist, MUSS ein ungehinderter Luftstrom vorhanden sein, um eine mögliche Überhitzung
zu vermeiden. Zwischen der Rückseite des Verstärkers und anderen Aufbauten sollte ein Abstand von mindestens 20 cm bestehen
und die Abluft entweichen können.
4: LEVEL CONTROL UND INDICATORS: Alle Verstärker der M-Range haben dedizierte Level Control und Signal Level
Monitors für jeden Kanal. Das Messgerät liefert folgende Informationen:
EINLEITUNG
Die Endstufen der M-Serie von HH sind Hochleistungs-2U-Rack-Verstärker, die entwickelt wurden, um maximale Leistung für
anspruchsvolle Anwendungen zu bieten. Es sind drei Modelle erhältlich, die alle mit Hochleistungs-Ringkernnetzteilen und einer
robusten Konstruktion ausgestattet sind. Geeignet für Bars, Pubs, Clubs, Kirchen, Musiker oder überall dort, wo Sie eine
Hochleistungsverstärkung benötigen. HH verfügt über mehr als fünf Jahrzehnte Erfahrung in der Entwicklung hochwertiger Endstufen
und war in der Tat einer der Pioniere auf diesem Gebiet.
Hauptmerkmale:
Zweikanalige Audio-Endstufe.
BEDIENELEMENTE UND FUNKTIONEN DER FRONTPLATTE
M2600D-Frontplatte abgebildet, aber alle Modi in der Reihe haben die gleichen Bedienelemente und das gleiche Layout.
Hochwertiges Hochleistungs-Ringkernnetzteil.
Schweres 2U-Chassis.
Extrem zuverlässige lineare Leistungsstufe.
Umfassendes Schutzsystem.
14
DE
0
-dB-dB
PROFESSIONAL POWER AMPLIFIER
CH1 CH2
FLT
CLIP
SIG
PWR
0ON/OFF
12
3
4

Designed and Engineered in the UK by HH Electronics LTD.
© 2022 HH Electronics Ltd
PROFESSIONAL POWER AMPLIFIER
Das Gerät muss unbedingt geerdet werden!
Der Normalbetrieb wird wieder aufgenommen, sobald der Fehler behoben und die Reset-Taste gedrückt wurde.
3: SICHERHEITSHINWEISE.
4: AUSGANGSEKTION: Zwei SpeakON-Ausgangsanschlüsse und 4-mm-Anschlussklemmen, die den zwei Kanälen des Verstärkers
entsprechen. Schließen Sie Lautsprecher entweder an die SpeakON-Ausgänge oder die Anschlussklemmen an.
Die 4-mm-Anschlussklemmen befinden sich hinter einer Sicherheitsabdeckung. Um darauf zuzugreifen, entfernen Sie zuerst die
Schraube, mit der die Kunststoffabdeckung befestigt ist.
2: RESET: Eine Schutzvorrichtung für die Verstärkerausgangsstufe. Es wird aktiviert, wenn der Verstärker in einen Kurzschluss oder
eine längere Überstromsituation getrieben wird, wie z. B. zu langes Fahren in zu niedrige Impedanzen oder zu hohe Leistung.
5: LÜFTER: Zwei Lüfter mit variabler Drehzahl zur Kühlung des Geräts. NICHT BEHINDERN!
STEREO: Kanal 1 Eingang Kanal 1 Ausgang - Pegelanpassung über Channel 1 Gain-Regler.
Kanal 1 Eingang Kanal 2 Ausgang - Pegelanpassung über Kanal 2 Gain-Regler.
Channel 2 Input, Gain Control and Output is disabled.
PARALLEL: Kanal 1 Eingang Kanal 1 Ausgang - Pegelanpassung über Channel 1 Gain-Regler.
Der Verstärker steuert eine minimale Lautsprecherimpedanz von 4Ω im Stereo- oder Parallelmodus und 8Ω im Brückenmodus.
Bitte verwenden Sie KEINE Instrumenten- oder Mikrofonkabel, um Ihren Verstärker und Ihre Lautsprecherbox zu verbinden!
6: EINGANGSEKTION: Zwei XLR-Eingangsanschlüsse, die unsymmetrische und symmetrische Eingänge akzeptieren – Pin 2 aktiv.
Symmetrische Signale werden für ein verbessertes Signal-Rausch-Verhältnis empfohlen.
LINK-AUSGÄNGE: Intern von den Eingangs-XLRs geroutet, können die Link-Ausgänge (Pin 2 heiß) verwendet werden, um ein
zusätzliches Gerät in Reihe zu schalten.
Kanal 2 Eingang Kanal 2 Ausgang - Pegelanpassung über Channel 2 Gain-Regler.
BRÜCKE: Kanal 1 Eingang Kanal 1 Ausgang - Pegelanpassung über Channel 1 Gain Control.
(SpeakON ist ein eingetragenes Warenzeichen der Neutrik AG.
Trennen Sie den Netzstecker, wenn der Verstärker nicht benutzt wird!
EMPFINDLICHKEITSREGELUNG: Zwei Optionen verfügbar: 0,775 V / 0 dBu und 1,4 V. Die verwendete Einstellung hängt vom
Pegel des Quellgeräts ab.
MODUSSCHALTER: Bietet drei Betriebsmodi:
1: IEC POWER INLET: Stellen Sie vor dem ersten Einschalten sicher, dass die Versorgungsspannung (über der Steckdose) mit
Ihrer örtlichen Netzversorgung übereinstimmt.
Bitte beachten Sie die Schaltpläne auf der folgenden Seite.
Alle anderen Warenzeichen sind Eigentum ihrer jeweiligen Inhaber)
Die Rückseite des M2600D ist abgebildet, jedoch haben alle Modi in der Reihe haben die gleichen Bedienelemente und
das gleiche Layout.
BEDIENELEMENTE UND FUNKTIONEN AUF DER RÜCKSEITE
15
DE
1
2364 5

Designed and Engineered in the UK by HH Electronics LTD.
© 2022 HH Electronics Ltd
PROFESSIONAL POWER AMPLIFIER
1: STEREO MODE
2: PARALLEL MODE
3: BRIDGE MODE
SpeakON WIRING:
SpeakON WIRING:
SpeakON WIRING:
(1-) LAUTSPRECHER -
(1+) LAUTSPRECHER +
1-
(2+) LAUTSPRECHER -
(1+) LAUTSPRECHER +
(1-) LAUTSPRECHER -
(1+) LAUTSPRECHER +
CH1
CH2
CH2
CH1
CH2
CH1
CH1
CH1
CH1
CH1
CH2
BRIDGE
EINGÄNGE UND AUSGÄNGE
Verwendet in allen Fällen entweder die SpeakON-Ausgänge oder die Polklemmen – nicht beide gleichzeitig.
1-
1-
CH1
CH2
16
DE

Designed and Engineered in the UK by HH Electronics LTD.
© 2022 HH Electronics Ltd
PROFESSIONAL POWER AMPLIFIER
CUIDADO: Cuando use productos electrónicos, debe tomar precauciones básicas, incluyendo las siguientes:
1. Lea estas instrucciones.
2. Guarde estas instrucciones.
3. Haga caso de todos los consejos.
4. Siga todas las instrucciones.
5. No usar este aparato cerca del agua.
6. Limpiar solamente con un trapo seco.
7. No bloquear ninguna de las salidas de ventilación. Instalar de acuerdo a las instrucciones del fabricante.
8. No instalar cerca de ninguna fuente de calor como radiadores, estufas, hornos u otros aparatos (incluyendo amplificadores) que produzcan calor.
9. Un aparato con la construcción de clase I deberá conectarse a una toma de corriente que disponga una conexión con protección. No retire la
patilla protectora del enchufe polarizado o con conexión a tierra. Un enchufe polarizado tiene dos clavijas, una más ancha que la otra. Un enchufe
con toma de tierra tiene dos clavijas y un tercer diente de tierra. La clavija ancha (la tercera) se proporciona para su seguridad. Si el enchufe
proporcionado no encaja en su toma de red, consulte a un electricista para que se reemplace por la obsoleta.
10. Proteja el cable de alimentación para que no sea pisado o pinchado, particularmente en los enchufes, habitáculos y el punto de salida del aparato.
11. Usar solamente componentes y accesorios proporcionados por el fabricante.
12. Usar solamente un carro, pie, trípode, o soporte especificado por el fabricante, o vendido junto al aparato. Cuando se use un carro, tenga
cuidado al mover el conjunto carro/aparato para evitar que se dañe en un vuelco.
13. El cable de alimentación o conector del aparato se usa como dispositivo de desconexión y debe permanecer accesible. El usuario debe permitir
un acceso fácil a cualquier entrada principal, interruptor haciéndolo así más operativo. Desenchufe este aparato durante tormentas eléctricas o
cuando no se use en largos períodos de tiempo.
14. Para cualquier reparación, acuda a personal de servicio cualificado. Se requieren reparaciones cuando el aparato ha sido dañado de alguna
manera, como cuando el cable de alimentación o el enchufe se han dañado, algún líquido ha sido derramado o algún objeto ha caído dentro del
aparato, el aparato ha sido expuesto a la lluvia o la humedad, no funciona de manera normal, o ha sufrido una caída.
15. Nunca retire la patilla de Tierra. Conecte el aparato sólo a una fuente de alimentación del tipo marcado al lado del cable de alimentación.
16. Si este producto va a ser instalado en una unidad de rack, use algún tipo de apoyo trasero.
17. Nota para el Reino Unido solamente: Si los colores de los cables en el enchufe principal de esta unidad no corresponden con los terminales en
su enchufe‚ proceda de la siguiente manera:
a) El cable de color verde y azul debe ser conectado al terminal que está marcado con la letra E‚ el símbolo de Tierra (earth)‚ coloreado en
verde o en verde y amarillo.
b) El cable coloreado en azul debe ser conectado al terminal que está marcado con la letra N o el color negro.
Riesgo de choque eléctrico - NO ABRIR. Para reducir el riesgo de descarga eléctrica, no retire la cubierta. No hay piezas que el usuario
pueda reparar. Solicite la revisión al personal cualificado.
Para evitar descargas eléctricas o incendios, no exponga este aparato a la lluvia ni a la humedad. Antes de usar este aparato, por favor
lea las instrucciones de funcionamiento.
De acuerdo al OSHA, cualquier exposición que exceda los límites arriba indicados puede producir algún tipo
de pérdida en la audición. Protectores para los canales auditivos o tapones para los oídos deben ser usados
cuando se opere con este sistema de sonido para prevenir una pérdida permanente en la audición, si la
exposición excede los límites indicados más arriba. Para protegerse de una exposición a altos niveles de
sonido potencialmente peligrosa, se recomienda que todas las personas expuestas a equipamiento capaz de
producir altos niveles de presión sonora, tales como este sistema de amplificación, se encuentren protegidas
por protectores auditivos mientras esta unidad esté operando.
c) El cable coloreado en marrón debe ser conectado al terminal que está marcado con la letra L o el color rojo.
19. La exposición a altos niveles de ruido puede causar una pérdida permanente en la audición. La susceptibilidad
a la pérdida de audición provocada por el ruido varía según la persona, pero casi todo el mundo perderá algo
de audición si se expone a un nivel de ruido suficientemente intenso durante un tiempo determinado. El
Departamento para la Salud y para la Seguridad del Gobierno de los Estados Unidos (OSHA) ha especificado
las siguientes exposiciones al ruido permisibles:
La intención de alertar al usuario de la presencia de "tensión peligrosa" alto dentro del recinto los productos puede ser suficiente para constituir
un riesgo de descarga eléctrica para las personas.
18. Este aparato eléctrico no debe ser sometido a ningún tipo de goteo o salpicadura y se debe tener cuidado para no poner objetos que
contengan líquidos, como vasos, sobre el aparato.
20. Símbolos y nomenclatura utilizada en el producto y en los manuales de producto, destinado a alertar al usuario de las áreas donde la precaución
adicional pueden ser necesarias, son las siguientes:
La intención de alertar al usuario de la presencia de importantes de operación y mantenimiento (servicio) en la literatura que
acompaña al producto.
INSTRUCCIONES IMPORTANTES DE SEGURIDAD
CAUTION:
WARNING:
Designed and Engineered in the UK by HH Electronics LTD.
© 2022 HH Electronics Ltd 17
ES

Designed and Engineered in the UK by HH Electronics LTD.
© 2022 HH Electronics Ltd
PROFESSIONAL POWER AMPLIFIER
Si el amplificador está montado en un rack, ES OBLIGATORIO que haya un flujo de aire libre y sin restricciones para evitar un
posible sobrecalentamiento. Debe haber un espacio libre de al menos 20 cm entre la cara posterior del amplificador y cualquier otra
estructura y una distancia segura para el aire de escape.
El compresor/limitador integrado está activo y evitando la sobrecarga y la distorsión de la señal.
1: HOYOS DE FIJACIÓN PARA MONTAJE EN RACK: Permite la instalación en un gabinete estándar de 19".
2: INTERRUPTOR DE ENCENDER-APAGAR: Apague el amplificador cuando no esté en uso.
3: HOYOS DE VENTILACIÓN: Para mantener su amplificador fresco, el aire pasa a través de las perforaciones del panel frontal,
a través de un filtro y finalmente sale por la parte trasera de la unidad.
Indica que el circuito de protección integrado está activo, lo que evita daños al amplificador.
Es vital que el flujo de aire NO ESTÉ restringido o interrumpido de ninguna manera.
Muestra que la señal está presente.
4: CONTROL DE NIVEL E INDICADORES: Todos los amplificadores de la gama M tienen monitores de nivel de la señal y
control de nivel dedicados para cada canal. El medidor proporciona la siguiente información:
Indica que el amplificador está encendido y listo para usar.
CONTROL DE NIVEL: Esto proporciona un ajuste continuo de -80dB a 0dB. Ajuste a 0dB para el funcionamiento normal. La
función del control de nivel está determinada por el modo de amplificador establecido a través del interruptor de modo del panel
trasero.
INTRODUCCIÓN
Amplificador de potencia de audio de dos canales.
Amplificador con Etapa de potencia linear ultra confiable.
Los amplificadores de potencia de la serie HH M son amplificadores con espacio de 2 unidades de rack y alta potencia, diseñados
para proporcionar el máximo rendimiento para las aplicaciones más exigentes. Son tres modelos disponibles, todos con unidades de
fuente de alimentación toroidal linear de alta resistencia y construcción robusta. Adecuado para bares, pubs, clubes, lugares de culto,
músicos o, de hecho, en cualquier lugar donde se necesite amplificación de alta potencia. HH tiene más de cinco décadas de
experiencia en el diseño de amplificadores de potencia de calidad y es considerado uno de los pioneros en esta área.
Chasis reforzado con 2 unidades de rack.
Características clave:
Fuente de alimentación toroidal, de alta calidad, para servicio pesado.
CONTROLES Y CARACTERÍSTICAS DEL PANEL FRONTAL
Sistema Integral de Protección.
Se muestra aqui el panel frontal del modelo M2600D, pero todos los modelos de la gama tienen los mismos controles y diseño.
18
ES
0
-dB-dB
PROFESSIONAL POWER AMPLIFIER
CH1 CH2
FLT
CLIP
SIG
PWR
0ON/OFF
12
3
4

Designed and Engineered in the UK by HH Electronics LTD.
© 2022 HH Electronics Ltd
PROFESSIONAL POWER AMPLIFIER
1: ENTRADA DE ALIMENTACIÓN IEC: Antes de prender el aparato, asegúrese de que el valor nominal del voltaje de
suministro (ubicado sobre el enchufe de alimentación) sea el mismo que el suministro de red local.
¡La unidad debe estar conectada a tierra en todas las circunstancias!
¡Desconecte el conector de alimentación cuando el amplificador no esté en uso!
2: RESET: Un dispositivo de protección para la etapa de salida del amplificador. Se activa si el amplificador sufre un cortocircuito o
cualquier situación de sobre corriente prolongada, como impedancias demasiado bajas, a una potencia demasiado alta durante
demasiado tiempo. El funcionamiento normal se reanudará una vez que se haya eliminado la falla y se haya presionado el botón Reset.
3: INFORMACIÓN DE SEGURIDAD.
Entrada del canal 1 Salida del canal 2: ajuste de nivel mediante el control de ganancia del canal 2.
(SpeakON es una marca registrada de Neutrik AG. Todas las demás
SALIDAS LINK: Enrutadas internamente desde los XLR de entrada, las salidas de Link (Pino 2 activo) se pueden usar para conectar
en cadena un dispositivo adicional.
CONTROL DE SENSIBILIDAD: Dos opciones disponibles: 0.775V/0dBu y 1.4V. La configuración utilizada dependerá del nivel del
dispositivo fuente.
ESTÉREO: Entrada del canal 1 Salida del canal 1 - ajuste de nivel mediante el control de ganancia del canal 1.
marcas comerciales son propiedad de sus respectivos dueños.)
La entrada del canal 2, el control de ganancia y de salida se encuentran deshabilitados.
Entrada del canal 2 Salida del canal 2: ajuste de nivel mediante el control de ganancia del canal 2.
El amplificador impulsará una impedancia mínima de altavoz de 4 en modo estéreo o paralelo y 8 en modo puente.Ω Ω
PARALELA: Entrada del canal 1 Salida del canal 1 - ajuste de nivel mediante el control de ganancia del canal 1.
6: SECCIÓN DE ENTRADA: Dos conectores de entrada XLR que aceptan entradas balanceadas y no balanceadas - Pino 2 activo.
Se recomiendan señales balanceadas para mejorar la relación señal/ruido.
Consulte los diagramas de cableado en la página siguiente.
5: VENTILADORES DE RESFRIAMIENTO: Dos ventiladores de velocidad variable para resfriar la unidad. ¡NO OBSTRUYA!
INTERRUPTOR DE MODO: Proporciona tres modos de funcionamiento:
¡NO utilice cables de instrumento o micrófono para conectar su amplificador y altavoz!
PUENTE: Entrada del canal 1 Salida del canal 1: ajuste de nivel mediante el control de ganancia del canal 1.
4: SECCIÓN DE SALIDA: Dos conectores de salida SpeakON y dos terminales de cables de 4 mm correspondientes a los dos
canales del amplificador. Conecte los altavoces a las salidas SpeakON o a los terminales.
Los terminales de 4 mm están ubicados detrás de una cubierta plástica de seguridad. Para acceder, primero quite el tornillo que sujeta
la cubierta.
Se muestra aqui el panel posterior de la M2600D, pero todos los modelos de la gama tienen los mismos controles y diseño.
CONTROLES Y CARACTERÍSTICAS DEL PANEL TRASERO
19
ES
1
2364 5

Designed and Engineered in the UK by HH Electronics LTD.
© 2022 HH Electronics Ltd
PROFESSIONAL POWER AMPLIFIER
ENTRADAS Y SALIDAS
20
ESES
1: STEREO MODE
2: PARALLEL MODE
3: BRIDGE MODE
CH1
CH1
BRIDGE
En todos los casos, utilice o las salidas SpeakON, o los terminales de 4mm, no use ambos al mismo tiempo.
(1-) ALTAVOZ -
(1+) ALTAVOZ +
SpeakON WIRING:
1-
(1-) ALTAVOZ -
(1+) ALTAVOZ +
SpeakON WIRING:
1-
SpeakON WIRING:
1-
(2+) ALTAVOZ -
(1+) ALTAVOZ +
CH1
CH2
CH2
CH1
CH2
CH1
CH2
CH1
CH1
CH1
CH2
This manual suits for next models
3
Table of contents
Languages:
Other HH Electronics Amplifier manuals
