HH Electronics Vector VRC-210 User manual

USER MANUAL
FULL RANGE ENCLOSURES
WITH A DETACHABLE MIXER

Designed and Engineered in the UK by HH Electronics LTD.
© 2019 HH Electronics Ltd
INTRODUCTION
The HH System VRC-210 – Clarity and Convenience.
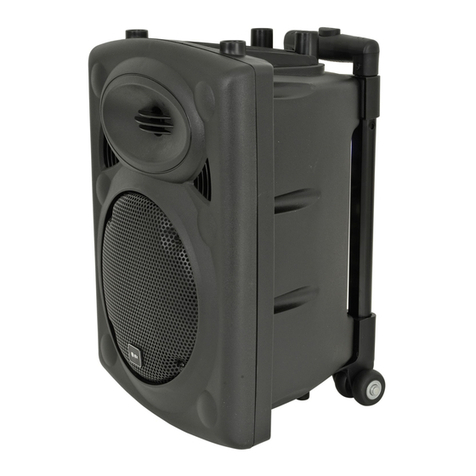
The HH VRC-210 is designed to be an all-in-one audio solution for a wide variety of
everyday applications – from classroom, dance studio to a business seminar or any kind of
musical performance
The VRC-210 gives you all the ease and convenience of everything you need to get the job
done with the minimum of fuss. Its sleek detachable mixer module offers a wide selection of
inputs/outputs including a Bluetooth® equipped media player. The pair of speaker leads and
power cord that are supplied, are all housed in their own neat clip off module. Both
enclosures include handles and 35mm pole sockets.
This manual contains important information regarding correct and safe operation of your
active system. Please read it thoroughly in order to get the best performance and reliability
from your new HH product.
CH5/6
5
4
3
2
1
010
9
8
7
65
4
3
2
1
010
9
8
7
65
4
3
2
1
010
9
8
7
65
4
3
2
1
010
9
8
7
65
4
3
2
1
010
9
8
7
65
4
3
2
1
010
9
8
7
6
-5+5
44
33
22
11
0
-5+5
44
33
22
11
0
-5+5
44
33
22
11
0
-5+5
44
33
22
11
05
4
3
2
1
010
9
8
7
6
BASSBASSBASS
PHANTOM POWER
TREBLE
PEAKPEAKPEAKPEAK
TREBLETREBLETREBLE
LEVEL
USB
L
R
CH1CH2CH3CH4
5
4
3
2
1
010
9
8
7
65
4
3
2
1
010
9
8
7
65
4
3
2
1
010
9
8
7
65
4
3
2
1
010
9
8
7
6
-5+5
44
33
22
11
0
-5+5
44
33
22
11
0
-5+5
44
33
22
11
0
-5+5
44
33
22
11
0
EFFECTEFFECTEFFECTEFFECT
BASS
MAXIMUM POWER CONSUMPTION - 500 WATTS
SUPPLY VOLTAGE AND FUSE RATING:
220-240V~ 50/60Hz
T3.15A L 250V
LEVELLEVELLEVELLEVELLEVELMASTER VOLUME
MIX OUT
-5+5
44
33
22
11
0
BASS
TREBLE
-5+5
44
33
22
11
0
EFFECT
DOWNUPSELECT
LR
LIMITER
SIGNAL
POWER
SD
L
R
CAUTION - RISK OF ELECTRIC SHOCK DO NOT OPEN
ATTENTION - LE RISQUE DE DÉCHARGE ÉLECTRIQUE NE S'OUVRENT PAS
LH SPEAKER
RH SPEAKER
CH5/6 + MEDIA PLAYER
LINE
MICLINE
MICLINE
MICLINE
MIC
DESIGNED AND ENGINEEREDIN THE
UK BY WWW.HHELECTRONICS.COM
SN:ABC1234567890
MODEL: VRC-210
CH5/6
5
4
3
2
1
010
9
8
7
65
4
3
2
1
010
9
8
7
65
4
3
2
1
010
9
8
7
65
4
3
2
1
010
9
8
7
65
4
3
2
1
010
9
8
7
65
4
3
2
1
010
9
8
7
6
-5 +5
4 4
3 3
2 2
1 1
0
-5 +5
4 4
3 3
2 2
1 1
0
-5 +5
4 4
3 3
2 2
1 1
0
-5 +5
4 4
3 3
2 2
1 1
0
5
4
3
2
1
010
9
8
7
6
BASS BASS BASS
PHANTOM POWER
TREBLE
PEAK PEAK PEAK PEAK
TREBLE TREBLE TREBLE
LEVEL
USB
L
R
CH1 CH2 CH3 CH4
5
4
3
2
1
010
9
8
7
65
4
3
2
1
010
9
8
7
65
4
3
2
1
010
9
8
7
65
4
3
2
1
010
9
8
7
6
-5 +5
4 4
3 3
2 2
1 1
0
-5 +5
4 4
3 3
2 2
1 1
0
-5 +5
4 4
3 3
2 2
1 1
0
-5 +5
4 4
3 3
2 2
1 1
0
EFFECT EFFECT EFFECT EFFECT
BASS
MAXIMUM POWER CONSUMPTION - 500 WATTS
SUPPLY VOLTAGE AND FUSE RATING:
220-240V~ 50/60Hz T3.15A L 250V
LEVEL LEVEL LEVEL LEVEL LEVEL MASTER VOLUME
MIX OUT
-5 +5
4 4
3 3
2 2
1 1
0
BASS
TREBLE
-5 +5
4 4
3 3
2 2
1 1
0
EFFECT
DOWN UP SELECT
L R
LIMITER
SIGNAL
POWER
SD
L
R
LH SPEAKER
RH SPEAKER
CH5/6 + MEDIA PLAYER
LINE
MIC LINE
MIC LINE
MIC LINE
MIC
DESIGNED AND ENGINEEREDIN THE
UK BY WWW.HHELECTRONICS.COM
SN:ABC1234567890
MODEL: VRC-210
2

Designed and Engineered in the UK by HH Electronics LTD.
© 2019 HH Electronics Ltd
ACCESS TO THE MIXER AND ACCESSORY BOX
Slide the catch to the left as indicated. Gently tilt the mixer/accessory
box then unhook from the cab.
POWER AND SPEAKER CONNECTIONS
Always switch off and disconnect the power cord when not in use.
MAXIMUM POWER CONSUMPTION - 300 WATTS
SUPPLY VOLTAGE AND FUSE RATING:
220-240V~ 50/60Hz T3.15A L 250V
MAXIMUM POWER CONSUMPTION - 300 WATTS
SUPPLY VOLTAGE AND FUSE RATING:
100-110V~ 50/60Hz T3.15A L 250V
100-110V~ 50/60Hz or 200-240V~ 50/60Hz.
PLEASE NOTE:
Only replace the fuse with the type stated!
The mains inlet, power switch and fuse are located to the right of the mixer.
The accepted input voltage range is preset to:
This cannot be changed by the user.
3

Designed and Engineered in the UK by HH Electronics LTD.
© 2019 HH Electronics Ltd
AVAILABLE ONBOARD
EFFECTS:
14
11
12
CH5/6
5
4
3
2
1
010
9
8
7
65
4
3
2
1
010
9
8
7
65
4
3
2
1
010
9
8
7
65
4
3
2
1
010
9
8
7
65
4
3
2
1
010
9
8
7
65
4
3
2
1
010
9
8
7
6
-5 +5
4 4
3 3
2 2
1 1
0
-5 +5
4 4
3 3
2 2
1 1
0
-5 +5
4 4
3 3
2 2
1 1
0
-5 +5
4 4
3 3
2 2
1 1
0
5
4
3
2
1
010
9
8
7
6
BASS BASS BASS
PHANTOM POWER
TREBLE
PEAK PEAK
TREBLE TREBLE TREBLE
LEVEL
L
R
CH1 CH2 CH3 CH4
5
4
3
2
1
010
9
8
7
65
4
3
2
1
010
9
8
7
65
4
3
2
1
010
9
8
7
65
4
3
2
1
010
9
8
7
6
-5 +5
4 4
3 3
2 2
1 1
0
-5 +5
4 4
3 3
2 2
1 1
0
-5 +5
4 4
3 3
2 2
1 1
0
-5 +5
4 4
3 3
2 2
1 1
0
EFFECT
PEAKPEAK
EFFECTEFFECT EFFECT
BASS
LEVEL LEVEL LEVEL LEVEL LEVEL MASTER VOLUME
MIX OUT
-5 +5
4 4
3 3
2 2
1 1
0
BASS
TREBLE
-5 +5
4 4
3 3
2 2
1 1
0
EFFECT
DOWN UP SELECT
L R
LIMITER
SIGNAL
POWER
L
R
CH5/6 + MEDIA PLAYER
LINE
MIC LINE
MIC LINE
MIC LINE
MIC
15
16
17
18
19
20
13
10
9
04
1-4: MONO INPUT CHANNELS.
8. FX SEND: This control determines how much (if any) of each channel is sent through the onboard FX
processor - also see (13).
12. LEVEL: Control the level of signal from channel 5/6 and a Bluetooth device if connected.
14. Master FX level: This control allows for quick overall adjustment of the FX level without having to individually adjust
the Input FX sent control (8).
17. MASTER EQ: 2 band active EQ for adjusting the signal. Setting both controls to 0 is a good starting point.
6. MIC/LINE SELECTION: Provides the correct internal gain structure for your connected device. The switch is ‘IN’ for
Mic level devices and ‘OUT’ for line level devices.
19. POWER LED: This will illuminate when the unit is powered up.
10. LEVEL: Controls the channel level to the master volume - also see (20).
7. EQ: 2 band active EQ for tonal correction of the signal. Setting both controls to 0 is a good starting point.
11. CH 5/6: A multi input line level Stereo channel. Choose from 2x 6.35mm jack, or left/right RCA inputs. Any
combination, or all can be used together.
20. MASTER VOLUME: system.Controls the overall level of your VRC-210
5. COMBI INPUT: For use with both low level/low impedance devices eg. - mic (200-600ohms), electro-acoustic guitar
or line level devices. This input will accept a balanced/ unbalanced signal via XLR, or 6.35mm jack plug.
13. FX PROCESSOR: Containing 16 high quality effects, this processor adds the professional touch to your signal chain.
The required effect is chosen using the DOWN/UP buttons and confirmed using the SELECT button.
Phantom power should only be used with condenser mic’s.
16. PHANTOM POWER: Turns on Phantom Power to all Mic channels should it be needed. Please note that the
Phantom will only be applied to the XLR of the Combi inputs.
15. MIX OUT: A convenient way of connecting your VRC-210 to another device such as an additional amp/speaker setup
or recording device.
9. PEAK: Adjust the level controls and signal level from your source(s) so the LED illuminates only briefly on peaks in the
music. Using the system with this LED on all or most of the time will result in poor sound quality.
18. LIMITER LED: This will illuminate when the Limiter is active. The limiter will protect the output stage from potential
overload.
USER INTERFACE
4

Designed and Engineered in the UK by HH Electronics LTD.
© 2019 HH Electronics Ltd
MEDIA PLAYER
(Automatically detected on insertion, or if removed &
reinserted uses smart technology to resume play from the
previous point).
3. DISPLAY SCREEN
1. SD CARD SLOT: Insert your Micro SD card here.
(Automatically detected on insertion, or if removed &
reinserted uses smart technology to resume play from the
previous point).
2. MEMORY STICK SLOT: Connect your USB thumb-
drive here.
NOTE: The USB socket is for the playback of recorded
tracks only, not for charging a USB device.
NOTE: The Media Player will play the music tracks on a
USB Stick/Micro SD Card in alphabetical / numerical
order.
Use the onboard player for playing Mp3 encoded audio
tracks from Micro SD card/USB Stick or Bluetooth device.
The media player is automatically powered up when the
amplifier is switched on.
CONNECT TO AN EXTERNAL BLUETOOTH DEVICE:
ALL - Plays all the tracks on the root of the device in date order, then the sub folders.
ONE - Plays one track repeatedly (cycle to the required track to play using NEXT button (8).
8. PLAY/PAUSE: Use this control to play or pause your music.
a. Select Bluetooth via the MODE button (4).
c. Your HH Vector is now connected to your Bluetooth device and can be controlled using the PLAY/PAUSE,
PREVIOUS, NEXT & LOOP BUTTONS.
4. MODE: Use this to toggle the Media input source between SD/USB and Bluetooth.
5. PREVIOUS: Press to skip to the preceding track.
Only one VRC-210 can be paired to your Bluetooth capable device at once, so remember to de-select if you plan to
use a different VRC-210 device next time.
FOD - Plays all track in the current active folder.
7. LOOP: Use this to enable/disable the looped playback modes. When using this button with an SD card or USB
thumb drive, there are 3 options:
6. NEXT: Press to skip to the next track.
Micro SD card, USB Stick - auto detected upon insertion - if a Micro SD Card is inserted while a USB thumb drive is
already connected, the Micro SC will become the ‘live’ audio source.
b. On your Bluetooth capable device, make sure Bluetooth is enabled. Scan down the list of available devices - search
for: ‘HH VECTOR’ and select. No password required.
678
5
4
123
5

Designed and Engineered in the UK by HH Electronics LTD.
© 2019 HH Electronics Ltd
STAGE PERFORMANCE
6
RH SPEAKER
HOUSE PA SYSTEM.
LH SPEAKER
12
CH5/6
5
4
3
2
1
010
9
8
7
65
4
3
2
1
010
9
8
7
65
4
3
2
1
010
9
8
7
65
4
3
2
1
010
9
8
7
65
4
3
2
1
010
9
8
7
65
4
3
2
1
010
9
8
7
6
-5 +5
4 4
3 3
2 2
1 1
0
-5 +5
4 4
3 3
2 2
1 1
0
-5 +5
4 4
3 3
2 2
1 1
0
-5 +5
4 4
3 3
2 2
1 1
0
5
4
3
2
1
010
9
8
7
6
BASS BASS BASS
PHANTOM POWER
TREBLE
PEAK PEAK
TREBLE TREBLE TREBLE
LEVEL
L
R
CH1 CH2 CH3 CH4
5
4
3
2
1
010
9
8
7
65
4
3
2
1
010
9
8
7
65
4
3
2
1
010
9
8
7
65
4
3
2
1
010
9
8
7
6
-5 +5
4 4
3 3
2 2
1 1
0
-5 +5
4 4
3 3
2 2
1 1
0
-5 +5
4 4
3 3
2 2
1 1
0
-5 +5
4 4
3 3
2 2
1 1
0
EFFECT
PEAKPEAK
EFFECTEFFECT EFFECT
BASS
LEVEL LEVEL LEVEL LEVEL LEVEL MASTER VOLUME
MIX OUT
-5 +5
4 4
3 3
2 2
1 1
0
BASS
TREBLE
-5 +5
4 4
3 3
2 2
1 1
0
EFFECT
DOWN UP SELECT
L R
LIMITER
SIGNAL
POWER
L
R
CH5/6 + MEDIA PLAYER
LINE
MIC LINE
MIC LINE
MIC LINE
MIC
13
04

Designed and Engineered in the UK by HH Electronics LTD.
© 2019 HH Electronics Ltd
7
SOLO PERFORMANCE
RH SPEAKER
LH SPEAKER
7
CH5/6
5
4
3
2
1
010
9
8
7
65
4
3
2
1
010
9
8
7
65
4
3
2
1
010
9
8
7
65
4
3
2
1
010
9
8
7
65
4
3
2
1
010
9
8
7
65
4
3
2
1
010
9
8
7
6
-5 +5
4 4
3 3
2 2
1 1
0
-5 +5
4 4
3 3
2 2
1 1
0
-5 +5
4 4
3 3
2 2
1 1
0
-5 +5
4 4
3 3
2 2
1 1
0
5
4
3
2
1
010
9
8
7
6
BASS BASS BASS
PHANTOM POWER
TREBLE
PEAK PEAK
TREBLE TREBLE TREBLE
LEVEL
L
R
CH1 CH2 CH3 CH4
5
4
3
2
1
010
9
8
7
65
4
3
2
1
010
9
8
7
65
4
3
2
1
010
9
8
7
65
4
3
2
1
010
9
8
7
6
-5 +5
4 4
3 3
2 2
1 1
0
-5 +5
4 4
3 3
2 2
1 1
0
-5 +5
4 4
3 3
2 2
1 1
0
-5 +5
4 4
3 3
2 2
1 1
0
EFFECT
PEAKPEAK
EFFECTEFFECT EFFECT
BASS
LEVEL LEVEL LEVEL LEVEL LEVEL MASTER VOLUME
MIX OUT
-5 +5
4 4
3 3
2 2
1 1
0
BASS
TREBLE
-5 +5
4 4
3 3
2 2
1 1
0
EFFECT
DOWN UP SELECT
L R
LIMITER
SIGNAL
POWER
L
R
CH5/6 + MEDIA PLAYER
LINE
MIC LINE
MIC LINE
MIC LINE
MIC
04

Designed and Engineered in the UK by HH Electronics LTD.
© 2019 HH Electronics Ltd
SPECIFICATION
8
In the interest of continued development, HH Electronics reserves the right to amend product specification without prior notification.
Amplifier
Power Rating : 2x 500W
Amplifier Type : Class D
Power Supply : SMPS (100-120 or 220-240 fixed)
Features
Inputs :
4x balanced Combi XLR/Jack with mic/line switch, 2x 6.3mm single ended jack inputs, 2x RCA inputs,
Media player with BT 4.1, USB and SD card
Outputs : RCA mix out. 2x 6.3mm Jack speaker outputs
Controls :
CH1-4 gain, 2 band eq, effect send, mic/line switch, CH5-6 gain, Master 16 digital effect section with level,
Master 2 band eq, master volume, Phantom power.
Speaker
HF Driver : 1" Compression Driver
LF Driver : 10" Woofer
Coverage : 90°H X 40°V
Enclosure
Cabinet : Robust polypropylene cabinet with carry handle
Finish : Black
Grille : Powdercoated steel
Other : 35mm Distance Pole Socket
Unit dimensions (HWD) : 49 x 31.5 x 31.5 CM
19.3" x 12.4" x 12.4"
Unit weight : 18.7Kg, 41.2 lbs
Carton dimensions (HWD) : 55.5 x 63.5 x 36.5 CM
21.9" x 25" x 14.4" , 0.129 M3
Packed weight : 19.7Kg, 43.4 lbs
8

Designed and Engineered in the UK by HH Electronics LTD.
© 2019 HH Electronics Ltd
BLOCK DIAGRAM
9
CONNECTOR WIRING
GND
3.5MM STEREO JACK
GND
6.35MM UNBALANCED JACK
+(HOT) LEFT
RIGHT
1 GROUND
2 HOT
3 COLD
12
3
1
2
3
1
2
3
12
3
MALE
(FRONT VIEW) (REAR VIEW) (FRONT VIEW) (REAR VIEW)
MALE FEMALE FEMALE
EQ
EQ
BASS TREBLE
BASS TREBLE
WOOFER
MONITOR - L
MONITOR - R
RCA
TWEETER
TWEETER
WOOFER
X-OVER
X-OVER
LIMITER
LIMITER
MASTER
VOLUME
LEVEL POWER
AMP
POWER
AMP
LEVEL
LEVEL
LEVEL
EQ
EQ
EQ
LEVEL
CH1
CH2
CH3
CH4
CH5/6
LINE INPUT - L
RCA - L
RCA - R
BLUETOOTH
MEDIA PLAYER
SD CARD
LINE INPUT - R
LINE INPUT
MIC INPUT
LINE INPUT
MIC INPUT
LINE INPUT
MIC INPUT
LINE INPUT
MIC INPUT
PEAK
INDICATOR
PEAK
INDICATOR
PEAK
INDICATOR
PEAK
INDICATOR
PEAK
INDICATOR
EQ
BASS TREBLE
BASS TREBLE
BASS TREBLE
BASS TREBLE
FX
LEVEL
FX
LEVEL
FX
LEVEL
MASTER FX
LEVEL
DSP MODULE
FX
LEVEL
9

Designed and Engineered in the UK by HH Electronics LTD.
© 2019 HH Electronics Ltd
10
(Stand not included)
35mm pole socket
HINTS AND TIPS
BASIC SETUP
SWITCHING OFF
ŸUse the minimum cut or boost in EQ. If all bands are boosted or cut, flatten
EQ, re-adjust gain and start again.
HH VRE cabs can be mounted on the floor, or a suitable pole or tripod. Don't
over-extend poles/tripods; ensure at least 4 x the pole diameter is still inside the
outer pole. Make sure the legs have a good splay on tripods, but do not obstruct
doorways or other access-ways.
Inspect the product during unpacking, if any damage is found, notify the dealer you
purchased it from immediately. Be sure to save the carton and all packaging materials.
Should you ever need to return the unit back to the dealer use only the original factory
packing. Pack all cables neatly, use cable ties to tidy excess cable length in 'figure-8' not
loops.
Do not connect or disconnect from the input signal source when the amplifier is
turned ON, damage could occur to the amplifier and the speaker.
If a pole mount is used, make sure that the thumb screw on the cabinet is tight.
After using the amplifier, please adjust the gain controls to their lowest settings,
then the amplifier can be turned off safely. Turn the power switch to the OFF
position and remove the power cord from the electrical source.
NOTE:
QUICK TIPS
UNPACKING
ŸUse electronic safety devices such as circuit breakers.
ŸStart with EQ settings flat and gains low.
ŸMaster volumes should be at zero for switch on and off.
ŸUse input gain to set maximum signal level without distortion.
ŸAvoid damp environments and extremes of temperature for storage and use of
all audio equipment.
ŸLook after your cables. Do not stand equipment on, or run cases over them,
do not tie knots in them and always use them for the correct application (a
signal lead is NOT a speaker lead). Coil and secure with cable ties before
storing.
ŸKeep lights away from speakers; heat can cause fires/speaker damage.
ŸBe aware of total power usage. Overloading a mains socket is potentially dangerous,
and likely to cause a power out during use.
ŸKeep power and signal cables apart.
ŸDon't run cables across access-ways; if you have to, run them above doors or use
approved cable covers.
ŸSet up mic levels first, and adjust other equipment to match.
ŸAvoid very high onstage levels from backline amps.
ŸEnsure your equipment is properly loaded and cannot move around during
transit.
10

Designed and Engineered in the UK by HH Electronics LTD.
© 2019 HH Electronics Ltd
TRANSLATIONS
11

Designed and Engineered in the UK by HH Electronics LTD.
© 2019 HH Electronics Ltd
ACCÈS A LA TABLE DE MIXAGE ET A LA BOITE D'ACCESSOIRES:
Glissez le loquet vers la gauche comme
indiqué. Basculez doucement la boîte
d'accessoires/table de
mixage et détachez-la de l'enceinte.
BRANCHEMENTS DE L'ALIMENTATION ET DES ENCEINTES
Veuillez toujours arrêter l'appareil et débrancher
le câble d'alimentation lorsque vous ne l'utilisez pas.
MAXIMUM POWER CONSUMPTION - 300 WATTS
SUPPLY VOLTAGE AND FUSE RATING:
220-240V~ 50/60Hz T3.15A L 250V
MAXIMUM POWER CONSUMPTION - 300 WATTS
SUPPLY VOLTAGE AND FUSE RATING:
100-110V~ 50/60Hz T3.15A L 250V
La prise d'alimentation, l'interrupteur général et le fusible sont situés à droite de la table de
mixage.
NOTE:
100-110V~ / or 200-240V~ / .50 60Hz 50 60Hz
Ne remplacez le fusible que par le modèle spécifié!
Ce réglage ne peut pas être modifié par l'utilisateur.
La gamme de la tension d'entrée est pré-réglée sur:
FR
12

Designed and Engineered in the UK by HH Electronics LTD.
© 2019 HH Electronics Ltd
AVAILABLE ONBOARD
EFFECTS:
14
11
12
CH5/6
5
4
3
2
1
010
9
8
7
65
4
3
2
1
010
9
8
7
65
4
3
2
1
010
9
8
7
65
4
3
2
1
010
9
8
7
65
4
3
2
1
010
9
8
7
65
4
3
2
1
010
9
8
7
6
-5 +5
4 4
3 3
2 2
1 1
0
-5 +5
4 4
3 3
2 2
1 1
0
-5 +5
4 4
3 3
2 2
1 1
0
-5 +5
4 4
3 3
2 2
1 1
0
5
4
3
2
1
010
9
8
7
6
BASS BASS BASS
PHANTOM POWER
TREBLE
PEAK PEAK
TREBLE TREBLE TREBLE
LEVEL
L
R
CH1 CH2 CH3 CH4
5
4
3
2
1
010
9
8
7
65
4
3
2
1
010
9
8
7
65
4
3
2
1
010
9
8
7
65
4
3
2
1
010
9
8
7
6
-5 +5
4 4
3 3
2 2
1 1
0
-5 +5
4 4
3 3
2 2
1 1
0
-5 +5
4 4
3 3
2 2
1 1
0
-5 +5
4 4
3 3
2 2
1 1
0
EFFECT
PEAKPEAK
EFFECTEFFECT EFFECT
BASS
LEVEL LEVEL LEVEL LEVEL LEVEL MASTER VOLUME
MIX OUT
-5 +5
4 4
3 3
2 2
1 1
0
BASS
TREBLE
-5 +5
4 4
3 3
2 2
1 1
0
EFFECT
DOWN UP SELECT
L R
LIMITER
SIGNAL
POWER
L
R
CH5/6 + MEDIA PLAYER
LINE
MIC LINE
MIC LINE
MIC LINE
MIC
15
16
17
18
19
20
13
10
9
04
10. LEVEL: Contrôle le niveau du canal. Voir aussi (20).
6. SÉLECTEUR MIC/LINE: Permet d'adapter le gain interne à votre source. Le sélecteur est enfoncé pour un niveau
MIC et sorti pour un niveau LINE.
1-4. CANAUX MONO.
8. BOUTON EFFECT: Ce contrôle détermine le volume de chaque canal envoyé vers le processeur d'effets intégré. Voir
aussi (13).
13. PROCESSEUR D'EFFETS: Ce processeur de qualité à 16 effets ajoute une touche professionnelle à votre signal.
L'effet recherché est sélectionné à l'aide des boutons UP/DOWN et confirmé avec le bouton SELECT.
12. LEVEL: Contrôle le niveau des canaux 5/6 et de l'appareil BlueTooth s'il est connecté.
16. PHANTOM POWER: Ce bouton permet d'appliquer, si besoin, une alimentation fantôme à toutes les entrées MIC.
Veuillez noter que seule la partie XLR des prises combinées sera alimentée.
7. ÉGALISATION: Réglage de tonalité actif à 2 bandes pour corriger le signal. Positionnez les boutons sur 0 comme point
de départ.
9. VOYANT PEAK: Ajustez le contrôle de niveau et le niveau du signal de votre source pour que ce voyant ne s'allume
que brièvement lors des pics de volume. Si ce voyant est souvent ou tout le temps allumé, le son sera de piètre qualité.
5. ENTRÉE COMBINÉE: Vous pouvez brancher soit une source de bas niveau et basse impédance telle qu'un micro
(200-600 ohms) ou une guitare électro-acoustique, soit une source de niveau ligne. Cette entrée XLR/Jack 6,35mm accepte
des signaux symétriques ou asymétriques.
11. ENTRÉE CH 5/6: Entrée stéréo polyvalente de niveau ligne. Vous pouvez utilisez les 2 entrées Jack 6,35mm, les 2
entrées gauche/droite RCA, ou n'importe quelle combinaison des quatre.
14. BOUTON EFFECT LEVEL: Ce contrôle permet un réglage rapide du niveau général des effets sans ajuster
individuellement chaque réglage EFFECT de chaque canal (8).
L'alimentation fantôme ne doit être utilisée qu'avec des micros à condensateur.
17. ÉGALISATION GÉNÉRALE: Réglage de tonalité actif à 2 bandes pour corriger le signal. Positionnez les boutons
sur 0 comme point de départ.
15. MIX OUT: Permet d'envoyer le signal mélangé de votre VRC-210 vers un ampli supplémentaire ou un enregistreur.
18. VOYANT LIMITER: Ce voyant s'allume lorsque le limiteur est actif. Le limiteur protège l'étage de sortie d'une
surcharge éventuelle.
19. VOYANT POWER: Ce voyant s'allume lorsque l'appareil est en marche.
20. MASTER VOLUME: Contrôle le volume général de votre système VRC-210.
PANNEAU DE COMMANDE
FR
13
Designed and Engineered in the UK by HH Electronics LTD.
© 2019 HH Electronics Ltd

Designed and Engineered in the UK by HH Electronics LTD.
© 2019 HH Electronics Ltd
LECTEUR AUDIO
Utilisez le lecteur intégré pour jouer les pistes audio MP3 de
la carte SD, de la clé USB ou de l'appareil BlueTooth. Le
lecteur audio se met automatiquement en marche lorsque
l'appareil est allumé.
2. FENTE CLÉ USB: Insérez votre clé USB dans cet
emplacement. Si elle est retirée et ré-insérée, la lecture se
poursuit à partir du dernier arrêt grâce à une technologie
intelligente.
NOTE: Le lecteur joue les pistes de la carte SD/clé USB par
ordre alphabétique et numérique.
NOTE: Cette prise USB est uniquement destinée à la lecture
de pistes audio et non pas à la charge d'appareils USB.
Les cartes SD et clés USB sont détectées automatiquement lors de leur insertion. Si une carte SD est insérée alors
qu'une clé USB est déjà branchée, la carte SD devient la source audio.
6. SUIVANT: Permet de passer à la piste suivante.
5. PRÉCÉDENT: Permet de passer à la piste précédente.
7. BOUCLE: Permet d'activer/désactiver le mode de jeu en boucle. Il existe trois options avec la lecture SD et USB:
(La carte est détectée automatiquement lors de l'insertion.
Si elle est retirée et ré-insérée, la lecture se poursuit à partir
du dernier arrêt grâce à une technologie intelligente).
3. AFFICHEUR.
4. MODE Sélectionne l'entrée de la source – carte SD, clé USB, liaison BlueTooth.
1. FENTE CARTE SD: Insérez votre carte SD dans cet
emplacement.
8. JEU/PAUSE: Permet de jouer ou faire une pause dans la lecture de la piste MP3.
ONE – Répète une seule piste (vous pouvez passer à la piste suivante grâce au bouton NEXT (8).
Seul un VRC-210 peut être appairé avec votre appareil BlueTooth à la fois. Veuillez le désélectionner si vous pensez utiliser
un VRC-210 différent la fois suivante.
ALL – Toutes les pistes de la racine sont jouées par ordre de date, puis celles des sous-dossiers.
FOD – Toutes les pistes du dossier en cours sont jouées.
b. Vérifiez que le système BlueTooth est activé sur votre appareil externe. Dans la liste proposée, sélectionnez HH
Vector. Aucun mot de passe n'est nécessaire.
CONNEXION AVEC UN APPAREIL BLUETOOTH
c. L'enceinte HH Vector est maintenant connectée à votre appareil BlueTooth et celui-ci est contrôlé par les boutons
JEU/PAUSE, PRÉCÉDENT et SUIVANT.
a. A l'aide du bouton MODE (4), balayez les modes jusqu'à BlueTooth.
678
5
4
123
FR
14

Designed and Engineered in the UK by HH Electronics LTD.
© 2019 HH Electronics Ltd
ACCESO AL LA MESCLADORA E CAJA DE ACCESORIOS:
Deslice la garra para la
izquierda como indicado.
Con cuidado vuelva la mescladora
hacia atrás y retírela del gabinete.
CONEXIONES DE ALIMENTACIÓN Y DE LAS CAJAS
¡Solamente remplazar el fusible por o con las mismas especificaciones!un
Siempre apague y retire el cable cuando no en uso.
MAXIMUM POWER CONSUMPTION - 300 WATTS
SUPPLY VOLTAGE AND FUSE RATING:
220-240V~ 50/60Hz T3.15A L 250V
MAXIMUM POWER CONSUMPTION - 300 WATTS
SUPPLY VOLTAGE AND FUSE RATING:
100-110V~ 50/60Hz T3.15A L 250V
NOTA:
¡Solamente remplazar el fusible por uno
con las mismas especificaciones!
El botón de prender, la caja de fusible y el conector de cable se encuentran en la lateral derecha
del equipo.
El voltaje se encuentra preajustado en:
100-110V~ / or 200-240V~ / .50 60Hz 50 60Hz
Esto no puede ser cambiado.
ES
15

Designed and Engineered in the UK by HH Electronics LTD.
© 2019 HH Electronics Ltd
EFECTOS INCLUIDOS EN
EL PRODUCTO:
14
11
12
CH5/6
5
4
3
2
1
010
9
8
7
65
4
3
2
1
010
9
8
7
65
4
3
2
1
010
9
8
7
65
4
3
2
1
010
9
8
7
65
4
3
2
1
010
9
8
7
65
4
3
2
1
010
9
8
7
6
-5 +5
4 4
3 3
2 2
1 1
0
-5 +5
4 4
3 3
2 2
1 1
0
-5 +5
4 4
3 3
2 2
1 1
0
-5 +5
4 4
3 3
2 2
1 1
0
5
4
3
2
1
010
9
8
7
6
BASS BASS BASS
PHANTOM POWER
TREBLE
PEAK PEAK
TREBLE TREBLE TREBLE
LEVEL
L
R
CH1 CH2 CH3 CH4
5
4
3
2
1
010
9
8
7
65
4
3
2
1
010
9
8
7
65
4
3
2
1
010
9
8
7
65
4
3
2
1
010
9
8
7
6
-5 +5
4 4
3 3
2 2
1 1
0
-5 +5
4 4
3 3
2 2
1 1
0
-5 +5
4 4
3 3
2 2
1 1
0
-5 +5
4 4
3 3
2 2
1 1
0
EFFECT
PEAKPEAK
EFFECTEFFECT EFFECT
BASS
LEVEL LEVEL LEVEL LEVEL LEVEL MASTER VOLUME
MIX OUT
-5 +5
4 4
3 3
2 2
1 1
0
BASS
TREBLE
-5 +5
4 4
3 3
2 2
1 1
0
EFFECT
DOWN UP SELECT
L R
LIMITER
SIGNAL
POWER
L
R
CH5/6 + MEDIA PLAYER
LINE
MIC LINE
MIC LINE
MIC LINE
MIC
15
16
17
18
19
20
13
10
9
04
20. Control MASTER VOLUME: Controla el volume general de tu Sistema VRC-210.
19. Indicador POWER: Este indicador LED se ilumina para indicar que la unidad esta encendida.
17. MASTER EQ: Ecualizadora activa de 2 bandas para ajuste de la tonalidad de la señal. Ajuste ambos en Zero para un
comienzo ideal.
16. Selector PHANTOM POWER: Prende y apaga la alimentación Phantom Power para todos los canales de MIC caso
sea necesario. Note que el Phantom solo es aplicado a la parte del conector XLR en los conectores Combi.
18. Indicador LIMITER: Este LED indica cuando la función de limitación se encuentra activa. El limitador protege las
Salidas de sobrecargas en potencial.
El Phantom power solo debe ser usado con micrófonos del tipo condensador.
9. PEAK: Ajuste los controles de nivel de entrada y señal para que este indicador LED se ilumine casi nunca durante la
operación. El uso del Sistema con este indicador prendido o siempre prendiendo, resulta en una calidad de sonido mala.
1-4. CANALES CON ENTRADA MONO.
5. ENTRADA COMBI: Para uso con dispositivos de señal de micrófono (baja impedancia) o de alta impedancia (teclados,
baterías electrónicas, procesadores, etc.). Esta entrada acepta señales balanceados y no balanceados vía el conector XLR, o el
de 6.35mm.
7. EQ: Esto es una ecualizadora activa de 2 bandas para la corrección tonal de la señal. El ajuste de ambos en la posición 0
es un buen punto para comenzar.
6. SELECTOR MIC/LINE: Proporciona la estructura de gano correcto para el equipo conectado. La llave se ajusta en 'IN'
para micrófonos y 'OUT' para equipos con señal de línea.
8. Control FX SEND: Este control determina la cantidad (si alguna) de señal de cada canal enviado al procesador de
efectos interno – vea también el numero 13 adelante.
10. LEVEL: Controla el nivel del canal enviado al control de volumen general – vea (20) adelante.
11. CH 5/6: Cualquier Este es un canal estéreo de línea. Se pueden usar los dos conectores de 6.35mm y tipo RCA L/R.
combinación o todas pueden ser usadas.
12. Botón LEVEL: Controla el nivel de señal del canal estéreo 5/6 y del dispositivo Bluetooth si conectado.
13. Procesador de Efectos FX: Contiene 16 efectos de alta calidad y adiciona un toque profesional a tu sonido. El efecto
deseado puede ser elegido usando los botones DOWN/UP y confirmados con el botón SELECT.
14. Control Master FX: Este control permite un ajuste general del nivel de efecto sin tener que ajustar el envió de efecto
en cada canal (8).
15. Salida MIX OUT: Una forma conveniente de conectar tu Sistema VRC-210 a otros aparatos como amplificadores,
cajas o equipos de grabación.
PANEL DE CONTROL
ES
16

Designed and Engineered in the UK by HH Electronics LTD.
© 2019 HH Electronics Ltd
REPRODUCTOR DE MEDIOS
Use el reproductor de medios incluido para reproducir
contenido con codificación MP3 desde una tarjeta SD,
pendrive o disco USB o dispositivo Bluetooth®.
El reproductor se prende de manera automática al prender
el equipo.
2. RECEPTACULO PARA MEMORY STICK: Conecte
su pendrive USB aquí. Lo mismo que la tarjeta SD, reproduce
desde el último punto caso removido y re inserido.
1. TARJETAS SD: Inserir una tarjeta SD normal en este
receptáculo. (La reproducción de la tarjeta viene con
tecnología inteligente que de forma automática detecta la
tarjeta al ser inserida, o si removida y re inserida, cuando
vuelve a reproducir desde el punto anterior).
NOTA: El conector USB es apenas para la reproducción de
músicas gravadas y no para carga de dispositivos USB
NOTA: El reproductor toca las músicas en orden alfabética y
numérica.
b. En su dispositivo Bluetooth, observe que la capacidad Bluetooth se encuentre habilitada. Vea en la lista de dispositivos
disponibles – o busque por: HH Vector y la seleccione.
4. MODE: Selecciona la Fuente de entrada – Tarjeta SD, USB, Bluetooth.
ALL – Toca todas las músicas en el archivo raíz del dispositivo y en orden cronológica, después toca los sub-archivos.
Solamente un sistema VRC-210 puede ser apareado al mismo tiempo con su dispositivo Bluetooth. Entonces no se
olvide de desparear si planea usar otra fuente.
a. Navegue por los modos del Sistema y seleccione Bluetooth (usando el botón MODE (4)).
3. TELA DEL MOSTRADOR
ONE – Toca una música de manera repetida (elija la música usando el botón NEXT (8).
c. El Sistema HH Vector se encuentra ahora conectado a su dispositivo Bluetooth y puede ser controlado usando los
comandos de PLAY/PAUSE, PREVIOUS, LOOP y NEXT.
FOD – Toca todas las músicas en el fichero activo.
Tarjetas Micro SD, drives USB - auto detectados al inserir – si una tarjeta Micro SD Card es inserida en cuanto un drive
USB ya se encuentre conectado, la tarjeta Micro SD se vuelve activa como línea 'viva' de audio.
6. NEXT: Presione para saltar de música.
7. LOOP: Use esta función para habilitar/deshabilitar los modos de reproducción en Loop. Al usar este control con
tarjetas SD o medios USB, existen 3 opciones:
5. PREVIOUS: Presione para retroceder de música.
8. PLAY/PAUSE: Use este control para reproducir o pausar su música MP3 o de fondo.
CONEXIÓN AL DISPOSITIVO BLUETOOTH:
678
5
4
123
ES
17

Designed and Engineered in the UK by HH Electronics LTD.
© 2019 HH Electronics Ltd
PT
ACCESSO AO MIXER E CAIXA DE ACCESÓRIOS
Deslize a garra para a esquerda como indicado. Com cuidado, volte o mixer para atrás e
retire-o do gabinete.
CONEXÕES DE ALIMENTAÇÃO E DAS CAIXAS
Sempre apague e retire o cabo de força quando não em uso.
MAXIMUM POWER CONSUMPTION - 300 WATTS
SUPPLY VOLTAGE AND FUSE RATING:
220-240V~ 50/60Hz T3.15A L 250V
MAXIMUM POWER CONSUMPTION - 300 WATTS
SUPPLY VOLTAGE AND FUSE RATING:
100-110V~ 50/60Hz T3.15A L 250V
das mesmas especificações.
NOTA:
Isto não pode ser alterado.
A voltagem se encontra pré-ajustada em:
A tecla de ligar, a Caixa de fusível e o conector para o cabo de alimentação se encontram na
lateral direita do produto.
Somente substitua o fusível por outro
100-110V~ 50/60Hz or 200-240V~ 50/60Hz.
18

Designed and Engineered in the UK by HH Electronics LTD.
© 2019 HH Electronics Ltd
PT
EFEITOS INCLUSOS
NO PRODUTO:
14
11
12
CH5/6
5
4
3
2
1
010
9
8
7
65
4
3
2
1
010
9
8
7
65
4
3
2
1
010
9
8
7
65
4
3
2
1
010
9
8
7
65
4
3
2
1
010
9
8
7
65
4
3
2
1
010
9
8
7
6
-5 +5
4 4
3 3
2 2
1 1
0
-5 +5
4 4
3 3
2 2
1 1
0
-5 +5
4 4
3 3
2 2
1 1
0
-5 +5
4 4
3 3
2 2
1 1
0
5
4
3
2
1
010
9
8
7
6
BASS BASS BASS
PHANTOM POWER
TREBLE
PEAK PEAK
TREBLE TREBLE TREBLE
LEVEL
L
R
CH1 CH2 CH3 CH4
5
4
3
2
1
010
9
8
7
65
4
3
2
1
010
9
8
7
65
4
3
2
1
010
9
8
7
65
4
3
2
1
010
9
8
7
6
-5 +5
4 4
3 3
2 2
1 1
0
-5 +5
4 4
3 3
2 2
1 1
0
-5 +5
4 4
3 3
2 2
1 1
0
-5 +5
4 4
3 3
2 2
1 1
0
EFFECT
PEAKPEAK
EFFECTEFFECT EFFECT
BASS
LEVEL LEVEL LEVEL LEVEL LEVEL MASTER VOLUME
MIX OUT
-5 +5
4 4
3 3
2 2
1 1
0
BASS
TREBLE
-5 +5
4 4
3 3
2 2
1 1
0
EFFECT
DOWN UP SELECT
L R
LIMITER
SIGNAL
POWER
L
R
CH5/6 + MEDIA PLAYER
LINE
MIC LINE
MIC LINE
MIC LINE
MIC
15
16
17
18
19
20
13
10
9
04
1-4: CANAIS COM ENTRADA MONO.
16. Seletor PHANTOM POWER: Liga e desliga a alimentação Phantom Power para todos os canais de MIC caso seja
necessário. Note que o Phantom somente é aplicado na parte do conector XLR nos conectores tipo Combi.
20. Controle MASTER VOLUME: Controla o volume geral de seu sistema VRC-210.
8. Controle FX SEND: Este controle determina a quantidade (se alguma) do sinal de cada canal enviado ao processador
de efeitos interno – veja item 13 adiante.
12. Tecla LEVEL: Controla o nível do sinal do canal estéreo 5/6 e do dispositivo Bluetooth si conectado.
7. EQ: Equalizador ativo de 2 bandas para a correção tonal do sinal. O ajuste de ambos na posição 0 é um bom ponto de
começo.
9. PEAK: Ajuste os controles de nível de entrada e do sinal para que este indicador LED se ilumine quase que nunca
durante a operação. O uso do sistema com este indicador acesso, ou sempre ligando, resulta em uma péssima qualidade de
som.
6. SELETOR MIC/LINE: Proporciona a estrutura de ganho correto para a entrada conectada. A chave poder ser ajustada
em 'IN' para microfone e 'OUT' para equipamentos com sinal de linha.
11. CH 5/6: Este é um canal estéreo de linha. Podem ser usados os dois conectores de 6.35mm e os tipo RCA L/R.
Qualquer combinação ou todas podem ser usadas.
10. LEVEL: Controla o nível do sinal do canal enviado ao controle de volume geral – veja item (20) adiante.
18. Indicador LIMITER: Este LED indica quando a função de limitação se encontra ativa. O limitador protege as Saídas de
sobrecargas em potencial.
O Phantom power somente debe ser usado con microfones tipo condensador.
15. Saída MIX OUT: Una forma conveniente de conectar seu Sistema VRC-210 a outros equipamentos como
amplificadores, caixas ativas ou equipamentos de gravação.
19. Indicador POWER: Este indicador LED se ilumina para indicar que a unidade está ligada.
5. ENTRADA COMBI: Para uso com dispositivos de sinal de microfone (baixa impedância) ou de alta impedância
(teclados, baterias eletrônicas, processadores, etc.). Esta entrada aceita sinais balanceados e não balanceados via conector
XLR, ou de 6.35mm.
13. Processador de Efeitos FX: Contém 16 efeitos de alta qualidade e adiciona um toque profissional ao som. O efeito
desejado pode ser escolhido usando as teclas DOWN/UP e confirmados com a tecla SELECT.
14. Controle Master FX: Este controle permite um ajuste geral do nível de efeito sem ter que ajustar o envio de efeito
em cada canal (8).
17. MASTER EQ: Equalizador ativo de 2 bandas para o ajuste da tonalidade do sinal. Ajuste ambos em Zero para um
começo ideal.
PAINEL DE CONTROLE
19

Designed and Engineered in the UK by HH Electronics LTD.
© 2019 HH Electronics Ltd
PT
REPRODUTOR DE MÍDIA
4. MODE: Seleciona a fonte de entrada – Cartão SD, USB, Bluetooth Cartões Micro SD, drives USB - auto detectados
ao inserir – Se um cartão Micro SD Card é inserido enquanto um Pendrive USB se encontra conectado, o cartão Micro
SD passa a ser ativo e vira a fonte 'viva' de áudio.
FOD – Toca todas as músicas na pasta ativa.
3. TELA DO MOSTRADOR.
Use o reprodutor de mídia incluído para reproduzir
conteúdo com codificação MP3 desde um cartão SD,
pendrive ou disco USB ou ainda, um dispositivo Bluetooth®.
NOTA: O conector USB serve apenas para a reprodução de
músicas gravadas e não para carregar dispositivos USB
c. O Sistema HH Vector se encontra conectado a seu dispositivo Bluetooth e pode ser controlado usando os
comandos de PLAY/PAUSE, PREVIOUS, LOOP e NEXT.
Apenas um sistema VRC-210 pode ser pareado ao mesmo tempo com seu dispositivo Bluetooth. Então não se esqueça
de desparear se planeja usar outra fonte no mesmo.
1. CARTÕES SD: Inserir una tarjeta SD normal en este
receptáculo.
(A reprodução de cartões vem com tecnologia inteligente
que de forma automática detecta o cartão a ser inserido, ou
se removido e reinserido, volta a reproduzir desde o ponto
anterior).
O reprodutor liga de forma automática ao ligar o produto.
2. RECEPTACULO PARA PENDRIVES: Conecte seu
pendrive USB aqui. Da mesma forma que o cartão SD, reproduz
desde o último ponto caso removido e reinserido.
NOTA: O reprodutor toca as músicas em ordem alfabética e
numérica.
5. PREVIOUS: Pressione para retroceder de música.
6. NEXT: Pressione para saltar para a próxima música.
7. LOOP: Use esta função para habilitar/desabilitar os modos de reprodução em Loop. Ao usar este controle com
cartões SD ou mídias USB, existem 3 opções:
ALL – Toca todas as músicas na pasta raiz do dispositivo e em ordem cronológica, depois toca os subarquivos.
ONE – Toca una música de maneira repetida (escolha a música usando a tecla NEXT (8).
8. PLAY/PAUSE: Use este controle para reproduzir o pausar sua música MP3 ou de fundo.
CONEXÂO AO DISPOSITIVO BLUETOOTH:
a. Navegue pelos modos do Sistema y selecione Bluetooth (usando a tecla MODE (4)).
b. Em seu dispositivo Bluetooth, observe que a função Bluetooth se encontre habilitada. Veja na lista de dispositivos
disponíveis– ou busque por: HH Vector e selecione.
678
5
4
123
20
Table of contents
Languages:
Other HH Electronics Speakers System manuals
Popular Speakers System manuals by other brands
QSC
QSC LF-4115 user manual

B-I-C America
B-I-C America Acoustech HT-8C Installation and owner's manual

Yamaha
Yamaha NS-6490 Specifications
Federal Signal Corporation
Federal Signal Corporation DSA2 Description, Specifications, and Installation Manual
Quer
Quer KOM0603 owner's manual
Definitive Technology
Definitive Technology Studio Slim Setup guide
