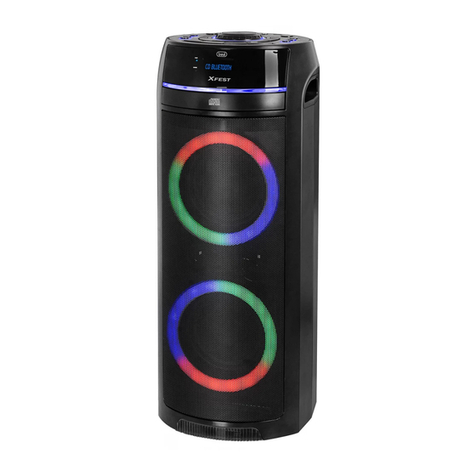
Trevi XF 700 User manual

ALTOPARLANTE AMPLIFICATO DJ ALTA POTENZA
FUNZIONE BLUETOOTH, LETTORE MP3, USB, RADIO, INGRESSI AUX-IN/MICROFONI
Manuale d'uso e collegamento
POWERED SPEAKER DJ HIGH POWER
BLUETOOTH FUNCTION, MP3 PLAYER, USB, RADIO, AUX-IN/ MICROPHONES
Connection and Operation Manual
ENCEINTE DJ POWERED HAUTE PUISSANCE
FONCTION BLUETOOTH, LECTEUR MP3, USB, RADIO, INPUT AUX IN/MICROPHONE
Mode d'emploi et branchement
SPRECHER POWERED DJ HIGH POWER
BLUETOOTH-FUNKTION, MP3-PLAYER, USB, RADIO, AUX-EINGANG/MIKROFON
Gebrauchs- und Anschlusshandbuch
ALTAVOZ DJ DE ALTA POTENCIA
FUNCIÓN BLUETOOTH, REPRODUCTOR DE MP3, USB, RADIO, DE ENTRADA AUX IN/MICROFONO
Manual para el uso y la conexión
LCD
DISPLAY
USB
PLAYER
XF 700
Guida d’uso
User guide
DISCO
LIGHT
AUX-IN
BT
BLUETOOTH
Per informazioni integrative ed aggiornamenti su questo prodotto visita www.trevi.it
For additional information and updates of this product see www.trevi.it

2
XF 700
NOTE D'USO
Questo apparecchio è uno strumento elettronico di alta precisione, evitate quindi di utilizzarlo nei seguenti casi:
• Vicinoafortifontidicalorecomecaloriferiestufe.
• Inluoghimoltoumidicomestanzedabagno,piscine,ecc.
• Inluoghimoltopolverosi.
• Inluoghisoggettiafortivibrazioni.
■Posizionate l'apparecchio in modo che ai suoi lati ci sia sempre abbastanza spazio per la libera circolazione di aria (almeno 5 cm).
■Non ostruite le feritoie di ventilazione.
■Se dei liquidi penetrano all'interno dell'apparecchio scollegate immediatamente la spina dalla presa e portate l'apparecchio al più vicino centro
assistenza autorizzato TREVI.
■Controllate sempre prima di accendere l'apparecchio che i cavi di alimentazione e di collegamento siano installati correttamente.
CURA E MANUTENZIONE
Per la pulizia si consiglia l’ uso di un panno morbido, leggermente inumidito. Evitate solventi o sostanze abrasive.
IMPORTANTE
Questo dispositivo e' progettato per uso domestico non professionale. La buona costruzione di questo apparecchio ne garantisce per lungo tempo il
perfettofunzionamento.Setuttaviadovessepresentarsiqualcheinconveniente,saràopportunoconsultareilpiùvicinoCentroAssistenzaautorizzatoTREVI.
TREVI persegue una politica di continua ricerca e sviluppo. Pertanto i prodotti possono presentare caratteristiche diverse da quelle descritte.
ITALIANO
DESCRIZIONE CONNETTORI/COMANDI
Comandi e prese sul dispositivo
1. Display
2. Spia led PAIR (accoppiamento BT)
3. Spia Led Stand-by
4. Equalizzatore
5. TREBLE, regolazione toni alti
6. Regolazione ECHO
7. Regolazione VOLUME
8. Mic. VOL., regolazione Volume Mic1/2
9. BASS, regolazione toni bassi
10. Tasto PAIR, accoppiamento BT
11. Tasto /SCAN, Play Pausa/ Scan.
12. Ingresso 3.5mm MIC 1
13. Ingresso 3.5mm MIC 2
14. Ingresso 3.5mm AUX IN
15.TastoLIGHT,selezione/attivazioneeffettoluce
16. Tasto +FOLD/10/M.
17. Tasto9,selezionetracciaprecedente,ricerca
indietro veloce
18. Tasto:,selezionetracciasuccessiva,ricerca
avanzamento veloce
19. Tasto FUNCTION, selezione funzioni
20. Ingresso USB
21. TUNING, manopola sintonia
22. Tasto STANDBY
23. Tasto P-MODE/MEM
24. Tasto -FOLD/10/M.
25. Altoparlanti
26. Maniglie
27. Presa di alimentazione AC
28. Microfono
8
123
45 6 7 9 1011
1213141516
26 26
17
18
19 20
21
22
23
24
2525
27
28

3
XF 700ITALIANO
ALIMENTAZIONE
Questa unità funziona con alimentazione di rete AC 100-240V 60/50Hz.
Per attivare l'unita' inserire il cavo di alimentazione nella presa sul dispositivo(27) e la spina in una presa di corrente.
Non collegare l'apparecchio a prese con tensione diversa da quella indicata.
FUNZIONI DI BASE
ACCENSIONE/SPEGNIMENTO
Premere il tasto STANDBY (22) per accendere/spegnere l'apparecchio.
NOTE:
- In modalità USB, AUX-IN e BT dopo circa 15 minuti di inattivita', l'unità passa automaticamente in modalità standby.
Per accendere nuovamente l'unità, premere il pulsante STANDBY (22) .
Si prega di notare che, tenendo molto basso il volume in qualsiasi sorgente audio, questo potrebbe essere riconosciuto come
"nessun segnale audio" e potrebbe inuenzare la capacità di rilevamento del segnale da parte del dispositivo portando auto-
maticamente l'apparecchio in modalità Stand-by. In questo caso premere il pulsante STANDBY (22) e aumentare il volume.
- In caso di funzionamento anomalo dell'apparecchio scollegare il cavo di alimentazione ed attendere alcuni minuti prima di
ricollegarlo.
IMPOSTAZIONE DEL MODO FUNZIONE
Per cambiare la modalità di funzionamento, premere piu' volte il tasto FUNCTION (19) per selezionare Radio (sul display compare
la frequenza), USB, BLUETOOTH(sul display compare BT), AUX-IN (sul display compare AUX).
REGOLAZIONE DEL VOLUME
1. Ruotare la manopola del VOLUME (7) per aumentare o diminuire il volume generale di riproduzione.
2. Ruotare la manopola MIC. VOL. (8) per regolare il volume del segnale sugli ingressi MIC 1(12) e MIC 2(13). La regolazione
agisce sui due ingressi contemporaneamente.
EQUALIZZATORE
Questa unità ha un sistema di equalizzazione audio integrato. Agire sulle barre di regolazione per le cinque frequenze (100Hz,
330Hz, 1KHz, 3.3KHz, 10KHz) presenti nel quadro EQ OPERATION(4) per selezionare un'impostazione che meglio si adatta alla
riproduzione sonora in corso.
REGOLAZIONE TONI ALTI E BASSI
Ruotare la manopola TREBLE(5) per regolare i toni alti.
Ruotare la manopola BASS(9)per regolare i toni bassi.
EFFETTO ECHO
Ruotare la manopola ECHO(6) per aumentare o diminuire l'effetto eco sugli ingressi MIC1 e MIC2.
Nota: l'effetto eco agisce unicamente sugli ingressi microfonici.
EFFETTI DISCO-LIGHT
Per attivare gli effetti Disco-Light premere il tasto LIGHT(15). È possibile scegliere tra cinque diversi effetti.
Perdisattivarel'effettoDisco-Light,premereilpulsanteLIGHT(15)piu'voltenoacheildisplaymostra"OFF".
FUNZIONE RADIO
PerascoltareletrasmissioniRadioFM.PremereiltastoFUNCTION(19)noaquandosuldisplayverràvisualizzatalascrittaFM
e la frequenza radio.
RICERCA DI UNA STAZIONE RADIO
Se si conosce la frequenza della stazione che si desidera sintonizzare direttamente:
• RuotarelamanopoladellasintoniaTUNING(21).Lafrequenzadellastazionevienevisualizzatasuldisplay.
MEMORIZZAZIONE AUTOMATICA/SCANSIONE
Pereseguireunascansione dellestazionisull'intera bandaesalvarleautomaticamentenellamemoriadell'apparecchio,tenerepremuto
per qulache secondo il tasto/SCAN (11). Dopo che l'unità avrà terminato la scansione, questa si sintonizzerà automaticamente
al numero preimpostato 1 (P01).
Per sintonizzarsi su una stazione precedentemente memorizzata:
• Persintonizzarsisullastazionesuccessiva,premereiltasto+FOLD./10/M.(16).
• Persintonizzaresullastazioneprecedente,premereiltasto-FOLD./10/M.(24).

4
XF 700
MEMORIZZAZIONE MANUALE DELLE STAZIONI
Se volete memorizzare le vostre stazioni radio preferite senza utilizzare la memorizzazione automatica:
1. Ruotare la manopola della sintonia TUNING (21) e sintonizzarsi sulla stazione che si desidera salvare nella memoria (ad esempio,
93,1MHz).
2. PremereiltastoP-MODE/MEM(23).Lascritta"P01"suldisplaycominceràalampeggiareperindicarechesistasalvandola
stazione nella memoria di preselezione 01. (Per cambiare il numero di memoria di preselezione, premere il tasto +FOLD./10/M.
(16) o il tasto -FOLD./10/M. (24)).
3. Premere il tasto P-MODE/MEM (23) per confermare e terminare il salvataggio della stazione (ad esempio, P01 ora è impostato
su 93,1MHz).
4. Persalvareun'altrastazione,ripetereipassida1a3.Èpossibilememorizzarenoa50stazioniFM.
INGRESSO USB
Questo apparecchio integra una porta USB per la riproduzione musicale.
1. PremereiltastoFUNCTION(19)eselezionarelamodalità"USB".
2. Collegare una chiavetta di memoria USB alla porta USB. La riproduzione inizierà automaticamente dalla traccia 1.
3. Per mettere in pausa la riproduzione, premere il tasto/SCAN(11).SulDispalyappariràlalettera"P".
4. Per riprendere la riproduzione, premere nuovamente il tasto/SCAN (11).
5. Per selezionare un determinato brano, premere rispettivamente il tasto :(18) o il tasto 9(17)durantelariproduzionenoa
quando sul display apparirà il numero del brano desiderato. L'unità avvierà automaticamente la riproduzione.
6. Per cercare un particolare passaggio durante la riproduzione, tenere premuto il tasto :(18) o il tasto 9(17) per eseguire la
riproduzionedelbranoadaltavelocitànoalpuntodesiderato(passaggio),quindirilasciareiltastopertornareallariproduzione
normale.
7. Per selezionare un brano con numero di traccia superiore a 10, premere il tasto +FOLD/10/M. (16) o il tasto -FOLD/10/M. (24).
Ad ogni pressione del tasto il numero delle tracce avanzerà/indietreggerà di 10 tracce, quindi premere il tasto :(18) o il tasto
9(17) per selezionare il brano desiderato.
8. Per selezionare una determinata cartella (se la chiavetta di memoria USB contiene più di una cartella), premere e tenere premuto
per qualche secondo il tasto +FOLD/10/M. (16) o il tasto -FOLD/10/M. (24) per avanzare o indietreggiare di una cartella, quindi
premere il tasto :(18) o il tasto 9(17) per selezionare la traccia desiderata.
RIPRODUZIONE RIPETUTA
È possibile ripetere la riproduzione di una traccia o di tutte le tracce presenti sulla chiavetta di memoria USB.
RIPETIZIONE DI UNA SINGOLA TRACCIA
1. PremereiltastoP-MODE/MEM(23)durantelariproduzione,ildisplayvisualizzeràilsimbolo" "eilbranoinascoltoverrà
riprodotto più volte.
2. Perannullarelariproduzioneripetuta,premerepiùvolteiltastoP-MODE/MEM(23)noaquandoilsimbolo" "nonscomparirà
dal display.
RIPETIZIONE DI TUTTE LE TRACCIE
1. PremerepiùvolteiltastoP-MODE/MEM(23)durantelariproduzione,noaquandosuldisplayverràvisualizzatoilsimbolo"
",tutteletraccepresentisullachiavettadimemoriaUSBverrannoriprodottepiùvolte.
2. Perannullarelaripetizioneditutteletracce,premereripetutamenteiltastoP-MODE/MEM(23)noaquandoilsimbolo"
"nonscompariràdaldisplay.
RIPETIZIONE DI UNA CARTELLA (SOLO PER MEMORIE USB CHE CONTENGONO CARTELLE)
1. PremerepiùvolteiltastoP-MODE/MEM(23)durantelariproduzione,noaquandosuldisplayverràvisualizzatoilsimbolo"
FOLDER",lacartellapresentesullachiavettadimemoriaUSBverràriprodottapiùvolte.
2. Perannullarelariproduzioneripetuta,premereripetutamenteiltastoP-MODE/MEM(23)noaquandoilsimbolo"
FOLDER"nonscompariràdaldisplay.
RIPRODUZIONE CASUALE
1. PremerepiùvolteiltastoP-MODE/MEM(23)durantelariproduzione,noaquandosuldisplayverràvisualizzatalascritta"RAND".
Lariproduzionecasualeinizieràautomaticamentedallatracciasuccessivaecontinuerànoaquandotuttiibranicontenutinella
memoria USB non verranno riprodotti, poi la riproduzione si fermerà.
2. Perannullarelariproduzionecasuale,premereripetutamenteiltastoP-MODE/MEM(23)noaquandolascritta"RAND"scom-
parirà dal display.
ITALIANO

5
XF 700
NOTE
- Il lettore potrebbe non supportare alcuni dispositivi USB, questo è dovuto all'incompatibilità di alcuni processori.
- Per evitare interferenze dannose, collegare sempre le periferiche USB direttamente all'unità, non utilizzare cavi di prolunga.
FUNZIONAMENTO BLUETOOTH
1. Accendere l'apparecchio e premere più volte il tasto FUNCTION (19) per selezionare la funzione bluetooth, sul display comparirà la
scritta"BT"elaspialedPAIR(2)diaccoppiamentocominceràalampeggeràadaltavelocità,ilsistemaentreràautomaticamente
in ricerca.
2. Attivare la funzionalità Bluetooth sul dispositivo esterno da accoppiare.
3. Avviarelaricercadeidispositivi.Altermineselezionareildispositivo"XF700".
4. Inserirelapassword"0000"serichiesto.
5. AdaccoppiamentoavvenutolaspialedPAIR(2)diaccoppiamentorimarràalucessaperindicareilcorrettocollegamentoe
ildisplayvisualizzeràlascritta"BT".
6. Premere il tasto/SCAN (11), per avviare la riproduzione e i tasti :(18) o il tasto 9(17) per selezionare i brani.
7. Ruotare la manopola VOLUME (7) o regolare il volume del dispositivo esterno per portare il volume della musica al livello
desiderato.
8. Tenere premuto per qualche secondo il tasto PAIR (10) per eliminare l'accoppiamento ed effettuare una nuova operazione di
pairing.
Nota: Il Bluetooth può funzionare no ad un raggio massimo di 10 metri in condizioni ottimali e senza ostacoli.
AUX-IN
1. Accendere l'apparecchio e premere più volte il tasto FUNCTION (19) per selezionare la funzione AUX-IN, sul display comparirà
lascritta"AUX".
2. Collegare una qualsiasi unità provvista di uscita audio tramite apposito cavo Jack da 3,5mm (non incluso) all'ingresso AUX IN
(14).
3. Ruotare la manopola VOLUME (7) o regolare il volume del dispositivo esterno per portare il volume della musica al livello
desiderato.
4. Regolare il dispositivo esterno dai propri comandi.
UTILIZZO DEL MICROFONO
1. Collegare il microfono in dotazione (28) nella presa MIC1(12) o MIC2 (13).
2. Accendere il microfono agendo sull'interruttore presente sul manico portandolo in posizione ON.
3. Regolare il volume di ingresso del microfono (8) e l'effetto eco (6) come desiderato tramite gli appositi comandi.
Nota: e' possibile utilizzare due microfoni contemporaneamente (secondo microfono non in dotazione).
CARATTERISTICHE TECNICHE
GENERALI
Alimentazione: .......................................................... AC 100-240V 60/50Hz
Consumo: .............................................................................. Max 42W
Consumo in Stand-by: ................................................................................. <0.5W
Banda di Frequenza Radio: ............................................................... FM: 87.5 - 108MHz
Peso: ....................................................................................8.2 Kg
Dimensioni: .....................................................627(L)x340(D)x323(H)mm
Temperature di lavoro: .....................................................................+5°C ~ +35°C
SEZIONE AUDIO
Potenza massima in uscita: ...................................................................................18Wx2
ITALIANO

6
XF 700
ENGLISH
NOTES ON USE
This is a precision electronic appliance; avoid using it in the following cases:
- Near strong heat sources, such as central heating plants or stoves.
- In very humid places such as bathrooms, swimming pools, etc.
- In very dusty places.
- In places subject to strong vibrations.
- Position the appliance in such a way that there is always enough room for free air circulation (at least 5 cm).
- Do not block the air inlets.
- If any liquid enters the appliance, unplug it immediately from the socket and take it to the nearest TREVI authorised service centre.
- Before switching on the appliance, always check that the power cable and the connection cable are properly installed.
CARE AND MAINTENANCE
Use a slightly damp soft cloth for cleaning. Do not use solvents and abrasive substances.
IMPORTANT
This device is designed for home use (not professional use). This appliance has been carefully built to ensure long-lasting perfect performance.
However, should any inconvenience occur, please contact your local authorised TREVI Service Centre.
TREVI follows a policy of ongoing research and development. Therefore products may have different features from those described.
LOCATION OF CONTROLS
Controls and sockets on the device
1. Display
2. PAIR Indicator
3. Standby Indicator
4. EQ Button
5. TREBLE Knob
6. ECHO Knob
7. VOLUME Knob
8. MIC Volume Knob
9. BASS Knob
10. PAIR Button
11. /SCAN Button
12. 3.5mm MIC Jack 1
13. 3.5mm MIC Jack 2
14. 3.5mm AUX IN Jack
15. LIGHT Button
16. +FOLD/+10/M. Button
17. Key 9, previous/Fast Backward Button
18. Key :, next/Fast Forward Button
19. FUNCTION Button
20. USB Port
21. Tuning Knob
22. STANDBY Button
23. P-MODE/MEM Button
24. -FOLD/-10/M. Button
25. Speakers
26. Handle
27. AC Socket
28. Microphone
8
123
45 6 7 9 1011
1213141516
26 26
17
18
19 20
21
22
23
24
2525
27
28

7
XF 700ENGLISH
POWER SOURCE
This unit works with direct AC mains supply AC 100-240V 60/50Hz
To TURN ON the unit 'plug the power cord into the outlet on the device (27) and the plug into a power outlet.
Donotconnecttheappliancetosocketswithavoltageotherthanspecied.
BASIC FUNCTIONS
TURNING THE UNIT ON/OFF
After connecting the power, then press the STANDBY button (22) on the front cabinet to turn on unit.
Note: If you don’t use the unit for a long time, disconnect the AC power cord from the household wall outlets.
NOTE: In USB/AUX/BT position, when the unit is not providing the main function for 15 minutes, the unit will automatically switch
in to standby mode. Press the STANDBY button (22) again to turn on the unit.
Please note that low volume setting in the audio source maybe recognized as “no audio signal”, this will affect the capability of
signal detection from the device and can also originate an automatic switch into standby mode. If this happens please reactivated
the audio signal transmission or increase the volume setting on the audio source player in order to resume playback.
ESD hints: The product maybe reset or not reset to operation of control due to electrostatic discharge, just switch off and re-
connect again.
SETTING THE FUNCTION MODE
To change the function modes, press the FUNCTION button(19) to choose USB/AUX IN/BT/RADIO function.
ADJUSTING THE VOLUME
1. Rotate the VOLUME knob (7) on the unit to increase or decrease the music volume.
2. Rotate the MIC VOL. knob (8) on the unit to increase or decrease the microphone volume.
EQUALIZER (EQ) FUNCTION
Thisunithasabuilt-inequalizersystem,adjusttheEQbar(4)byvefrequencies(100Hz,330Hz,1KHz,3.3KHz,10KHz)onunit
to select a setting that best matches the music style.
TREBLE ADJUSTMENT
Rotate the TREBLE knob (5) on unit to increase or decrease the treble effect that best matches the music style.
MICROPHONE ECHO ADJUSTMENT
Rotate the ECHO knob (6) on unit to increase or decrease the microphone echo effect that best matches the style.
DISCO-LIGHT
Tochangethediscolighteffects,presstheLIGHTbutton(15)onunit.Youcanchoosefromvedifferentashingmodes.
To disable the disco light, press the LIGHT button (15) on unit until the display shows “OFF”.
RADIO OPERATION
Listen to FM radio broadcasts. Press the FUNCTION button (19) until the display reads FM and the radio frequency.
TUNING TO A RADIO STATION
If you know the station frequency that you want to tune to directly:
• TunetoastationbyrotatetheTUNINGknob(21).Thestationfrequencyisshownonthedisplay.
AUTO PRESET MEMORY/SCAN
To scan for stations within reception range and save them to preset memory automatically, press and hold the /SCAN (11)
button.Aftertheunitisnishedscanning,theunitwillautomaticallytunetopresetnumber1(P01).
To tune to a preset station:
• Totunetothenextpresetstation,pressthe+FOLD/+10/M.button(16).
• Totunetothepreviouspreset,pressthe-FOLD/-10/M.button(24).
MANUAL PRESET MEMORY OPERATION
Choose which stations to save in preset memory instead of scanning automatically.
1. Rotate the TUNING knob (21) to tune to the station that you want to save as a preset (e.g., 93.1MHz).
2. PresstheP-MODE/MEMbutton(23),“P01”willashonthedisplaytoindicatethatyouaresavingthestationasPresetMemory
01. (To change the preset memory number, press the +FOLD/+10/M. button (16) or -FOLD/-10/M. button (24))

8
XF 700
ENGLISH
3. PresstheP-MODE/MEMbutton(23)tonishsavingthestation(e.g.,P01isnowsetto93.1MHz).
4. To save another station, repeat steps 1 to 3. You may save up to 50 FM stations
USB OPERATION
This PA System provides one USB port for music playback.
1. Press the FUNCTION button (19) on unit to select “USB” mode.
2. Connect the USB memory stick to the USB port (20). Playback will start automatically from Track 1.
3. To pause playback, press the /SCANbutton(11)onunit.ThecurrenttrackNo.and"P"willshowonthedisplay.
4. To resume playback, press the /SCAN button (11) again.
5. To select a desired track, press the :(18) or 9(17) button respectively during playing until the desired track appears on the
display. The unit will start play automatically.
6. To search for a particular passage during playback, press and hold the :(18) or 9(17) button to scan the current playing
track at high speed until desired point (passage) appears, then release the button for normal playback mode.
7. To select a song which track number exceeds 10, press the +FOLD/+10/M. button (16) or -FOLD/-10/M. button (24) each
time to skip forward/backward 10 tracks, then press the :(18) or 9(17) button to select desired track.
8. To select a desired folder (if the USB contains more than one folder), press and hold the +FOLD/+10/M. button (16) or -FOLD/-
10/M. button (24) each time to skip forward/backward a folder, then press the :(18) or 9(17) button to select desired track.
Important: The USB port is intended for data transfer only, other devices cannot be used with this USB connection. The use of
USB extension cords is not recommended.
REPEAT PLAY
You can play one track or all tracks on the USB repeatedly.
TO REPEAT A SINGLE TRACK
1. Press P-MODE/MEM button (23) on unit during play, the display will show “ ” and the current track will be played over an
over again till you press the/SCAN button (11) on unit.
2. To cancel repeat play, press P-MODE/MEM button (23) on unit until “ ” disappears from the display.
TO REPEAT ALL THE TRACKS
1. Press P-MODE/MEM button (23) on unit until the “ ” shows steadily on the display, all tracks on the USB will be played
over and over again till you press the/SCAN button (11) on unit.
2. To cancel repeat play, press the P-MODE/MEM button on unit until “ ” disappears from the display.
TO REPEAT THE FOLDER (ONLY FOR USB WHICH CONTAINS MORE THAT ONE FOLDER)
1. Press the P-MODE/MEM button (23) on unit until “ FOLDER ” show steadily on the display, the current folder will be
repeated over and over again till you press the /SCAN button (11) on unit.
2. To cancel repeat play, press the P-MODE/MEM button (23) on unit until “ FOLDER” disappears from the display.
RANDOM PLAY
Press the P-MODE/MEM button (23) on unit in play mode till the “RAND” shows steadily on the display, the random play will start
from next track automatically, until all tracks are played over and then it will stop. Press the P-MODE/MEM (23) button on unit again
until the “RAND” disappears from the display to cancel.
NOTES
- The player may not support some USB devices, this is due to the incompatibility of some processors.
- To avoid harmful interference, always connect USB devices directly to the unit, do not use extension cords.
BLUETOOTH OPERATION
1. PresstheFUNCTIONbutton(19)onunittoswitchtoBTfunction,theLCDwilldisplay“bt”andthepairindicator(2)willash
at high speed.
2. Turn on the Bluetooth function on the device, scan the unit “XF 700” and connect, then input the password 0000 if required,
the pair indicator (2) keep light up to indicate connection done, and the display will show “bt”. Press Play to start playback.
3. Rotate the VOLUME knob (7) on the unit or adjust the volume on the external device to increase or decrease the music volume
to your desired level.
4. Press and hold the PAIR button (10) to disconnect Bluetooth.
Note: The Bluetooth works best within 10 meters.

9
XF 700ENGLISH
AUX-IN OPERATION
1. Press the FUNCTION button (19) on unit to select “AUX” mode.
2. Connect your audio device to the AUX IN jack (14) found on the front of the unit with an AUX IN cable.
3. Rotate the VOLUME knob (7) on the unit or adjust the volume on the external device to increase or decrease the music volume
to your desired level.
4. Control playback with your audio device.
MIC JACK OPERATION
1. Connect your microphone (28) to the 3.5mm MIC jack 1 (12) or MIC jack 2 (13) found on the front of the unit.
2. Rotate the MIC VOL. knob (8) on the unit to increase or decrease the microphone volume.
Note: you can use two microphones simultaneously (second microphone not included).
SPECIFICATIONS
GENERAL
Power Requirement: .......................................................... AC 100-240V 60/50Hz
Power Consumption: .............................................................................. Max 42W
Stand-by Consumption: ................................................................................. <0.5W
Frequency Range: ............................................................... FM: 87.5 - 108MHz
Weight: ....................................................................................8.2 Kg
Dimensions: .....................................................627(L)x340(D)x323(H)mm
Operation temperature: .....................................................................+5°C ~ +35°C
AUDIO SECTION
Power output: ...................................................................................18Wx2

10
XF 700
NOTES D’EMPLOI
Cet appareil est un instrument électronique de haute précision ; évitez donc de l’utiliser dans les cas suivants :
- Près de grosses sources de chaleur comme des radiateurs et des poêles.
- Dans des endroits très humides comme les salles de bains, les piscines, etc.
- Dans des endroits très poussiéreux.
- Dans des endroits exposés à de fortes vibrations.
- Placez l’appareil de sorte qu’il y ait toujours assez d’espace sur ses côtés pour laisser circuler librement l’air (au moins 5 cm).
- Ne bouchez pas les fentes d’aération.
- Si des liquides pénètrent à l’intérieur de l’appareil, débranchez-le immédiatement et portez-le au centre d’assistance agréé TREVI le plus proche.
- Contrôlez toujours, avant d’allumer l’appareil, que les câbles d’alimentation et les câbles de branchement sont correctement installés.
MANIEMENT ET ENTRETIEN
Pour le nettoyage, il est conseillé d’utiliser un chiffon doux légèrement humide. Évitez l’emploi de solvants ou de substances abrasives.
IMPORTANT
Cet appareil est conçu pour un usage domestique (usage non professionnel). La bonne fabrication de cet appareil garantit un fonctionnement parfait
pour une longue période. Si toutefois quelques inconvénients devaient se présenter, adressez-vous au Centre d’Assistance agréé TREVI le plus proche.
TREVI observe une politique de recherche et de développement continus. C’est pourquoi ses produits peuvent présenter des caractéristiques différentes
par rapport à celles qui sont décrites.
DESCRIPTION DES CONNECTEURS ET DES COMMANDES
Commandes et prises
1.Afchage
2. PAIR, indicateur LED pour BT appairage
3. Indicateur LED Stand-by
4. Equalizer
5. TREBLE, triple réglage
6. Réglez ECHO
7. Ajustez VOLUME
8. Mic. VOL, Réglage du volume Mic 1/2.,
9. BASS, réglage des graves
10. PAIR bouton, BT appairage
11. Bouton /SCAN, Lecture Pause/Scan.
12. Entrée 3.5mm MIC 1
13. Entrée 3.5mm MIC 2
14. AUX IN entrée 3.5mm
15. BoutonLIGHT,sélection/effetdelalumièred'activation
16. Bouton +FOLD/+10/M.
17. Bouton9,lasélectiondepisteprécédente,recherche
rapide vers l'arrière
18. Bouton :, sélection de piste suivante, recherche
rapide vers l'avant
19. Bouton FONCTION, sélectionnez les fonctions
20. Entrée USB
21. TUNING, DIAL
22. Bouton STANDBY
23. Bouton P-MODE/MEM.
24. Bouton -FOLD/-10/M.
25. Haut-parleurs
26. Poignée
27. Prise d'alimentation CA
28. Microphone
FRANCAIS
8
123
45 6 7 9 1011
1213141516
26 26
17
18
19 20
21
22
23
24
2525
27
28

11
XF 700FRANCAIS
ALIMENTATION
Cet appareil fonctionne sur alimentation AC 100-240V 60/50Hz
Pouractiverl'unité«branchezlecordond'alimentationdanslaprisesurl'appareil(27)etlachedansuneprisedecourant.
Nepasraccorderl'appareilauxprisesavecunetensionautrequecellespéciée.
FONCTIONS DE BASE
POWER ON/OFF
Appuyez sur le bouton (22) STANDBY pour activer/éteindre l'appareil.
Remarque:
- En mode USB, AUX-IN et BT après 15 minutes d'inactivité ", l'appareil passe automatiquement en mode veille.
Appuyez sur le bouton STANDBY (22) pour allumer l'appareil,.
S'il vous plaît noter que la prise de volume très faible de toute source audio, cela pourrait être reconnu comme «non audio" et
pourrait affecter la capacité de détection du signal par le dispositif amenant automatiquement l'appareil en mode veille. Dans
ce cas, appuyez sur le bouton STANDBY (22) et augmenter le volume.
- En cas de fonctionnement anormal de l'appareil débranchez le cordon d'alimentation et attendez quelques minutes avant de
le rebrancher.
REGLAGE DE LA FONCTION MODE
Pourchangerlemodedefonctionnement,appuyezsurplus'foisleboutondefonction(19)poursélectionnerRadio(surl'afchage
delafréquence),USB,BLUETOOTH(afchageBT),AUX-IN(AUXapparaîtsurl'écran).
AJUSTEMENT DU VOLUME
1. Tournez le bouton VOLUME (7) pour augmenter ou diminuer le volume global de la lecture.
2. Tournez le bouton MIC. VOL. (8) pour régler le volume du signal sur les entrées MIC 1 (12) et MIC 2 (13). Le contrôle fonctionne
sur les deux entrées simultanément.
EQUALIZER
Cet appareil dispose d'un système d'égaliseur audio intégré. Loi sur les barres de contrôle pour les cinq fréquences (100Hz, 330Hz,
1kHz, 3,3 kHz, 10KHz) dans le cadre EQ OPERATION (4) pour sélectionner un réglage qui convient le mieux à la lecture du son.
REGLAGE TONALITE AIGUS ET DES GRAVES
Tournez le bouton TREBLE (5) pour régler les aigus.
Tournez le bouton BASS (9) pour régler les basses.
ECHO EFFET
Tournez le bouton ECHO (6) ou d'augmenter pour diminuer l'effet d'écho sur les entrées MIC1 et MIC2.
Remarque: l'écho ne fonctionne que sur les entrées micro.
DISCO-LIGHT EFFETS
Pour activer les effets Disco Light-pression longue sur la touche LIGHT (15). Vous pouvez choisir parmi cinq différents effets.
Pourannulerl'effetDisco-Light,appuyezetmaintenezlatoucheLIGHT(25)plusieursfoisjusqu'àcequel'écranafche"OFF".
FONCTION RADIO
PourécouterdesémissionsderadioFM.Appuyezsurlatouchedefonction(19)jusqu'àcequel'écranafchelafréquenceFM
écrite et radio.
RECHERCHE D'UNE STATION DE RADIO
Si vous connaissez la fréquence de la station que vous souhaitez accorder directement:
• TournezleTUNINGboutonderéglage(21).Lafréquencedelastationapparaîtsurl'écran.
MEMORISATON AUTOMATIQUE/SCAN
Pour balayer les stations de la bande entiers et de les enregistrer automatiquement dans la mémoire, appuyez et maintenez pour
qulache selon tasto /SCAN (11). Après que l'appareil a terminé la numérisation, il syntonise automatiquement un numéro de
présélection 1 (P01).
Pour régler une station mémorisée précédemment:
• Poursyntoniserlastationsuivante,appuyezsurle+FOLD./10/M.(16).
• Pouraccorderàlastationprécédente,appuyezsurlebouton-FOLD./10/M.(24).

12
XF 700
FRANCAIS
MEMORISATION MANUELLE
Si vous souhaitez stocker vos stations de radio préférées sans utiliser le stockage automatique:
1. Tourner la molette TUNING bouton de réglage (21) et syntoniser la station que vous souhaitez enregistrer dans la mémoire (par
exemple, 93,1MHz).
2. AppuyezsurlatoucheP-MODE/MEM(23).Marqué"P01"surl'écransemetàclignoterpourindiquerquevousenregistrezla
station dans la mémoire préréglée 01. (Pour changer le numéro de la mémoire de présélection, appuyez sur le +FOLD./10/M.
(16) ou bouton -FOLD./10/M. (24)).
3. AppuyezsurlaP-MODE/MEM(23)pourconrmeretterminerlegaindelastation(parexemple,P01estmaintenantxéà
93,1MHz).
4. Pour enregistrer une autre station, répétez les étapes 1 à 3. Vous pouvez mémoriser jusqu'à 50 stations FM.
ENTRÉE USB
Ce dispositif intègre un port USB pour la lecture de musique.
1. Appuyez sur la touche FUNCTION (19) et sélectionner le mode «USB».
2. Branchez une clé USB dans le port USB. La lecture commence automatiquement à partir de la piste 1.
3. Pour interrompre la lecture, appuyez sur la tasto/SCAN."P"lettreapparaîtsurl'écran.
4. Pour reprendre la lecture, appuyez sur la tasto/SCAN (11) à nouveau.
5. Poursélectionnerunepistespécique,appuyezsurlatouche,respectivement:(18) ou 9 bouton 9 (17) pendant la lecture
jusqu'àcequel'écranafchelenumérodepistesouhaité.L'unitédémarreraautomatiquementlalecture.
6. Pour rechercher un passage particulier pendant la lecture, appuyez et maintenez enfoncé le bouton:(18) ou sur la touche 9
(17) pour lire au point de la piste à haute vitesse (passage) souhaitée, puis relâchez le bouton pour revenir à la lecture normale.
7. Pour sélectionner une piste avec un certain nombre de top piste 10, appuyez sur la +FOLD/10/M. (16) ou -FOLD/10/M. (24).
Chaque fois que le bouton est enfoncé, le nombre de pistes avancera / sauvegardera 10 pistes, et appuyez sur le bouton :
(18) ou 9 bouton 9(17) pour sélectionner la piste désirée.
8. Pour sélectionner un dossier (si la clé de mémoire USB contient plus d'un dossier), appuyez et maintenez le bouton pendant
quelques secondes +FOLD/10/M. (16) ou -FOLD/10/M. (24) pour faire avancer ou en arrière un dossier, puis appuyez sur le
bouton : (18) ou 9 bouton 9 (17) pour sélectionner la piste désirée.
REPRODUCTION REPETE
Vous pouvez répéter la lecture d'une piste ou toutes les pistes sur la clé de mémoire USB.
REPETITION D'UN SINGLE TRACK
1. AppuyezsurlatoucheP-MODE/MEM(23)pendantlalecture,l'écranafchelesymbole" "etlapisteencoursdelectureà
plusieurs reprises.
2. Pourannulerlalecturerépétée,appuyezsurlatoucheP-MODE/MEM(23)jusqu'àcequelesymbole" "disparaîtdel'écran.
REPETITION TOUTES LES PLAGES
1. AppuyezsurlatoucheP-MODE/MEM(23)pendantlalecturejusqu'àcequel'écranafchelesymbole" ",touteslespistes
sur la clé de mémoire USB sera lue de façon répétée.
2. Pourannulerlarépétitiondetouteslespistes,appuyezsurlatoucheP-MODE/MEM(23)jusqu'àcequelesymbole" "
disparaîtdel'écran.
FOLDER REPEAT (UNIQUEMENT AU DOSSIER USB MEMORY CONTENANT)
1. AppuyezsurlatoucheP-MODE/MEM(23)pendantlalecturejusqu'àcequel'écranafchelesymbole" FOLDER",ce
dossier sur la clé mémoire USB sera lue de façon répétée.
2. Pourannulerlalecturerépétée,appuyezplusieursfoissurlatoucheP-MODE/MEM(23)jusqu'àcequelesymbole"
FOLDER"disparaîtdel'écran.
LECTURE ALÉATOIRE
1. AppuyezsurlatoucheP-MODE/MEM(23)pendantlalecturejusqu'àcequel'écranafche«RAND»estafché.Lalecture
aléatoire commencera automatiquement à partir de la piste suivante et continuer jusqu'à ce que toutes les pistes de la mémoire
USB ne sont pas lus, la lecture s'arrête.
2. Pourannulerlalecturealéatoire,appuyezsurlatoucheP-MODE/MEM(23)jusqu'àcequelemot"RAND"disparaîtdel'écran..
Remarque
- Le joueur peut ne pas supporter certains périphériques USB, cela est dû à l'incompatibilité de certains processeurs.
- Pour éviter les interférences nuisibles, toujours connecter vos périphériques USB directement à l'unité, ne pas utiliser de
rallonges.

13
XF 700FRANCAIS
BLUETOOTH FONCTIONNEMENT
1. Allumezl'appareiletappuyezsurlatoucheFUNCTION(19)poursélectionnerlafonctionBluetooth,l'écranafche"BT"etl'indi-
cateur LED PAIR (2) de couplage vont commencer à clignoter à grande vitesse, le système sera rechercher automatiquement.
2. Activez la fonction Bluetooth sur le périphérique externe à coupler.
3. Lancezunerecherchedesappareils.Alan,sélectionnezlepériphérique"XF700".
4. Entrezlemotdepasse"0000"sinécessaire.
5. Pourl'accouplementaeulieupairesd'accouplement,l'indicateurLED(2)resteraunelumièrexepourindiqueruneconnexion
correcteetl'écranafche"BT".
6. Appuyez sur la tasto /SCAN (11), pour démarrer la lecture, et les touches : (18) ou 9 bouton 9 (17) pour sélectionner
les pistes.
7. Tournez le bouton VOLUME (7) ou régler le volume de l'appareil externe pour amener le volume de la musique au niveau souhaité.
8. Maintenez la position pendant quelques secondes sur la touche PAIR (10) pour supprimer la connexion et de faire une nouvelle
opération d'appairage.
Remarque: Le Bluetooth peut fonctionner jusqu'à une distance maximale de 10 mètres dans des conditions optimales et sans
obstacles.
AUX-IN
1. Allumezl'appareiletappuyezsurlatoucheFUNCTION(19)poursélectionnerlafonctionAUX-IN,l'écranafche"AUX".
2. Branchez une unité équipée avec sortie audio via un câble jack 3,5 mm spécial (non inclus) à la prise AUX IN (14).
3. Tournez le bouton VOLUME (7) ou régler le volume de l'appareil externe pour amener le volume de la musique au niveau souhaité.
4. Réglez l'appareil externe de leurs commandes.
UTILISATION DU MICROPHONE
1. Connectez le microphone fourni (28) dans la prise MIC1 (12) ou MIC2 (13).
2. Allumez le microphone en utilisant l'interrupteur sur la poignée du microphone sur la position ON.
3. Réglez le volume de l'entrée microphone et l'effet d'écho que désiré en utilisant les commandes appropriées.
Remarque: vous pouvez utiliser deux microphones simultanément (second microphone non inclus).
CARACTÉRISTIQUES
GENERAL
Alimentation: .......................................................... AC 100-240V 60/50Hz
Consommation: .............................................................................. Max 42W
Consommation Stand-by: ................................................................................. <0.5W
Bande de fréquence radio: ............................................................... FM: 87.5 - 108MHz
Poids: ....................................................................................8.2 Kg
Dimensions: .....................................................627(L)x340(D)x323(H)mm
Les températures de travail: .....................................................................+5°C ~ +35°C
SECTION AUDIO
Puissance de sortie maximale: ...................................................................................18Wx2

14
XF 700
DEUTSCH
GEBRAUCHSHINWEISE
Dieses Gerät ist ein elektronisches Instrument höchster Präzision. Die Inbetriebnahme des Geräts sollte daher in den folgenden Fällenvermieden werden:
• InderNähevonWärmequellenwieHeizkörpernundÖfen.
• InsehrfeuchtenRäumenwieBadezimmern,Schwimmbädernusw.
• InsehrstaubigenRäumen.
• AnOrten,diestarkenSchwingungenausgesetztsind.
- Das Gerät sollte so aufgestellt werden, dass an den Seiten jeweils genügend Raum verbleibt, um eine freie Luftzirkulation zu ermöglichen (min-
destens 5 cm).
- Die Ventilationsöffnungen dürfen nicht abgedeckt werden.
- Sollten Flüssigkeiten ins Innere des Geräts eindringen, den Stecker von der Steckdose unmittelbar abziehen und sich an die nächstgelegene
autorisierte TREVI-Kundendienststelle wenden.
- Vor dem Einschalten des Geräts ist sicherzustellen, dass Netzkabel und Anschlusskabel korrekt installiert sind.
PFLEGE UND WARTUNG
Für die Reinigung wird die Verwendung eines leicht angefeuchteten, weichen Tuchs empfohlen. Der Einsatz von Lösungsmitteln oder scheuernden
Substanzen sollte vermieden werden.
WICHTIG
DiesesGerätistfürdenHeimgebrauch(nichtprofessionellenGebrauch).DerfachgemäßeBaudiesesGerätsgewährleistetlangfristigeinen einwandfreien
Betrieb. Sollten dennoch Betriebsstörungen auftreten, wenden Sie sich bitte an nächstgelegene autorisierte TREVI-Kundendienststelle.
Die Firma TREVI verfolgt eine Politik ständiger Forschung und Weiterentwicklung. Die Produkte können daher andere als die beschriebenen Eigen-
schaften aufweisen.
BESCHREIBUNG DER ANSCHLÜSSE/BEDIENELEMENTE
Kontrollen und Steckdosen am Gerät
1. Anzeige
2. PAIR-Indikator
3. Standby-Anzeige
4. EQ-Taste
5. TREBLE- Knob
6. ECHO Knob
7. VOLUME-Regler
8. MIC-Lautstärkeregler
9. BASS Knob
10. PAIR-Taste
11. /SCAN, taste
12. 3,5-mm-Buchse MIC 1
13. 3.5mm MIC Jack 2
14. 3,5 mm AUX-IN-Buchse
15. LIGHT, lichttaste
16. FOLD/10/M. Taste
17. Taste 9, vorherige/Schnell zurück Knopf
18. Taste :, nächster/Fast Forward Taste
19. FUNCTION, funktions-Taste
20. USB-Anschluss
21. TUNING Knob
22. STANDBY-Taste
23. P-MODE/MEM Taste
24. -FOLD/10/M. taste
25. Lautsprecher
26. Griff
27. AC-Buchse
28. Mikrofon
8
123
45 6 7 9 1011
1213141516
26 26
17
18
19 20
21
22
23
24
2525
27
28

15
XF 700DEUTSCH
NETZVERSORGUN
Dieses Gerät arbeitet mit AC-Stromversorgung AC 100-240V 60/50Hz.
DasGerät"steckenSiedasNetzkabelindieSteckdoseaufdemGerät(27)unddenSteckerineineSteckdosezuaktivieren.
Das Gerät nicht an Steckdosen mit einer anderen Spannung als angegeben verbinden.
GRUNDFUNKTIONEN
POWER ON/OFF
Drücken Sie die STANDBY (22) Taste zum Ein-/Ausschalten des Geräts.
HINWEIS:
- Im USB-Modus, AUX-IN und BT nach 15 Minuten Inaktivität ", schaltet das Gerät automatisch in den Bereitschaftsmodus .
Drücken Sie die STANDBY (22), um auf das Gerät einzuschalten,.
Bitte beachten Sie, dass sehr geringe Lautstärke in jeder beliebigen Audioquelle nehmen, dies als "kein Ton" erkannt werden
konnte und die Signalerfassungsfähigkeit durch das Gerät automatisch das Gerät in den Standby-Modus zu bringen beein-
trächtigen könnten. In diesem Fall drücken Sie die Taste STANDBY (22) und die Lautstärke zu erhöhen.
- Im Falle einer anormalen Betrieb des Gerätes das Netzkabel ziehen und ein paar Minuten vor der Wiederverbindung warten.
MODUS EINSTELLUNG FUNKTION
Um den Betriebsmodus zu ändern, drücken Sie mehrmals die Taste FUNCTION (19), zum Auswählen von Radio (auf dem Display
erscheint die Frequenz), USB, Bluetooth (Anzeige BT), AUX-IN (Das Display zeigt AUX).
LAUTSTÄRKE
1. Drehen Sie den VOLUME-Regler (7) zu erhöhen oder die gesamte Wiedergabe-Lautstärke zu verringern.
2. Drehen Sie den MIC. VOL. Regler (8) das Volumen des Signals an den Eingängen MIC 1 (12) und MIC 2 (13) einzustellen. Die
Steuerung arbeitet an beiden Eingängen gleichzeitig.
EQUALIZER
Dieses Gerät verfügt über einen eingebauten Audio-Equalizer-System. Gesetz über die Steuerstäbe für die fünf Frequenzen (100
Hz, 330 Hz, 1 kHz, 3,3kHz, 10kHz) im Rahmen EQ OPERATION (4) um eine Einstellung auszuwählen, die am besten die Sound-
Wiedergabe entspricht.
EINSTELLUNG TONE HöHEN UND BäSSE
Drehen Sie den Knopf TREEBLE (5), um die Höhen einzustellen.
Drehen Sie den Regler BASS (9), um die Bässe einzustellen.
ECHO EFFECT
Drehen Sie den Knopf ECHO (6) zu erhöhen oder verringern die Echo-Effekt auf die Eingänge MIC1 und MIC2.
Hinweis: das Echo funktioniert nur auf Mikrofoneingänge.
DISCO-LICHTEFFEKTE
Um die Auswirkungen Disco-Licht-lange drücken Sie die Taste LIGHT (15). Sie können aus acht verschiedenen Effekten wählen.
UmdenEffektDisco-Lightabzubrechen,drückenundhaltenSiedieTasteLIGHT(15)mehrmals,bisdieAnzeige"OFF".
FUNCTION RADIO
So hören Sie UKW-Radiosendungen . Drücken Sie die Taste FUNCTION (19), bis das Display wird die FM geschrieben und Radio-
frequenz zeigen.
SUCHE NACH EINER RADIOSENDER
Wenn Sie wissen, um die Frequenz des Senders, den Sie in direkt einstellen möchten:
• DrehenSiedenDrehknopfTUNING(21).DieSenderfrequenzerscheintaufdemDisplay.
AUTOMATISCHE AUFNAHME/SCAN
So scannen Sie die ganze Band Stationen und speichern Sie sie automatisch in dem Speicher, drücken und halten, um qulache nach
tasto/SCAN (11). Nachdem das Gerät Scanvorgang abgeschlossen ist, wird es automatisch Melodie auf eine voreingestellte
Nummer 1 (P01).
Zum Einstellen auf einen zuvor gespeicherte Sender:
• zurnächstenStationzustimmen,drückenSiedieFOLD./10/M.(16).
• UmzumvorherigenSenderzustimmen,drückenSiedieTaste-FOLD./10/M.(24).

16
XF 700
DEUTSCH
MANUELLES SPEICHERN STATIONEN
Wenn Sie Ihre Lieblings-Radiosender zu speichern, ohne die Verwendung von automatischen Speicherung:
1. Drehen Sie den Einstellknopf TUNING (21) und Melodie zu dem Sender, den Sie im Speicher gespeichert werden soll (zum
Beispiel 93,1MHz).
2. DrückenSiedieP-MODE/MEMTaste(23).Sobezeichnete"P01"aufdemDisplaybeginntzublinken,umanzuzeigen,dassSie
die Sender im Senderspeicher speichern 01. (Um die Anzahl der Senderspeicher zu ändern, drücken Sie die +FOLD./10/M.
(16) oder -FOLD./10/M. (24)).
3. Drücken Sie die P-MODE/MEM Taste (23), um zu bestätigen und den Sender zu speichern (zB P01 nun auf 93,1MHz eingestellt
ist) beenden.
4. Zum Speichern eine andere Station, wiederholen Sie die Schritte 1 bis 3. Sie können bis zu 50 UKW-Sender speichern.
INPUT USB
Dieses Gerät integriert einen USB-Port für die Musikwiedergabe .
1. DrückenSiedieTasteFUNCTION(19)undwählenSieden"USB"-Modus.
2. Schließen Sie einen USB-Speicherstick in den USB-Port. Die Wiedergabe wird automatisch von der Spur 1 beginnen.
3. Zum Anhalten der Wiedergabe drücken Sie die tasto(11),"P"SchreibenaufdemDisplayerscheint.
4. Zum Fortsetzen der Wiedergabe drücken Sie die tasto (11) wieder.
5. Um einen bestimmten Titel auszuwählen, und drücken Sie die Taste, bzw. :(18) oder 9 (17) Taste während der Wiedergabe,
bis das Display die gewünschte Titelnummer zeigt. Das Gerät wird automatisch die Wiedergabe zu starten.
6. Um nach einer bestimmten Passage während der Wiedergabe, drücken Sie suchen und die Taste gedrückt halten :(18) oder
die Taste 9 (17) wieder auf die gewünschte Stelle der Hochgeschwindigkeitsstrecke (Durchgang ) zu spielen, lassen Sie dann
die Taste, um zurückzukehren normale Wiedergabe.
7. Um einen Titel mit einer Reihe von Top-Spur 10 zu wählen, drücken Sie die +FOLD/10/M. (16) oder Taste -FOLD/10/M. (24).
Jedes Mal, wenn die Taste gedrückt wird, wird die Anzahl der Spuren voran/werden 10 Titel zurück, und drücken Sie die Taste
: (18) oder 9(17), um den gewünschten Titel zu wählen.
8. Um einen Ordner zu wählen (wenn der USB-Stick mehr als einem Ordner enthält), drücken Sie die Taste für einige Sekunden
gedrückt, +FOLD/10/M. (16) oder Taste -FOLD/10/M. (24) zu fördern oder einen Ordner sichern, dann drücken Sie die Taste
: (18) oder 9(17), um den gewünschten Titel zu wählen.
WIEDERHOLTE FORTPFLANZUNG
Sie können die Wiedergabe eines Titels oder aller Titel auf dem USB-Memory-Stick wiederholen.
WIEDERHOLUNG EINER EINSPURIGE
1. DrückenSiedieP-MODE/MEMTaste(23)währendderWiedergabe,wirddasDisplaydasSymbol" "undderaktuelleTitel
wird wiederholt abgespielt.
2. UmdiewiederholteWiedergabe,drückenSiedieP-MODE/MEMTaste(23),bisdasSymbol" "verschwindetausdemDisplay
zu löschen.
WIEDERHOLUNG ALLE SPUREN
1. DrückenSiedieP-MODE/MEMTaste(23)währendderWiedergabe,bisdasDisplaydasSymbol" "tzeigt,werdenalle
Tracks auf dem USB-Memory-Stick wird wiederholt abgespielt.
2. AlleTitelwiederholen,drückenSiedieP-MODE/MEM-Taste(23),bisdasSymbol" "verschwindetausdemDisplayzu
löschen.
REPEAT FOLDER (NUR AUF USB-Speicher mit FOLDER)
1. DrückenSiedieP-MODE/MEMTaste(23)währendderWiedergabe,bisdasDisplaydasSymbol" FOLDER",zeigtsich
dieser Ordner auf dem USB-Memory-Stick wird wiederholt abgespielt.
2. WiederholteWiedergabeabzubrechen,wiederholtdieP-MODE/MEMTaste(23),bisdie" FOLDER"Symbolausdem
Display verschwindet.
ZUFALLSWIEDERGABE
1. DrückenSiedieP-MODE/MEMTaste(23)währendderWiedergabe,bisdieAnzeige"RAND"angezeigtwird.DieZufallswiedergabe
wird automatisch von der nächsten Spur beginnen und weiter, bis alle Titel im USB-Speicher nicht abgespielt werden, dann die
Wiedergabe zu stoppen.
2. Zufallswiedergabeabzubrechen,drückenSiedieP-MODE/MEMTaste(23),bisdasWort"RAND"ausdemDisplayverschwindet.
Hinweis:
- Der Spieler kann einige USB-Geräte nicht unterstützt, ist dies aufgrund der Unverträglichkeit von einigen Prozessoren.

17
XF 700DEUTSCH
- Zur Vermeidung funktechnischer Störungen, immer schließen Sie Ihre USB-Geräte direkt an das Gerät, keine Verlängerungskabel.
BLUETOOTH-BETRIEB
1. Schalten Sie das Gerät ein und drücken Sie die FUNCTION (19), um die Bluetooth-Funktion zu wählen, erscheint auf dem Display
"BT"unddieLED-AnzeigePAIR(2)KupplungwirdmithoherGeschwindigkeitzublinkenbeginnen,wirddasSystemautomatisch
suchen.
2. Aktivieren Sie die Bluetooth-Funktion auf dem externen Gerät verbunden werden.
3. StartenSieeineSuchenachGeräten.AmEndewählenSiedie"XF700"Gerät.
4. GebenSiedasKennwort"0000"ein,fallserforderlich.
5. Für Paarung Paarung Paare aufgetreten ist, die LED-Anzeige (2) wird ein festes Licht bleiben richtige Verbindung anzuzeigen
undaufdemDisplayerscheint"BT".
6. DrückenSie die tasto / PAAR (23), dieWiedergabe zustarten, und die Tasten : (18)oder 9(17), um dieTitel auszuwählen.
7. Drehen Sie den VOLUME-Regler (7) oder die Lautstärke des externen Geräts einstellen Lautstärke der Musik auf das gewünschte
Niveau zu bringen
8. Halten Sie für ein paar Sekunden die PAIR-Taste (10), um die Verbindung zu löschen und einen neuen Pairing machen.
Hinweis: DieBluetoothkannaufeinemaximaleReichweitevon10MeternunteroptimalenBedingungenarbeitenundohneHindernisse.
AUX-IN
1. SchaltenSiedasGeräteinunddrückenSiedieTasteFUNCTION(19)zurAuswahlvonAUX-INFunktion,wirddieAnzeige"AUX"
zeigen.
2. Schließen Sie ein beliebiges Gerät mit Audio-Ausgang über einen speziellen 3,5-mm-Klinke-Kabel (nicht im Lieferumfang
enthalten) an den AUX IN (14).
3. Drehen Sie den VOLUME-Regler (7) oder die Lautstärke des externen Geräts einstellen Lautstärke der Musik auf das gewünschte
Niveau zu bringen.
MIKROFON
1. Schließen Sie das mitgelieferte Mikrofon (28) an die Buchse MIC 1 (12) oder MIC2 (13).
2. Schalten Sie das Mikrofon mit dem Schalter am Griff des Mikrofons in die Position ON.
3. Stellen Sie die Lautstärke des Mikrofon-Eingang (8) und den Echoeffekt (6) wie gewünscht mit den entsprechenden Befehlen.
Hinweis: Sie können zwei Mikrofone gleichzeitig verwendet werden (zweites Mikrofon nicht im Lieferumfang enthalten).
TECHNISCHE DATEN
GENERAL
Stromversorgung: .......................................................... AC 100-240V 60/50Hz
Verbrauch: .............................................................................. Max 42W
Verbrauch Stand-by: ................................................................................. <0.5W
Band Radio Frequency: ............................................................... FM: 87.5 - 108MHz
Gewicht: ....................................................................................8.2 Kg
Abmessungen: .....................................................627(L)x340(D)x323(H)mm
Arbeitstemperaturen: .....................................................................+5°C ~ +35°C
AUDIO ABSCHNITT
Maximale Ausgangsleistung: ...................................................................................18Wx2

18
XF 700
ESPANOL
NOTAS PARA EL USO
Este aparato es un instrumento electrónico de alta precisión; por lo tanto debe evitar utilizarlo en los siguientes casos:
• Cercadefuertesfuentesdecalorcomocaloríferosyestufas.
• Enlugaresmuyhúmedoscomocuartosdebaño,piscinas,etc.
• Enlugaresmuypolvorientos.
• Enlugaressujetosafuertesvibraciones.
■Posicione el aparato de manera que el espacio circundante sea amplio para la libre circulación del aire (por
lo menos 5 cm).
■No obstruya las ranuras de ventilación.
■ Sipenetranlíquidosdentrodelaparato,desconecteinmediatamenteelenchufedelatomadecorrientey
lleve el aparato al centro de asistencia autorizado TREVI más cercano.
■Siempre compruebe que los cables de alimentación y de conexión estén instalados correctamente antes de encender el aparato.
CUIDADO Y MANTENIMIENTO
Para efectuar la limpieza se aconseja utilizar un paño suave, ligeramente humedecido. Evite solventes o
sustancias abrasivas.
IMPORTANTE
Estedispositivoestádiseñadoparausodoméstico(usonoprofesional).Labuenaconstruccióndelaparato
garantizasu perfecto funcionamiento durante mucho tiempo. Si sepresentase algúninconveniente, será
oportuno consultar al Centro de Asistencia autorizado TREVI más cercano.
TREVIcultivaunapolíticadeinvestigaciónydesarrollocontinuos.Porconsiguiente,losproductospuedenpresentarcaracterísticasdistintasalasdescritas.
DESCRIPCIÓN DE LOS CONECTORES/MANDOS
Controles y conectores
1. Pantalla
2. Indicador LED PAIR, para BT emparejamiento
3. Indicador LED de stand-by
4. Ecualizador
5. TREBLE, ajuste de triple
6. Ajuste ECHO
7. Ajuste VOLUMEN
8. Mic. VOL., Ajuste de volumen de micrófono 1/2
9. BASS, ajuste de graves
10. PAIR de claves, el emparejamiento BT
11. Botón/SCAN, reproducción Pausa/Scan.
12. Entrada de 3,5 mm MIC 1
13. Entrada de 3,5 mm MIC 2
14. Entrada de 3,5 mm AUX-IN
15.BotónLIGHT,laselección/efectodelaluzdeactivación
16. Tecla +FOLD/10/M.
17. Tecla 9, la selección de la pista anterior, una
búsquedarápidahacia
18.Tecla:,próximaseleccióndepista,rápidobúsqueda
hacia adelante
19. Botón FUNCTION, seleccione las funciones
20. Entrada de USB
21. TUNING, perilla de sintonización
22. Botón STANDBY
23. Botón P-MODE/MEM
24. Botón -FOLD/10/M.
25. Altavoces
26. Manijas
27. Toma de corriente AC
28. Micrófono
8
123
45 6 7 9 1011
1213141516
26 26
17
18
19 20
21
22
23
24
2525
27
28

19
XF 700
ELLEHNIKA
ESPANOL
ALIMENTACION
Esta unidad funciona con la fuente de alimentación de AC 100-240V 60/50Hz
Para activar la unidad, conecte el cable de alimentación a la toma de corriente en el dispositivo (27) y el enchufe en una toma de
corriente.
Noconecteelaparatoatomasdecorrienteconunvoltajedistintoalespecicado.
FUNCIONES BÁSICAS
POWER ON/OFF
Pulse el botón STANDBY (22) para encender/apagar el dispositivo.
NOTAS:
- En el modo USB, AUX-IN y BT después de 15 minutos de inactividad', la unidad cambia automáticamente al modo de espera.
Pulse el botón STANDBY (22) para encender la unidad,.
Tengaencuentaquelaadopcióndeunvolumenmuybajodecualquierfuentedeaudio,estopodríaserreconocidocomo"No
haysonido"ypodríaafectaralacapacidaddedeteccióndelaseñalporeldispositivoconloqueautomáticamentelaunidad
en modo de espera. En este caso, pulse el botón STANDBY (22) y aumentar el volumen.
- En caso de funcionamiento anormal de la unidad de desconectar el cable de alimentación y espere unos minutos antes de
volver a conectar.
SELECION DE LAS FUNCIÓN
Paracambiarelmododefuncionamiento,pulsemás"veceselbotónFUNCIÓN(19)paraseleccionarRadio(enlapantallala
frecuencia), USB, Bluetooth (BT pantalla), AUX-IN (AUX aparezca en la pantalla).
AJUSTE DEL VOLUMEN
1. Gire el volumen VOLUME (7) para aumentar o disminuir el volumen global de la reproducción.
2.GireelMICVOL(8)paraajustarelvolumendellasentradasdeseñalMIC1(12)yMIC2(13).Elajustefuncionaenlasdos
entradas simultáneamente.
ECUALIZADOR
Esta unidad tiene un sistema ecualizador de audio incorporado. Ley de las barras de control para las cinco frecuencias (100 Hz,
330Hz,1KHz,3.3KHz,10KHz)enlaoperacióndemarcoEQOPERATION(4)paraseleccionarunaconguraciónquemejorse
adapte a la reproducción del sonido.
AJUSTE DE TONO AGUDOS Y BASS
Gire el mando TREEBLE (5) para ajustar los agudos.
Gire el mando BASS (9) para ajustar los graves.
EFECTO ECHO
Gire la perilla de ECHO (6) para aumentar o disminuir el efecto de eco en la entrada MIC1 y MIC2.
Nota: el eco sólo funciona en las entradas de micrófono.
EFECTO DISCO-LIGHT
Para activar los efectos DISCO-LIGHT pulse el boton LIGHT (15). Puede elegir entre cinco diferentes efectos.
ParacancelarelefectoDISCO-LIGHT,pulseelbotónLIGHT(15)másveceshastaquelapantallamuestre"OFF".
FUNCIÓN DE RADIO
Para escuchar emisoras de radio FM. Pulse el botón FUNCTION (19) hasta que la pantalla mostrará la frecuencia de FM escrita y radio.
BÚSQUEDA DE UNA RADIO
Si conoce la frecuencia de la emisora que desea sintonizar directamente:
• GirarelbotóndesintoníaAJUSTE(21).Lafrecuenciadelaemisoraapareceenlapantalla.
ALMACENAMIENTO AUTOMATICO/SCAN
Para escanear todo las estaciones de banda y guardarlos automáticamente en la memoria, pulse y mantenga pulsado para qulache
segúntasto/SCAN(11).Despuésdequelaunidadhayaterminadodeescanear,sesintonizaráautomáticamenteaunnúmero
preestablecido 1 (P01).
Para sintonizar una emisora almacenada previamente:
• Parasintonizarlasiguienteestación,pulselatecla+FOLD./10/M.(16).
• Parasintonizarlaestaciónanterior,pulseelbotón-FOLD./10/M.(24).

20
XF 700
ESPANOL
ALMACENAMIENTO MANUAL ESTACIONES
Si desea almacenar sus emisoras de radio favoritas sin necesidad de utilizar el almacenamiento automático:
1. GirarelbotóndesintoníaTUNING(21)ysintonicelaemisoraquedeseaguardarenlamemoria(porejemplo,93,1MHz).
2. PulseelbotónP-MODE/MEM(23).Conlasletras"P01"enlapantallacomienzaaparpadearparaindicarquevaaguardarla
estaciónenlamemoria01.(Paracambiarelnúmerodelamemoria,pulselasteclas+FOLD./10/M.(16)o-FOLD./10/M.botón.
(24)).
3. PulseelbotónP-MODE/MEM(23)paraconrmarynalizarlaestacióndeverano(porejemplo,P01seestableceahoraen
93,1MHz).
4. Para guardar otro canal, repita los pasos 1 a 3. Puede almacenar hasta 50 emisoras de FM.
ENTRADA USB
EstedispositivointegraunpuertoUSBparalareproduccióndemúsica.
1. PulseelbotóndeFUNCTION(19)yseleccioneelmodo"USB".
2. Conectar un dispositivo de memoria USB en el puerto USB. La reproducción se iniciará automáticamente desde la pista 1.
3. Para hacer una pausa en la reproducción, pulse el tasto/SCAN(11)."P"letraapareceenlapantalla.
4. Para reanudar la reproducción, pulse de nuevo la tasto/SCAN (11).
5. Paraseleccionarunapistaespecíca,pulselatecla,respectivamenteelbotón9(17) o la tecla :(18) durante la reproducción
hastaquelapantallamuestraelnúmerodepistadeseado.Launidadiniciaráautomáticamentelareproducción
6. Para buscar un pasaje particular durante la reproducción, pulse y mantenga pulsado el botón :(18) o la tecla 9(17) para
reproducirdenuevoalpuntodelavíadealtavelocidad(paso)deseado,luegosuelteelbotónparavolveralareproducción
normal.
7. Paraseleccionarunapistaconunnúmerodepistasuperior10,pulselatecla+FOLD/10/M.(16)olatecla-FOLD/10/M.(24).
Cadavezquesepulsaelbotón,elnúmerodepistasavanzará/realizaráunacopiade10pistas,ypulseelbotón:(18) o la
tecla 9(17) para seleccionar la pista deseada.
8. Para seleccionar una carpeta (si el dispositivo de memoria USB contiene más de una carpeta), pulse y mantenga pulsado el
botón durante unos segundos +FOLD/10/M. (16) o la tecla -FOLD/10/M. (24) para avanzar o retroceder en una carpeta, a
continuación, pulse el botón :(18) o la tecla 9(17) para seleccionar la pista deseada.
REPRODUCCIÓN REPETIDA
Puede repetir la reproducción de una pista o todas las pistas del dispositivo de memoria USB.
REPETIR UNA SOLA PISTA
1. PulseelbotónP-MODE/MEM(23)durantelareproducción,lapantallamostraráelsímbolo" "ylapistaactualsereproducirá
repetidamente.
2. Paracancelarlareproducciónrepetida,pulseelbotónP-MODE/MEM(23)hastaqueelsímbolo" "desaparecedelapantalla.
REPETICIÓN DE TODAS LAS PISTAS
1. PulseelbotónP-MODE/MEM(23)durantelareproducciónhastaqueaparezcaelsímbolo" ",todaslaspistasdeldispo-
sitivo de memoria USB se reproduce de forma repetida.
2. Paracancelarlarepeticióndetodaslaspistas,pulseelbotónP-MODE/MEM(23)hastaqueelsímbolo" "desaparece
de la pantalla.
REPETIR CARPETA (SÓLO PARA LA CARPETA MEMORIA USB QUE CONTIENE)
1. PulseelbotónP-MODE/MEM(23)durantelareproducciónhastaqueaparezcaelsímbolo" FOLDER",lestacarpetaen
el dispositivo de memoria USB se reproduce de forma repetida.
2. Paracancelarlareproducciónrepetida,presionerepetidamenteelbotónP-MODE/MEM(23)hastaqueelsímbolo"
FOLDER"desaparecedelapantalla.
REPRODUCCION EN ORDEN ALEATORIO
1. PulseelbotónP-MODE/MEM(23)durantelareproducciónhastaquelapantallamuestraquesevisualice"RAND".Larepro-
ducción aleatoria se iniciará automáticamente desde la pista siguiente y continuar hasta que todas las pistas en la memoria
USB no se reproducen, a continuación, la reproducción se detendrá.
2. Paracancelarlareproducciónaleatoria,pulseelbotónP-MODE/MEM(23)hastaquelapalabra"RAND"desaparecerádela
pantalla.
NOTAS
- El reproductor no sea compatible con algunos dispositivos USB, esto se debe a la incompatibilidad de algunos procesadores.
- Para evitar interferencias perjudiciales, siempre conecte los dispositivos USB directamente a la unidad, no utilice cables de
extensión.
Table of contents
Languages:
Other Trevi Speakers System manuals

Trevi
Trevi SB 8315 TV User manual

Trevi
Trevi XR 120 BT User manual

Trevi
Trevi XB 70 BT User manual

Trevi
Trevi SH 8400 BT User manual

Trevi
Trevi AVX 582USB User manual

Trevi
Trevi SB 8380 SW User manual

Trevi
Trevi SB 8316 TV User manual

Trevi
Trevi SB 8300TV User manual

Trevi
Trevi SB 5010TV User manual

Trevi
Trevi AVX 570 BT User manual