Hi-Tech Diamond All-U-Need Rock/Mineral User manual
INSTRUCTION MANUAL
EST. 1984
HI TECH
EST. 19 84
HI TECH
All-U-Need
ROCK/MINERAL MODEL

2
SAFETY INSTRUCTIONS
IMPORTANT! READ FIRST
For your own safety be sure to read, understand and follow all warnings, safety rules and
instructions in this instruction manual before using this machine. Failure to do so can
result in serious personal injury. This instruction manual is intended for the following
machine models: 20-020, 20-021, 20-023, 20-024, 21-001, 21-002, 21-003 and 21-005.
Save these instructions
SETUP
• Intended for indoor use only.
• Avoid dangerous environments. Do not use
this machine near gasoline or other flammable
liquids.
• Make sure machine is securely placed on a
sturdy, level surface with ample working area
and away from open electrical outlets.
• Check for damaged parts. Before use of this
machine, always check for any damaged parts
to determine that it will operate properly and
perform its intended function. Check for proper
alignment of moving parts, binding of moving
parts, breakage of parts, mounting, and any
other conditions that may aect its operation. A
part that is damaged must be properly replaced
through the manufacturer of this machine to
avoid risk of injury.
• Use only identical All-U-Need parts for
replacement parts. Use of any other parts not
originally intended for the All-U-Need may create
a hazard or cause product damage.
• Use only recommended accessories. The use
of improper accessories on this machine may
cause risk of injury.
• Know your power tool. Read this instruction
manual carefully. Learn the correct applications
and limitations as well as specific warnings and
hazards related to this machine.
USAGE
• Always wear proper apparel. Do not wear any
loose clothing, gloves, neckties or jewelry that
can get caught in the machine’s moving parts.
Long hair must be secured with a rubber band or
hair tie.

3
SAFETY INSTRUCTIONS
• Always wear proper eye protection to protect
you from any debris that may fly out while
grinding. We recommend wearing safety goggles
or safety glasses with side shields. Everyday
glasses are not safety glasses. If anyone is around
the machine while it is in use, they must wear
safety glasses.
• Keep work area well lit and clean. Make sure
your work area is not cluttered.
• Do not operate unattended. Adult supervision
is required at all times. Never leave the machine
running unattended.
• Do not operate this machine while under the
influence of drugs, alcohol or any medication.
• Never run discs dry. Make sure there is
adequate water used while grinding so that
rock dust is not formed. This dust contains
chemicals that can be hazardous to your lungs
if inhaled and is known to cause cancer, birth
defects or other reproductive harm. To reduce
your exposure to these chemicals, work in a well
ventilated area and wear a face or dust mask if
the grinding operation is dusty.
• Use only water as a coolant.
• Never grind more than one workpiece at a
time.
• Some rocks contain poisonous elements.
Avoid grinding rocks that contain uranium,
mercury, lead, arsenic, etc. Make sure you know
the material you are grinding.
• Do not allow water to run down the sha
and into the motor. This will cause the motor to
instantly burn out. This machine is designed in such
a way that this does not occur with normal use.
• Do not allow the water level to build up in the
catch tray. Make sure the drainage hole is open
so water does not back-up in the catch tray and
possibly leak down the motor sha.
• Do not force the tool or attachment to do a job
it is not designed to do.
• Discs continue to spin aer turn o,
eventually slowing to a stop.
• Avoid awkward operations and hand
positions. Make sure you have good balance
while working on this machine. A sudden slip
could cause your hand to move into the disc.
MAINTENANCE
• Always disconnect from power before
servicing. Disconnect machine from power
source before making any adjustments and when
not in use.
• Do not abuse the power cord. Never carry
the machine by the cord or yank it to disconnect
from receptacle. Keep cord away from heat, oil
and sharp edges.
• Do not open the black cone body. There are no
user serviceable parts inside.
• Clean and dry machine aer use.

4
TABLE OF CONTENTS
SAFETY INSTRUCTIONS 2
WARRANTY INFORMATION 5
MACHINE DETAILS 6
OPERATING INSTRUCTIONS 7
GRINDING AND POLISHING 8
MAINTENANCE 10
COOLING SYSTEM 11
ACCESSORIES 12
FAQS 14
TROUBLESHOOTING 15
REGISTER YOUR PRODUCT
Register your Hi-Tech Diamond All-U-Need at
hitechdiamond.com/register to help facilitate
any warranty related requests. You can also
register your All-U-Need by completing and
mailing us the enclosed registration form.
Complimentary mailing envelope is included for
your convenience.

5
ONE-YEAR LIMITED WARRANTY
What does this warranty cover?
This warranty covers all structural and electrical
parts of the Hi-Tech Diamond All-U-Need such as
the motor, rectifier, speed controller, etc.
What does this warranty not cover?
This warranty does not cover any consumable
goods such as saw blades, diamond abrasives
and/or polishing products. This warranty also
does not cover any abuse, misuse, intentional
damage, incorrect usage, failure to adequately
take care of the machine, improperly following
the instructions, servicing by someone other than
Hi-Tech Diamond personnel, the or loss and/or
any act of nature.
Who is covered under this warranty?
This warranty only covers the original purchaser
of the equipment. It is non-transferable.
What is the warranty period?
This warranty service is in force for one full year
from the date of your purchase. Please retain
the original invoice of your machine for proof
of warranty or register your All-U-Need.
Need our warranty service?
Contact us directly by phone at (630) 596-9909
or by email at sales@hitechdiamond.com and
we will assist you. You must prove that you
are under warranty by providing us with
the original invoice of your machine or by
registering your All-U-Need to receive our
warranty service.
This All-U-Need is warranted by the manufacturer to be free from
defect for the period of one full year from the date of purchase.
Extended warranty program
You’ve made a smart investment by purchasing
this Hi-Tech Diamond All-U-Need so protect it by
extending this manufacturer’s warranty another
1-2 years! For purchase and more details, visit
hitechdiamond.com or call (630) 596-9909.
Important note: You have up to 45 days from the
purchase date of this Hi-Tech Diamond machine to
add this extended warranty.

6
MACHINE DETAILS
The image below shows parts and accessories included with your All-U-Need machine:
SPEED CHART
The motor installed in the All-U-Need
is variable speed, delivering speeds of
800 rpm - 3,400 rpm. Use this speed
chart as a guide so you can work at
the speed you desire. These values
are approximate. Actual speeds may
vary.
3,400 rpm 800 rpm
1,800 rpm
2,300 rpm
1,200 rpm2,900 rpm
1
2
3
4
6
5
7
8
9
10 11 12
1. Water cup with black
water tube and valve
2. Silver arbor with black
knob and washer
3. Black spray shield
4. All-U-Need base unit (1/4
hp variable speed motor)
5. Clear drain tube
6. Water cup with cup holder
7. 3/32" Allen wrench
(included with instruction
manual)
8. 180# diamond lap disc
with backing plate
9. Acrylic backing plates (4)
10. 325# brown smoothing
disc
11. 600# red smoothing disc
12. 1,200# blue smoothing
disc
13. Tech-11 polishing pad
with 14,000# diamond paste
syringe
13

7
OPERATING INSTRUCTIONS
1Carefully unpack the All-U-Need from the box
and remove all loose foam and accessories.
Set the packaging aside should you need it in the
future. Check to make sure all parts are present
on both the machine and in the accessory kit. If
you find any missing or damaged parts, call us
immediately at 1 (630) 596-9909 or email us at
2
Place the All-U-Need on a table or surface
that is flat in a well lit location. Make sure
the machine sits level and the white catch tray
is securely mounted on a horizontal plane on
the motor housing. If the tray is raised or tilted,
it will hit the motor sha or silver arbor and rub,
causing a squeaking sound on the arbor.
3
Install the water system by inserting the black
tube with valve into the white cup with the
hole. Position this cup on top of the spray shield.
Insert the clear drain tube into the drain hole
on the bottom right side of the white catch tray.
Position the other white cup under the drain tube.
See cover image for correct set-up. Fill the top
cup with clean water. Never re-use water. Note: To
install the optional cup holder or Pro-Flow water
cooling system, see page 11.
4
Included in the All-U-Need accessory kit are
three colored diamond smoothing discs, one
Tech-11 polishing pad and four backing plates.
The smoothing discs and Tech-11 pad need to
be assembled before use. To do this, remove
the protective backing from the discs and apply
the pressure-sensitive adhesive side to a clean,
smooth surface of the backing plate. Each disc
needs a backing plate. Make sure to center the
pre-punched hole in the disc with the arbor hole
in the backing plate. Improper centering may
cause the disc to spin out of round resulting in
machine vibration. Make sure the discs have even
contact with the backing plate surface.
Note: Discs may be slightly smaller than the
backing plates.
5
Put the 180# diamond lap disc on the arbor
and secure with the ¼"-20 thread knurled
black knob and washer (Fig. A). This is the first
disc you will use to start shaping your rough
material. Put on safety goggles (not included)
and turn the power switch on. Adjust the water
drip so that the water is aimed at the center of
the disc. You only need a few drops of water to
adequately lubricate the discs. You can control
the splash by raising or lowering the black spray
shield.
Screws (4)
located on
the black
spray shield
are adjustable
to raise and
lower the
spray shield
to control the
water splash
Fig. A
Silver arbor
with washer
White catch
tray
8
GRINDING AND POLISHING
STEP 1: ROUGH SHAPING
The 180# diamond lap disc is used for shaping
rough material and removes any surface
irregularities. This allows your work piece to be
smoothed and polished. Never use discs dry
and use only clean water as a lubricant. Do not
use wipers or sponges, as they may become
contaminated with cutting debris and larger
diamond particles, causing scratches in your work
piece. Grind the edges of stones and glass to fit
your desired mounting or template. Remove as
many flat spots as possible if you are making a
domed cabochon. If a sharp edge is present on
your work piece, gently apply the sharp edge to
the diamond disc to prevent possible chipping.
STEP 2: SMOOTHING
The 325# brown diamond smoothing disc is
used next to further refine your desired shape. It
also removes scratches and flat spots le from
the 180# rough grinding process. It is important
to remove all of the scratches from step 1
because these scratches are diicult, sometimes
impossible, to remove later in the smoothing and
polishing process. Rinse the black spray shield
with clean water before proceeding to step 3.
STEP 3: SMOOTHING
The 600# red diamond smoothing disc is used
next to further smooth and refine your work piece
before proceeding to the next step. It is not as
aggressive as the last disc and aids in removing
the remaining scratches and flat spots. Remove
any scratches le from step 2.
180# diamond lap disc
325# brown smoothing disc
600# red smoothing disc

9
GRINDING AND POLISHING
STEP 4: PRE-POLISH
The 1,200# blue diamond smoothing disc is used
next. Once you’ve completed shaping your stone
with the previous steps, use this disc to remove
any scratches le from step 3. This disc is a pre-
polish pad, which preps your stone for the final
polish.
STEP 5: POLISH
The Tech-11 polishing pad is used to put the final
polish on your material. You will need to charge
the Tech-11 polishing pad with the 14,000#
diamond paste before use. To do this, take the
diamond paste syringe, remove the cap and
squeeze the syringe plunger in a series of small
dots onto the surface of the Tech-11 pad (Fig.
B). Use your fingers to rub these small dots into
the pad. Once charged, you will only need to
apply additional diamond paste to the pad when
you notice that the pad is no longer polishing.
Using the Tech-11 polishing pad with water is
not required because the diamond compound
mixture contains its own carriers. However, if you
are working with brittle, heat sensitive material,
such as opal, be careful not to let your work
piece overheat. To avoid overheating, use a very
small amount of clean water to keep your work
piece cool or simply lower the RPM to reduce
heat buildup. Note: Use only one type of polishing
compound per Tech-11 polishing pad. Do not mix
dierent polishing compounds on the same pad.
1,200# blue smoothing disc
Fig. B
Tech-11 polishing pad with
14,000# diamond paste syringe

10
MAINTENANCE
OILING
The only part you need to oil on the All-U-Need
machine is the inside of the 2" silver arbor. This is
required because the motor sha and arbor are
made of dierent materials. Over time, they can
seize together, making it impossible to remove
the arbor. Every two months or so, remove the
arbor by inserting the included Allen wrench into
the set screw, turning counter-clockwise. Turn the
arbor upside down. Apply a few drops of motor
oil, way oil, lithium or water pump grease into
the area where the arbor fits onto the sha. Make
sure there is no excess oil so that oil doesn’t drip
down the motor sha and get into the motor.
This will cause an instant motor burn-out. When
putting the arbor back onto the sha, make sure
the screw is positioned against the flat side of the
motor sha. If the screw is positioned against the
rounded side of the sha, it will make a squeak-
ing noise and create friction, causing the motor
sha to get hot. Once the arbor is positioned
properly, check the set screw for tightness on the
arbor using the Allen wrench. Do not over tighten
the set screw, as you will need to remove it regu-
larly to clean the tray. The arbor may be adjusted
up and down if necessary to keep the spinning
disc below the black spray shield.
CLEANING
The All-U-Need is designed to be easily disas-
sembled for cleaning. Aer each use, rinse the
black splash guard and flush out the white catch
tray with clean water so the rock sediment can
get washed down the drain tube. Any used water
must not be disposed down a sink, as it can
harden like cement, closing o the drain. Allow
the machine to dry completely then store it in a
safe place, away from children.
Note: When you are finished using the diamond lap
disc and diamond smoothing discs, rinse and spin
completely dry. Store them in a clean, dry plastic
bag until next use. The maximum weight of any
discs/laps should not exceed 1.5lbs on your All-U-
Need machine.
FUSE DETAILS
The fuse is installed in the back of the All-U-Need
machine. It is a 250V, 2AMP slo-blo cartridge fuse.
If you need a replacement, this fuse can be found
at your local hardware store. See below for how
to change the fuse.
Set
screw
Push in with a flat head screwdriver, then turn to the le
(counter-clockwise)
Arbor

11
COOLING SYSTEM
INSTALLING THE CUP HOLDER
1
The black cup holder is found in your water kit
bag, take it out.
2
Using a screwdriver, unscrew the screw that
is located in the front right corner in the All-U-
Need base.
3
Center the hole in the black cup holder with
the hole in the base and screw the black cup
holder into the All-U-Need base.
Note: Do not over-tighten the screw or the screw
may strip the hole. If this happens, the screw will
not be able to tighten. Only tighten the screw so
there is a snug fit.
INSTALLING THE PRO-FLOW
ATTACHMENT
This feature is not available on all models.
1Attach your Pro-Flow water cooling system
to any side of the All-U-Need white catch
tray. Tighten the thumbscrews to fasten.
2
Connect the Pro-Flow clear tubing to the
water pump or pressure tank. Connect the
⅝" diameter clear tubing to the drain spout
of the catch tray and place the other end in
a bucket (not included) to collect the runo
water.
3
Adjust your desired water flow using the
control valve.

12
ACCESSORIES
Backing plates
Our 6" and 8" acrylic backing plates provide a
flat surface to back diamond smoothing discs,
diamond lap discs and polishing pads. They are
3/8" thick and have 1/2" arbor holes.
Tech-11 polishing pads
Our 6" and 8" Tech-11 polishing pads serve as a
general polishing pad to polish stone and glass.
Use with cerium oxide, tin oxide or diamond
compound.
Final polish pads
Our 6" and 8" final polishing pads are specially
designed to put a mirror polish on stone and
glass. They are pre-charged with cerium oxide so
you don’t need to mess with slurry or diamond
paste .
Sponge pads
Our 6" and 8" sponge pads are used under
diamond smoothing discs and polishing pads to
provide a cushion that helps facilitate doming
into cabochons and removes flat spots. They are
1/8" thick and ideal for making cabochons.
For more Hi-Tech Diamond products and accessories, visit hitechdiamond.com.

13
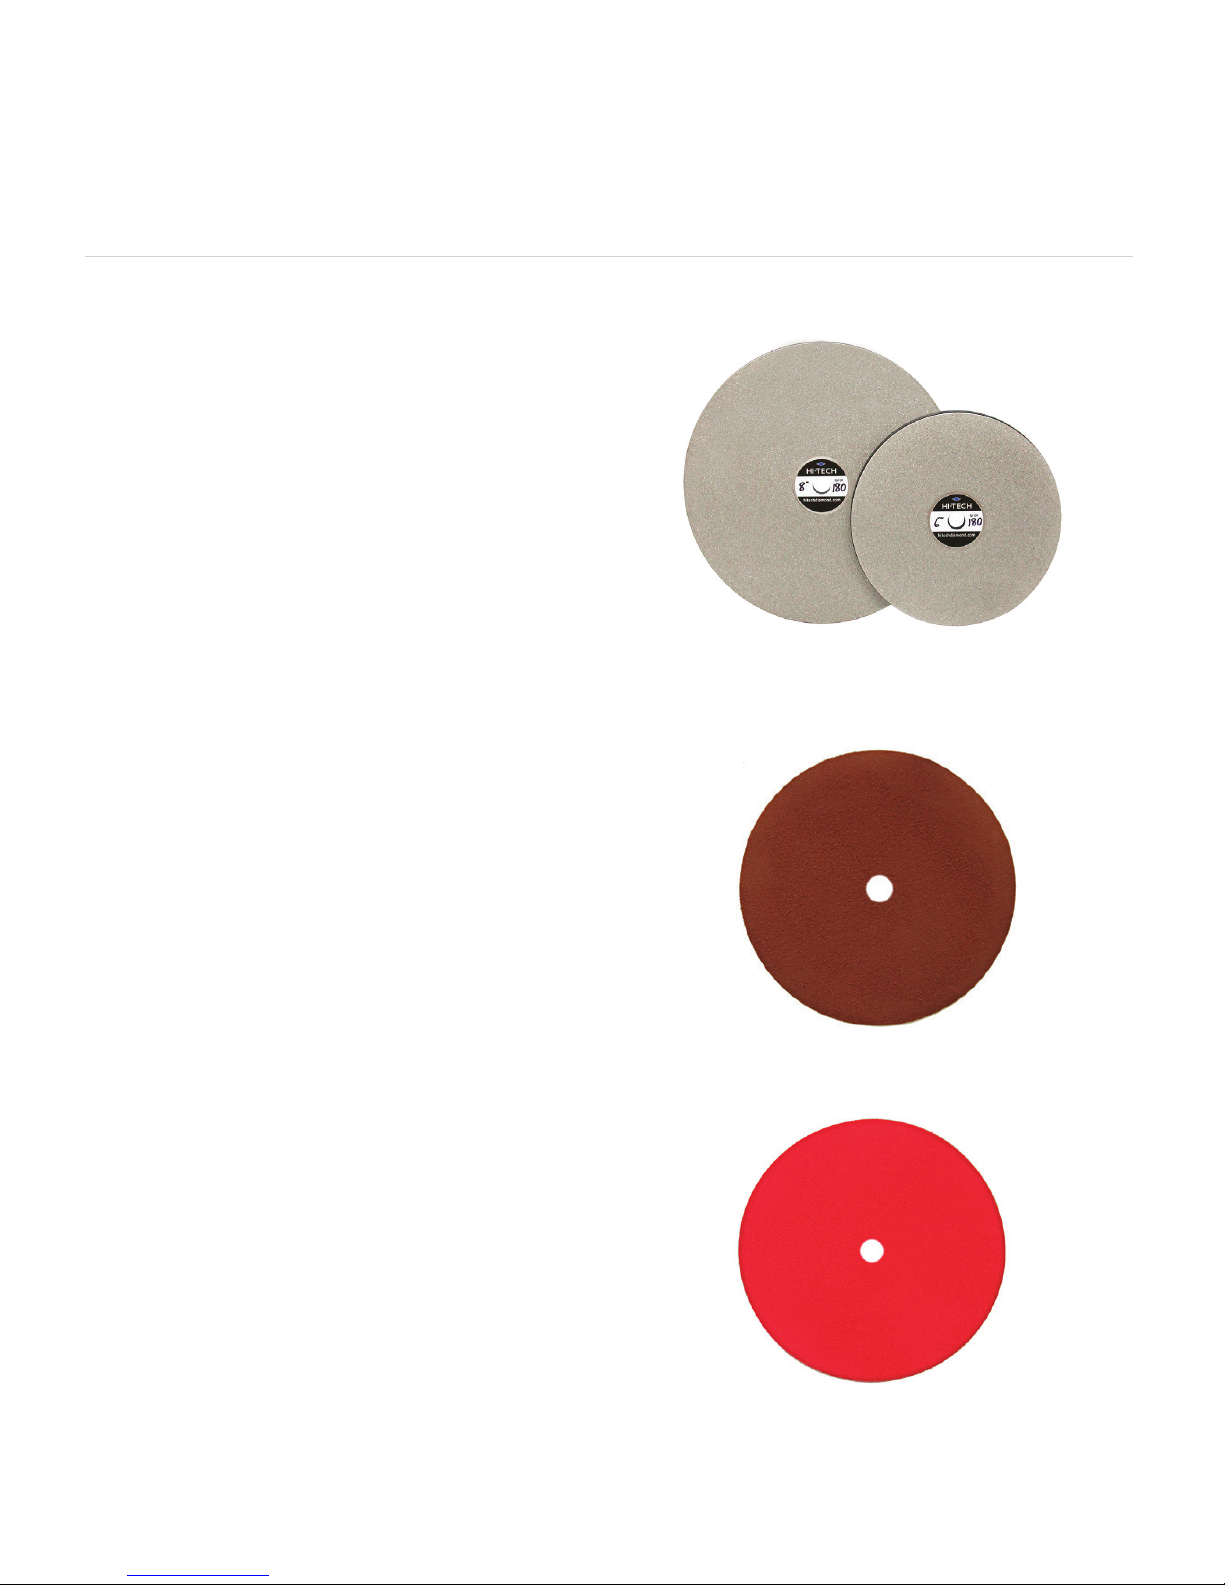
Diamond lap discs
Our 6" and 8" diamond lap discs are used for
precise rough and fine grinding on stones and
glass. They are nickel electroplated, using top
grade diamond powder. Discs are available as
1mm thick, top plates with adhesive backings or
come prebound to acrylic backing plates. Select
from the following grits: 60#, 80#, 100#, 180#,
260#, 360#, 600#, 1,200# and 3,000#.
Glass grinding bits
Our glass grinding bits are used for shaping
edges of glass pieces and creating grooves in
stained glass for wire wrapping. Bits with 3/8"
arbor holes conveniently fit onto the motor sha
of the All-U-Need, transforming this flat lap into
a power-horse glass grinder. Select from the
following grits: 60#, 80#, 100#, 220#, 360# and
600#.
ACCESSORIES
For more Hi-Tech Diamond products and accessories, visit hitechdiamond.com.
Diamond smoothing discs
Our 6" and 8" diamond smoothing discs are used
for smoothing, refining and polishing gemstones,
glass, synthetic material and metal. Discs are
available in the following grits: 220#, 325#, 600#,
1,200# and 3,000#.
Diamond smoothing disc kits
Our 6" and 8" diamond smoothing disc kits are
great for replacing all of the items in the All-U-
Need and Slant Cabber accessory kit. Kits are
available with or without backing plates and
include the following: 325# disc, 600# disc, 1,200#
disc, Tech-11 polishing pad and 14,000# diamond
paste syringe.

14
FAQS
What lubricants should I use with the
All-U-Need?
We recommend using only clean water with
the All-U-Need. If desired, you may add a water
soluble coolant to the water.
Can I reuse water for diamond
grinding?
You can, but we don’t recommend this. When you
reuse water, you risk getting contamination on
your diamond discs which increases the chances
of unwanted scratches on your work pieces. For
best results, use clean water every time you use
the All-U-Need.
How do I clean the white catch tray?
To prevent the drain tube from clogging, flush
the white catch tray aer every use on the All-
U-Need by taking a small bucket of clean water
and pouring the water into the catch tray so the
leover rock sediment gets flushed down the
drain tube. Once you see all of the sediment
gone and the white catch tray is clean, your
All-U-Need will be ready for the next use. If you
need to remove the white catch tray for further
cleaning, do so by removing the arbor with the
Allen wrench that is included with the All-U-Need
instruction manual.
What is the clear tube attached to the
arbor for?
The clear tube attached to the silver arbor helps
prevent water from getting into the motor. The
All-U-Need is designed in such a way that water
should never get into the motor if properly used,
but this is another solution in preventing this
from happening.
Can I reuse backing plates that are
backed to used, old smoothing discs,
polishing pads and diamond lap discs?
Yes. Purchasing new backing plates for new
smoothing discs, polishing pads and diamond
laps is not required, if you can properly remove
them from the backing plate. To remove diamond
smoothing discs and polishing pads from backing
plates, simply heat the surface of the diamond
smoothing disc using a heat source from a hair
dryer or heat gun. This takes approximately
2-3 minutes. Peel o the disc from the backing
plate. If there is residual glue stuck on the
backing plate, take a razor blade and scrape it
o. To remove diamond lap discs, which are the
electroplated diamond discs, use the same heat
process as above and use a screwdriver to prop
o the disc from the backing plate. Note: If for
some reason you can’t remove all of the residual
glue from the backing plate, we recommend
purchasing a new backing plate. If the surface
on the backing plate is not fully clean or smooth,
this may cause new discs, pads or laps to not stick
properly or lay flat on the backing plate surface,
causing unwanted bumps and grooves on your
work pieces.
Do you sell electrical spare parts for
my All-U-Need? Whom do I contact if
I need a repair or replacement for my
All-U-Need?
Due to the technical nature of our machines,
we do not oer electrical spare parts for you to
install yourself such as motors, speed controllers,
rectifiers, etc. Instead, we oer a repair
service that is done in-house by our qualified
technicians. For more information about our
repair service, visit hitechdiamond.com/repairs.

15
TROUBLESHOOTING
My machine is vibrating...
The motor that is installed in the All-U-Need
is variable speed, meaning you can adjust the
speed in-between the range of 800 rpm - 3,400
rpm. When the All-U-Need is run at slower
speeds, you may experience a vibration. We
recommend running the All-U-Need at higher
speeds to prevent this vibration. If you are still
experiencing a vibration aer running the All-
U-Need at high rpms, check to see if your discs
are properly centered. If the diamond lap disc,
diamond smoothing discs or polishing pads are
not accurately centered with the 1/2" arbor hole
in the backing plate, this will cause a vibration.
My motor is beginning to rust, why is
this?
The only possible way the motor can rust is
if there is water getting into the motor. Water
should never get into the motor with the correct
water set up so if you are seeing rust, make sure
your water set up doesn’t allow water to drip into
the motor.
What should I do if the drain tube
keeps clogging with sediment?
If the drain tube keeps clogging with leover rock
sediment, simply flush out the sediment with lots
of clean water until the sediment gets flushed
down the drain tube. If a large piece of sediment
is clogged and stuck in the drain tube, use an air
spray gun to blow it out.
My All-U-Need is making a loud,
squeaking noise. Why is this?
If your All-U-Need is making a loud, squeaking
noise, it can be one of the following scenarios:
1) The inside of the silver arbor hasn’t been oiled
in a while. Make sure you are oiling the inside of
the arbor according to the oiling instructions on
page 10.
2) The white catch tray is raised or tilted, thus
hitting the motor sha or arbor and causing
them to rub against each other. Make sure your
All-U-Need sits on a flat, level surface.
3) The clear tube on the arbor is rubbing against
the white catch tray. Simply push this clear tube
upward, until it can’t go any higher and is no
longer making contact with the white catch tray.
4) The arbor isn’t properly tightened onto the
motor sha. Make sure the arbor is secured using
the included Allen wrench.
I can’t remove the arbor from the
motor shaft.
If you can’t remove the arbor from the motor
sha using the Allen wrench, it is most likely
because the arbor and motor sha seized
together. This is a result from not oiling the inside
of the arbor according to the oiling instructions
on page 10. If it impossible to remove, please
contact Hi-Tech Diamond at 1 (630) 596-9909 and
one of our specialized technicians will help you
over the phone for correct removal.

MANUFACTURED BY
Reentel International Inc.
808 Burr Oak Drive
Westmont, IL 60559
U.S.A.
PHONE
1 (630) 596-9909
EMAIL
WEBSITE
hitechdiamond.com
FACEBOOK
facebook.com/hitechdiamond
TWITTER
twitter.com/hitechdiamond
EST. 1984
HI TECH
Rev 03/15/18
EST. 19 84
HI TECH
This manual suits for next models
1
Table of contents
Other Hi-Tech Diamond Sander manuals


Popular Sander manuals by other brands

Ingersoll-Rand
Ingersoll-Rand 313 instructions

BLACK DECKER
BLACK DECKER BDGP1518 Original instructions

Parkside
Parkside 275647 Original instructions

EINHELL
EINHELL DSE 125 Original operating instructions

Parkside
Parkside PSS 250 - MANUEL 2 Operation and safety notes

Dynabrade
Dynabrade 58050 Important operating, maintenance and safety instructions


