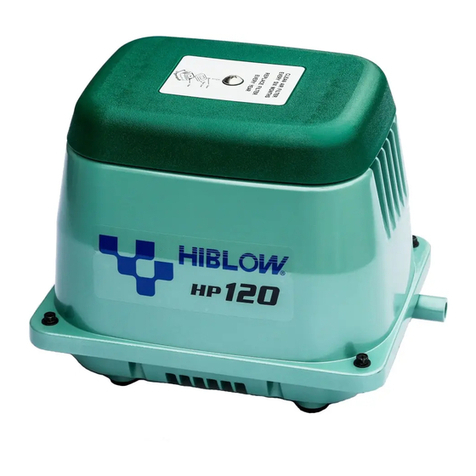
HIBLOW HP-10 Operating manual

MAINTENANCE GUIDE
MAINTENANCE GUIDE

Introduction
We thank you very much purchasing our TECHNO TAKATSUKI
HIBLOW air pumps. The introduction of the first HIBLOW pump
was over twenty years ago. More than 3 million HIBLOW pumps
have now been produced and found widespread applications. This
guide book is explained comprehensible as everyone can repair
easily. Can be useful when repairing by all means. Also, please
utilize our maintenance tools for replacement.
What is ISO 9001?
In 1987, the International Organization for Standardization (ISO)
established its ISO 9000 standards. These internationally approved
standards provide specifications not for products but for quality-
assurance systems. ISO 9000 consists of three separate standards:
ISO 9001, 9002, and 9003. Of these, ISO 9001 is the most rigorous,
encompassing points ranging from design control to after-sales
service. To qualify for an ISO 9001 certificate, applicants must first
pass in-company, customer, and third-party audits. After receiving
ISO 9001 certification, regular checks are then conducted to ensure
that the company maintains the required standards. In addition,
management policies on product quality are documented and checked
against actual practice throughout the entire organization. In essence,
the ISO 9001 standard certifies that a company has not only
established an outstanding quality-control record, but has also proven
capable of sustaining this record.
The Product Liability Law
Japan's Product Liability Law was introduced in July 1995 in
response to the increasing difficulty consumers were having in
evaluating the quality of high-technology products and in claiming
damages associated with product defects. With the Product Liability
Law making it easier for customers to claim damages, manufacturers
must now assign a higher priority to quality control.At Techno
Takatsuki Co., Ltd., our response to the above developments was to
create a program that ensured our products were in compliance with
the Product Liability Law. At the same time, we implemented a full
range of safety measures. As a result of these efforts, we received
ISO9001 certification in December 1995, a testament to the high
quality of our product design and manufacturing systems. Despite
this initial success, we remain determined to further improve our
quality-control system, and look forward to the support of our
customers as Techno Takatsuki continues to evolve in years to come.


2
Maintenance tool / Your Warranty
Maintenance tools
Your Warranty
qScrew Driver
w5.5Aeach side wrench (3Awrench)
e7Aeach side wrench (4Awrench)
r8Aeach side wrench (5Awrench)
tBox Driver Handle
q
t
w
e
r
With a carring case.
1. Please check a warranty card is supplied and make sure not to lose it.
There is a possibility of expense even though the pump
is under warranty. Read the warranty card carefully.
2. We provide a seven-year guarantee on all spare parts even if the pump go out
of production.
3. Please make an inquiry about a failure of the pump. Here is a number for
customer inquiries.
TECHNO TAKATSUKI CO., LTD.
8-16 HATCHO-NISHIMACHI, TAKATSUKI, OSAKA, 569-0095 JAPAN
TEL : 81–726 – 84 – 0805
A year warranty period.

17
HP
Removing upper housing
STEP
1
STEP
1
To remove the filter cover, put your fingers on
one side of the cover and pull it up.
STEP
2
STEP
2
Remove the filter from the upper housing,
replace it new one or clean it.
•At this time, remove any dust or foreign matter from
the inlet of the filter cover, and the filter mounting
surface and the inlet of the filter.
•If the filter is dirty, dust it off well. If it is heavily
soiled, use a neutral detergent to wash it, rinse it
with water, and dry it well out of direct sunlight
before reinstalling.
STEP
3
STEP
3
According to the photo, replace the filter, put the
filter cover back on the upper housing, align the
fitting boss of the upper housing with its
counterpart of the filter cover, then press the
filter cover downwards from above to fit it in.
•Take care not to press the filter cover in its improper
position as it may be damaged.
•Do this work after every other works have done.
•This pump is of a totally oil-less type. Therefore,
never put oil or other liquids into the pump inlet.
●When performing cleaning and replacement, be sure to unplug the pump unit first.
●When performing the replacement work, the pump body may be still hot and you
may get burnt. Therefore, wait until the pump has been allowed to cool.
●Do not carry the pump by the filter cover.
!CAUTION
●The cleaning of the filter and the exchang method are the same though shape in
dependence on the model might be different from the photograph.
HP series
FILTER CLEANING AND REPLACEMENT
HP Series

18
HP Removing upper housing
STEP
1
STEP
1
Remove all the bolts from the four corners.
STEP
2
STEP
2
If it is difficult to remove it due to the heavily
stuck internal seal packing, pry it open by
inserting the tip of a flat-head screwdriver into
the clearance between the exhaust nozzle and
the upper housing.
STEP
3
STEP
3
According to the photo, if the stick is too heavy,
raise up the pump body and hit the exhaust
nozzle lightly with a hammer.
•Do not use a metal hammer.
The removing upper housing method is the same though shape in dependence on
the model might be different from the photograph.
HP series
HP Series
REMOVING UPPER HOUSING

19
HP
HP-10/20
HP-10/20
qFilter Cover
wSemi Cover Packing
eFilter
rFitting Boss
tUpper Housing
yCasing Block
uDiaphragm
iDiaphragm Base
oElectromagnet
!0 Actuating Rod
!1 L-Tube
!2 Frame
!3
Vibration Control Rubber
!4 Center Plate
!5 Gasket
!6 Lower Housing
!7 Power Cord
HP-10 1999/ 4 -
HP-20 1999/ 4 -
Air pump
Start of production
Discontinuance of production
q
w
e
r
t
y
ui
o
!0
!1
!2
!3
!4
!5
!6
!7
STRUCTURE AND PART NAMES
HP-10/20
HP Series

20
HP Replacing the Chamber Block
STEP
1
STEP
1
Remove the upper housing according to the
picture on page 17.
Remove the L-tube from the casing nozzle.
Remove the installation screws of the chamber
block. (4 screws on each side.)
Remove the casing block.
STEP
2
STEP
2
Remove the U-lock nut.
•Use the box driver to loosen (or tighten) the U-lock
nut.
STEP
3
STEP
3
Remove one of the diaphragm mounting blocks
from the actuating rod, and pull out the other
diaphragm mounting block with the rod from
the pump body.
Remove another U-lock nut and the diaphragm
mouting block from the rod.
This completes the chamber block removal
procedure.
●When performing the replacement, be sure to unplug the pump unit first.
●Replace the diaphragms and the valves with new ones regularly
(every one year or one and half years) in order to maintain their initial performance.
●For chamber block replacement, be sure to change both chamber blocks at the same time.
●The actuating rod employs powerful permanent magnets. Therefore, be sure to remove
your watch and precision machine before starting the work as it may fail due to their
strong magnetic force.
●Do not put the actuating rod close to a magnetic card, a magnetic disk or any other
magnetic media as their data may be lost.
!CAUTION
REMOVAL OF THE CHAMBER BLOCKS
REPLACING THE CHAMBER BLOCK
HP-10/20

STEP
4
STEP
4
Install a new diaphragm mouting block on the
actuating rod.
Set the actuating rod in line with groove and
tighten the U-lock nut.
•Use new U-lock nut and washer only that come as
replacement parts to prevent loosening and causing
failure of the pump.
STEP
5
STEP
5
Insert the actuating rod in accordance with the
gap of the frame.
Secure the diaphragm mounting block on other
side and tighten with washer and U-lock nut
using the box driver.
Make sure the gaps between the actuating rod
and the electromagnet are even.
STEP
6
STEP
6
Connect L-tube to the casing block. Secure the
casing block with the screws. (4screws on each
side.)
Install the other casing block at the same way.
STEP
7
STEP
7
Secure the upper housing with the bolts.
Then, replace the filter and filter cover on it.
(See page17 “FILTER CLEANING AND
REPLACEMENT”)
FITTING THE CHAMBER BLOCKS
REPLACING THE CHAMBER BLOCK
21
HP
Replacing the Chamber Block
HP-10/20

HP-30 1998/ 8 —
HP-40 1998/ 8 —
HP-50 1998/12 —
Air pump
Start of production
Discontinuance of production
HP-30/40/50
qFilter Cover
wSemi Cover Packing
eFilter
rFitting Boss
tUpper Housing
y
Sound Absorber (HP50)
uCasing Block
iDiaphragm Ring
oDiaphragm
!0 Diaphragm Base
!1 Electromagnet
!2 Actuating Rod
!3 L-Tube
!4 Frame
!5
Vibration Control Rubber
!6 Center Plate
!7 Gasket
!8 Lower Housing
!9 Power Cord
q
w
e
r
t
y
u
i
o!0
!1
!2
!3
!4
!5
!6
!7
!8
!9
STRUCTURE AND PART NAMES
22
HP HP-30/40/50
HP-30/40/50
HP Series

23
HP
Replacing the Chamber Block
STEP
1
STEP
1
Remove the upper housing.(See page18)
Remove the sound absorber.
Remove the four screws hold the chamber
block. (4screws on each side.)
Pull out the L-tube from the casing nozzle and
remove the casing block on both side.
STEP
2
STEP
2
Remove one of the U-lock nuts hold the
diaphragm mounting block to the rod.
•Use the box driver to loosen (or tighten) the U-lock
nut.
STEP
3
STEP
3
Remove one of the diaphragm mounting block
from the rod, and pull out the other diaphragm
mounting block with the rod from the pump body.
Remove another U-lock nut and the diaphragm
mounting block from the rod.
This completes the chamber block removal
procedure.
●Be sure to unplug the pump unit.
●Replace the diaphragms and the valves with new ones at least once a year or one and
a half years in order to maintain their initial performance.
●For chamber block replacement, be sure to change both chamber blocks at the same time.
●The rod employs powerful permanent magnets. Therefore, be sure to remove your watch
and precision machine before starting the work as it may fail due to their strong
magnetic force.
●Do not put the actuating rod close to a magnetic card, a magnetic disk or any other
magnetic media as their data may be lost.
!CAUTION
REPLACING THE CHAMBER BLOCK
REMOVAL OF THE CHAMBER BLOCKS
HP-30/40/50

STEP
4
STEP
4
Install a new diaphragm mounting block on the
actuating rod.
Set the actuating rod in line with groove and
tighten the U-lock nut with the box driver.
•Use new U-lock nut and washer only that come as
replacement parts to prevent loosening and causing
failure of the pump.
STEP
5
STEP
5
Insert the actuating rod in accordance with the
gap of the frame.
Secure the diaphragm mounting block on other
side and tighten with washer and U-lock nut
with the box driver.
Make sure the gaps between the actuating rod
and the electromagnet are even.
STEP
6
STEP
6
Connect L-tube to the casing block and secure
the casing with the screws. (4screws on each
side)
Install the other casing block at the same way.
STEP
7
STEP
7
Install the sound absorber. (HP-50)
•Be extremely careful not to pinch the Sound
Absorber in the Upper Housing.
Secure the upper housing with the bolts.
Then place the filter and filter cover on the
upper housing. (See page17 “FILTER
CLEANING AND REPLACEMENT”)
24
HP Replacing the Chamber Block
REPLACING THE CHAMBER BLOCK
FITTING THE CHAMBER BLOCKS
HP-30/40/50

25
HP
Replacing the Electromagnet
STEP
1
STEP
1
Cut the wire from the terminals on the
electromagnet with nippers.
•It is recommended that you make a note of the
wiring.
STEP
2
STEP
2
Remove the nuts with the box driver.
(7
mm
wrench.)
STEP
3
STEP
3
Pull out electromagnets from the pump body.
●Be sure to unplug the pump unit.
●When performing replacement work, the pump body may be still hot and you may get
burnt. Therefore, wait until the pump has been allowed to cool.
●Be sure to remove the chamber block and the actuating rod before replacing the
electromagnet.
●It is better to let an experienced technician handle the soldering process.
Take precautions against being burnt.
●In case of HP-10/20, do the same way of replacing the electromagnet.
!CAUTION
REPLACING THE ELECTROMAGNET
REMOVING THE ELECTROMAGNET
HP-10~50

26
HP Replacing the Electromagnet
STEP
4
STEP
4
Secure the electromagnets to the body by the
nuts. Use the box driver. (7
mm
wrench)
STEP
5
STEP
5
Tie the wires in a bundle with a silicon tube.
Connect the wires to the terminals.
STEP
6
STEP
6
Solder the wires to the terminals.
The wire requires a soldered connection.
STEP
7
STEP
7
This completes the electromagnet replacement
procedure.
HP-10~50
REPLACING THE ELECTROMAGNET
FITTING THE ELECTROMAGNET

27
HP
HP-60/80
w
!3
y
!7
!4
q
e
r
t
!9
i
o
!0
!1
!2
u
!6
!5
!8
@0
@1
@2
HP-60/80
qFilter Cover
wSemi Cover Packing
eFilter
rFitting Boss
tUpper Housing
ySound Absorber
uCasing Block
iDiaphragm Ring
oDiaphragm
!0 Diaphragm Base
!1 SP Switch
!2 Safety Screw
!3 Electromagnet
!4 Actuating Rod
!5 L-Tube
!6 Hose Band
!7 Frame
!8
Vibration Control Rubber
!9 Center Plate
@0 Gasket
@1 Lower Housing
@2 Power Cord
HP-60 1995/ 9 —
HP-80 1995/ 9 —
Air pump
Start of production
Discontinuance of production
STRUCTURE AND PART NAMES
HP-60/80
HP Series

28
HP Replacing the Chamber Block
STEP
1
STEP
1
Remove the Upper Housing.
(See page18 “REMOVING UPPER HOUSING”)
STEP
2
STEP
2
Remove the sound absorber.
Pull out the L-tube from the casing nozzle.
Remove the four screws hold the chamber block
and the casing block on both side.
(4screws on each side)
STEP
3
STEP
3
Remove one of the U-lock nuts hold the
diaphragm mounting block to the rod.
•Use the box driver to loosen (or tighten) the U-lock
nut.
●Be sure to unplug the pump unit.
●Replace the diaphragms and the valves with new ones at least once a year or one and
a half years in order to maintain their initial performance.
●For chamber block replacement, be sure to change both chamber blocks at the same time.
●The rod employs powerful permanent magnets. Therefore, be sure to remove your watch
and precision machine before starting the work as it may fail due to their strong
magnetic force.
●Do not put the actuating rod close to a magnetic card, a magnetic disk or any other
magnetic media as their data may be lost.
!CAUTION
REMOVAL OF THE CHAMBER BLOCKS
REPLACING THE CHAMBER BLOCK
HP-60/80

STEP
4
STEP
4
Remove one of the diaphragm mounting blocks from the
actuating rod and pull out the other diaphragm mounting
block with the rod and finally, separate the diaphragm
mounting block and rod.
This completes the chamber block removal procedure.
•When pull out the rod, take care not to allow the rod projection to
accidentally hit the lever of the SP switch. If the pump stops automatically,
the safety screw must be broken to prevent any further damage to the pump.
Be sure all debris is removed from unit. (See Step8)
STEP
5
STEP
5
Install the new diaphragm mounting block on
the actuating rod.
•Use new U-lock and washer only that come as
replacement parts to prevent loosening and causing
failure of the pump.
STEP
6
STEP
6
Insert the actuating rod in accordance with the
gap of the frame.
Secure the diaphragm mounting block on the
other side and tighten the U-lock nut with the
box driver.
Make sure the gaps between the actuating rod
and the electromagnet are even.
STEP
7
STEP
7
Connect L-tube to the casing block and secure
the casing with the screws.
(4screws on each side)
Install the other casing block at the same way.
29
HP
Replacing the Chamber Block
REPLACING THE CHAMBER BLOCK
FITTING THE CHAMBER BLOCKS
HP-60/80

30
HP Replacing the Chamber Block
STEP
8
STEP
8
Dispose of broken screw.
•Be sure all debris is removed from unit as it can
result in damage to the permanent magnets and or
even in a failure of the pump.
STEP
9
STEP
9
Draw a new safety screw through a hole in the
different direction of the terminal.
(Threading order : The L-shaped lever–the
spring electrode)
STEP
10
STEP
10
Fasten the screw with a nut.
The screw is designed so that the nut will turn
freely when it is properly fastened, stop
tightening when this happens.
STEP
11
STEP
11
This completes the replacement of the safety
screw procedure.
Make sure the gaps between L-shaped lever and
lug of the actuating rod are even.
•When checking the movement of the switch while the
power is connected, touching the terminal will result
in an electric shock.
•Unplug the pump immediately after the check.
REPLACING THE CHAMBER BLOCK
REPLACEMENT OF SAFETY SCREW
HP-60/80

31
HP
Replacing the Chamber Block
STEP
12
STEP
12
Install the sound absorber.
STEP
13
STEP
13
Place the upper housing back on body.
•Be extremely careful not to pinch the Sound
Absorber in the Upper Housing.
Secure it with the bolts.
Then place the filter and filter cover on the
upper housing. (See page17 “FILTER
CLEANING AND REPLACEMENT”)
REPLACING THE CHAMBER BLOCK
HP-60/80

32
HP Replacing the Electromagnet
STEP
1
STEP
1
Cut the wire from terminals on the electromag-
nets with nippers.
•It is recommended that you make a note of the wiring.
STEP
2
STEP
2
Undo the frame screws and remove the SP
switch.
STEP
3
STEP
3
Remove the mounting nuts with the box driver.
(7
mm
wrench)
Pull out the electromagnets from the pump
body.
●Be sure to unplug the pump.
●When performing replacement work, the pump body may be still hot and you may get
burnt. Therefore, wait until the pump has been allowed to cool.
●Be sure to remove the chamber block and the actuating rod before replacing the
electromagnet.
●It is better to let an experienced technician handle the soldering process.
!CAUTION
REPLACING THE ELECTROMAGNET
REMOVAL OF ELECTROMAGNET
HP-60/80
This manual suits for next models
8
Other HIBLOW Air Compressor manuals
Popular Air Compressor manuals by other brands

CTI-Cryigenics
CTI-Cryigenics 8500 Installation, operation and servicing instructions

Stanley
Stanley B 255/10/50 instruction manual

Craftsman
Craftsman 16923 owner's manual

Stanley
Stanley Fatmax TAB 200/10/24V Instruction manual for owner's use

GE
GE H301 Series operating manual

Quincy Compressor
Quincy Compressor QMA Series instruction manual