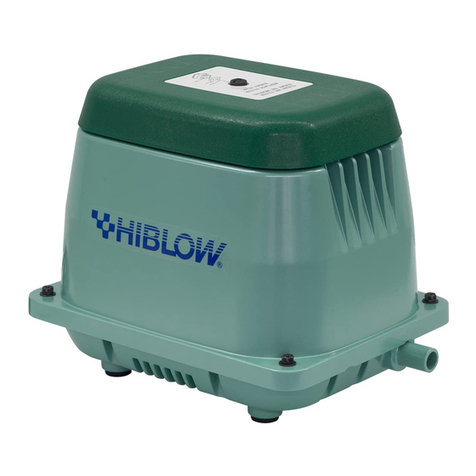
HIBLOW HP Series User manual

1
HP-60/80
HP
HP Series
STRUCTURE AND PART NAMES
HP-60/80
HP-60
HP-80
1995/9
1995/9
─
─
HP-60/80
漓 Filter Cover
滷 Air Filter Gasket
澆 Air Filter
潺 Fitting Boss
潸 Upper Housing
澁 Silencer Wrap
澀 Casing Block
潯 Diaphragm Ring
潛 Diaphragm
濳 Diaphragm Mounting
潭 SP Switch
澂
SP Swwitch Screw
潼 Electromagnet
潘 Actuating Rod
澎 Internal L-Tube
澑 Hose Clamp
濂 Frame
潦
Vibration Control Rubber
澳 Center Plate
澣 Base Gasket
澡 Lower Housing
澤 Power Cord
Air pump Start of production
Discontinuance of production
Goodies Wastewater Supplies
Phone: 1300 282 181 Fax: 1300 282 989
PO Box 1524, Oxenford QLD 4210 35 Scenic Cr, Coomera QLD 4209
Email: [email protected] Web: www.goodies.net.au

2
HP
ReplacingtheChamberBlock
HP-
60/80
REPLACING THE CHAMBER BLOCK
●Besuretounplugthepumpunit.
●Replacethediaphragmsandthevalveswithnewonesatleastonceayeartooneand
ahalfyearregularlyinordertomaintaintheirinitialperformance.
●Forchamberblockreplacement,besuretochangebothchamberblocksatthesametime.
●The rod employs powerful permanent magnets. Therefore, be sure to remove your
watchandanyotherprecisionmachinesbeforeoperationastheymaybeaffectedby
thestrongmagneticforce.
●Donotputtheactuatingrodclosetoamagneticcard,magneticdiskorothermagnetic
mediaasthedatamaybedestroyed.
STEP
1
STEP
1
Toremovetheupperhousing.
(RefertoREMOVING UPPER HOUSING)
Removethesoundabsorber.
PullouttheL-tubefromthecasingblock.
STEP
2
STEP
2
Removethe4screwsholdingthechamberblock
andthecasingblock.
(4screwsoneachside)
STEP
3
STEP
3
Remove 1 U-lock nuts from one side holding the
diaphragmmountingblocktotherod.
●Usethenutdrivertoloosen(ortighten)theU-locknut.
REMOVAL OF THE CHAMBER BLOCKS
CAUTION!
Goodies Wastewater Supplies
Phone: 1300 282 181 Fax: 1300 282 989
PO Box 1524, Oxenford QLD 4210 35 Scenic Cr, Coomera QLD 4209
Email: [email protected] Web: www.goodies.net.au

3
ReplacingtheChamberBlock
HP
HP-
60/80
REPLACING THE CHAMBER BLOCK
STEP
4
STEP
4
STEP
5
STEP
5
STEP
6
STEP
6
Inserttheactuatingrodintothemachinebody.Be
suretofitthepositioningbossonthediaphragm
baseintotheconcavepartoftheframestay.
Secure the diaphragm mounting block on the
other side and tighten washers and U-lock nuts
withthenutdriver.
Make sure that gap between the actuating rod
andtheelectromagnetsiseven.
Removeoneofthediaphragmmountingblocksfrom
the actuating rod and pull out the other diaphragm
mountingblockwiththerod.Afterthat,separatethe
diaphragmmountingblockandtherod.
●Whenpullingouttherod,besurenottocatchtherod
projectionontheleveroftheSPswitch.
●Ifthepumpstopsautomatically,thesafetypinmustbebrokentopreventany
furtherdamagetothepump.Besureallbrokenpiecesareremovedfromthe
unit.(SeeStep8)
STEP
7
STEP
7
Mount the casing block with screws (4screws on
eachside).
AndinsertL-tubeintothenozzleofcasingblock.
Completetheothercasingblockatthesameway.
Fittheactuatingrodbyaligningitwiththegroove
andtightenU-locknutandflatwasherbythenut
driver.
●UsenewU-locknutandwasher,otherwise,U-locknut
mayworklooseandcausemalfunction.
FITTING THE CHAMBER BLOCKS
Goodies Wastewater Supplies
Phone: 1300 282 181 Fax: 1300 282 989
PO Box 1524, Oxenford QLD 4210 35 Scenic Cr, Coomera QLD 4209
Email: [email protected] Web: www.goodies.net.au

4
HP
ReplacingtheChamberBlock
STEP
8
STEP
8
Checkthatthebrokenscrewisremovedfromunit.
●Ifthebrokenpinisleftinsidetheunit,itcangetcaught
in between electromagnets and actuating rod, which
cancausebreakdown.
STEP
9
STEP
9
Insert a new safety pin through the hole on the
terminalside.
(Please Insert safety pin through the spring
electrode,L-shapedleverinsuchorder.)
STEP
10
STEP
10
Installthelockingcollarfromtheothersideofthe
terminalandinsertituntilitclicks.
STEP
11
STEP
11
This completes the replacement of the safety pin
procedure.
Make sure the gaps between L-shaped lever and
taboftheactuatingrodiseven.
●Becarefulnottotouchtheterminalwhenthepoweris
on,testingtheoperatingconditionsasthiswillresultin
anelectricshock.
●Unplugthepumpimmediatelyafterthecheck.
HP-
60/80
REPLACING THE CHAMBER BLOCK
REPLACEMENT OF SAFETY PIN
Goodies Wastewater Supplies
Phone: 1300 282 181 Fax: 1300 282 989
PO Box 1524, Oxenford QLD 4210 35 Scenic Cr, Coomera QLD 4209
Email: [email protected] Web: www.goodies.net.au

5
ReplacingtheChamberBlock
HP
HP-
60/80
REPLACING THE CHAMBER BLOCK
STEP
12
STEP
12
STEP
13
STEP
13
Placetheupperhousingbackonbody.
●Be extremely careful not to catch the sound absorber
ontheupperhousing.
Fastenitwiththebolts.
Then,placethefilterandfiltercoverontheupper
housing. (Refer to FILTER CLEANING AND
REPLACEMENT)
Installthesoundabsorber.
Goodies Wastewater Supplies
Phone: 1300 282 181 Fax: 1300 282 989
PO Box 1524, Oxenford QLD 4210 35 Scenic Cr, Coomera QLD 4209
Email: [email protected] Web: www.goodies.net.au

6
HP
ReplacingtheElectromagnet
HP-
60/80
REPLACING THE ELECTROMAGNET
●Besuretounplugthepumpunit.
●Whenperformingreplacement work, the pumpbodymaystillbe hot and youcould
getburned.Sopleasewaituntilthepumphascooledbeforehandling.
●Be sure to remove the chamber block and the actuating rod before replacing the
electromagnet.
●It is better to let an experienced technician handle the soldering process. Take
precautionsagainstgettingburned.
STEP
1
STEP
1
Cut the wire from terminals on the electromag-
netswithnippers.
●Itisrecommendedthatyoumakeanoteofthewiring.
STEP
2
STEP
2
Loosenthescrew,fixingSPswitchandremoveit.
(There are hexagonal nuts at SP switch side. Be
surenottolosethemastheyfallinsidetheunit.)
STEP
3
STEP
3
Removethehexagonalnutsbythenutdriver.
(7mmwrench)
Pullouttheelectromagnetsfromthepumpbody.
CAUTION
!
REMOVAL OF ELECTROMAGNET
Goodies Wastewater Supplies
Phone: 1300 282 181 Fax: 1300 282 989
PO Box 1524, Oxenford QLD 4210 35 Scenic Cr, Coomera QLD 4209
Email: [email protected] Web: www.goodies.net.au

7
ReplacingtheElectromagnet
HP
HP-
60/80
REPLACING THE ELECTROMAGNET
STEP
4
STEP
4
STEP
5
STEP
5
STEP
6
STEP
6
Insertthewireintothesilicontube,andtieupina
bundle.
Stripthecoatingoffeachwire.
(5-7mmfromtheend)
Connectthewirestotheterminals.
Solderthewirestotheterminals.
Thewirerequiresasolderedconnection.
Mountnewelectromagnetintheunit.
Tightenuphexagonalnutswithnutdriver.
STEP
7
STEP
7
This completes the electromagnet replacement
procedure.
InstalltheSPswitchtotheframewiththescrews.
●Becarefulofthedirectionofswitchlever.(Refertothe
pictures)
MOUNTING THE ELECTROMAGNET
Goodies Wastewater Supplies
Phone: 1300 282 181 Fax: 1300 282 989
PO Box 1524, Oxenford QLD 4210 35 Scenic Cr, Coomera QLD 4209
Email: [email protected] Web: www.goodies.net.au
Other manuals for HP Series
3
This manual suits for next models
2
Table of contents
Other HIBLOW Water Pump manuals
Popular Water Pump manuals by other brands
SFA
SFA Sanifast ZH190 Operating & installation manual

Alemite
Alemite 3400 Series Service guide

DAB
DAB GENIX VT Series Instruction for installation and maintenance

Pentair
Pentair HYPRO 9260 Series Original instruction manual

Graco
Graco Monark C Series Instructions-parts list

Crivit
Crivit Air-Pump 292829 instruction manual

Colibri
Colibri Rigi Usage instructions

Annovi Reverberi
Annovi Reverberi AR320BPTWINTOP-C/C instruction manual

DRESSER Wayne
DRESSER Wayne 4/Vista Series Installation & operation

Becker
Becker SV 130 operating instructions

Gardena
Gardena 21000 inox operating instructions

Graco
Graco Husky 715 Instructions-parts list