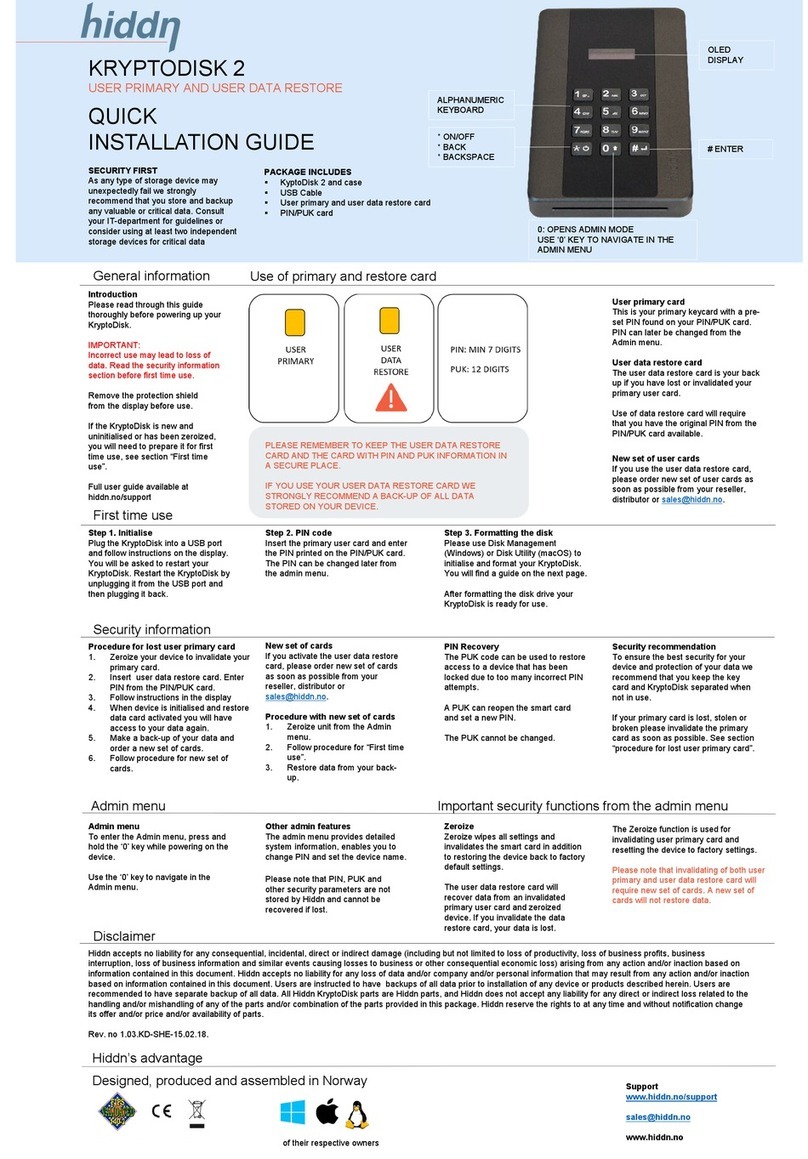
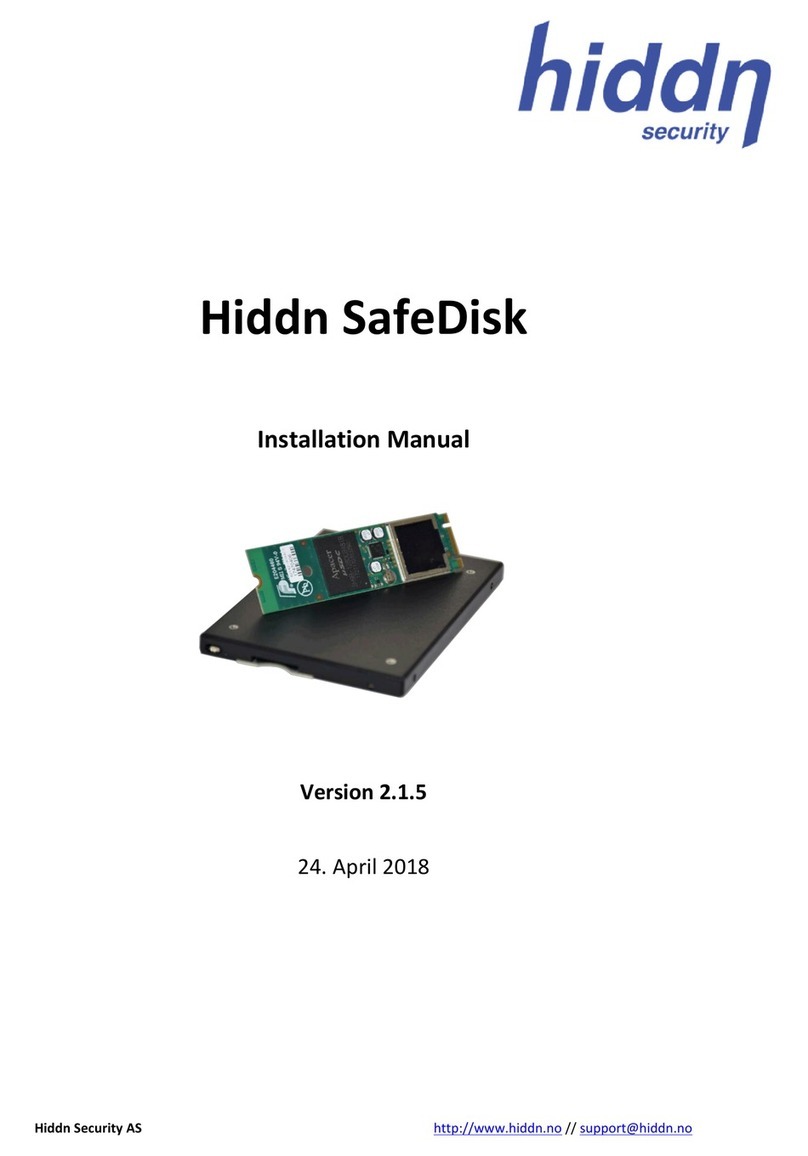
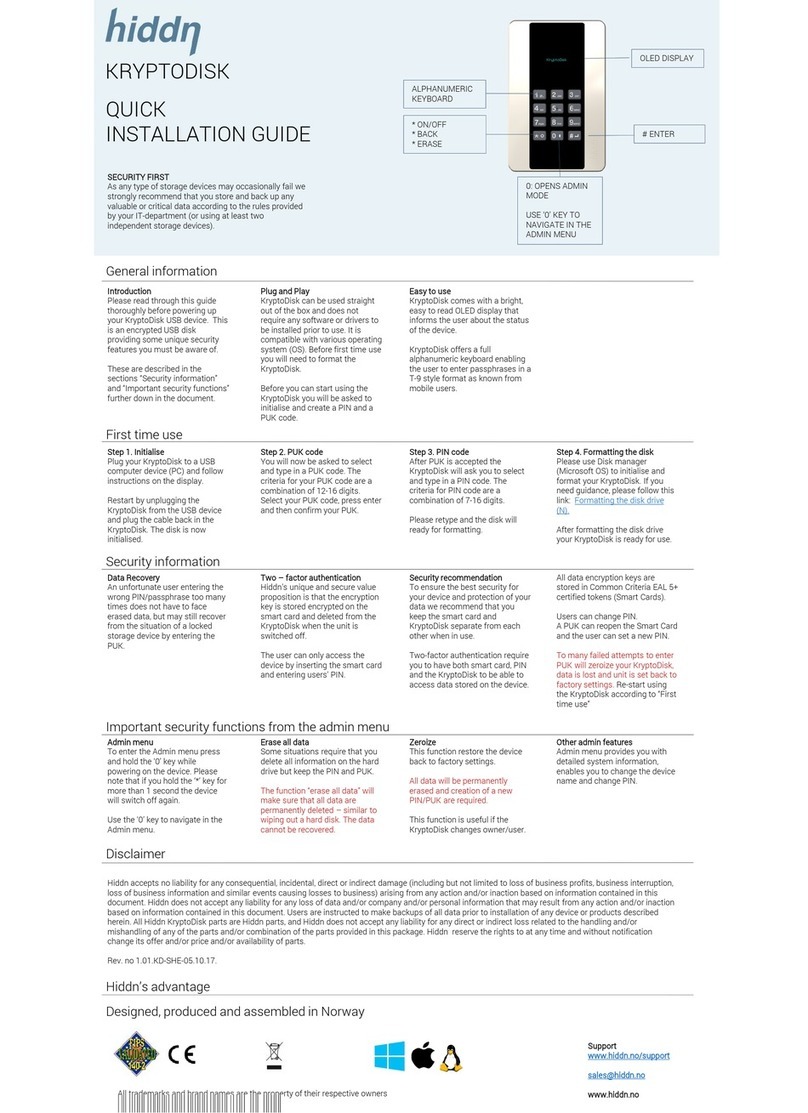
Hiddn KryptoDisk 2 User manual


2
KRYPTODISK 2 | SELFKEY
Copyright © Hiddn, 2018. All rights reserved.
Windows is a registered trademark of Microsoft
Corporation. All other trademarks and copyrights
referred to are the property of their respective owners.
Distribution of modified versions of this document is
prohibited without the explicit permission of the
copyright holder. Distribution of the work or derivative
work in any standard (paper) book form for commercial
purposes is prohibited unless prior permission is
obtained from the copyright holder. Documentation is
provided as is and all express or implied conditions,
representations and warranties, including any implied
warranty of merchantability, fitness for a particular
purpose or noninfringement, are disclaimed, except to
the extent that such disclaimers are held to be legally
invalid.
KD02-UM-SD1-01.03-ENG-29.11.18

3
KRYPTODISK 2 | SELFKEY
1. Introduction .................................................................................................................................... 4
2. First time use...................................................................................................................................5
Initialize the KryptoDisk 2 encryption module....................................................................................5
Initialize and format the KryptoDisk 2 storage device........................................................................5
Change PIN code .................................................................................................................................5
3. Daily use..........................................................................................................................................6
4. How to respond in case of emergency [FAQs]................................................................................6
My Smart Card was lost or stolen.......................................................................................................6
My KryptoDisk 2 was lost or stolen.....................................................................................................6
My KryptoDisk 2 and Smart Card was lost or stolen........................................................................... 6
I believe there is malware on my device ............................................................................................6
I forgot the PIN code for my Smart Card ............................................................................................7
I want to return the KryptoDisk 2 and the Smart Card to Factory Default.........................................7
The KryptoDisk 2 stops responding when set up as a bootable disk..................................................7
5. Security recommendations.............................................................................................................7
Store the KryptoDisk 2 and the Smart Card separately when not in use ........................................... 7
Remove Smart Card from the KryptoDisk 2 when in use ...................................................................7
Back up your data ............................................................................................................................... 8
Understand the concepts of zeroizing ................................................................................................ 8
Understand the principles behind Hiddn’s unique security technology ............................................8
6. Important information about Hiddn’s security principles ..............................................................8
7. Passphrase, PUK and PIN requirements ......................................................................................... 9
8. Admin menu.................................................................................................................................... 9
System info..........................................................................................................................................9
Change PIN code .................................................................................................................................9
Set name ............................................................................................................................................. 9
Zeroize KryptoDisk 2 ........................................................................................................................... 9
Erase All Data ....................................................................................................................................11
Admin Battery Status ........................................................................................................................11
Set Keep Alive ...................................................................................................................................11
9. Initializing and formatting the hard drive .....................................................................................12
Formatting a hard drive in Windows ................................................................................................12
Formatting a hard drive on Mac .......................................................................................................14
10. Warranty and RMA Information ...............................................................................................15

4
KRYPTODISK 2 | SELFKEY
1. Introduction
The KryptoDisk 2 is the perfect solution for securely transporting data between the office and home, travelling
with sensitive data, working between office branches and moving sensitive data between systems and
platforms.
There are two ways of using the KryptoDisk 2 - either as a generic external storage disk, or as a bootable
external disk. As an external storage disk, it provides you with a secure USB environment for file storage, while
using it as a bootable disk enables you to use virtually any computer and still work in a secure environment.
The KryptoDisk 2 features a superior level of security and offers a GDPR – proof guarantee that secures you
against GDPR breaches and potential fines if your KryptoDisk 2 is lost or stolen. Your data is protected with
military grade AES 256-bit hardware encryption and a two-factor authentication. The data encryption key is
stored on a Common Criteria EAL 5+ certified smart card and is deleted from the KryptoDisk 2 when the device
is powered off.
NB: The GDPR-proof guarantee is only valid when the smart card is kept separate from the device.
Upon first use, simply insert the included Smart Card, containing your encryption suite, into your KryptoDisk 2,
select a PUK and PIN code, and connect the device to any computer. For a detailed walkthrough, please refer to
section «First time use”
The package includes the following:
KryptoDisk 2
USB Cable
Smart Card

5
KRYPTODISK 2 | SELFKEY
2. First time use
This section contains instructions on how to set up the KryptoDisk 2 during first time use. Before you can start
using the KryptoDisk 2, you must initialize (i.e. pair) the device and the Smart Card (included), and thereafter
format the hard drive from your computer's operating system.
Unlike most other drives on the market, Hiddn’s two-factor encryption products cannot be pre-formatted. This
is a security, precaution feature and a consequence of how the encryption module inside the KryptoDisk 2 is
designed. When you pair the KryptoDisk 2 with the Smart Card, the data encryption key is transferred to the
device for the first time. That means that any pre-installed data (e.g. partition tables) would be unreadable. To
be able to use the KryptoDisk 2 with your computer, the KryptoDisk 2 therefore needs to be formatted upon
first use.
When the KryptoDisk 2 is initialized and formatted, it is ready to be used together with your preferred device.
Initialize the KryptoDisk 2 encryption module
1. Power up and insert the Smart Card in your KryptoDisk 2.
2. Connect the device to your computer using the included USB cable.
3. The device will prompt you to confirm initialization with the Smart Card. Press the "9"-key followed by the
"#"-key to confirm.
4. Wait until the device prompts you to restart, then disconnect the USB cable.
5. Reconnect the USB cable with the Smart Card still inserted in the device.
6. The device will prompt you to select and confirm a PUK code. Enter your code and press the "#"-key to
proceed. Please refer to section 7 – Passphrase, PUK and PIN requirements to ensure that your PUK code
is valid. If you don't want to set a PUK code, leave the field blank and press the "#" key to proceed.
7. The device will prompt you to select and confirm a PIN code. Enter your code and press the "#"-key to
proceed. Please refer to section 7 – Passphrase, PUK and PIN requirements to ensure that your PIN code is
valid.
The encryption module inside KryptoDisk 2 is now initialized and successfully paired with the Smart Card.
Initialize and format the KryptoDisk 2 storage device
Before you can start using the KryptoDisk 2, the storage device must be initialized and formatted. For
instructions on this step, please refer to section 9 – Initializing and formatting the storage device.
Change PIN code
For instructions on this step, please refer to section 8 – Admin menu.

6
KRYPTODISK 2 | SELFKEY
3. Daily use
This section contains instructions on the daily use of KryptoDisk 2.
NB: We strongly recommend that you remove the Smart Card from the KryptoDisk 2 when the authentication
process is complete and the "Disk Unlocked" message appears in the display, especially when you are working
in public spaces.
1. Power on the KryptoDisk 2
2. Insert the Smart Card
3. Enter your PIN code
4. Connect the KryptoDisk 2 to your computer (or similar device) using the included USB cable. It is now
unlocked and ready for use
5. Remove the Smart Card from the KryptoDisk 2. We recommend that keep the Smart Card secure and
separate to your KryptoDisk 2.
4. How to respond in case of emergency [FAQs]
This section contains procedures for emergency situations like a lost, stolen or malfunctioning card or device,
as well as information on how to use the Smart Card.
My Smart Card was lost or stolen
If you have lost control of your Smart Card, you should zeroize the KryptoDisk 2 immediately. Please refer to
section 8–Admin menu and follow the procedure Zeroize without the Smart Card inserted.
NB: If your Smart Card is lost or stolen, you can order a new one from our website www.hiddn.no
My KryptoDisk 2 was lost or stolen
The tamper-proof hardware encryption module in the KryptoDisk 2 provides a level of security that is sufficient
for the Norwegian Army and GDPR requirements, amongst others. The AES-256 encryption keeps your data
safe against brute force attacks.
If you have access to a second KryptoDisk 2 the encryption key on the Smart Card can be deleted by zeroizing
the card while on battery power as described in section 8 – Admin menu under Zeroize the Smart Card and
optionally the KryptoDisk 2 – Battery power.
To destroy the Smart Card completely cut up the RFID chip on the card.
My KryptoDisk 2 and Smart Card was lost or stolen
In addition to being tamper-proof, the Smart Card contains a secure retry-counter that protects the PIN code.
After 5 unsuccessful attempts the card will lock, and the only way to reactivate it is to enter the PUK code.
After 10 unsuccessful PUK entries the card will be permanently locked.
If your KryptoDisk 2 is lost together with the Smart Card, we strongly recommend that you eliminate any
record of the PUK and PIN codes. If you follow these measures, the data on your device is considered secure
even though the card was lost along with the device.
I believe there is malware on my device
The KryptoDisk 2 features a cryptographic erase function that removes all possible access to any data on the
device (including the malware). Technically this is done by destroying or invalidating the encryption key used
to decrypt the data. The KryptoDisk 2 can then be used safely again, but all the data on the device prior to the
cryptographic erase will be unrecoverable.

7
KRYPTODISK 2 | SELFKEY
Please refer to section 0 – Admin menu for instructions on how to perform a cryptographic erase.
I forgot the PIN code for my Smart Card
If you forget your PIN code, you can use the PUK code to restore your data and get access to your KryptoDisk 2
again.
1. Enter a wrong PIN code 5 times to trigger a prompt to enter the PUK code
2. Enter your PUK code to unlock the KryptoDisk 2
3. Reset your PIN code from the Admin menu. Please refer to section 0 – Admin menu for instructions
I want to return the KryptoDisk 2 and the Smart Card to Factory Default
Some situations might require you to instantly zeroize your Smart Card. An example is to reuse the KryptoDisk
2 within the organization. The emergency zeroize function allows you to do this without entering the Admin
menu.
1. While not connected to USB cable, insert your Smart Card into the KryptoDisk 2
2. Power on the device
3. Press and hold the ‘3’, ‘*’ and ‘#’-keys for at least 1 second until “Card Zeroized” is shown
4. Connect the USB cable and “Zeroize Completed is shown followed by “Please restart.
5. Remove and reconnect the USB cable to verify that the KryptoDisk 2 is reset to Factory Default by
observing that the KryptoDisk 2 shows “Initialize [Y/N]”
The KryptoDisk 2 stops responding when set up as a bootable disk
If booting from the KryptoDisk 2, the operating system might cut power to the USB bus during start-up. To
prevent the KryptoDisk 2 to stop responding it might be necessary to set Keep Alive to 1 second. This will
enable retransmitting the encryption key from the Smart Card to the KryptoDisk 2 after the short loss of
power.
Please refer to section 8 – Admin menu for instructions.
5. Security recommendations
This section contains our recommendations on how to fully utilise the KryptoDisk 2's security features. The
KryptoDisk 2 is an advanced security product capable of providing a very high level of data protection.
However, as with any other product, security can be compromised by human error and wrong use. In this
section, we have outlined some recommendations on how to establish good security habits.
Store the KryptoDisk 2 and the Smart Card separately when not in use
The KryptoDisk 2 relies on a two-factor authentication scheme using a PIN code and a smart card. Effective
protection requires that the authentication factors are kept separate from the device they protect when it is
not in use. To ensure that you do not compromise this protection, we strongly recommend that the Smart
Card is stored separated from the KryptoDisk 2.
Remove Smart Card from the KryptoDisk 2 when in use
We strongly recommend that you remove the Smart Card from the KryptoDisk 2 after the authentication
process is complete, especially when working in a public place. As soon as the "Disk Unlocked" message shows
in the display you can remove the card and store it separately from the KryptoDisk 2.

8
KRYPTODISK 2 | SELFKEY
Back up your data
Make sure that you have a secure backup of your data, in case your device is lost, stolen or malfunctions.
Understand the concepts of zeroizing
Zeroizing is a key security feature in the KryptoDisk 2, which allows the user to disable communications
between the device and the Smart Card. For an introduction to the concept of zeroizing, please refer to section
6 – Important information about Hiddn’s security principles.
For information on how to zeroize and which method to use, please refer to section 8 – Admin menu.
Understand the principles behind Hiddn’s unique security technology
To increase your familiarity with the security concepts underpinning the KryptoDisk 2, please refer to section 6
– Important information about Hiddn’s security principles.
6. Important information about Hiddn’s security principles
This section contains information on the key principles of Hiddn's encryption and authentication technology,
which lay at the core of the KryptoDisk 2's encryption module.
The KryptoDisk 2 derives its matchless security from a two-factor authentication scheme, where the factors
are something you know – a PIN code – and something you have – a smart card. The key used to decrypt the
data on the KryptoDisk 2 is stored on the Smart Card, and it is securely transferred to the device only if the
correct PIN code is entered. Thus, the data on the device is impossible to access unless both factors are
present.
The encryption solution used in the KryptoDisk 2 uses a Common Criteria EAL5+-approved Smart Card that
contains two different keys.
The data encryption key ("DEK") is the key that is used to encrypt and decrypt the data stored on the device.
Without the DEK, the data is completely unreadable and impossible to interpret.
The communication key is the key that allows the KryptoDisk 2 and the Smart Card to communicate securely,
which is necessary for the DEK to be transferred safely.
During initialisation, the communication key is copied from the Smart Card to the KryptoDisk 2 in a non-
repeatable process, thus opening a secure communication channel between the device and that specific smart
card. Because the encryption module inside the KryptoDisk 2 only can hold one communication key, it is
impossible to unlock the KryptoDisk 2 using another Smart Card, unless the device or card is zeroized.
Each time you use the KryptoDisk 2, the DEK is transferred from the Smart Card to the device, allowing you to
decrypt and access the data on the drive. If the device is unplugged from the computer, the DEK is deleted and
must be transferred from the Smart Card again. This ensures that the data is secure even if the KryptoDisk 2 is
lost or stolen.
Zeroizing is the process of disabling communications between the KryptoDisk 2 and its matching Smart Card,
and the opposite process of Initializing. It is a key security feature, because the communication key can only be
transferred once from a Smart Card. Thus, zeroizing the KryptoDisk 2 ensures that a lost or stolen Smart Card
can never be used to access the data on the device. Please refer to section 8 – Admin menu for information on
how to zeroize your KryptoDisk 2.
NB: Zeroizing must be performed with care, as it will make all the data on the device unrecoverable as the DEK
is no longer in the Smart Card. Before zeroizing we recommend you to take back-up of all data on the
KryproDisk 2. If you require the possibility to restore your data, consider our solution using two smart cards –
a User Primary Card and a User Data Restore Card. For more information, please refer to our website hiddn.no.

9
KRYPTODISK 2 | SELFKEY
7. Passphrase, PUK and PIN requirements
This section contains information on the requirements for PUK and PIN codes on your KryptoDisk 2 device.
Between 7-15 digits in length
Cannot contain only repetitive numbers, e.g. (3-3-3-3-3-3-3)
Cannot contain only consecutive numbers, e.g. (1-2-3-4-5-6-7), (7-8-9-0-1-2-3-4), (7-6-5-4-3-2-1)
After 5 unsuccessful PIN entries the device is locked and PUK entry is required
After 10 unsuccessful PUK entries the device is permanently locked, and any stored data will be lost
You can create a memorable word, name, phrase or any other alphanumerical PIN combination by simply
pressing the key with the corresponding letters on it. Examples of alphanumerical PIN codes include:
PIN code “Password”:
7(PQRS) 2(ABC) 7(PQRS) 7(PQRS) 9(WXYZ) 6 (MNO) 7(PQRS) 3(DEF)
PIN code “HIDDN”:
4(GHI) 4(GHI) 3(DEF) 3(DEF) 6(MNO)
8. Admin menu
This section contains information on the Admin menu on the KryptoDisk 2, which is used for customization and
administration of the device. Some of the controls in the Admin menu are only visible with the smart card
inserted – these are marked with in the list below. Others are only available on battery power – these
are marked with battery icon
To enter the Admin menu, press and hold the "0"-key while powering on the device. To navigate the menu,
press the "0"-key, and press the "#"-key to select an option. Select the "Exit" option to leave the menu.
System info
This provides a list of version numbers and serial numbers for your device, which is useful if you must contact
customer support for any reason. The smart card must be inserted for smart card information to be displayed.
Change PIN code
This allows you to change the PIN code of your device. You will be prompted to input your old PIN code,
followed by a prompt to enter the new code, and finally a prompt to confirm the new code. The PIN code must
comply with the requirements outlined in section 7 – Passphrase, PUK and PIN requirements.
Set name
This allows you to define a name for your KryptoDisk 2. The device name will appear in the display during start-
up, allowing you to easily distinguish between multiple devices. If you assign a name to your device, the start-
up process will be 2 seconds delayed allowing the name to appear.
You will be prompted to enter a device name. The KryptoDisk 2 uses alphanumeric inputs for this function,
allowing you to input letters as well as numbers using the keypad. Confirm by pressing the "0/enter" key. To
remove a stored name, simply erase all the characters using the "*" key and save an empty name.
Zeroize KryptoDisk 2
This allows you to zeroize your KryptoDisk 2 and Smart Card.
Both the KryptoDisk 2 and the corresponding Smart Card can be zeroized, either separately or together. This
disables all communication between the KryptoDisk 2 and the paired Smart Card. When you zeroize, the data

10
KRYPTODISK 2 | SELFKEY
encryption key is deleted from the Smart Card, meaning that the data on the device is lost. Following the
zeroize process, a new data encryption key is generated in the Smart Card and the KryptoDisk 2 must be
initialized again.
There are various alternatives for zeroizing, and which to use depends on what your objective is. The
alternatives, their uses and their consequences are listed below.
NB: When you zeroize the KryptoDisk 2 or Smart Card, the data on the device is lost. Make sure you back up
your data regularly.
Zeroize the KryptoDisk 2 after loss of Smart Card
This method is used if your Smart Card is lost, stolen or malfunctioning.
When you zeroize without the Smart Card inserted, the encryption module in the KryptoDisk 2 deletes the
communication key stored in the device, thus making it unable to communicate with the Smart Card. The data
stored on the device will be permanently lost.
To zeroize without the Smart Card inserted, power up your device while connected to USB power and enter
the Admin menu. Select the Zeroize option and confirm by entering "Y" (press the 9-key). If you want to cancel,
enter "N" (press the 6-key). The device will confirm and prompt you to restart the device. Disconnect and
reconnect the USB cable to complete the zeroize process.
NB: After this process, the data on the device is lost even if you recover your Smart Card. The recovered card
must also be zeroized and used to perform a fresh initialisation of the KryptoDisk 2.
Zeroize both the Smart Card and the KryptoDisk 2 on USB power
This method is used if you are replacing your Smart Card or transferring ownership of the KryptoDisk 2.
When you zeroize both the Smart Card and the KryptoDisk 2, the encryption module in the KryptoDisk 2
deletes both the communication key stored in the device and the communication key stored on the card. This
reverts the KryptoDisk 2 back to factory settings.
To zeroize both the Smart Card and the KryptoDisk 2, power up your device with the card inserted and enter
the Admin menu. Select the Zeroize option and confirm by entering "Y" (press the 9-key). If you want to cancel,
enter "N" (press the 6-key). The KryptoDisk 2 will confirm and prompt you to restart the device. Disconnect
and reconnect the USB cable, and the device will confirm that the zeroization was successful.
Zeroize the Smart Card on Battery power
This method is used if you are replacing your Smart Card or transferring ownership of the KryptoDisk 2 and
cant access a computer.
When you zeroize both the Smart Card and the KryptoDisk 2, the encryption module in the KryptoDisk 2
deletes both the communication key stored in the device and the communication key stored on the card. This
reverts the KryptoDisk 2 back to factory settings.
To zeroize both the Smart Card and the KryptoDisk 2, power up your device with the card inserted and enter
the Admin menu. Select the Zeroize option and confirm by entering "Y" (press the 9-key). If you want to cancel,
enter "N" (press the 6-key).
NB: While you are running on battery power, the device will only zeroize the Smart Card. Until the KryptoDisk
2 is connected to USB power it will not be zeroized. To zeroized the Kryptodisk 2 you will be prompted to
connect the device to a computer. When connected to USB power with the Smart Card inserted, the
KryptoDisk 2 will start to zerioze and confirm the operation when completed.

11
KRYPTODISK 2 | SELFKEY
NB: When you zeroize the Smart Card without zeroizing the KryptoDisk 2 at the same time (i.e. when you
zeroize while on battery power), the Smart Card will zeroize the next KryptoDisk 2 it is inserted into (if it's
connected to USB power). In case you have several KryptoDisks, please make sure you use the card with the
proper device.
Erase All Data
This allows you to erase the data on your KryptoDisk 2 through a method called cryptographic erase. Because
it can be done on battery power without connecting to the computer, it can be useful if you suspect that there
is malicious software on your device. When you perform a cryptographic erase, the encryption key on the
Smart Card is deleted and a new one is generated, which makes everything on your device unrecoverable.
Only perform this action if you are sure that you want to delete all the data on your KryptoDisk 2.
To perform a cryptographic erase, power up your device with the Smart Card inserted and enter the Admin
menu. Select the Erase All Data option and confirm by entering "Y" (press the 9-key). If you want to cancel,
enter "N" (press the 6-key). This action requires user authentication, and you will be prompted to enter your
PIN code if you haven't already done it during this session. When you have confirmed the process and been
authenticated, "Device erased" will appear in the display.
To continue using the device, the drive must be initialized and formatted again. Please refer to section 9 –
Initializing and formatting the storage device for instructions. You don't need to initialize the encryption
module.
Admin Battery Status
This displays the voltage (V) and charge (%) of the battery in the KryptoDisk 2.
Set Keep Alive
This allows you to activate and set the timer for keep alive mode. This mode allows you to establish a pre-set
timer that keeps the KryptoDisk 2 unlocked after the device is unplugged (the timer can be set to maximum
240 seconds). This can be useful if the KryptoDisk 2 is to be moved from one computer to another in a secure
environment. This also needs to be used if booting from the KryptoDisk 2 and the operating system cuts
power to the USB bus during start-up.
To activate this mode, enter the Admin menu. If the KryptoDisk 2 is connected to a computer, you will be
prompted to disconnect it. The display will reveal whether keep alive mode is currently active, where "0"
means inactive. Enter how long (in seconds) you want the device to be unlocked after unplugging. The "*"-key
functions as a backspace key. Press the "#"-key to save.
To disable the feature, enter "0" or simply delete the current setting and confirm.
NB: This functionality, while practical, can be a severe security liability if misused. If someone were to gain
access to your KryptoDisk 2 while it is open and connected, they can steal it, connect it to their own computer
and gain access to your data.
Only activate the “keep alive” feature if you are certain your environment is safe and that you understand
the possible ramifications. We recommend you to re-sett this feature when not in a secure environment.

12
KRYPTODISK 2 | SELFKEY
9. Initializing and formatting the hard drive
Formatting a hard drive in Windows
NB: Formatting in Windows requires admin access.
1. Open Disk Management
Open the Disk Management tool. How to do this depends on your version of Windows, but usually you can
press the Windows key and type “Run” (consult Microsoft help pages to find the corresponding command if
you have a native language installation of Windows). In the resulting dialogue box, enter diskmgmt.msc
The disk management tool will open and you can start formatting the disk.
2. Initialize disk
Disk initialisation should appear automatically. If it doesn’t, right-click on the icon and follow the instructions.
3. Partition and format disk
Once Disk Management opens, look for the new drive in the list.
NB: KryptoDisk 2 is a new hard drive that needs to be partitioned before use. In Windows, partitioning needs
to be done before a hard drive can be formatted. The KryptoDisk 2 will probably be on a dedicated row
labelled Disk 1 (or 2, etc.) and will say Unallocated.
Tap-and-hold or right-click anywhere on it and choose New Simple Volume.
Tap or click Next > on the New Simple Volume Wizard window that appears.
Tap or click Next > on the Specify Volume Size step to confirm the size of the drive you're creating.
Tap or click Next > on the Assign Drive Letter or Path step
Windows will now partition the drive, a process that will only take a few seconds on most computers. In
Windows 10, Windows 8, and Windows 7 you will be asked to format the disk.

13
KRYPTODISK 2 | SELFKEY
NTFS is the most recent file system available for Windows systems, and is recommended if you only intend to
use your KryptoDisk 2 with Windows computers. If you want to move data between computers with different
operating systems, e.g. Mac or Linux computers, select exFAT.
Our suggested settings for Windows-exclusive use are as follows:
File
System
Allocation unit size
Volume
label
Perform a quick format
Enable file/folder
compression
NTFS
Default
[Your
choice]
Yes
No
Our suggested settings for inter-platform use are as follows:
File
System
Allocation unit size
Volume
label
Perform a quick format
Enable file/folder
compression
exFAT
Default
[Your
choice]
Yes
No

14
KRYPTODISK 2 | SELFKEY
Formatting a hard drive on Mac
Launch Disk Utility, located in /Applications/Utilities.
1. Initialize disk
Disk initialisation will most likely pop up automatically. If not please click on the disk icon and a wizard will take
you further.
2. Partition and format disk
From the left-hand pane, select the drive you wish to format. Click the Erase button at the top of the Disk
Utility window, or select Erase from the Edit menu. A window should pop up resembling the image below.
Mac OS Extended (Journaled) is the default MacOS file system, and is recommended if you only intend to use
your KryptoDisk 2 with Apple computers. If you want to move data between computers with different
operating systems, e.g. Windows or Linux computers, select exFAT.
Our suggested settings for Mac-exclusive use are as follows:
Name
Format
Scheme
[Your choice]
Mac OS Extended (Journaled)
GUID Partition Map
Our suggested settings for inter-platform use are as follows:
Name
Format
Scheme
[Your choice]
exFAT
GUID Partition Map
When you have configured your settings, click the Erase button.
Disk Utility will erase and format the selected drive, resulting in a single volume being created and mounted on
your Mac’s desktop.
Click the Done button.

15
KRYPTODISK 2 | SELFKEY
10.Warranty and RMA Information
Two Year Warranty:
Hiddn offers a 2-year warranty on the KryptoDisk 2 against defects in materials and workmanship under normal
use. The warranty period is effective from the date of purchase either directly from Hiddn or an authorised
reseller.
Disclaimer and terms of warranty:
The warranty becomes effective on the date of purchase and must be verified with your sales receipt or invoice
displaying the date of product purchase. Hiddn will, at no additional charge, repair or replace defective parts
with new parts or serviceable used parts that are equivalent to new in performance. All exchanged parts and
products replaced under this warranty will become the property of Hiddn.
This warranty does not extend to any product not purchased directly from Hiddn or an authorised reseller or to
any product that has been damaged or rendered defective: 1) as a result of accident, misuse, neglect, abuse or
natural or personal disaster, or any unauthorised disassembly, repair or modification or failure and/ or inability
to follow the written instructions provided in this instruction guide: 2) by the use of parts not manufactured or
sold by Hiddn; 3) by modification of the product; or 4) as a result of service, alternation or repair by anyone
other than Hiddn and shall be void. This warranty does not cover normal wear and tear.
No other warranty, either express or implied, including any warranty or merchantability and fitness for a
particular purpose, has been or will be made by or on behalf of Hiddn or by operation of law with respect to the
product or its installation, use, operation, replacement or repair.
Hiddn is not liable for, and does not cover under warranty, any costs associated with servicing and/or the
installation of the Product/s.

16
KRYPTODISK 2 | SELFKEY
Other manuals for KryptoDisk 2
2
Table of contents
Other Hiddn Storage manuals
Popular Storage manuals by other brands
HP
HP storevirtual 3200 user guide
Quantum
Quantum LTO-8 HH SAS Technical reference manual
iStarUSA
iStarUSA BPN-DE340SS Series user manual

American Megatrends
American Megatrends StorTrends 1100-P Specifications
Verbatim
Verbatim Store 'n' Go Hi-Speed USB quick start guide
SanDisk
SanDisk Shoot & Store brochure
