Customer service:
1. Your order on Amazon, Contact Seller Service. Reply within 24 hours.
2. Email Service:
Reply within 24 hours.
3. Facebook Service. Visit Hieha official website:
www.hieha.net
Reply within 12 hours except for the weekend.
Also the QA part on the product detailed page, it will include
youtube links that solves frequently asked question. 95% of the
questions would resolve after checking it.
We have done our best to deliver a high-quality product and
we’ll continue doing so, Hieha does not recommend to install
the product yourself.
We recommend having it professionally installed by a certified
professional.
If you decide to install the unit by yourself please do read the
user manual carefully and follow the installation steps.
Do not hesitate to get in touch with us if you meet any difficulties
installing the unit we are always available to answer any of your
questions and more than happy to take your suggestions.
We try our best to be as responsive as possible, you can always
get in touch with us through:
About This Manual
Important Tips
To entirely understand how to properly install and use your new Hieha product, it is
recommended to read this entire user’s manual and keep it in a safe place for future
reference.
Read the Entire Manual
-Keep The Manual
-Follow All Instructions
-Clean with A Dry Cloth Only
-Do Not Use Or Operate Near Water
-Do Not Defeat Any Safety Features
1.Test the unit before installation.
2.Use the reset hole if your car stereo malfunctions.
3.Check our Contact Us info at the last page of the User’s manual.
Catalogue
Basic Parameters
Features of This Product
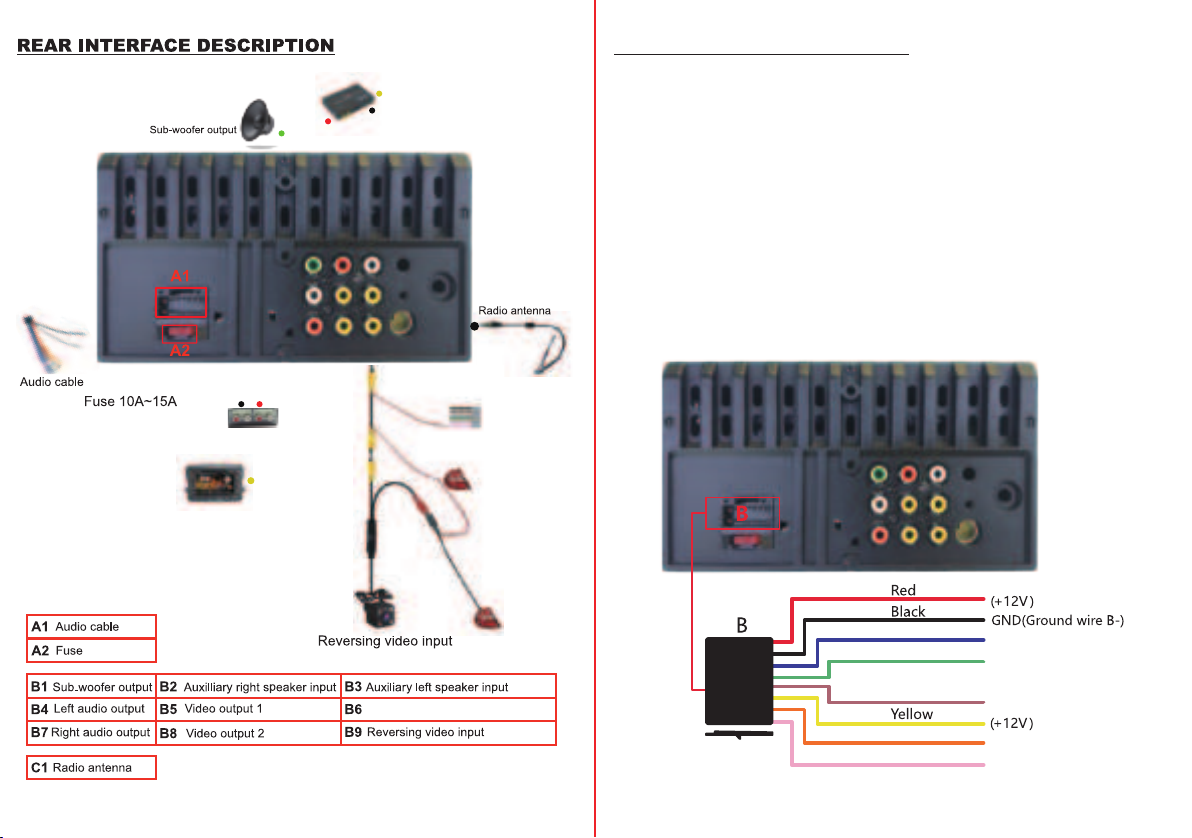
Rear Interface Description
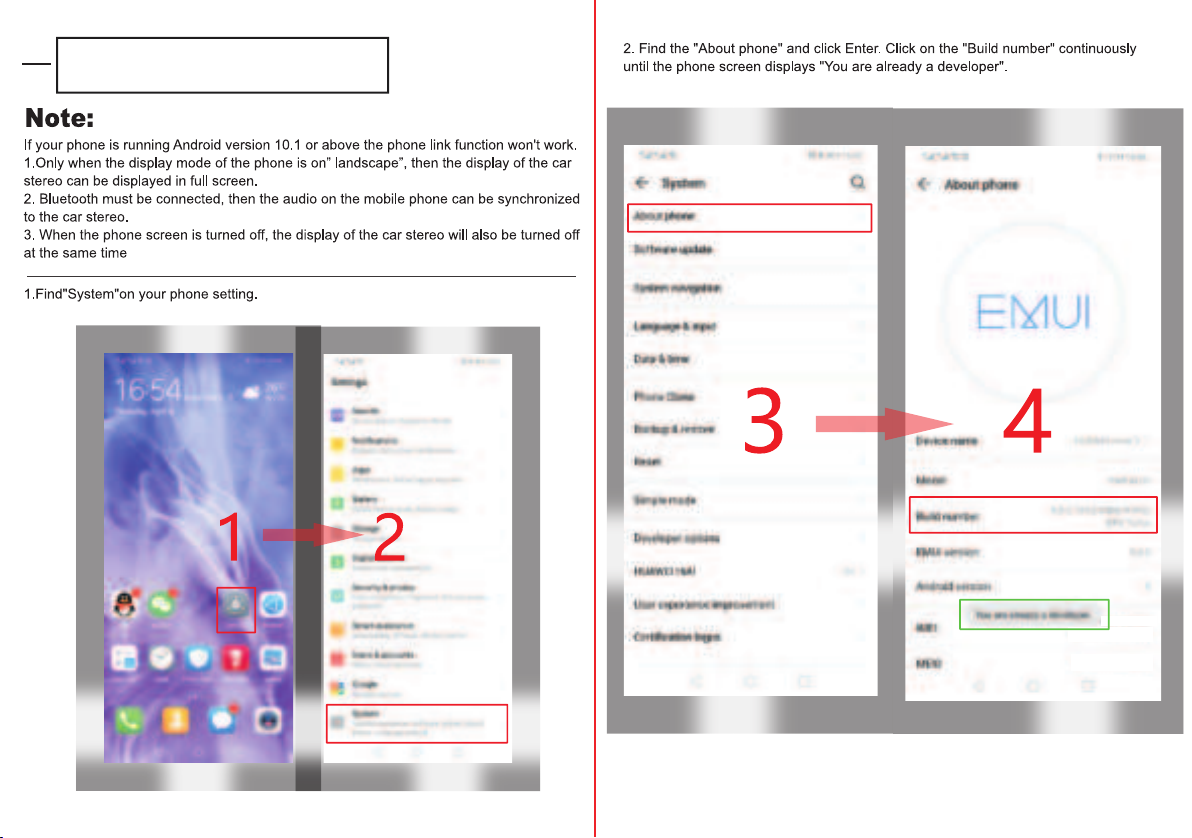
Mirror Link Function
Functional Description
Test Before Installation
............................................................................
.......................................................
...........................................................
......................................................................
..............................................................
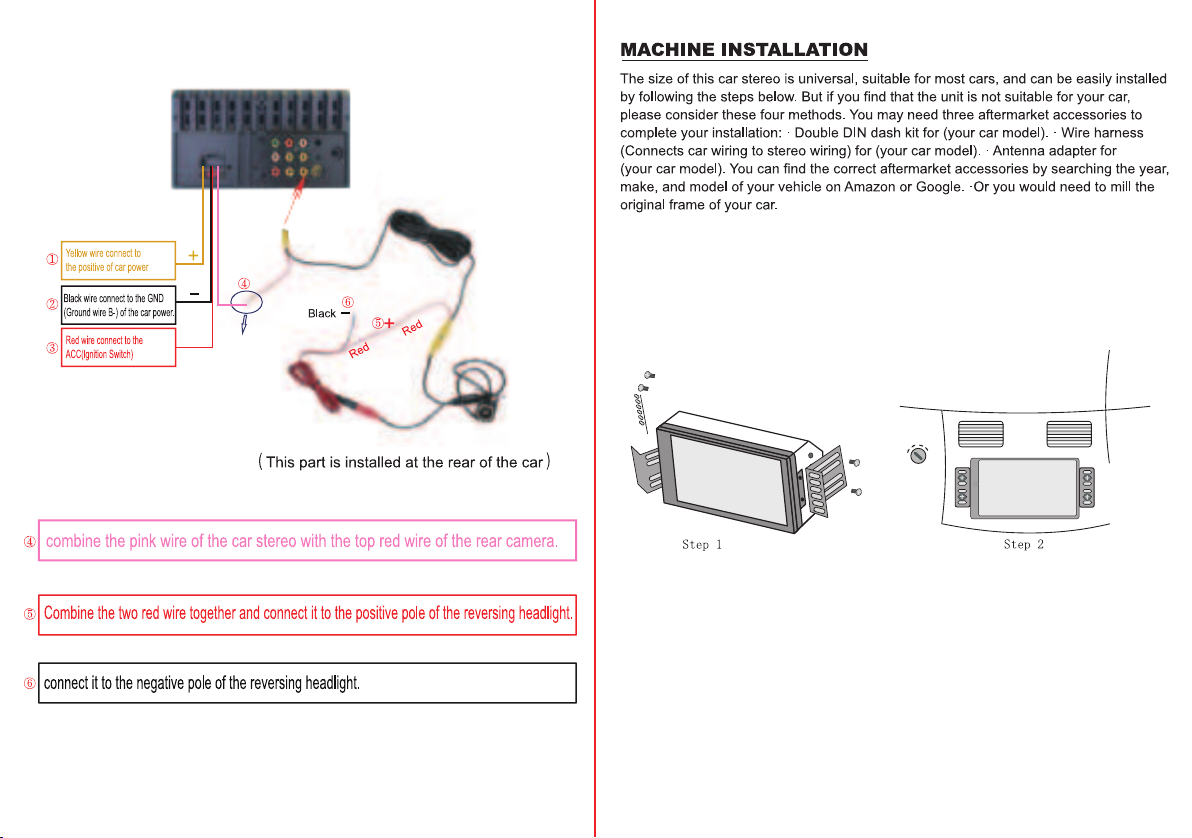
Machine Installation
Carplay/Android Auto Function
Mirror Link for iPhone
Mirror Link for Android
Radio Function
Bluetooth Function
USB Play Function
AV IN Function
Page 3
Page 2
Page 4 to 6
Page 7 to 10
Page 12 to 13
Page 16 to 19
Page 20 to 21
Page 23 to 24
Page 24 to 26
Page 26
Page 14
Page 15
Page 11
Page 22
.....................................................................
.....................................................................................
....................................................................................
................................................................
..............................................................................................
.........................................................................................
...........................................................................................
.................................................................................................
...........................................
- 01 -