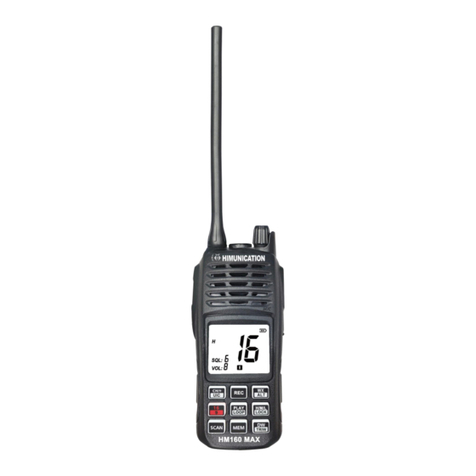
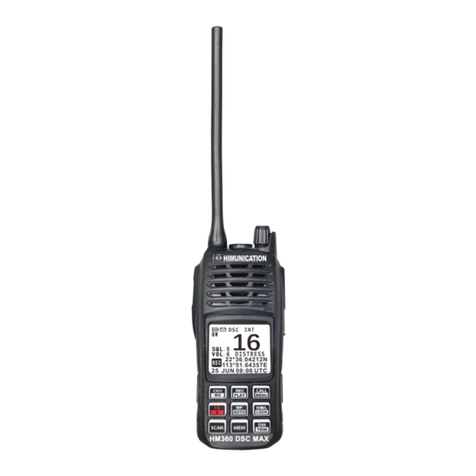
Himunication HM-360DSC User manual

- 1 -
Himunication HM-360DSC
Table of
contents
Introduction ............................................................................................................................2
Waterproof designWarning....................................................................................................3
Key description.......................................................................................................................4
Key function ...........................................................................................................................5
Display ...................................................................................................................................5
Menu screen operation...........................................................................................................6
Description othe menu features.....................................................................................6
DSC Menu.....................................................................................................................7
MMSI ID setup...............................................................................................................8
Individual call Pos request, Group/Test call....................................................................8
All ship call...................................................................................................................10
Receive call log ...........................................................................................................11
Send call log................................................................................................................11
Phone book .................................................................................................................11
DSC setup ...................................................................................................................12
Distress Menu..............................................................................................................12
Main Menu...................................................................................................................13
VHF operation .............................................................................................................13
GPS setting .................................................................................................................14
System config..............................................................................................................14
Key operation.......................................................................................................................15
Power ON/OFF Volume control ..................................................................................15
Special function key....................................................................................................15
SQL key......................................................................................................................15
Up/Down key..............................................................................................................15
16/9 key......................................................................................................................15
Select the second priority channel..............................................................................15
Hi/Lo/Lock key............................................................................................................16
CH/*/Wx key...............................................................................................................16
SCAN key...................................................................................................................16
MEM key ....................................................................................................................16
DW/Tri Watch key.......................................................................................................17
MOB key.....................................................................................................................17
Backlight.....................................................................................................................17
Tx Time Out................................................................................................................17
Build in Battery.....................................................................................................................18
Connection Cable.................................................................................................................18
Local Time & Date................................................................................................................19
AppendixA– Near Lightning Strike Test..................................................................................20
Annexe B – Channel List......................................................................................................21
Declaration of conformity CE................................................................................................28

- - 2 - -
Himunication HM-360DSC
HM-360 DSC Instruction Manual
Introduction
Your transmitter-receiver HM-360 DSC was developed by using high technologies. Designed
for an international use, it allows you to emit and to receive on all the international channels of
the marine band VHF such as specified by the international union (ITU)
The device is a high-quality electronic equipment, builds according to the rule book with the
best components, it answers all the standards of the market to supply you with clear and
reliable communications.
Your transmitter-receiver is designed to supply reliable years of functioning, it thanks to a
microprocessor with optimized performances.
Note: Within the framework of the directive WEEE, the end of life products must not be
thrown by the user but dismissed.

- - 3 - -
Himunication HM-360DSC
EU Regulatory Conformance
As certified by the qualified laboratory, the product is in compliance with the essential requirements
and other relevant provisions of the Directive 1999/5/EC. Please note that the above information is
applicable to EU countries only.
Waterproof design Warning:
This product is the IP67 waterproof design, in order to achieve the best performance, before the
end-user use it, and please pay the highest attention for the following two points:
1, To tighting the antenna because there is an O-ring at the bottom of antenna side
2, To Cover tightly the mini USB cap because there is an O-ring design around the cap

- 4 -
Himunication HM-360DSC
Key description
PTT
DISTRESS
MOB
SQL
Power
Battery capacity
Squelch level
Local Date Time
Band
Current channet
GPS position
UP
CH/*/WX
CALL/MENU
16/9
SCAN
HI/LO/LOCK
DW/TRIW
DOWN
MEM
HM-360DSC
HIMUNICATION

- 5 -
Himunication HM-360DSC
Key function
Keys Short press less than 3 seconds Long press more than 3 seconds
HI/Lo /Lock TX Power Hi/Low Key Lock/key unlock
16/9 CH 16 CH09
DW/TriW Dual Watch mode Tri Watch mode
SCAN All Scan/all memory Scan Priority all/memory Scan
MEM MEMORY Mode Save/Delete Memory Channel
Up/Down Channel/ Setting Up/Down Channel up /down(much faster)
Menu/Call DSC menu Main menu
MOB
MOB activated
Distress Distress menu Distress alerty calling
SQL Sql setting Switch on/off Time& Date display
Volume Knob
Power ON / OFF
Adjust the volume level
Display
Battery
capacity Power Band
Current channel
Squelch level
GPS position
Local Date & Time

- 6 -
Himunication HM-360DSC
Menu Screen Operation
The description on of the menu features
Main Menu
VHF Operation Channel Band Set
Priority 2nd ch
GPS Setup GPS Setting
ATIS Operation My ATIS ID
AITS Function
DSC Operation My MMSI ID
DSC Function
System Config System Config
LCD Back Light
Back Light Time
LCD Contrast
Key Beep
Version Info
Factory Reset
DSC Menu
Individual Call Input Address
From Phonebook
Position Request Input Address
From Phonebook
All Ship Call Routine
Safety
Urgency
Group Call Input Address
From Phonebook
Test Call Input Address
From Phonebook

- 7 -
Himunication HM-360DSC
Receive Call Log Distress Call
Others
Call
Send Call Log Distress Call
MOB Call
Others Call
Phone Book Buddy List
Group
List
DSC Setup Position Input
Auto Ch Change
Position Reply
Test Ack
My MMSI ID My MMSI ID
100000008
DSC Menu:
Short press the Call/Menu key will saw below DSC Menu as below.
DSC Menu
Individual Call
Position Request
All Ship Call
Group Call
Test Call
Receive Call Log
Send Call log
Phone Book
DSC Setup
My MMSI ID
Exit ▲▼ Enter
Then the CH/*/WX key will became the Exit key and the Call/Menu key will became the Enter k e y.
The
UP/DOWNkeyfunction has the same function to choose the item at the menu without the changes.

- 8 -
Himunication HM-360DSC
For My MMSI ID setup
Firstly, set up the MMSI ID, to click the My MMSI ID and Enter, then you are able to set up your related
MMSI ID as below generally you need to double confirm the MMSI ID then your MMSI ID will be
locked by this radio.
MY MMSI ID
123456789
Exit
When you input 9 digits, UP/DOWN key to choose the number from1-9,you need to input all numbers
from the left to right one by oneWhen you input all 9 digits then press the enter to confirm.
Input Address
Input 9 digits
123- - - - - -
Exit ▲▼ Enter
After you enter 123000001 these nine figures, the screen will be displayed as below
Input Address
Input 9 digits
123000001
Exit ▲▼ Enter
for Individual Call, Position Request, Group Call and Test Call.
Click the preferred item then you able to find the target MMSI ID to call by Input Address or From
Phonebook.We take the individual call as an example.
When you selected the input address item to click and input 9 digits such as the 100000000 for your
address as below.
Input Address
Input 9 digits
10000000 0
Exit ▲▼ Enter

- 9 -
Himunication HM-360DSC
Then select the type of individual call such as the safety
Individual Call
Routine
S af ety
Urgency
Exit ▲▼ Enter
Then select the channels such as the 01 port operation then confirm to call
Individual Call
Select Channel:
01 port ops/vts
03 unauthorized
05 port ops/vts
06 inter ship
07 commercial
08 commercial
Exit ▲▼ Enter
Then the individual call is sent
Individual Call
To: 100000000
Safety
Telephony by
Channel 01
Exit Call
Then the individual call is sent
DSC USA
LO SQL:5
01A
PORT OPERAT/UTS
Elapsed 00:12
Exit

- 10 -
Himunication HM-360DSC
for All Ship Call:
Select theAll Ship Call item
DSC Menu
Individual Call
Position Request
Al l Shi p Cal l
Group Call
Test Call
Receive Call Log
Send Call log
Phone Book
DSC Setup
My MMSI ID
Exit ▲▼ Enter
Then select the type of All Ship Call such as the Urgency
All Ship Call
Routine
Safety
Urge n c y
Exit ▲▼ Enter
Then select the channels such as the 07 Commercial then confirm to call
Individual Call
Select Channel:
01 port ops/vts
03 unauthorized
05 port ops/vts
06 inter ship
0 7 c o mm e rc i al
08 commercial
Exit ▲▼ Enter
Then the All Ship Call is sent
All Ship Call
To : All Ship
Urgency
Telephony by
Channel 07
Exit Call

- 11 -
Himunication HM-360DSC
DSC USA
LO SQL:5
07A
COMMERCIAL
Elapsed 00:04
Exit
Receive Call Log
When receive the DSC call and you able to check the message from the Distress Call then able to see
the exact message.
DSC Menu
Individual Cal
Position Request
All Ship Call
Group Call
Test Call
Rec e i ve Cal l L o g
Send Call Log
Phone Book
DSC Setup
My MMSI ID
Exit ▲▼ Enter
Receive call log
Distress call
Others call
Exit ▲▼ Enter
Received DSC
Distress call
Undesignated
From: 123456789
GPS POS; Unknown
88: 88 UTC
Exit Delete
Send Call Log
To press the Send Call Log able to saw the previous Distress Call MOB Call and Other Call you have
sent
Phone Book:
Able to check the contact ship by Buddy list and Group list

- 12 -
Himunication HM-360DSC
DSC Setup
The DSC setup menu got the 4 item to choose as the Position Input, Auto Ch Change, Position Reply
and TestAck.
For Position Input you can set up the GPS position and UTC time by manual operation.
For Auto Ch Change, Position Reply and Test Ack you can choose the Automatic or Manual by you
interests.
Distress Menu:
Pull the Distress red cover then press the Distress key You are able to saw the Distress Menu in
below.
Distress Menu
Undesignated
Fire ,,Explosion
Flooding
Collision
Grounding
Capsizing
Sinking
Abandoning
Piracy
Man Overboard
Exit
Send the distress Message:
Choose one distress item such as the Sinking the press and hold the distress key for 3 seconds the
Sinking distress message will be sent.
Distress Menu
Undesignated
Fire,, Explosion
Flooding
Collision
Grounding
Capsizing
Si n ki n g
Exit ▲▼
You also able to choose to resend pause or Exit after the message be sent.
Distress Call
Sinking
Push the key
For 3 Seconds!

- 13 -
Himunication HM-360DSC
DSC USA
HI SQL:5
16
DISTRESS
Resend in 4:09
Exit Pause Send
Main Menu:
Long press the Call/Menu key will saw below Main Menu as below.
Main Menu
VHF Operation
GPS Setup
ATIS Operation
DSC Operation
System Config
Exit ▲▼ Enter
For VHF Operation:
Select the VHF operation to enter will see Channel Band Set and Priority 2nd Ch options in below
VHF Operation
Cha n n el Ba nd Se t
Priority 2 nd Ch
Exit ▲▼ Enter
For VHF Operation, you are able to choose the wanted channel band from those three options USA,
INT and CAN.

- 14 -
Himunication HM-360DSC
Channel Band Set
√ USA
INT
CAN
Exit ▲▼ Enter
For Priority 2nd Ch you can select you wanted priority 2nd channel.
Priority 2 n d Ch
Select Channel:
01 telephony
04 sar
05 port ops/ vts
06 inter ship
0 7 co mm e rc i a l
08 commercial
Exit ▲▼ Enter
For GPS Setting:
You are able to setup the Time Display and Time Offset More detail able to see the 5.4 (4) the local
time and date on screen:
For System Config:
Select the system Config and you are able to see the below menu to check and adjust the LCD/Key
Beep figure, version info and factory reset.
System Config
L CD Ba ck li g h t
Back Light Time
LCD Contrast
Key Beep
Uers ion Info
Factory Reset
Exit ▲▼ Enter

- 15 -
Himunication HM-360DSC
KEY OPERATION
Power ON/OFF & Volume Control
Turn the Volume knob clockwiseuntil a click sound heard, the unit will power on
Volume Control:
Turn the Volumeknob: Clockwise-volumeup,
Counter-clockwise-volume
down.
Special function: Distress Key and Real DSC
Send the Distress message:
Pull the Distress key cover then able to Press the Red key into the Distress Menu selection. Then
select the current distress situation such as the “Flooding” then press and hold for 3 seconds, the
selected DSC message will be send.
This message also will be resend within 4 mines, press the Up key will pause or resume the resend,
press Call/Menu key will resend immediately. Press the CH/*/WX key will exit the current menu and
give the option on cancel of this selected distress alert.
Receive the Distress message:
The HM360 model has two receivers, one receiver used for receiving/transmit voice and another
receiver used for to continually monitor 70 channels. The DSC function for HM360 model is operated
by individual way. Even you are using the HM360 to make the transmission or receive, when the DSC
message is arrived. The HM360 handheld model always can receive the entire DSC message as a
fixed mounted marine radio.
Press the Call/Menu key and select the receive call log then press the enter to see all received DSC
message.
SQL key
Short press the SQL key then press the Up/Down key to select squelches level accordingly. Then
short press the SQLkey to exit the squelch level adjustment.
Long press SQL key, then move into GPS features, presses up/down key to see COG/SOG and the
GPS signal via the current satellite.
To select the kilometer and Knots, long press call/menu key then select the GPS setup, then choose
the GPS setting, then choose the speed unit, then you able to choose knots/km.
Once select then exit and the radio will keep your last choice.
Up/Down key
At the normal mode, they act as Channel Up/Down key. When it press > 0.5 sec, the channels will
change in a quick way. It returns to normal mode when key press is released.
16/9 key
At the normal mode ,pressing the 16 / 9 Key (short press to jump to priority CH16 at High Power and
long press to jump to priority CH9 at High Power) if the current channel is not the priority channel
After the channel is tuned to the priority channel, the “P-CH” and “P-2nd”icon is lit to indicate that the
priority CH16 or CH9 has been reached. UP/Down key functions normally.
Select the second priority channel
Change the second priority channel by 16/9 key: normally the second priority channel is initially sets
as the channel 9.At the normal mode, Long press the 16 / 9 Key will display the second priority
channel as channel 9.Then long press the 16 / 9 Key again and the “2nd Prior” icon will display on the
screen. Using the UP/Down key to choose your prefer channel as the second priority channel then

- 16 -
Himunication HM-360DSC
long press the 16 / 9 Key to confirm it
Change the second priority channel by Menu key: Press the 16 / 9 Key then press the Call/ Main key
to select VHF operation option then press Enter to select the Priority 2nd Ch then press Enter and
select you preferred channel by Up/Down Key then press Enter to confirm
Hi/Lo/Lock Key
Short press the Hi/Lo/LOCK key will toggle the TX power from Hi to Lo or vice versa. The
corresponding “HI or Lo” icon will turn on to display on the LCD.
Some of the channel such as channel 16 only for high power/channel 13&67 only for low power) has
been limited to be low power only or high power only. Thus, the software needs to check against the
channel setting stored in the EEPROM
Long press the Hi/Lo/LOCK key will lock the keys and the “lock key” icon,then all of the key will be
locked to use except the PPT key and Distress key /related distress function. Long press the
Hi/Lo/LOCKkey again to cancel the lock mode and the “lock key” icon will disappear.
Ch/ */Wx key
Short press CH/*/WX key will enter private mode if there are same private channel in the EEPROM.
The “PRIVATE”icon will display on the screen. Press Up/Down key to change private channel.,
If there aren’t any private channel in the EEPROM, the “--” icon will display on the screen.
Weather Band:
Long press the CH/*/WX key will enter WX mode when the current operational channel band is USA or
Canada.When Dual or Tri watch is being activated in the Wx mode, the watch will monitor the current
WX channel and priority channel(s).
Scan Key
This is the function to scan for currently working channels. When a signal is detected, the scan
pauses until the signal disappears.
Short press on the Scan Key, to activate the SCAN function. Scan all
channels. Long press the Scan Key, to activate the Priority Scan.
MEM Key
Enter /Exit the memorymode:
Short press the MEM key to enter the memory mode, the memory channel will mark as the “M” icon at
the right side of channel number. At the left side of the current channel will mark as the “user “icon
means as already enter the user memory mode.
At the Memory mode, short press the MEM key to exit the memory mode. The “M” icon ( at the right
side of channel number) and the “user” icon (at the left side of the current channel) will disappear.
Adding/Deletingmemory CH:
During the normal mode, use the UP/DOWN key to select the desired channel for programming.
Long press the MEM key to store up the channel as memory channel.
The “M” icon at the right side of current channel number will shows up to indicate the current CH has
been saved in the memory. No limited of memory channels.
Separate memory channel exists for USA, International, and Canadian Frequency group.
During the normal mode, use the UP/DOWN key to select the memorychannel to be deleted.
Long press the MEM key to delete the selected channel from the memory.

- 17 -
Himunication HM-360DSC
DW/TriW key (Dual Watch/Tri Watch)
At the normal mode, short press DW/TRIW key to activate the DUAL WATCH mode. Monitor the
current channel and Ch 16 in cycle. Whenever, Weather Alert is activated, the Wx Alert channel will be
monitored once every 4sec.
Long press DW/TRI key to activate the TRI WATCH mode. Monitor the Ch 16, current channel and 1
programmed channels in cycle.
MOB key
Long press the MOB key will activate the MOB function. The radio will send a MOB call with its MMSI
and latitude and longitude.
Backlight
Any key press will turn on the backlit (if backlit setting is ON ) except the PTT key. The backlit should
be remaining on for 5 seconds if no any keys pressed. The time out will be reset if any key pressed
within the timeframe.
TX Time Out
The transmission will be automatically turn off after PTT key pressed over 5 consecutive minutes. The
TX mode will be terminate and back to Rx mode. To indicate the PTT key as the stuck condition. Once
the PTT key is released, the TX time out timer will be reset. PTT key will work back normally.

- 18 -
Himunication HM-360DSC
Build in Battery
The HM-360DSC model has the Build in Battery design like a Phone there are three steps to
installation and removal the battery in below diagram.
Step1 Step2 Step3
Connection Cable
Due to the HM-360DSCgot the build in battery. Therefore, we do place the IP68 connection
cable (1.5 meter length) for power charger. It also used for the software update and automatic
test in manufacture stage.
For Power charger:

- 19 -
Himunication HM-360DSC
The local time and date on screen:
DSC USA
HI
DSC USA
LO
SQL: 9 16
DISTRESS
22°32.3608´N
113°57.0323´E
24 OCT 03 :39 UTC
SQL: 5 06
INTERSHIP/SAFETY
22°32.4327´N
113°56.9480´E
27 NOV 16 :08 LOC
UTC TIME LOCAL TIME
When the HM360 cannot receive the GPS signal to display the current position, the screen will
automatic display the UTC local time and date.
Long press the SQL key will switch on/off Time Date display. When the radio received the GPS signal,
the screen will display the current GPS location and related UTC time and date below the GPS
location mark.
The user can press the menu to switching your local time based on the UTC time. Long press the
Call/Menu key then select the GPS setup item to enter. Then you can saw the GPS setting item and
click the enter to select the Time offset item Then you are able to adjust your location time based on
the time difference with the UTC time then press the enter to confirm. (You need to pass the entire
item from the hour-minutes –secondsthen able to saw the enter option to click and confirm).
Time offset
UTC —
00:00
Exit ▲▼ Enter

- 20 -
Himunication HM-360DSC
Appendix A – Near Lightning Strike Test
This appendix describes the general procedure for evaluating the immunity to near lightning strikes
(NLS) of the HM-360DSC VHF Radio.
The test simulates a slow, high-energy pulse produced by an NLS event.
Related External Documents
BS EN 61000-4-5: 2006
EMC Directive 2004/108/EC
List of Abbreviations
AE
Auxiliary Equipment
CE
Conducted Emissions
EMC
Electromagnetic Compatibility
EN
European Norm
EUT
Equipment Under Test
FTB
Fast Transient Burst
MED
Marine Equipment Directive
QP
Quasi
Peak
Safety
The high voltage interference pulse can contain a very large quantity of energy and every precaution
shall be taken to avoid contact with EUT during a test. It is highly recommended that at least one other
person is present (or very close by) during the test.
Test Configuration
EUT
Setup
The EUT shall be setup in a typical system configuration on an isolated wooden bench with NO
GROUNDPLANE. The power to the EUT and auxiliary equipment shall be from 12V or 24V sealed
lead-acid batteries via a suitable fuse. The length of the EUT power cable shall be no more than 2m.
Any screens within the system shall be terminated at the battery very connection.
EUT- Operating-
Configuration
All operating configurations should be tested with appropriate performance criteria defined for each
test.
Performance Criteria
From BS EN 61000-4-5: 2006
Performance criteria C: Temporary loss of function or degradation of performance, the correction of
which requires operator intervention.
Other manuals for HM-360DSC
1
Table of contents
Other Himunication Marine Radio manuals

