Hisense Sero 8 Pro User manual

User Manual

1
Content
Need to Know..........................................................3
Model and Serial Numbers.............................................................3
Getting Started........................................................4
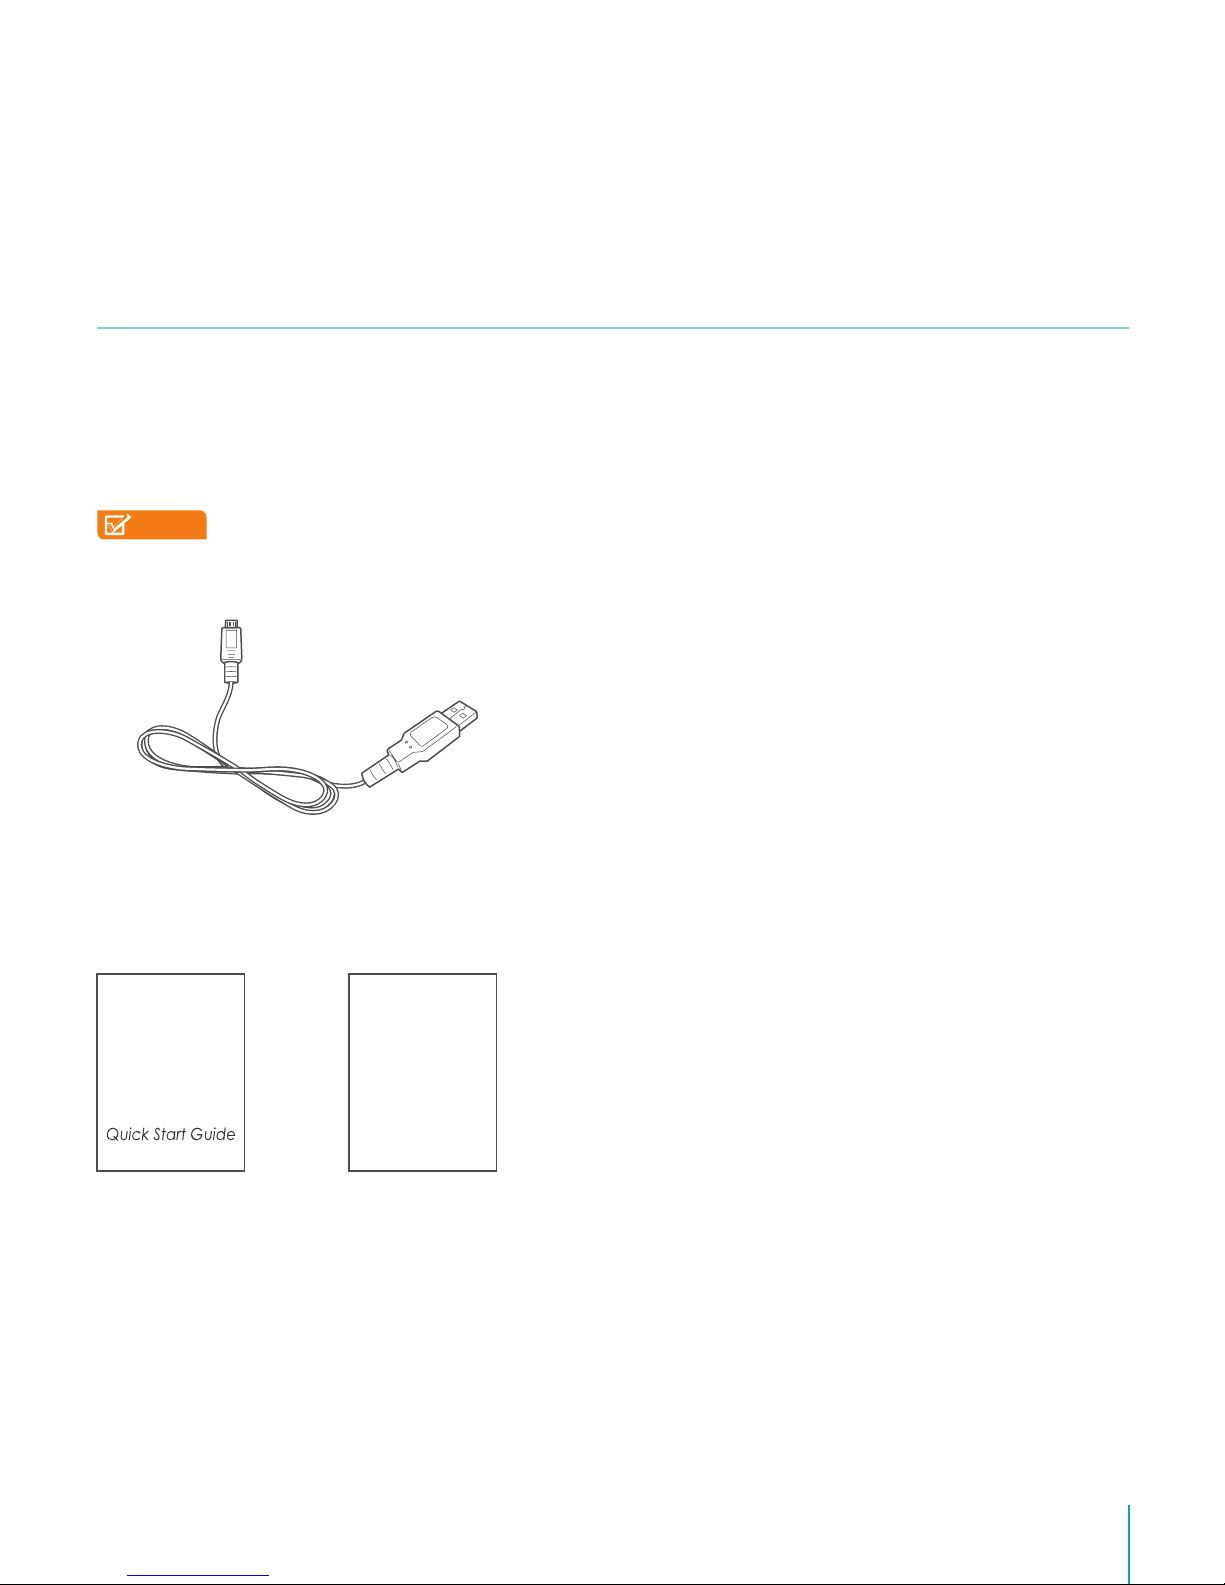
Package Contents................................................................................4
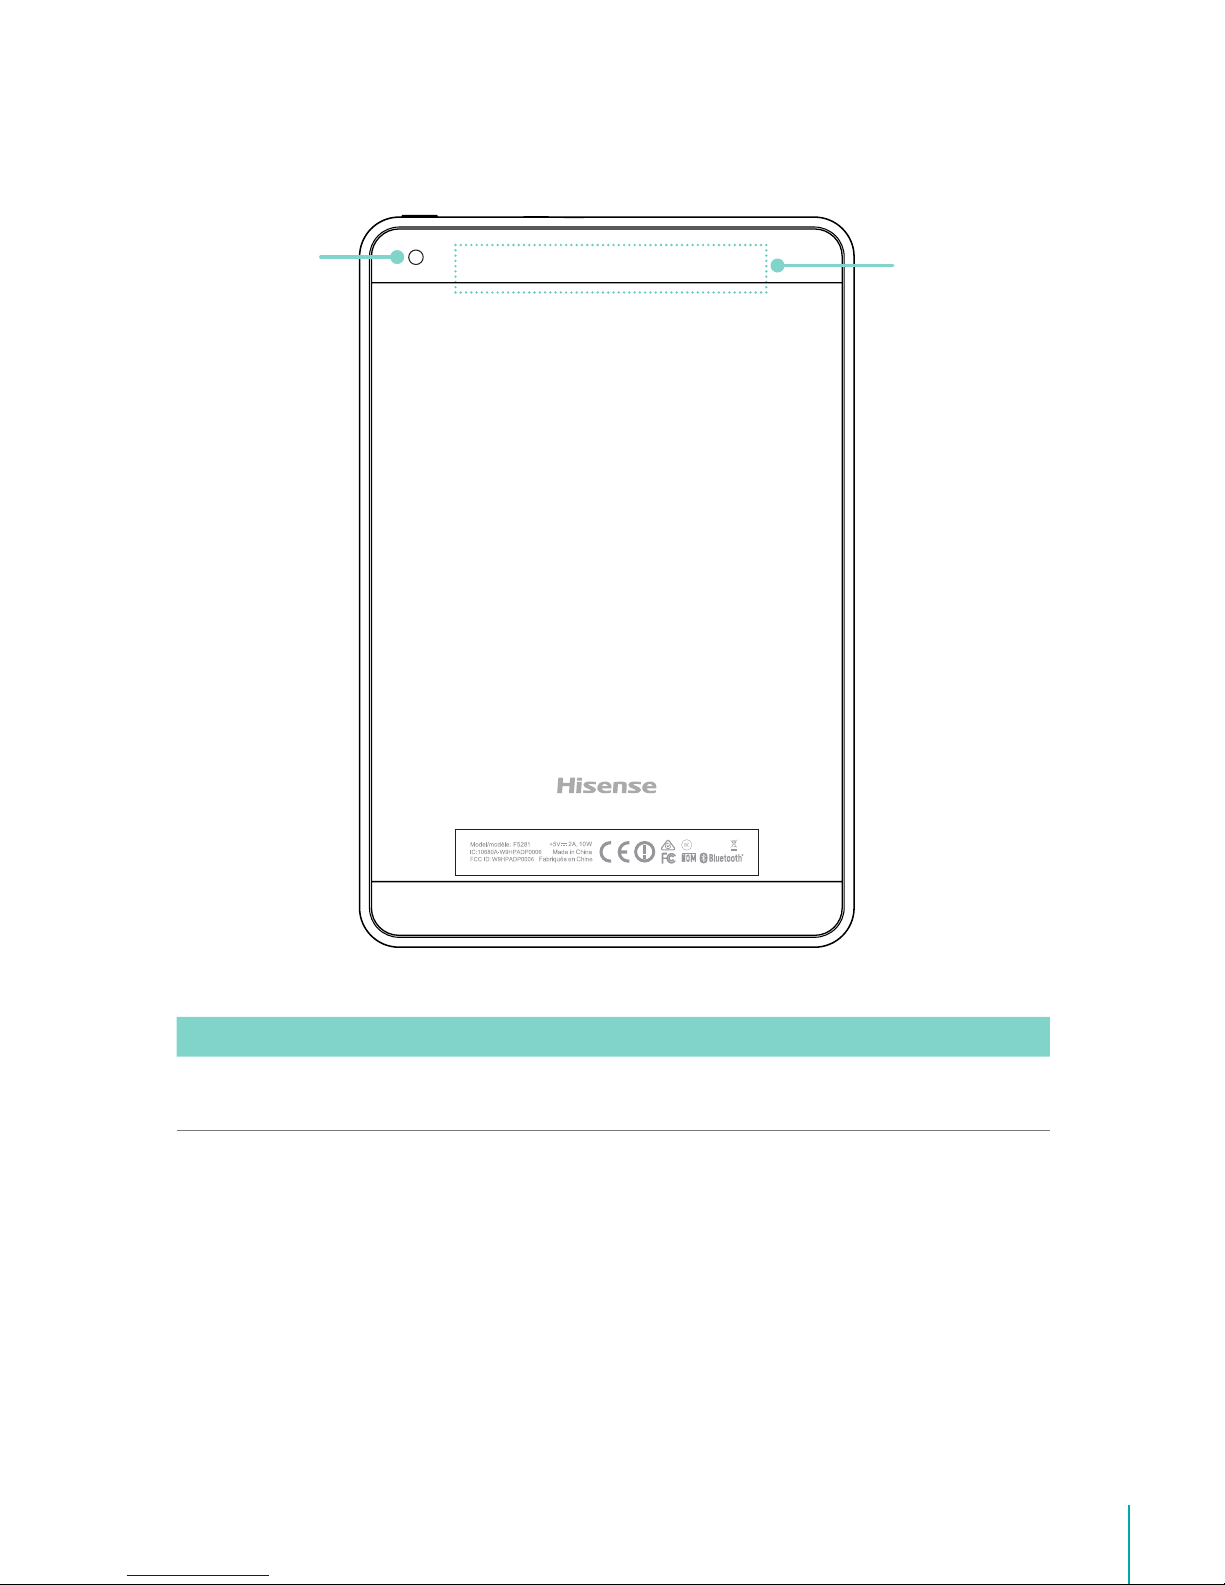
Understanding Your Sero 8 pro Tablet....................................5
Home Screen..........................................................................................7
Buttons........................................................................................................8
Making Connections ...........................................11
Battery...................................................................................................... 11
Micro-USB.............................................................................................. 12
Micro SD Card...................................................................................... 12
Headphone........................................................................................... 12
Wi-Fi........................................................................................................... 13
VPN............................................................................................................. 14
Bluetooth................................................................................................ 15
Basic...........................................................................17
Setup Guide.......................................................................................... 17
Basic Operation ..................................................................................17
Sharing..................................................................................................... 19
Security....................................................................................................19
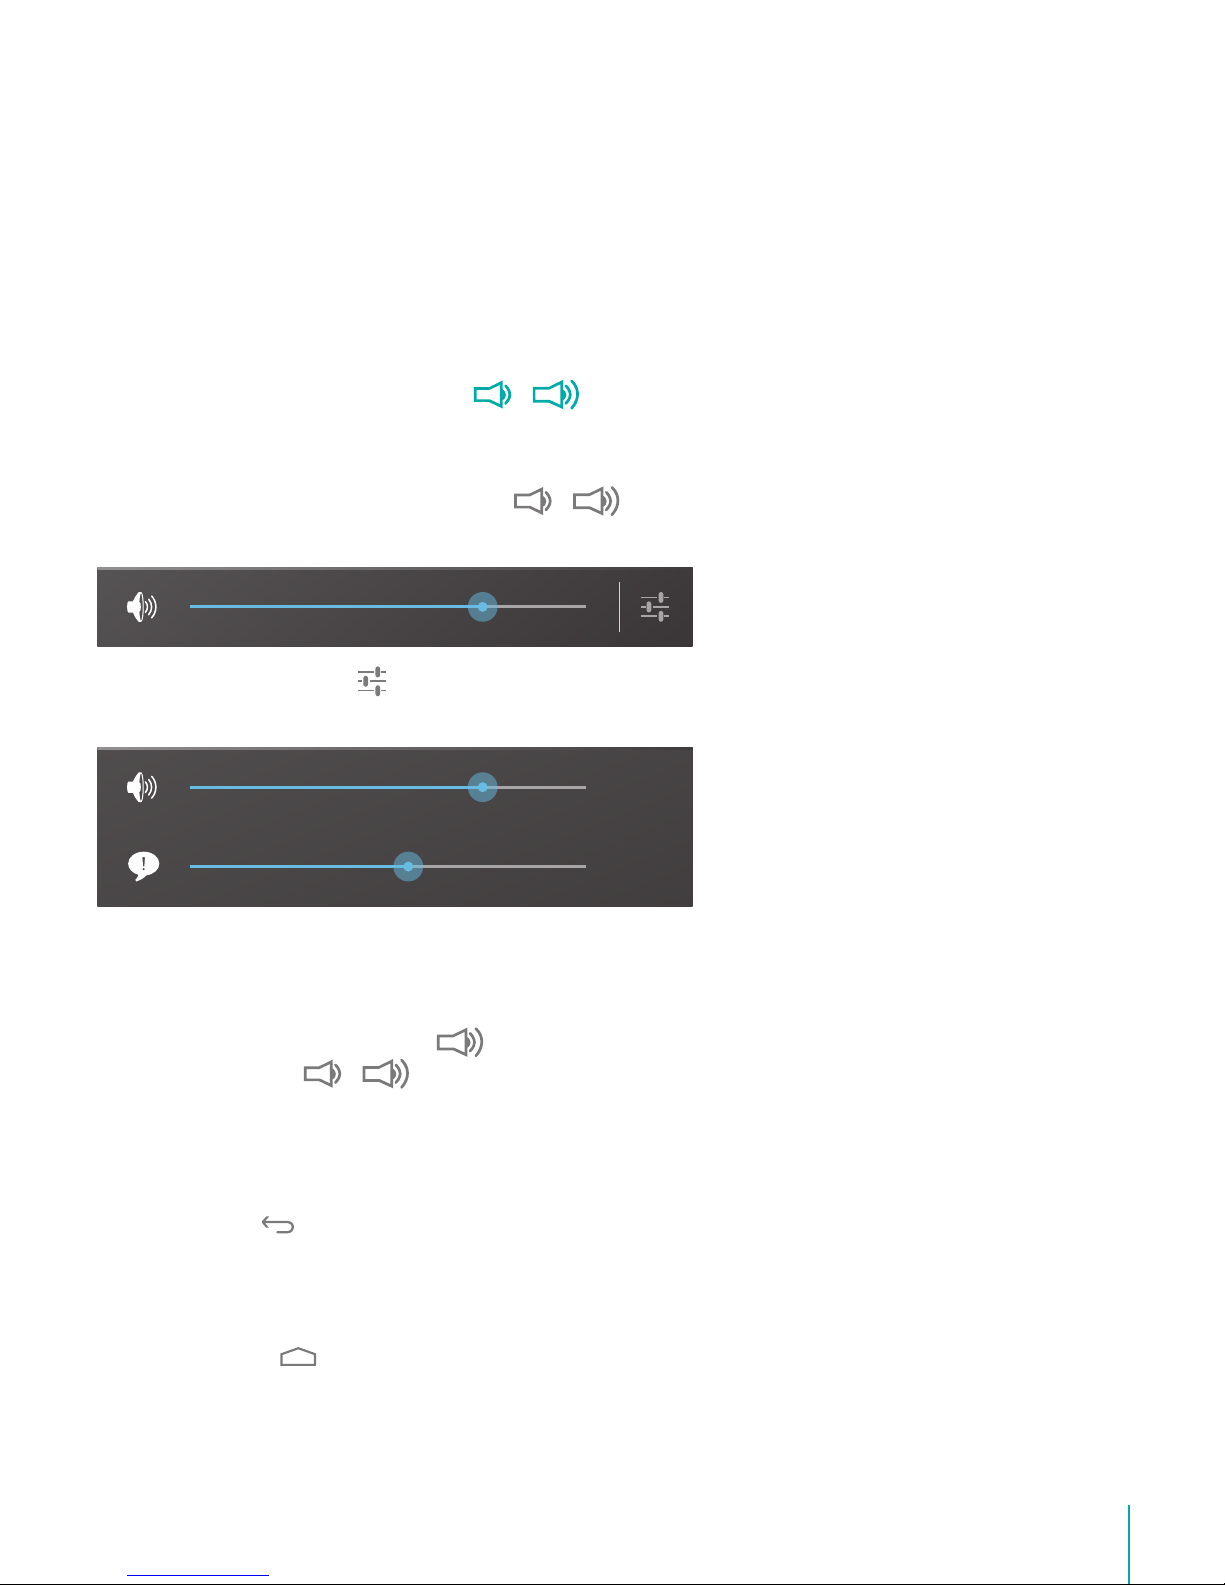
Settings....................................................................................................20
Location................................................................................................... 23
Google Account.................................................................................23
Syncing....................................................................................................24

2
Appendix A............................................................25
Specifications.......................................................................................25
Troubleshooting ................................................................................ 26
Appendix B.............................................................27
Important Safety Instructions.................................................... 27
Certification and Compliance....................................................29
Appendix C ............................................................32
Legal Terms ...........................................................................................32
Copyright and Trademark Notices..........................................33

3Need to Know
Need to Know
Read this chapter to learn where to view the model and serial numbers.
Model and Serial Numbers
Model Number
You can go to Settings > SYSTEM > About tablet to view the Model number.
Serial Number
You can go to Settings > SYSTEM > About tablet > Status to view the Serial number.
1

4Getting Started
Getting Started
Read this chapter to learn about Sero 8 pro features, how to use the controls, and more.
Package Contents
The following items are included with the Sero 8 pro:
Power Adapter
Use the power adapter to connect the outlet to charge the battery.
NOTE The power adapter may vary in different countries.
Micro-USB Cable
Use the USB cable to connect the Sero 8 pro’s Micro-USB port to the power adapter to
charge the battery, or to your computer.
Quick Start Guide & Warranty
Warranty
2

5Getting Started
Understanding Your Sero 8 pro Tablet
Item Function
Headphone port Headphone connections for personal listening.
Micro-USB port Connect to wall outlet with Micro-USB cable and power
adapter for charging. Connect to a computer, keyboard, more
other devices with USB port.
Micro SD port Plug microSD card (up to 32G).
Power Button Press & hold to turn on/o; Press it to put/wake the unit in/from
sleep mode.
Power Button
Front Camera
Speakers
Headphone port
Micro SD port
Micro-USB port

6Getting Started
Item Function
Wireless and
Bluetooth Antenna Support wireless network and Bluetooth function.
NOTE Avoid holding this region when using wireless or Bluetooth.
Rear Camera Wireless and
Bluetooth Antenna

7Getting Started
Home Screen
To move between Home screens, slide left or right.
Notification and Status Bar
At the top of the screen, you’ll see indicators that inform you about the status of your Sero 8
pro. You can open the Notification Tray or the Quick settings by pressing the Notification or
Status bar and dragging it down.
The table below lists icons that appear the most frequently in the Notification and Status Bar.
Icon What it means
Airplane mode Shows that airplane mode is on. You can not access the Internet. Non-wireless
features are available.
Alarm An alarm is set.
Alert Install/update/enable Google Play service.
Bluetooth Sero 8 pro is using Bluetooth function.
Status Bar
Navigation
Buttons
Back
Home
Recent
Apps
Menu
Notification Bar
Google Search
App Icons
Volume Down
Button
Volume Up
Button

8Getting Started
Icon What it means
Downloaded Received les
Uploaded Sent les
Calendar Task reminders.
Message Received new message.
Music Play Music application is running.
Screenshots Screenshot captured.
Silent mode Silent mode is on.
USB tethering Sero 8 pro has connected to a computer and the USB tethering is turned on.
Wi-Fi Sero 8 pro has a Wi-Fi Internet connection. The more bars, the stronger the
connection.
Buttons
Power Button
Turn Sero 8 pro On
Press & hold the Power button until the Hisense logo displays.
Turn Sero 8 pro Off
In awake mode, press & hold the Power button until a message displays. Next, tap Power Off
> OK. Your Sero 8 pro will shut down.
Set Airplane / Silent Mode
In awake mode, press & hold the Power button until a message displays. You can set
Airplane mode and Silent mode.
Put Sero 8 pro in Sleep Mode
Press the Power button to put the Sero 8 pro in sleep mode.
If you do not touch the screen for several minutes, then the Sero 8 pro will automatically go
into sleep mode.
Tip: You can go to Settings > DEVICE > Display > Sleep to set the screen timeout.

9Getting Started
Wake Sero 8 pro From Sleep Mode
Press the Power button to wake the Sero 8 pro from sleep mode.
Forced Shutdown
If your Sero 8 pro becomes unresponsive during use, you can press & hold the Power button
for 8 seconds to shut it down. Then press the Power button to restart it.
Volume Up/Down Buttons
Silent Mode Off
Press the Volume Up/Down button to increase or decrease the volume. You can
also slide the focus on the volume bar to adjust it.
Press Settings button to stretch the volume bar, then you can adjust the notifications’
volume.
Tip: You can go to Settings > DEVICE > Sound > Volumes to adjust the volume of the alarms.
Silent Mode On
Press the Volume Up button to turn off Silent mode, then you can press the Volume
Up/Down button to increase or decrease the volume.
Navigation Buttons
Back Button
Tap this button to open the previous screen you were working in, even if it was in a different
app. Once you go back to the Home screen, no further history will be available.
Home Button
Tap this button from anywhere on your Sero 8 pro to return to the Home screen. If you’re
viewing a left or right Home screen, this will open the central Home screen.

10Getting Started
Recent Apps Button
Tap this button to view recently used apps. Tap an app to use it again.
You can slide down to see more apps. You can also slide it away to the left or right.
Menu Button
Tap this button to choose your wallpaper, add a widget to any screen, add or delete a screen.
You can set the launcher preferences. You can also open your system settings or apps’
management interface.

11Making Connections
Making Connections
Read this chapter to learn how to connect to an external device and establish data
transmission.
Battery
The Sero 8 pro has an internal Lithium-ion Polymer rechargeable battery. For important safety
instructions about the battery and charging the Sero 8 pro, see Important Safety Instructions
on page 27.
The Battery Icon
The battery icon in the upper-right corner of the status bar shows the battery level or
charging status.
High battery Low battery Needs to be charged Charging
Charging the Battery
The best way to charge the battery is to plug your Sero 8 pro into a wall outlet using the
power adapter and Micro-USB cable included with your accessories.
NOTES • Use the power adapter and Micro-USB cable included with your accessories. Other
power adapters and Micro-USB cables may charge more slowly or not at all.
• The power adapter and wall outlet are only for reference, they may vary in different
countries.
The Sero 8 pro also charges slowly when you connect it to the USB port on your
computer. The battery may drain instead of charge when the battery usage is large.
Micro-USB
Cable
Power
Adapter
Wall Outlet
3

12Making Connections
Micro-USB
You can use the included Micro-USB cable to connect the Sero 8 pro’s Micro-USB port to
your computer’s USB port.
To change your Sero 8 pro’s USB connection options, go to Settings > DEVICE > Storage >
Menu icon > USB computer connection. You can select the Sero 8 pro is connected as MTP
or PTP.
Micro SD Card
Insert the microSD card contacts facing down into the Sero 8 pro’s Micro SD port.
To check the storage of microSD card, go to Settings > DEVICE > Storage.
Headphone
microSD
Card
Microphone
Audio left
Audio right Grounded

13Making Connections
Headphones can be connected to the Sero 8 pro’s headphone port. For more information
about headphones, see Important Safety Instructions on page 27.
NOTE If you use the microphone function that comes with headphones, choose the 3.5mm
4-Conductor Headset.
Wi-Fi
You can connect to a wireless access point, or hotspot to use Wi-Fi. Some hotspots are open
and you can simply connect to them. Others implement security features that require other
steps to set up.
Add a Wi-Fi Network
You can add a Wi-Fi network so your device will remember it, along with any security
credentials, and connect to it automatically when it’s in range. You must also add a Wi-Fi
network if the network does not broadcast its name (SSID), or to add a Wi-Fi network when
you are out of range.
1. Turn on Wi-Fi, if it’s not already on.
2. Tap the Plus icon at the top of the screen.
3. Enter the SSID (name) of the network. If necessary, enter security or other network
configuration details.
4. Tap Save.
Forget a Wi-Fi Network
To forget a Wi-Fi network, go to Settings > WIRELESS & NETWORKS > Wi-Fi > [the network
name] > Forget.
Advanced Wi-Fi Settings
To set the Advanced Wi-Fi, go to Settings > WIRELESS & NETWORKS > Wi-Fi > Menu icon >
Advanced .
Network notification - By default, when Wi-Fi is on, you receive notification in the Status
bar when your device detects an open Wi-Fi network. Uncheck this option to turn off
notification.
Keep Wi-Fi on during sleep - To select whether to put the Sero 8 pro in sleep mode when
it’s connected to Wi-Fi.
Scanning always available - Check to scan for networks even when Wi-Fi is turned off.
Avoid poor connections - Check the box to automatically avoid using networks with a low-
quality or unreliable Internet connection.

14Making Connections
Install certificates - To use a certificate to identify your Sero 8 pro, you must obtain it
with help from your system administrator, and install it in your tablet’s trusted credential
storage.
Wi-Fi optimization - By default, when Wi-Fi is on the battery usage is optimized.
MAC address - The Media Access Control (MAC) address of your device when connected
to a Wi-Fi network.
IP address - The Internet Protocol (IP) address assigned to the device by the Wi-Fi network
you are connected to (unless you used the IP settings to assign it a static IP address).
Configure Proxy Settings for a Wi-Fi Network
Some network administrators require you to connect to internal or external network
resources via a proxy server. By default, the Wi-Fi networks you add are not configured to
connect via a proxy, but you can change that for each Wi-Fi network you’ve added.
1. Press & hold a network in the list of Wi-Fi networks you’ve added.
2. Tap Modify network in the dialog that opens.
3. Select Show advanced options.
4. If the network has no proxy settings, tap None under Proxy Settings, then tap Manual in
the menu that opens.
5. Enter the proxy settings supplied by your network administrator.
6. Tap Save.
NOTE Proxy settings are used by the browser but may not be used by other apps.
VPN
To configure VPN access, you must first obtain the details from your network administrator.
Depending on your organization’s solution, you may need to obtain a VPN app, either from
your administrator or on Google Play.
Go to Settings > WIRELESS & NETWORKS > More > VPN.
Add a VPN
1. From the VPN screen, tap the Plus icon to add VPN profile.
2. In the form that appears, fill in the information provided by your network administrator.
3. Tap Save.
Connect to a VPN
1. From the VPN screen, tap the name of the VPN.
2. In the dialog that opens, enter any requested credentials.

15Making Connections
3. Tap Connect.
Edit a VPN
1. From the VPN screen, press & hold the name of the VPN profile.
2. In the dialog that opens, tap Edit profile.
3. Edit the VPN settings you want.
4. Tap Save.
Delete a VPN
1. From the VPN screen, press & hold the name of the VPN profile.
2. Press & hold the VPN you want to delete.
3. In the dialog that opens, touch Delete profile.
Bluetooth
You can use Bluetooth to communicate between the Sero 8 pro and other Bluetooth
devices, such as a Bluetooth headset over a distance of about 8 meters.
NOTES • To extend the life of your battery between charges, turn off Bluetooth when you’re not
using it.
• The Wi-Fi function and the Bluetooth function can simultaneous operation, but can
not simultaneous transmit.
To connect to a Bluetooth device, first turn on your Sero 8 pro’s Bluetooth. Then, the first
time you use a new Bluetooth device, you need to “pair” it with your Sero 8 pro so that both
devices know how to connect securely to each other. After that, they connect automatically.
To turn Bluetooth on or off, open Quick Settings, tap Bluetooth icon. You can also go to
Settings > WIRELESS & NETWORKS and then tap the Bluetooth switch.
Pairing Bluetooth Devices
Before you can use a Bluetooth device with the Sero 8 pro, you must first pair it.
1. Make the device you want to pair discoverable. See the documentation that came with
your device to learn how to make it discoverable.
2. Make sure Bluetooth is turned on by going to Settings > WIRELESS & NETWORKS.
3. Tap Bluetooth. Your Sero 8 scans for and displays the ID of all available Bluetooth devices
in range.
NOTE If your mobile device stops scanning before your Bluetooth device is ready, tap
Search for devices.
4. Tap the ID of the Bluetooth device in the list to pair with it.

16Making Connections
5. Follow the instructions to complete the pairing. If prompted, enter a passkey, or refer to
the documentation that came with the device.
If the pairing is successful, your Sero 8 pro connects to the device.
Connecting Bluetooth Devices
Once you’ve paired with a Bluetooth device, then you can connect to it manually if you want
to switch devices or reconnect after it is back in range.
1. Go to Settings > WIRELESS & NETWORKS, make sure Bluetooth is turned on.
2. In the list of Paired Devices, tap a paired but unconnected device. When the Sero 8 pro
and the device are connected, the device is displayed as connected in the list.
Send Files
1. Make sure Bluetooth is turned on.
2. Press & hold the file you want send, tap share icon > Bluetooth icon .
3. Tap the device you want to send it to. The Sero 8 pro begins to send the file.
Tip: You can see the sending status in Notification Tray.
Receive Files
1. Make sure Bluetooth is turned on and visible. To set Visibility timeout, go to Settings >
WIRELESS & NETWORKS > Bluetooth > Menu icon > Visibility timeout.
2. When the Bluetooth share icon is shows up in Notification bar, open the Notification
Tray and tap the notification, follow the instructions to complete the receiving.
3. To check the information of Bluetooth received, go to Settings > WIRELESS & NETWORKS
> Bluetooth > Menu icon > Show received files.
Tip: You can see the receiving status in Notification Tray.
Rename or Unpair a Bluetooth Device
You can change the name of the Bluetooth device as it appears on your Sero 8 pro. You can
also unpair a Bluetooth device.
1. Go to Settings > WIRELESS & NETWORKS, make sure Bluetooth is turned on.
2. In the Bluetooth settings, tap the Settings icon beside the connected Bluetooth device
you want to configure.
3. A screen opens that allows you to change the device’s name or unpair it.

17Basic
Basic
Read this chapter to learn about the Sero 8 pro basic features.
Setup Guide
Turning Your Sero 8 pro On for the First Time
To start, turn on your Sero 8 pro by pressing and holding Power button until the Hisense
logo appears. After the animation appears, follow the on-screen instructions to set up your
Sero 8 pro.
1. Slide up and down to select the language, then tap icon.
2. Connect to a Wi-Fi network. Tap a network name to see more details or connect to it, and
enter a password if necessary.
NOTES • You can skip connecting progress, and set a Wi-Fi network in Settings later.
• If your skip connecting progress, the following steps will vary.
3. When prompted, sign in the using email address and password for your Google Account.
If you don’t have one yet, go ahead and create one. For more information about Google
Account, see Google Account on page 23.
NOTE If you do not log in to Google Account, the following steps will vary.
4. Select your Google services.
5. Select your time zone, set current date and time of your Sero 8 pro.
6. Enter your name.
Basic Operation
Using Apps
You interact with the Sero 8 pro using your fingers to tap, double tap, press & hold, slide,
pinch, and rotate objects on the touchscreen.
Tap or Double Tap
To select a feature or item, quickly touch the screen.
Double tap your finger quickly on an item to bring up more details.
4

18Basic
Press & Hold
Touch the screen and hold it there for 2 seconds.
In many situations, pressing and holding will open a menu.
Slide or Drag
Touch the screen and slide your finger to another location.
Press and hold on an object and slide it to another location on the
screen.
Zoom
Place two fingers about an inch apart on the screen. Slide them together
to‘zoom out’.
Slide your fingers apart to‘zoom in’.
Rotate
Place two fingers about an inch apart on the screen. Rotate them in
clockwise or counter-clockwise.
Rearrange Home Screen
Move apps or widgets: Press & hold an icon or widget, slowly to drag it to the screen edge,
the screen will switch.
View info about an app: Press & hold it, drag it to the top of the screen, and drop the app
over the App Info icon .
Uninstall an app: Press & hold it, drag it to the top of the screen, and drop the app over
the Uninstall icon .
Remove widgets: Press & hold a widget, when the Remove icon appears at the top of
the screen, drag the widget into it.
Organize Your Apps With Folders
Make a new folder on your Home screen: Press & hold an icon, slowly to drag it on top of
another app.
Rename folder: Tap the folder, then tap the name of folder, enter a new name.
Press & hold an icon, slowly to drag it into / out of a folder.

19Basic
Manage Downloads
To manage most downloads, tap the Downloads icon .
From the Download app:
Tap an item to open it.
Press & hold an item you want to share, then tap the Share icon and choose a sharing
method from the list.
Press & hold an item you want to delete, then tap the Trash icon .
Screen Orientation
In Quick Settings, you can tap rotation icon to switch the screen rotation mode: Auto Rotate
or Rotation Locked. Or go to Settings > SYSTEM > Accessibility > Auto-rotate screen.
Sharing
The Sero 8 pro gives you lots of ways to share with other people.
In many apps, tap Share or Share icon and choose a sharing method from the list for
sharing. The options vary depending on the app you’re using.
Security
Set Screen Lock
You can set an automatic screen lock to prevent unauthorized access.
To adjust your lock settings:
1. Go to Settings > PERSONAL > Security > Screen security > Screen lock.
2. Tap the type of lock you want and follow the on-screen instructions. If you have previously
set a lock, you must enter the pattern, PIN, or password to unlock the lock settings.
Slide - The slide provides no protection, but lets you get to the Home screen quickly.
Hisense - The Hisense lets you slide on the screen, then get to the Home screen.
ROTATION LOCKEDAUTO ROTATE
Table of contents
Languages:
Other Hisense Tablet manuals

Hisense
Hisense HM618 User manual

Hisense
Hisense HM628N User manual

Hisense
Hisense HM616 User manual

Hisense
Hisense Sero 7 Pro User manual

Hisense
Hisense Sero 7 Lite User manual

Hisense
Hisense SERO 7 LE User manual

Hisense
Hisense Sero 8 User manual

Hisense
Hisense HM516 User manual

Hisense
Hisense Sero 7 Pro User manual