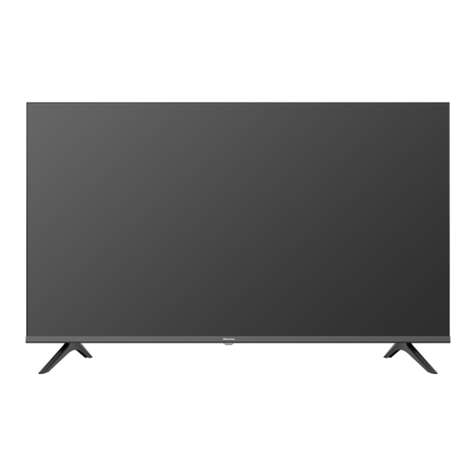
Hisense 32A5KQ User manual

Read the manual carefully and ensure you have fully understood
its contents before operating this device for the first time.
English

Contents
First-Time Use
Using the E-Manual............................................................................................................................3
Home Screen......................................................................................................................................3
Connecting to the Internet..................................................................................................................6
Setup via Mobile Phone..................................................................................................................... 8
Prepare Live TV................................................................................................................................. 8
Using External Devices...................................................................................................................... 8
Using the TV Voice Service...............................................................................................................9
Guidelines........................................................................................................................................... 9
Enjoy Live TV
Channel Scan................................................................................................................................... 13
Live Menu......................................................................................................................................... 14
Channel Edit..................................................................................................................................... 16
Programme Info................................................................................................................................18
Programme Guide (EPG).................................................................................................................19
Programme Recording (PVR).......................................................................................................... 20
Reminder.......................................................................................................................................... 23
Timeshift........................................................................................................................................... 24
HbbTV...............................................................................................................................................25
Learn about Live TV Support Settings.............................................................................................25
Benefits of Smart TV
Using a VIDAA Account................................................................................................................... 27
Voice Service Setup......................................................................................................................... 27
Content Sharing................................................................................................................................31
Using Apps....................................................................................................................................... 32
Using the Art App.............................................................................................................................33
Enjoy the Internet............................................................................................................................. 33
Data Protection and Security........................................................................................................... 34
Usage Mode Setup.......................................................................................................................... 34
Using the Mobile App.......................................................................................................................35
Connecting to External Devices
Remote & Accessories.....................................................................................................................36
Connecting Bluetooth Devices......................................................................................................... 38
Connecting a Set Top Box...............................................................................................................39
Connecting a Blu-ray or DVD Player...............................................................................................39
Sharing your Smart Phone/Computer Screen on the TV................................................................ 40
Using AirPlay and HomeKit..............................................................................................................40
Connecting USB Devices.................................................................................................................41
1
Contents
Connecting Headphones.................................................................................................................. 42
Connecting Audio Visual (AV) Devices............................................................................................43
Connecting Speakers or Other Audio Receivers.............................................................................44
Connecting a Digital Audio System with ARC/eARC.......................................................................44
Connecting a PC or mobile device.................................................................................................. 45
Settings Overview
Picture...............................................................................................................................................46
Sound................................................................................................................................................50
Network.............................................................................................................................................54
General............................................................................................................................................. 56
Support............................................................................................................................................. 58
Using Parental Controls................................................................................................................... 60
Reset to Factory Default.................................................................................................................. 60
Entertainment
Game................................................................................................................................................ 61
Sports................................................................................................................................................61
Media................................................................................................................................................ 62
Accessibility Features
Accessibility Menu Setup................................................................................................................. 66
Audio Type Setup.............................................................................................................................66
Dialogue Enhancement.................................................................................................................... 66
Subtitle Setup................................................................................................................................... 66
Screen Magnification........................................................................................................................ 67
Voice Guide...................................................................................................................................... 67
Troubleshooting
FAQ...................................................................................................................................................68
TV Status Diagnosis.........................................................................................................................73
Remote Control Service................................................................................................................... 74
Picture Issues................................................................................................................................... 74
Sound Issues....................................................................................................................................75
Network Issues................................................................................................................................. 76
Channel and Broadcast Issues........................................................................................................ 76
External Device Connection Issues................................................................................................. 77
HDMI & CEC Issues........................................................................................................................ 78
Media Files....................................................................................................................................... 78
Voice Service Issues........................................................................................................................ 78
Other Issues..................................................................................................................................... 78
2

First-Time Use
Using the E-Manual
View the embedded E-Manual that contains information about your TV's key features.
Disclaimer:
Instructions and images through this manual are only for reference and may differ from the actual product.
Launch the E-Manual
Press / button on your remote control and select Settings > Support > E-Manual.
Enter the Home screen of the E-Manual.
Press / button on your remote control and select TV, then press / button on your
remote control and select E-Manual.
Enter Enjoy Live TV chapter to learn more about how to set up Live TV features.
Press / button on your remote control and select Connection Guide.
Enter Connecting to External Devices chapter to learn more about how to connect external devices to your
TV and how to set up.
Note:
• The black background icon indicates the button on the remote control.
• The grey background icon indicates the icons on the device for selecting.
Use the Buttons in the E-Manual
Search
Search for the product feature information, the E-Manual will provide all the titles and content that contains the
search information.
QR Code
Scan the QR Code with your Smart Phone to open the E-Manual on your device.
Try Now button
Select Try Now, and it will guide you to the corresponding TV menu for trying the function.
Home Screen
All TV functions can be accessed from the Home screen.
3

First-Time Use
1. Navigation bar
2. Apps
Note:
• Indicators or icons may vary depending on models/countries/regions.
Display the Home Screen
Press / button on your remote control to enter the Home screen.
To exit the Home screen, press / button on your remote control or use the navigation buttons
to move the focus to the Input icon on the top of the screen, press button to enter and select your
desired input source.
Use the Navigation Bar
The navigation bar refers to indicators and icons on the top of the Home screen.
Note:
• Indicators or icons may vary depending on models/countries/regions.
Search
Search the content you want.
Input
Select the input source depending on the device you have connected to your TV.
Settings
Manage TV configuration.
Notifications
Allow pop-up notifications to appear for useful information and events that occur with your TV, including:
Advertising, New Arrivals, Warnings and Legal Statements, System Messages and Alexa Notification.
You can enable/disable each of these notifications at Settings in the notification centre.
You can view the list of event messages generated by the TV.
4

First-Time Use
To delete all notifications, select Clear All.
Note:
• The Alexa Notification may not be applicable in some models/countries/regions.
• When you sign into your VIDAA account, please find Notifications in VIDAA Account on the Home screen.
VIDAA Account
A VIDAA account provides all the best features of your Smart TV and ensures that all services are kept up to
date.
For more information about VIDAA account, please refer to Benefits of Smart TV > Using a VIDAA Account in
this manual.
Voice
Quick access to Voice Service. For more information, please refer to Benefits of Smart TV > Voice Service
Setup in this manual.
Guide
Quick access to Guide. For more information, please refer to Enjoy Live TV > Programme Guide (EPG) in this
manual.
Live TV
Quick access to Live TV. For more information, please refer to First-Time Use > Prepare Live TV in this
manual.
Time
You can always view the current time at the top of the Home screen.
Network
Connect your TV to the Internet through a wireless connection or an Ethernet cable , and the
corresponding icon will appear.
Use the Shortcuts
You can add inputs, channels and websites to the Home screen to have quick access to them for your
convenience.
5

First-Time Use
Add and remove inputs
1. Press / button.
2. Move the focus to an input you want to add to the Home screen and press / > Add to home > .
The input icon will appear in Shortcuts on the Home screen.
Note:
• Some options from the input source page cannot be added to the Home screen.
•To remove the input from Shortcuts, move the focus to the shortcut, then press and hold the button on
your remote control.
Add and remove channels
1. In Live TV, press / button to access the channel list.
2. Press / button and press button to tick channel(s) that you would like to add on the Home
screen.
3. Select Add to home. The channel icon will appear in Shortcuts on the Home screen.
Note:
•To remove the channel from Shortcuts, move the focus to the shortcut, then press and hold the button
on your remote control.
Add and remove webpages
1. In Browser, visit a website you would like to add on the Home screen.
2. Use the D-pad to move the focus to the icon in the top of the Browser navigation bar.
3. Select Add and this webpage will appear in the Shortcuts on the Home screen.
Note:
•To remove webpages from Shortcuts, move the focus onto the shortcut page, then press and hold the
button on your remote control.
Connecting to the Internet
To get access to the Internet using a wired connection or connecting to an available wireless network.
Connect to a Wired (Ethernet) Network
To get access to the Internet using a wired connection, it is recommended to use a modem or router that
supports Dynamic Host Configuration Protocol (DHCP). Modems and routers that support DHCP automatically
provide the IP address, netmask, gateway, DNS Server 1 and DNS Server 2, so you do not have to enter
them manually. Most home networks already have DHCP.
6

First-Time Use
After connecting to a wired (Ethernet) network, press / button on your remote control, and select
Settings > Connection > Network > Network Configuration.
Set the TV network by selecting Network Configuration and press button to enter the submenu.
•Connection Type
Choose a wired (Ethernet) network connection to access the Internet.
•Ethernet
Display network status.
•IP Settings
In IP Version, you can select from IPv4 and IPv6. When IPv4 is selected, the IP address, netmask,
gateway, DNS Server 1 and DNS Server 2 will be automatically defined, or you can configure them
manually for your network connection. When IPv6 is selected, all information is automatically defined.
Related information
Network on page 54
Network Issues on page 76
My TV cannot connect to the network. on page 69
Connect to a Wireless Network
To connect to an available wireless network, make sure that you turn on your wireless router and have the
wireless router's SSID and password before attempting to connect.
To get access to the Internet using a wireless connection, press / button on your remote control, and
select Settings > Connection > Network > Network Configuration.
Set the TV network by selecting Network Configuration and press button to enter the submenu.
•Connection Type
Choose a wireless network connection to access the Internet.
•Advanced Settings
Configure the advanced wireless network settings for the TV.
•Add
You can add a wireless network.
•Refresh
Refresh wireless network.
Note:
• If no wireless router is found, select Add and enter the network name in the SSID.
7

First-Time Use
• If no wireless router is found, select Refresh.
Related information
Network on page 54
Network Issues on page 76
My TV cannot connect to the network. on page 69
Setup via Mobile Phone
When you turn on the TV for the first time, the TV will support setup via your smart device by scanning the QR
code.
If you scan the QR code to allow setup via the mobile app, setup of the TV will be more efficient.
Before performing setup with the mobile app, please make sure your mobile device has Bluetooth activated
and is connected to the wireless network.
Note:
• The setup above is for referencing purpose and may differ depending on models/countries/regions.
Prepare Live TV
Connect satellite/antenna/cable to the TV
Note:
• TV jacks may vary and satellite/antenna/cable function may not be applicable in some models/countries/
regions.
• You may also connect devices that can receive broadcast signals such as a Set Top Box.
Start auto scan or manual scan
1. Press / button on your remote control and select TV.
2. Press / button on your remote control and select Settings > Channel > Auto Scan/Advanced
Settings > Manual Scan.
Using External Devices
Access to connected external devices including wireless connected devices.
8

First-Time Use
Switch between external devices connected to the TV
1. Press / button on your remote control or press / button to move the focus to the
Input icon on the top of the Home screen, press button to enter.
2. Select your desired input source.
Edit the name of input sources
1. Press / button on your remote control or press / button to move the focus to the
Input icon on the top of the Home screen, press button to enter.
2. Move the focus to an input source and press / button on your remote control.
3. Select Rename.
Note:
• Some input sources cannot be renamed.
Using the TV Voice Service
Select Voice Service on the TV
To access the Voice Service and select a voice assistant:
•press / button on your remote and select Voice icon in the navigation bar;
•or press button on your remote control;
•or press / button to select Settings icon, and select System > Voice Service.
Use the remote microphone
You can enjoy interacting with voice assistant using your voice by just pressing and holding the button on
your remote control.
Note:
• Voice Service feature may not be applicable in some models/countries/regions.
•The remote control with button is only available in some models/countries/regions.
• To use this function, End User License Agreement and corresponding Smart feature privacy policy/terms
and conditions may be required to be agreed to.
Related information
Voice Service Setup on page 27
Guidelines
Note:
• Guidelines content is only applicable in Germany.
• The actual design of remote control could differ.
9

First-Time Use
How are TV channels sorted and why?
Channel sorting
The availability of individual channel may depend on the selected reception path, such as satellite (DVB-S/
S2), cable (DVB-C) or antenna (DVB-T2) and the signal strength.
Standard or an operator (Astra 19.2°, Vodafone (NRW, Hessen, BW) or Pÿur) can be selected for automatic
channel search.
To sort channels when selecting an Operator:
When an operator is selected, the channels are sorted based on the operator's criteria.
Channel sorting when selecting Standard:
After a successful channel search, the channels are sorted by genre. These include full programmes, children,
sports, documentaries, or regional and local programmes.
Broadcasters with less coverage and, if available, international channels are listed in alphabetical order after
the pre-sorted list.
If LCN (Logical Channel Number, only possible with cable reception) is activated during the channel search,
the sorting takes place according to the criteria of the local cable network operator.
Search by Channel name
The search within Live TV can be opened with the button. Here you can search for individual channels by
name.
Radio Transmitter
Radio channels are listed in alphabetical order after the list of TV channels.
To make finding radio channels easier, the filter function of the channel list is recommended (please refer to
Display Channel List in this manual).
Sort Manually
The channel list can be manually sorted at any time. More information can be found in Edit Channel List and
Edit Favourite Channel List in this manual.
How are apps sorted and why?
The applications on the VIDAA platform are positioned according to the bellow criteria.
In the Application Docker on the Home Launcher:
To ensure equal representation of apps and provide fair treatment of newly launched content partners, the
applications are ordered based on the (i) global number of users, (ii) number of users in Germany, (iii) number
of subscribers in Germany, (iv) share of local language content, (v) variety of content, and (vi) novelty of the
platform. At all times the Application launcher must include:
• the 2 leading global SVOD platforms
• the 2 leading global TVOD platforms
• the 2 leading global AVOD platforms
• the leading local sports platform
• at least 4 leading local applications with predominantly German content
10

First-Time Use
• at least 1 leading application with children's content
• at least 2 applications that have launched in the last 6 months
The ordering of applications is reviewed every 6 months and a new programming table is issued for newly
connected devices.
In the My Apps section:
The applications are ordered in alphabetical order.
How can TV channels and apps be customised?
TV channels
In Live TV, press / button on your remote control and press button to select a Live TV channel
category such as Antenna or Cable, then use D-pad to select Edit.
Alternatively, in Live TV, press / button, select Settings > Channel > Channel Edit, and select a Live
TV channel category such as Antenna or Cable.
•Press button on the selected channel, then a checkbox will appear. You can select multiple channels
at the same time to move or delete.
•Move: Press button to move the selected channel.
Moving the channels could be restricted by the operator. If you want to be able to move channels, it is
recommended not to choose an operator during channel scan, LCN should be set to Off.
•Delete: Press button to delete the selected channel.
•Restore: Press [RED] button, or press / button to display the colour menu and select RED
to enter the list of deleted channels. Press button to restore the deleted channel.
•Filter: Press [YELLOW] button or press / button to display the colour menu and select
YELLOW, the filter screen will pop up. Press button to select options, the channel list can be updated.
•Search: Press [BLUE] button or press / button to display the colour menu and select BLUE
to search the channel.
Favourite list
Viewing your favourite list
In Live TV, press / button on your remote control and press button, then select FAV1-4 to display
the favourite list.
Editing the favourite list
In Live TV, press / button on your remote control and press , and select FAV1-4, then use D-pad to
select Edit.
Alternatively, in Live TV, press / button on your remote control, and select Settings > Channel >
Channel Edit, then select FAV1 - FAV4.
You can add, move or remove favourite channels.
•Select Add channels to add the selected channel to the favourite list.
•Select a channel in a favourite list, press button to move it.
11

First-Time Use
•Select a channel in a favourite list, press button to remove it.
Apps
/ > More Apps
Factory installed apps:
Select the item you want to move, then long press button, use the D-pad to move it, and press button
to store position.
Non-factory installed apps:
Select the item you want to move, then long press button to select Sort, use the D-pad to move it, and
press button to store position.
Note:
• Some Apps cannot be moved.
How are recommendations created?
Recommendations on the platform are dependent on the ability and willingness of partners to provide
metadata to the platform. The content is positioned depending on the following criteria:
Above the fold applications:
The recommendations originate from the Content partners that are highlighted. They are in the domain of the
end-user.
Below the fold applications:
Recommendation rows are created by the editorial team, following these guidelines:
1. Content variety – Providing a broad selection of content
2. Type of access variety – Providing advertising-supported, subscription, and transactional content
3. Balance – Providing a balance between global and local content
12

Enjoy Live TV
Channel Scan
You can scan for channels automatically or manually.
Auto Scan
Automatic channel scan.
1. Press / button on your remote control, and select TV.
2. In Live TV, press / button and select Settings > Channel > Auto Scan.
If no TV channels were saved before, you will be prompted to do a channel scan.
Satellite
•Single satellite: You can use single satellite if you only have one satellite installed.
•DiSEqC: You can choose DiSEqC if you have DiSEqC equipment. Up to four satellites in DiSEqC 1.0
mode can be installed.
If you are using a motorised antenna, you can use DiSEqC 1.2 mode.
•Unicable: If your home is equipped with Unicable satellite distribution, you should use this option.
Please make sure that you know the Unicable band and frequency to be used. The information should be
available on the equipment or the landlord can provide it.
Antenna
•Channel: Select from All Channels or Free Channels. This option may not be available depending on
countries/regions/operators.
•Scan Mode: Select from digital channels only (DTV), digital and analogue channels (DTV+ATV) or
analogue channels only (ATV).
If you receive DVB-T or DVB-T2 signal, you can use DTV.
•LCN: Switch on/off LCN (Logical Channel Number).
Please note that some operators are restricted to manually change the channel order. If you switch off
LCN, then the channel list can be edited after channel scan.
This function may not be applicable in some models/countries/regions.
Cable
•Channel: Select from All Channels or Free Channels. This option may not be available depending on
countries/regions/operators.
•Scan Mode: Select from digital channels only (DTV), digital and analogue channels (DTV+ATV) or
analogue channels only (ATV).
•LCN: Switch on/off LCN (Logical Channel Number).
Please note that some operators are restricted to manually change the channel order. If you switch off
LCN, then the channel list can be edited after channel scan.
This function may not be applicable in some models/countries/regions.
Note:
• Satellite/antenna/cable function may not be applicable in some models/countries/regions.
13

Enjoy Live TV
Related information
Prepare Live TV on page 8
Manual Scan
Manually scan for channels for DTV or ATV.
1. Press / button on your remote control, and select TV.
2. In Live TV, press / button on your remote control and select Settings > Channel > Advanced
Settings > Manual Scan.
DTV Manual Scan
Manually scan for DTV services.
When the DTV Manual Scan screen appears, press / button to select Antenna, Cable or Satellite and
configure corresponding settings. Then select Start to commence the search of that channel. When the signal
has been received, the signal strength will be displayed on the screen.
ATV Manual Scan
Manually scan for ATV services.
•Frequency: Input the channel frequency you want (only available for some countries/regions).
•Channel Number: Select the channel number you want (only available for some countries/regions).
•Picture System: Select the Colour System.
•Sound System: Select the Sound System.
Note:
• Satellite/antenna/cable function may not be applicable in some models/countries/regions.
Related information
Prepare Live TV on page 8
Live Menu
You can obtain quick access to the channel list, favourite channel list or use relevant features with ease when
watching TV programmes.
Display Channel List
In Live TV, press / button on your remote control to display the Channel List menu.
Alternatively, in Live TV, press / button on your remote control and select Channel List.
Learn about channel list sub-menu
In Live TV, press / button on your remote control and press button.
14

Enjoy Live TV
TV List
Display Live TV channel categories, such as Cable and Antenna.
FAV1-4
Display favourite lists 1 to 4.
Filter
Select channels by Content, HD, Channel Block, Scrambled and Sort.
Some options in Filter may not be available in some models/countries/regions.
Edit
Edit the channel list.
Note:
• The sub-menu options may vary depending on models/countries/regions.
Related information
Edit Channel List on page 16
Display Favourite Channel List
In Live TV, press / button on your remote control and press button, then select FAV1-4 to display
the favourite list.
Related information
Edit Favourite Channel List on page 17
Learn about the On-Screen Menu
In Live TV, press / button to access the on-screen menu.
•Guide
Quick access to Guide (EPG).
•PVR
Launch Schedule Recording.
•Timeshift
Launch Timeshift.
15

Enjoy Live TV
•HbbTV
Enable or disable HbbTV functionality for the current channel (only available for digital channels).
•Subtitle
Turn on Subtitle function or select subtitle option for digital broadcast content.
•Recording List
Quick access to Recording List.
•E-Manual
Enter Enjoy Live TV chapter to learn more about how to set up Live TV features.
•Audio Only
When you select this option, the screen will not display the picture. You can only listen to the audio.
Press any button except the power button, volume buttons and mute button to restore the picture.
•Settings
Set up picture, sound, channel, network, accessibility, system and support.
Note:
• The menus displayed vary depending on models/countries/regions.
Related information
Programme Guide (EPG) on page 19
Programme Recording (PVR) on page 20
HbbTV on page 25
Subtitle Setup on page 66
Channel Edit
Manually edit the channel list or favourite channel list to your preference.
Edit Channel List
Before you can edit the channel list, Channel Scan must be completed first.
In Live TV, press / button on your remote control and press button to select a Live TV channel
category such as Antenna or Cable, then use D-pad to select Edit.
Alternatively, in Live TV, press / button, select Settings > Channel > Channel Edit, and select a Live
TV channel category such as Antenna or Cable.
16

Enjoy Live TV
Manage the channels
•Press button on the selected channel, then a checkbox will appear. You can select multiple channels
at the same time to move or delete.
•Move: Press button to move the selected channel.
Moving the channels could be restricted by the operator. If you want to be able to move channels, it is not
recommended to choose an operator during channel scan, and LCN should be set to Off.
•Delete: Press button to delete the selected channel.
•Restore: Press [RED] button, or press / button to display the colour menu and select RED
to enter the list of deleted channels. Press button to restore the deleted channel.
•Filter: Press [YELLOW] button or press / button to display the colour menu and select
YELLOW, the filter screen will pop up. Press button to select options, the channel list can then be
updated.
•Search: Press [BLUE] button or press / button to display the colour menu and select BLUE
to search for a channel.
Export the channel list to USB
The current channel list can be exported to a USB storage device.
In Live TV, press / button on your remote control and select Settings > Channel > Channel Edit >
Export to USB.
Import the channel list from USB
Previously exported channel lists can be imported via a USB storage device.
In Live TV, press / button on your remote control and select Settings > Channel > Channel Edit >
Import from USB.
Edit Favourite Channel List
Before you can edit the favourite list, Channel Scan must be completed first.
Add a channel to a favourite list
You can add channels from various reception types to the favourite list.
17

Enjoy Live TV
1. In Live TV, press / button to display the channel list.
2. Press / button and select the channel(s) you want to add to the favourite list.
3. Select Add to Favourite and choose from FAV1-FAV4.
4. Then, a heart-shape icon will appear next to the added channel.
Move or remove channels in a favourite list
In Live TV, press / button on your remote control and press , select FAV1-4, then use D-pad to
select Edit.
Alternatively, in Live TV, press / button on your remote control and select Settings > Channel >
Channel Edit, then select FAV1-FAV4.
You can add, move, or remove favourite channels.
•Select Add channels to add the selected channel to the favourite list.
•Select a channel in a favourite list, and press button to move it.
•Select a channel in a favourite list, and press button to remove it.
Programme Info
While watching TV programmes, press / / button to load the programme info bar.
1. Channel logo
2. Channel number
3. Channel name
4. Indicator of Favourite
5. Date and time, and channel category
18

Enjoy Live TV
6. Current programme
7. Next programme
Note:
• The remote control buttons may vary depending on models/countries/regions.
• The image is only for reference and may differ from the specific product.
Programme Guide (EPG)
The Guide (EPG) provides a convenient way to check TV programmes for the upcoming 8 days. The
information displayed by the Guide (EPG) is made available by the commercial television networks for digital
channels only. The Guide (EPG) also provides a simple way to record your favourite programmes and a
reminder function, which can switch channels automatically at scheduled times, so that you will not miss
programmes of interest. The availability and amount of programme information will vary depending on the
broadcaster.
Note:
• The Guide (EPG) function is only available for digital channels. Analogue channels are not supported.
Launch the Guide
In Live TV, press / button, or press / button and select Guide (EPG) to display programme
guide.
Learn about the Guide menu
•Watch
In Guide (EPG), when a current programme is selected, press > Watch to switch to the channel you
want to see.
•PVR/Reminder
In Guide (EPG), press / button to select the channels. Press / button to select programme
based on the time schedule.
Press button to select PVR or Reminder.
For more information, please refer to Enjoy Live TV > Programme Recording (PVR) or Enjoy Live TV >
Reminder in this manual.
Note:
• The PVR function may not be applicable in some models/countries/regions.
•Scheduled
In Guide (EPG), press [RED] button or press / button to display the colour menu and
select RED. This will display a list of scheduled reminders and recordings.
•Programme Colour
In Guide (EPG), press [GREEN] button or press / button to display the colour menu and
select GREEN. Use the colours to indicate different genres in the Guide (EPG) for quick and easy viewing.
Note:
• This function may not be applicable in some models/countries/regions.
19
Table of contents
Other Hisense TV manuals

Hisense
Hisense 55U8HAU User manual

Hisense
Hisense LCDF0104 User manual

Hisense
Hisense LHD19W57EU User manual

Hisense
Hisense 43A7100F User manual

Hisense
Hisense HE32N50HTS User manual

Hisense
Hisense 75U8G User manual

Hisense
Hisense LEDN32K300M User manual

Hisense
Hisense 32D20 User manual

Hisense
Hisense U8G Series User manual

Hisense
Hisense 50A7500F User manual

Hisense
Hisense 40K220 User manual

Hisense
Hisense HL55V89PZ User manual

Hisense
Hisense A7HAU Series User manual

Hisense
Hisense LCD42P69P User manual

Hisense
Hisense A87H User manual

Hisense
Hisense 75T910UAD User manual

Hisense
Hisense PDP4220EU User manual

Hisense
Hisense M5010 User manual

Hisense
Hisense 58K700UWD User manual

Hisense
Hisense 75N7 User manual