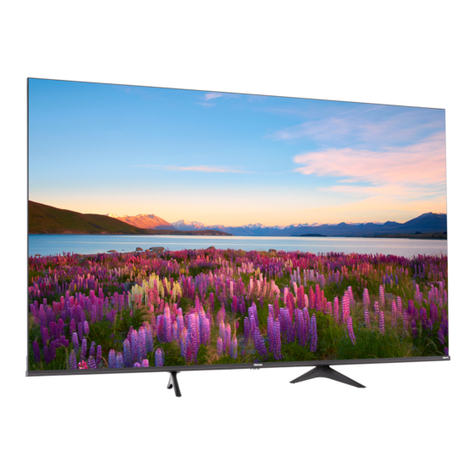
Hisense 32D33 User manual

English
ES-M135202

B
snoitcurtsnIytefaStnatropmI
1. Read, Retain, Follow All Instructions
Read all safeties and operations about the TV. Retain them safely for future reference.
Follow all operations and instructions accordingly.
2. Heed Warnings
Adhere to all warnings on the appliance and in the operating instructions.
3. Cleaning
Unplug the TV from the wall outlet before cleaning. Do not use liquid, abrasive, or
aerosol cleaners. Cleaners can permanently damage the cabinet and screen. Use a
soft dampened cloth for cleaning.
4. Attachments and Equipment
Never add any attachment and/or equipment without approval of the manufacturer as
such additions may result in the risk of fire, electric shock or other personal injury.
5. Water and Moisture
The apparatus shall not be exposed to dripping of splashing and that no objects filled
with liquids, such as vases, shall be placed on the apparatus.
6. Setting
Do not place this TV on an unstable cart, stand or table. Placing the TV on an
unstable base can cause the TV to fall, result in serious personal injuries as well
as damage to the TV. Use only a cart, stand, bracket or table recommended by the
manufacturer or salesperson.
7. Ventilation
Slots and openings in the cabinet are provided for ventilation and to ensure reliable
operation for the TV and to protect it from overheating. Do not cover the ventilation
openings in the cabinet and never place the set in a confined space such as built-in
cabinet unless proper ventilation is provided. Leave a minimum 10 cm gap all around
the unit.
8. Power Source
This TV should be operated only from the type of power source indicated on the
marking label. If you are not sure of the type of power supplied to your home, consult
your appliance dealer or local power company.
9. Grounding or Polarization
This TV is equipped with a polarized alternating current line plug (a plug having one
blade wider than the other). This plug will fit into the power outlet only one way. This is
a safety feature. If you are unable to insert the plug fully into the outlet, try reversing
the plug. If the plug should still fail to fit, contact your electrician to replace your
obsolete outlet. Do not defeat the safety purpose of the polarized plug.
A
snoitcurtsnIytefaStnatropmI
The flash with the symbol of arrowhead,
inside an equilateral triangle alerts the
user about the presence of a dangerous
tension not isolated inside the product
which can be sufficiently powerful to
constitute a risk of electrocution.
The point of exclamation inside an
equilateral triangle alerts the user about
the presence of important operating
instructions and maintenance in the
document enclosed in the package.
Do not open the back cover.
In no case the user is allowed
to operate inside the TV set.
Only a qualified technician
from the manufacture is
entitled to operate.
Disposal of Used Electrical &ElectronicEquipment
The meaning of the symbol on the product, its accessory or packaging
indicates that this product shall not be treated as household waste.
Please, dispose of this equipment at your applicable collection point
for the recycling of electrical & electronic equipments waste. In the
European Union and Other European countries which there are separate
collection systems for used electrical and electronic product. By ensuring
the correct disposal of this product, you will help prevent potentially
hazardous to the environment and to human health, which could otherwise be caused
by unsuitable waste handling of this product. The recycling of materials will help
conserve natural resources. Please do not therefore dispose of your old electrical and
electronic equipment with your household waste. For more detailed information about
recycling of this product, please contact your local city office, your household waste
disposal service or the shop where you purchased the product.
Please read the following safeguards for your TV and retain for future reference.
Always follow all warnings and instructions marked on the television.
Main plug is used as the disconnect device, the disconnect device shall
remain ready for operating.
Incorrect replacement of the battery may lead to the risk, including the
replacement of another similar or the same type. Do not expose batteries to
heat such as sun or fire or something like that.
The device should not be exposed to dripping and spraying and it can not
be placed under objects filled with liquids.

C D
snoitcurtsnIytefaStnatropmIsnoitcurtsnIytefaStnatropmI
10. Lightning
For added protection for this TV during a lightning storm, or when it is left unattended
and unused for long periods of time, unplug it from the wall outlet and disconnect the
antenna or cable system. This will protect the TV from damage due to lightning and
power-line surge.
11. Power Lines
An outside antenna system should not be located in the vicinity of overhead power
lines or other electric light or power circuits, or where it can fall into such power lines or
circuits. Where installing an outside antenna system, extreme care should be taken to
keep from touching such power lines or circuits as contact with them might be fatal.
12. Overloading
Do not overload wall outlets and extension cords as this can result in a risk of fire or
electric shock.
13. Object and Liquid Entry
Never push any kinds of object into this TV through openings as they may come up
against dangerous voltage points or short-out parts that could result in fire or electric
shock. Never spill any kinds of liquid on or into the TV.
14. Outdoor Antenna Grounding
If an outside antenna or cable system is connected with the TV, be sure the antenna
or cable system is grounded so as to provide protection against voltage surges
and built-up static charges. Section 810 of the National Electric Code, ANSI/NFPA
No. 70-1984,provides information with respect to proper grounding of the mast and
supporting structure, grounding of the lead in wire to an antenna discharge unit,
connection to grounding electrodes, and requirements for the grounding electrode.
15. Servicing
Do not attempt to service this TV yourself as opening or removing covers may expose
you to dangerous voltage or other hazards. Refer all servicing to qualified service
personnel.
16. Damage Requiring Service
Unplug the TV from the wall outlet and refer servicingto qualified service personnel
under the following conditions:
(a) When the power - supply cord or plug is damaged.
(b) If liquid has been spilled, or objects have fallen into the TV.
(c) If the TV has been exposed to rain or water.
(d) If the TV operates abnormally by following the operating instructions. Adjust
only those controls that are covered by the operating instructions as an improper
adjustment of other controls may result in damage and will often require extensive
work by a qualified technician to restore the TV to its normal operation.
(e) If the TV has been dropped or the cabinet has been damaged.
17. Replacement Parts
When replacement parts are required, be sure the service technician has used
replacement parts specified by the manufacturer or have the same characteristics as
the original part. Unauthorized substitutions may result in fire, electric shock or other
hazards.
18. Safety Check
Upon completion of any service or repair to the TV, ask the service technician to
perform safety checks to determine that the TV is in safe operating condition.
19. Heat
The product should be situated away from heat sources such as radiators, heat
registers, stoves, or other products (including amplifiers) that product heat.
20. Attention
Excessive sound pressure from earphones and headphones can cause hearing loss.

2
Getting Started
1
Contents
Getting Started
Making Connections .............................................................................
Shortcuts Instructions ..........................................................................
Select Input Source .............................................................................
Frist Time Steup ..................................................................................
Basic Features
Other Information
Main Menu Operation
Picture Menu ........................................................................................
Sound Menu................. ........................................................................
Channel Menu ......................................................................................
Lock System Menu ...............................................................................
Setup Menu ..........................................................................................
Electronic Programme Guide (EPG) Menu ..........................................
Time Shift .............................................................................................
Other Setting
PC Setting Menu ..................................................................................
ATV/AV/YPbPr/HDMI ...........................................................................
USB Operation .....................................................................................
Troubleshooting .................................................................................
USB Multimedia Playback Format .....................................................
2
6
8
8
9
10
12
14
16
21
21
21
23
23
26
28
NOTES
Check the jacks for position and type before making any connections. Loose
connections can result in image or color problems. Make sure that all connections
are tight and secure.
Not all A/V devices have the ability to connect to a TV, please refer to the user
manual of your A/V device for compatibility and connections procedure.
Always unplug the power cord when connecting external equipment.
Connect to broadcast antenna or the cable TV
1. To have an optimal picture quality, it is strongly recommended to have an external
antenna or a cable TV.
NOTES
It is recommended that coaxial cable (75Ω) be used to eliminate the interference
caused by the mismatched impedance.
The antenna cable should not be bound together with the power cord.
When using the cable TV, please insert the plug of the coaxial cable (75 Ω) directly
into the antenna outlet.
TV JACK
ANT/CABLE IN
Connect to devices with USB interface
1. This unit has standard USB interface and can be connected to the standard USB1.1
and USB2.0 disks.
2. You can either use the USB connection cord or directly insert the USB into the USB
port at the side of the TV.
TV JACK
USB
Making Connections

3 4
Connecting component cevices (DVD/PVR)
1. Component video(Y, Pb, Pr)transmits video as separate Y, Pb, Pr signals. Use this
connection for high-definition video signals from a DVD or other equipment.
2. Connect Component inputs (“Pr ”,“Pb ”, “Y”) and audio(R/L) of your set with
Component video and audio cables to the corresponding component video and
audio (R/L)out connectors on the PVR or DVD. Component audio Jack common AV
IN audio Jack.
Connect to AV devices
1. Connect video terminal to an appropriate external terminal on A/V device such as
a VCR, DVD or Camcorder with a video cable.
2. Connect“R -AUDIO - L” on your set to the corresponding audio terminal with audio
cables on the A/V device.
Equipment with A/V jacks
DVD Player/Recorder
Video
Camera
EXTERNAL DEVICES
Set-top box
Satellite Receiver
Satellite
antenna
cable
VCR
TV JACK
A/V OUT
Video
L
R
White(L)White(L)
Yellow(Video)Yellow(Video)
Red(R)Red(R)
AV Cable
(not included)
VIDEO L R
AV IN
Y PBPR
COMPONENT IN
L R
Equipment with A/V jacks
Video
Camera
EXTERNAL DEVICES
Satellite
antenna
VCR
White(L)
White(L) Red(R)
Red(R)
Audio Cable
(not included)
Component Cable
(not included)
TV JACK
Component
R
L
PR
PB
Y
PR/CR
PR/CR
PB/CB
PB/CB
YY
Getting Started Getting Started
NOTE
The “Y, Pb and Pr ” connectors on your component devices (PVR or DVD) are
sometimes marked with Y, B-Y and R-Y or Y, CB and CR. (Colors for inputs and
cables must correspond on both devices.)
NOTE
The HDMI connector provides both video and audio signals, it’s not necessary to
connect the audio cable.
Connect to devices with HDMI interface
Support digital connections between HDMI - enabled AV devices such as PVR,
DVD, Blu-Ray, AV receiver and digital devices.
Some devices such as PVR or DVD player require HDMI signal to be set to output
in the device's settings.
Please consult your device user manual for instructions.
1. Use an HDMI cable to connect the A/V device’s HDMI output jack to the TV’s HDMI
jack.
2. Plug the connected devices into the mains socket before switching on the TV .
3. Select the corresponding source from the TV.
HDMI
HDMI
TV JACK
EXTERNAL DEVICES
DVD Player/Recorder
Set-top box
Equipment with HDMI jacks
HDMI Cable
(not included)
Connecting a PC with VGA cable
1. Use a VGA cable to connect the PC’s VGA output jack to the TV’s VGA jack. Use
an audio cable to connect the PC’s audio output jack to TV’s PC/DVI AUDIO IN jack.
2. Plug the connected devices into the mains socket before switching on the TV.
3. Select the corresponding source from the TV.

5 6
Getting Started Getting Started
EXTERNAL DEVICES
Computer
TV JACK
VGA PC/DVI AUDIO IN
Audio Cable
(not included)
VGA Cable
(not included)
NOTES
Primarily this unit is intended for use as an LCD TV. If you want to use it as a
monitor, please contact the manufacturer of the PC Video/Graphic's card for further
support. Perfect compatibility is not warranted.
The VGA cable will not be supplied with the product.
We strongly recommend to use VGAcable with 2 cores as shown in the figure.
COAXIAL audio
1. Use a coaxial cable to connect the A/V device’s digital audio in jack to the TV’s
DIGITALAUDIO OUT jack.
2. Plug the connected devices into the mains socket before switching on the TV.
3. Select the corresponding source from the TV.
TV JACK
EXTERNAL DEVICES
Powerless
Bass Speaker Speaker
Audio Ampli�er
COAXIAL Coaxial Cable
(not included)
NOTE
When a digital audio system is connected to the DIGITAL AUDIO OUT (COAXIAL)
jack, decrease the volume of both the TV and the system.
Connecting a headphone
Headphones can be connected to the HEADPHONE output on your set. (While the
headphone is connected, the sound from the built-in speakers will be disabled.)
Turning your TV on and off
Selecting the video source
Adjusting the volume
1. To turn your TV on: Connect the TV to an AC power outlet and turn on the AC
Power ON/OFF switch and turn on the Power button. A few seconds later an image
will appear on the screen.
1. Select the video source depending on the video device you have connected to the
TV set. DTV, ATV, AV,YPbPr,HDMI PC and USB can be chosen as the video
source.
2. Press [Source]to select the video source . When the list of video source appears,
press [▲/▼] to select the source, then press [OK] to enter.
Press [VOL /VOL ] to increase or decrease the volume. Press [Mute] to turn off
the Audio. Press [Mute] again to turn on theAudio.
NOTE
Turn the Power button off when you do not intend to use the TV for long periods,
for example overnight. Remove the connection from the wall power outlet if you do
not intend to use the unit for longer period, for example, if you plan to be away for
a few days. Wait at least 5 seconds after turning off if you want to turn on the TV
again.
Shortcuts Instructions
∧ ∨
NOTE
To prevent possible hearing damage, do not listen at high volume levels for long
periods
AUDIO OUT
EXTERNAL DEVICESTV JACK

7
Getting Started
8
Getting Started
Selecting the picture mode
Press [Picture]one or more times to select the picture mode which you want. You
can select Standard, Soft, Vivid, User (a mode that you defined) mode.
Selecting the aspect ratio
Setting the sleep timer
1. Press [Zoom] to display the aspect ratio. Press this key several times to switch
this mode.
2. You can select Full, Zoom 1, Zoom 2, 4:3, Auto,Dot to Dot.
1. You can specify the time you want your TV to wait before it automatically turns off.
Press [Sleep] one or more times until the remaining time which you want appears.
2. You can select Off, 5 minutes, 15 minutes, 30 minutes, 60 minutes, 90
minutes, 120 minutes...... 240 minutes.
NOTE
The option of aspect is vary with different source.
NOTE
If the interface are different, the source menu will change.
NOTE
If there are no input signal, the TV set will turn to standby
mode automatically after about 15 minutes.
Changing channels
Selecting the sound mode
Press /[CH CH ] to go to the previous or next channel. Either, Press the number
buttons to select a channel. For example, to select channel 12, press 1, then 2
within 3 seconds.
Press [Sound]one or more times to select the sound mode which you want.
Standard, Voice, Custom, Music mode can be selected.
∧ ∨
First Time Setup
Connect an RF cable from the TV’s input called “ANT 75Ω” and to your TV Aerial socket.
OSD Language
Press [◄ / ►] button to select the language to be used for menus and message.
Mode Setting
Press [◄ / ►] button to select mode.
Country
Press [◄ / ►] button to select the country
you want to.
Auto Scan
Press [◄ / ►] button to select Mode:
DTV+ATV, DTV, ATV.
First Time Setup
Move Adjust MENU: Return EXIT:Exit
OSD Language English
Mode Setting Home Mode
Country Australia
Auto Scan DTV+ATV
Start
Select Input Source
Press [Source] button to display the input source list,Press [▼/▲] or [Source]
button to select the input source you want to,
Press [OK] button to enter the input source,Press [Exit]
button to quit.

Getting S
9 10
Main Menu Operation
Auto Scan
MENU: Skip EXIT:Exit
Scanning Ch26
Analog Channels Found: 0
Digital Channels Found:
DTV :18 Radio :0 Data :0
Auto Tuning Status
First tuning digital, press [Menu] button to skip digital tuning,
Second tuning analogue, press [Menu] button to skip analogue tuning.
Press [Menu] button to display the main menu.
Press [◄ / ►] button select Picture in the main menu,then press [OK / ▼] to enter.
Auto Scan
MENU: Skip EXIT:Exit
Scanning 145.25 MHz
Analog Channels Found: 3
Digital Channels Found:
DTV :19 Radio :1 Data :1
Picture Menu
1. Press [▼ / ▲]button to select the option that you want to adjust in the Picture
menu.
2. Press [OK /◄ / ►]button to adjust.
3. After finishing your adjustment, Press [Menu]button to return back to the previous
menu.
Picture Mode
Press [▼ / ▲]button to select Picture Mode, then press[◄ / ►]button to select.
(Available Picture mode: Standard,Soft,User, Vivid).
TIPS: You can press [Picture]button to change the Picture Mode directly.
Basic Features
Advanced Settings
Adjust advanced video features to fine tune
the picture.
Press [▼ / ▲] button to select Advanced
Settings, then press [OK / ►] button to
enter sub-menu.
Brightness/Contrast/ Sharpness/Saturation/Hue
Press [▼ / ▲]button to select option, then press [◄ / ►]button to adjust.
Brightness: Adjust the visual perception output of the entire picture, it will effect the
iuminousness of the picture.
Contrast: Adjust the highlight intensity of the picture, but the shadow of the picture is
invariable.
Sharpness: Adjust the peaking in the detail of the picture.
Saturation: Adjust the saturation of the color based on your own like.
Hue: Use in compensating color changed with the transmission in the NTSC mode.
Color Temp: Change the overall color cast of the picture.
Press [▼ / ▲]button to select Color Temp, then press[◄ / ►]button to select
Standard/Cool/Warm.
Standard: Produces a vivid image.
Cool: Produces a gentle blue-hued image.
Warm: Produces a red-hued image.
Zoom: Press [▼ / ▲]button to select Aspect Ratio, then press[◄ / ►]button to select.
Full, Zoom 1, Zoom 2, 4:3, Auto,Dot to Dot. To select the available display format.
Basic Features
Dynamic Contrast Medium
Dynamic Contrast
Automatically adjust picture detail and
brightness.
Press [▼ / ▲] button to select Dynamic Contrast , then press[◄ / ►] button to select .
(Available Dynamic Contrast : Off,Weak ,Medium,Strong ).
Backlight
Adjust backlight to suit light conditions in the room.Under low room
illumination, the use of lower backlight settings is recommended for reduced power
consumption and extended life of the flat panel of your television.
Sound Menu
Press [Menu] button to display the main
menu.
Press [◄ / ►] button select SOUND in the
main menu,then press [OK / ▼] to enter.

11 12
1. Press [▼ / ▲] button to select the option
that you want to adjust in the SOUND
menu.
2. Press [OK /◄ / ►] button to adjust.
3. After finishing your adjustment, Press
[Menu] button to return back to the
previous menu.
Sound Mode
Press [▼ / ▲] button to select Sound Mode, then press [◄ / ►] button to select.
(Available Sound mode: Standard, Voice, Custom,Music).
TIPS: You can press [Sound] button on the remote control to change the Sound
Mode directly.
Standard Produces a balanced sound in all environments.
Voice Preserves the original sound.Good for musical programs.
Custom Select to customize sound settings.
Music Enhances treble and bass for a rich sound experience.
Treble/Bass/Balance
Press [▼ / ▲] button to select option, then press [◄ / ►] button to adjust.
Treble Adjust the treble effect.Increases or decreases high-pitched sounds.
Bass Adjust the bass effect.Increases or decreases lower-pitched sounds.
Balance Adjust the balance between left and right speakers to adapt to your
listening position.
Basic Features Basic Features
SPDIF
Press [▼ / ▲] button to select Digital Output, then press [◄ / ►] button to select Off /
Auto / PCM .
Audio Description
Press [▼ / ▲] button to select Audio
Description , then press [OK / ►] button to
enter sub-menu.
Not available in Australia.
AVL
Automatically reduces sudden volume changes,for example,when switching beween
the channels.
Press [▼ / ▲] button to select AVL, then press [◄ / ►] button to select On or Off.
Mode
Press [▼ / ▲] button to select Mode, then
press [◄ / ►] button to select On or Off.
When the mode is On,Volume can be adjust
by users.
Sound Type
Press [▼ / ▲] button to select Sound Type, then press [◄ / ►] button to select.
(Available Sound Type: Stereo,Nicam Dual I,Nicam Dual II,Mixed).
Balance: This item can adjust the speaker’s output, it enables you to listen to best at
your position.
AVL: This item uses for reducing the difference between channel and program’s
volume automatically.
Surround Sound
Press [▼ / ▲] button to select Surround Sound, then press [◄ / ►] button to select
On or Off.
EQ Setting
You can choose different options Off,Rock,
Pop,Jazz,User.Adjust the curve of 7 bands
equalizer. Press [▼ / ▲] button to select EQ
Setting, then press [OK / ►] button to enter
sub-menu.
NOTE
1. Press [▼ / ▲] button to select the option
that you want to select in the Channel
menu.
2. Press [OK] button to enter sub-menu.
3. Press [Menu] button to return back to the previous menu.
Press [Menu] button to display the main
menu.
Press [◄ / ►] button to select Channel
in the main menu,then press [OK / ▼] to
enter.
Channel Menu
Channel
Auto Scan
Manual Scan
Channel Edit
Signal Information
Auto Scan
Press [▼ / ▲] button to select Auto Scan, then press [OK / ►] button to enter
sub-menu.

13 14
Basic Features Basic Features
Country
Press [◄ / ►]button to select country
Mode
Press [◄ / ►]button to select Mode: DTV+ATV,
DTV, ATV.
Start
Press [OK / ►]button to start the auto searching.
It will search digital channels first,then analog
channels.
Australia
Manual Scan
Search for the channels manually.
Press [▼ / ▲] button to select Manual Scan,
then press [OK / ►] button to enter sub-menu.
Digital Manual Scan
Press [▼ / ▲] button to select Digital Manual
Scan, then press [OK / ►] button to enter
sub-menu.
Start
Press [OK / ►] button to start the channel
searching.
AFC
Auto Frequency control.
press [◄ / ►] button to select On or Off.
Start
Press [OK / ►] button to start the channel searching.
Analog Scan
Press [◄ / ►] button to select Analog Scan.
Channel to Save
Press [◄ / ►] button to select Channel to Save.
Color System
Press [◄ / ►] button to select Color System:Auto,PAL or SECAM.
Sound System
Press [◄ / ►] button to select Sound System :Auto,DK,BG,I or L.
Channel Edit
Press [▼ / ▲] button to select Channel Edit, then press [OK / ►]button to enter
sub-menu.
The three colored key are the
shortcut key for programming the channels.
First press [▼ / ▲] to highlight the channel
you want to delete or move or skip, then:
Press the [Red] button to delete the channel.
Press the [Green] button to skip the select
channel. (Your TV set will skip the channel
automatically when using CH+/- to view the
channels.)
Press the [Yellow] button to rename the channel.
Rename
Analog Manual Scan
Press [▼ / ▲]button to select Analog Manual
Scan, then press [OK / ►] button to enter
sub-menu.
Signal Information
Press [▼ / ▲] button to select Signal
Information, then press the [OK] button
to see the detail information about the
signal. Only available when there is signal
under DTV.
Lock System Menu
Press [Menu] button to display the main
menu.
Press [◄ / ►] button select Lock System
in the main menu,then press [OK / ▼] to
enter.The original password is "0000".
1. Press [▼ / ▲] button to select the option
that you want to adjust in the Lock
System menu.
2. Press [OK/◄ / ►] button to adjust.
3. After finishing your adjustment, Press [Menu] button to return back to the previous
menu.
Hotel Mode
New Password
Clear Lock

15 16
Basic Features Basic Features
Enable
Press [▼ / ▲] button to select Enable, then
press [◄ / ►] button to select On or Off.
Channel Locks,Parental Rating and Lock
Keypad are available when Enable is On.
Parental Rating
Digital television programs are rated to protect young views from unsuitable content for
their age. This unit will only display programs that do not exceed an appropriate
classification level as determined by a responsible adult. Please select and set the
level of protection from following list. Use a safe password for the Lock Menu to avoid
unauthorized changes.
No Block - No programs are blocked.
Block R and above - All "R" rated classified programs are blocked.
Block AV and above - Adult audiences, strong violence, 15 years and older.
Block MA and above - Mature audiences only, 15 years and older.
Block M and above - Mature audiences only, parental guidance is strongly advised.
Block PG and above - Parental guidance recommended.
Block G and above - General audiences.
Block all - All programs are blocked.
Press [▼ / ▲] button to select Parental Rating, then press [◄ / ►] button to select.
Channal Locks
Press [▼ / ▲] button to select Channal
Locks, then press [OK / ►] button to enter
sub-menu.
Hotel mode
Active Hotel Mode: Set hotel mode On or Off.
Note: The following settings work only when
Active Hotel Mode is set to be ON.
Max Vol.: Set the max volume that you can
adjust.
Default Vol.: Set the default volume for every
time you open the TV, the default volume is 20.
Source Lock: To lock the input sources that
you want.
Default Source: Set the default input source
when turning on your TV.
Default DTV Program: Only available when the Default Source is set to DTV.
Default ATV Program: Only available when the Default Source is set to ATV.
Backup to USB: Backup data to USB.
Restore from USB: Restore data fron USB.
Recall: Recall the default settings of Hotel Mode.
New Password
Press [▼ / ▲] button to select New Password,then enter a 4-digital number you want to
set twice.
Clear Lock
Press [▼ / ▲] button to select Clear Lock.
Lock Keypad
Set to prevent it from being used by young children,or other unexpected usage.
Press [▼ / ▲] button to select Lock Keypad , then press [◄ / ►] button to select On
or Off.
Setup Menu
Press [Menu] button to display the main menu.
Press [◄ / ►] button select Setup in the main menu,then press [OK / ▼] to enter.
1. Press [▼ / ▲] button to select the option that you want to adjust in the Setup menu.
2. Press [OK/◄ / ►] button to adjust.
3. After finishing your adjustment, Press [Menu] button to save and return back to the
previous menu.
Audio Language
Subtitle
Teletext
Mode Setting
Time Settings
PVR Settings
First Time Setup
Reset
Home Mode

17 18
Basic Features Basic Features
OSD Language
Select an OSD menu language can be displayed.Default English is selected as menu
language.
Press [▼ / ▲] button to select OSD Language, then press [◄ / ►] button to select.
Audio Languages
Select an audio language can be displayed.
Default English is selected as audio language.
Press [▼ / ▲] button to select Audio
Languages, then press [OK] button to enter
sub-menu.
Press [▼ / ▲ / ◄ / ►]button to select the
Audio Primary Language and Audio
Secondary Language.
Subtitle
Select a subtitle language can be displayed.Default English is selected as subtitle
language.
Press [▼ / ▲] button to select Subtitle, then press Enter button to enter sub-menu.
Hearing Impaired
Press [▼ / ▲] button to select Hearing
Impaired, then press [◄ / ►] button to
select On or Off.
Not available in Australia.
Mode
Press [▼ / ▲] button to select Mode, then
press [◄ / ►] button to select On or Off.
Press [▼ / ▲ / ◄ / ►] button to select the
Subtitle Primary Language and Subtitle
Secondary Language.
Teletext
Adjust Teletext settings. Only available under
DTV ,ATV,AV source.
Press [▼ / ▲] button to select Teletext, then
press [OK / ►] button to enter sub-menu.
Under DTV source,press [◄ / ►] button to
select Digital Teletext Language and
Decoding Page Language.
Under ATV,AV source,
press [◄ / ►] button to select Decoding Page Language.
Mode Setting
Press [▼ / ▲] button to select Mode Setting.
Time Settings
Press [▼ / ▲] button to select Time Settings,
then press [OK / ►] button to enter
sub-menu.
On Screen Display(OSD)Time
Press [▼ / ▲] button to select OSD Time,
press [◄ / ►] button to select.(Available
OSD Time:Off, 10seconds, 20seconds,
30seconds, 60seconds).
Sleep Timer
Set a timer for the TV to turn off automatically.
Press [▼ / ▲] button to select Sleep Timer,
press [◄ / ►] button to select.(Available Sleep
Timer:Off ,5mins, 15mins, 30mins, 60mins, 90mins, 120mins, 240mins).
Auto Sleep
Press [▼ / ▲] button to select Auto Sleep ,press [◄ / ►] button to select Off, 3 hours,
4hours or 5 hours.
Time Zone
Select your time zone.
Press [▼ / ▲] button to select Time Zone,
then press [OK / ►] button to enter sub-menu.
Time
Press [▼ / ▲] button to select Time ,then
press [OK / ►] button to enter sub-menu.
Set Auto Sync to Off,then you can set the
time manually .
In the case of loss of power, the clock setting
will be lost.
NOTE

19 20
Basic Features Basic Features
PVR List Function
File Manager
The PVR list function enables the user to easily record the digital television content for
later viewing. The function is to be used in DTV source only, the format of storage disk
must be FAT32 or NTFS. This option does not commence if the data storage device
has not been connected. There are two options for recording;
One is selecting the desired program and then pressing record button [●] in remote
control, then selecting sub menu Scheduled Record, please choose the group number
and then select the frequency of recording (once, daily, weekdays) so you would be
able to schedule your desired program.
Second option is pressing [pvr list] button and then selecting sub menu Scheduled
Record, please choose the group number and then select the frequency of recording
(once, daily, weekdays) so you would be able to schedule your desired program. Since
Schedule Record is only provide channel name, you require to check and remember in
advance your desire program, time and channel information via EPG.
Note: If the program has been commenced already, you need to change the start time
with a delay otherwise the program recording does not initiate.
To playback the recorded program, please refer to the File Manager section for detailed
information.
To enter to PVR Setting submenu (File Manager, Scheduled Record, and Device List):
1. Press [pvr list] button in the remote
2. Press [◄ / ►] button to select the
desired submenu.
In the File Manager section, you would be able to see the recorded file list on right side
of menu. By selecting the files from the list the information of the recorded program has
been displayed at the button of the menu.
To replay the recorder program, press
the [Red] button.
To delete recorded program, press
[Green] button.
To delete all, press [Yellow] button.
To zoom in/out, press the [Blue]
button.
In the File Manager section, you would be able to see the recorded file list on right side
of menu. By selecting the files from the list the information of the recorded program has
been displayed at the button of the menu.
To replay the recorder program, press the [Red] button.
To delete recorded program, press [Green] button.
To delete all, press [Yellow] button.
To zoom in/out, press the [Blue] button.
Device List: This sub menu is providing user to check and select the storage device
which will be used for recording. To format the USB or Storage devices please Press
the [Red] button.
Warning: Formatting the disk will result in deleting all files. It is recommended that you
use a dedicated USB storage device only for PVR purpose.
Scheduled Record: To schedule the program to record, first you need to choose the
program that you want to record and find out about time and channel in EPG. Then you
pick a group number and select the frequency of recording (once, daily, weekdays).
This procedure should be repeated for any extra recording program.
Note: If the program has been commenced already, you need to change the Start time
with a delay otherwise the program record does not initiate.
To delete the entire scheduled program, press [Yellow] button.
To delete only one schedule program, press [Green] button.

21 22
Basic Features Basic Features
First Time Setup
Press [▼ / ▲]button to select First time
Setup, then press [OK]button to enter.
Reset
Press [▼ / ▲] button to select Reset, then
press [OK] button to enter sub-menu.
If you are sure to reset,press Yes to reset.
Electronic Programme Guide (EPG) Menu
Time Shift
Reset
Press the button EPG in the remote control to enter EPG menu.
Press the [Red] button to display previous date.
Press the [Green] button to display next date.
Press the [Yellow] button to see the setting
you have done before.
Press the [Blue] button to set the time you
want to remind the program you want to see.
1. Press [▼ / ▲] button on the remote control to select the option that you want to
adjust in the PC Setting menu.
2. Press [OK] button on the remote control to adjust.
3. After finishing your adjustment, Press [Menu] button to return back to the previous
menu.
Other Setting
PC Setting Menu
Press [Source] button on the remote control
to select PC.
Press [Menu] button on the remote control to
display the main menu.
Press [◄ / ►] button on the remote control to
select PC Setting in the main menu.
1. Right click anywhere on your display, select
'Properties'.
2. Find the Settings tab on the dialogue box, set
the screen Resolution.
3. Click OK to exit.
Primarily this unit is intended for use as an LCD TV.
If compatibility is a problem when using this unit as
a monitor, please contact the manufacturer of the
PC Video/Graphic's card for further support. Perfect
compatibility is not warranted.
NOTES
NOTES
The option allows the user to watch a live broadcast(DTV only)with a delay.Since the
function record temporary the program onto a USB or portable storage device.The user
must make sure to connect a USB disk which its storage capacity is no less than
2G.Otherwise the recording will not commerce.
Press the [T.shift] button to dispaly the menu,press the [ ] button to pause the live
broadcast and press it again to paly.Press the [ ] button to watch reverse and press
the [ ] button to watch advance palyback rapidly.Press the [ ] button to exit the
function and watch the current broadcast.
Set the PC Software properly to match one of the below options.
Supported VGA Modes:
VGA____ (640×480 60Hz)
SVGA___ (800×600 60Hz)
XGA____ (1024×768 60Hz)
SXGA___ (1280×1024 60Hz)
Your PC/Notebook may not be able to display some of these resolutions.
1. Sharpness,Saturation and Advanced Settings in Picture menu are invalid.
2. Audio Description and Sound Type in Sound menu are invalid.
3. Channel Locks and Parental Rating in Lock menu is invalid.
4. Audio Languages, Subtitle,Teletext and PVR Settings in Setup menu is invalid.
5. PC mode has no Channel menu.
NOTES
Auto Adjust
Press [OK/ ►] button to adjust the screen automatically to the optimal position of the
picture.
H Position: Adjust the horizontal position of the picture.
V Position: Adjust the vertical position of the picture.
Phase: Adjust the horizontal interfering lines.
Clock: Adjust the vertical interfering lines.

23 24
Basic Features Basic Features
ATV / AV / YPbPr / HDMI
USB OPERATION
1. Picture menu and description are the same as that for DTV mode.
2. Audio Description and Sound Type in Sound menu is invalid.
3. AV/YPbPr/HDMI mode has no Channel menu.
4. Parental Rating and Channel Locks in Lock menu is invalid for HDMI/AV/YPbPr
mode.Parental Rating is invalid for ATV mode.
5. Audio Languages, Subtitle and PVR Settings in Setup option are invalid for AV/
mode.Audio Languages, Subtitle,Teletext PVR Settings in Setup option are invalid
for HDMI/YPbPr mode.
6. HDMI have screen mode in picture menu.
Before operating USB menu,Plug in USB device, then press [Source] button to
set the Input Source to USB .
Press [Media] button to select USB or press
[▼ / ▲] button to select USB in the Source
menu, then press [OK]button to enter.
Press [◄ / ►]button to select the option you
want to adjust in the main USB menu, then
press [OK]button to enter.
NOTE
After playing Music by pressing [info] the info bar activated
Functions description for video player using remote control
Press to play or pause.
Press to play the previous song.
Press to play the next song.
Press to play backward.
Press to play faster.
Press to stop and back to the previous folder.
Press [◄ / ►] to change to the Previous and/ or Next music file.
Press [Blue] button, so you would be able to select Quick Menu and set (repeat
type, background music on/off)
Press [Exit] button to return back to the previous menu.
Please refer to the table provided at the end of User Manual for playable format list.
How to play Music
Press [◄ / ►]button to select Audio file in the main menu, , and enter to the desired
folder by pressing [OK]
Press [▼ / ▲]to move between audio files
Press [◄ / ►]to change page
Press [OK] to select audio file
Press [CH+/-] to switch between File list and
Player.
Press Quick Menu by pressing [Blue] button,
so you would be able to select (repeat type,
background music on/off)
Press [Exit] button to return back to the previous menu.
How to play Photo
Press [◄ / ►]button to select PHOTO in the main menu, and enter to the desired
folder by pressing [OK]
Press [▼ / ▲ / ◄ / ►] to move between files
Press [CH+/-] for change page
Press [OK] to select photo
Press [Exit] button to return back to the
previous menu.
Press Quick Menu by pressing [Blue] button,
so you would be able to select (interval time,
repeat type, background music on/off)
Please refer to the table provided at the end of User Manual for playable format list.
After playing photo by pressing [info] the info bar activated
Press [OK] to switch between single slide and slide show.
Press [◄ / ►] to change to the Previous and/ or Next Photo.
Press[▼ / ▲] to rotate the picture, please note you need to pause the photo player
first and then rotate function would be enabled.
Press [Blue] button, so you would be able to select Quick Menu and set (interval
time, repeat type, background music on/off)
Press [Exit] button to return back to the previous menu.
How play photo while playing background music.
In order to activate background music while playing photo, first you need to turn on the
background music by pressing [blue] button and then select Music file to play and
then select photo.

25 26
Basic Features Other Information
Troubleshooting
When there is something wrong with your TV, you can try turning off the TV
and then restart it. You can also operate according to the following chart. If the
problem still cannot be solved,please contact the professional technicians.
SYMPTOMS POSSIBLE SOLUTIONS
No sound or picture.
Check if the power line is in the outlet and if it has
electricity.
Check if you have pressed Power button on the TV or
Power button on the remote control.
Check the setting of picture brightness and contrast.
Check the volume.
The picture is normal
but there is no sound.Check the volume.
Check if Mute mode is set.
No picture and white
or black picture. Adjust Picture Setting.
Check Color System.
The sound and
picture are interfered.
Try to find the appliance affecting TV set, and move it
far away from the TV set.
Try to insert the power plug of the TV set into another
outlet.
Unclear picture or
picture with snow.
Check the direction, position and connection of your
antenna.
Adjust the direction of your antenna or reset or fine
tune the channel.
The remote control
does not work.
Change the batteries in the remote control.
Clean the upper side of the remote control.(radiating
window)
Check the contacting points of the batteries.
Check if there is obstruction between the remote
control and the monitor.
Check if the batteries are correctly installed.
How to read a TEXT file?
Only when you enter the Music playback music and then enter the Photo or Text,
the function of Background Music can work.
NOTE
After opening the TEXT file by pressing [info] button displays.
Press [◄ / ►] button to select TEXT file in the main menu, , and enter to the
desired folder by pressing [OK]
Press [▼ / ▲] to move between text files
Press [◄ / ►] to change page
Press [OK] to select TEXT file
Press Quick Menu by pressing [Blue] button,
so you would be able to select (repeat type,
Background Music on/off, Encode Type)
Press [Exit] button to return back to the
previous menu.
Press [◄ / ►] for selecting previous and/or next page
Press [0-9] digit on remote to change to
desired page
Press Quick Menu by pressing [Blue] button,
so you would be able to select (repeat type,
Background Music on/off, Encode Type)
Press [Exit] button to return back to the
previous menu.
Functions description for video player using remote control
Press to play or pause.
Press to view the previous movie.
Press to view the next movie.
Press to play backward.
Press to play faster.
Press to stop and back to the previous folder.
How to play Movie
Press [◄ / ►] button to select Audio file in the main menu, , and enter to the desired
folder by pressing [OK]
Press [▼ / ▲] to move between audio files
Press [◄ / ►] to change page
Press [OK] to select video file
Press Quick Menu by pressing [Blue] button,
so you would be able to select (repeat type,
preview, Encode Type)
Press [Exit] button to return back to the
previous menu.

27
Other Information
SYMPTOMS POSSIBLE SOLUTIONS
H/V strip or the
picture shaking. Check if there is interfering source nearby, such as
appliance or electric tools.
The cabinet of the TV
Missing TV channels
Colours are faded,
picture is too bright
or too dark
Sound works, but no
picture
TV turning on and off
No signal from HDMI
and AV in connection
Dropping out signal/
Picture is distorted or
fuzzy (HDMI and AV
in connection)
makes “Click” sound.
Sometimes the room temperature change can cause the
Retune in the channels.
Check alignment of antenna.
Try TV on different antenna point.
Internal antennas may not be able to pick all the
channels, recommend external antenna for proper
reception.
Reset the settings to default.
Try on different channels or sources.
Try to change channel or open menu.
Try to retune the channels.
Test on a different power point or different location.
Test the TV by plugging it straight into a power point,
without extension cords, power boards or surge
protectors.
Disconnect and reconnect the device, make sure that
the cables are plugged in to corresponding ports.
Test the device on another TV.
Disconnect and reconnect the device.
Replace the cable.
Check that the settings on device matches TV specs.
television cabinet to inflate or contra, which makes the
sound. This does not mean the TV breaks down.
Multimedia File Extension
Decoder
Video Audio
Notes
Video
*.avi
MPEG
(*.mpeg,
*.mpg,
*.dat, *vob)
MPEG-4(*.mp4)
TS(*.ts,
*.trp, *tp)
MKV(*.mkv)
MPEG-1 Layer 2
MPEG-1 Layer 3
MPEG-2 Layer 3
AC3
AAC-LC
HE-AAC V1
HE-AAC V2
MPGE1/MPEG2
/MPEG4: Up
to 1080p @ 30F
H.264: Up to
1080p @ 25F
AAC: AAC-LC
(type 2),
HE-AAC v1
(type 5,SBR),
HE-AAC v2
(type 29,
SBR+PS)
MPEG-1
MPEG-2 MP
MPEG-4 SP
MPEG-4 ASP
MPEG-4 XVID
DivX
H.264(AVC)
MP@Level 4
H.264(AVC)
HP@Level 4
MPEG-1 MP
MPEG-2 MP
MPEG-4 SP
MPEG-4 ASP
MPEG-4 XVID
H.264(AVC)
MP@Level 4
H.264(AVC)
HP@Level 4
MPEG-1
MPEG-2 MP
H.264(AVC)
MP@Level 4
H.264(AVC)
HP@Level 4
MPEG-1
MPEG-2 MP
MPEG-4 SP
MPEG-4 ASP
MPEG-4 XVID
H.264(AVC) MP @
Level 4
H.264(AVC) HP @
Level 4
28
Other Information
USB Multimedia Playback Format

29
Other Information
Multimedia File Extension
Decoder
Video Audio
Notes
Music
Photo
Text
File system: Hi Speed FS, FAT32, NTFS(NTFS compressed file is not supported).
PVR function: Recording standby, time-shift, EPG recording reservation.
Note: 1.Max 500 files supported each folder.
2.Licenses involved in specifications above are supposed to be obtained by
customers themselves.
*.flv
H.264(AVC) MP @
Level 4
H.264(AVC) HP @
Level 4
VC-1/WMV9
(*.wmv,
*.asf)
RMVB(*.rm,
*rmvb)
*.mp3
AAC
(*.aac,*m4a)
*.wav
*.jpg
*.jpeg
*.txt
VC-1 MP
VC-1 SP
VC-1 AP
RV8 720P@30
RV9 720P@30
RV10 720P@30
Baseline Mode
Progressive Mode
UTF-8
UNICODE
ASCII
File Size <=1MB
LPCM
ADPCM
AAC
HE-AAC V1
HE-AAC V2
MPEG-2 Layer 3
MPEG-1 Layer 3
Cook Codec
WMA Standard
WMA
Professional
Bit Rate:up to
320Kbps
Sample Rate:
32KHz,
44.1KHz,48KHz
72x72<Baseline
resolution
< 7680x4320
Progressive
Mode Size
<=1280x1024
File Size<=10MB
Table of contents
Other Hisense TV manuals

Hisense
Hisense 40K220 User manual

Hisense
Hisense LCD3201EU User manual

Hisense
Hisense 75P7 User manual

Hisense
Hisense 40H4C1 User manual

Hisense
Hisense M5010 User manual

Hisense
Hisense 32A5100F User manual

Hisense
Hisense 32P2 User manual

Hisense
Hisense 50H7GB series User manual

Hisense
Hisense H9908 User manual

Hisense
Hisense K660HK3D series User manual

Hisense
Hisense 43A7100F User manual

Hisense
Hisense LCD19W57ACA User manual

Hisense
Hisense ES-A20020K-1 User manual

Hisense
Hisense 50R7 User manual

Hisense
Hisense 75N7 User manual

Hisense
Hisense A9H User manual

Hisense
Hisense 32H4D User manual

Hisense
Hisense LCDF0104 User manual

Hisense
Hisense 32N2170HW User manual

Hisense
Hisense ES-L215110 User manual