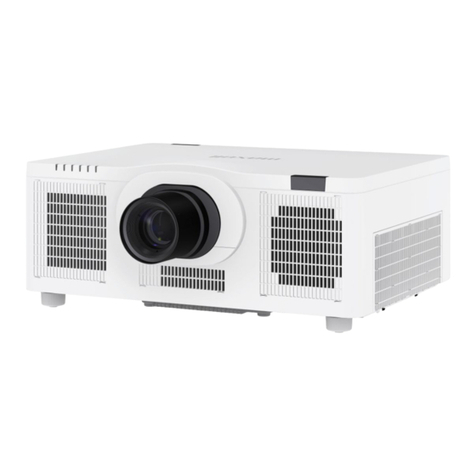
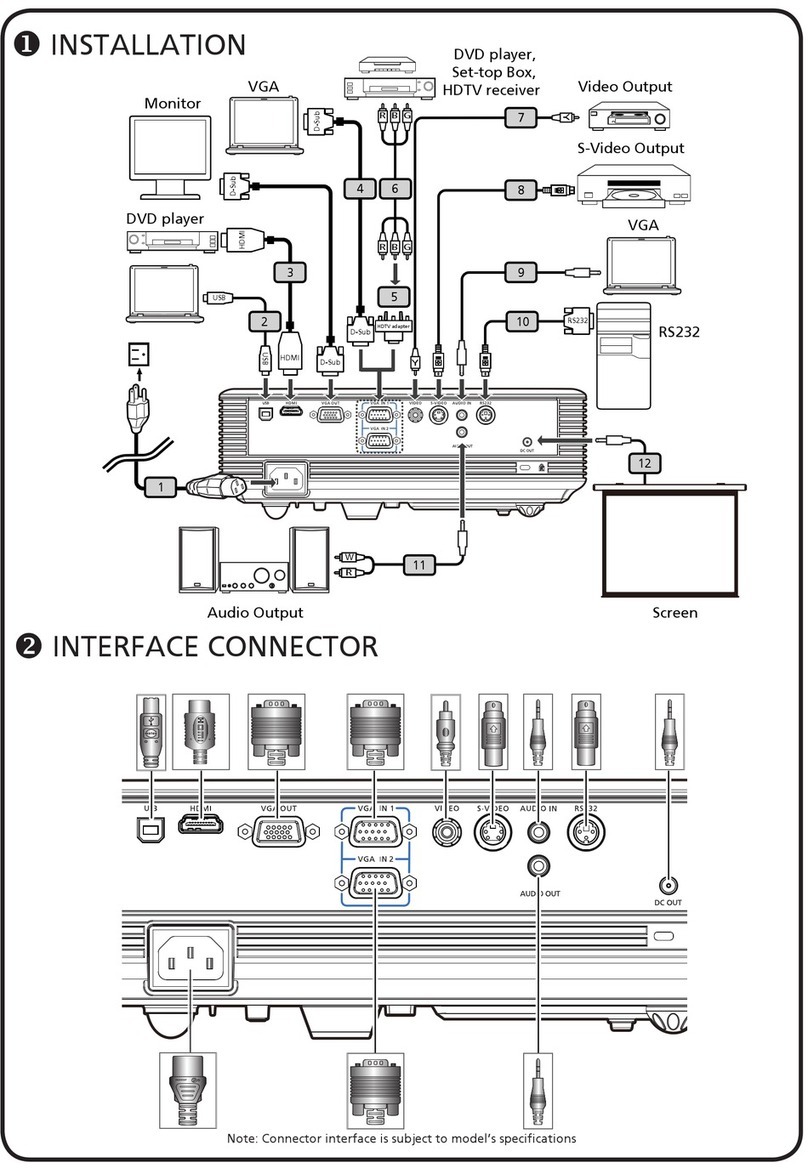
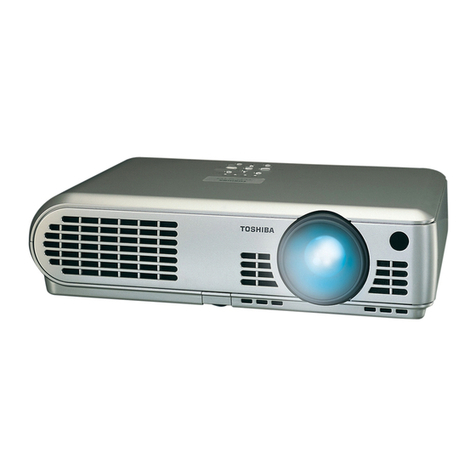
Hitachi Maxell CP-CX251N User manual

1
Projector
CP-CX251N
User's Manual (detailed)
Operating Guide
Thank you for purchasing this projector.
►Before.using.this.product,.please.read.all.manuals.for.this.
product.Be.sure.to.read.“Safety Guide”..rst.After.reading.them,.store.them.in.a.
safe.place.for.future.reference
WARNING
•.The.information.in.this.manual.is.subject.to.change.without.notice
•.The.illustrations.in.this.manual.are.for.illustrative.purposes.They.may.differ.
slightly.from.your.projector
•.The.manufacturer.assumes.no.responsibility.for.any.errors.that.may.appear.in.
this.manual
•.The.reproduction,.transfer.or.copy.of.all.or.any.part.of.this.document.is.not.
permitted.without.express.written.consent
NOTE
Trademark acknowledgment
Various.symbols.are.used.in.this.manual.The.meanings.of.these.symbols.are.
described.below.
About.this.manual
WARNING
CAUTION
This.symbol.indicates.information.that,.if.ignored,.could.possibly.
result.in.personal.injury.or.even.death.due.to.incorrect.handling
This.symbol.indicates.information.that,.if.ignored,.could.possibly.
result.in.personal.injury.or.physical.damage.due.to.incorrect.
handling
Please.refer.to.the.pages.written.following.this.symbol
•..Mac®.is.a.registered.trademark.of.Apple.Inc
•..Windows®,.DirectDraw®.and.Direct3D®.are.registered.trademarks.of.Microsoft.Corporation.
in.the.US.and/or.other.countries
•..VESA.and.DDC.are.trademarks.of.the.Video.Electronics.Standard.Association
•.Blu-ray.DiscTM.and.Blu-rayTM.are.trademarks.of.Blu-ray.Disc.Association
All.other.trademarks.are.the.properties.of.their.respective.owners
NOTICE This.entry.notices.of.fear.of.causing.trouble

2
Contents
Introduction ...............3
Features.3
Checking.the.contents.of.package
.3
Fastening.the.lens.cover.4
Part.names.5
Setting up .................8
Arrangement.8
Connecting.with.your.devices
.10
Connecting.to.a.power.supply
.15
Using.the.security.bar.and.slot.15
Remote control ............16
Installing.the.batteries.16
About.the.remote.control.signal .16
Changing.the.frequency.of.remote.control.signal
. 17
Using.as.a.simple.PC.mouse.&.keyboard
. 17
Power on/off ..............18
Turning.on.the.power
.18
Turning.off.the.power
.19
Operating ................20
Adjusting.the.volume .20
Temporarily.muting.the.sound .20
Selecting.an.input.signal.20
Searching.an.input.signal.21
Selecting.an.aspect.ratio .22
Adjusting.the.projector's.elevator.23
Adjusting.the.focus.23
Using.the.automatic.adjustment.feature
.24
Adjusting.the.position.24
Correcting.the.keystone.distortions
.....25
Using.the.magnify.feature.26
Temporarily.freezing.the.screen.27
Temporarily.blanking.the.screen..27
Using.the.menu.function..28
EASY MENU. . . . . . . . . . . . . . . 30
Aspect,
D-zoom,
Keystone,
picture moDe,
eco moDe, instAllAtion, reset, Filter time,
lAnguAge, ADvAnceD menu, exit
PICTURE menu ............32
Brightness, contrAst, gAmmA, color temp,
color, tint, shArpness, mymemory
IMAGE menu ..............35
Aspect, over scAn, v position, h position,
h phAse, h size, Auto ADjust execute
INPUT menu ..............38
progressive, viDeo nr, color spAce,
viDeo FormAt, hDmi FormAt,hDmi rAnge
computer in, FrAme locK, resolution
SETUP menu ..............42
D-zoom, D-shiFt, picture position,
Keystone,
lAmp&Filter, instAllAtion
,
stAnDBy moDe
AUDIO menu ..............46
volume, speAKer, AuDio source,
SCREEN menu.............47
lAnguAge, menu position, BlAnK,
Auto BlAnK, stArt up,
MyScreen,
MyScreen.Lock
, messAge, source nAme,
templAte, c.c.
OPTION menu .............53
Auto seArch, Direct power on,
Auto power oFF, myButton, mysource,
scheDule, service
NETWORK menu ...........
65
SECURITY menu ...........66
security pAssworD chAnge,
MyScreen
pAssworD, pin locK,
mytext pAssworD,
mytext DisplAy, mytext writing,
Maintenence ..............71
Replacing.the.lamp.71
Cleaning.and.replacing.the.air.lter . 73
Replacing.the.internal.clock.battery
. 75
Other.care.76
Troubleshooting ...........77
Related.messages .77
Regarding.the.indicator.lamps .79
Resetting.all.settings.81
Phenomena.that.may.be.easy.to
.
..
be.mistaken.for.machine.defects
.81
Specications .............86

3
Introduction
•.Keep.the.original.packing.materials,.for.future.reshipment.Be.sure.
to.use.the.original.packing.materials.when.moving.the.projector.Use.special.
caution.for.the.lens
NOTE
Introduction
..The.projector.provides.you.with.the.broad.use.by.the.following.features
Checking the contents of package
ü....The.unique.optics.system.produces.a.large.projected.image.in.a.short.
distance,.which.provides.you.with.various.ways.of.use
ü....
The.double.layer.lter.system.is.expected.to.function.longer.and.offers.you.
less.maintenance.frequency
ü....
This.projector.has.a.variety.of.I/O.ports.that.supposedly.cover.for.any.
business.scene.The.HDMI.port.can.support.various.image.equipment.which.
have.digital.interface.to.get.clearer.pictures.on.a.screen
ü...This.projector.can.be.controlled.and.monitored.via.LAN.connection.
Please.see.the.Contents of package.section.in.the.User’s Manual (concise).
which.is.a.book.Your.projector.should.come.with.the.items.shown.there.Require.
of.your.dealer.immediately.if.any.items.are.missing
Features

4
Introduction
Fastening the lens cover
To.avoid.losing.the.cover,.please.fasten.the.lens.
cover.to.the.projector.using.the.included.strap
Put.the.strap.end.into.the.slit.of.the.lens.
cover.with.the.knot.on.the.side.of.the.lens.
Make.sure.that.the.strap.is.inserted.to.the.
end.of.the.slit
Fasten.the.strap.to.the.strap.hole.as.shown.
in.the..gure.for.step.1.Please.note.that.the.
knot.on.the.strap.is.used.to.fasten.it.to.the.
lens.cover.in.step.2
1
2
►Do.not.hang.the.
lens.cover.in.front.of.the.lens.when.the.
projector.is.mounted.upside.down.such.as.
when.mounted.on.the.ceiling.Otherwise,.
the.lens.cover.may.block.the.light.from.the.
projector.or.hit.the.lens,.which.may.cause.
damage.to.it.When.mounting.the.projector.
upside.down,.hang.the.lens.cover.on.the.
side.of.the.projector.or.place.it.on.the.
projector.For.instance,.let.the.strap.put.
through.the.concave.portion.around.the.
security.bar.to.hang.the.lens.cover.(refer.
to.the..gure)
►Be.careful.not.to.damage.the.lens.while.
handling.the.lens.cover
CAUTION
Lens.cover Strap.slit
Strap.hole
Strap
12
Insert.the.upper.tab.(1.part).of.the.lens.cover.
between.the.upper.case.and.lens.as.shown.
in.the..gure.for.step.3.Then,..t.the.right/left.
tabs.(2.parts).to.attach.the.lens.cover
3
Upper.tab
Right/Left.tabs
Upper.case
Lens
3

5
Introduction
(1).Control.panel.(6)
(2)..Lamp.cover.(71)
The.lamp.unit.is.inside
(3).Remote.sensor.(16)
(4).Lens.(76)
(5)..AC.(AC.inlet).(15)
(6).Ports.(6)
(7).Exhaust.vent
(8).Speaker.(13, 20, 46)
(9).Elevator.feet.(x.2).(23)
(10).Spacer.(23)
(11).Security.slot.(15)
(12).Security.bar.(15)
(13).Strap.hole.(4)
(14).FOCUS.ring.(23)
(15)..Filter.cover.(73)
The.air..lter.and.intake.
vent.are.inside
(16).Intake.vents
(17).Battery.cover.(75)
►HOT! :.Do.not.touch.around.the.lamp.cover.and.the.exhaust.
vents.during.use.or.just.after.use,.since.it.is.too.hot
►Do.not.look.into.the.lens.and.the.openings.on.the.projector.while.the.lamp.is.
on,.since.the.projection.ray.may.cause.a.trouble.on.your.eyes
►Do.not.use.the.security.bar.and.slot.to.prevent.the.projector.from.falling.down,.
since.it.is.not.designed.for.it
►Keep.any.object.away.from.concentrated.projection.light.beam.Blocking.the.
beam.by.something.causes.high.temperature.and.could.result.in..re.or.smoke
WARNING
►Maintain.normal.ventilation.to.prevent.the.projector.from.heating.up.Do.not.
cover,.block.or.plug.up.the.vents.Do.not.place.anything.that.can.stick.or.be.
sucked.to.the.vents,.around.the.intake.vents.Clean.the.air..lter.periodically
CAUTION
Part names
Projector
(14)
(16)
(3)
(5)
HOT!
HOT!
(2) (1)
(9) (10)
(6)
(12)
(11)
(7)
(15)
(8)
(4)
(13)
(17)

6
Introduction
Control panel
(1).STANDBY/ON.button.(18)
(2).INPUT.button.(20)
(3).POWER.indicator.(18, 79)
(4).TEMP.indicator.(79)
(5).LAMP.indicator.(79)
(6)..MENU./.Cursor.button.(28)
Ports (10 ~ 15)
(1) (2) (3)
(5)
(4)
(6)
Part names (continued)
(2) (7) (6)
(4)
(9)
(3)
(8)
(10)
(1)
(5)
(1).LAN port.
(2) HDMI.port
(3) USB TYPE B port
(4).AUDIO IN(L,R)..ports.
(5)..AUDIO OUT (L,R).ports
(6).COMPUTER IN1.port.
(7).COMPUTER IN2 / MONITOR OUT.port.
(8).CONTROL.port
(9).VIDEO.port
(10).S-VIDEO.port.

7
Introduction
Remote control
(1).VIDEO.button.(21).
(2).COMPUTER.button.(21)
(3).SEARCH.button.(22)
(4).STANDBY/ON.button.(18)
(5).ASPECT.button.(22)
(6).AUTO.button.(24)
(7).BLANK.button.(27)
(8).MAGNIFY.-.ON.button.(26)
(9).MAGNIFY.-.OFF.button.(26)
(10).MY.SOURCE/DOCCAMERA.button..
(21,.56)
(11).VOLUME.-.button.(20)
(12).PAGE.UP.button.(17)
(13).PAGE.DOWN.button.(17)
(14).VOLUME.+.button.(20)
(15).MUTE.button.(20)
(16).FREEZE.button.(27)
(17).MY.BUTTON.-.1.button.(55, 56)
(18).MY BUTTON.-.2.button.(55, 56)
(19).KEYSTONE.button.(25)
(20).POSITION.button.(24, 29)
(21).MENU.button.(28, 29)
(22).▲/▼/◄/►.cursor.buttons.(28)
(23).ENTER.button.(28, 29).
(24).ESC.button.(28)
(25) RESET.button.(28)
(26).Battery.cover.(16)
B a c k . o f ...........................
the.remote.control
(2)
(1)
(6)
(5)
(16)
(8)
(9)
(19)
(17)
(20)
(22)
(24)
(10)
(4)
(3)
(7)
(12)
(14)
(11)
(13)
(15)
(18)
(21)
(23)
(25)
(26)
VIDEO
DOC.CAMERA
KEYSTONE
ASPECT SEARCH BLANK
MUTE
MY BUTTON
POSITION
ESC
MENU
RESET
COMPUTER MY SOURCE/
AUTO
MAGNIFY
PAGE
DOWN
ON
OFF
FREEZE
UP
㧗
VOLUME
ENTER
Part names (continued)

8
Setting up
Setting.up
(continued.on.next.page)
Install.the.projector.according.to.the.environment.and.manner.the.projector.will.be.
used.in
Arrangement
Refer.to.table.T-1.and..gures.F-1.and.F-2.at.the.end.of.User’s.Manual.(concise).to.determine.
the.screen.size.and.projection.distance
The.values.shown.in.the.table.are.calculated.for.a.full.size.screen
..V..Screen.size.(vertical)..H..Screen.size.(horizontal).
.
a..Projection.distance.(±8%)
...
.
b1.,.b2..Screen.height.(±8%)
•..For.the.case.of.installation.in.a.special.state.such.as.ceiling.mount,.the.speci.ed.
mounting.accessories.and.service.may.be.required.Before.installing.the.projector,.
consult.your.dealer.about.your.installation
• .
The.screen.position.may.shift.after.installation.if.the.projector.is.suspended.from.the.
ceiling.or.other.location.due.to.the..exibility.of.the.plastic.projector.body.If.readjustment.is.
necessary,.consult.with.your.dealer.or.service.personnel
• .The.projected.image.position.and/or.focus.may.change.during.warm-up.(approx.30.
minutes.after.the.lamp.is.turned.on).or.when.the.ambient.conditions.change.Readjust.
the.image.position.and/or.focus.as.necessary
• .Since.the.projector.features.a.short.throw,.be.aware.that.it.is.required.to.select.a.screen.
carefully.to.have.better.performance
-.A.soft.screen.such.as.a.pull-down.screen.may.cause.serious.distortion.of.a.projected.
image.A.hard.screen.such.as.a.board.screen.is.recommended.for.use.with.this.
projector
-.A.high-gain.screen.such.as.a.bead.screen.that.has.narrow.viewing.angle.is.not.suitable.
for.this.projector.A.low-gain.screen.(around.10).such.as.a.matte.screen.that.has.wide.
viewing.angle.is.recommended.for.use.with.this.projector
-.
A.screen.with.a.weave.pattern.may.cause.moiré.on.the.projected.image,.which.is.not.a.
failure.of.the.projector.A.screen.that.has.less.moiré.effects.is.recommended.for.use.with.this.
projector
►
Place.the.projector.in.a.stable.horizontal.position.If.the.
projector.falls.or.is.knocked.over,.it.could.cause.injury.and/or.damage.to.the.
projector.Using.a.damaged.projector.could.then.result.in..re.and/or.electric.shock
•..Do.not.place.the.projector.on.an.unstable,.slanted.or.vibrational.surface.such.
as.a.wobbly.or.inclined.stand
•..Do.not.place.the.projector.on.its.side.or.front.position.
•..For.special.installation.such.as.ceiling.mounting,.be.sure.to.consult.your.dealer.
beforehand
WARNING

9
(continued.on.next.page)
Setting up
Arrangement (continued)
►Place.the.projector.in.a.cool.place,.and.ensure.that.there.is.
suf.cient.ventilation.The.high.temperature.of.the.projector.could.cause..re,.
burns.and/or.malfunction.of.the.projector
•..Do.not.stop-up,.block.or.otherwise.cover.the.projector's.vents
•..Keep.a.space.of.30.cm.or.more.between.the.sides.of.the.projector.and.other.
objects.such.as.walls
•.Do.not.place.or.attach.anything.that.would.block.the.lens.or.vent.holes
•.Do.not.place.the.projector.on.metallic.thing.or.anything.weak.in.heat
•..Do.not.place.the.projector.on.carpet,.cushions.or.bedding
•..Do.not.place.the.projector.in.direct.sunlight.or.near.hot.objects.such.as.heaters.
Do.not.place.the.projector.where.the.air.from.an.air.conditioner.or.similar.unit.
will.blow.on.it.directly
•..
Do.not.place.anything.near.the.projector.lens.or.vents,.or.on.top.of.the.projector
•..
Do.not.place.anything.that.may.be.sucked.into.or.stick.to.the.vents.on.the.
bottom.of.the.projector.This.projector.has.some.intake.vents.also.on.the.bottom
►Do.not.place.the.projector.anyplace.where.it.may.get.wet.Getting.the.projector.
wet.or.inserting.liquid.into.the.projector.could.cause..re,.electric.shock.and/or.
malfunction.of.the.projector
•..Do.not.place.the.projector.in.a.bathroom.or.the.outdoors
•..Do.not.place.anything.containing.liquid.near.the.projector
•..
Do.not.place.the.projector.where.any.oils,.such.as.cooking.or.machine.oil,.are.used
►
Use.only.the.mounting.accessories.the.manufacturer.speci.ed,.and.leave.installing.
and.removing.the.projector.with.the.mounting.accessories.to.the.service.personnel
•..Read.and.keep.the.user’s.manual.of.the.mounting.accessories.used
WARNING
►Avoid.placing.the.projector.in.smoky,.humid.or.dusty.place.
Placing.the.projector.in.such.places.could.cause..re,.electric.shock.and/or.
malfunction.of.the.projector
•.Do.not.place.the.projector.near.humidi.ers,.smoking.spaces.or.a.kitchen.Also.
do.not.use.an.ultrasonic.humidi.er.near.the.projector.Otherwise.chlorine.and.
minerals.contained.in.tap.water.are.atomized.and.could.be.deposited.in.the.
projector.causing.image.degradation.or.other.problems
►
Position.the.projector.to.prevent.light.from.directly.hitting.the.projector's.remote.sensor
►Do.not.place.the.product.in.a.place.where.radio.interference.may.be.caused
►Do.not.place.this.product.in.a.magnetic..eld
►
If.the.projector.is.used.at.an.altitude.of.about.1600.m.or.higher,.set.ALTITUDE.
of.the.SERVICE.item.in.the.OPTION.menu.to.HIGH
.(60).Otherwise,.set.it.to.
NORMAL.
If.the.projector.is.used.with.a.wrong.setting,.it.may.cause.damage.to.the.projector.
itself.or.the.parts.inside
CAUTION

10
Setting up
Before.connecting.the.projector.to.a.device,.consult.the.manual.of.the.device.to.
con.rm.that.the.device.is.suitable.for.connecting.with.this.projector.and.prepare.
the.required.accessories,.such.as.a.cable.in.accord.with.the.signal.of.the.device.
Consult.your.dealer.when.the.required.accessory.did.not.come.with.the.product.or.
the.accessory.is.damaged
After.making.sure.that.the.device.and.projector.are.turned.off,.connect.them.
following.the.instructions.below
►
Use.only.the.appropriate.accessories.Otherwise.it.could.cause.
a..re.or.damage.to.the.device.and.the.projector.
-..Use.only.the.accessories.specified.or.recommended.by.the.projector’s.
manufacturer.Consult.your.dealer.when.the.required.accessory.did.not.come.
with.the.product.or.the.accessory.is.damaged.It.may.be.regulated.under.some.
standard
-..For.a.cable.with.a.core.at.only.one.end,.connect.the.end.with.the.core.to.the.
projector.That.may.be.required.by.EMI.regulations.
-.Neither.disassemble.nor.modify.the.projector.and.the.accessories
-.Do.not.use.the.damaged.accessory.Be.careful.not.to.damage.the.accessories
Route.a.cable.so.that.it.is.neither.stepped.on.nor.pinched.out
WARNING
►Do.not.turn.on.or.off.the.projector.while.connected.to.a.device.
in.operation,.unless.that.is.directed.in.the.manual.of.the.device.Otherwise.it.may.
cause.malfunction.in.the.device.or.projector
►Be.careful.not.to.mistakenly.connect.a.connector.to.a.wrong.port.Otherwise.it.
may.cause.malfunction.in.the.device.or.projector.
-..When.connecting.a.connector.to.a.port,.make.sure.that.the.shape.of.the.
connector..ts.the.port
-..Tighten.the.screws.to.connect.a.connector.equipped.with.screws.to.a.port
-..Use.the.cables.with.straight.plugs,.not.L-shaped.ones,.as.the.input.ports.of.the.
projector.are.recessed
CAUTION
Connecting with your devices
(continued.on.next.page)
Arrangement (continued)
•.The.projector.may.make.a.rattling.sound.when.tilted,.moved.or.
shaken,.since.a..ap.to.control.the.air..ow.inside.of.the.projector.has.moved.Be.
aware.that.this.is.not.a.failure.or.malfunction
•.The.incoming.light.to.the.screen.from.the.projector.has.a.large.angle.While.
the.white.image.is.on.the.screen,.you.may.see.it.with.colors,.but.this.is.because.
of.the.type.of.the.screen.used.or.the.angles.viewed,.and.it.is.not.a.malfunction
•.When.the.ambient.temperature.is.around.35.to.40°C,.the.brightness.of.the.
lamp.is.reduced.automatically
NOTE

11
Connecting with your devices (continued)
•..When.AUTO.is.selected.for.the.COMPUTER IN1.or.COMPUTER IN2.port.in.
COMPUTER.IN.of.the.INPUT.menu,.that.port.will.accept.component.video.
signals.(40)
•..When.the.USB TYPE B.port.and.the.computer's.type.A.USB.port.are.connected,.
you.can.use.the.remote.control.as.a.simple.mouse.and.keyboard.of.the.computer.
(17)
Setting up
•.Plug-and-Play.is.a.system.composed.of.a.computer,.its.operating.system.
and.peripheral.equipment.(ie.display.devices).This.projector.is.VESA.DDC.
2B.compatible.Plug-and-Play.can.be.used.by.connecting.this.projector.to.a.
computer.that.is.VESA.DDC.(display.data.channel).compatible
-..Take.advantage.of.this.feature.by.connecting.a.computer.cable.to.the.
COMPUTER IN1.port.(DDC.2B.compatible).Plug-and-Play.may.not.work.
properly.if.any.other.type.of.connection.is.attempted
-..
Please.use.the.standard.drivers.in.your.computer.as.this.projector.is.a.Plug-and-
Play.monitor
About Plug-and-Play capability
(continued.on.next.page)
Computer
HDMI
AUDIO
OUT
USB
(A) DISPLAY

12
Connecting with your devices (continued)
(continued.on.next.page)
•.Before.connecting.the.projector.to.a.computer,.consult.the.computer’s.
manual.and.check.the.compatibility.of.the.signal.level,.the.synchronization.
methods.and.the.display.resolution.output.to.the.projector.
-..Some.signal.may.need.an.adapter.to.input.this.projector
-..Some.computers.have.multiple.screen.display.modes.that.may.include.some.
signals.which.are.not.supported.by.this.projector
-..Although.the.projector.can.display.signals.with.resolution.up.to.UXGA..
(1600X1200),.the.signal.will.be.converted.to.the.projector’s.panel.resolution.
before.being.displayed.The.best.display.performance.will.be.achieved.if.the.
resolutions.of.the.input.signal.and.the.projector.panel.are.identical
•..If.you.connect.this.projector.to.a.notebook.computer,.you.need.to.output.the.
display.to.an.external.monitor,.or.output.simultaneously.to.the.internal.display.
and.an.external.monitor.Consult.the.computer's.manual.for.the.setting
•..Depending.on.the.input.signal,.the.automatic.adjustment.function.of.this.
projector.may.take.some.time.and.not.function.correctly.
-..Note.that.a.composite.sync.signal.or.sync-on-green.signal.may.confuse.the.
automatic.adjustment.function.of.this.projector.(40).
-..If.the.automatic.adjustment.function.does.not.work.correctly,.you.may.not.see.
the.dialog.to.set.the.display.resolution.In.such.a.case,.use.an.external.display.
device.You.may.be.able.to.see.the.dialog.and.set.an.appropriate.display.
resolution
NOTE
Setting up

13
Connecting with your devices (continued)
Setting up
To.use.network.functions.of.the.projector,.connect.the.LAN.port.with.the.
computer's.LAN.port,.or.with.an.access.point.that.is.connected.to.the.computer.
with.wireless.LAN,.using.a.LAN.cable.To.use.NETWORK.BRIDGE.function,.
also.connect.the.CONTROL.port.and.an.RS-232C.port.of.the.external.device.to.
communicate.as.a.network.terminal.See.the User's Manual - Network Guide.for.
details.of.the.network.functions
►Before.connecting.the.projector.to.a.network.system,.be.sure.to.
obtain.the.consent.of.the.administrator.of.the.network
►
Do.not.connect.the.LAN.port.to.any.network.that.might.have.the.excessive.voltage
CAUTION
RS-232C
LAN RS-232C
Access
point
Computer
(continued.on.next.page)
External Device

14
Setting up
•.The.HDMI.port.of.this.model.is.compatible.with.HDCP.(High-bandwidth.
Digital.Content.Protection).and.therefore.capable.of.displaying.a.video.signal.
from.HDCP.compatible.DVD.players.or.the.like
-.The.HDMI.supports.the.following.signals
Video.signal.:.480i@60,.480p@60,.576i@50,.576p@50,.720p@50/60,.
1080i@50/60,.1080p@50/60
Audio.signal.:.Format.Linear.PCM
Sampling.frequency.48kHz./.441kHz./.32kHz
-.This.projector.can.be.connected.with.another.equipment.that.has.HDMITM.
connector,.but.with.some.equipment.the.projector.may.not.work.properly,.
something.like.no.video
-.Be.sure.to.use.an.HDMITM.cable.that.has.the.HDMITM.logo
-.Use.a.Category.2-certied.HDMITM.cable.to.input.1080p@50/60.signal.to.the.
projector
-.When.the.projector.is.connected.with.a.device.having.DVI.connector,.use.a.
DVI.to.HDMITM.cable.to.connect.with.the.HDMI.input
NOTE
Connecting with your devices (continued)
VCR/DVD/Blu-ray Disc player Monitor
Speakers
(with an amplier)
COMPONENT
Cb/Pb
Y
Cr/Pr
RL
VIDEO
AUDIO
OUT
HDMI R
L
S-VIDEO
AUDIO
OUT
RL
RGB IN

15
Setting up
Connecting to a power supply
1 Put.the.connector.of.the.power.cord.into.the.
AC.(AC.inlet).of.the.projector
2 Firmly.plug.the.power.cord’s.plug.into.the.
outlet.In.a.couple.of.seconds.after.the.
power.supply.connection,.the.POWER.
indicator.will.light.up.in.steady.orange
►Please.use.extra.caution.when.connecting.the.power.cord,.as.
incorrect.or.faulty.connections.may.result.in..re.and/or.electrical.shock
•.Do.not.touch.the.power.cord.with.a.wet.hand
•.Only.use.the.power.cord.that.came.with.the.projector.If.it.is.damaged,.consult.
your.dealer.to.get.a.new.one.Never.modify.the.power.cord.
•.Only.plug.the.power.cord.into.an.outlet.whose.voltage.is.matched.to.the.power.
cord.The.power.outlet.should.be.close.to.the.projector.and.easily.accessible.
Remove.the.power.cord.for.complete.separation
•.Do.not.distribute.the.power.supply.to.multiple.devices.Doing.so.may.overload
the.outlet.and.connectors,.loosen.the.connection,.or.result.in..re,.electric.shock
or.other.accidents
WARNING
Using the security bar and slot
A.commercial.anti-theft.chain.or.wire.up.to.
10.mm.in.diameter.can.be.attached.to.the.
security.bar.on.the.projector
Also.this.product.has.the.security.slot.for.
the.Kensington.lock.
For.details,.see.the.manual.of.the.security.
tool
►Do.not.use.the.security.bar.and.slot.to.prevent.the.projector.
from.falling.down,.since.it.is.not.designed.for.it
WARNING
►Do.not.place.anti-theft.chain.or.wire.near.the.exhaust.vents.
It.may.become.too.hot.
CAUTION
•.The.security.bar.and.slot.is.not.comprehensive.theft.prevention.
measures.It.is.intended.to.be.used.as.supplemental.theft.prevention.measure
NOTE
Please.remember.that.when.the.DIRECT.POWER.
ON.function.activated.(53),.the.connection.of.the.
power.supply.make.the.projector.turn.on
AC Power.cord
Security.bar
Security.slot
Anti-theft.chain.or.wire

16
Remote control
Remote.control
About the remote control signal
The.remote.control.works.with.the.projector’s.remote.
sensor.This.projector.has.a.remote.sensor.on.the.front
The.sensor.senses.the.signal.within.the.following.range.
when.the.sensor.is.active:
60.degrees.(30.degrees.to.the.left.and.right.of.the.sensor).
within.about.3.meters
Installing the batteries
Please.insert.the.batteries.into.the.remote.control.before.using.it.If.the.remote.control.
starts.to.malfunction,.try.to.replace.the.batteries.If.you.will.not.use.the.remote.control.for.
long.period,.remove.the.batteries.from.the.remote.control.and.store.them.in.a.safe.place
►Always.handle.the.batteries.with.care.and.use.them.only.as.
directed.Improper.use.may.result.in.battery.explosion,.cracking.or.leakage,.
which.could.result.in.re,.injury.and/or.pollution.of.the.surrounding.environment
•.Be.sure.to.use.only.the.batteries.specied.Do.not.use.batteries.of.different.
types.at.the.same.time.Do.not.mix.a.new.battery.with.used.one.
•.
Make.sure.the.plus.and.minus.terminals.are.correctly.aligned.when.loading.a.battery
•.Keep.a.battery.away.from.children.and.pets
•.Do.not.recharge,.short.circuit,.solder.or.disassemble.a.battery
•.
Do.not.place.a.battery.in.a.re.or.water.Keep.batteries.in.a.dark,.cool.and.dry.place
•.If.you.observe.battery.leakage,.wipe.out.the.leakage.and.then.replace.a.battery.
If.the.leakage.adheres.to.your.body.or.clothes,.rinse.well.with.water.immediately
•.Obey.the.local.laws.on.disposing.the.battery
WARNING
•.
The.remote.control.signal.reected.in.the.screen.or.the.like.may.be.available.
If.it.is.difcult.to.send.the.signal.to.the.sensor.directly,.attempt.to.make.the.signal.reect
•.The.remote.control.uses.infrared.light.to.send.signals.to.the.projector.(Class.1.
LED),.so.be.sure.to.use.the.remote.control.in.an.area.free.from.obstacles.that.
could.block.the.remote.control’s.signal.to.the.projector
•.
The.remote.control.may.not.work.correctly.if.strong.light.(such.as.direct.sun.
light).or.light.from.an.extremely.close.range.(such.as.from.an.inverter.uorescent.
lamp).shines.on.the.remote.sensor.of.the.projector.Adjust.the.position.of.
projector.avoiding.those.lights
NOTE
Remote..
sensor
30º 30º Approx
3.m.
1 Remove.the.battery.cover
2 Align.and.insert.the.two.AA.batteries.
.
(HITACHI MAXELL Part No.LR6 or R6P).
according.to.their.plus.and.minus.terminals
.as.indicated.in.the.remote.control
3
Put.the.battery.cover.back.to.the.former.state

17
Remote control
Changing the frequency of remote control signal
The.accessory.remote.control.has.the.two.choices.on.signal.
frequency.Mode.1:NORMAL.and.Mode.2:HIGH.If.the.remote.control.
does.not.function.properly,.attempt.to.change.the.signal.frequency
In.order.to.set.the.Mode,.please.keep.pressing.the.combination.of.
two.buttons.listed.below.simultaneously.for.about.3.seconds
Using as a simple PC mouse & keyboard
(1).PAGE UP key:.Press.PAGE UP.button
(2).PAGE DOWN key:.Press.PAGE DOWN.button
(3).Mouse left button:.Press.ENTER.button
(4).Move pointer:.Use.the.cursor.buttons.▲,.▼,.◄.and.►
(5).ESC key:.Press.ESC.button
(6).Mouse right button:.Press.RESET.button
►Improper.use.of.the.simple.mouse.&.keyboard.
function.could.damage.your.equipment.While.using.this.
function,.please.connect.this.product.only.to.a.computer.Be.
sure.to.check.your.computer’s.manuals.before.connecting.this.
product.to.the.computer
NOTICE
When.the.simple.mouse.&.keyboard.function.of.this.product.does.not.work.
correctly,.please.check.the.following
•.When.a.USB.cable.connects.this.projector.with.a.computer.having.a.built-in.pointing.
device.(eg.track.ball).like.a.laptop.PC,.open.BIOS.setup.menu,.then.select.the.external.
mouse.and.disable.the.built-in.pointing.device,.because.the.built-in.pointing.device.may.
have.priority.to.this.function
•.
Windows.XP.SP3.or.higher.is.required.for.this.function.And.also.this.function.may.not.work.
depending.on.the.computer’s.con.gurations.and.mouse.drivers.This.function.can.work.with.the.
computer.which.can.operate.general.USB.mouse.or.keyboard
•.You.cannot.do.things.like.press.two.buttons.at.once.(for.instance,.pressing.two.buttons.
at.the.same.time.to.move.the.mouse.pointer.diagonally)
•.
This.function.is.activated.only.when.the.projector.is.working.properly.This.function.is.not.
available.in.any.of.the.following.cases:
-.While.the.lamp.is.warming.up.(The.
POWER
indicator.blinks.in.green)
-.While.displaying.BLANK.
(27)
.or.TEMPLATE.
(51)
.screen
-.When.any.menu.is.displayed.on.the.screen
-.
While.using.the.cursor.buttons.to.operate.the.sound.or.screen.functions.such.as.adjusting.the.
sound.volume,.correcting.the.keystone,.correcting.the.picture.position.and.magnifying.the.screen
NOTE
(1).Set.to.Mode.1:NORMAL.VOLUME - and.RESET.buttons.
(2).Set.to.Mode.2:HIGH.MAGNIFY OFF.and.ESC.buttons
Please.remember.that.the.REMOTE.FREQ.in.the.SERVICE.item.of.
the.OPTION.menu
.(
61)
.of.the.projector.to.be.controlled.should.be.
set.to.the.same.mode.as.the.remote.control
VIDEO
DOC.CAMERA
KEYSTONE
ASPECT SEARCH BLANK
MUTE
MY BUTTON
POSITION
ESC
MENU
RESET
COMPUTER MY SOURCE/
AUTO
MAGNIFY
PAGE
DOWN
ON
OFF
FREEZE
UP
ー
+
VOLUME
12
ENTER
(1)(2)
VIDEO
DOC.CAMERA
KEYSTONE
ASPECT SEARCH BLANK
MUTE
MY BUTTON
POSITION
ESC
MENU
RESET
COMPUTER MY SOURCE/
AUTO
MAGNIFY
PAGE
DOWN
ON
OFF
FREEZE
UP
ー
+
VOLUME
12
ENTER
(1)
(3)
(5)
(2)
(4)
(6)
USB TYPE B.
port
The.accessory.remote.control.works.as.a.simple.mouse
and.keyboard.of.the.computer,.when.the.projector’s.USB
TYPE.B.port.and.the.computer’s.type.A.USB.port.are
connected

18
Power on/off
1 Make.sure.that.the.power.cord.is.rmly.
and.correctly.connected.to.the.projector.
and.the.outlet
Turning on the power
2
3
Power.on/off
VIDEO
DOC.CAMERA
KEYSTONE
ASPECT SEARCH BLANK
MUTE
MY BUTTON
POSITION
ESC
MENU
RESET
COMPUTER
MY SOURCE/
AUTO
MAGNIFY
PAGE
DOWN
ON
OFF
FREEZE UP
ー
+
VOLUME
12
ENTER
FOCUS
-+
D-ZOOM
-+
Make.sure.that.the.POWER.indicator.is.
steady.orange.(79).Then,.remove.the.
lens.cover
Press.the.STANDBY/ON button.on.the.
projector.or.the.remote.control.The.
projection.lamp.will.light.up.and.the.
POWER.indicator.will.begin.blinking.in.
green.When.the.power.is.completely.on,.
the.indicator.will.stop.blinking.and.light.in.
steady.green.(79)
VIDEO
DOC.CAMERA
KEYSTONE
ASPECT SEARCH BLANK
MUTE
MYBUTTON
POSITION
ESC
MENU
RESET
COMPUTER MYSOURCE/
AUTO
MAGNIFY
PAGE
DOWN
ON
OFF
FREEZE
UP
ー
+
VOLUME
12
ENTER
POWER.indicator
(continued.on.next.page)
STANDBY/ON.button
To.display.the.picture,.select.an.input.signal.according.to.the.section.Selecting an
input signal.(20)
The.INITIAL.SETTING.Menu.will.be.displayed.by.factory.default.upon.startup.
Once.the.INITIAL.SETTING.Menu.is.set,.it.will.not.appear.until.FACTORY.RESET.
(64).is.executed.If.you.wish.to.change.the.settings,.refer.to.the.LANGUAGE.
(47).and.ALTITUDE.(60).menu.
(1)..LANGUAGE:.Use.the.▲/▼/◄/►.
buttons.to.select.the.desired.language.
and.press.the.ENTER.button.of.the.
remote.control.or.the.INPUT.button.of.
the.projector.to.execute
(2)..ALTITUDE:.Use.the.▲/▼.buttons.to.
select.NORMAL.for.altitude.below.1600.
m.(5250.feet),.otherwise.select.HIGH.
and.press.the.ENTER.button.of.the.
remote.control.or.the.INPUT.button.of.
the.projector.to.execute

19
Power on/off
►Do.not.touch.around.the.lamp.cover.and.the.exhaust.vents.
during.use.or.just.after.use,.since.it.is.too.hot
►Remove.the.power.cord.for.complete.separation.The.power.outlet.should.be.
close.to.the.projector.and.easily.accessible
WARNING
1 Press.STANDBY/ON.button.on.the.projector.or.on.the.remote.control
The.message.“Power.off?”.will.appear.on.the.screen.for.about.5.seconds
Turning off the power
2 Press.the.STANDBY/ON.button.again.while.the.message.appears
The.projector.lamp.will.go.off,.and.the.POWER.indicator.will.begin.blinking.
in.orange.Then.the.POWER.indicator.will.stop.blinking.and.light.in.steady.
orange.when.the.lamp.cooling.is.complete.(79)
Do.not.turn.the.projector.on.for.about.10.minutes.or.more.after.turning.it.off.
Also,.do.not.turn.the.projector.off.shortly.after.turning.it.on.Such.operations.might.
cause.the.lamp.to.malfunction.or.shorten.the.lifetime.of.some.parts.including.the.lamp
•.Turn.the.power.on/off.in.right.order.Please.power.on.the.projector.
prior.to.the.connected.devices.
•.
This.projector.has.the.function.that.can.make.the.projector.automatically.turn.on/
off.Please.refer.to.the.DIRECT.POWER.ON.
(53)
.and.AUTO.POWER.OFF.
(54)
.
items.of.the.OPTION.menu
NOTE
3 Attach.the.lens.cover,.after.the.POWER.indicator.turns.in.steady.orange
Turning on the power (continued)
WARNING..►A.strong.light.is.emitted.when.the.projector’s.power.is.on.Do.
not.look.into.the.lens.of.the.projector.or.look.inside.of.the.projector.through.any.
of.the.projector’s.openings,.since.the.projection.ray.may.cause.a.trouble.on.
your.eyes
►Do.not.touch.around.the.lamp.cover.and.the.exhaust.vent.during.use.or.just.
after.use,.since.it.is.too.hot

20
VIDEO
DOC.CAMERA
KEYSTONE
ASPECT SEARCH BLANK
MUTE
MY BUTTON
POSITION
ESC
MENU
RESET
COMPUTER MY SOURCE/
AUTO
MAGNIFY
PAGE
DOWN
ON
OFF
FREEZE
UP
ー
+
VOLUME
12
ENTER
Operating
Operating
1
Adjusting the volume
Use.the.VOLUME +/VOLUME -.buttons.to.adjust.the.volume
A.dialog.will.appear.on.the.screen.to.aid.you.in.adjusting.the.
volume.If.you.do.not.do.anything,.the.dialog.will.automatically.
disappear.after.about.ten.seconds
●..When. .is.selected.for.current.picture.input.port,.the.volume.adjustment.is.
disabled.Please.see.AUDIO.SOURCE.item.of.AUDIO.menu.(46)
●..Even.if.the.projector.is.in.the.standby.mode,.the.volume.is.adjustable.in.the.
following.conditions:
-..An.option.other.than. .is.selected.for.STANDBY.in.the.AUDIO.SOURCE.
item.of.the.AUDIO.menu.(46)
-.
NORMAL.is.selected.in.the.STANDBY.MODE.item.of.the.SETUP.menu.
(44)
1 Press.MUTE.button.on.the.remote.control.
A.dialog.will.appear.on.the.screen.indicating.that.you.have.muted.
the.sound.
To.restore.the.sound,.press.the..MUTE,.VOLUME +.or.
VOLUME -.button.Even.if.you.do.not.do.anything,.the.dialog.
will.automatically.disappear.after.about.ten.seconds
Temporarily muting the sound
●..When. .is.selected.for.current.picture.input.port,.the.sound.is.always.muted.
Please.see.AUDIO.SOURCE.item.of.AUDIO.menu.(46)
●..CC.(Closed.Caption).is.automatically.activated.when.sound.is.muted.and.an.
input.signal.containing.CC.is.received.This.function.is.available.only.when.
or.COMPUTER IN2,.and.when.AUTO.is.selected.for.DISPLAY.in.the.CC.
menu.under.the.SCREEN.menu.(52)
1 Press.the.INPUT button.on.the.projector.
Each.time.you.press.the.button,.the.projector.
switches.its.input.port.from.the.current.port.as.below
Selecting an input signal
(continued.on.next.page)
●..
While.ON.is.selected.for.AUTO.SEARCH.item.in.OPTION.menu.(53),.the.projector.
will.keep.checking.the.ports.in.above.order.repeatedly.till.an.input.signal.is.detected
VIDEO
DOC.CAMERA
KEYSTONE
ASPECT SEARCH BLANK
MUTE
MY BUTTON
POSITION
ESC
MENU
RESET
COMPUTER MY SOURCE/
AUTO
MAGNIFY
PAGE
DOWN
ON
OFF
FREEZE
UP
ー
+
VOLUME
12
ENTER
VOLUME +/-.button
DOC.CAMERA
SEARCH
MY SOURCE/
PAGE
PAGE
DOWN
UP
MUTE.button
................
COMPUTER.IN1..COMPUTER.IN2..
....................VIDEO.......S-VIDEO........HDMI..........................................
INPUT button
....................VIDEO.......S-VIDEO........HDMI..........................................
....................VIDEO.......S-VIDEO........HDMI..........................................
....................VIDEO.......S-VIDEO........HDMI..........................................
....................VIDEO.......S-VIDEO........HDMI..........................................
....................VIDEO.......S-VIDEO........HDMI..........................................
....................VIDEO.......S-VIDEO........HDMI..........................................
....................VIDEO.......S-VIDEO........HDMI..........................................
................
....................VIDEO.......S-VIDEO........HDMI..........................................
....................VIDEO.......S-VIDEO........HDMI..........................................
....................VIDEO.......S-VIDEO........HDMI..........................................
....................VIDEO.......S-VIDEO........HDMI..........................................
....................VIDEO.......S-VIDEO........HDMI..........................................
....................VIDEO.......S-VIDEO........HDMI..........................................
Table of contents
Other Hitachi Maxell Projector manuals
