E-5
Safety Precautions
To Prevent Fire, Short-Circuit, Electric Shock, Injury and Failure
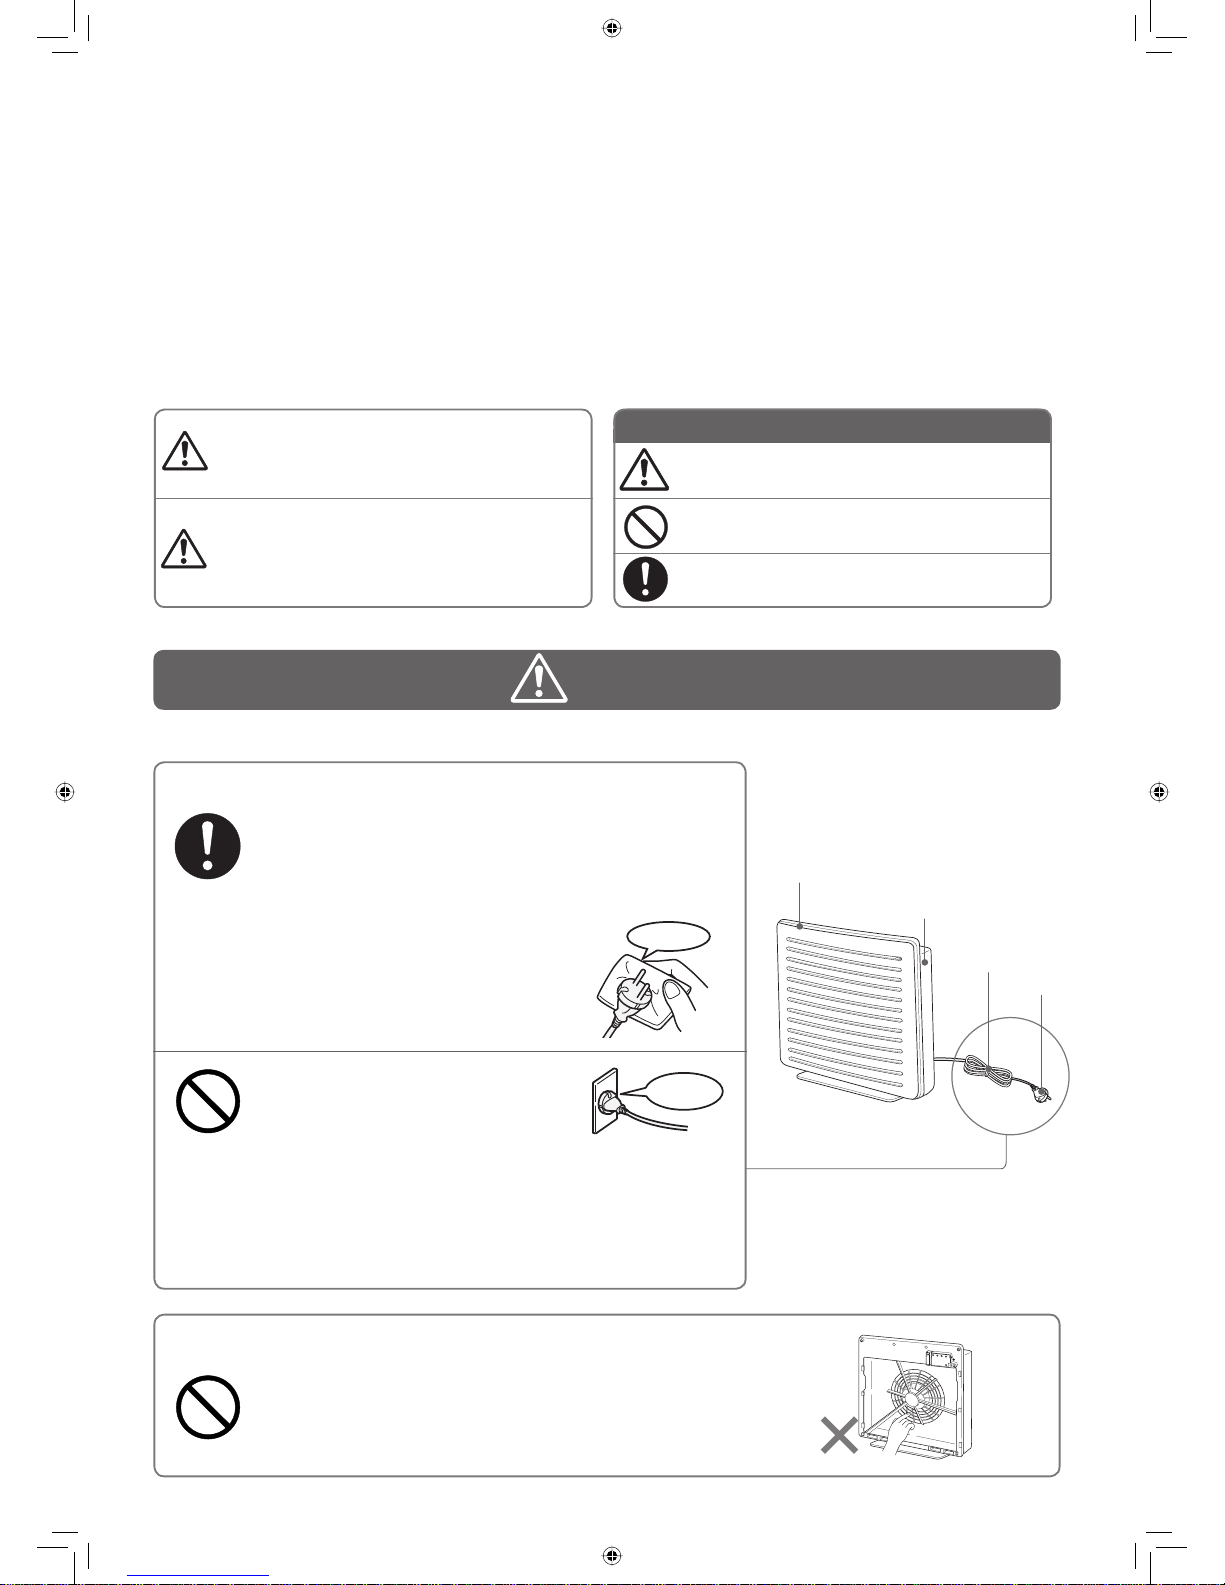
Be sure to hold the plug, not the power cord, when unplugging it from AC outlet.
Unplug the power plug from the wall outlet when you do not use the air
purifier for a long time.
可燃性ガス
CAUTION
AC Outlet, Power Plug and Power Cord
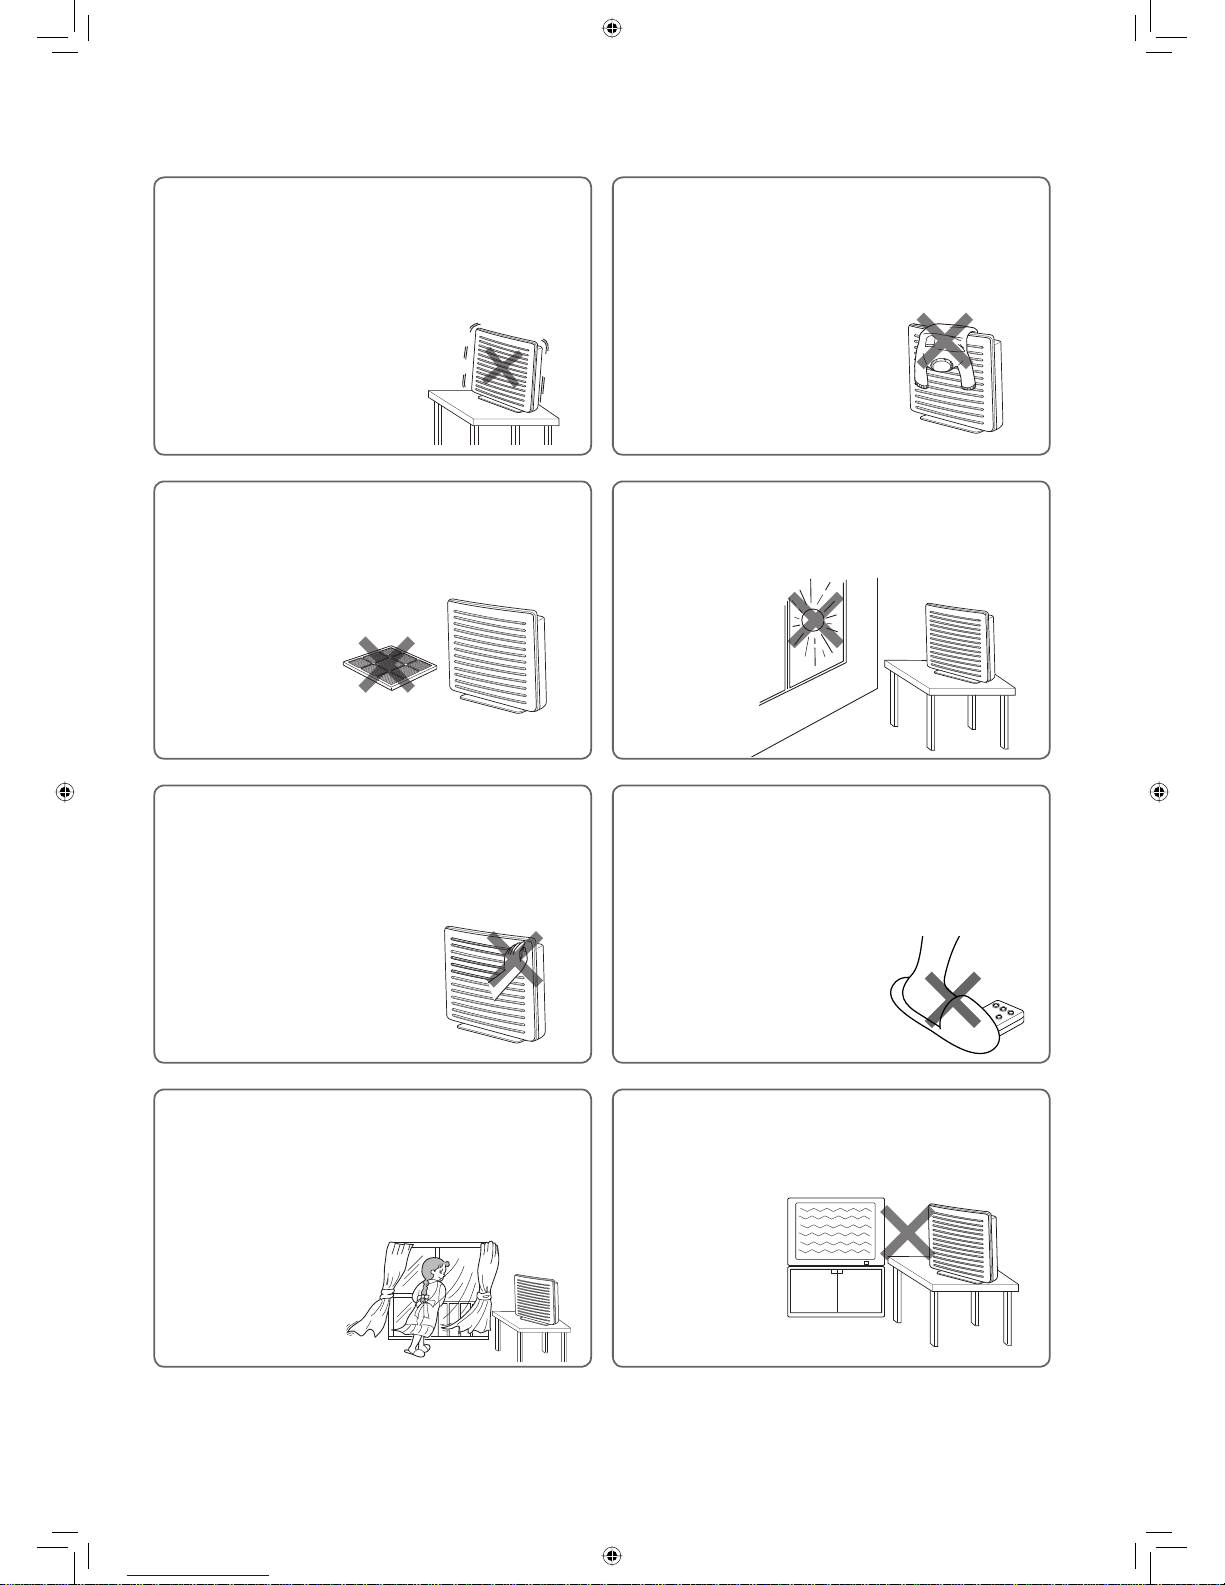
Place of Use
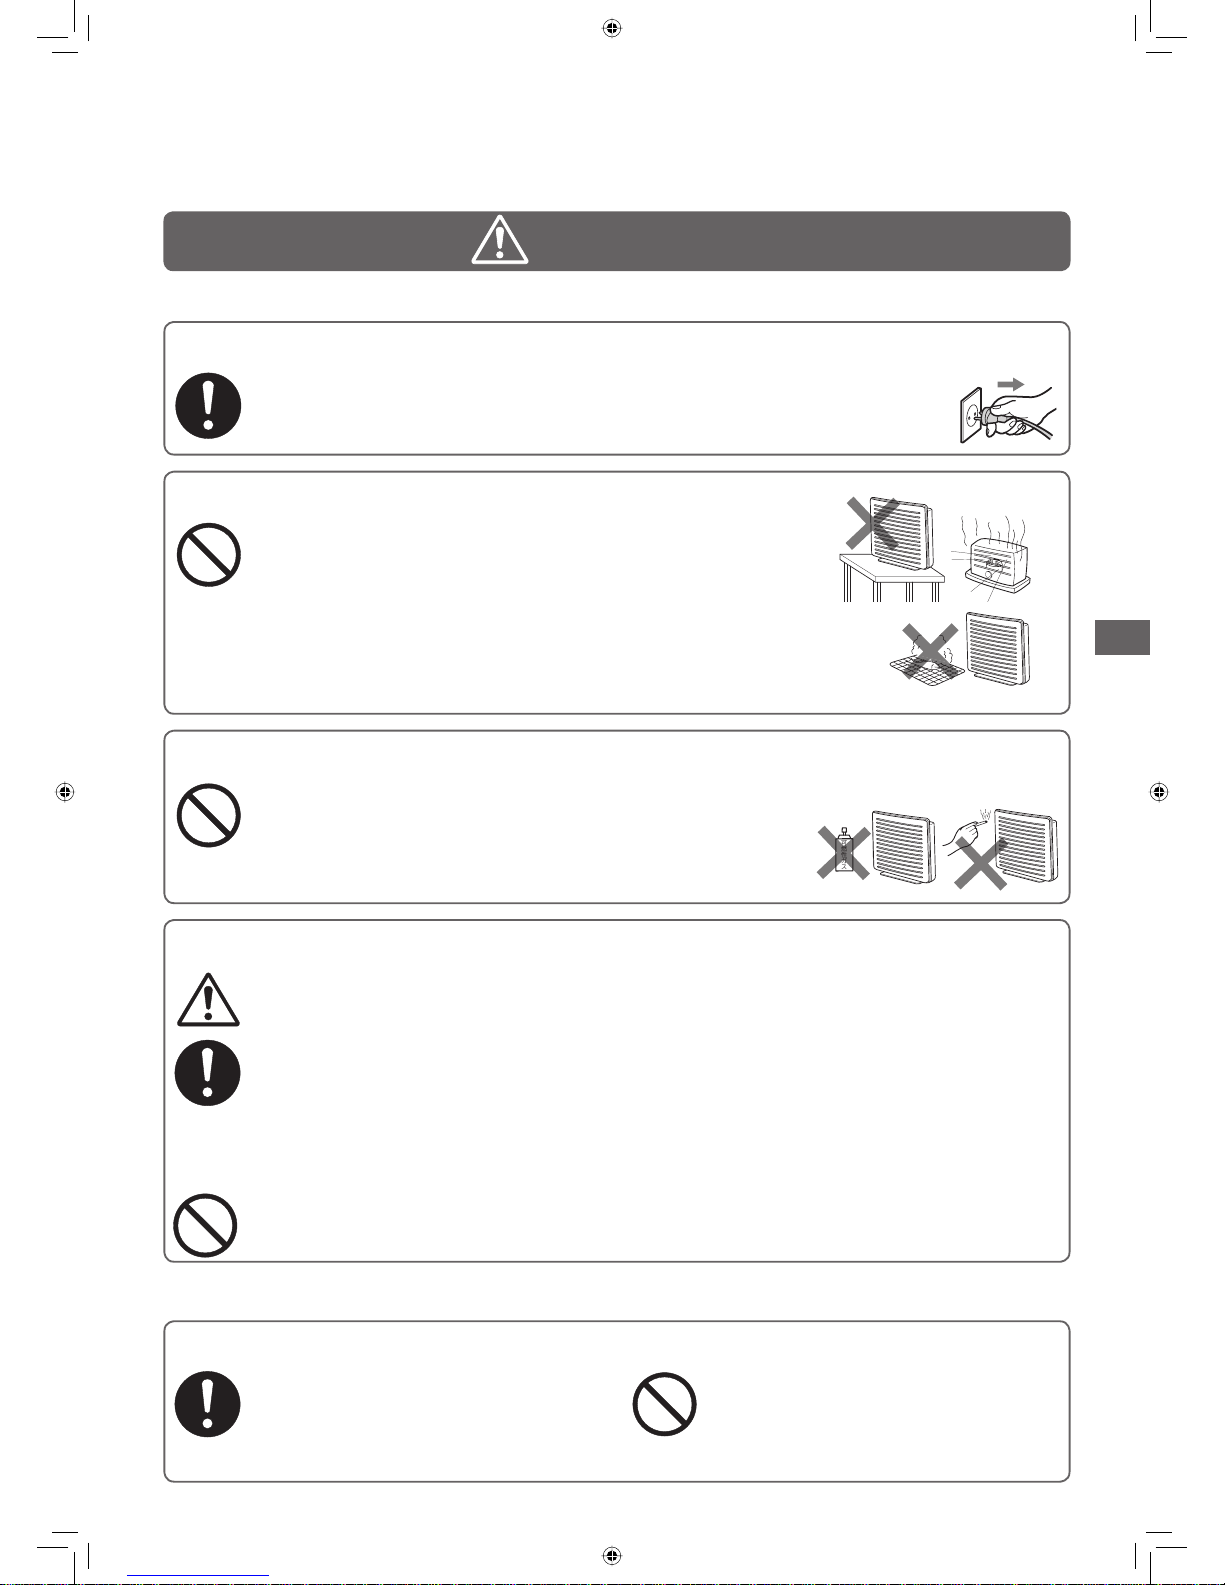
Do not use in a humid place such as in bathroom.
Do not place air purifier near a hot object such as a heater.
Do not use in a place where soot of oil, such as machine oil, is
floating in the air.
Do not use air purifier in a kitchen as a substitute of ventilating fan.
Do not use in a place where any organic solvent or chemicals are used.
Do not use the air purifier in a place where a machine tool
such as a grinder and welder that produces sparks such as
flammable dust is installed.
Purifier Body and Panel
Do not use benzene or thinner when wiping or spray
flammable gas such as insecticides.
Do not let air purifier intake inflammables, lit cigarettes or incense.
Do not put your finger or any other object into air outlet and
inlet on the panel.
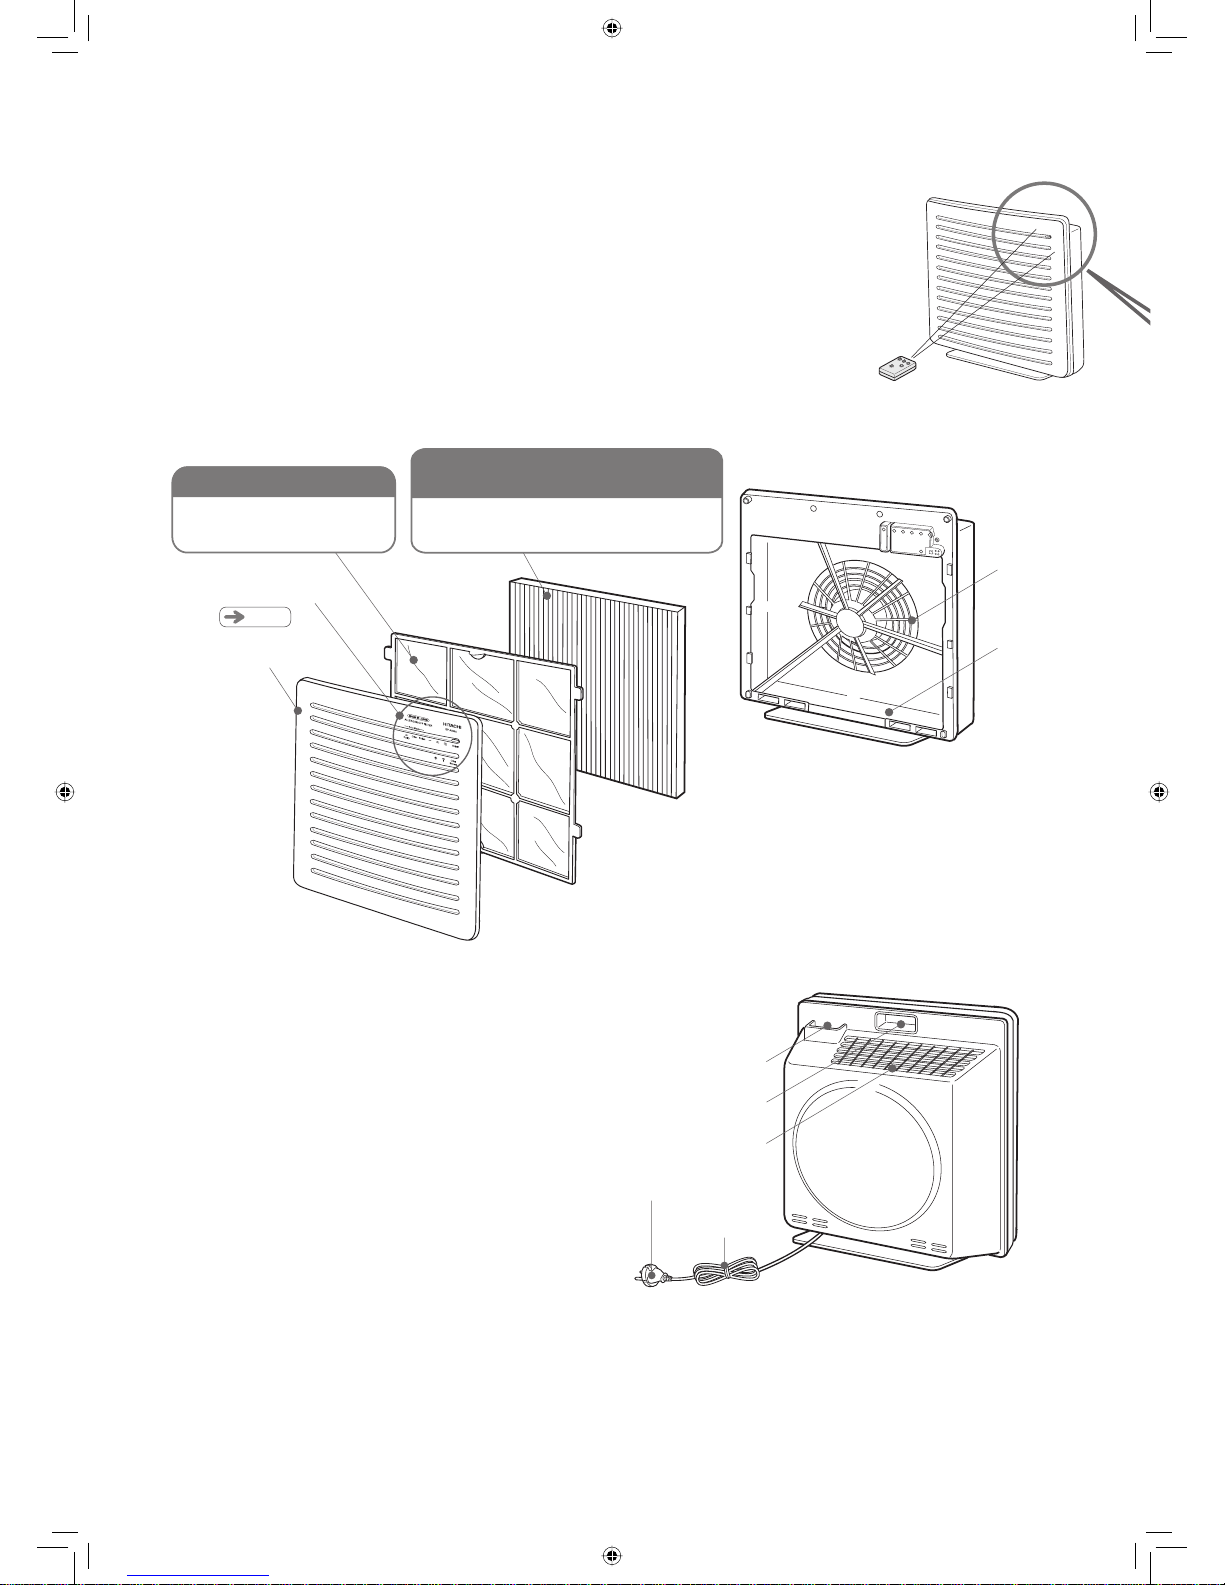
Firmly hold the grip when carrying the air purifier.
Ventilate a room frequently if any heating appliance is simultaneously used with air purifier.
Otherwise, it may cause carbon monoxide poisoning.
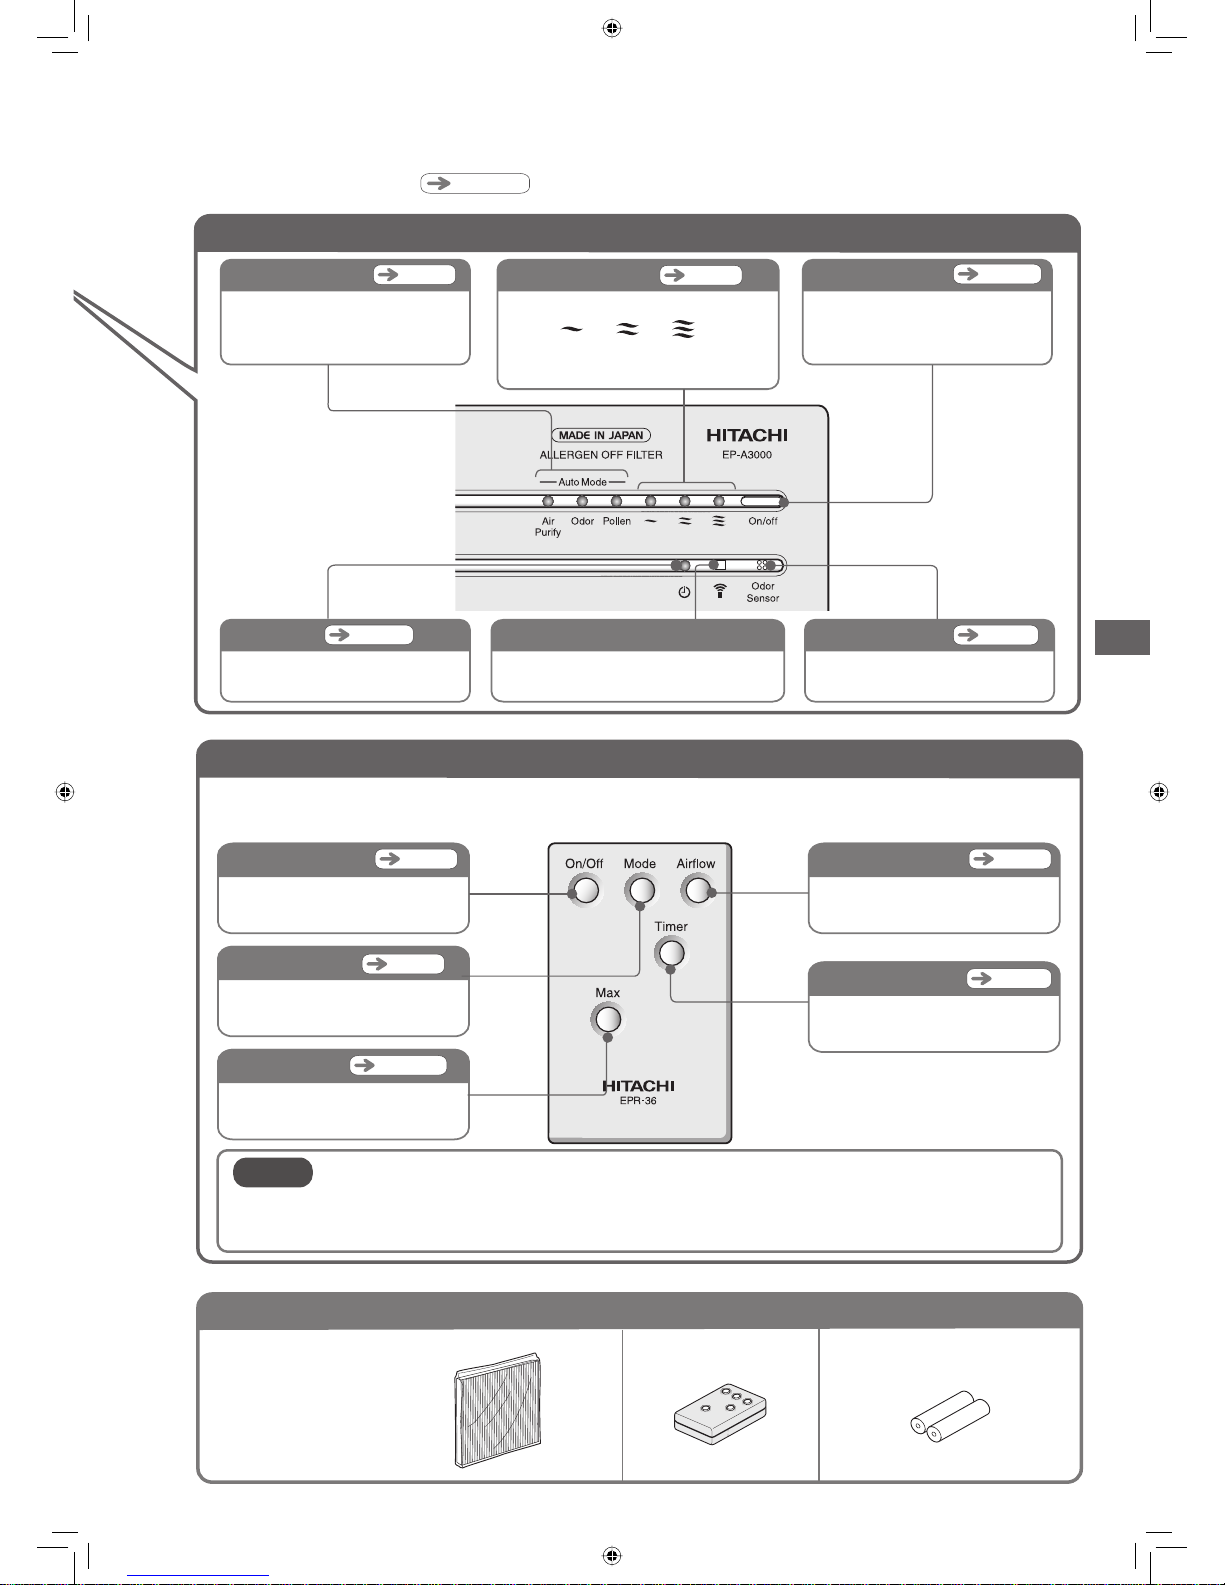
Use dry cell batteries properly after reading the precautions on them.
Use a genuine filter for the Hitachi Air Purifier.
Other filters may cause unit failure.
The appliance is not to be used by children or persons with reduced physical, sensory or
mental capabilities, or lack of experience and knowledge, unless they have been given
supervision or instruction.
Children should be supervised to ensure that they do not play with the appliance.
Do not operate the unit when using fumigating (smoking) type insecticide.
Using such insecticide will cause chemicals to accumulate in the unit and to be emitted by subsequent operation,
which can be harmful to heath. After using insecticide, ventilate the room well before running the purifier.
Miscellaneous
To Prevent Floor Scratches orWall Stains
During Cleaning / Place of Use
During cleaning, lay a soft cloth on
the floor and place the purifier and
detached components (panel and
the like) on it.
Otherwise, it may cause scratches on the floor.
Do not use the air purifier near the
wall that cannot be scrubbed such
as cloth-covered white wall.
The air purifier will take in the surrounding
air and may produce local stains.
EP-A3000.indd 5 11/18/2011 8:40:41 AM