manuals.online logo
Brands
  1. Home
  2. •
  3. Brands
  4. •
  5. Hitachi
  6. •
  7. CRT TV
  8. •
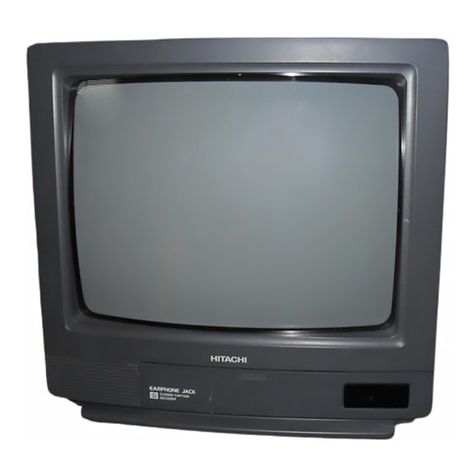
  9. Hitachi CG2026S User manual

Hitachi CG2026S User manual

Other Hitachi CRT TV manuals

Hitachi C28W433N User manual

Hitachi

Hitachi C28W433N User manual

Hitachi C2874TN User manual

Hitachi

Hitachi C2874TN User manual

Hitachi 32CX39B User manual

Hitachi

Hitachi 32CX39B User manual

Hitachi 27CX4B User manual

Hitachi

Hitachi 27CX4B User manual

Hitachi C32W40TN User manual

Hitachi

Hitachi C32W40TN User manual

Hitachi 35UX60B, 35TX10B User manual

Hitachi

Hitachi 35UX60B, 35TX10B User manual

Hitachi CL32W460AN User manual

Hitachi

Hitachi CL32W460AN User manual

Hitachi CL2554AN User manual

Hitachi

Hitachi CL2554AN User manual

Hitachi 32UX59B User manual

Hitachi

Hitachi 32UX59B User manual

Hitachi CL28W460N User manual

Hitachi

Hitachi CL28W460N User manual

Hitachi C32W1TN User manual

Hitachi

Hitachi C32W1TN User manual

Hitachi 27MM20B User manual

Hitachi

Hitachi 27MM20B User manual

Hitachi 27CX0B User manual

Hitachi

Hitachi 27CX0B User manual

Hitachi CP2842AN User manual

Hitachi

Hitachi CP2842AN User manual

Hitachi C28WF532N User manual

Hitachi

Hitachi C28WF532N User manual

Hitachi 27AX4B, 27AX3B, 27AX0B User manual

Hitachi

Hitachi 27AX4B, 27AX3B, 27AX0B User manual

Hitachi 20SA4B, 20SA2B User manual

Hitachi

Hitachi 20SA4B, 20SA2B User manual

Hitachi CP2996TA User manual

Hitachi

Hitachi CP2996TA User manual

Hitachi D36WF840N User manual

Hitachi

Hitachi D36WF840N User manual

Hitachi 31KX41K User manual

Hitachi

Hitachi 31KX41K User manual

Hitachi CL2843S User manual

Hitachi

Hitachi CL2843S User manual

Hitachi 32FX41B, 32UX51B, 36FX42B, 36UX52B, 36CX35B User manual

Hitachi

Hitachi 32FX41B, 32UX51B, 36FX42B, 36UX52B, 36CX35B User manual

Hitachi CP2143S User manual

Hitachi

Hitachi CP2143S User manual

Hitachi C2566TN User manual

Hitachi

Hitachi C2566TN User manual

Popular CRT TV manuals by other brands

JVC AV-21QS5SP instructions

JVC

JVC AV-21QS5SP instructions

Philips COLOR TV 25 INCH TABLE TR2517C owner's manual

Philips

Philips COLOR TV 25 INCH TABLE TR2517C owner's manual

LG 30FZ1DC Specification sheet

LG

LG 30FZ1DC Specification sheet

Sony FD TRINITON WEGA KV-24FS120 operating instructions

Sony

Sony FD TRINITON WEGA KV-24FS120 operating instructions

RCA F19442 user guide

RCA

RCA F19442 user guide

Samsung CS761 Owner's instructions

Samsung

Samsung CS761 Owner's instructions

Philips 29PT4973 Instructions for use

Philips

Philips 29PT4973 Instructions for use

Panasonic TC-29P100 Series operating instructions

Panasonic

Panasonic TC-29P100 Series operating instructions

RCA F19422 user guide

RCA

RCA F19422 user guide

Sony WEGA KV 32HS20 operating instructions

Sony

Sony WEGA KV 32HS20 operating instructions

Samsung SlimFit TX R3079WH Owner's instructions

Samsung

Samsung SlimFit TX R3079WH Owner's instructions

Palsonic MODEL 5179G owner's manual

Palsonic

Palsonic MODEL 5179G owner's manual

Toshiba CF13H22 owner's manual

Toshiba

Toshiba CF13H22 owner's manual

Magnavox MS3650C - 36" Smart Ctv Directions for use

Magnavox

Magnavox MS3650C - 36" Smart Ctv Directions for use

Philips 21PT9469 user manual

Philips

Philips 21PT9469 user manual

Mitsubishi CS-35305 owner's guide

Mitsubishi

Mitsubishi CS-35305 owner's guide

Toshiba 14AF41 owner's manual

Toshiba

Toshiba 14AF41 owner's manual

Sony KD-34XBR970 - 34" Hdtv 16x9 Format Specifications

Sony

Sony KD-34XBR970 - 34" Hdtv 16x9 Format Specifications

manuals.online logo
manuals.online logoBrands
  • About & Mission
  • Contact us
  • Privacy Policy
  • Terms and Conditions

Copyright 2025 Manuals.Online. All Rights Reserved.

GB
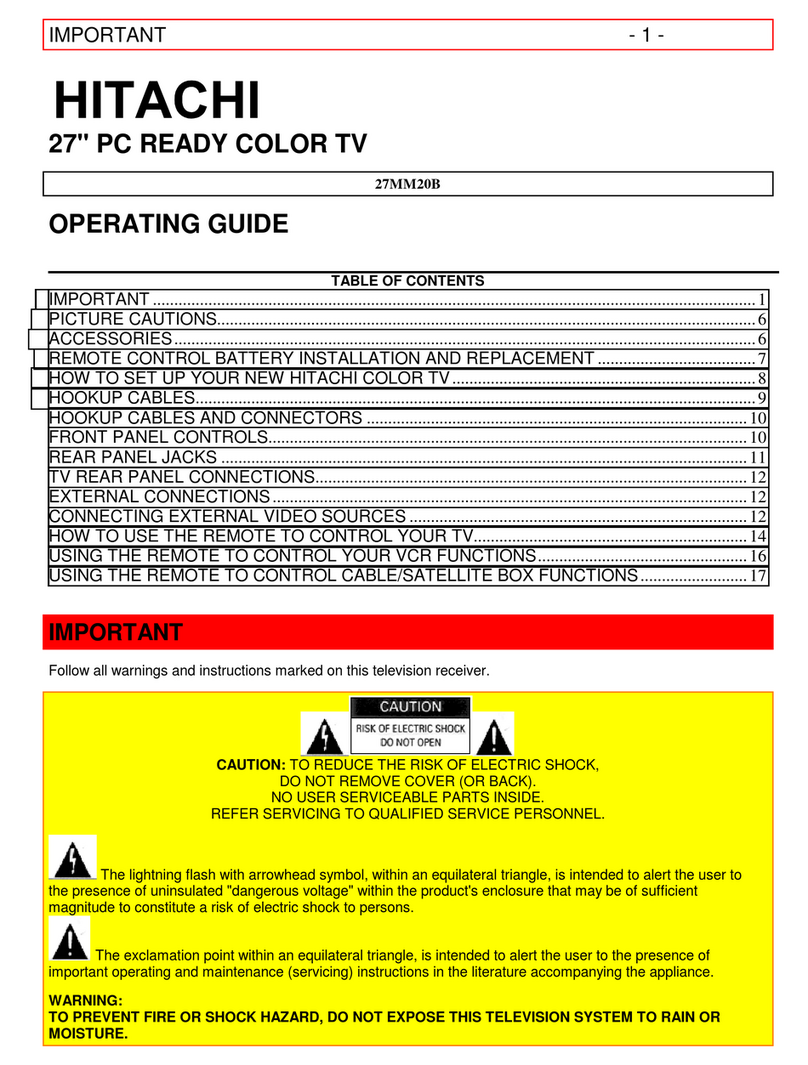
Instructions for use
CG2026S
GB - 1 -
Contents
Remote Control Buttons ................................................... 2
Control Panel Buttons ...................................................... 3
Connect Peripheral Equipment ....................................... 3
Connect Peripheral Equipment ....................................... 4
Via the Euroconnector .................................................... 4
Via Aerial Input ................................................................ 4
Decoder.......................................................................... 4
TV and Video Recorder .................................................. 4
Search for and store the test signal of the video
recorder .......................................................................... 4
Ca era and Ca corder ............................................... 4
Connect the decoder to the video recorder ................... 4
Preparation ....................................................................... 5
Features ......................................................................... 5
Safety Precautions ........................................................... 5
Before Switchin on your TV ........................................... 7
Power connection .......................................................... 7
Connections to the RF input socket .............................. 7
How to connect other devices ........................................ 7
Inserting batteries in the re ote control handset ......... 7
Switchin the TV ON/OFF ................................................. 7
To switch the TV on ........................................................ 7
To switch the TV off ........................................................ 7
Operatin the TV ............................................................... 7
A.P.S. (Auto atic Progra ing Syste ) ...................... 7
Operating with the buttons on the TV set ....................... 8
Operating with Re ote Control ..................................... 8
Menu System .................................................................... 8
Sound Menu ................................................................... 8
Picture Menu .................................................................. 9
Feature Menu ............................................................... 10
Install Menu ..................................................................10
Progra e Menu ........................................................ 11
Autostore ...................................................................... 11
Other Features................................................................ 12
TV Status ...................................................................... 12
Progra e Swap (P<P) ............................................. 12
Double-digit (- -) ........................................................... 12
Personal Preferences (PP) .......................................... 12
Sleep Ti er Last Minute Indicator ............................... 12
Mute Indicator ............................................................... 12
No-Signal ..................................................................... 12
Blue Background During No-Signal ............................ 12
Volu e Bar ...................................................................12
AV Modes ...................................................................... 12
Teletext ............................................................................ 13
To operate Teletext ....................................................... 13
To select a page of Teletext .......................................... 13
To Select Index Page ................................................... 13
To Select Teletext with a TV Progra e ..................... 13
Searching for a page while watching TV ..................... 13
To Select Double Height Text ....................................... 13
To Reveal concealed Infor ation .............................. 13
To Stop Auto atic Page Change ................................. 13
To Select a Subcode Page .......................................... 13
Fastext .......................................................................... 13
To exit Teletext .............................................................. 14
To Display the Ti e ..................................................... 14
Tips .................................................................................. 14
Care of the Screen ....................................................... 14
Poor Picture .................................................................. 14
No Picture ..................................................................... 14
Sound ........................................................................... 14
Re ote Control ............................................................14
No solution ................................................................... 14
Specifications ................................................................. 14
01-ENG-(CG2026S)-5186-AV-3040-AK30-MN1P-PLLFS-BG-50051298.p65 13.07.2004, 13:191
GB - 2 -
Remote Control Buttons
= Stand By
I-II = No Function
0 - 9 = Direct Progra
=Previous Progra e
- - = Double Digit
= Info (Progra Menu)
= Progra e Up (Cursor Up)
= Cursor Right
-VOL / VOL + = Volu e - / Volu e +
Yellow (FEATURE) = Feature Menu
Blue (INSTALL) = Installation Menu
= External Source (AV-1, F-AV, RGB)
Teletext Buttons
= Teletext
= Update
= Hold
= Index Page
= Reveal
= Expand
= Ti e
= Mix
= TV / Quit Menu
Red (SOUND) = Sound Menu
Green (PICTURE) = Picture Menu
= Progra e Down (Cursor Down)
= Cursor Left
= Menu
= Change Picture Preset
= Mute
01-ENG-(CG2026S)-5186-AV-3040-AK30-MN1P-PLLFS-BG-50051298.p65 13.07.2004, 13:192
GB - 3 -
Control Panel Buttons
$17,1
POWER = Power On / Off
- VOLUME + = Volu e - / Volu e +
- PROG. + = Progra - / Progra +
Front AV input
AUDIO L / R = Audio left (white) / right (red)
VIDEO = VCR (yellow)
Connect Peripheral Equipment
There is a wide range of audio and video equip ent that can be connected to your TV.
The connection diagra s show the back of the TV where the different equip ent should be connected.
DECODER
FOR SATELLITE RECEIVER
VIDEO
AUDIO
CAMERA
6&$57
$HULDO ([WHUQDO
REAR PANEL
)URQW$9
/  5
01-ENG-(CG2026S)-5186-AV-3040-AK30-MN1P-PLLFS-BG-50051298.p65 13.07.2004, 13:193
GB - 4 -
Connect Peripheral Equipment
There is a wide range of audio and video equip ent that can
be connected to your TV.
The following connection diagra s show you where the dif-
ferent equip ent should be connected at the rear side of the
TV.
Via the Euroconnector
Your TV set has a Euroconnector socket. If you want to con-
nect peripherals (e.g. video, decoder, etc.) which have Euro-
connectors, to your TV, use SCART 1 input.
If an external device is connected via Euroconnector sockets
TV is switched to AV ode auto atically. If the signal is RGB
then the RGB OSD indicator is displayed on the screen.
In AV ode if you press the   button the TV status OSD is
displayed on the screen.
Via Aerial Input
If the equip ent you want to connect to your TV e.g. video re-
corder or satellite receiver does not have a SCART socket, you
should connect it to the aerial (ANT) socket on your TV.
Decoder
Cable TV offers you a wide choice of progra s. Most of the
are free, others are to be paid for by the viewer. This eans
that you will need to subscribe to the broadcasting organiza-
tion whose progra es you wish to receive. This organiza-
tion will supply you with a corresponding decoder unit to allow
the progra es to be unscra bled.
For further infor ation ask your dealer. See also the booklet
supplied with your decoder.
Connectin a decoder with an aerial socket to the TV
 Connect the aerial cable.
Connectin a decoder without an aerial socket to the
TV
 Connect the decoder to your TV with a SCART lead to
SCART 1. When your decoder has a SCART connector you
can obtain better picture quality if you connect a SCART lead
to EXTERNAL.
 Then select the appropriate AV ode by pressing the 
$9

button.
TV and Video Recorder
 If your video recorder has a SCART socket please connect
it to the TV using a SCART lead. Your TV should also be
connected to your video recorder using the aerial RF output
socket.
Please note using a SCART lead will produce better qualitiy
pictures.
Search for and store the test signal of the
video recorder
 Unplug the aerial cable fro the aerial socket ANT of your
video recorder.
 Switch on your TV and put the video recorder on the test sig-
nal. (See the handbook for your video recorder.)
 Enter the Tuning enu via the Install enu.
 Search for the test signal of your video recorder in the sa e
way as you searched for and stored the TV signals. See
Tuning, Search and Store TV channels. Store the test signal
under progra e nu ber 0.
 Replace the aerial cable in the aerial socket ANT of your
video recorder once you have stored the test signal.
Camera and Camcorder
To connect to Front-AV input
Connect your ca corder to the front of your TV.
 Connect your equip ent to the TV via VIDEO (yellow), AUDIO
R (red) and AUDIO L (white) inputs. You should connect the
jacks to the input of the sa e colour.
Connect the decoder to the video recorder
So e video recorders have a special SCART connector for de-
coder.
 Connect a SCART lead to the SCART connector of your de-
coder and to the special SCART connector of your video re-
corder. See also the handbook of your video recorder.
 To connect your video recorder to the TV, see TV and Video
Recorder section.
If you want to connect ore equip ent to your TV, consult your
dealer.
01-ENG-(CG2026S)-5186-AV-3040-AK30-MN1P-PLLFS-BG-50051298.p65 13.07.2004, 13:194
GB - 5 -
Preparation
Place the TV on a solid surface.
If placing the TV into a cabinet or alcove, ensure there is at least
a 100 (10c ) gap to the sides and rear and top of the TV.
This is to allow for adequate ventilation during operation.
Please read below for ore safety infor ation before instal-
lation.
Use this apparatus in tropical and/or moderate climates
Features
 It is a re ote controlled colour television.
 100 progra es fro VHF, UHF bands or cable channels
can be preset.
 It can tune cable channels.
 Controlling the TV is very easy by its enu driven syste .
 It has SCART connector for external devices (video recorder,
audio equip ent, video ga es, etc.).
 Front AV in is available.
 Teletext (Fastext).
 A.P.S. (Auto atic Progra ing Syste ).
 All progra es can be na ed.
 Progra e swapping between last watched two pro-
gra es.
 Forward or backward auto atic tuning.
 Sleep ti er.
 Child Lock.
 Auto atic sound ute when no trans ission.
 When no valid signal is detected, after 5 inutes the TV
switches itself auto atically to stand-by ode.
 WSS (Wide Screen Signaling).
Safety Precautions
IMPORTANT SAFETY INFORMATION ON
OPERATING YOUR TV
Dos and Donts
DOs
This Television has been designed and anufactured to eet
international safety standards, but like any electrical equip-
ent, care ust be taken if you are to obtain the best results
and safety is to be assured.
DO read the operating instructions before you atte pt to use
the equip ent.
DO consult your dealer if you are in any doubt about installa-
tion, operation or safety of your equip ent.
DO be careful with glass panels or doors on equip ent.
This TV is supplied with a fitted ains plug. This plug ust
not be cut off as it ay contain a special radio interference filter,
the re oval of which could lead to i paired perfor ance. If
you wish to extend the lead, obtain an appropriate safety ap-
proved extension lead or consult your dealer.
Observe the anufacturers instructions when connecting ex-
tension leads to the TV. Check the fuse rating on the new plug,
this should be fitted with a 5 A p fuse which confor s to ei-
ther ASTA or BSI (BS1 362) approvals, these are easily iden-
tifiable by either the or sy bols. If you are in any doubt
about the installation of an extension lead, please consult a
co petent electrician.
DONTs
DONT continue to operate the equip ent if you are in any
doubt about it working nor ally, or if it is da aged in any way
switch off, withdraw the ains plug and consult your dealer.
DONT place water filled vessels on top of T.V. cabinets.
DONT re ove any fixed cover as this ay expose dangerous
voltages.
DONT leave equip ent switched on when it is unattended un-
less it is specifically stated that it is designed for unattended
operation or has a stand-by ode. Switch off using the switch
on the equip ent and ake sure your fa ily know how to do
this. Special arrange ents ay need to be ade for infir or
handicapped people.
DONT use equip ent such as personal stereos or radios so
that you are distracted fro the require ents of traffic safety.
It is illegal to watch television whilst driving.
DONT obstruct the ventilation of the equip ent, for exa ple
with curtains or soft furnishings. Overheating will cause da -
age and shorten the life of the equip ent.
DONT use akeshift stands and NEVER fix legs or stands to
the TV with any screws other than those provided - to ensure
co plete safety always use the anufacturers approved
stand with the fixings provided.
DONT allow electrical equip ent to be exposed to rain or
oisture.
01-ENG-(CG2026S)-5186-AV-3040-AK30-MN1P-PLLFS-BG-50051298.p65 13.07.2004, 13:195
GB - 6 -
ABOVE ALL
 NEVER let anyone, especially children push anything into
holes, slots or any other opening in the case - this could
result in a fatal electric shock
 NEVER guess or take chances with electrical equipment
of any kind - it is better to be safe than sorry!
1. Power Cor
The power supply cable should be placed so that it is not likely
to be walked on or pinched by ite s placed on or against it.
Pay particular attention to the cable
Where it enters the plug, power outlet, and the point where it
e erges fro the receiver.
2. Moisture an Water
Do not use this equip ent in a hu id and da p place (avoid
the bathroo , the sink in the kitchen, and near the washing
achine). Do not expose this equip ent to rain or water, as
this ay be dangerous and do not place objects filled with liq-
uids on top. Avoid fro dripping or splashing.
3. Cleaning
Before cleaning, unplug the receiver fro the ain supply out-
let. Do not use liquid or aerosol cleaners. Clean with a soft dry
cloth.
4. Lightning
To prevent da age during a stor , lightning or when going on
holiday, disconnect the power lead and aerial fro the wall
outlet and disconnect the aerial plug fro the back of the tele-
vision.
5. Ventilation
The slots and openings on the receiver are intended for ven-
tilation and to ensure reliable operation. To prevent overheat-
ing, these openings ust not be blocked or covered in anyway.
6. Replacement Part
When replace ent parts are required, be sure the service
technician has used replace ent parts which are specified
by the anufacturer or have the sa e specifications as the
original one. Unauthorized substitutions ay result in fire, elec-
trical shock, or other hazards.
7. Servicing
Please refer all servicing to qualified personnel. Do not re ove
the back cover as this ay result in an electric shock.
8. X-rays
This television has sheilding for protection against the e is-
sion of X-rays.
9. Flame sources
Do not place naked fla e sources on the apparatus.
Warning!
Any intervention contrary to regulations, in particular, any
modification of high voltage or a replacement of the picture
tube may lead to an increased concentration of x-rays. Any
television modified in this way no longer complies with license
and must not be operated.
Instructions for waste disposal:
 Packaging and packaging aids are recyclable and should
principally be recycled. Packaging materials, such as foil
bag, must be kept away from children.
 Batteries, including those which are heavy metal-free, should
not be disposed of with household waste. Please dispose of
used batteries in an environmentally sound manner. ind out
about the legal regulations which apply in your area
DO NOT LEAVE YOUR TV IN STAND-BY OR OPERATING
WHEN LEFT UNATTENDED FOR A LONG TIME
CAUTION
RISK O ELECTRIC SHOCK
The lightning flash with the arrowhead sy bol, within an equilateral triangle, is intended to alert the user
to the presence of uninsulated ''dangerous voltage''
within the product' enclosure that ay be of sufficient agnitude to constitute a risk of an electric shock.
The excla ation point within an equilateral triangle is intended to alert the user to the presence of i por-
tant operating and aintenance (servicing) instructions in the literature acco panying the appliance.
01-ENG-(CG2026S)-5186-AV-3040-AK30-MN1P-PLLFS-BG-50051298.p65 13.07.2004, 13:196
GB - 7 -
Before Switching on your TV
Power connection
IMPORTANT: The TV set is designed to operate on 220-240V
AC, 50 Hz.
 After unpacking, allow the TV set to reach the a bient roo
te perature before you connect the set to the ains.
Connections to the RF input soc et
 Connect the aerial or cable TV plug into the RF input socket
on the back of the TV.If you are also connecting a video re-
corder /satellite receiver, plug the aerial into this equip ent
first and then connect the RF output socket fro this device
to the RF input on the back of the TV.
9+)8+)

:
795($53$1(/
&$%/(79
How to connect other devices
IMPORTANT: Switch off the TV before connecting any external
device.
Sockets for external connections are at the back of the TV. For
connection of other devices via Euroconnector refer to the
anuals of the related devices.
Inserting batteries in the remote control
handset
 Place the batteries in the right directions as seen below.
 Re ove the battery cover located on the back of the handset
by gently pulling upwards fro the indicated part.
 Insert two AAA (R03) or equivalent type batteries inside.
 Replace the battery cover.
NOTE: Remove batteries from remote control handset when
it is not to be used for a long period.Otherwise it can be dam-
aged due to any leakage of batteries.
Switching the TV ON/O
To switch the TV on
Your TV will switch on in two steps:
1- Press the power button located on the front of the TV. Then
the TV switches itself to standby ode and the RED LED
located below the TV turns on.
2- To switch on the TV fro stand-by ode either:
Press a digit button on the re ote control so that a progra e
nu ber is selected,
or,
Press Progra e Up or Down buttons on the front of the TV
or on the re ote control, so that last switched off progra e
is selected.
In either case the TV will switch on and the RED LED will turn
to GREEN.
To switch the TV off
 Press the stand-by button on the re ote control, so the TV will
switch to stand-by ode and the GREEN LED will beco e
RED,
or,
Press the power button located on the front of the TV, so the TV
will switch off and the GREEN LED will turn off.
Operating the TV
You can operate your TV both using the remote control
handset and onset buttons
A.P.S. (Automatic Programming System)
"PLEASE, CHECK ANTENNA CABLE. AUTO PROGRAMMING
SYSTEM" essage will be displayed when you turn on your TV
for the first ti e. A.P.S., searches and sorts all channels and
stores the auto atically on your TV, according to the trans-
ission of progra e syste s in your area.
To cancel A.P.S. before starting, press 
79
 button. First of all
choose the COUNTRY.
The "STANDARD" setting is fixed to "BG". You cannot change
this ite 's setting. This, will effect the sort process in A.P.S.. To
select START use   or   button and press   or  
button. To cancel A.P.S. during running press   or   but-
ton.
3/($6(&+(&.$17(11$&$%/(
$872352*5$00,1*6<67(0
&28175<
67$1'$5'
67$57
'
%*
$36,65811,1*
39+)
&$1&(/
After A.P.S. is finalized, a progra e list will apper on the
screen. In the progra e list you will see the progra e
nu bers and na es assigned to the progra es.
If you do not accept the locations and / or the progra e
na es of progra es, you can change the in Progra e
enu.
01-ENG-(CG2026S)-5186-AV-3040-AK30-MN1P-PLLFS-BG-50051298.p65 13.07.2004, 13:197
GB - 8 -
Operating with the buttons on the TV set
Volu e setting and progra e selection can be ade using
the buttons on the front panel.
Volume Settin
 Press - VOLUME button to decrease volu e or VOLUME+
button to increase volu e, so a volu e level scale (slider)
will be displayed at the iddle of the botto on the screen.
 By pressing both the VOLUME + and - VOLUME buttons
at the sa e ti e you can enter Main enu.
Pro ramme Selectin
 Press PROG. + button to select the next progra e or
- PROG. button to select the previous progra e.
Operating with Remote Control
The re ote control handset of your TV is designed to control
all the functions of the odel you selected. The functions will
be described in accordance with the enu syste of your TV.
Functions of the enu syste are described in Menu Syste
section.
Volume Settin
Press VOL+ button to increase volu e. Press VOL- button
to decrease volu e. A volu e level scale (slider) will be dis-
played at the iddle of the botto on the screen.
Pro ramme Selectin (Previous or next pro ramme)
 Press   button to select the previous progra e.
 Press   button to select the next progra e.
Pro ramme Selectin (direct access):
Press digit buttons on the re ote control handset to select
progra es between 0 and 9. TV will switch to the selected
progra e. To select progra es between 10 - 99, you ust
use the double digit button "- -".
this OSD is displayed at the left hand upper on the
screen.
After this, press the digit buttons consecutively for the pro-
gra e you want to select (eg. for progra e 27, first press
2 and then 7). If the second digit is not entered within 3 sec-
onds, this function will disappear.
Press directly the progra e nu ber to reselect single digit
progra es.
Pro ramme Swappin
 Press "P<P" (progra e swap) button to select the last
selected progra e. This button provides swapping be-
tween last two selected progra es. For exa ple, select
progra e 8, then select progra e 2. Now, if you press
"P<P" button, progra e 8 will be selected. If you press the
sa e button again, progra e 2 will be selected and so on.
Menu System
Your TV has been designed with a enu syste , to provide an
easy anipulation of a ulti-function syste . The TV is con-
trolled by choosing the co ands, which are displayed on
the screen.
Press the " " button. The Main enu will be displayed at the
iddle on the screen.
All the selected ite s in this enu syste is indicated with
CYAN characters and with an arrow on the leftside of ite s.
To select a sub- enu use   or   button, and press   or
 button. Each option can also be selected with the coloured
button and " " button on the re ote control.
MAIN MENU
The enu syste is described below.
The short way in order to enter the enus, press :
"" Button, Main Menu.
Red Button, Sound Menu.
Green Button,Picture Menu.
Yellow Button, Feature Menu.
Blue Button, Install Menu.
"" Button, Pro ramme Menu.
Menu button has two functions; first is opening or closing the
"MAIN MENU", and the second is closing the sub- enu and
then opening its parent enu.
Sound Menu
To chan e sound settin s
 Enter the Sound Menu directly, pressing the Red button or,
 As you enter the ain enu, sound will be the first selected
option. In the ain enu, select SOUND using   or  
button, then enter the sound enu pressing   or  
button.
Settin Volume:
As you enter the sound enu, Volu e will be the first selected
option.
 Press   button to increase volu e.
 Press   button to decrease volu e.
01-ENG-(CG2026S)-5186-AV-3040-AK30-MN1P-PLLFS-BG-50051298.p65 13.07.2004, 13:198

GB - 9 -
Or you can directly change the volu e settings using VOL+
(to increase) or -VOL (to decrease) button.
92/80(
6725(
$9/ 21
Settin AVL
Auto atic Volu e Li iting (AVL) function nor alises sound
to obtain fixed output level between progra s, having different
sound levels. Pressing   or   button will turn on and off
this feature.
92/80(
6725(
$9/ 21
To Store the Settin s
 Press   or   button on STORE option to store Sound
enu settings.
92/80(
6725(
$9/ 21
Picture Menu
 To enter the Picture enu directly, press the GREEN button,
or
 Press " " button, now you are in Main enu. In the Main
enu, select PICTURE using   or   button, then enter
the Picture enu pressing   or   button.
Settin Bri htness
 As you enter the picture enu, Brightness will be the first
selected option.
 Press   button to increase brightness.
 Press   button to decrease brightness.
%5,*+71(66
&2175$67
&2/285
6+$531(66
02'(
6725( 
Settin Contrast
 Using   or   button select Contrast.
 Press   button to increase contrast level.
 Press   button to decrease contrast level.
Settin Colour
 Using   or   button select Colour.
 Press   button to increase colour level.
 Press   button to decrease colour level.
Settin Sharpness
 Using   or   button select Sharpness.
 Press   button to increase sharpness.
 Press   button to decrease sharpness.
Mode
This ite is used to change the picture size. By pressing  
or   button you ay choose one of these options: 4:3,
16:9 and AUTO. It is also possible to change picture odes
directly by pressing button   on your re ote control.
 4:3 This option forces the picture ratio to 4:3 ode.
 16:9 This option forces the picture ratio to 16:9 ode.
 AUTO This allows to change the picture ode auto atically,
according to the trans ission of the selected channel. For
exa ple, your TV is 4:3 ode, but the trans ission of that
channel is in 16:9 ode. If you select the AUTO ode, the TV
is switched to 16:9 ode auto atically. If the TV is in 4:3
ode and the picture ratio of the channel is also 4:3, there will
be no affect selecting the picture ode to AUTO ode.
WSS feature is only used in TV and F-AV odes. For the Pic-
ture Mode selection in AV-1 the pin 8 (of Scart) value is used.
In RGB odes the Picture Mode can be 4:3, 16:9 (Auto ode
is not available.).
When the enu appears on screen, picture ode will auto-
atically change to its default tube ode (4:3 or 16:9) but it
will turned to its stored ode when the enu disappears.
01-ENG-(CG2026S)-5186-AV-3040-AK30-MN1P-PLLFS-BG-50051298.p65 13.07.2004, 13:199