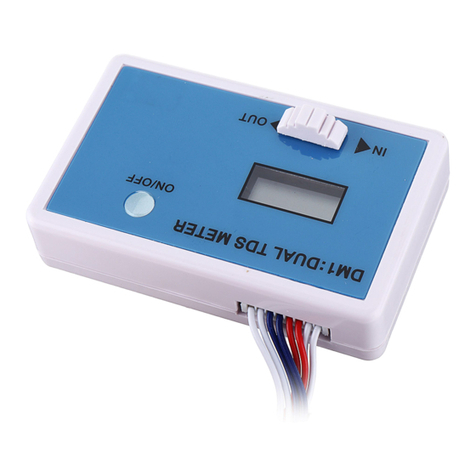
HM Digital DM-2 User manual

COMMERCIAL DUAL INLINE
TDS MONITOR
Measure the TDS levels of two different water lines, such as
the tap water and filtered water, at any time.
The DM-2 is an ideal monitor to know if a filter cartridge, resin
cartridge or membrane is functioning effectively. Install the
DM-2 so you’ll always know how a water filtration or purifica-
tion system is performing.
®
PARTS
DM-2: Base Unit (LCD Display)
2 x 1/4” T-fittings (standard)
2 x AA Batteries (pre-installed)
2 x SP-3 Shielded Sensors (connected)
Warranty
This product is warranted to the purchaser against material and workmanship for one
(1) year from the date of purchase.
What is covered: Repair, parts and labor, or replacement at the Company's option.
Transportation charges for repaired or new product to be returned to the purchaser.
What is not covered: Transportation charges for the defective product to be sent to
the Company. Any consequential damages, incidental damages, or incidental
expenses, including damages to property. This includes damages from abuse or
improper maintenance such as tampering, wear and tear, water damage, or any other
physical damage. This product is not waterproof and should not be fully submerged in
water. Products with any evidence of such damage will not be repaired nor replaced.
How to obtain warranty performance: Include with the product, your name,
address, phone number, description of problem, and proof of date of purchase and
return to:
HM Digital, Inc.
ATTN: Returns
5819 Uplander Way
Culver City, CA 90230
U.S.A.
Implied Warranties: Any implied warranties, including implied warranties of
merchantability and fitness for a particular purpose, are limited in duration to five years
from date of purchase. Some states do not allow limitations on how long an implied
warranty lasts, so the above limitation may not apply to you. To the extent any
provision of this warranty is prohibited by federal and state law and cannot be
preempted, it shall not be applicable. This warranty gives you specific legal rights, and
you may also have other rights, which vary from state to state.
NOTE: Warranties are product-specific. Third-party products and products deemed by
HM Digital as "accessories" are not covered under warranty. Third-party products
include, but are not limited to, batteries, fittings and adhesives.
Designed in USA and Korea
Made in China
www.hmdigital.com
Please contact the manufacturer of your water
system for recommended TDS levels.
An ISO-9001 Certified Company
model DM-2
USER’S GUIDE
What is TDS?
Total Dissolved Solids (TDS) are the total amount of inorganic elements, including
minerals, salts or metals dissolved in water, other than the pure water molecules
(H2O) and suspended solids. A TDS meter works by measuring the total amount of
mobile charged ions dissolved in a given volume of water, expressed in total quantity
as parts per million (ppm), or in weight as mg/liter. TDS is directly related to the purity
of water and the quality of water purification systems. TDS affects everything that
consumes, lives in, or uses water, whether organic or inorganic, for better or for
worse. For people, a lower TDS level in drinking water is typically preferred.
The U.S. EPA’s Secondary Regulations for drinking water advise a maximum
contamination level of 500 ppm for TDS.
Reverse Osmosis (RO) systems work by filtering the tap water and rejecting the
waste water. You can determine your system’s effectiveness by calculating the
HOW TO CALCULATE PERCENT REJECTION
((Tap TDS - RO TDS) ÷(Tap TDS)) x 100 = Percent Rejection
Example: Tap TDS = 352 ppm and RO TDS = 18 ppm. Percent rejection = 94.9%.
Contact the manufacturer of your system to determine minimum percent rejection
levels and when to change the filter or membrane.
Useful links for more information
More information on TDS:
http://www.tdsmeter.com/what-is
RO Percent Rejection Calculator:
http://www.tdsmeter.com/what-is?id=0003
DM-2 page:
http://www.tdsmeter.com/products/dm2.html
rev. 03/2012
www.tools.in.th
www.neonics.co.th

SPECIFICATIONS
Frequently Asked Questions (FAQs)
1. What should the TDS readings be?
For drinking water and filter performance, the lower the TDS level, the better. There is never a
“right” or “wrong” number. For filter performance, calculate the percent rejection to determine
performance levels. Contact the manufacturer of your filter system for recommended levels.
2. My TDS levels fluctuate. Is this normal?
Yes. Slight fluctuations are normal from day-to-day. A variety of factors affect the reading.
3. Does the DM-2 have an alarm or programmable set point?
No. You will need to view the readings. Models QC-1, PM-1, FM-2 and others have alarms.
4. How will I know when the batteries need to be replaced?
A low battery indicator, “bat” will appear on the display for 3 seconds when the unit is turned on.
5. Can I use the DM-2 to monitor a water softener?
No. Water softeners do not remove TDS. Models FM-1 or FM-2 are suggested for softeners.
6. Where can I get more information on water quality?
Visit www.hmdigital.com
INSTRUCTIONS
To install the DM-2 to a water purification or filtration system:
1. Insert the white sensors fully into the bottom of the T-fittings.
2. Orient the sensor pins so that they are perpendicular to the direction of the T. The water
should flow over both pins equally. (You should be able to see both pins of you look
through the fitting.) See illustration #1 below.
3. Disconnect the water source.
4. Snip the source (tap) water tube at a point between the source and the filter. Insert both
ends of the tube into the top of the IN line sensor’s T-fitting. See illustration #2.
5. Snip the product (filtered) water tube at a point between the filter and a dispenser. Insert
both ends of the tube into the top of the OUT line sensor’s T-fitting. See illustration #2.
6. The DM-2 monitor can be attached anywhere on or near the water system using the
mounting bracket (which can be secured by screws or the adhesive tape).
7. Reconnect the water source. Your monitor is now ready for use.
NOTE: Consult a professional plumber for specific bracket or connection questions.
Installation
TDS Range: 0-9990 ppm
Resolution: 0-999: 1 ppm
1000-9990: 10 ppm (indicated by a blinking ‘x10’ icon - multiply the reading by 10)
Accuracy: +/-2% (of the reading)
Conversion Factor: NaCl (avg. of 0.5)
Factory Calibration: 342 ppm NaCl (digital calibration)
Sensor Cable Length: 46” (116.8 cm) (including sensor)
Power Source: 2 x AA batteries
Auto Shut-Off: After 3 minutes
Battery Life: Approximately 2 years
Base Unit Dimensions: 4.6 x 2.6 x 0.7 in (11.6 x 6.8 x 1.8 cm)
Base Unit Weight: 7.9 oz (224.3 g) (including batteries)
CARE AND MAINTENANCE
Very little care is necessary for your DM-2.
Never touch the sensor pins, as skin oils may adversely affect the TDS measurement.
To clean the sensor pins, clean with rubbing alcohol and let air dry.
Avoid removing the fittings, as doing this often may strip the plastic off the sensor and potentially
cause a leak.
If you notice the readings are off from what they should be, replace the batteries or re-calibrate.
000PPM
x10
Screen Description
TDS Level
Parts per million (equivalent to mg/L)
Times 10 indicator
(appears if over 999 ppm)
The DM-2 can be configured in a variety of ways, depending upon your needs.
Typically, the IN line (line 1) is connected to the source (tap) water, and the OUT line
(line 2) is connected to the product (filtered) water. The DM-2 can also be configured
with multiple systems, such as an RO/DI combination, as well as with HM Digital’s
Single Inline TDS Monitor (model SM-1).
Calibration
1. Obtain a certified calibration solution that is correct for your needs. The calibration solution should
be NaCl (sodium chloride). HM Digital’s 342 ppm NaCl solution is recommended.
2. Disconnect both T-fittings from their tubes. Do not remove the sensor from the T. Ensure the
orientation of the sensor to the fitting is correct, as in illustration #1. Shake any water out.
3. For better accuracy, calibrate to a flowing solution. If this is not possible, you can calibrate to a still
solution. (If calibrating to a still (not flowing) solution, calibrate to 3% above the level of the
calibration solution. This will accommodate for the lack of flowing water, which the monitor is
programmed for. For example, if the calibration solution is 342 ppm, calibrate to 352 ppm.)
4. Turn on the monitor and place each T-fitting (with the sensors in them) into the calibration solution.
You will get a reading. Ensure the fitting is completely filled with solution and there are no air
bubbles. This step is critical for proper calibration. If the reading is correct, stop here.
5. If the reading on the monitor (for either line) does not match the solution, select the line you wish
to calibrate (they are calibrated separately) by clicking IN or OUT.
6. Press and hold the IN or OUT button (the side you want to calibrate) for 2 seconds. “CAL” will
flash on the screen and the corresponding green light will blink.
7. Press the up button (IN) or the down button (OUT) to adjust the reading until it matches the value
of your calibration solution. Hold for rapid advancement. Do not move the sensor!
8. Once the reading is correct, press the POWER button once. Wait until “End” appears. This
sensor is now calibrated and will revert to the measurement reading. Each sensor needs to be
calibrated separately.
To cancel calibration, press POWER twice.
Your monitor was factory calibrated to 342 ppm (NaCl). This level is suitable for most tap
water/filtered water applications, so it is ready to use out of the box. However, you may need to
re-calibrate based on your needs, as well as from time-to-time to ensure best results. To calibrate:
Avoid removing the ttings from the sensors. Excessive removal and insertion of the
ttings could ultimately scratch the sensor and potentially cause leakage.
112 2
Push tubing straight in as far as it can go. To remove, push in small collet and pull the tubing out.
LOOKING
THROUGH
THE
FITTING
SIDE VIEW
Illustration #1
To insert the sensor
into the fitting.
Illustration #2
To insert the tubing
into the fitting.
1. Press the “POWER” button.
2. To display the TDS level of the feed (tap) water, press the IN button. To display the TDS level of
the product (filtered) water, press the OUT button.
3. The displayed TDS will be most accurate after approximately 10 seconds.
4. Determining filter effectiveness depends on your particular system. For an RO system, for
example, compare the IN water TDS levels with the OUT water TDS.
5. If the “x10” icon appears, then the TDS level is above 999 ppm. Therefore, multiply the reading
by 10. For example, if the display shows 143 ppm with the ‘x10’ icon, the actual TDS level is
1430 ppm. (If the ‘x10’ icon does not appear, the reading on the display is the actual TDS level.)
6. Turn off the unit. (It will automatically shut off after 3 minutes to conserve battery power).
Usage
TROUBLESHOOTING
ECC display (error)
Incorrect readings
6AE display (low batteries)
The “OUT” reading is higher than
the “IN” reading
Issue Potential Solution(s)
1. The sensor cable is unplugged. Open the back
panel and connect the cable securely.
1. Re-calibrate the monitor.
2. Change the batteries.
1. Change the batteries.
1. Check your connections. The sensors may be
reversed.
Changing the Batteries
1. To replace the batteries, unscrew the four metal screws on the rear of the unit and remove the
back panel.
2. Remove the batteries.
3. Replace both batteries with two fresh AA batteries. Ensure the polarity is correct.
4. Close the back panel and replace the screws. You will not need to recalibrate.
If the batteries are low, when the unit is turned on, you will see 6AE (bat) for three seconds.
1. The water is out of the monitor’s TDS range.
OOC display (out of range)
www.tools.in.th
www.neonics.co.th
Other HM Digital Monitor manuals
Popular Monitor manuals by other brands
Shenzhen Mindray Bio-Medical Electronics
Shenzhen Mindray Bio-Medical Electronics MEC-1000 Service manual
Lenovo
Lenovo L27m-28 quick start guide
ViewSonic
ViewSonic VS15023 user guide
Panasonic
Panasonic PanaMedia PM15 operating instructions

Panasonic
Panasonic BT-LH910G operating instructions
LG
LG 34UC80-B owner's manual
