Holtkötter® & Holtkötter Leuchten® are registered trademarks
of Holtkötter International, Inc. All Rights Reserved.
© Holtkötter International, Inc.
Major lamp parts manufactured in Germany by Holtkötter Leuchten GmbH.
Bulbs manufactured in Germany by Osram GmbH.
Final assembly by Holtkötter International Inc. in South St. Paul MN.
HOLTKÖTTER INTERNATIONAL INC.
155 Hardman Avenue South South St. Paul MN 55075
fax: (888) 552-8661 • phone: (800) 899-5444
www.holtkoetter.com
e-mail: customerservice@holtkoetter.com
ASSEMBLY INSTRUCTIONS FOR
Halogen Table Lamp
No. 62 7/2
Please make sure that all the parts for your lamp are enclosed. The following parts
should be included with this package:
1. Reflector Kit
A. Glass Shade
B. Two Frosted glass shields
C. Two Bayonet base halogen bulb (75-Watts Clear)
D. Allen Wrench
2. Lamp Base
Assembly Instructions (see diagram):
I. To install the glass shade (A) remove the finished reflector cover (B) by
unscrewing the small white knobs (C) located just below the white shade
support (D). Set the cover and knobs aside.
II. Next remove the aluminum nuts (E) from the column. Install the glass shade
over the white shade support (D) and screw the aluminum nuts (E) back in
place.
III. Now reinstall the finished reflector cover (B) by placing it over the installed glass
shade (A). Align the cover with the glass and screw the small white knobs (C)
back in place.
IV. To install the bulbs (F) insert the bulb into the bayonet socket. The bulb is
inserted by pushing it slightly down into the socket and then turning it clockwise.
Repeat on the other side. NOTE: BE CAREFUL NOT TO TOUCH THE BULB WITH
YOUR BARE HANDS.
V. Next remove the finished screws (H) and washers (L) located below the glass
shield holder (J) with the allen wrench (K). Set aside.
VI. Finally install the frosted glass shields (G). Holding the glass shield in place with
the smooth side down carefully align the shield with the holder place the
washer (L) on the screw (H) and tighten in place. DO NOT OVERTIGHTEN.
Repeat on the other side.
VI. Plug the lamp into the outlet. Your lamp is now operational.
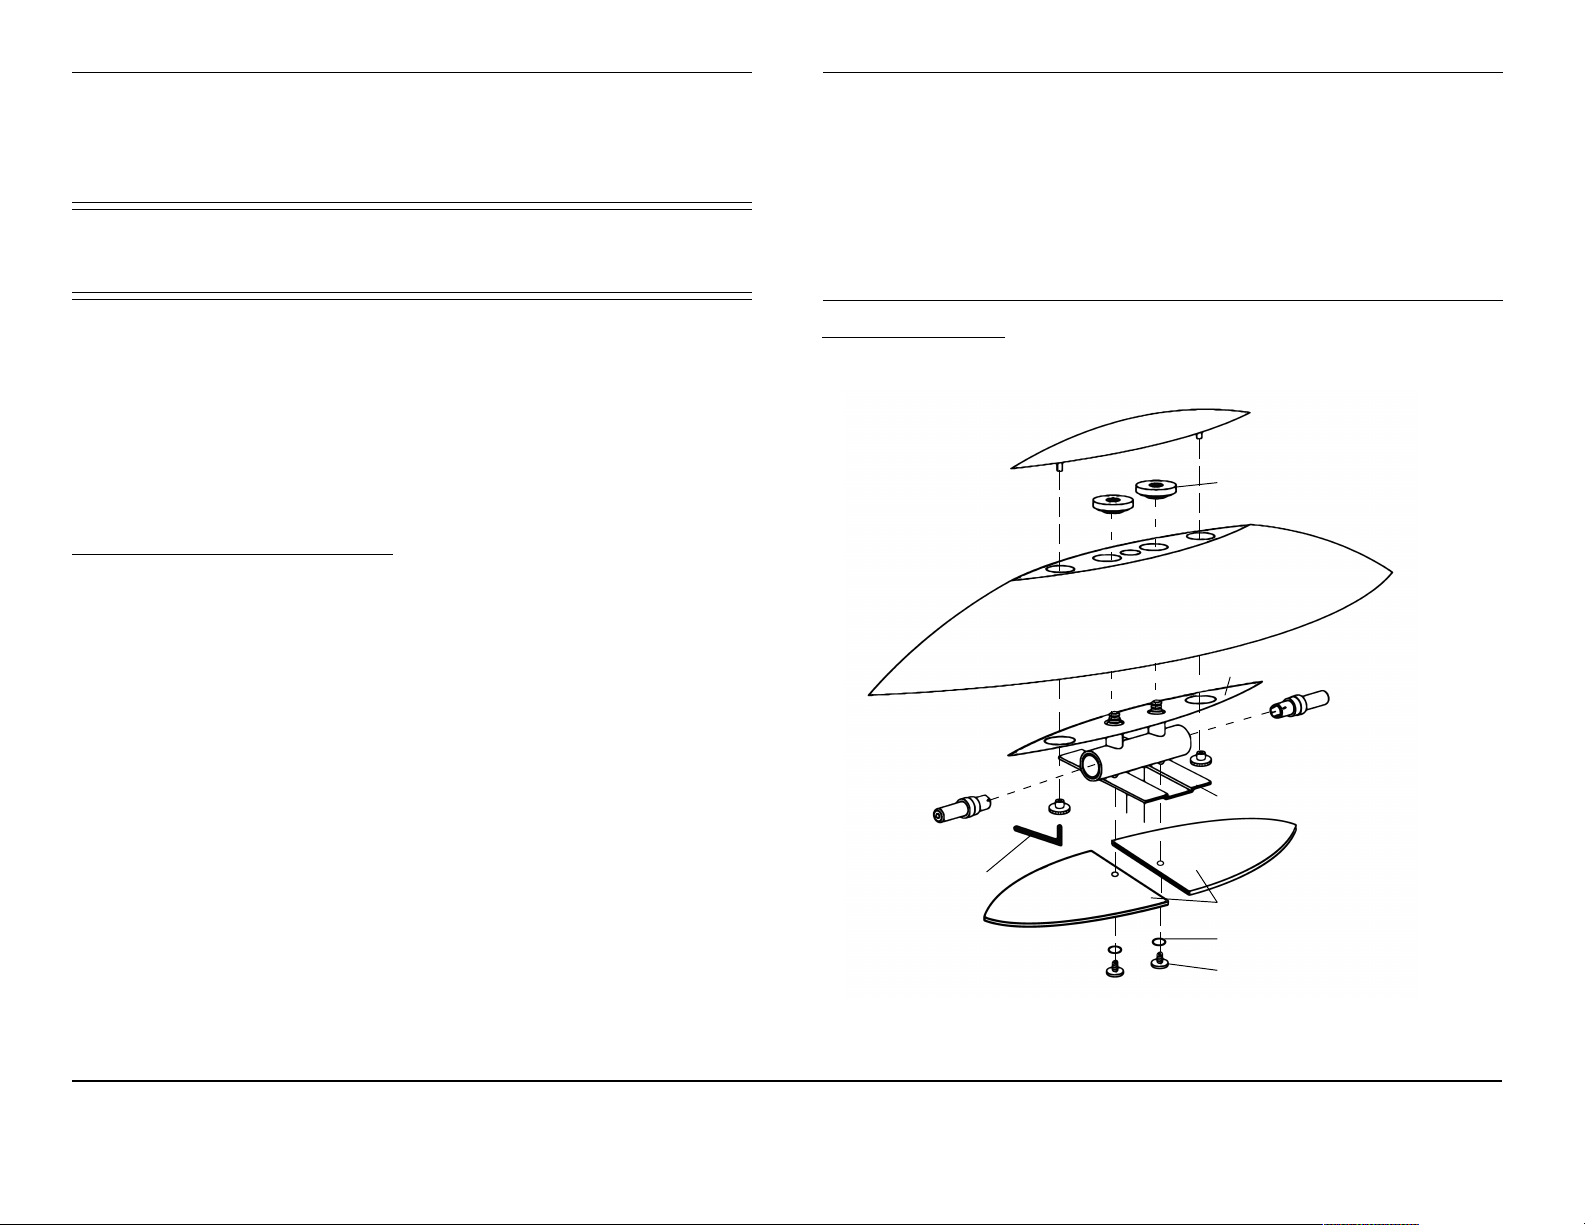
Assembly Diagram
(C) Small White Knobs
(B) Finished Reflector Cover
(G) Frosted Glass Shields
(A) Glass Shade
(H) Finished Screws
(E) Aluminum Nuts
(L) Washers
(K) Allen Wrench
(D) White Shade Support
(J) Glass Shield Holder
(F) Bulbs


