Home Protector 4AHD User manual

Now that you have purchased a
Home Protector product you can rest
assured in the knowledge that as
well as your 3 year parts and labour
warranty you have the added peace
of mind of dedicated helplines and
web support.

1
1
Getting to Know your DVR
This quick start guide will help you to get your CCTV kit up and running as quickly as
possible.
We suggest you connect up the kit to familiarise yourself with it before installing the
cameras in their permanent location.
Before installation please check you have all the kit contents listed below and read
the following safeguards and warnings carefully.
1.Video In x 4 (BNC) - connects your cameras
2.HDMI - connects a TV/Display with HDMI input
3.VGA - connects a TV/Monitor with VGA input
4.USB 1 (upper USB 2.0 port) - connects a mouse
5.USB 2 (lower USB 2.0 port) external storage device
6.LAN - connects to your home network
7. Power In - use to connect to the power adaptor
Kit Contents: 1 x DVR • 4 x Video cameras (inc. cable and fixings) • 4 x 18m Video/power cables
• 1 x 12V𝌂4A Power adaptor • 1 x Mouse • 1 x HDMI cable • 1 x RJ45 Ethernet cable
Important Safeguards and Warnings
• Do not place heavy objects on top of the DVR.
• Do not let any liquids spill on the DVR.
• Gently brush clean the DVR surfaces regularly. Before cleaning please switch off and
disconnect the power supply.
• Do not disassemble or attempt to repair the DVR by yourself. If repair is necessary please
contact the reseller or a qualified specialist.
• Make sure any outdoor electrical connections are adequately sealed / waterproofed
Environment
• Ensure the DVR is installed in an appropriate temperature environment; min 0˚C, max 40˚C.
• Avoid direct sunlight and install away from any direct heat source.
• Do not install the DVR in a damp, smoky or dusty environment.
• Instal in a safe position where the DVR will not be damaged.
• Ensure the DVR is installed in a stable work environment.
• Install in a well ventilated and clean location.
• Always use within the recommended input and output rating.
Fig. 1 DVR Connections
1
6
3
247
5
2
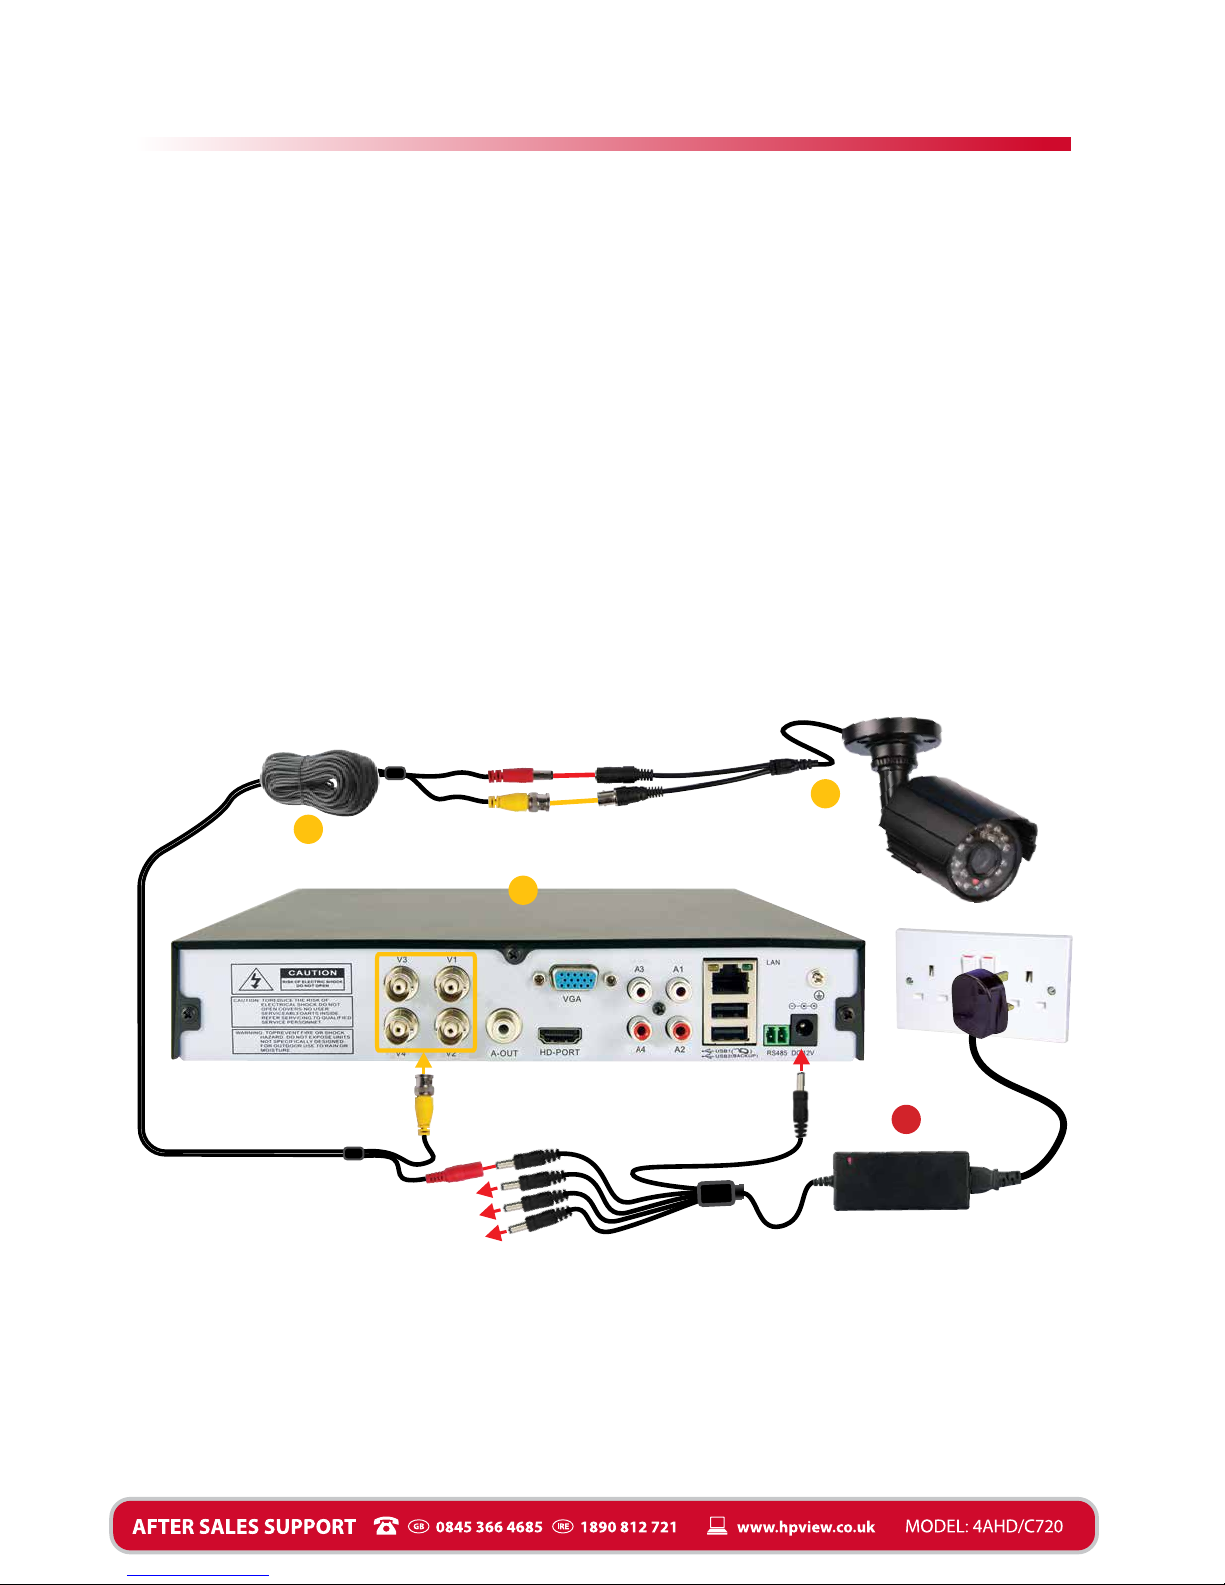
Power & Camera Connections
Connecting the cameras and power supply as shown in Fig. 2 below.
1.Connect the power adaptor [D] to the DC In socket [7 on Fig. 1] on the back of the DVR.
2.Connect the power socket on each 18m combined video/power cable [C] to one of the plugs
of the power power adaptor [D].
3.Connect the BNC plug on each video/power cable [C] to one of the yellow Video In (BNC)
ports [1 on Fig. 1] on the rear of the DVR.
4.Connect the other end of each combined video/power cable [C] to the camera cable power
and video connectors [B] repeat steps 2 & 3 for each camera.
5.When all other connections have been made plug the power supply into a 13A mains socket
and switch on socket.
A. DVR
B. Video cameras and connection cables x 4
C. 18m combined video/power cable x 4
D. 12V𝌂4A Power adaptor
E. Mouse (see Fig. 3)
F. HDMI cable (see Fig. 3)
G. RJ45 Ethernet network cable (see Fig. 3)
Kit Contents:
2
A
B
C
D
Fig. 2 DVR Power and Camera Connections
3
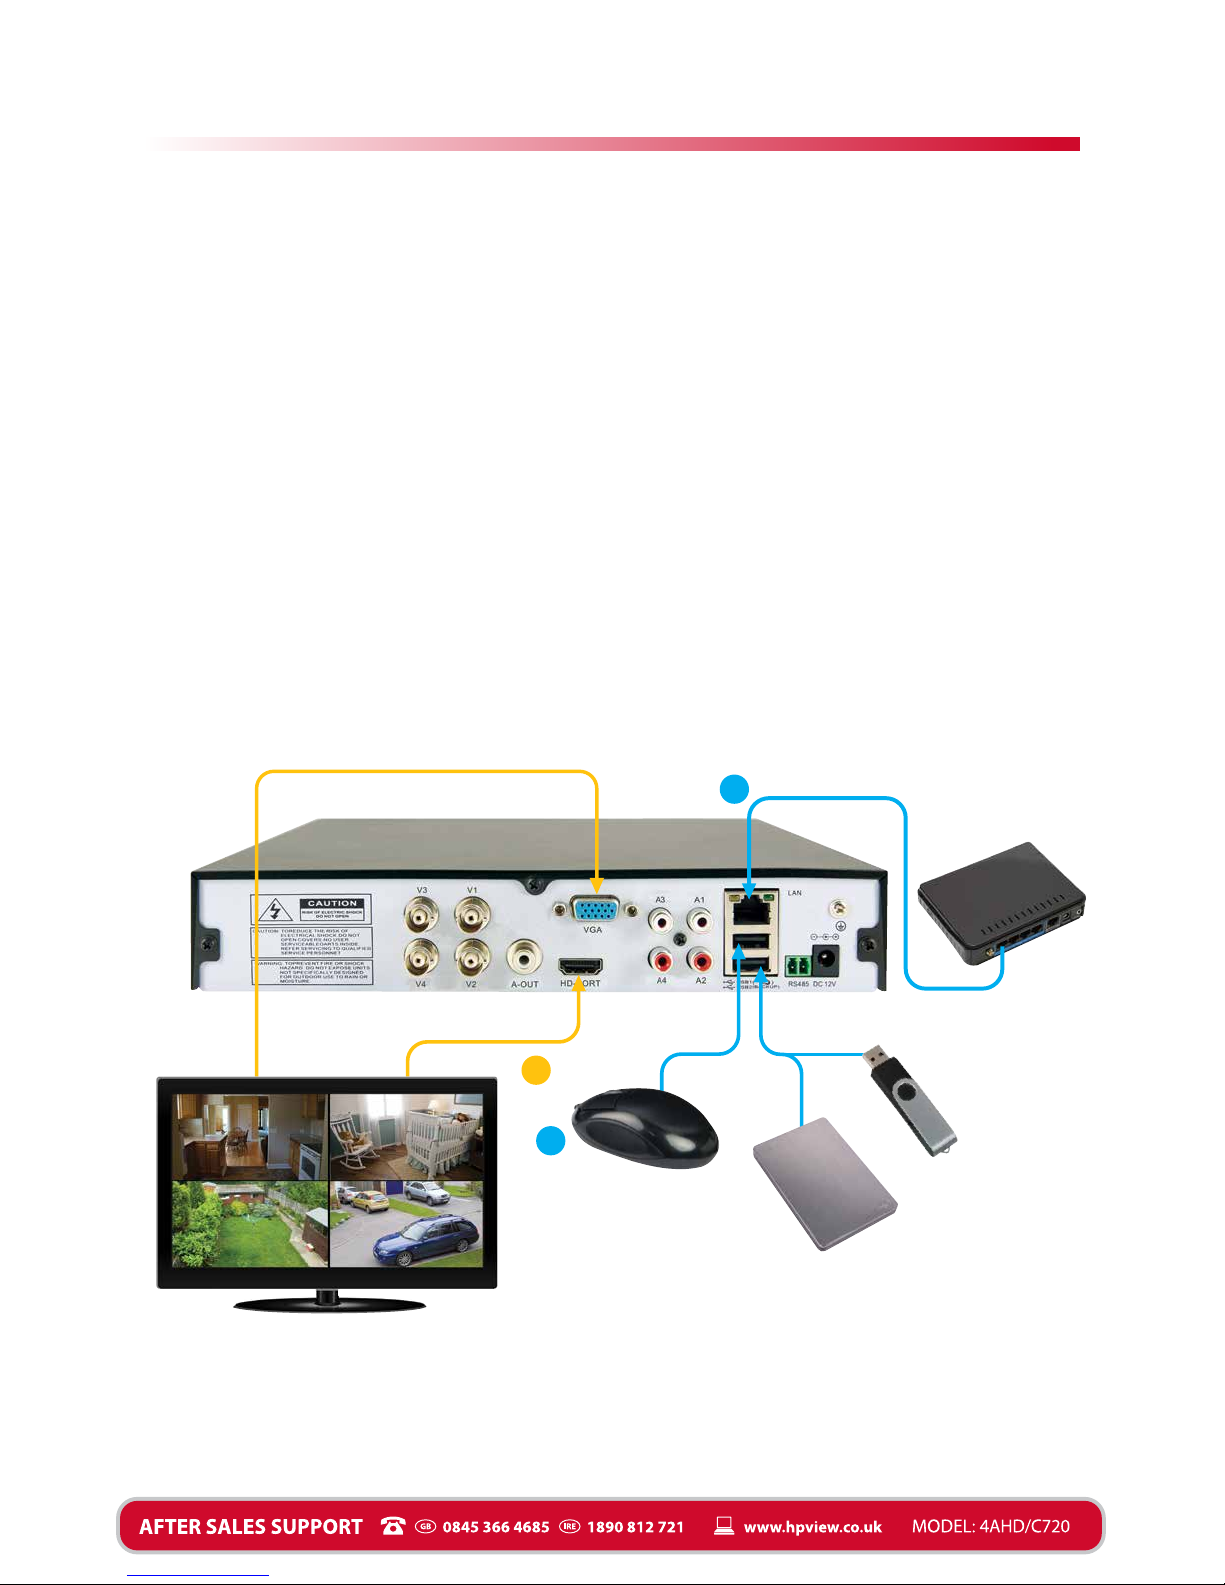
Video & Data Connections
3
Router/Wireless
access point
Display/Monitor
Mouse [E] - USB 2.0
connection
USB storage device -
USB 2.0 connection
Fig. 3 Video & Data Connections
Connecting to your home network see Fig. 3 below
Plug the RJ45 Ethernet cable supplied [G] into the LAN port [6 on Fig. 1] on the DVR and the
other end into a spare port on your router or wireless access point.
Connecting the mouse see Fig. 3 below
Connect the mouse to the upper USB 2.0 port of the two available marked USB 1 [4 on Fig. 1].
Alternatively you can connect the mouse to the USB port on the bottom right of the front panel.
Use one or the other to connect the mouse.
Connecting the DVR to a Display see Fig. 3 below
There are two options for connecting displays to your DVR. if you are connecting to an HDTV
for best results use the HDMI cable supplied [F] to connect to the HDMI port [2 on Fig. 1].
Alternatively if your display has no HDMI port you can use the VGA output [3 on Fig. 1].
Connecting an optional USB backup storage device see Fig. 3 below
The DVR has a 1TB hard drive installed but you can connect an additional USB storage device
for additional backup or for transfering a recording. Connect the additional USB storage
device to the lower USB 2.0 port of the two marked USB 2 [5 on Fig. 1].
VGA connection
(cable not supplied)
HDMI connection, use
HDMI cable supplied
RJ45 Ethernet
network cable
supplied
F
G
E

Once you’ve connected all the leads, turn on your DVR and you are ready to go, so just follow
these simple instructions to get your home security system up and running;
1. Connecting your DVR to your broadband router. Make sure the DVR is turned off and
using the Ethernet cable provided, plug one end into the LAN Port (7) on your DVR and
connect the other end into an available port on your broadband router.
2. Downloading the NPview App to your iOS
or Android phone.
You can either scan the appropriate QR code
opposite, using your device, to take you straight
to the App or alternatively visit iTunes or
Google Play and search for the NPview App.
3.
Scanning the QR code from your DVR.
• Turn on your DVR and display and the SCREEN 1
opposite will appear. Press “Next Page” and
SCREEN 2 will appear.
• Open the App on your iOS or Android phone.
(if you have not already created your username,
select “Register” to create your unique login).
• Login using your username and password.
• On your phone select Device Management ( )
• Click “Add device”
• On your phone next to Cloud ID click then
with your phone scan the SN QR Code on
display
SCREEN 2 see opposite
.
NB: The ID number of your DVR will be displayed
next to Cloud ID when you have scanned the code
successfully.
• Click Save and the message “Successfully Added”
will appear.
• The App will return to the Device List and your
DVR ID number will be displayed in the list.
• Click on your DVR number to view your cameras live.
4. Selecting your preferred recording settings. The default recording mode is continuous
mode for each camera, which means that the cameras will record continuously to the built-in
hard drive. The capacity of the hard drive is about thirty days and when the disk is full it will
overwrite the previous video starting from the earliest recording. (If you want to know more
about changing recording options, please refer to the online User Guide*).
Now you’ve completed the setup your home security system is ready to go. You can view your
cameras remotely using the NPview App providing you have a Wi-Fi or 3G/4G data connection
on your device.
If you have any questions, contact us on the appropriate number in the panel below or go to
the website shown in the panel.
Alternatively you can use the Producty Info QR code on page 5
to access the online User Guide.
4
Connecting the DVR to the Internet
4
Android
iOS
SCREEN 1
SCREEN 2

Waste electrical and electronic products
should not be disposed of with household waste.
Please recycle where facilities exist.
Check with your Local Authority for recycling advice.
5
This manual suits for next models
1
Table of contents
Other Home Protector Security Camera manuals


