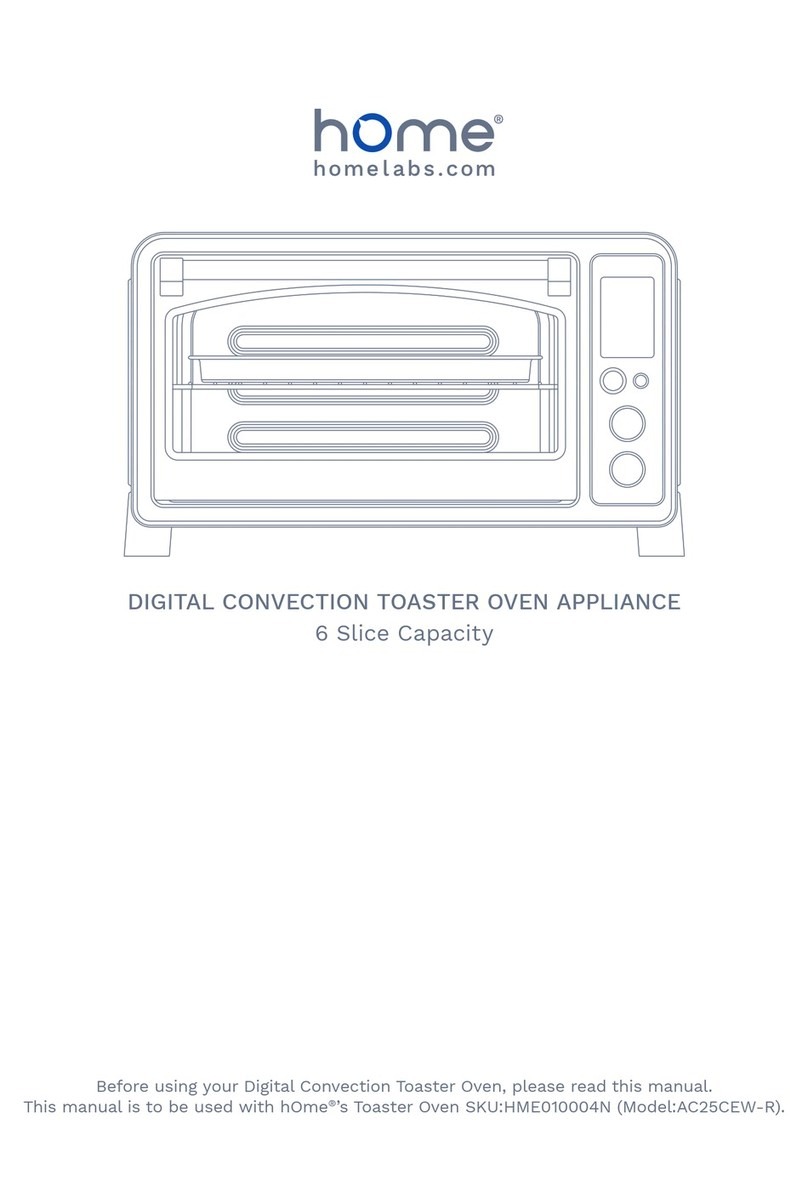
Home AC25CEW-R User manual

Digital Convection Toaster Oven Appliance
6 Slice Capacity
Before using your Digital Convection Toaster Oven, please read this manual.
This manual is to be used with hOme®’s Toaster Oven SKU:HME010004N (Model:AC25CEW-R).

Important Safety Instructions 5
Before First Use 6
How to Use 7
Operation 7-9
Rotisserie Function 10
Using the Rotisserie Forks 10
Care and Cleaning 10
Warranty 11
USER MANUAL
TABLE OF CONTENTS
...on purchasing your new hOme®appliance!
Don’t forget to register your product
at www.home.family/reg for updates,
coupons, and other relevant information.
Although greatly appreciated,
product registration is not required to
activate any warranty.
CONGRATULATIONS

4 5
IMPORTANT SAFETY INSTRUCTIONS
SAVE THESE INSTRUCTIONS / FOR HOUSEHOLD USE ONLY
When using electrical appliances basic safety precautions should be followed, including the following:
1. Read all instructions before using the Digital Convection Toaster Oven (“appliance”).
2. To protect against any electrical hazards, DO NOT place the unit or the cord in water or any other liquids.
3. Do not touch any hot surfaces. Use oven mitts for removing or touching any hot parts. Always place appliance on heat
protected surface.
4. Leave about 4-6 inches of open space all around the exterior of this appliance. Place the appliance on a dry,
horizontal surface.
5. Unplug the appliance from outlet when not in use and before cleaning. Always allow to cool before attaching or
removing any parts.
6. The use of accessory attachments is not recommended by hOme®
7. Plug cord into the wall outlet. To disconnect, turn any control to “off”, then remove plug from wall outlet.
8. Do not let cord hang over edge of table or counter, or touch hot surface.
9. Do not place the appliance inside a heated oven or near a hot gas or electric burner.
10. Do not use outdoors.
11. If the electric circuit is overloaded with other appliances, this appliance may not operate properly. The appliance
should be operated on a separate electrical circuit from other operating appliances.
12. The temperature of accessible surfaces may be high when the appliance is operating.
13. Do not operate any appliance with a damaged cord or plug or after the appliance malfunctions or has been damaged in
any manner. Return appliance to hOme®
14. Store only the accessories provided with this appliance inside the oven when not in use. Do not store any
other materials.
15.
like, when in operation. Do not put any items on top of the appliance when in operation.
16. Do not place any cardboard, paper or plastic inside the appliance.
17. All containers placed inside the oven must not be airtight. They should have enough room to allow for
18.
19. Do not clean with metal scouring pads. Pieces can break off the pad and touch electrical parts involving a
risk of electric shock.
20. In order to prevent accidental burns, always use the handle and knobs to operate this appliance.
21. The temperature of the door or outer surface may be high when the appliance operating.
22.
electric shock.
23. Do not cover crumb tray or any part of the oven with metal foil. This will cause overheating of the oven.
24. Extreme caution must be used when moving an appliance containing hot oil or other hot liquids. Use extreme caution
when removing tray or disposing of hot grease.
25. This appliance is not intended for use by persons (including children) with reduced physical, sensory or mental
capabilities. Or lack of experience and knowledge unless they have been given supervision or instruction concerning
use of the appliance by a person responsible for their safety.
26. Children should be supervised to ensure that they do not play with the appliance.
27. The appliance is not intended to be operated by means of an external timer or separate remote-control system.
28. The rear surface of appliance shall be placed against a wall.
a) A short power-supply cord (or detachable power-supply cord) should be used to reduce the risk resulting from
becoming entangled in or tripping over a longer cord.
b) Longer detachable power-supply cords or extension cords are available and may be used if care is exercised
in their use.
c) If a longer detachable power-supply cord or extension cord is used:
1) The marked electrical rating of the cord set or extension cord should be at least as great as the electrical rating
of the appliance;
2) The cord should be arranged so that it will not drape over the countertop or tabletop where it can be pulled on
by children or tripped over unintentionally; and
3) If the appliance is of the grounded type, the cord set or extension cord should be a grounding-type 3-wire cord.
29. Do not use appliance for other than intended use.
30. Do not clean with metal scouring pads. Pieces can break off the pad and touch electrical parts, creating a risk of
electric shock.
31. Extreme caution should be exercised when using containers constructed of other than metal or glass.
32. Not responsible for any damage or harm caused by improper use or care.
E248242

6 7
1. Remove all accessories and shipping materials packed inside the appliance. Keep all packaging material out of
2. Wash the Rack and Pan in warm soapy water. Wipe the inside of the appliance with a damp cloth or sponge.
Blot dry with paper towels to be sure the unit is dry before using.
3.
ANOTHER APPLIANCE.
4. Make sure the Crumb Tray is properly installed before using.
5.
minutes. This will burn off any oils still on the appliance.
NOTE: The oven may smoke during this process. This is normal for a new appliance and will not last more than
10-15 minutes.
BEFORE FIRST USE
TIME
TEMP.
1. Door handle
2. Housing
3. Function knob
4. Stop/Start button
5. Timer knob
6. Temperature knob
7. Baking rack
8. Baking tray
9. Rotisserie fork
10. Crumb tray
7 8
Control Panel
910
1
2
3
4
5
6
HOW TO USE
OPERATION
CAUTION: THE OVEN SURFACES ARE HOT DURING AND AFTER USE
GENERAL INSTRUCTIONS
When using electrical appliances basic safety precautions should be followed, including the following:
1. Read all instructions before using.
2. To protect against any electrical hazards, DO NOT place appliance or cord in water or any other liquids.
3. Do not touch any hot surfaces. Use oven mitts for removing or touching any hot parts. Always place appliance on heat
protected surface.
4. Leave about 4-6 inches of open space all around the exterior of this appliance. Place the appliance on a dry,
horizontal surface.
5. Unplug the appliance from outlet when not in use and before cleaning. Always allow to cool before attaching or
removing any parts.
TOAST. In the process of cooking,
pressing “Stop/Start” can stop cooking.
1 ) TOAST FUNCTION
Use the Toast function for foods such as corn, bread, cookies and heating food.
1. Place the baking rack to the desired height.
2. Rotate the FUNCTION Knob until the screen display “TOAST”.
3. Rotate the TEMP. knob to set the power level from 1-6.
4. Rotate the TIME knob to set the quantity of bread from 1-6. The default quantity is 4 slices.
5. Press “Stop/Start” button to start cooking. The default temperature is 450OF and it cannot be changed.
6.
7. Always remove food with oven mitts. Food and appliance are very hot.
2 ) BAKE FUNCTION
Use the Bake function for foods such as less tender cuts of meat, soups and stews.
1. Place the baking rack to the desired height.
2. Rotate the FUNCTION Knob until the screen display “BAKE”.
3. Rotate the TIME knob to set the length of cooking time. The default time is 30 minutes.
4. Rotate the TEMP. knob to set temperature. The default temperature is 450OF.
5. Press “Stop/Start” button to start cooking.
6. TOAST function.
7. Always remove food with oven mitts. Food and appliance are very hot.
3 ) BROIL FUNCTION
NOTE: Do not preheat when using this function.
1. Place the baking rack to the desired height.
2. Rotate the FUNCTION Knob until the screen display “BROIL”.
3. Rotate the TIME knob to set the length of cooking time. The default time is 30 minutes.
4. Rotate the TEMP. knob to set temperature. The default temperature is 350OF.
5. Press “Stop/Start” button to start cooking.
6. TOAST function.
7. Always remove food with oven mitts. Food and appliance are very hot.

8 9
4 ) PIZZA FUNCTION
NOTE: Do not preheat when using this function.
Use the Pizza function is ideal for pizza.
1. Place the baking rack to the desired height.
2. Rotate the FUNCTION Knob until the screen display “PIZZA”.
3. Rotate the TIME knob to set the size of pizza (6 inches, 9 inches, 12 inches). The default size is 9 inches.
4. Rotate the TEMP. knob to set temperature. The default temperature is 450OF.
5. Press “Stop/Start” button to start cooking. The default cooking time is 13 minutes and it cannot be changed.
6. TOAST function.
7. Always remove food with oven mitts. Food and appliance are very hot.
5 ) COOKIES FUNCTION
NOTE: Do not preheat when using this function.
The Cookies Function is ideal for cookies.
1. Place the baking rack to the desired height.
2. Rotate the FUNCTION Knob until the screen display “COOKIES”.
3. Rotate the TIME knob to set the length of cooking time. The default time is 30 minutes.
4. Rotate the TEMP. knob to set temperature. The default temperature is 350OF.
5. Press “Stop/Start” button to start cooking.
6. TOAST function.
7. Always remove food with oven mitts. Food and appliance are very hot.
6 ) DEFROST FUNCTION
Use the Defrost Function for defrosting food.
1. Place the baking rack to the desired height.
2. Rotate the FUNCTION Knob until the screen display “DEFROST”.
3. Rotate the TIME knob to set the length of cooking time. The default time is 30 minutes.
4. Rotate the TEMP. knob to set temperature. The default temperature is 180OF.
5. Press “Stop/Start” button to start cooking.
6. TOAST function.
7. Always remove food with oven mitts. Food and appliance are very hot.
7 ) REHEAT FUNCTION
Use the Defrost Function for defrosting food.
1. Place the baking rack to the desired height.
2. Rotate the FUNCTION Knob until the screen display “REHEAT”.
3. Rotate the TIME knob to set the length of cooking time. The default time is 1 hour and 30 minutes.
4. Rotate the TEMP. knob to set temperature. The default temperature is 350OF.
5. Press “Stop/Start” button to start cooking.
6. TOAST function.
7. Always remove food with oven mitts. Food and appliance are very hot.
8 ) ROTISSERIE FUNCTION
The Rotisserie Function is ideal for roasting chicken
1. Place the baking rack to the desired height.
2. Rotate the FUNCTION Knob until the screen display “ROTISSERIE”.
3. Rotate the TIME knob to set the length of cooking time. The default time is 1 hour.
4. Rotate the TEMP. knob to set temperature. The default temperature is 350OF.
5. Press “Stop/Start” button to start cooking.
6. TOAST function.
7. Always remove food with oven mitts. Food and appliance are very hot.
9 ) KEEP WARM FUNCTION
Use the Keep warm function for keeping food warm.
1. Place the baking rack to the desired height.
2. Rotate the FUNCTION Knob until the screen display “KEEP WARM”.
3. Rotate the TIME knob to set the length of cooking time. The default time is 1 hour and 30 minutes.
4. Rotate the TEMP. knob to set temperature from 100OF to 180OF. The default temperature is 180OF.
5. Press “Stop/Start” button to start cooking.
6. TOAST function.
7. Always remove food with oven mitts. Food and appliance are very hot.
10 ) CONVECTION FUNCTION
Use the Convection function for toasts, steaks, baking pizza and bread.
1. Place the baking rack to the desired height.
2. Rotate the FUNCTION Knob until the screen display “CONVECTION”.
3. Rotate the TIME knob to set the length of cooking time. The default time is 30 minutes.
4. Rotate the TEMP. knob to set temperature. The default temperature is 450OF.
5. Press “Stop/Start” button to start cooking.
6. TOAST function.
7. Always remove food with oven mitts. Food and appliance are very hot.

10 11
ROTISSERIE FUNCTION
ROTISSERIE FUNCTION USING THE ROTISSERIE FORKS
CARE AND CLEANING
1. Remove the Baking Rack from the appliance and set aside.
2. Place the Baking Pan in the lowest level of the appliance. This will catch all the drippings from the food that is on the
Rotisserie Forks as it cooks. DO NOT attempt to use the Rotisserie Function without placing the Baking Pan in the
correct position of the appliance.
3. Set the Function knob to “ROTIS”.
4. Select the length of time you want to Rotisserie the food.
5. Rotate the Temperature knob clockwise to desired temperature.
1. Before cleaning unplug the appliance and allow it to cool completely.
2. Wash all the attachments with mild, soaped water including the rack and the baking tray.
3. Do not use abrasive cleansers, scrubbing brushes and chemical cleaner as this will cause damage
to the non-stick coating of baking tray.
4. Using a wet cloth to wipe the inner of the appliance.
5. Clean the door by using a wet cloth saturated with detergent or soap.
6. Never immerse the appliance in water or other liquid.
1. Secure the food with weight centered on the forks.
2.
that the holding forks will stay in place during the Rotisserie cooking session.
3. Insert the pointed end of the Rotisserie forks into the Rotisserie Socket on the inside right side of the appliance.
4.
left side of the appliance.
5. Set the Temperature knob and the Time knob to begin operating the appliance.
6. Once the cooking time has been complete and you have checked the internal temperature of the food to ensure that it
has cooked properly, you can remove the Rotisserie Forks with the Rotisserie Helper Handle.
7. Hold the handle in your right hand and support handle in your left hand.
8. Place the hooks on the Helper Hander underneath the Rotisserie Forks.
9.
10. Gently remove the right pointed side of the Rotisserie Forks from the Rotisserie Socket and remove the food on the
forks out of the appliance.
11. Place the food on a heat safe plate or dish when you have removed from the appliance. Let it cool slightly before
attempting to remove the holding forks and Rotisserie Forks from the food
12. To remove the Holding Forks, turn the screws counterclockwise and pull the Holding.
WARNING: HOT SURFACE
WARRANTY
hOme®offers a limited two-year warranty (“warranty period”) on all of our products purchased new and unused from
hOme Technologies, LLC or an authorized reseller, with an original proof of purchase and where a defect has arisen,
wholly or substantially, as a result of faulty manufacture, parts or workmanship during the warranty period. The warranty
does not apply where damage is caused by other factors, including without limitation: (a) normal wear and tear; (b)
®; (e) commercial or non-household use.
The hOme®warranty covers all costs related to restoring the proven defective product through repair or replacement
be provided instead of repairing a defective product. HOme®’s exclusive obligation under this warranty is limited to such
repair or replacement.
A receipt indicating the purchase date is required for any claim, so please keep all receipts in a safe place. We
recommend that you register your product on our website, www.home.family/reg. Although greatly appreciated, the
product registration is not required to activate any warranty and product registration does not eliminate the need for the
original proof of purchase.
The warranty becomes void if attempts at repair are made by non-authorized third parties and/or if spare parts, other
than those provided by hOme®, are used.
You may also arrange for service after the warranty expires at an additional cost.
These are our general terms for warranty service, but we always urge our customers to reach out to us with any issue,
regardless of warranty terms. If you have an issue with a hOme®product, please contact us at 1-800-898-3002, and we
will do our best to resolve it for you.
to country or province to province. The customer may assert any such rights at their sole discretion.
WARNING
This manual is to be used with all items with the following SKU and model numbers:
WARNING: Keep all plastic bags away from children.
State of California Proposition 65 Warnings:
WARNING: THIS PRODUCT COULD CONTAINS ONE OR MORE CHEMICALS WHICH
ARE KNOWN TO THE STATE OF CALIFORNIA TO CAUSE CANCER, BIRTH DEFECTS OR
OTHER REPRODUCTIVE HARM.
Manufacturer, distributor, importer and seller are not liable for ANY damage caused by
improper use, storage, care or failure to follow warnings associated with this product.
SKU: HME010004N
Model: AC25CEW-R
CONTACT US
Customer Service
Phone: 1-800-898-3002
Email: [email protected]amily
Website: www.home.family/help

SKU: HME010004N
PART: HME010004MNL
Model: AC25CEW-R
RATING: 120V, 60Hz, 1500 WATTS, AC ONLY
© 2016 hOme Technologies, LLC
37 East 18 Street, 7th Floor. | New York, NY 10003
All rights reserved, hOme®.
Printed in China.
HOUSEHOLD USE ONLY
Other manuals for AC25CEW-R
1
Table of contents
Other Home Oven manuals
Popular Oven manuals by other brands

Bosch
Bosch CSG656BS2B/B1 User manual and installation instructions

Siemens
Siemens CM633GB 1M Series instruction manual

Flavel
Flavel FSBG51W Users guide & installation

BELLISSIMO
BELLISSIMO TB60FDTSS-3 Instructions for use and installation

STOVES
STOVES 500DIT User, installation & servicing instructions

Bellini
Bellini BO908CX2 Installation & operation instructions

Breville
Breville Smart Oven Pro BOV845 Instruction book

NEFF
NEFF B12M22N0 Instructions for use

Zanussi
Zanussi FM 21-22 Instructions for use

Hisense
Hisense BSA65334PG Instructions for use

Whirlpool
Whirlpool AKZM 662 User and maintenance manual

Indesit
Indesit FID201X/1 Instructions for installation and use