8
FM RADIO AUDIO SOURCE (CONTINUED) FM RADIO AUDIO SOURCE (CONTINUED)
AUX IN AUDIO SOURCE
5.
6.
1.
2.
3.
4.
5.
6.
7.
1.
2.
1.
2.
3.
4.
Repeat Steps 1 to 4 for any other radio stations you want
to preset. You can preset up to 20 radio stations.
To overwrite a programmed radio station, simply store
another radio station in the particular Preset Program you
wish to replace, using Steps 1 to 4 above.
Programming Radio Stations Manually on the Docking
Speaker
You can program up to 20 preset radio stations using the
buttons on the Docking Speaker.
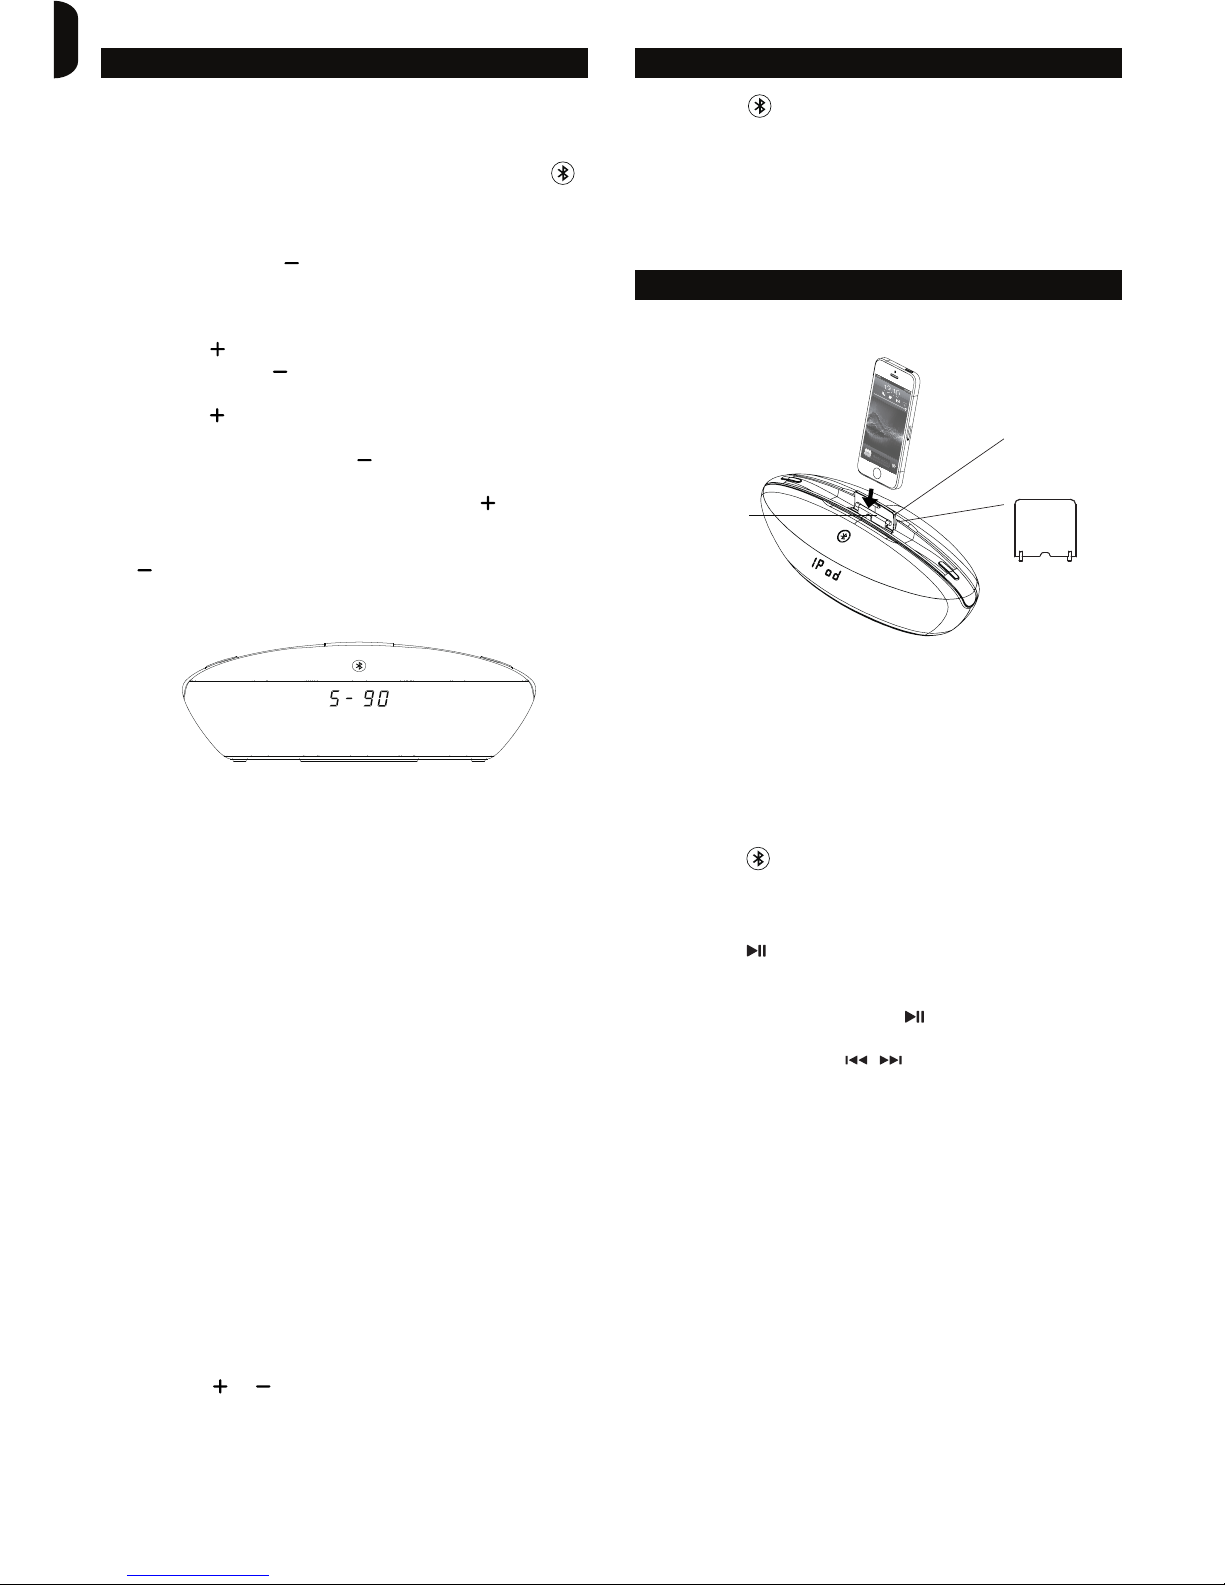
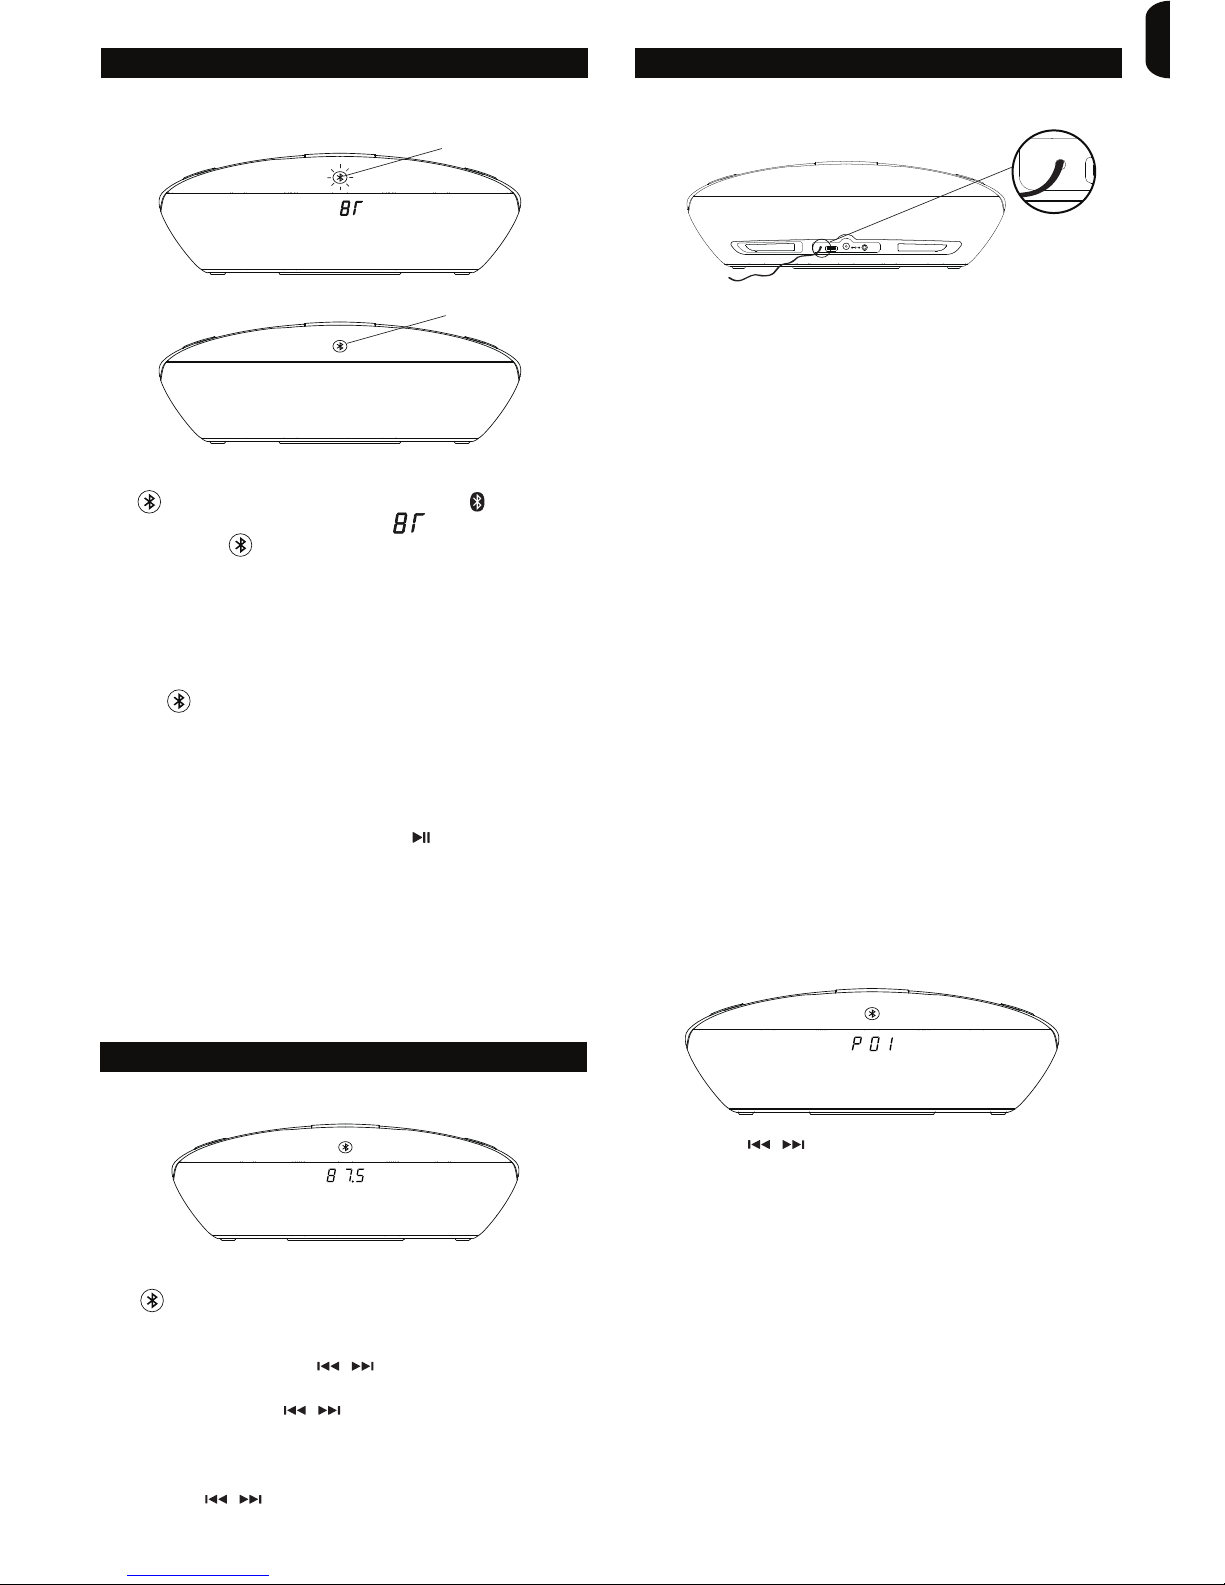
Press the Button on the Docking Speaker for
about 2 seconds. “SrCH” will display on the LED Display
Screen and the Docking Speaker will automatically search
for the next available radio station.
The LED Display Screen will then display a number from
“P01”, “P02” to “P20”. “P01” represents “Preset
Program 1” and “P02” represents “Preset Program 2”
and so on.
Press the or Button to select the Preset Program
number that you want (from P01 to P20).
When you have chosen the Preset Program number, wait
for the Preset Program number to blink on the LED
Display Screen for about 3 seconds.
The Preset Program has now been set and will
automatically play that radio station.
Repeat Steps 1 to 4 for any other radio stations you want
to preset. You can preset up to 20 radio stations.
To overwrite a programmed radio station, simply store
another radio station in the particular Preset Program you
wish to replace, using Steps 1 to 4 above.
Selecting & Listening to a Preset Radio Station
After successfully presetting a number of Preset
Programs in the FM Radio Audio Source Mode, you can
select your preset stations on the Docking Speaker or by
using the Remote Control:
On the Docking Speaker, press the Button once
and the LED Display Screen will display a Preset Program
from “P01” to “P20” (usually the last used Preset
Program will display first). Press repeatedly until
you reach the Preset Program number you want to listen
to*.
* If at any time you wish to select a radio station that is
not a Preset Program, simply press the Button on
the Docking Speaker for 2 seconds or more to activate
the auto-search function to automatically search for the
next available radio station. After landing on the first auto
searched radio station, press the Button again to
revert back to manually selecting radio stations.
On the Remote Control, press the ▲or ▼to select the
Preset Program**.
** If at any time you wish to select a radio station that is
not a preset program, simply press the Button on
the Remote Control to manually select a radio station.
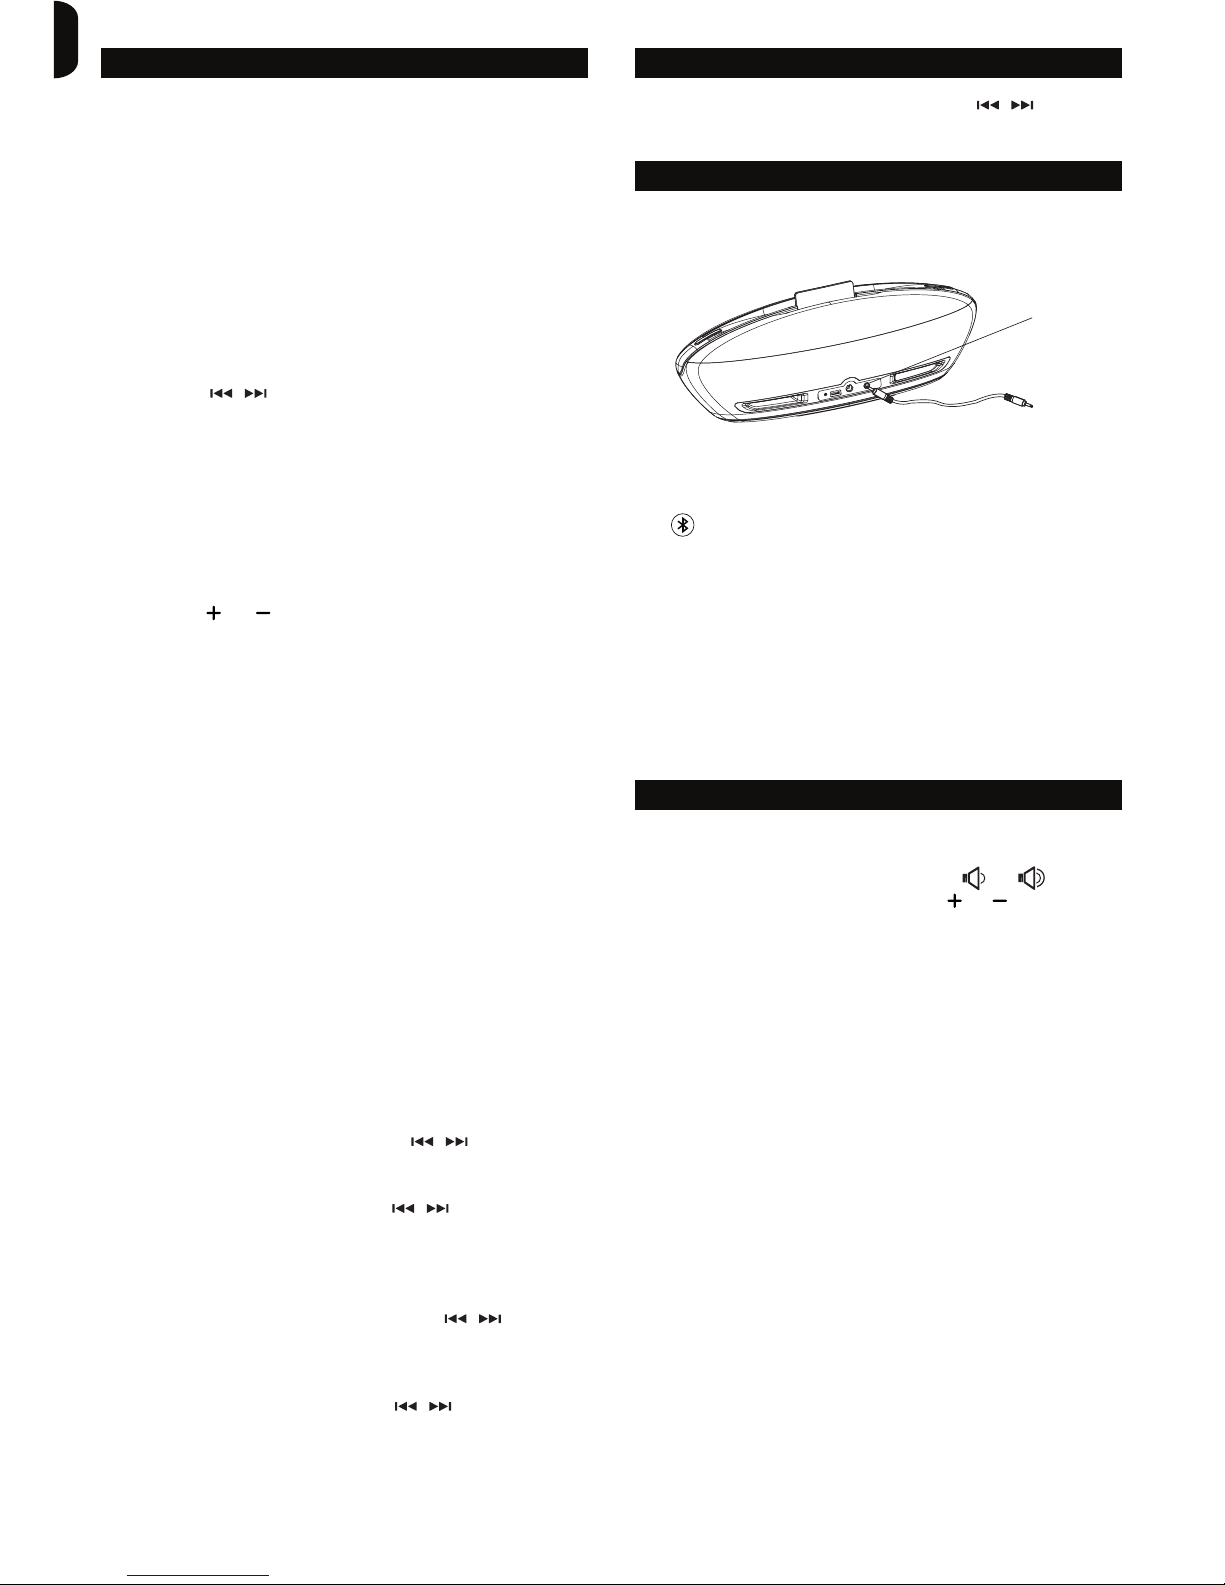
Play from an MP3 player or another external audio device
using the AUX IN Jack and 3.5mm Audio Cable (included).
Go to the AUX IN Audio Source Mode by pressing the
Button until you see “AUX” displayed on the LED
Display Screen.
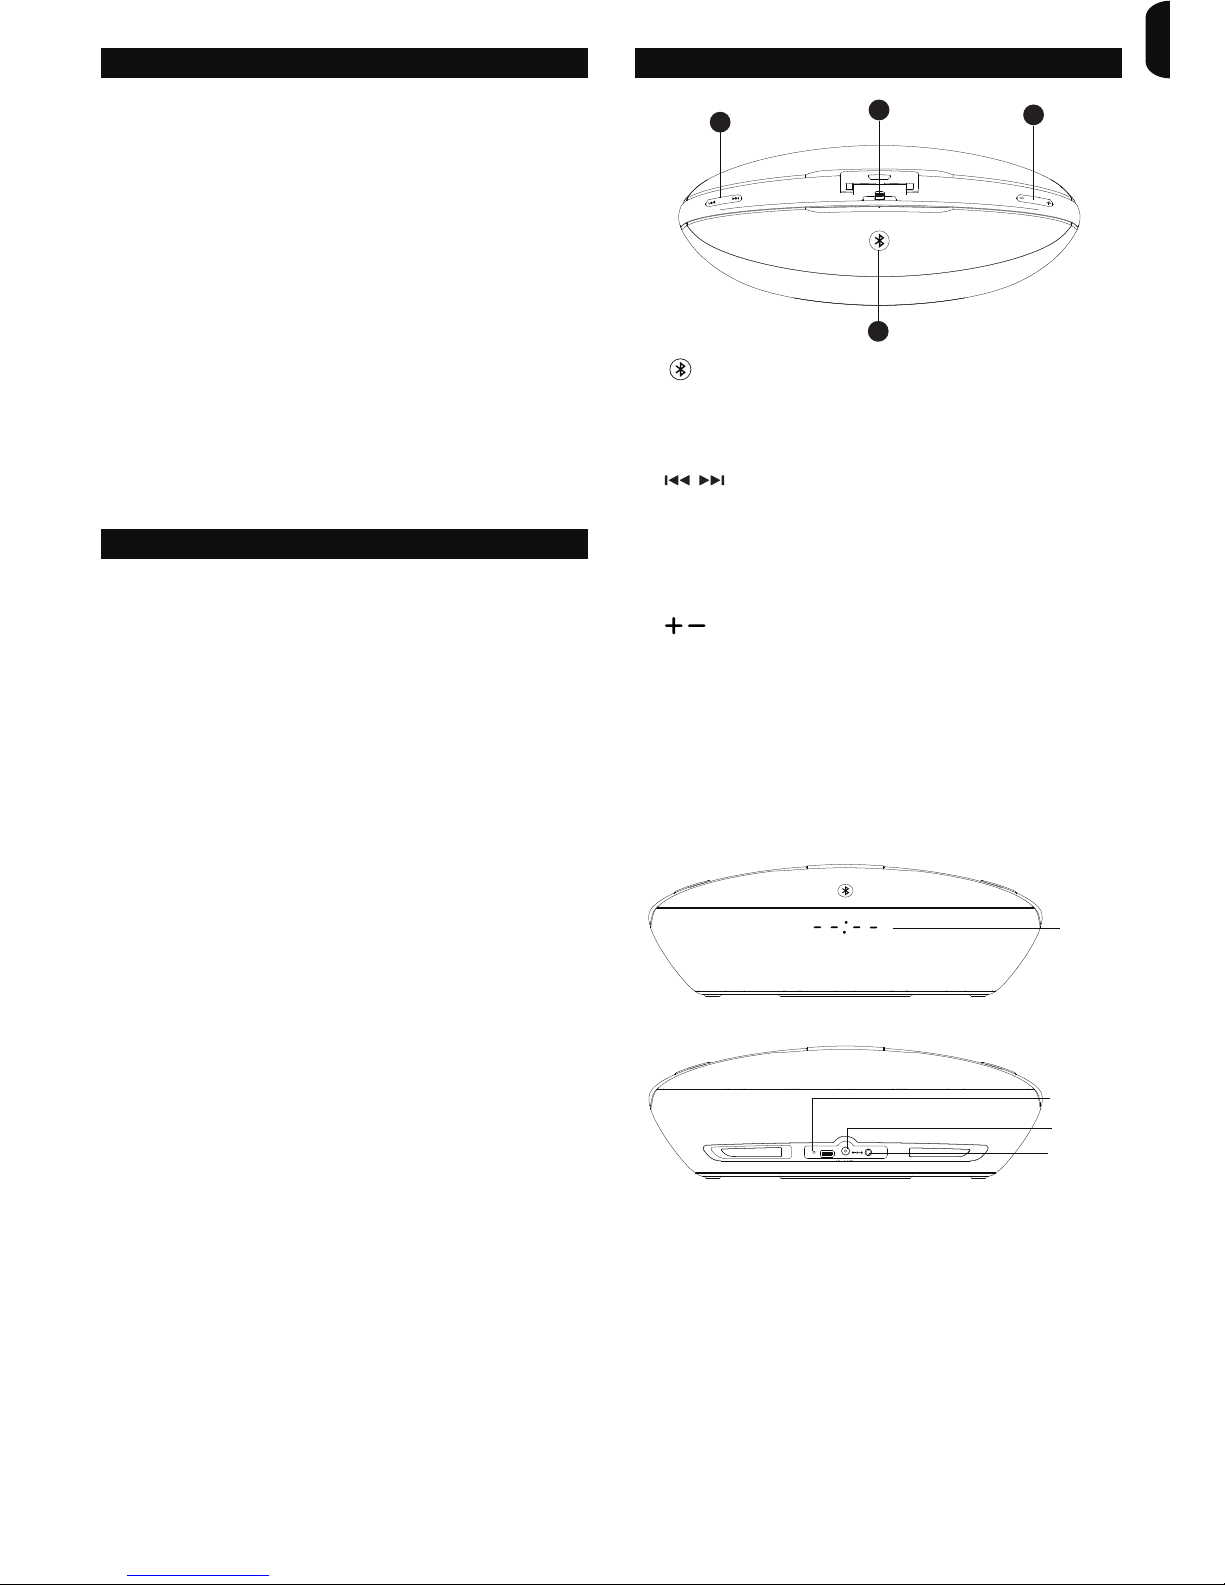
Connect the 3.5mm Audio Cable into the AUX IN Jack on
the back-side of the Docking Speaker.
Plug the other end of the 3.5mm Audio Cable into your
device.
Play the device by following the Play instructions on your
audio device or device user manual.
Adjusting the Volume of Sounds
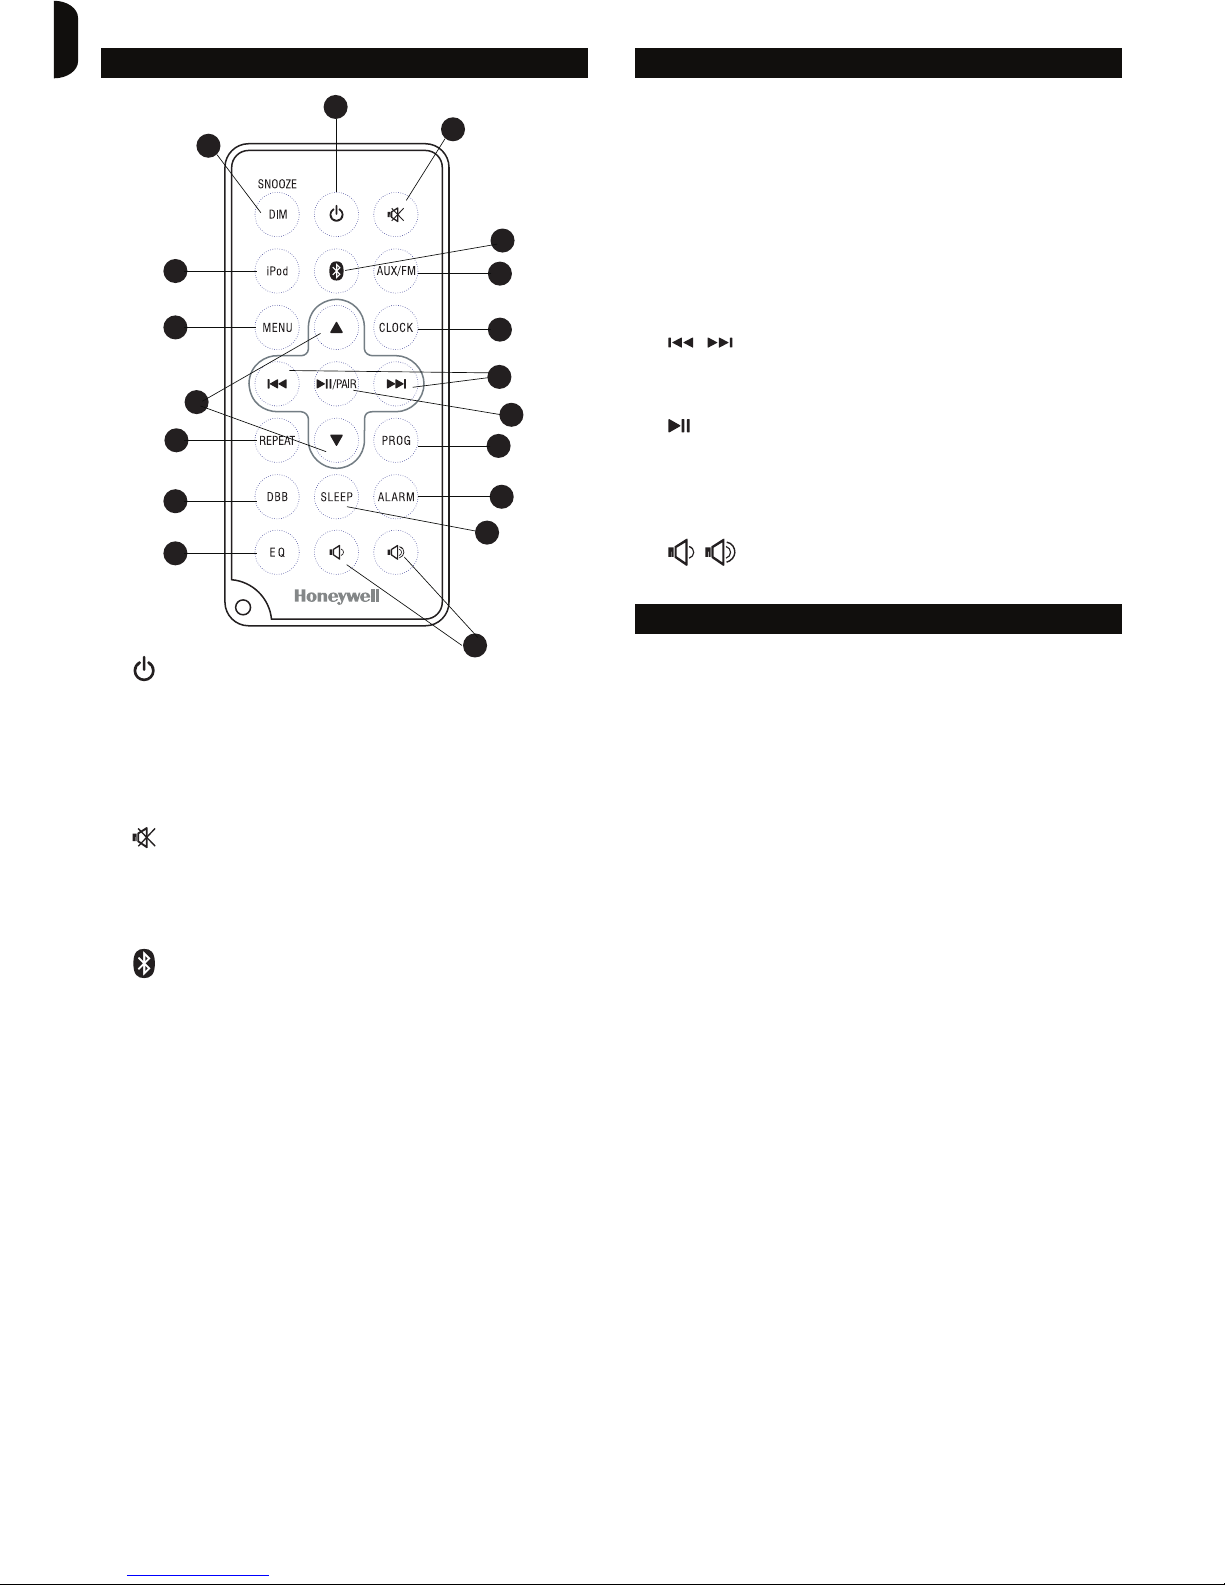
In any Audio Source Mode, press the or Button
on the Remote Control or press the or Button on the
Docking Speaker to reduce or increase the volume of the
speaker.
WARNING: Listening to music or sounds at very high
volume levels can damage hearing. It is recommended to
listen to the Docking Speaker at moderate and
comfortable volume levels that will not impair or damage
hearing.
Muting Sounds
At any time you may press the MUTE Button on the
Remote Control to silence all sounds being played in any
of the four Audio Source Modes above.
Digital Sound Profile
Press the EQ Button on the Remote Control to select the
digital sound equalizer profile you prefer. Press repeatedly
until you reach the desired profile. Choose from 5
equalizer profiles:
1. FLAT
2. POP
3. ROCK (“ROC”)
4. JAZZ
5. CLASSIC (“CLAS”)
SPEAKER & SOUND PROFILES