Hoppecke 5 OPzV 250 Guide

for valve-regulated stationary lead-acid batteries
Installation, commissioning and operating instructions
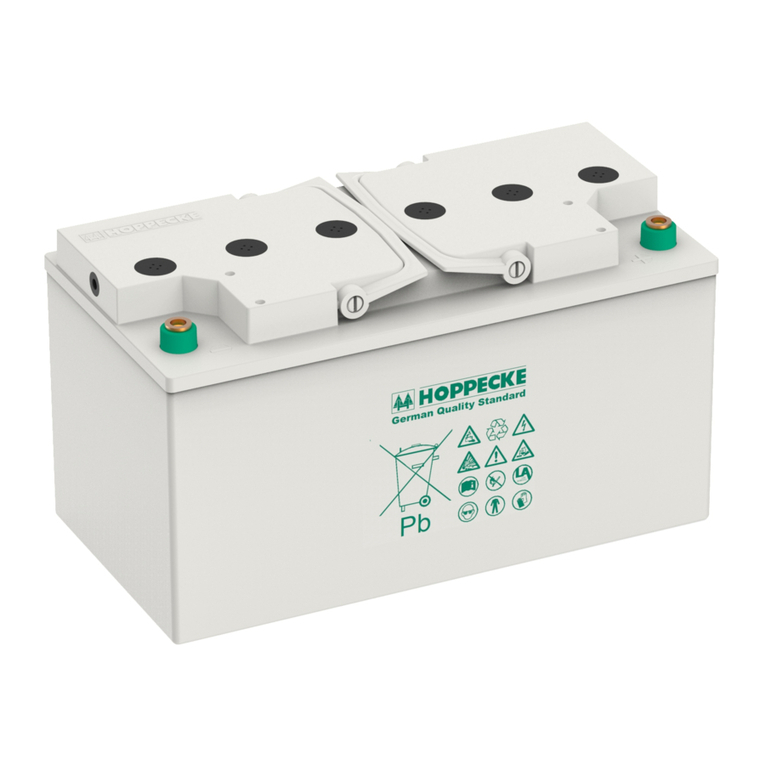
Similar to the illustration

2 3
Installation, commissioning and operating instructions for valve-regulated stationary lead-acid batteries
7140203153 V1.4 (09.2018)
Installation, commissioning and operating instructions for valve-regulated stationary lead-acid batteries
7140203153 V1.4 (09.2018)
Preface
Valued customer,
Thank you for choosing a HOPPECKE product.
Please read this documentation carefully and completely before performing any tasks using the lead-acid
batteries. This documentation contains important information regarding safe and correct unpacking, storage,
installation commissioning, operation and maintenance of lead-acid batteries. Non-compliance with these safety
instructions can lead to severe personal injury and material damage. HOPPECKE is not responsible or liable
for direct or indirect injury or damage resulting from improper use of this product; all warranty claims become
null and void.
HOPPECKE reserves the right to make changes to the contents of this documentation. HOPPECKE Batterien
GmbH & Co. KG is not responsible for errors in this documentation. HOPPECKE is not liable for direct damage
related to the use of this documentation.
Our products are undergoing constant development. For this reason, there may be discrepancies between
the product that you have purchased and the product as represented in this documentation. Please keep this
documentation so that it is immediately available for all personnel who must perform work in connection with
the batteries.
If you have questions, we would be happy to help you: You can reach us via email:
or by phone on working days between the hours of 8 am and 4 pm (CET) at the following number:
Telephone +49(0)2963 61-0
Fax +49(0)2963 61-481.
Your Team from
HOPPECKE Batterien GmbH & Co. KG
Postal address:
HOPPECKE Batterien GmbH & Co. KG
P.O. Box 11 40
D-59914 Brilon
Germany
Head office address:
HOPPECKE Batterien GmbH & Co. KG
Bontkirchener Straße 1
D-59929 Brilon-Hoppecke
Telephone +49(0)2963 61-0
Fax +49(0)2963 61-449
Internet www.hoppecke.com
Email [email protected]
Installation, commissioning and operating instructions
for valve-regulated stationary lead-acid batteries
Type und Design: PRIOTEX Medien GmbH, 59929 Brilon
© 2013 HOPPECKE Batterien GmbH & Co. KG
P.O. Box 1140
D–59914 Brilon
All rights reserved, even for patent and utility patent applications.
The distribution and duplication of this document and the use and disclosure of its contents are prohibited
unless written permission is granted by HOPPECKE Batterien GmbH & Co. KG. Noncompliance will result in a
claim for damages.

4 5
Installation, commissioning and operating instructions for valve-regulated stationary lead-acid batteries
7140203153 V1.4 (09.2018)
Installation, commissioning and operating instructions for valve-regulated stationary lead-acid batteries
7140203153 V1.4 (09.2018)
Used Symbols
The following safety notes need to be observed. Listed symbols are used multiple times for safety relevant
information:
Danger!
Personal health, batteries or the environment are at risk.
Failure to observe this hazard notice can lead to severe or fatal injury.
Attention!
Batteries, materials or the environment are at risk. Personal safety is not at risk.
Failure to observe this notice can lead to malfunction or damage to the batteries. In addition,
material and environmental damage may occur.
Risk of explosion or blast, splashing of hot or molten substances.
Risk of explosion and fire, avoid short circuits.
Avoid electrostatic charges and discharges/sparks.
Failure to observe this hazard notice can lead to severe or fatal injury.
Risk of corrosion caused by leaking electrolyte.
Electrolyte is strongly corrosive.
Electrical voltages hazardous to health may cause fatal injury.
Metal parts of the battery are always alive, therefore do not place items or tools on the battery.
Failure to observe this hazard notice can lead to severe or fatal injury.
Warning! Risks caused by batteries.
Do not smoke!
Do not use any naked flame or other sources of ignition.
Risk of explosion and fire!
General prohibition
Observe these instructions and keep them located near the battery for future reference.
Work on batteries only by trained qualified personnel.
While working on batteries wear protective eye-glasses, protective gloves and
clothing!
Observe accident prevention regulations as well as EN 50110-1 and
IEC 62485-2 (Stationary batteries) or IEC 62485-3 (Traction batteries).
Wear conductive shoes.
General order
Any acid splashes on the skin or in the eyes must be rinsed with plenty of clean water immedia-
tely. Then seek medical assistance.
Spillages on clothing should be rinsed out with water!
Recycling
Spent batteries have to be collected and recycled separately from normal household
wastes.
General notice or tip for better understanding and optimum use of the battery or batteries.
Pb
0 Safety notices
0.1 General Information
Danger!
Incorrect use of the products described here can lead to personal and material damage.
HOPPECKE is not responsible or liable for direct or indirect personal and material damages which
occur as a result of handling the products described here.
Risk of explosion and fire, avoid short circuits. Avoid electrostatic charges and discharges/spaks.
Attention! Metal parts of the battery or batteries are always live, so never place foreign objects
or tools on top of the batteries.
Electrostatic discharges can ignite oxyhydrogen gas and therefore cause an explosion of the
battery! Exploding parts can lead to heavy injuries.
Electrolyte is highly corrosive.
Contact with electrolyte is impossible in normal working conditions. Electrolyte coming out of
damaged cells or blocks is highly corrosive too. Acid splashes in the eyes or on the skin must be
washed with plenty of clean water. Then consult a doctor immediately!
Clothing contaminated by acid should be washed in water.
Leaking electrolyte is harmful to the eyes and skin. Refer also to chap. 2.3, Safety precautions!
Attention!
Incomplete or insufficient maintenance can lead to unexpected battery failure or reduction of
battery power. Maintenance work must be completed once every six months by HOPPECKE
specialists or by qualified personnel trained by HOPPECKKE in accordance with the instructions
in this documentation.
Danger!
Work on batteries, especially installation and maintenance should be performed by trained
HOPPECKE specialists (or by qualified personnel trained by HOPPECKE) only; personnel must be
familiar with battery handling and the required precautionary measures. Unauthorized persons
must keep away from the batteries!
Without proper and regular maintenance of the batteries by HOPPECKE specialists (or personnel autho-
rized by HOPPECKE), the safety and reliability of the power supply during operation cannot be ensured.
Sealed lead-acid batteries are always filled before delivery. Sealed stationary lead-acid battery
cells must not be refilled with water during the entire battery service life. Overpressure valves are
used as sealing plugs. These plugs cannot be opened without damaging.

6 7
Installation, commissioning and operating instructions for valve-regulated stationary lead-acid batteries
7140203153 V1.4 (09.2018)
Installation, commissioning and operating instructions for valve-regulated stationary lead-acid batteries
7140203153 V1.4 (09.2018)
HOPPECKE offers the following type ranges as valve regulated lead-acid (VRLA) batteries:
net.power
OPzV
power.bloc OPzV
power.com HC
power.com XC
grid | power VR M (power.com SB)
grid | power VR X/grid | power VR X FT
sun | power VR L (OPzV solar.power/OPzV bloc solar.power)
sun | power VR M (solar.bloc)
The product names used for HOPPECKE battery series have been changed. In the overview below
you will find the respective counterparts of old and new names. In the rest of this document old
names will be listed in brackets.
Pb
Following symbols and pictograms are pictured on each battery cell or on each battery block:
Read the instruction for installation, commissioning and operation carefully.
Always wear protective goggles and cloths.
Avoid naked flames and sparks.
General danger warning.
Risk of electrical voltage.
Risk of chemical burns through electrolyte.
Risk of explosion, avoid short circuits, electrostatic charge and discharge/sparks.
Battery with low concentration of antimony.
Used batteries with this symbol have to be recycled.
Used batteries which are not sent for recycling are to be disposed of as special waste under all
relevant regulations.
Old new
OPzV bloc solar.power sun | power VR L
OPzV solar.power sun | power VR L
power.com SB grid | power VR M
solar.bloc sun | power VR M

8 9
Installation, commissioning and operating instructions for valve-regulated stationary lead-acid batteries
7140203153 V1.4 (09.2018)
Installation, commissioning and operating instructions for valve-regulated stationary lead-acid batteries
7140203153 V1.4 (09.2018)
0.2 Safety instructions for working with lead-acid batteries
When working on batteries, always observe the safety regulations documented in DIN EN
50110-1 (VDE 0105-1) Operation of electrical installations:
• Always proceed in the correct order when installing and removing the battery and when connec-
ting it to the charger.
• Pay attention to the polarity!
• Make sure the connections are tight.
• Use only battery charger leads that are in perfect technical condition and that have adequate
cross-sections.
• Batteries must not be connected or disconnected while current is flowing or while the charger
is switched on.
• Before opening the load circuit, make sure that the charger is in a switched-off state by measu-
ring the voltage.
• Secure the charger to prevent it from being switched back on again!
• Heed the instructions given in the operating manual provided by the manufacturer of the battery
charger.
Danger!
Under certain conditions, there is a risk caused by electrical battery voltage and in the event
of a short circuit, extremely high short circuit currents may flow.
There is a risk of explosion and fire due to explosive gas.
Observe the following regulations (IEEE standards valid for USA only):
– ZVEI publication „Instructions for the safe handling of electrolyte for lead-acid accumulators.“
– VDE 0510 Part 2: 2001-12, in accordance with IEC 62485-2: „Safety requirements for secon-
dary batteries and battery installations - Part 2: Stationary batteries“.
– DIN EN 50110–1 (VDE 0105–1): Operation of electrical installations; German version EN
50110-1:2004.
– IEEE Standard 485–1997: „Recommended Practice for Sizing Large Lead Acid Storage Batteries
for Generating Stations.“
– IEEE Standard 1187–2002: „Recommended Practice for Installation Design and Installation of
Valve Regulated Lead-Acid Storage Batteries for Stationary Applications“.
– IEEE Standard 1188–2005: „Recommended Practice for Maintenance, Testing and Replacement
of Valve Regulated Lead-Acid (VRLA) Batteries for Stationary Applications“.
– IEEE Standard 1189–2007: „Guide for Selection of Valve-Regulated Lead-Acid (VRLA) Batteries
for Stationary Applications“.
– IEEE Standard 1375–1998: „Guide for Protection of Stationary Battery Systems“.
– DIN EN 50110-1 (VDE 0105-1): “Company of electrical instructions” ; German copy EN 50110-
1:2004
Batteries contain corrosive acids which can lead to chemical burn on skin and eyes if the
battery is damaged.
You must wear safety goggles while handling the battery!
Wear all the intended personal safety clothing while handling the batteries.
1. When renewing old batteries, ensure that all electrical loads are switched off before removing
the old battery (separators, fuses, switches). This must be carried out by qualified personnel.
Danger!
2. Remove all wrist watches, rings, chains, jewelry and other metal objects before working with
batteries.
3. Use insulated tools only.
4. Wear insulating gloves and protective shoes (refer to also to Chap. 2.2).
Danger!
5. Never place tools or metal components on top of the batteries.
Danger!
6. Make sure that the battery or batteries are not mistakenly grounded. If the system is grounded,
terminate the connection.
Touching a grounded battery by mistake can result in severe electric shock. The risk caused
by an incorrect connection can be significantly reduced by terminating the ground connection.
Attention!
7. Before establishing connections, make sure to check the correct polarity - better one too many
times than one too few.
Danger!
8. Filled lead-acid batteries contain highly explosive gas (hydrogen/air mixture). Never smoke,
handle open flames or create sparks near the batteries. Always avoid electrostatic discharge;
wear cotton clothing and ground yourself if necessary.
Danger!
9. Blocks/cells are very heavy. Make sure they are installed securely. Only use suitable means of
transport. Do not lift or pull up blocks/cells on the poles.
Danger!
10. Never carry batteries by the battery terminals.
Attention!
11. These batteries contain lead and cannot under any circumstances be disposed of with
household waste or at a waste dump at the end of their service life (for more information,
refer to Chap. 1.4).
Attention!
12. Contains lead-metall (CAS- Nr. 7439-92-1). This metall is one of the reach list chemicals.

10 11
Installation, commissioning and operating instructions for valve-regulated stationary lead-acid batteries
7140203153 V1.4 (09.2018)
Installation, commissioning and operating instructions for valve-regulated stationary lead-acid batteries
7140203153 V1.4 (09.2018)
Table of contents
Preface .................................................................................................................................................. 3
Symbols .............................................................................................................................................. 4
0 Safety notices..................................................................................................................................... 5
0.1 General Information ................................................................................................................ 5
0.2 Safety instructions for working with lead-acid batteries .............................................................. 8
1 General Information ............................................................................................................................ 12
1.1 Safety precautions .................................................................................................................. 12
1.2 Technical Data ...................................................................................................................... 12
1.2.1 Excample for single cell ......................................................................................................... 12
1.2.2 Identification plate battery ...................................................................................................... 13
1.3 CE-Mark ................................................................................................................................ 13
1.4 Disposal and recycling ........................................................................................................... 13
1.5 Service ................................................................................................................................. 13
2 Safety ............................................................................................................................................ 14
2.1 General ................................................................................................................................ 14
2.2 Personal safety equipment, protective clothing, equipment ...................................................... 14
2.3 Safety precautions ................................................................................................................ 14
2.3.1 Sulfuric acid ......................................................................................................................... 14
2.3.2 Explosive gases .................................................................................................................... 15
2.3.3 Electrostatic discharge .......................................................................................................... 16
2.3.4 Electric shock and burns ....................................................................................................... 17
3 Transport ........................................................................................................................................... 18
3.1 General ................................................................................................................................. 18
3.2 Delivery completeness and externally visible damage .............................................................. 18
3.3 Latent defects ........................................................................................................................ 19
4 Storing batteries before installation .................................................................................................... 20
4.1 General ................................................................................................................................ 20
4.2 Storage time ......................................................................................................................... 20
4.3 Preparing for a several-month storage period .......................................................................... 20
5 Installation ....................................................................................................................................... 21
5.1 Demands on the erection site ................................................................................................ 21
5.1.1 Calculation of safety distance ................................................................................................ 23
5.2 Filling the cells ..................................................................................................................... 24
5.2.1 Check .................................................................................................................................. 24
5.2.1.1 Ventilation - preventing explosion ........................................................................................... 24
5.2.1.2 Ventilation - calculation for ventilation requirements of battery rooms ....................................... 24
5.3 Conducting an open-circuit voltage measurement .................................................................... 26
5.4 Installation tools and equipment ............................................................................................ 26
5.5 Rack Installation ................................................................................................................... 27
5.6 Cabinet Installation ............................................................................................................... 28
5.7 Handling the batteries ........................................................................................................... 29
5.8 General information on connecting the batteries ..................................................................... 29
5.9 Putting the cells/blocks into the racks ................................................................................... 30
5.10 Connecting the batteries ....................................................................................................... 32
5.10.1 Connection terminals ............................................................................................................ 32
5.10.2 Type of connection cable ....................................................................................................... 32
5.10.3 Clamping batteries using battery connectors ........................................................................... 32
5.10.4 Installing the screwed connectors .......................................................................................... 33
5.10.5 Clamping connection plates onto the batteries ....................................................................... 33
5.11 Connect the battery system to the DC power supply ................................................................ 34
5.12 Commissioning charge (initial charge) .................................................................................... 35
5.12.1 Commissioning charge with constant voltage (IU characteristic curve) ...................................... 35
5.12.2 Extended commissioning charge ............................................................................................ 35
6 Battery operation ............................................................................................................................... 36
6.1 Unloading ............................................................................................................................... 36
6.2 Charging - general ................................................................................................................... 36
6.2.1 Standby parallel operation ....................................................................................................... 38
6.2.2 Floating operation ................................................................................................................... 39
6.2.3 Switch mode operation (charge/discharge operation) ................................................................ 39
6.2.4 Float charging ......................................................................................................................... 39
6.2.5 Equalizing charge (correction charge)........................................................................................ 40
7 Charging of HOPPECKE sun| power VR L battery in Solar Applications ................................................... 42
7.1 Charge and discharge parameters............................................................................................ 42
7.2 Alternating currents................................................................................................................. 43
7.3 Temperature influence on battery performance and lifetime ....................................................... 43
7.3.1 Temperature influence on battery capacity................................................................................ 44
7.3.2 Temperature influence on battery service life ............................................................................ 44
7.4 Influence of cycling on battery behaviour .................................................................................. 44
7.4.1 Endurance in cycles depending on depth of discharge ............................................................... 45
7.4.2 Endurance in cycles depending on ambient temperature............................................................ 45
7.4.3 Electrolyte freezing point depending on depth of discharge (DoD)............................................... 46
7.5 Remarks to warranty management ........................................................................................... 47
8 Battery maintenance .......................................................................................................................... 47
8.1 Work to be performed every six months.................................................................................... 47
8.2 Work to be performed annullay ................................................................................................ 48
8.3 Cleaning of battery.................................................................................................................. 48
9 Testing the battery system................................................................................................................. 49
9.1 Performing the capacity test (short form) .................................................................................. 49
9.2 Performing the capacity test (extended version) ........................................................................ 49
9.3 Capacity test of the battery...................................................................................................... 51
10 Fault Retification ............................................................................................................................. 53
11 Required ventilation for hydrogen generated by batteries................................................................... 53
12 Disassembly..................................................................................................................................... 54
Inspection protocol................................................................................................................................ 55
Safety data sheet.................................................................................................................................. 56

12 13
Installation, commissioning and operating instructions for valve-regulated stationary lead-acid batteries
7140203153 V1.4 (09.2018)
Installation, commissioning and operating instructions for valve-regulated stationary lead-acid batteries
7140203153 V1.4 (09.2018)
1 General information
The electrolyte of sealed lead-acid batteries is fixed in a glass fiber fleece (AGM) or gel. Therefore an upright
or horizontal installation of battery cells or blocks is basically possible. The generation of oxyhydrogen gas is
extremely reduced by an internal recombination circle. Sealed lead-acid battery cells or battery blocks are not
sealed gas tightly. The integrated valve has to open by pressure overload. Sealed lead-acid batteries must
not be opened. HOPPECKE offers numerous sealed lead-acid batteries as single cells (nominal voltage 2 V) or
blocks (nominal tension:6 V or 12 V) for different applications.
1.1 Safety precautions
Danger!
Read this documentation carefully and completely before performing any tasks using the batte-
ries. This documentation contains important information regarding the safe and correct unpacking,
storage, installation commissioning, operation and maintenance of filled lead-acid batteries.
Danger!
To ensure your own safety as well as the safety of your colleagues and the system, it is essential
that you have read and understood all instructions in this documentation and adhere to them
strictly. If you have not understood the information contained in this documentation or if local
regulations and conditions apply which are not covered by the documentation (or run contrary to
the information in this documentation), please contact your local HOPPECKE representative. You
can also contact us at our head office directly.
Danger!
If you are conducting any work on or with the battery system, it is essential that you familiarize
yourself with the installation, operation and maintenance of lead-acid batteries.
1.2 Technical data
1.2.1 Example for single cell
Each single cell/each battery block has an own identification plate on the top side of the cell/block cap. Refer
to the example below.
Example: The information on the identification plate is as follows:
5 OPzV 250
5 = number of positive plates
OPzV = battery type
250 = Nominal capacity C10 (capacity during discharge with ten
hours´ current (I10) over a discharge time of 10 h (t10))
267 = actual capacity C10 (capacity of discharge with 10 h
current)
5 OPzV 250
2V 250Ah CN / 267 Ah C10
Ufloat = 2,25 V/cell
! upright position only !
Made in Germany
non spillable
1.2.2 Identification plate battery
The identification plate of the entire battery system can be found on the
battery rack or inside the battery cabinet.
The nominal voltage, the number of cells/blocks, the nominal capacity
(C10 = CN) and the battery type are listed on the identification plate of
the system.
Fig. 1–1: Example for type plate on battery rack
1.3 CE-Mark
Effective as of 1 January 1997, the EC declaration of conformity 2006/95/EC (Low Voltage
Directive) and the corresponding CE marking for the battery system are required for batteries with
a nominal voltage between 75 V and 1500 V DC.
The installer of the battery system is responsible for displaying the declaration and affixing the CE
label on or next to the battery’s identification plate.
1.4 Disposal and recycling
Attention!
Used batteries with this marking are recyclable goods and must be sent for recycling.
Used batteries which are not sent for recycling are to be disposed of as special waste
under all relevant regulations.
We offer our customers our own battery return system. All lead acid batteries are taken to the
secondary lead smelting plant at our HOPPECKE site, observing the provisions of the German
– recycling and waste law
– battery regulations
– transport approval regulations
– t
ogether with the general principles of environmental protection and our own corporate guidelines.
The HOPPECKE smelting plant is the only lead smelter in Europe certified under
– DIN EN ISO 9001 (processes and procedures),
– DIN EN ISO 14001 (environmental audit),
– and specialist disposal regulations covering specialist disposal with all associated waste codes
for storage, treatment and recycling.
For further information: +49(0)2963 61-280.
1.5 Service
HOPPECKE has a worldwide service network that you should take advantage of. HOPPECKE service is there for
you whenever you need specialist consultation for installation of the battery system, parts and accessories or
system maintenance. Contact us or your local HOPPECKE representative.
HOPPECKE service:
Email: [email protected]
Refer to the HOPPECKE website for contact data of all international HOPPECKE branches:
Internet: www.hoppecke.com
Pb

14 15
Installation, commissioning and operating instructions for valve-regulated stationary lead-acid batteries
7140203153 V1.4 (09.2018)
Installation, commissioning and operating instructions for valve-regulated stationary lead-acid batteries
7140203153 V1.4 (09.2018)
2 Safety
2.1 General
If the casing of a sealed lead-acid battery is damaged, small quantities of electrolyte, acid mist or hydrogen gas
may leak out. Always take the normal safety precautions when working with lead-acid batteries.
Consider all instructions and engineer standards, as mentioned in chapter 0.2.
2.2 Personal safety equipment, protective clothing, equipment
While working on batteries wear protective eye-glasses, protective gloves and
clothing!
Observe accident prevention regulations as well as EN 50110-1 and
IEC 62485-2 (Stationary batteries) or IEC 62485-3 (Traction batteries).
If working with lead-acid batteries, the following equipment must be provided at the very least:
– Insulated tools
– Protective shoes
– Rubber gloves
– Fire extinguisher
– Rubber apron
– Protective goggles
– Face shield
– Face mask
– Emergency eye wash (recommended).
To avoid electrostatic charging, all textiles, protective shoes and gloves worn while working with
batteries must have a surface resistance of <108ohm and an insulation resistance of ≥105ohm
(refer IEC 62485-2 and DIN EN ISO 20345:2011 Personal protective equipment - Safety footwear).
If possible wear ESD shoes.
Danger!
Remove all wrist watches, rings, chains, jewelry and other metal objects before working with
batteries.
Never smoke, handle open flames or create sparks near the batteries.
Never place tools or metal components on top of the batteries.
The use of proper tools and safety equipment can help to prevent injury or reduce the severity of injury in
case of an accident.
2.3 Safety precautions
2.3.1 Sulfuric acid
Sealed lead-acid batteries are safe when used properly. However, they contain diluted sulfuric acid (H2SO4) that
is bonded in gel or glass mat. The bonded sulfuric acid is extremely corrosive and can cause serious injury.
Further information to sulfuric acid can be found in the attached material safety data sheet.
Note also the information in the attached ZVEI leaflet “Instructions for the safe handling of lead-acid accumu-
lators (lead-acid batteries)”.
2.3.2 Explosive gases
Danger!
Lead-acid batteries can release an explosive mixture of hydrogen and oxygen gases. Severe per-
sonal injury could occur in the event of an explosion of this mixture.
– Always wear the recommended protective clothing (protective goggles, insulated gloves and
protective shoes, etc.)
– Use the correct tools only („non-sparking“ with insulated grips, etc.).
– Eliminate all potential sources of ignition such as sparks, flames, arcs.
– Prevent electrostatic discharge. Wear cotton clothing and ground yourself when you are working
with the batteries directly.
Danger!
In case of fire, extinguish using water or CO2extinguisher only.
Do not point the fire extinguisher directly at the battery or batteries to be extinguished. There
is a risk that the battery casing may break as a result of thermal tension. In addition, there is
a risk of static charging on the surface of the battery. This could result in an explosion. Switch
off the charging voltage of the battery. If extinguishing a fire, use a breathing apparatus with
a self contained air supply. If using water to extinguish a fire, there is a risk that the water/
foam could react with the electrolyte and result in violent spatter. For this reason, wear acid-
resistant protective clothing. Burning plastic material may produce toxic fumes. If this should
occur, leave the location as quickly as possible if you are not wearing the breathing apparatus
described above.
Danger!
If using CO2fire extinguishers, there is a risk that the battery could explode as a result of
static charging.
Note also the information in the attached ZVEI leaflet “Instructions for the safe handling of lead-
acid accumulators (lead-acid batteries)”.

16 17
Installation, commissioning and operating instructions for valve-regulated stationary lead-acid batteries
7140203153 V1.4 (09.2018)
Installation, commissioning and operating instructions for valve-regulated stationary lead-acid batteries
7140203153 V1.4 (09.2018)
2.3.4 Electric shock and burns
Danger!
Batteries can cause severe electric shock. If there is a short circuit, very strong currents may
be present. Do not touch any bare battery components, connectors, clamps or terminals.
In battery systems with a nominal voltage of over 1,500 V DC, you must provide equipment
for splitting the batteries into cell groups with voltages lower than 1,500 V DC. In order to
prevent serious injury as a result of electric shock or burns, be very cautious when performing
any work on the battery system.
Always wear the recommended protective clothing (insulated rubber gloves and rubber shoes,
etc.) and always use insulated tools or tools made of non-conductive material.
Remove all wrist watches, rings, chains, jewelry and other metal objects before working with
batteries.
Before conducting work on the battery system...
Determine whether the battery system is grounded. We do not recommend this. If the system is grounded,
terminate the connection.
Touching a grounded battery by mistake can result in severe electric shock. This risk can be significantly redu-
ced by removing the ground connection. However, the racks (or cabinets) used to hold the batteries do need to
be well grounded or completely insulated.
If a battery system is grounded…
There is a voltage between the ground and the ungrounded terminal. If a grounded person touches
this terminal, there is risk of fatal injury. There is also a risk of short circuit if dirt or acid on the
ungrounded terminal come in contact with the battery rack.
If an additional ground connection is made by some cells within the (grounded) battery system,
there is a risk of short circuit, fire and explosion.
If a battery system is not grounded…
If an accidental ground connection is made by some cells within the battery system, voltage is
created between the ground and the ungrounded terminal. The voltage can be dangerously high -
risk of fatal injury due to electric shock.
If a second accidental ground connection is made, there is a risk of short circuit, fire and explo-
sion.
If you have questions about these instructions or any other questions regarding safety when
working with a battery system, please contact your local HOPPECKE representative. You can also
contact us at our head office directly.
2.3.3 Electrostatic discharge
All lead-acid-batteries produce hydrogen and oxygen while operating, particularly during charging. These gases
leak from the battery in the ambience. Based on the mandatory natural or technical ventilation it can be assu-
med that a flame able oxyhydrogen concentration exists only in the close proximity of the battery. A flame able
mixture of oxyhydrogen always exists inside the battery cells. This effect does not depend on the battery techno-
logy, design or manufacturer, rather than a specific characteristic of all lead-acid batteries. The energy needed
for an ignition of oxyhydrogen is quite low and can be caused differently. Examples: Open flame, fire, glowing
sparks or flying firebrands from grinding, electric spark from switches or fuses, hot surface areas >200 °C
and – an underestimated cause – electrostatic discharge.
Measures to avoid the ignitions of detonating gas through electrostatic discharges
The development of electrostatic discharges on the battery or on your body or on clothes can be avoided if you
consider the information below:
Do not wipe the battery with an arid fabric especially made of synthetic material.
Rubbing on surfaces of plastic material (battery jars are typically made of plastic material) causes
electrostatic charges.
Clean the surface of batteries with water- moistened cotton fabric only. By using a water-moiste-
ned cotton fabric you avoid the buildup of electrostatic charges.
While working on batteries do not rub your clothes (e.g. made of wool) on the battery. Thereby
electrostatic charges could build up on the battery jar, your body or on your clothes.
Wear suitable shoes and clothing with special surface resistance th
at avoid the buildup of elec-
trostatic charge. Thereby the buildup of electrostatic charge on the body and clothing can be
avoide
d.
Do not remove self-adhesive labels, from the battery without special safety measures.
Removing plastic labels can build up electrostatic charges, which can ignite oxyhydrogen gas.
Before pulling off the label, wipe the battery moist.

18 19
Installation, commissioning and operating instructions for valve-regulated stationary lead-acid batteries
7140203153 V1.4 (09.2018)
Installation, commissioning and operating instructions for valve-regulated stationary lead-acid batteries
7140203153 V1.4 (09.2018)
3 Transportation damages
3.1 General
We take great care in packaging the batteries that we send to you so that they arrive without damage. We
strongly recommend that you inspect the delivery for possible shipping damage as soon as it arrives.
For road transportation, filled lead-acid rechargeable batteries are not treated as dangerous
goods if
– They are undamaged and sealed
– They are protected from falling, shifting and short circuit
– They are firmly secured to a pallet
– There are no dangerous traces of acids, lye, etc. on the outside of the packaging
Danger!
It is essential that loads on road vehicles are properly secured.
Attention!
Monobloc batteries/battery cells are very heavy (depending on type between ca. 10kg and max.
240kg per cell/bloc). Wear protective shoes. Use only the appropriate transportation equipment
for transport and installation.
3.2 Delivery completeness and externally visible damage
Check immediately upon delivery (while the carrier is still present) to make sure that your shipment is complete
(compare with the delivery note). In particular, check the number of battery pallets and the number of boxes
with accessories. Then inspect the goods for possible shipping damage.
Note all
– damages to the outer packaging
– visible stains or moisture that might indicate electrolyte leakage
If the delivery is incomplete or damaged as a result of shipping
– Write a short defect notice on the delivery note before signing it.
– Ask the carrier for an inspection and note the name of the inspector.
– Compose a defect report and send it to us and to the carrier within 14 days.
3.3 Defects
Observe all required safety measures to avoid electric shock.
Keep in mind that you are handling live batteries. Observe all instructions in Chap. 2 “Safety”.
Unpack the goods as soon as possible upon delivery (the sooner, the better) and inspect them for any defects
in case commissioning should be carried out promptly.
The sealed batteries are always filled before delivery.
Check the entire scope of delivery to make sure that it matches the detailed delivery note (or
the packing list).
Failure to promptly inform the carrier of defects or incompleteness could result in the loss of
your claims.
If you have questions regarding incomplete shipments or damage to the delivered products, please
contact your local HOPPECKE representative. You can also contact us at our head office directly.

20 21
Installation, commissioning and operating instructions for valve-regulated stationary lead-acid batteries
7140203153 V1.4 (09.2018)
Installation, commissioning and operating instructions for valve-regulated stationary lead-acid batteries
7140203153 V1.4 (09.2018)
Observe ventilation requirements (refer to Chap. 5.2.1.1) even for charging of temporarily con-
nected cells.
Attention!
Fig. 4–1: Available Capacity vs. storage time
5 Installation
5.1 Demands on the erection site
Danger!
When renewing old batteries, ensure that all electrical loads are switched off before removing the
old battery (separator, fuses, switches).
This must be carried out by qualified personnel.
If you have questions regarding battery system installation, please contact your local HOPPECKE representative.
You can also contact us at our head office directly.
If choosing an installation location, determining space requirements and performing the installa-
tion, observe the relevant installation drawing if it is available.
The floor must be suitable for battery installation; it must:
– have a suitable load-carrying capacity,
– be sufficiently conductive,
– be at ground level (max. thickness of backing elements under racks and cabinets: 6 mm),
– be as free of vibration as possible (otherwise a special rack is required).
Within the EU, follow VDE 0510 Part 2: 2001-12, in accordance with IEC 62485-2: „Safety requi-
rements for secondary batteries and battery installations - Part 2: Stationary batteries“.
Capacity [% C10]
Storage time [month]
4 Storage
4.1 General
After receiving the batteries, you should unpack, install and charge them as soon as possible. If this is not
possible, store the batteries fully-charged in a dry, clean, cool and frost-free location. Excessively high storage
temperatures may result in accelerated self-discharge and premature aging. Do not expose the batteries to
direct sunlight.
Attention!
Do not stack the pallets with the batteries as this can cause damage which is not covered under
the warranty.
4.2 Storage time
Attention!
If the cells/batteries are to be stored for a long period of time, store them fully-charged in a dry,
frost-free location. Avoid direct sunlight. To prevent damage to the batteries, an equalizing charge
must be performed after a maximum storage period of six months (see Chap. 6.2.5). Calculate
this exact time starting on the day of delivery. By the end of the max. storage time charge accep-
tance might be declined during battery recharge. Hence, HOPPECKE recommends a suitable
process of charging, which assures a gentle full charge of the battery (refer to Chap. 6.2.5). If
storage temperatures exceed 20 °C, more frequently equalizing charges may be necessary (at
temperatures around 40 °C monthly charges). Refer also to figure 4–1 to retrieve max. storage
times for different storages temperatures. Failure to observe these conditions may result in
sulfating of the electrode plates and significantly reduced capacity and service life of the battery.
Battery recharge during storage time should be carried out max. twice. The battery should be
operated in continuous float charge mode thereafter.
Battery service life commences with delivery of the battery or batteries from the HOPPECKE plant.
Storage times have to be added completely to the service life.
Attention!
Required process for charging the batteries by achievement of max. storage duration:
Charge with constant power of 1 A or 2 A per 100 Ah C10 battery capacity. Interrupt charging when
all cell voltages have rised to min 2.65 V/cell (refer also to Chap. 6.2).
4.3 Preparing for a several-month storage period
If the storage time extends over a period of several months, make sure to provide an appropriate charger so
that the charging tasks can be performed promptly as previously described. For temporary storage, arrange the
blocks/cells so that they can be temporarily connected in series for charging. The batteries should remain on
their pallets until final installation.
To avoid having to perform the previously described work, we strongly recommend that you con-
nect the battery or batteries to the regular charging voltage supply within six months. Failure to
observe the recharging intervals will render the warranty null and void.

22 23
Installation, commissioning and operating instructions for valve-regulated stationary lead-acid batteries
7140203153 V1.4 (09.2018)
Installation, commissioning and operating instructions for valve-regulated stationary lead-acid batteries
7140203153 V1.4 (09.2018)
5.1.1 Calculation of safety distance
In close proximity of the batteries the dilution of explosive gases is not always given. Therefore a safety distance
has to be realized by a clearance, in which there must not be any sparking or glowing equipments (max. surface
temperature 300°C). The diffusion of the oxyhydrogen depends on the gas release and the ventilation close
to the battery. For the following calculation of the safety distance ‘d’ it can be assumed that the oxyhydrogen
expands spherical. Figure 5.1 depicts a graphic approximation of the safety distance ‘d’ depending on the
battery capacity. Subsequently a detailed calculation is shown.
Safety clearance:
Required safety clearance needs to be calculated according to formula stated in IEC 62485-2.
Volumes of a hemisphere:
Air volume flow required to reduce the concentration of generated hydrogen H2in the air to 4% max.:
Required radius of the hemisphere:
Fig. 5–1: Safety distance based on battery capacity (Source HOPPECKE)
Safety clearance d [mm]
Battery capacity C [Ah]
VLA battery float charge mode
VRLA battery float charge mode
VLA battery boost charge mode
VRLA battery boost charge mode
Requirement Our recommendation
Ventilation source Sufficient room ventilation is absolutely required to limit the
hydrogen concentration (H2 concentration) in the ambient air of
the battery room to a value of <2% by volume.
Hydrogen is lighter than air. Make sure that hydrogen does not
accumulate (e.g., in the ceiling area). Ventilation and deaerati-
on openings should be placed near the ceiling. (see also Chap.
5.2.1.1 and Chap. 5.2.1.2).
Environment The ambience should be clean and dry. Water, oil and dirt must be kept away
from the cell surface.
Passageway width
in front of and between
the battery racks
(and cabinets)
Europe: Passageway width = 1.5 x cell width (installation depth), at least
500 mm (see also IEC 62485-2).
USA: 36“ or. 915 mm
HOPPECKE recommendation:
If possible at the installation location: 1 m.
Otherwise: in accordance with local regulations.
Minimum distances
Rack to wall
Battery to wall
Conductive parts to ground
Battery end terminals
Battery to sources of ignition
Upper surface of battery to
next tier of rack or bottom
of the next cabinet
50 mm
100 mm
1.500 mm for Unom or Upart >120 V VDC between non-insulated and grounded
parts (e.g. water lines)
1.500 mm for Unom >120 V DC
See calculation of the safety distance Chap. 5.1.1.
250 mm It mus be possible to measure the voltage.
Access door Lockable and fire retardant (T90).
Lighting Recommend: at least 100 lx.
Labeling Warning signs in accordance with IEC 62485-2.
Warning sign depicting risk of electrical volta-
ge only necessary if battery voltage exceeds
60V DC.
Risk of explosion No sources with ignition (e.g. open flame, glowing objects, electrical switches,
sparks) near to the cell openings.
Ambient temperature The recommended operating temperature ist between 10 °C and 30 °C. The
optimal temperature is 20 °C ± 5 K. Higher temperatures shorten the service
life of the battery. All technical data is valid for the nominal temperature of 20
° C. Lower temperatures decrease battery capacity. Exceeding the limit tempe-
ratures of 55 °C is not permissible. Avoid operating at temperatures en excess
of 45 °C for long periods of time.
Batteries should not exposed to direct sunlight or near heat sources.
Ambient air The air in the battery room must be free of impurities, e.g. suspended matter,
metal particles or flammable gases.
The humidity should be at a maximum of 85%.
Earthing
If you ground the racks or battery cabinets, make sure that you use a connection
to a reliable grounding point.
Battery installation We recommend that batteries are properly installed in HOPPECKE battery racks
or cabinets. The use of other operator-specific solutions may render the warran-
ty for the batteries null and void.
Country-specific
regulations
Some countries require batteries and racks to be installed in collection tanks.
Please observe all local regulations and contact you local HOPPECKE represen-
tative if necessary.
Tab. 5–1: Demands on the erection site
Danger!

24 25
Installation, commissioning and operating instructions for valve-regulated stationary lead-acid batteries
7140203153 V1.4 (09.2018)
Installation, commissioning and operating instructions for valve-regulated stationary lead-acid batteries
7140203153 V1.4 (09.2018)
Sum of factors:
Parameter Lead-acid batteries
sealed cells
fg: Gas emissions factor 0.2
fs: Safety factor for gas emissions
(includes 10% faulty cells and aging) 5
Ufloat: Float charge voltage, V/cell 2.27
Ifloat: Typical float charge current, mA per Ah 1
Igas: Current (float charge), mA per AH
(used only for calculating the air volume flow for float charge) 1
Uboost: Boos charge voltage, V/cell 2.40
Iboost: Typical boost charge current, mA per Ah 8
Igas: Current (boost charge), mA per Ah (used only for calculating the
air volume flow for boost charge) 8
Tab. 5–2: Recommended current values (Extract from the IEC 62485-2)
If designing the ventilation in battery rooms, depending on the structural conditions, either „natural ventilation“
or „technical ventilation“ can be used.
Observe the following points:
Natural ventilation:
– intake and exhaust openings required
– minimum cross-section (free opening in wall) (A in cm2, Q in m3/h) (given that: vair = 0.1 m/s)
– increased ventilation through chimney effect (air routing)
– exhaust released outside (not into air-conditioning systems or surrounding rooms).
Technical ventilation:
– increased ventilation using fan (generally extractor fans)
– air flow rate according to air volume flow Q
– air drawn in must be clean
– if large amounts of gas are released during charging, continued ventilation is required for 1 h after charging
is complete
– for multiple batteries in one room: required air flow = ∑Q
– avoid a ventilation short circuit by ensuring that there is sufficient distance between the intake and exhaust
opening.
In case of a technical (forced) ventilation the charger shall be interlocked with the ventilation system or an alarm
shall be actuated to secure the required air flow for the selected charging mode.
with
5.2 Filling the cells
Sealed lead-acid batteries are always filled before delivery. Sealed stationary lead-acid battery
cells must not be refilled with water during the entire battery service life. Overpressure valves are
used as sealing plugs. These plugs cannot be opened without damaging.
5.2.1 Check
Make sure that the installation and ventilation requirements according to IEC 62485-2 are met.
Should commission charging be carried out using higher amperage than you established for the type of ventilation
equipment, then you must increase the ventilation in the battery room (e.g. using additional portable fans) accor-
ding to the amperage applied.
Increased ventilation has to be applied during commissioning and for one hour afterwards. The same applies for
occasional special battery charging processes.
5.2.1.1 Ventilation - preventing explosion
It is impossible to stop gases from being generated while charging batteries; therefore, the hydrogen concen-
tration in the air must be reduced with sufficient ventilation. Do not use sparking equipment near batteries.
The following could act as sources of ignition for gas explosions:
– open flames
– flying sparks
– electrical, sparking equipment
– mechanical, sparking equipment
– electrostatic charge.
Observe the following measures to prevent gas explosions:
– sufficient natural or technical ventilation
– no heating using open flames or glowing objects (T > 300°C)
– separate battery compartments with individual ventilation
– anti-static clothing, shoes and gloves (according to applicable DIN and EN regulations)
– surface conductivity resistance: <108Ω and insulating resistance ≥ 105Ω
– hand-held lights with power cable without switch (protection class II)
– hand-held lights with battery (protection category IP54)
– warning and regulatory signs.
The ventilation requirements for battery rooms, cabinets or compartments are based on the required reduction
of the concentration of hydrogen generated during charging and safety factors which include battery aging and
the potential for fault (“worst case”).
5.2.1.2 Ventilation - calculation for ventilation requirements of battery rooms
Air volume flow Q:
v = dillution factor = 96% air/4% H2= 24
q = quantity of hydrogen generated = 0.42 10–3 m3/Ah
s = safety facotr = 5
n = number of cells
IGas = current per 100 Ah
C = nominal capacity of the battery

26 27
Installation, commissioning and operating instructions for valve-regulated stationary lead-acid batteries
7140203153 V1.4 (09.2018)
Installation, commissioning and operating instructions for valve-regulated stationary lead-acid batteries
7140203153 V1.4 (09.2018)
Equipment Available?
Lifting conveyor (forklift truck, lift truck or small mobile crane or similar device to aid
in battery installation)
Chalk line and chalk (optional)
Plastic spirit level (optional)
Torque wrench
Backing elements (max. 6 mm) for installing the racks (cabinets) (optional)
Ratchet set (optional)
Wrench and ring wrench set with insulated grips
Screwdriver with insulated grip
Paper towels or cloths (made of cotton; do not use cloths made out of synthetic
fibers as there is a risk of static charging), moisturised with water
Brushes with hard plastic bristles (optional)
Plastic measuring tape
Safety equipment and protective clothing
Aeronix®battery terminal grease (only for cells/blocs with exposed lead on post terminals)
Insulating mats for covering conductive parts
Tab. 5–4: Equipment for installation
5.5 Rack installation
We recommend that batteries are properly installed in HOPPECKE battery racks or HOPPECKE
battery cabinets. The use of other operator-specific solutions may render the warranty for the
batteries null and void.
HOPPECKE produces different types of racks. For installation information, see the separate docu-
mentation included with each rack.
Danger!
Observe the special requirements and regulations when installing battery racks in seismic areas!
Danger!
The installation location must fulfill the conditions described in Chap. 5.1.
Comply with the minimum distances listed in Tab. 5–1.
Fig. 5–2:
Step rack (left) and
tier rack (right)
Another sample calculation for battery room ventilation is available in Required ventilation for
hydrogen generated by batteries, Chap. 10, „Required ventilation for hydrogen generated by bat-
teries“.
5.3 Conducting an open-circuit-voltage measurement
Before installing the batteries, conduct an open-circuit voltage measurement of the individual
cells or monobloc batteries to determine their state of charge and to make sure that they are
functioning properly. Fully-charged cells with an electrolyte temperature of 20 °C should have an
open-circuit voltage as listed in Tab. 5–3.
The open-circuit voltages of the individual cells of a battery must not differ more than 0.02 V
from one another.
Type of cell/monobloc battery Technical guidelines Open-circuit voltage
OPzV DIN 40742 2.080 V ... 2.140 V/c
power.bloc OPzV DIN 40744 2.080 V ... 2.140 V/c
net.power 12 V 100 und 12 V 150 –– 2.080 V ... 2.140 V/c
net.power 12 V 92 und 170 Ah –– 2.100 V ... 2.160 V/c
grid | power VR M (power.com SB) –– 2.080 V ... 2.140 V/c
power.com HC –– 2.080 V ... 2.140 V/c
sun|power VR L (OPzV solar.power/OPzV bloc solar.power)
–– 2.080 V ... 2.140 V/c
sun | power VR M (solar.bloc) –– 2.080 V ... 2.140 V/c
power.com XC –– 2.100 V ... 2.160 V/c
grid | power VR X/grid | power VR X FT –– 2.120 V ... 2.180 V/c
Tab. 5–3: Open circuit voltages for different cells/block batteries
The following open-circuit voltage deviations are acceptable for monobloc batteries:
– 4 V monobloc 0.03 V/block
– 6 V monobloc 0.04 V/block
– 12 V monobloc batteries 0.05 V/block
High temperatures decrease the open-circuit voltage while lower temperatures increase it. A
deviation of 15 K from the nominal temperature changes the open-circuit voltage by 0.01 V/cell.
Please consult your local HOPPECKE representative regarding larger deviations.
5.4 Installation tools and equipment
The batteries are delivered on pallets and the required accessories are located in separate packaging units.
Observe all information from the previous sections.
Danger!
For the installation, you will require your personal safety equipment, protective clothing, safety
tools and other equipment as described in Chap. 2.2.

28 29
Installation, commissioning and operating instructions for valve-regulated stationary lead-acid batteries
7140203153 V1.4 (09.2018)
Installation, commissioning and operating instructions for valve-regulated stationary lead-acid batteries
7140203153 V1.4 (09.2018)
If installing block batteries with L-connectors you should consider, that L- connectors have to be
mounted before positioning the battery block in the battery cabinet.
Note: The L-connectors are not intended for high current applications (e.g. UPS). Please contact
your local HOPPECKE representative in case of questions.
5.7 Handling the batteries
Be very careful when lifting and moving the batteries as a falling battery could cause personal injury or material
damage. Always wear protective shoes and safety goggles.
Install the battery in accordance with VDE 0510 Part 2: 2001-12 (in accordance with IEC 62485-2).
For example, you must cover conductive parts using insulating mats.
Make sure that all terminals are covered with insulating caps.
5.8 General information on connecting the batteries
Attention!
If connecting the batteries, always establish the serial connections first followed by the parallel
connection. Do not reverse this procedure.
Before connecting, check to make sure that the batteries have the correct polarity.
To establish the serial connection, arrange the batteries so that the positive terminal of one bat-
tery is positioned as near as possible to the negative terminal of the next battery.
If sealed stationary batteries are connected in parallel, observe the following:
1. Only battery strings with the same length and voltage may be connected with one another. Cross connecting
the individual strings between the cells should be avoided because strings could be very long. Cross connec-
tions mask bad cells and blocks and could cause individual battery strings to overload.
2. Only batteries of the same type and same state of charge should be connected (same battery type, plate
size and plate design).
3. The environmental conditions should be the same for each string connected in parallel. In particular, avoid
temperature discrepancies between the individual strings/batteries.
4. In order to ensure consistent current distribution, make sure that the connectors and end connections are set
up so that the individual supply lines connected to the consumer have the same electrical resistance ratio.
5. The commissioning date of the batteries should be the same (batteries of the same age, identical storage
time and same state of charge).
If the installation does not comply with all of the above mentioned guidelines, you have to charge each string
separately and connect them in parallel afterwards.
1. If the installation drawing is available, mark the outlines of the racks on the installation surface using chalk.
2. The installation surface must be level and rigid. If backing elements are used, make sure that the thickness
does not exceed 6 mm.
3. Carefully set up the racks and arrange them horizontally.
4. The distances of the support profiles must correspond to the dimensions of the cell or monobloc battery.
5. Check rack stability and ensure that all screwed and clamp connectors are firmly secured.
6. If necessary, ground the racks or rack parts.
If using wooden racks: you must fit a flexible connector between each rack joint.
Attention!
5.6 Cabinet installation
Alternatively, you may choose to install the batteries in HOPPECKE cabinets.
The cabinets can be delivered with batteries already installed or battery installation can take
place on-site.
HOPPECKE provides different types of cabinets.
Danger!
The installation location must fulfill the conditions described in Chap. 5.1.
Comply with the minimum distances listed in Tab. 5–1.
Fig. 5–3: Battery cabinet

30 31
Installation, commissioning and operating instructions for valve-regulated stationary lead-acid batteries
7140203153 V1.4 (09.2018)
Installation, commissioning and operating instructions for valve-regulated stationary lead-acid batteries
7140203153 V1.4 (09.2018)
In general, connect the batteries using the shortest possible cables.
Normally, cells are connected in series with alternating polarity,
resulting in the shortest possible connector length.
Batteries of type range OPzV and sun | power VR L can also be mounted
horizontally in racks or cabinets. These are optional variants for hori-
zontal operation. These variants need to be ordered extra. Fig. 5–12
depicts an example for connection of horizontal oriented battery cells.
The lid of the battery cells must not rest on parts of the
battery rack or cabinet.
Fig. 5–12: Example of a horizontal arrangement of the batteries with OPzV-cells in a battery cabinet
5.9 Putting the cells/blocks into the racks
1. Apply some soft soap to the profiles of the rack so that the batteries can be adjusted sideways more easily
once they have been placed onto the rack.
Fig. 5–13: Greased support profiles
2. Position the batteries one after another into the racks so that they are angled and level with the correct
polarity. Remove all transportation and hoisting equipment.
For large batteries, it is required that you begin installation in the center of the rack.
When using tier racks, install the batteries on the bottom rack first.
Attention!
When handling the batteries, observe the instructions in Chap. 5.7.
Place the batteries carefully onto the profiles of the rack, otherwise the battery casing could be
damaged.
When placing the batteries on the rack, do not allow the batteries to knock up against one ano-
ther. This could destroy the batteries!
Danger!
The battery connection terminals + and - must under no circumstance be short-circuited. This also
applies also to the + and – pole of the entire battery string. Be very careful when using step racks.
Attention!
3. Slide the blocks (or cells) to either side until the distance between the batteries is approx.
10 mm (Fig. 5–14). If connectors are used, these determine the distance between the batte-
ries. When sliding the batteries sideways in the racks, do not push them at the middle; instead,
push them at the corners as these are stronger. Push batteries using your hands only; never
use a tool.
Fig. 5–14: 10 mm clearance between the batteries
4. Final step: Count all cells/blocks and check for completeness.
Cells 12 OPzV 1500 Ah
to 24 OPzV 3000 Ah
Cells <= 12 OPzV 1200 Ah

32 33
Installation, commissioning and operating instructions for valve-regulated stationary lead-acid batteries
7140203153 V1.4 (09.2018)
Installation, commissioning and operating instructions for valve-regulated stationary lead-acid batteries
7140203153 V1.4 (09.2018)
5.10 Connecting the batteries
The batteries are in their final position and can now be connected.
5.10.1 Connection terminals
The battery terminals of the types sun | power VR M 12 V 58 – 12 V 90 have been greased at
the factory using Aeronix® battery terminal grease. Inspect each terminal for visible damage or
oxidation. If necessary you should clean the terminal by using a brush (with hard plastic bristles).
Re-grease by using the above mentioned terminal grease.
Other sealed lead acid battery types don’t need to be greased because the terminals are rubber
molded.
5.10.2 Type of connection cable
The battery system that you received is designed to produce a specified amount of power (kW) or current (A) at
a particular voltage for a certain period of time (standby time).
You should be familiar with these parameters (U, kW, A). If this is not the case, please contact your local
HOPPECKE representative.
The battery system was designed so that the electrical energy is available at the battery terminals.
Limit voltage drop between the battery terminals and electrical loads to an absolute minimum. If
the voltage drop is too large, the backup time of the battery system may be reduced.
Observe the following information:
1. Keep the cable length between the batteries and the charging rectifier/USV as short as pos-
sible.
2. The cable cross-section should be calculated so that voltage drop is negligible even at a high
current flow. Use the cross-section of the cable provided to calculate the voltage drop at the
nominal current. If in doubt, use cable with a cross-section that is one size larger.
Danger!
The connection cable must be short-circuit proof or double-wall insulated. That means:
– The insulation strength of the cable is higher than the max. system voltage or
– there is a distance of at least 100 mm between wiring and electrically conductive parts or
– connectors must be furnished with additional insulation.
– Avoid mechanical stress on the cell/battery terminals. Protect cables with large cross-sections
using cable ties and cable clamps.
The connection cables between the main connection terminals and the charging rectifier or UPS
should be flexible conductors.
5.10.3 Clamping batteries using battery connectors
There are screwed row, step and tier connectors (see Fig. 5–15).
Row connectors are used to connect the individual cells/monobloc batteries, step connectors
are used to connect the individual steps to one another (for use with step racks) and the tier
connectors are used to connect the tiers (for use with tier racks).
Fig. 5–15: Using row connectors and step connectors
Attention!
Row, step, tier and end connectors are designed as screwed connectors. After loosening a con-
nection, the assembly screws must always be replaced.
5.10.4 Installing the screwed connectors
1. The batteries are connected using the insulated row connectors (Fig.
5–16). When establishing the serial connection, the batteries are arran-
ged so that the negative terminal of one battery is connected to the
positive terminal of the next battery until the entire system has reached
the necessary voltage.
Make sure that you do not cause mechanical damage to
the terminals.
Attention!
2. Attach the connectors as shown in Fig. 5–15. First attach the screws
by hand only so that you can make final adjustments to the cells and
connectors.
3. Tighten the screws using a torque wrench. The recommended torque is
20 Nm ±1 Nm.
It is very important to tighten screws thoroughly as a loose
connection can become very hot and result in ignition or
explosion.
Screws are approved for single use only!
Attention!
4. If necessary, fit the connectors and end terminals (connection plates)
with insulating covers.
5.10.5 Clamping connection plates onto the batteries
There are a total of 11 different types of connection plates (see Fig. 5–15). Connection plates are
always used when wires must be connected to cells with multiple battery terminals.
Attention!
We strongly recommend that you use original HOPPECKE connection plates when connecting
wires to cells with multiple battery terminal pairs. Using other solutions may lead to overhea-
ting, risk of fire and increased electrical contact resistance!
Fig. 5–16: Screwed connector
installation

34 35
Installation, commissioning and operating instructions for valve-regulated stationary lead-acid batteries
7140203153 V1.4 (09.2018)
Installation, commissioning and operating instructions for valve-regulated stationary lead-acid batteries
7140203153 V1.4 (09.2018)
Installation of standard connection plates
Screw the connection brackets onto the end terminals of the battery (see Fig. 5-17).
Attention!
Make sure that you do not cause mechanical damage to the
terminals.
2. First attach the screws by hand only so that you can make final adjustments
to the cells, connection brackets and connection plates. Fix the connection
plate to the connection bracket of the battery with a torque of 20Nm.
3. Afterwards tighten the pole screws using a torque wrench The recommended
torque is 20 Nm ±1 Nm.
Attention!
It is very important to tighten screws thoroughly as a loose con-
nection can become very hot and result in ignition or explosion.
5.11 Connect the battery system to the DC power supply
Attention!
Make sure that all installation work has been performed properly before connecting the battery
system to the charging rectifier or UPS.
1. Measure the total voltage (target value = sum of open-circuit voltages of the individual cells or monobloc
batteries).
2. If necessary: label the cells or monobloc batteries visibly with continuous numbers (from the positive terminal
to the negative terminal of the battery). HOPPECKE includes number stickers in your shipment.
3. Attach polarity labels for the battery connections.
4. Complete the identification plate in this documentation (see Chap. 1.2).
5. Attach safety marking signs (these include: „Danger: batteries“, „Smoking prohibited“ and, for battery volta-
ges >60 V, „Dangerous voltage“). Attach further marking signs according to local requirements.
6. Attach the safety notices (see Chap. 0).
7. If necessary: Clean the batteries, the racks and the installation room.
Danger!
Never clean batteries using feather dusters or dry towels.
Danger of electrostatic charging and gas explosion. We recommend cleaning the batteries
using damp cotton cloths or paper towels.
8. Connect the battery system to the charging rectifier/UPS using the end connections („plus to plus“ and
„minus to minus“) and proceed as described in Chap. 5.13.
The connection cables between the end connections of the battery and the charging rectifier or
UPS should be flexible conductors.
Inflexible wires could transfer vibrations, which could loosen the connection under certain cir-
cumstances.
The cables must be supported so that no mechanical load can be transferred to the connection
terminals (cable trays, cable ducts, cable clamps).
5.12 Commissioning charge (initial charge)
Normally, by the time of installation, batteries are no longer fully charged. This applies especially
to batteries that have been in storage for a long period of time (see Chap. 4). In order to charge
the cells to the optimum level as quickly as possible, you must first perform an initial charge. The
initial charge (time-restricted) is a „boost charge“.
1. Familiarize yourself with the maximum voltage that the charge rectifier can deliver without damaging the
peripherals.
2. Divide this maximum value by the number of battery cells (not batteries) connected in series. This is the
maximum cell voltage for the initial charge.
3. Set the voltage so that average cell voltages are at a max. of 2.35V per cell. The initial charge can take up
to 48 hours.
It is important for this initial charge to be carried out completely.
Avoid interruptions if at all possible.
Log the commissioning in the commissioning report (see Inspection record).
4. During commissioning, measure the cell voltage of the pilot cells and after commissioning, measure the
cell voltage and surface temperature of each cell and log this data in the commissioning report along with
the time.
Danger!
The surface temperature must not exceed 55 °C. If necessary, the charge operation must be
interrupted, till the temperature drops below 45 °C.
5.12.1 Commissioning charge with constant voltage (IU characteristic curve)
– A charge voltage of max. 2.35 V per cell is required.
– The max. charge current should not be higher than 20 A per 100 Ah C10.
– If the max. temperature of 55 °C is exceeded, the charge operation must be interrupted or
– you must temporarily switch to float charging to allow the temperature to drop.
– The end of commissioning charge is reached when the cell or bloc voltage no longer rises for a period of
2 hours.
5.12.2 Extended commissioning charge
Extended storage or climatic influences (humidity, temperature fluctuations) reduce the charging
state of the cells. This makes an extended commissioning charge necessary.
Conduct the extended commissioning charge according to the following procedure:
1. Charge at 10 – 15 A per 100 Ah C10 until 2,35 V/cell is achieved (approx. 3–5 hours).
2. Charge at 2,35 V/cell until charging current has reached 1 A per 100 Ah.
3. Charge with 1 A per 100 Ah for 4 hours (cell voltage will exceed 2,35 V/cell).
Fig. 5–17: Installing the end
terminals (connection plates)

36 37
Installation, commissioning and operating instructions for valve-regulated stationary lead-acid batteries
7140203153 V1.4 (09.2018)
Installation, commissioning and operating instructions for valve-regulated stationary lead-acid batteries
7140203153 V1.4 (09.2018)
6 Battery operation
DIN VDE 0510 Part 1 and IEC 62485-2 apply for the operation of stationary battery systems.
Each battery is subject to a natural electro-chemical aging process, which causes the reduction
of the metallic lead within the battery (corrosion). The progress of the aging process and also the
service life of the battery depend significantly on the operating temperature.
Attention!
The recommended operating temperature for lead-acid batteries is between 10 °C and 30 °C.
Technical data is valid for the nominal temperature of 20 °C. The ideal operating temperature
range is 20 °C ±5 K. Higher temperatures shorten the service life of the battery. Lower temperatu-
res decrease battery capacity. Exceeding the limit temperature of 55 °C is not permissible. Avoid
operating at temperatures in excess of 45 °C for long periods of time.
The natural aging process and thus the service life expectation play an important role especially in
high current applications. A high current application is an application with currents and discharge
rates ≤ C0,5. Discharging with high currents results in disproportionately more heat, which may
lead to a thermal overload of the corroded metallic conductor. From a certain level of the aging
progress the reduced cross sections are not able to conduct the designed maximum permitted
current for the defined period. In an extreme case this can result in an unexpected battery failure.
Attention!
The capacity test helps to check the efficiency and safety of the batteries and can thus avoid an
unexpected battery failure. Please note, that during the capacity test the load current must corre-
spond to the maximum permitted current for which the battery is designed. Regular review of the
batteries in compliance with specifications defined in Chap. 9 (Testing the battery system) gene-
rally eliminates the risk of an unexpected battery failure. We recommend performing the capacity
test in accordance with Chap. 9 periodically, but at least once a year. In light of past experience
during the first 3 years of the operating life of the batteries the capacity test can be omitted.
6.1 Discharging
Attention!
Never allow the final discharge voltage of the battery to drop below the voltage corresponding to
the discharge current.
Unless the manufacturer has specified otherwise, no more than the nominal capacity is to be
discharged. Immediately after discharge (including partial discharge), charge the battery comple-
tely.
6.2 Charging - general
Depending on how the batteries are used, charging is to be carried out in the operating modes described in
Chap. 6.2.1 to Chap. 6.2.4.
Apply the charging procedure with limit values in accordance with DIN 41773 (lU characteristic
curve).
Attention!
Superimposed alternating currents
Depending on the charger type and charging characteristic curve, alternating currents flow through
the battery during charging and are superimposed onto the charging direct current. These superim-
posed alternating currents and the reaction of the loads lead to additional heating of the battery
or batteries and create a cyclical strain on the electrodes. This might result in premature aging
of the battery.
Attention!
After recharging and continuous charging (float charging) in standby parallel operation or floating
operation, the effective value of the superimposed alternating current is not permitted to exceed
5 A per 100 Ah nominal capacity.
In order to achieve the optimum service life for sealed lead-acid batteries on float charge, a
maximum effective value of the alternating current of 1 A per 100 Ah nominal capacity is recom-
mended.
Attention!
Temperature-related adjustment of the charge voltage
Within the operating temperature range of 15 °C to 25 °C, temperature-related adjustment of the
charge voltage is not necessary.
If the operating temperature is constantly outside this temperature range, the charge voltage
must be adjusted.
The temperature correction factor is approx. -0.003 V/cell per K.
Temperature [°C] -10 0 10 20 30 40
Charge voltage [V/cell] 2.34 2.31 2.28 2.25 2.22 2.19
Tab. 6–1: Corrected charge voltage in relation to charge temperature for battery types with 2.25 V/cell float charge
at Tnom
Fig. 6–1: Temperature related float charge voltage adjustment
Attention!
Maximum charge currents
Up to 2.4 V/cell the battery is able to absorb the maximum current the battery charger provides.
Using the IU-characteristic according to the DIN 41773 a charging current of 5A to 20A per 100Ah
rated capacity (C10) is recommended.
Temperature [°C]
Charge Voltage [V/Cell]
-10 -5 0 5 10 15 20 25 30 35 40
2,35
2,34
2,33
2,32
2,31
2,30
2,29
2,28
2,27
2,26
2,25
2,24
2,23
2,22
2,21
2,20
2,19
2,18
2,17
2,16
2,15

38 39
Installation, commissioning and operating instructions for valve-regulated stationary lead-acid batteries
7140203153 V1.4 (09.2018)
Installation, commissioning and operating instructions for valve-regulated stationary lead-acid batteries
7140203153 V1.4 (09.2018)
Battery type Float charge voltage
OPzV 2.25 ± 1% V/cell
power.bloc OPzV 2.25 ± 1% V/cell
net.power 12 V 100 und 150 Ah 2.25 ± 1% V/cell
net.power 12 V 92 und 170 Ah 2.27 ± 1% V/cell
power.com XC 2.27 ± 1% V/cell
grid | power VR M (power.com SB) 2.25 ± 1% V/cell
power.com HC 2.25 ± 1% V/cell
sun|power VR L (OPzV solar.power/OPzV bloc solar.power)
2.25 ± 1% V/cell
sun | power VR M (solar.bloc) 2.25 ± 1% V/cell
grid | power VR X/grid | power VR X FT 2.28 ± 1% V/cell
Tab. 6–2: Float charge voltage adjustment in standby parallel operaion
DC power supply Elctrical Load
BatteryCharger
6.2.1 Standby parallel operation
Fig. 6–2: Standby parallel operation
The following is characteristic for this operating mode:
– Consumers, direct current source and battery are connected in parallel.
– The charge voltage is the operating voltage of the battery and the system voltage at the same time.
– The direct current source (charging rectifier) is capable of supplying the maximum load current and the battery
charge current at any time.
– The battery only supplies current when the direct current source fails.
– The charge voltage should be set at (see Tab. 6–2) x number of cells in series (measured at the battery’s
terminals).
– To reduce the recharging time, a charging stage can be applied in which the charge voltage is max 2,40 V x
number of cells (standby parallel operation with recharging stage).
– Automatic changeover to the charge voltage of (see Tab. 6-2) x number of cells in series occurs after charging.
DC power supply Electrical Load
Battery
6.2.2 Floating operation
The following is characteristic for this operating mode:
– Consumers, direct current source and battery are connected in parallel.
– The charge voltage is the operating voltage of the battery and the system voltage at the same time.
– The direct current source is not able to supply the maximum load current at all times. The load current inter-
mittently exceeds the nominal current of the direct current source. During this period the battery supplies
power.
– The battery is not fully charged at all times.
– Therefore, depending on the number of discharges, the charge voltage must be set to approx. (2.27 to 2.30
V) x the number of cells connected in series.
6.2.3 Switch mode operation (charge/discharge operation)
Fig. 6–3: Switch mode operation
The following is characteristic for this operating mode:
– When charging, the battery is separated from the consumer.
– The max. charge voltage of the battery is 2.4 V/cell.
– The charging process must be monitored.
– At 2.4 V/cell, if the charge current has dropped to 1.5 A per 100 Ah nominal capacity, you must switch to
float charging as described in Chap. 6.2.4.
– The battery may be connected to the consumer if required.
6.2.4 Float charging
Float charging is used to keep the battery or batteries in a fully charged state and corresponds to a large extent
to the charge type, mentioned in chapter 6.2.1.
Use a charger that complies with the specifications described in DIN 41773 (IU characteristic curve).
Set the voltage so that average voltage is 2.25 V ±1 % (2.27 V ±1 % for net.power 12 V 92/170
Ah and power.com XC and 2.28 V ±1 % for grid | power VR X).
Example: Nominal battery voltage: 60 V, float charge voltage of charging device is 30 x float charge voltage per
cell. E.g. 30 x cells OPzV result in 30 x 2.25 V = 67.5 V +/-1% (=max. 68.18 V/min. 66.83 V).
Table of contents
Other Hoppecke Camera Accessories manuals