TROUBLESHOOTING
Issue Possibilities / Solutions
Does not appear to
be heating the pool
Check to make sure water is flowing through the tubes. Check the flow
strength at the pool inlet.
Has it been sunny? Addtional sunCOIL(s) may be needed.
There could be a clog in the tubing. Try to purge out the clog
Leaking heater Check the connection seals and replace or repair if defective.
Bubbles continue to flow
out of the pool water
inlet well after the pump
has been turned on
Check the connections for a suction leak.
There could be a break in the tubing.
There could be a clog in the tubing.
Try to purge out the clog.
Check to make sure the flow rate is normal.
PAGE 6
3
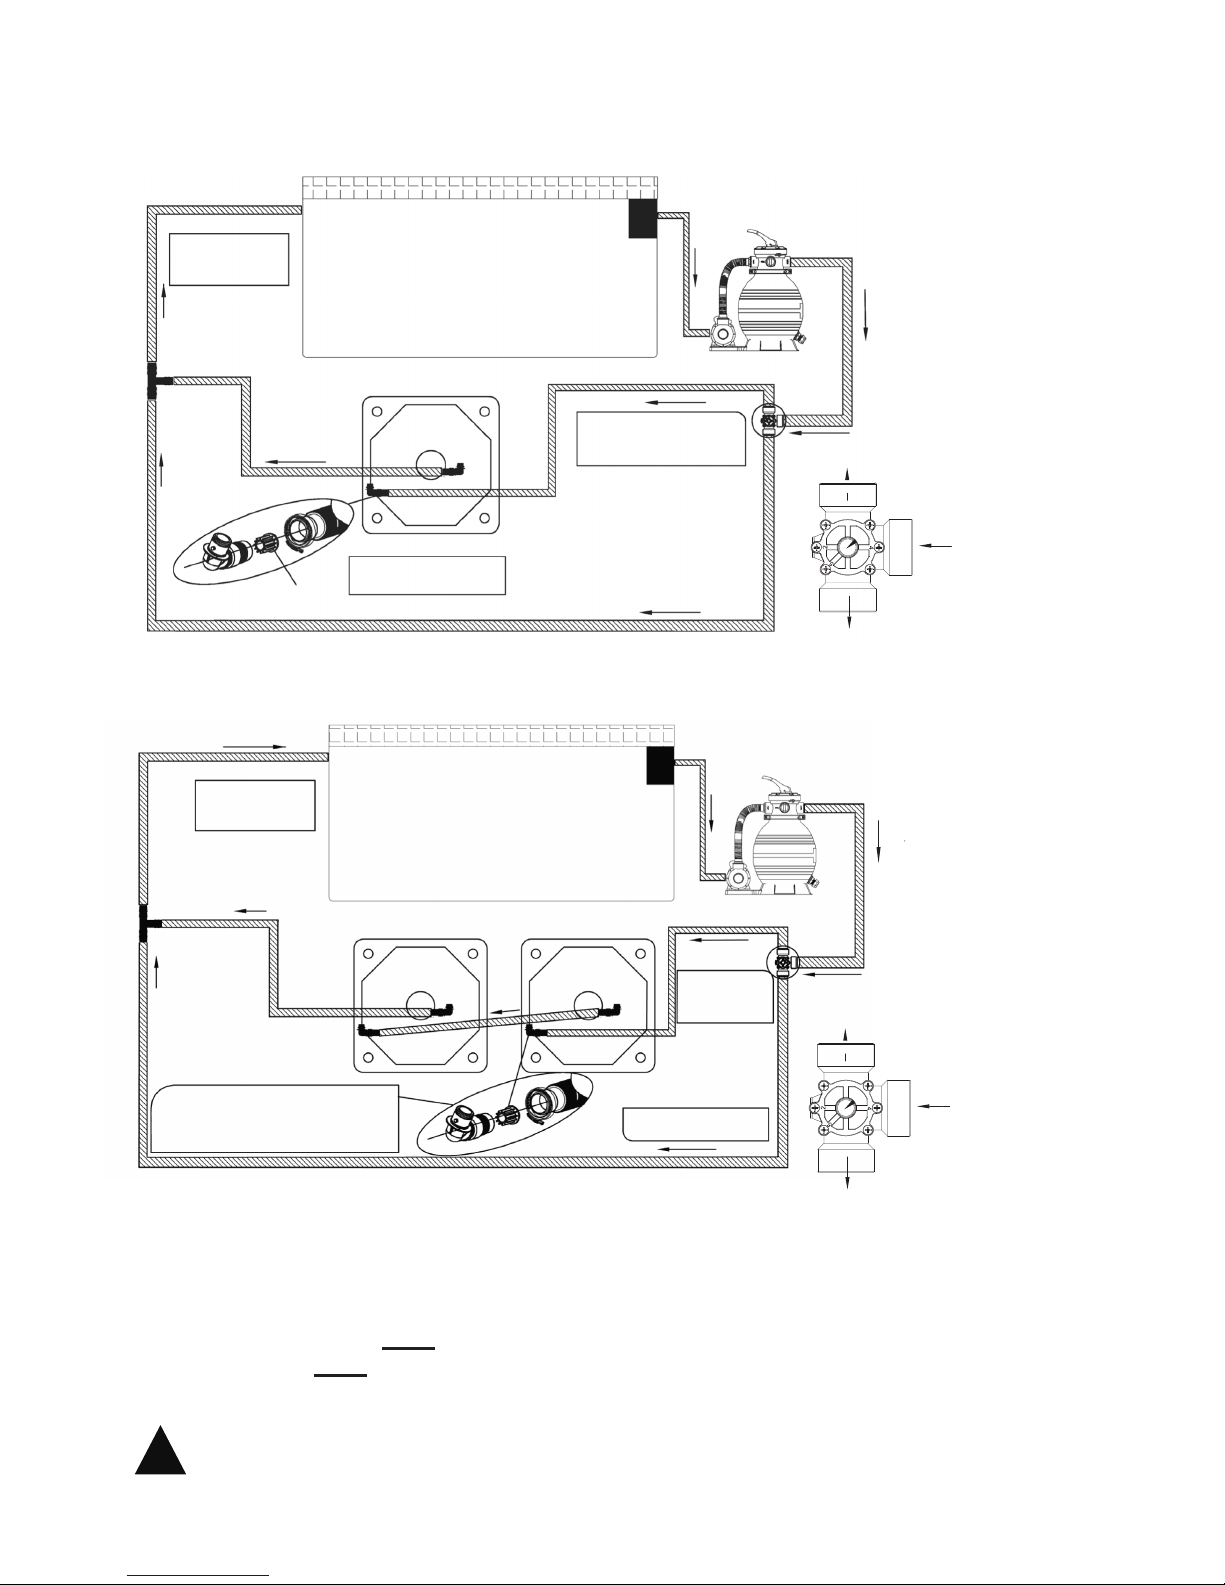
1
Water from
Pump Filter
(Common Port)
to sunCOIL
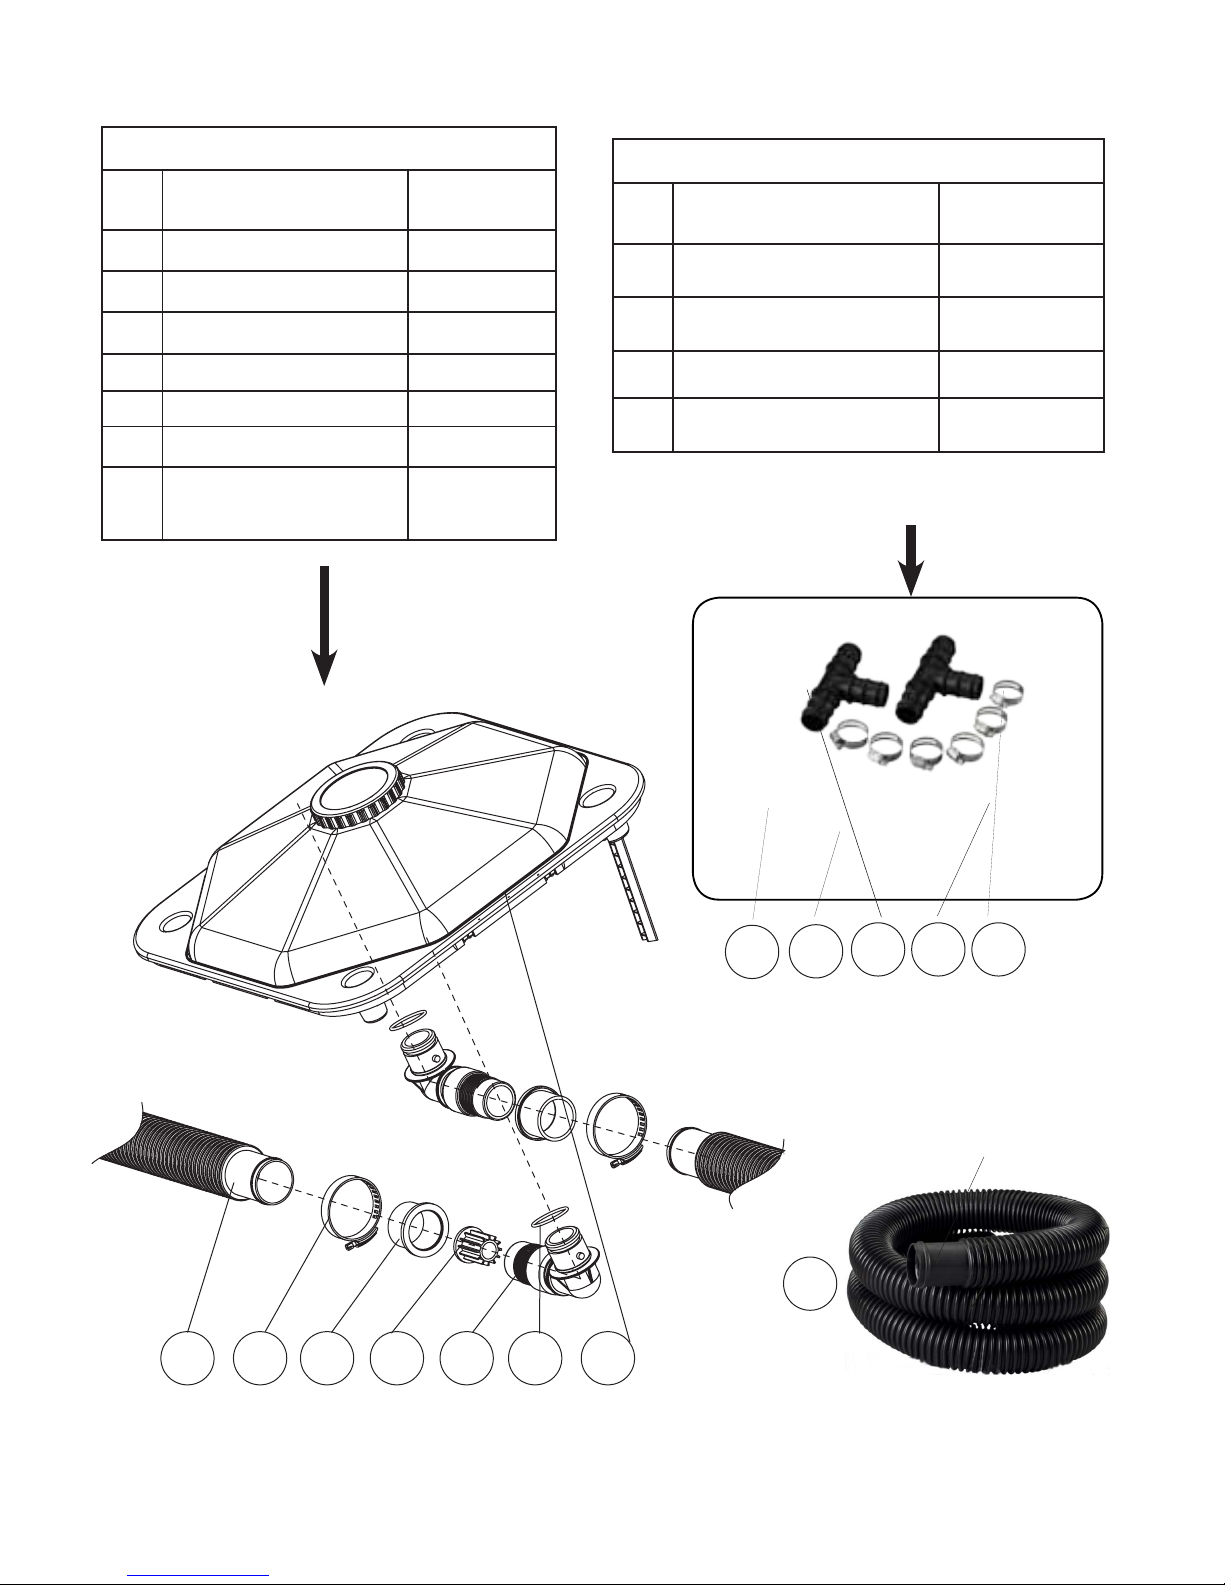
3."T" Connector Installation
A. The "T" Connector must be positioned exactly as shown in Figures 3 & 4. Failure to position the "T"
Connector correctly will reduce the effectiveness of the sunCOIL.
B. Attach the second Elbow Connector to the remaining port on the underside of the sunCOIL in the same
way as the first Elbow Connector. No Flow Reducer is used here.
C. Attach a hose from the Elbow to the "T" Connector & secure the hose at both ends with stainless steel
hose clamps.
D. Attach a hose from the Diverter Valve to the "T" Connector & secure both ends with a stainless steel hose
clamp.
E. Attach a hose from the "T" Connector to the return fitting on the pool wall and secure the hose at both
ends with a stainless steel hose clamp.
F. Unblock the Skimmer & Return Fitting & allow water to flow into the system.
Check for leaks & tighten the hose clamps if necessary.
How to use the Diverter Valve (see Fig. 7)
4.
Do not use sunCOIL on a Pump larger than 1 1/2
(1.5) H.P. This will overload the sunCOIL and
cause damage.
A. Position the Nose on the front of the Diverter Valve
Handle to the correct Position Number below based on
the size of your pump.
B. To BYPASS the sunCOIL & divert all water
directly back to the Pool, place the Nose of the
Valve Handle in "Position 3".
Pumps 1/4 (.25) H.P. - Use Position 1:
Directs all water to sunCOIL. (Only used by small pumps.)
Using any other positions on this size pump will not heat water.
Pumps 3/4 (.75) up to 1 1/2 (1.5) H.P. - Use Position 2:
Directs 1/2 water through sunCOIL & 1/2 to bypass.
Bypass - Use Position 3:
All water bypasses sunCOIL an no heating takes place. Use when
no heating is required. You may use other water features when
Diverter Valve is in Position 3.
Not Used - Position 4: This position is never used.
Using this position will damage Pump and Filter.
Pumps 1/2 (.5) H.P. - Use Position 5:
Directs 3/4 of water through sunCOIL & 1/4 is bypassed.
Fig. 7
Nose of Handle points to Position Number
to "T" Connector