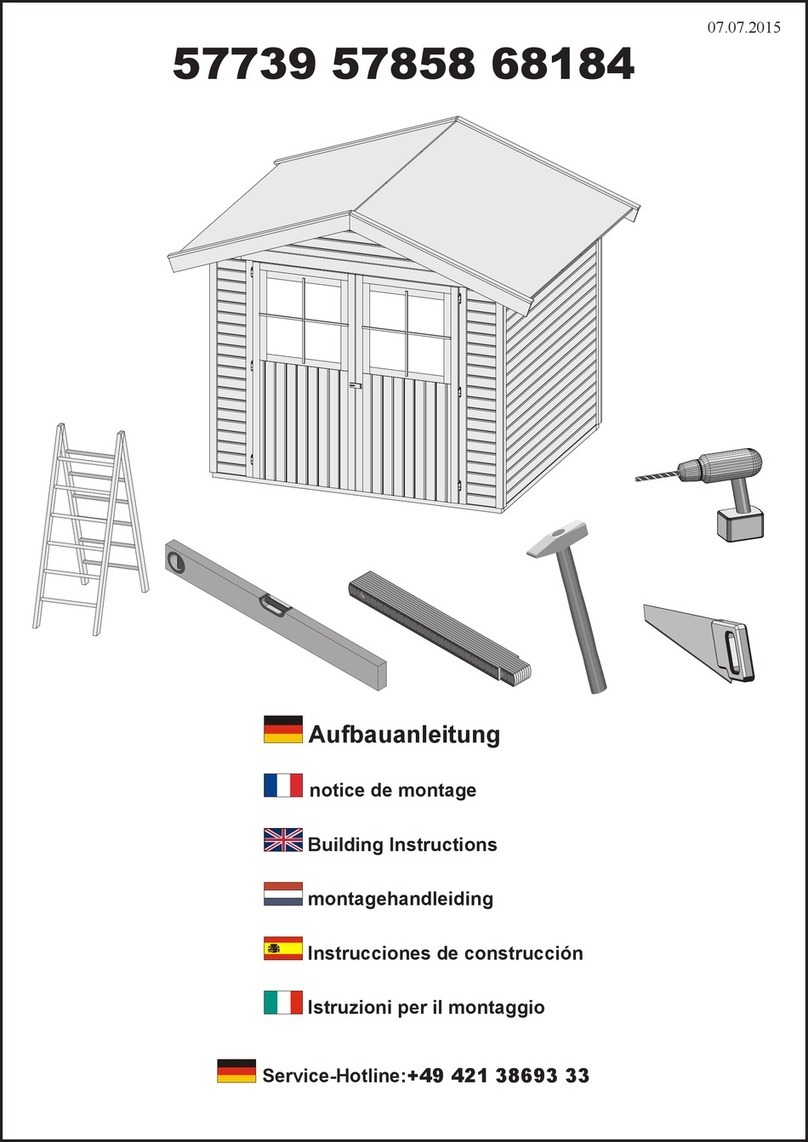
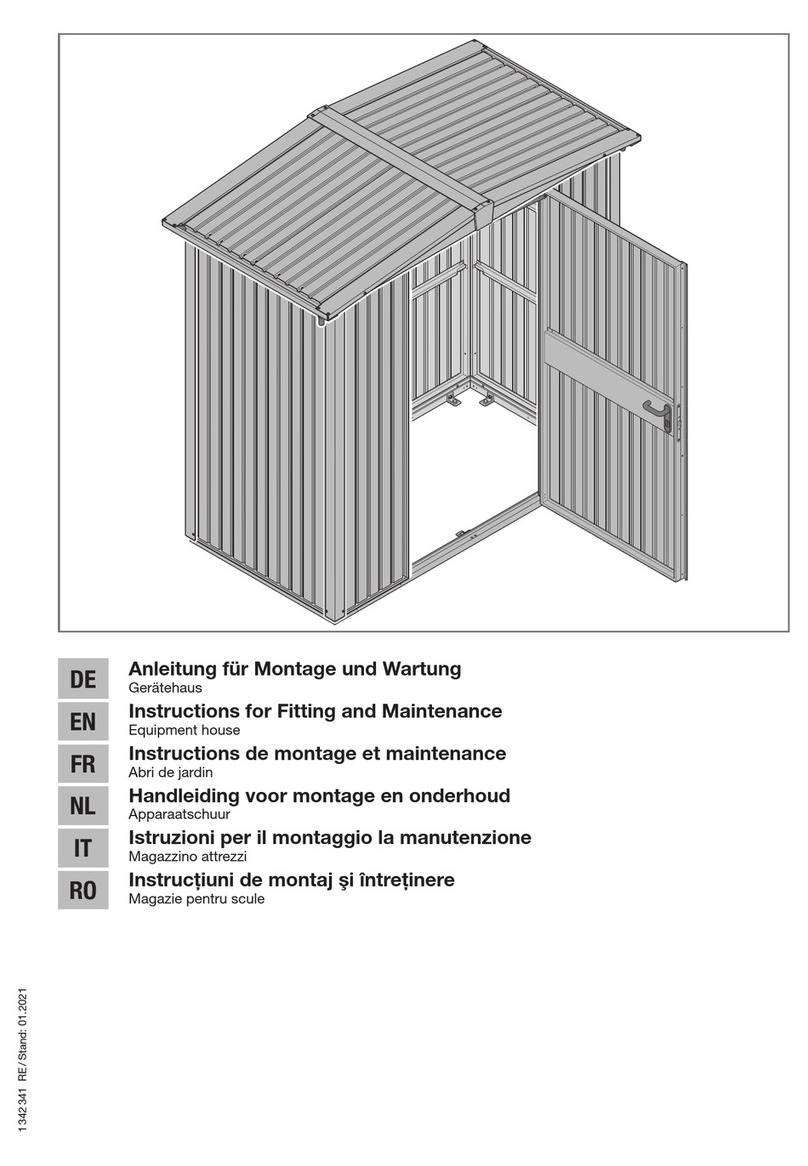
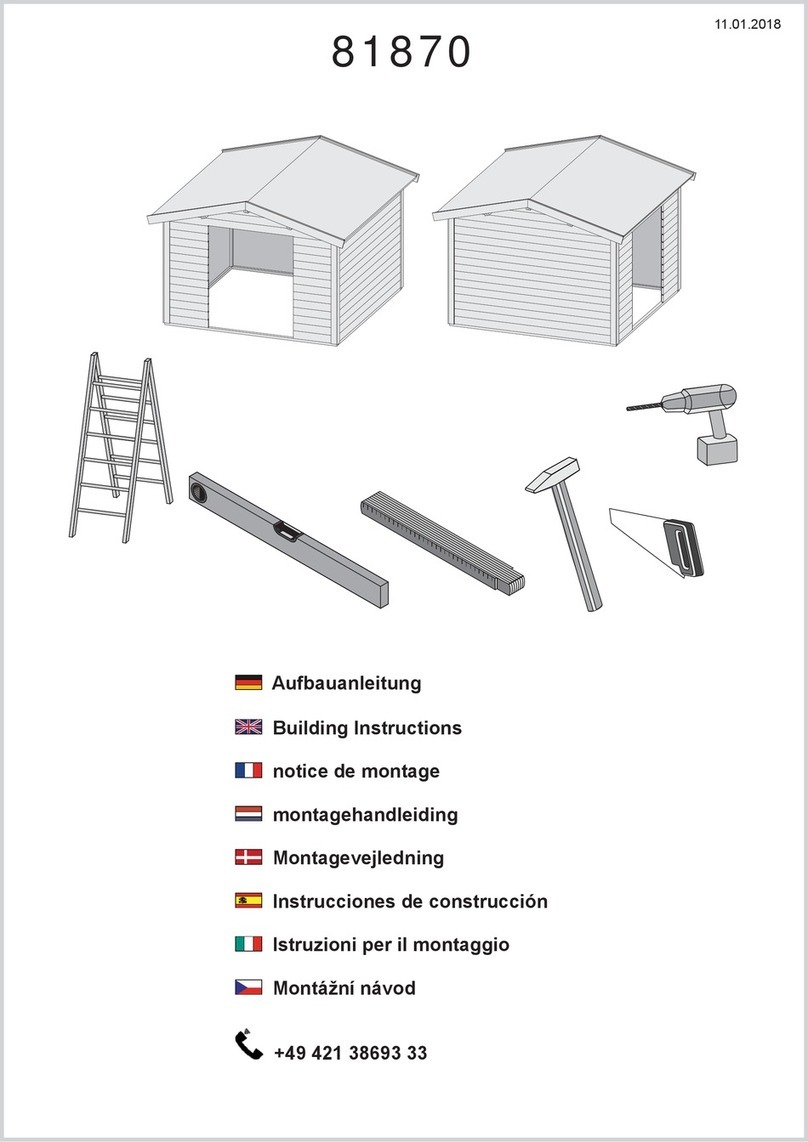
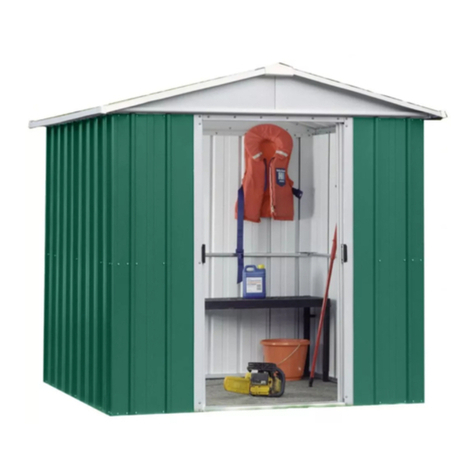
Hornbach EcoStar RAL5014 User manual

DE Anleitung für Montage und Wartung
Gerätehaus
EN Instructions for fitting and maintenance
Equipment house
FR Instructions de montage et maintenance
Abri de jardin
NL Handleiding voor montage en onderhoud
Apparaatschuur
IT Istruzioni per il montaggio la manutenzione
Magazzino attrezzi
+CS SK TR EL RO BG
1 343 501 RE / Stand: 02.2022

DE Gerätehaus ........................................................3
EN Equipment housing .................................................6
FR Abri de jardin.......................................................8
NL Apparaatschuur ...................................................11
IT Magazzino attrezzi .................................................13
CZ Zahradní domek na nářadí ..........................................16
SK Domček na náradie ................................................18
TR Bahçe kulübesi ....................................................20
EL Αποθήκη εργαλείων ................................................22
RO Magazie pentru scule...............................................25
BG Постройка за инструменти .........................................28
...............................................................31
21 343 501 RE / 02.2022

Inhaltsverzeichnis
1 Zu dieser Anleitung...................................... 3
1.1 Verwendete Symbole..................................... 3
2 Sicherheitshinweise .................................... 3
2.1 Fachkundige Personen.................................. 3
2.2 Bestimmungsgemäße Verwendung............... 3
2.3 Verwendete Warnhinweise............................. 3
2.4 Allgemeine Sicherheitshinweise .................... 3
3 Montage........................................................ 4
3.1 Sicherheitshinweise....................................... 4
4 Wartung ........................................................ 4
4.1 Profilzylinder .................................................. 4
4.2 Türbänder ...................................................... 4
5 Oberflächenschutz ...................................... 4
6 Reinigung und Pflege .................................. 4
6.1 Oberflächen des Gerätehaus......................... 4
6.2 Verglasung Kunststoffscheiben ..................... 4
7 Demontage und Entsorgung....................... 5
1 Zu dieser Anleitung
Lesen und beachten Sie diese Anleitung!
Sie gibt Ihnen wichtige Informationen zur sicheren
Montage und für die fachgerechte Pflege und Wartung
des Gerätehauses.
Bewahren Sie diese Anleitung sorgfältig auf.
Tragen Sie die Serien-Nr. (siehe Typenschild) ein.
Serien-Nr.: ............................................................
1.1 Verwendete Symbole
wichtiger Hinweis zur Vermeidung von
Sachschäden
zulässige Anordnung oder Tätigkeit
unzulässige Anordnung oder Tätigkeit
siehe Textteil (z.B.Punkt 2.2.1)
prüfen
Weitergabe sowie Vervielfältigung dieses Dokuments, Verwertung und
Mitteilung seines Inhalts sind verboten, soweit nicht ausdrücklich
gestattet. Zuwiderhandlungen verpflichten zu Schadenersatz. Alle
Rechte für den Fall der Patent-, Gebrauchsmuster- oder Geschmacks-
mustereintragung vorbehalten. Änderungen vorbehalten.
Bildteil ................................................. 31
optionale Bauteile
Handfest befestigen
Satteldach
Pultdach
Bauteil / Verpackung entfernen / recyceln
2 Sicherheitshinweise
Schäden, die durch Nichtbeachtung dieser Anlei-
tung und der Sicherheitshinweise entstehen, ent-
binden den Hersteller von der Haftungspflicht.
2.1 Fachkundige Personen
Lassen Sie die Montage und Wartung von einem
Fachkundigen (gemäß §2 Abs.5 BetrSichV) nach
dieser Anleitung durchführen.
2.2 Bestimmungsgemäße Verwendung
• Das Gerätehaus eignet sich zur Aufbewahrung von
Gartengeräten, Fahrrädern und Dingen für den Frei-
zeitbedarf.
• Das Gerätehaus eignet sich nicht zur Lagerung von
Gefahrstoffen und zur Unterbringung von Personen
oder Tieren.
• Informieren Sie sich bei Ihrer zuständigen örtlichen
Behörde über die geltenden Regelungen und Vor-
schriften zur Errichtung eines Gerätehauses.
2.3 Verwendete Warnhinweise
Spezielle Sicherheitshinweise erfolgen an den jeweils
wichtigen Stellen. Sie sind mit den folgenden
Symbolen und Signalwörtern gekennzeichnet.
Das allgemeine Warnsymbol kennzeichnet
eine Gefahr, die zu Verletzungen oder zum
Tod führen kann.
WARNUNG
Kennzeichnet eine Gefahr, die zum Tod oder zu
schweren Verletzungen führen kann.
ACHTUNG
Kennzeichnet eine Gefahr, die zur Beschädigung
oder Zerstörung des Produkts führen kann.
2.4 Allgemeine Sicherheitshinweise
• Der Fachkundige muss darauf achten, dass die
jeweiligen nationalen Vorschriften der
Arbeitssicherheit eingehalten werden.
1 343 501 RE / 02.2022 3
DEUTSCH

• Erstellen Sie nach unseren Vorgaben ein geeignetes
Fundament für das Gerätehaus, um die
Standfestigkeit unter Windlast zu gewährleisten.
Fundament Maße mind. 250mm Breite und
800mm Tiefe, nur mit diesem Fundament und bei
geschlossener Tür ist die Standfestigkeit bei einer
Windlast von 150km/h gegeben.
• Ändern oder entfernen Sie keine Bauteile! Sie
könnten dadurch wichtige Sicherheitsbauteile außer
Funktion setzen. Verwenden Sie ausschließlich auf
das Gerätehaus abgestimmte Originalteile.
• Sorgen Sie für ausreichenden Wasserablauf im
Bodenprofilbereich.
• Schützen Sie das Gerätehaus vor aggressiven und
ätzenden Mitteln, wie z.B. Säuren, Laugen,
Streusalz, Düngemittel oder sonstigen chemischen
Stoffen.
• Im Sommer können im Gerätehaus sehr hohe
Temperaturen entstehen, sorgen Sie für
ausreichende Belüftung.
• Das Dach des Gerätehauses ist für eine Schneelast
von 150 kg/m2ausgelegt. Bei einer Schnee Höhe
von 0,5m muss das Dach geräumt werden. Bei
einer größeren Eislast (Eisregen) muss das
Gerätehaus vom Eis befreit werden.
• Das Dach des Gerätehauses darf von Personen
nicht betreten werden.
3 Montage
3.1 Sicherheitshinweise
WARNUNG
Verletzungsgefahr
Bei der Montage besteht Verletzungsgefahr.
Beachten Sie folgende Anweisungen:
▶ Tragen Sie Schutzbrille und
Schutzhandschuhe.
▶ Montieren Sie das Gerätehaus nicht bei
Wind. Die Montage unter Windeinwirkung
kann gefährlich sein.
HINWEIS
• Prüfen Sie die Eignung der mitgelieferten
Befestigungsmittel entsprechend der baulichen
Gegebenheiten. Verwenden Sie nur geeignete
Befestigungsmittel.
• Montieren Sie das Gerätehaus auf einem
geeigneten Fundament, mit allen mitgelieferten
Befestigungen gemäß der Montageanleitung!
Alle Maßangaben im Bildteil in mm.
Für eine einfache und sichere Montage führen Sie die
Arbeitsschritte sorgfältig durch!
4 Wartung
4.1 Profilzylinder
ACHTUNG
Pflegemittel
Ungeeignete Pflegemittel können zu
Beschädigungen führen und die Funktion
beeinträchtigen.
▶ Verwenden Sie nur spezielle Pflegemittel für
Profilzylinder aus dem Fachhandel. Verwenden
Sie kein Öl oder Grafit.
4.2 Türbänder
• Ölen Sie die Türbänder mindestens einmal jährlich
mit einem handelsüblichen Schmieröl.
5 Oberflächenschutz
Das Gerätehaus ist aus verzinktem Material und poly-
esterpulvergrundbeschichtet. Kratzer oder kleinere
Beschädigungen sind kein Reklamationsgrund. Für
einen dauerhaften Oberflächenschutz empfehlen wir
binnen drei Monaten nach der Auslieferung einen
Endanstrich.
Beachten Sie hierfür folgende Schritte:
1. Schleifen Sie die Oberflächen mit feinem Schleifpa-
pier leicht an (mind. 180er-Körnung).
2. Reinigen Sie die Oberflächen mit Wasser und
trocknen Sie diese.
3. Streichen Sie die Oberflächen mit einem lösemittel-
haltigen 2K-Epoxid Haftgrund und einem handels-
üblichen Kunstharzlack für den Außenbereich.
Stimmen Sie beide Anstriche aufeinander ab.
Beachten Sie hierbei die Verarbeitungshinweise des
Lackherstellers.
Erneuern Sie den Endanstrich bei Bedarf
entsprechend der örtlichen atmosphärischen
Belastung.
6 Reinigung und Pflege
6.1 Oberflächen des Gerätehaus
• Reinigen Sie die Oberflächen mit klarem Wasser
und weichem Schwamm oder mit einem
handelsüblichen Lackreiniger.
• Entfernen Sie regelmäßig Laub und andere
Verschmutzungen von der Dachfläche und aus der
Dachrinne.
6.2 Verglasung Kunststoffscheiben
ACHTUNG
Reinigungsmittel
Ungeeignete Reinigungsmittel können
Spannungsrisse auslösen und die Scheiben
beschädigen.
▶ Verwenden Sie keine scheuernden
Reinigungsmittel, scharfe Werkzeuge oder
alkoholhaltige Glasreiniger.
41 343 501 RE / 02.2022
DEUTSCH

▶ Reinigen Sie die Kunststoffscheiben mit klarem
Wasser und einem weichen Tuch oder Schwamm.
▶ Verwenden Sie bei stärkerer Verschmutzung einen
milden, acrylverträglichen Kunststoffreiniger.
Beachten Sie auch die Anwendungshinweise des
Herstellers.
7 Demontage und Entsorgung
• Das Gerätehaus nach dieser Montageanleitung,
sinngemäß in umgekehrter Reihenfolge demon-
tieren.
• Das Gerätehaus den länderspezifischen
Vorschriften entsprechend fachgerecht entsorgen.
1 343 501 RE / 02.2022 5
DEUTSCH

Contents
1 About these instructions............................. 6
1.1 Symbols used................................................ 6
2 Safety instructions ............................... 6
2.1 Qualified persons........................................... 6
2.2 Intended use.................................................. 6
2.3 Warnings used............................................... 6
2.4 General safety instructions............................ 6
3 Fitting............................................................ 7
3.1 Safety instructions......................................... 7
4 Maintenance................................................. 7
4.1 Profile cylinder ............................................... 7
4.2 Door hinges ................................................... 7
5 Surface protection....................................... 7
6 Cleaning and care........................................ 7
6.1 Surfaces of the equipment housing............... 7
6.2 Synthetic panes for glazing ........................... 7
7 Dismantling and disposal............................ 7
1 About these instructions
Read and follow these instructions carefully!
They provide you with important information on the
safe fitting, as well as proper care and maintenance,
of your equipment housing.
Keep these instructions in a safe place for later refe-
rence.
Enter the serial number (see the data label) here.
Serial no.: ............................................................
1.1 Symbols used
Important note for avoiding damage to pro-
perty
Permissible arrangement or activity
Non-permissible arrangement or activity
See text section (e.g. section 2.2.1)
Check
Optional components
Tighten by hand
Gable roof
Pent roof
Remove / recycle the compo-
nent / packaging
2 Safety instructions
The manufacturer is not liable for damage resul-
ting from non-compliance with these instructions
including the safety instructions.
2.1 Qualified persons
Have a qualified person (in acc. with §2 para.5
Industrial Safety Regulation) fit and maintain the door
following these instructions.
2.2 Intended use
• The equipment housing is suitable for storing gar-
dening equipment, bicycles and leisure items.
• The equipment housing is neither suitable for the
storage of hazardous substances nor for accommo-
dating people or animals.
• Contact your responsible local authorities for infor-
mation on the applicable rules and regulations for
setting up a tool shed.
2.3 Warnings used
Special safety information is provided at respective
important points in these instructions. They are identi-
fied by the following symbols and signal words.
The general warning symbol indicates a
danger that can lead to injury or death.
WARNING
Indicates a danger that can lead to death or serious
injuries.
ATTENTION
Indicates a danger that can lead to damage or
destruction of the product.
2.4 General safety instructions
• The qualified person must ensure that the respec-
tive national regulations regarding occupational
safety are complied with.
Section ................................................ 31
Dissemination as well as duplication of this document and the use and
communication of its content are prohibited unless explicitly permitted.
Noncompliance will result in damage compensation obligations. All
rights reserved in the event of patent, utility model or design model
registration. Subject to changes.
61 343 501 RE / 02.2022
ENGLISH

• Produce suitable foundations for the equipment
housing, according to our instructions, to guarantee
stability under wind load. Foundation dimensions
are min. 250mm wide and 800mm deep – stability
under a wind load of 150km/h is only provided with
these foundations and with the door closed.
• Do not alter or remove any components! You could
otherwise risk putting important safety components
out of action. Only use original parts intended for
use with this particular equipment housing.
• Make sure there is sufficient water run-off in the
area of the bottom profile.
• Protect the equipment housing from aggressive and
caustic substances, such as acids, alkalis, road
salt, fertilisers or other chemical substances.
• Very high temperatures can be reached in the
equipment housing in summer, so make sure there
is sufficient ventilation.
• The roof of the tool shed is designed for a snow
load of 150 kg/m2. Snow must be cleared from the
roof at a snow height of 0.5m. In the event of a
severe ice load (freezing rain), the equipment
housing must be cleared of ice.
• No persons are permitted to step on the roof of the
tool shed.
3 Fitting
3.1 Safety instructions
WARNING
Danger of injury
There is a danger of injury during fitting. Observe the
following instructions:
▶ Wear safety glasses and protective gloves.
▶ Do not fit the equipment housing in windy
conditions. Fitting under wind exposure
may be dangerous.
NOTES
• Check that the fixing materials supplied are suitable
for the given structural conditions. Only use suitable
fixing material.
• Fit the equipment housing on suitable foundations
with all delivered fastenings according to the fitting
instructions!
All dimensions in the illustrated section are in mm.
To ensure simple and safe fitting, carefully go through
the work steps!
4 Maintenance
4.1 Profile cylinder
ATTENTION
Care products
Unsuitable care products may cause damage and
impair function.
▶ Only use specialised care products for the profile
cylinder. Do not use oil or graphite.
4.2 Door hinges
• Oil the hinges at least once a year with a commer-
cially available lubrication oil.
5 Surface protection
The equipment housing is made of galvanized mate-
rial and has a polyester-primer coating. Scratches or
smaller damage are not valid reasons for complaints.
To ensure permanent surface protection, we recom-
mend a final coating within three months after deli-
very.
Please observe the following steps:
1. Lightly sand the surfaces with a fine sand paper (at
least 180 grain size).
2. Clean the surfaces with water and then dry them.
3. Apply a 2C epoxy primer to the surfaces and paint
them with a conventional synthetic resin paint for
outdoor applications. Match the two paint types.
Observe the application instructions of the paint
manufacturer.
Renew the final coat if required, depending on the
local weather conditions.
6 Cleaning and care
6.1 Surfaces of the equipment housing
• Clean the surfaces with clear water and a soft
sponge or with conventional paint cleaners.
• Remove leaves and other dirt from the roof surface
and gutter at regular intervals.
6.2 Synthetic panes for glazing
ATTENTION
Cleaning products
Unsuitable cleaning agents may cause tension
cracks and damage the panes.
▶ Do not use abrasive cleaners, sharp tools or glass
cleaners containing alcohol.
▶ Clean the synthetic panes with clear water, and a
soft cloth or sponge.
▶ For greater soiling, use a mild acrylic-compatible
synthetic cleaner. Also observe the manufacturer’s
instructions.
7 Dismantling and disposal
• Dismantle the equipment housing in accordance
with these fitting instructions in the logically correct
reverse order and dispose of it properly.
• Dispose of the tool shed in accordance with the
country-specific regulations.
1 343 501 RE / 02.2022 7
ENGLISH

Table des matières
1 A propos de ces instructions...................... 8
1.1 Symboles utilisés........................................... 8
2 Consignes de sécurité ......................... 8
2.1 Personnes qualifiées...................................... 8
2.2 Utilisation appropriée..................................... 8
2.3 Consignes de sécurité utilisés....................... 8
2.4 Consignes de sécurité générales .................. 9
3 Montage........................................................ 9
3.1 Consignes de sécurité................................... 9
4 Maintenance................................................. 9
4.1 Cylindres profilés ........................................... 9
4.2 Paumelles ...................................................... 9
5 Protection des surfaces.............................. 9
6 Nettoyage et entretien................................. 9
6.1 Surfaces de l’abri de jardin............................ 9
6.2 Vitres synthétiques pour vitrage .................... 9
7 Démontage et élimination......................... 10
1 A propos de ces instructions
Lisez attentivement et suivez les présentes inst-
ructions!
Elles vous fournissent des informations importantes
pour un montage sûr ainsi que pour un entretien et
une maintenance appropriés de l’abri de jardin.
Conservez soigneusement les présentes instructions.
Saisissez le numéro de série (voir plaque
d’identification).
N° de série: ............................................................
1.1 Symboles utilisés
Avis important pour éviter les dommages
matériels
Disposition ou procédure autorisée
Disposition ou procédure interdite
Voir partie texte (p. ex. le paragraphe 2.2.1)
Vérification
Composants en option
Fixation solide à la main
Toit en pente
Toit en appentis
Retrait / recyclage du composant / conditi-
onnement
2 Consignes de sécurité
Les dégâts causés par le non-respect de ces inst-
ructions et de ces consignes de sécurité dégagent
le fabricant de toute responsabilité.
2.1 Personnes qualifiées
Faites effectuer le montage et la maintenance par une
personne qualifiée (selon l’article2, paragraphe5, de
l’ordonnance allemande relative à la sécurité
d’exploitation BetrSichV) conformément à ces
instructions.
2.2 Utilisation appropriée
• L’abri de jardin est destiné au rangement des outils
de jardin, des vélos et des objets de loisirs.
• L’abri de jardin ne doit pas être utilisé pour stocker
des matières dangereuses ou pour accueillir des
personnes ou des animaux.
• Informez-vous auprès des autorités locales
compétentes pour connaître les réglementations et
les dispositions en vigueur pour la construction
d’un abri de jardin.
2.3 Consignes de sécurité utilisés
Les passages importants sont marqués par des
consignes de sécurité spéciales. Ces consignes sont
symbolisées par les symboles et mentions
d’avertissement suivantes.
Ce symbole général d’avertissement désigne
un danger susceptible de causer des bles-
sures ou la mort.
AVERTISSEMENT
Désigne un danger susceptible de provoquer la mort
ou des blessures graves.
ATTENTION
Désigne un danger susceptible d’endommager ou
de détruire le produit.
Partie illustrée..................................... 31
Toute transmission ou reproduction de ce document, toute exploitation
ou communication de son contenu sont interdites, sauf autorisation
expresse. Tout manquement à cette règle est illicite et expose son
auteur au versement de dommages et intérêts. Tous droits réservés en
cas de dépôt d’un brevet, d’un modèle d’utilité ou d’agrément. Sous
réserve de modifications.
81 343 501 RE / 02.2022
FRANÇAIS

2.4 Consignes de sécurité générales
• Le professionnel doit s’assurer que les prescrip-
tions nationales relatives à la sécurité au travail sont
respectées.
• Construisez une fondation appropriée pour l’abri de
jardin selon nos spécifications afin d’assurer sa sta-
bilité sous la charge au vent. La fondation doit avoir
une largeur minimale de 250mm et une profondeur
minimale de 800mm. Une fondation de cette
dimension avec la porte fermée permet d’obtenir
une stabilité à une charge au vent de 150km/h.
• Ne modifiez et ne déposez aucuncomposant! Cela
risquerait de mettre hors service des composants
importants pour la sécurité. Utilisez exclusivement
des pièces d’origine appropriées pour l’abri de
jardin.
• Veillez à un écoulement d’eau suffisant au niveau
du profilé de sol.
• Protégez l’abri de jardin des produits agressifs ou
corrosifs tels que les acides, les alcalis, le sel
d’épandage, les engrais ou autres substances chi-
miques.
• En été, des températures très élevées peuvent sur-
venir dans l’abri de jardin; veillez par conséquent à
une aération suffisante.
• Le toit de la remise à outils est conçu pour une
charge neigeuse de 150 kg/m2. Lorsque la neige
atteint une hauteur de 0,5m, le toit doit être
déblayé. En cas de charge de glace importante
(pluie verglaçante), l’abri de jardin doit être dégagé
de la glace.
• Il est interdit de monter sur le toit de la remise
àoutils.
3 Montage
3.1 Consignes de sécurité
AVERTISSEMENT
Risque de blessure
Un risque de blessure existe lors du montage.
Observez les consignes suivantes:
▶ Portez des lunettes de protection et des
gants de protection.
▶ Ne montez pas l’abri de jardin dans des
conditions venteuses. Un montage sous
l’action du vent peut être dangereux.
REMARQUES
• Vérifiez la compatibilité du matériel de fixation
fourni avec les impératifs architecturaux correspon-
dants. Utilisez uniquement un matériel de fixation
approprié.
• Montez l’abri de jardin sur une fondation
appropriée, en utilisant toutes les fixations fournies
conformément aux instructions de montage!
Toutes les dimensions dans la partie illustrée sont
enmm.
Afin d’assurer un montage simple et sûr, effectuez
soigneusement toutes les étapes de montage!
4 Maintenance
4.1 Cylindres profilés
ATTENTION
Produits d’entretien
Des produits d’entretien inadaptés peuvent causer
des dommages et compromettre le fonctionnement.
▶ Pour le nettoyage, utilisez uniquement des
produits d’entretien du commerce conçus pour
cylindres profilés. N’utilisez aucune huile ni aucun
graphite.
4.2 Paumelles
• Huilez les paumelles de porte au moins une fois par
an avec une huile de lubrification usuelle.
5 Protection des surfaces
L’abri de jardin est réalisé en matériau galvanisé et
doté d’un revêtement d’apprêt à base de poudre en
polyester. Des rayures ou de légers dommages ne
peuvent faire l’objet de réclamations. Pour une pro-
tection durable des surfaces, nous recommandons
d’appliquer une couche finale dans les trois mois
suivant la livraison.
Pour ce faire, respectez les étapes suivantes:
1. Poncez légèrement les surfaces avec du papier de
verre fin (grain 180 min.).
2. Nettoyez les surfaces avec de l’eau puis séchez-
les.
3. Peignez les surfaces avec de la peinture d’accroche
époxy à 2composants et un vernis aux résines syn-
thétiques pour l’extérieur. Harmonisez les deux
couches. Respectez pour cela les consignes
d’utilisation du fabricant de peinture.
Renouvelez la couche finale si besoin en fonction de
la charge atmosphérique locale.
6 Nettoyage et entretien
6.1 Surfaces de l’abri de jardin
• Nettoyez les surfaces avec de l’eau claire et une
éponge douce ou avec un produit de nettoyage
pour surfaces laquées du commerce.
• Enlevez régulièrement les feuilles et autres débris
de la surface du toit et des gouttières.
6.2 Vitres synthétiques pour vitrage
ATTENTION
Produits nettoyants
Des produits nettoyants inappropriés peuvent
provoquer des fissures de contrainte et
endommager les vitres.
▶ N’utilisez aucun détergent, outil pointu ni
nettoyant pour vitres contenant de l’alcool.
1 343 501 RE / 02.2022 9
FRANÇAIS
▶ Nettoyez les vitres synthétiques à l’eau claire,
avec un chiffon ou une éponge souples.
▶ En cas de fort encrassement, utilisez un nettoyant
pour matière plastique doux et compatible avec
l’acrylique. Tenez également compte des
consignes d’utilisation du fabricant.
7 Démontage et élimination
• Démontez l’abri de jardin conformément aux pré-
sentes instructions de montage dans l’ordre inverse
des étapes et éliminez-le de manière appropriée.
• Mettre l’abri de jardin au rebut conformément aux
prescriptions spécifiques du pays.
10 1 343 501 RE / 02.2022
FRANÇAIS

Inhoudsopgave
1 Over deze handleiding............................... 11
1.1 Gebruikte symbolen .................................... 11
2 Veiligheidsinstructies......................... 11
2.1 Deskundige personen.................................. 11
2.2 Gebruik volgens de voorschriften................ 11
2.3 Gebruikte waarschuwingen......................... 11
2.4 Algemene veiligheidsinstructies .................. 11
3 Montage...................................................... 12
3.1 Veiligheidsinstructies ................................... 12
4 Onderhoud.................................................. 12
4.1 Profielcilinder ............................................... 12
4.2 Deurscharnieren .......................................... 12
5 Oppervlaktebescherming ......................... 12
6 Reiniging en onderhoud............................ 12
6.1 Oppervlakken van de apparaatschuur ........ 12
6.2 Beglazing kunststof ruiten ........................... 12
7 Demontage en afvoer................................ 12
1 Over deze handleiding
Lees deze handleiding aandachtig en neem de
instructies in acht!
Hierin staat belangrijke informatie betreffende een vei-
lige montage en vakkundig onderhoud van de
apparaatschuur.
Bewaar deze handleiding zorgvuldig.
Vul het serienummer in (zie typeplaatje).
Serienummer: ............................................................
1.1 Gebruikte symbolen
Belangrijke opmerking ter voorkoming van
materiële schade
Toelaatbare opstelling of handeling
Verboden plaatsing of handeling
Zie tekstdeel (bijv. punt 2.2.1)
controleren
Optionele onderdelen
Handvast bevestigen
Zadeldak
Lessenaarsdak
Onderdeel / verpakking verwijderen / recy-
clen
2 Veiligheidsinstructies
De fabrikant is niet aansprakelijk voor schade die
ontstaat door het niet-naleven van deze
handleiding en de veiligheidsinstructies.
2.1 Deskundige personen
Laat de montage en het onderhoud uitvoeren door
een deskundige (conform §2 lid.5 van de Duitse
bedrijfsveiligheidsverordening) volgens deze handlei-
ding.
2.2 Gebruik volgens de voorschriften
• De apparaatschuur is geschikt voor de opslag van
tuinapparatuur, fietsen en recreatieproducten.
• De apparaatschuur is niet geschikt voor de opslag
van gevaarlijke stoffen en als onderdak voor per-
sonen of dieren.
• Neem contact op met uw plaatselijke overheid voor
informatie over de geldende regels en voorschriften
voor de bouw van een gereedschapsschuur.
2.3 Gebruikte waarschuwingen
Speciale veiligheidsinstructies staan op de desbetref-
fende belangrijke plaatsen. Deze zijn gemarkeerd met
de volgende symbolen en signaalwoorden.
Het algemene waarschuwingssymbool mar-
keert een gevaar dat kan leiden tot verwon-
dingen of tot de dood.
WAARSCHUWING
Duidt een gevaar aan dat kan leiden tot ernstig of
dodelijk letsel.
OPGELET
Duidt een gevaar aan dat kan leiden tot beschadi-
ging of vernietiging van het product.
2.4 Algemene veiligheidsinstructies
• De deskundige moet erop letten dat de desbetref-
fende nationale voorschriften betreffende veilig
werken in acht worden genomen.
Illustraties ........................................... 31
Doorgeven of kopiëren van dit document, gebruik en mededeling van de
inhoud ervan zijn verboden indien niet uitdrukkelijk toegestaan. Overtre-
dingen verplichten tot schadevergoeding. Alle rechten voor het inschri-
jven van een patent, een gebruiksmodel of een monster voorbehouden.
Wijzigingen onder voorbehoud.
1 343 501 RE / 02.2022 11
NEDERLANDS

• Creëer volgens onze specificaties een geschikte
fundering voor de apparaatschuur om de stabiliteit
bij windbelasting te garanderen. De afmetingen van
de fundering zijn minimaal 250mm breed en
800mm diep. De stabiliteit wordt bij een windbelas-
ting van 150km/h alleen gegarandeerd in geval van
een fundering volgens deze specificaties en een
gesloten deur.
• Wijzig of verwijder geen onderdelen! U kunt daar-
door belangrijke veiligheidsonderdelen buiten wer-
king stellen. Gebruik uitsluitend op de apparaats-
chuur afgestemde originele onderdelen.
• Zorg voor voldoende waterafvoer rond het vloerprofiel.
• Bescherm de apparaatschuur tegen agressieve en
bijtende bestanddelen, zoals zuren, logen, strooi-
zout, meststoffen of andere chemische stoffen.
• In de zomer kan het erg warm worden in de
apparaatschuur. Zorg voor voldoende ventilatie.
• Het dak van de gereedschapsschuur is berekend
op een sneeuwbelasting van 150 kg/m2. Vanaf
0,5m sneeuw moet de sneeuw ook van het dak
worden geruimd. In het geval van een grotere ijsbe-
lasting (ijzel) moet de apparaatschuur van ijs
worden ontdaan.
• Het dak van de gereedschapsschuur mag niet
worden betreden door personen.
3 Montage
3.1 Veiligheidsinstructies
WAARSCHUWING
Gevaar voor lichamelijk letsel
Tijdens de montage bestaat gevaar voor lichamelijk
letsel. Neem de volgende instructies in acht:
▶ Draag een veiligheidsbril en veiligheids-
handschoenen.
▶ Installeer de apparaatschuur niet bij veel
wind. Montage bij invloed van wind kan
gevaarlijk zijn.
OPMERKINGEN
• Controleer de geschiktheid van het meegeleverde
bevestigingsmateriaal overeenkomstig de bouw-
kundige omstandigheden. Gebruik uitsluitend
geschikte bevestigingsmiddelen.
• Monteer de apparaatschuur volgens de montage-
handleiding met alle meegeleverde bevestigings-
middelen op een geschikte fundering.
Alle maataanduidingen in de illustraties zijn in mm.
Voer voor een eenvoudige en veilige montage de
stappen van de werkwijze zorgvuldig uit!
4 Onderhoud
4.1 Profielcilinder
OPGELET
Onderhoudsmiddelen
Ongeschikte onderhoudsproducten kunnen schade
veroorzaken en de werking nadelig beïnvloeden.
▶ Gebruik enkel speciale onderhoudsmiddelen voor
profielcilinders uit de vakhandel. Gebruik geen
olie of grafiet.
4.2 Deurscharnieren
• Olie de deurscharnieren ten minste 1x per jaar met
een in de handel verkrijgbare smeerolie.
5 Oppervlaktebescherming
De apparaatschuur bestaat uit verzinkt materiaal en is
voorzien van poedergrondverf. Krassen of kleinere
beschadigingen zijn geen reden voor reclamatie. Voor
een langdurige oppervlaktebescherming adviseren wij
om binnen drie maanden na levering een aflaklaag
aan te brengen.
Neem hiervoor de volgende stappen in acht:
1. Schuur de oppervlakken licht op met fijn schuurpa-
pier (min. korrel 180).
2. Reinig de oppervlakken met water en droog deze
af.
3. Verf de oppervlak met een oplosmiddelhoudende
tweecomponenten-epoxyprimer en een gangbare
kunstharslak voor buitenshuis. Stem beide verven
op elkaar af. Neem hierbij de verwerkingsinstructies
van de verffabrikant in acht.
Vernieuw de aflaklaag indien nodig overeenkomstig
de plaatselijke atmosferische belasting.
6 Reiniging en onderhoud
6.1 Oppervlakken van de apparaatschuur
• Reinig de oppervlakken met schoon water of met
een in de handel verkrijgbaar lakreinigingsmiddel en
een zachte spons.
• Verwijder regelmatig bladeren en ander vuil van het
dak en uit de dakgoot.
6.2 Beglazing kunststof ruiten
OPGELET
Reinigingsmiddelen
Ongeschikte reinigingsmiddelen kunnen spannings-
scheuren veroorzaken en de ruiten beschadigen.
▶ Gebruik geen schurende reinigingsmiddelen,
scherpe gereedschappen of alcoholhoudende
glasreinigers.
▶ Reinig de kunststof ruiten met schoon water en
een zachte doek of spons.
▶ Gebruik bij sterke verontreiniging een mild reini-
gingsmiddel voor kunststof dat geen acrylglas
aantast. Neem ook de gebruiksaanwijzingen van
de fabrikant in acht.
7 Demontage en afvoer
• Demonteer de apparaatschuur volgens deze mon-
tagehandleiding in omgekeerde volgorde en voer
deze vakkundig af.
• Voer de gereedschapsschuur op de juiste wijze af
volgens de landspecifieke voorschriften.
12 1 343 501 RE / 02.2022
NEDERLANDS

Indice
1 Su queste istruzioni................................... 13
1.1 Simboli utilizzati........................................... 13
2 Indicazioni di sicurezza...................... 13
2.1 Persone competenti .................................... 13
2.2 Uso conforme.............................................. 13
2.3 Avvertenze utilizzati ..................................... 13
2.4 Indicazioni generali disicurezza .................. 14
3 Montaggio .................................................. 14
3.1 Indicazioni di sicurezza................................ 14
4 Manutenzione............................................. 14
4.1 Cilindri profilati............................................. 14
4.2 Cerniere della porta ..................................... 14
5 Protezione della superficie ....................... 14
6 Pulizia e cura.............................................. 14
6.1 Superfici del magazzino attrezzi.................. 14
6.2 Finestratura in lastre di acrilico.................... 14
7 Smontaggio e smaltimento....................... 15
1 Su queste istruzioni
Leggete ed osservate queste istruzioni!
Le forniranno le informazioni necessarie per un mon-
taggio senza pericoli e per una manutenzione a regola
d'arte del magazzino attrezzi.
La preghiamo diconservare queste istruzioni con
cura.
Inserire il numero di serie (vedere la targhetta di identi-
ficazione).
N° di serie: ............................................................
1.1 Simboli utilizzati
Avviso importante per evitare danni alle
cose
Disposizione o attività consentita
Disposizione o attività non consentita
vedere il testo (p.es. il punto2.2.1)
Controllare
Componenti opzionali
Fissare saldamente a mano
Tetto a due spioventi
Tetto a uno spiovente
Rimuovere e riciclare componente / imbal-
laggio
2 Indicazioni di sicurezza
Il costruttore non si assume alcuna responsabilità
in caso di danni dovuti alla mancata osservanza di
queste istruzioni e delle indicazioni di sicurezza.
2.1 Persone competenti
Far effettuare il montaggio e la manutenzione da un
esperto (secondo §2 comma5 della BetrSichV -
legge sulla sicurezza di azionamento) seguendo
queste istruzioni.
2.2 Uso conforme
• Il magazzino attrezzi è adatto per riporre attrezzi da
giardino, biciclette e cose per il tempo libero.
• Il magazzino attrezzi non è adatto per lo stoccaggio
di materiali pericolosi o per la sistemazione di
persone o animali.
• Informarsi presso la propria autorità locale sulle
regole e le disposizioni applicabili per la costruzione
di una casetta da giardino.
2.3 Avvertenze utilizzati
Le indicazioni di sicurezza speciali indicano i rispettivi
punti importanti. Sono contrassegnate con i seguenti
simboli e parole chiave.
Il simbolo di avvertimento generale indica il
rischio di lesioni fisiche o addirittura di
morte.
AVVERTENZA
Indica un pericolo che può comportare lesioni gravi
o la morte.
ATTENZIONE
Indica il pericolo di danneggiamento o distruzione
del prodotto.
Parte illustrata .................................... 31
Il trasferimento di dati a terzi e la copia del documento stesso, utiliz-
zando il contenuto per scopi diversi da quelli preposti, è vietato, salvo
diversamente accordato per iscritto dalla società. La mancanza di piena
adesione a queste condizioni farà scaturire azione legale contro la per-
sona o la società recante l’offesa. Tutti i diritti, riferiti a Certificazioni, già
esistenti o in via di applicazione, sono riservati. Con riserva di apportare
modifiche.
1 343 501 RE / 02.2022 13
ITALIANO

2.4 Indicazioni generali disicurezza
• L'esperto deve rispettare le rispettive norme
nazionali per la sicurezza sul lavoro.
• Creare fondamenta adeguate per il magazzino
attrezzi secondo le nostre specifiche per garantire
la stabilità con carico dovuto al vento. Dimensioni
delle fondamenta min. 250mm di larghezza e
800mm di profondità, solo con queste fondamenta
e con porta chiusa si ottiene la stabilità ad un carico
dovuto al vento di 150km/h.
• Non modificare o rimuovere nessun componente!
C'è il rischio di mettere fuori funzione importanti
componenti di sicurezza. Utilizzare esclusivamente
pezzi originali studiati per il magazzino attrezzi.
• Garantire un sufficiente scarico dell'acqua nell'area
del profilo a pavimento.
• Proteggere il magazzino attrezzi dall'azione di
agenti aggressivi e corrosivi come ad es. acidi,
soluzioni alcaline, sale antigelo, fertilizzanti o altre
sostanze chimiche.
• In estate possono verificarsi temperature molto
elevate nel magazzino attrezzi, garantire una
sufficiente aerazione.
• Il tetto della casetta da giardino è progettato per
sostenere un carico di neve di a 150 kg/m2di neve.
In caso di neve superiore di 0,5m occorre
sgomberare il tetto. In caso di un carico di ghiaccio
maggiore (pioggia ghiacciata), il magazzino attrezzi
deve essere liberato dal ghiaccio.
• Le persone non possono salire sul tetto della
casetta da giardino.
3 Montaggio
3.1 Indicazioni di sicurezza
AVVERTENZA
Pericolo di lesioni
Durante il montaggio esiste il pericolo di lesioni.
Osservare le seguenti indicazioni:
▶ Indossare occhiali e guanti protettivi.
▶ Non montare il magazzino attrezzi in
presenza di vento. Il montaggio in caso di
azione del vento può essere fonte di
pericolo.
NOTE
• Verificare l‘idoneità d‘uso del materiale di fissaggio
in dotazione in relazione alle condizioni della
struttura. Utilizzare esclusivamente il materiale di
fissaggio adatto alla struttura dell‘edificio.
• Montare il magazzino attrezzi su fondamenta
adeguate, con tutti i fissaggi in dotazione in base
alle istruzioni per il montaggio!
Tutte le quote nella parte illustrata sono in mm.
Per un montaggio semplice e sicuro eseguire
accuratamente i passi!
4 Manutenzione
4.1 Cilindri profilati
ATTENZIONE
Prodotti per la pulizia
Prodotti per la pulizia non idonei possono provocare
danni e compromettere il funzionamento.
▶ Utilizzare solamente i detergenti speciali per
cilindri profilati in commercio. Non utilizzare olio o
grafite.
4.2 Cerniere della porta
• Lubrificare le cerniere della porta almeno una volta
l'anno con un normale lubrificante reperibile sul
mercato.
5 Protezione della superficie
Il magazzino attrezzi è in materiale zincato ed ha una
mano di fondo in polvere di poliestere. Graffi o piccoli
danni non costituiscono motivo di reclamo. Per una
protezione della superficie permanente consigliamo di
applicare una verniciatura finale entro tre mesi dalla
consegna.
Osservare i seguenti passi:
1. Raschiare le superfici con una carta abrasiva fine
(grana min.180).
2. Pulire le superfici con acqua e asciugarle.
3. Applicare un fondo epossidico 2K contenente
solventi sulle superfici e passare una mano di
comune vernice in resina sintetica all'esterno. Utiliz-
zare vernici intonate tra loro. Osservare in proposito
le istruzioni di posa del produttore di vernici.
Se necessario, ripassare una verniciatura finale in
base alle condizioni atmosferiche del luogo.
6 Pulizia e cura
6.1 Superfici del magazzino attrezzi
• Pulire le superfici con acqua pulita e con una
spugna morbida o con un detergente per vernici
commerciale.
• Eliminare, ad intervalli regolari, fogliame e altra
sporcizia dalla superficie del tetto e dalla grondaia.
6.2 Finestratura in lastre di acrilico
ATTENZIONE
Detergenti
I detergenti non idonei possono causare la forma-
zione di fessure di tensione che danneggiano le
lastre.
▶ Non utilizzare detergenti abrasivi, oggetti appuntiti
o detergenti per il vetro a contenuto alcolico.
▶ Pulire le lastre in acrilico con acqua pulita e un
panno morbido o una spugna.
▶ In caso di sporco ostinato utilizzare un detergente
delicato per plastica acrilica. Osservare le
istruzioni per l'uso del produttore.
14 1 343 501 RE / 02.2022
ITALIANO

7 Smontaggio e smaltimento
• Smontare il magazzino attrezzi seguendo le presenti
istruzioni per il montaggio in ordine inverso e smal-
tire in maniera appropriata.
• Smaltire la casetta da giardino in modo appropriato
secondo le disposizioni specifiche del paese.
1 343 501 RE / 02.2022 15
ITALIANO

Obsah
1 Ktomuto návodu ....................................... 16
1.1 Používané symboly...................................... 16
2 Bezpečnostní pokyny ................................ 16
2.1 Odborníci..................................................... 16
2.2 Řádné používání .......................................... 16
2.3 Používané výstražné pokyny ....................... 16
2.4 Všeobecné bezpečnostní pokyny................ 16
3 Montáž........................................................ 17
3.1 Bezpečnostní pokyny .................................. 17
4 Údržba ........................................................ 17
4.1 Profilová cylindrická vložka ......................... 17
4.2 Dveřní závěsy .............................................. 17
5 Povrchová ochrana.................................... 17
6 Čištění aúdržba......................................... 17
6.1 Povrchové plochy zahradního domku......... 17
6.2 Prosklení umělohmotných tabulí ................. 17
7 Demontáž alikvidace ................................ 17
1 Ktomuto návodu
Přečtěte si prosím tento návod adodržujte jej!
Obsahuje důležité informace pro bezpečnou montáž
apro odborné ošetření aúdržbu zahradního domku
na nářadí.
Tento návod pečlivě uschovejte.
Zapište si sériové číslo (viz typový štítek).
Sériové číslo: ............................................................
1.1 Používané symboly
Důležité upozornění pro zabránění mate-
riálním škodám
Přípustné uspořádání nebo činnost
Nepřípustné uspořádání nebo činnost
Viz textová část (např. bod 2.2.1)
Kontrola
Obrazová část .................................... 31
Volitelné konstrukční díly
Ruční upevnění
Sedlová střecha
Pultová střecha
Odstranění / recyklace konstrukčního
dílu / obalu
2 Bezpečnostní pokyny
Škody, které vznikly nedodržením tohoto návodu
abezpečnostních pokynů, zbavují výrobce povin-
nosti ručení.
2.1 Odborníci
Montáž aúdržbu nechte provádět podle tohoto
návodu odborníkem (podle §2 odst.5 nařízení
obezpečnosti provozu – BetrSichV).
2.2 Řádné používání
• Zahradní domek je vhodný kuložení zahradního
nářadí, kol apotřeb pro volný čas.
• Zahradní domek není určen kuložení nebezpečných
látek ani jako přístřešek pro osoby nebo zvířata.
• Upříslušného místního úřadu se informujte
oplatných právních úpravách apředpisech
ovýstavbě zahradního domku.
2.3 Používané výstražné pokyny
Speciální bezpečnostní pokyny jsou uvedeny na
příslušných důležitých místech. Jsou označeny
následujícími symboly asignálními výrazy.
Obecný výstražný symbol označuje
nebezpečí, které může vést ke zraněním
osob nebo smrti.
VAROVÁNÍ
Označuje nebezpečí, které může vést ke smrtel-
nému úrazu nebo ktěžkým zraněním.
POZOR
Označuje nebezpečí, které může vést kpoškození
nebo zničení výrobku.
2.4 Všeobecné bezpečnostní pokyny
• Odborník musí dbát na dodržování aktuálních
národních předpisů bezpečnosti práce.
Šíření arozmnožování tohoto dokumentu, zužitkování asdělování jeho
obsahu je zakázáno, pokud není výslovně povoleno. Jednání vrozporu
stímto ustanovením zavazuje knáhradě škody. Všechna práva pro
případ zápisu patentu, užitného vzoru nebo průmyslového vzoru
vyhrazena. Změny vyhrazeny.
16 1 343 501 RE / 02.2022
ČESKY

• Vytvořte podle našich pokynů vhodné základy pro
zahradní domek, čímž zajistíte jeho odolnost proti
zatížení větrem. Základy musí být široké min.
250mm ahluboké 800mm. Pouze stěmito základy
azavřenými dveřmi odolá zahradní domek
působení větru orychlosti 150km/hod.
• Neměňte ani neodstraňujte žádné konstrukční díly!
Mohli byste tak vyřadit zfunkce důležité
bezpečnostní konstrukční díly. Používejte výhradně
originální náhradní díly schválené pro příslušný
zahradní domek.
• Zajistěte dostatečný odtok vody voblasti půdního
profilu.
• Chraňte zahradní domek před agresivními a
leptavými prostředky, jako jsou např. kyseliny, louhy,
posypová sůl, hnojiva nebo další chemické látky.
• Vlétě může teplota vzahradním domku dosahovat
vysokých hodnot. Zajistěte dostatečné větrání.
• Střecha zahradního domku na nářadí je
koncipována pro zatížení sněhem 150 kg/m2.
Pokud napadne více než 0,5m sněhu, odkliďte sníh
ze střechy domku. Při vyšším zatížení ledem
(mrznoucí déšť) zbavte zahradní domek ledu.
• Osoby nesmí na střechu zahradního domku na
nářadí vstupovat.
3 Montáž
3.1 Bezpečnostní pokyny
VAROVÁNÍ
Nebezpečí zranění
Při montáži hrozí nebezpečí zranění. Dodržujte
následující pokyny:
▶ Používejte ochranné brýle arukavice.
▶ Nemontujte zahradní domek, když fouká
vítr. Montáž za větru může být nebezpečná.
UPOZORNĚNÍ
• Prověřte vhodnost dodaných upevňovacích
prostředků pro dané stavební podmínky. Používejte
jen vhodné upevňovací prostředky.
• Zahradní domek namontujte na vhodné základy
pomocí dodaných upevňovacích prostředků podle
návodu kmontáži!
Všechny rozměrové údaje vobrazové části jsou
uvedeny vmm.
Pro jednoduchou abezpečnou montáž provádějte
pečlivě jednotlivé pracovní kroky!
4 Údržba
4.1 Profilová cylindrická vložka
POZOR
Prostředky pro ošetřování
Nevhodné prostředky pro ošetřování mohou
způsobit poškození aomezit funkci.
▶ Košetření profilové cylindrické vložky používejte
pouze speciální prostředky zodborných obchodů.
Nepoužívejte olej ani grafit.
4.2 Dveřní závěsy
• Dveřní závěsy alespoň jednou ročně promažte
běžným mazacím olejem.
5 Povrchová ochrana
Zahradní domek na nářadí je zpozinkovaného mate-
riálu aje opatřen polyesterovým práškovým základním
nátěrem. Škrábance nebo drobná poškození nejsou
důvodem kreklamaci. Pro trvalou ochranu
doporučujeme povrch do tří měsíců po dodání opatřit
finálním nátěrem.
Dodržujte přitom následující kroky:
1. Lehce obruste povrchy jemným brusným papírem
(min. zrnitost 180).
2. Očistěte povrchové plochy vodou avysušte je.
3. Natřete povrchy dvousložkovým epoxidovým
základním nátěrem sobsahem rozpouštědel
aběžným syntetickým lakem pro venkovní použití.
Dbejte na vzájemné sladění obou nátěrů. Dodržujte
přitom pokyny výrobce pro zpracování laku.
Vpřípadě potřeby finální nátěr obnovte podle místního
atmosférického zatížení.
6 Čištění aúdržba
6.1 Povrchové plochy zahradního domku
• Plochy očistěte vodou aměkkou houbou nebo
běžným čistícím prostředkem na lakované povrchy.
• Zplochy střechy aze střešního okapu odstraňujte
pravidelně listí ajiné nečistoty.
6.2 Prosklení umělohmotných tabulí
POZOR
Čisticí prostředky
Nevhodné čisticí prostředky mohou vést
kprasklinám způsobeným pnutím apoškodit tabule.
▶ Nepoužívejte abrazivní čisticí prostředky, ostré
nářadí ani čističe skel sobsahem alkoholu.
▶ Umělohmotné tabule čistěte čistou vodou
aměkkým hadříkem nebo měkkou houbou.
▶ Vpřípadě silnějšího znečištění použijte jemný
čisticí prostředek na umělou hmotu, neutrální vůči
akrylu. Dodržujte rovněž pokyny kpoužití od
výrobce.
7 Demontáž alikvidace
• Zahradní domek demontujte podle tohoto návodu
analogicky vopačném pořadí.
• Zahradní domek zlikvidujte odborně podle místně
platných předpisů.
1 343 501 RE / 02.2022 17
ČESKY

Obsah
1 Ktomuto návodu ....................................... 18
1.1 Použité symboly .......................................... 18
2 Bezpečnostné pokyny............................... 18
2.1 Odborníci..................................................... 18
2.2 Určený spôsob použitia............................... 18
2.3 Použité výstražné pokyny............................ 18
2.4 Všeobecné bezpečnostné pokyny............... 18
3 Montáž........................................................ 19
3.1 Bezpečnostné pokyny ................................. 19
4 Údržba ........................................................ 19
4.1 Profilový cylinder ......................................... 19
4.2 Závesy dverí ................................................ 19
5 Povrchová ochrana.................................... 19
6 Čistenie a starostlivosť ............................. 19
6.1 Povrchy domčeka nanáradie...................... 19
6.2 Presklenie, plastové tabule.......................... 19
7 Demontáž alikvidácia ............................... 19
1 Ktomuto návodu
Prečítajte si a dodržujte tento návod!
Nájdete vňom dôležité informácie prebezpečnú
montáž a preodborné ošetrovanie aúdržbu domčeka
nanáradie.
Tento návod starostlivo uschovajte.
Zaznačte sériové číslo (pozri výrobný štítok).
Sériové č.: ............................................................
1.1 Použité symboly
dôležité oznámenie na zabránenie vzniku
materiálnych škôd
prípustné usporiadanie alebo činnosť
neprípustné usporiadanie alebo činnosť
pozri textovú časť (napr.bod2.2.1)
skontrolujte
Obrazová časť.................................... 31
voliteľné konštrukčné diely
upevnenie použitím sily
sedlová strecha
pultová strecha
odstránenie / recyklácia konštrukčného
dielu / balenia
2 Bezpečnostné pokyny
Škody, ktoré vznikli v dôsledku nedodržania tohto
návodu a bezpečnostných pokynov, zbavujú
výrobcu povinností vyplývajúcich zozáruky.
2.1 Odborníci
Montáž a údržbu prenechajte odborníkovi (podľa §2
ods.5 predpisu) podľa tohto návodu.
2.2 Určený spôsob použitia
• Domček na náradie je vhodný nauschovanie
záhradného náradia, bicyklov a vecí
navoľnočasové aktivity.
• Domček na náradie nie je vhodný na skladovanie
nebezpečných látok ana poskytnutie prístrešia pre
ľudí azvieratá.
• Informujte sa u príslušného miestneho orgánu o
platných nariadeniach a predpisoch týkajúcich sa
zriadenia domčeka na náradie.
2.3 Použité výstražné pokyny
Špeciálne bezpečnostné pokyny sú umiestnené vždy
na príslušných dôležitých miestach. Sú označené
nasledujúcimi symbolmi a signálnymi slovami.
Všeobecný výstražný symbol označuje
nebezpečenstvo, ktoré môže viesť kporane-
niam alebo smrti.
VAROVANIE
Označuje nebezpečenstvo, ktoré môže viesť k smrti
alebo ťažkým poraneniam.
POZOR
Označuje nebezpečenstvo, ktoré môže viesť k
poškodeniu alebo zničeniu výrobku.
2.4 Všeobecné bezpečnostné pokyny
• Odborník musí dbať na to, aby boli dodržané
súčasné národné predpisy pre bezpečnosť práce.
Postúpenie, ako aj rozmnožovanie tohto dokumentu, zhodnocovanie
asprostredkovanie jeho obsahu je zakázané, pokiaľ to nie je výslovne
povolené. Konanie v rozpore s týmto nariadením zaväzuje k náhrade
škody. Všetky práva pre prípad registrácie patentu, úžitkového vzoru
alebo vzorky vyhradené. Zmeny vyhradené.
18 1 343 501 RE / 02.2022
SLOVENSKY

• Aby ste zabezpečili stabilitu domčeka na náradie pri
zaťažení vetrom, vyhotovte preň vhodný základ
podľa našich pokynov. Rozmery základu min.
250mm šírka a 800mm hĺbka. Len s takýmto
základom a pri zatvorených dverách je daná
stabilita pri zaťažení vetrom 150km/h.
• Nemeňte ani neodstraňujte žiadne konštrukčné
diely! Mohli by ste tým vyradiť z funkcie dôležité
bezpečnostné prvky. Používajte výlučne originálne
diely schválené pre domček na náradie.
• Zabezpečte dostatočný odtok vody voblasti
pôdneho profilu.
• Chráňte domček na náradie pred agresívnymi
ažieravými prostriedkami, ako sú napr. kyseliny,
lúhy, posypová soľ, hnojivá alebo iné chemické látky.
• Vlete môžu vdomčeku na náradie vznikať veľmi
vysoké teploty, preto zabezpečte dostatočné
vetranie.
• Strecha domčeka na náradie je skonštruovaná na
zaťaženie snehom do 150 kg/m2. Ak snehová vrstva
dosiahne 0,5m, musí sa sneh zostrechy odstrániť.
Pri väčšom zaťažení ľadom (mrznúci dážď) sa
domček nanáradie musí zbaviť ľadu.
• Nestúpajte na strechu domčeka na náradie.
3 Montáž
3.1 Bezpečnostné pokyny
VAROVANIE
Nebezpečenstvo poranenia
Pri montáži hrozí nebezpečenstvo poranenia.
Dodržujte nasledujúce pokyny:
▶ Používajte ochranné okuliare a ochranné
rukavice.
▶ Montáž domčeka na náradie nevykonávajte
zaveterného počasia. Montáž pri pôsobení
vetra môže byť nebezpečná.
UPOZORNENIE
• Preskúšajte vhodnosť dodaných upevňovacích
prostriedkov vzhľadom nastavebné danosti.
Používajte výlučne vhodné upevňovacie
prostriedky.
• Domček na náradie namontujte na vhodný základ
so všetkými dodanými upevneniami podľa návodu
na montáž!
Všetky rozmery uvedené v obrazovej časti sú v mm.
Pre jednoduchú a bezpečnú montáž starostlivo
vykonajte pracovné kroky!
4 Údržba
4.1 Profilový cylinder
POZOR
Ošetrovací prostriedok
Nevhodné ošetrovacie prostriedky môžu viesť k
poškodeniam a mať nepriaznivý účinok na funkciu.
▶ Používajte výlučne špeciálne ošetrovacie
prostriedky pre profilové cylindre
zošpecializovaného obchodu. Nepoužívajte olej
ani grafit.
4.2 Závesy dverí
• Závesy dverí naolejujte minimálne jedenkrát ročne s
bežným olejom na mazanie.
5 Povrchová ochrana
Domček na náradie je zpozinkovaného materiálu
sozákladnou polyesterovou práškovou povrchovou
úpravou. Škrabance alebo drobné poškodenia nie sú
dôvodom na reklamáciu. Na trvalú povrchovú ochranu
odporúčame vykonať v priebehu troch mesiacov po
dodaní konečný náter.
Dodržte pritom nasledujúce kroky:
1. Povrchy zľahka obrúste jemným brúsnym papierom
(min. zrnitosť180).
2. Povrchy očistite vodou aosušte.
3. Povrchy natrite 2-zložkovou epoxidovou základnou
náterovou farbou sobsahom rozpúšťadla abežným
syntetickým lakom preexteriér. Obidva nátery
navzájom prispôsobte. Dodržiavajte pri tom upozor-
nenia k spracovaniu od výrobcu laku.
Vrchný náter v prípade potreby obnovte podľa
miestneho atmosférického zaťaženia.
6 Čistenie a starostlivosť
6.1 Povrchy domčeka nanáradie
• Povrchy čistite čistou vodou amäkkou špongiou
alebo bežným čistiacim prostriedkom nalak.
• Zo strechy astrešného žľabu pravidelne odstraňujte
lístie ainé nečistoty.
6.2 Presklenie, plastové tabule
POZOR
Čistiaci prostriedok
Nevhodné čistiace prostriedky môžu vyvolať
napäťové trhliny a poškodiť tabuľky.
▶ Nepoužívajte drhnúce čistiace prostriedky, ostré
nástroje ani čističe na okná s obsahom alkoholu.
▶ Plastové tabuľky čistite čistou vodou a jemnou
handričkou alebo špongiou.
▶ Pri silnejšom znečistení používajte mierne čistiace
prostriedky na plast, ktoré sú vhodné pre akryl.
Dodržiavajte aj upozornenia výrobcu k
spracovaniu.
7 Demontáž alikvidácia
• Domček na náradie demontujte v súlade s týmto
návodom na montáž, podľa zmyslu v obrátenom
poradí.
• Domček na náradie riadne zlikvidujte v súlade
spredpismi špecifickými pre danú krajinu.
1 343 501 RE / 02.2022 19
SLOVENSKY

İçindekiler
1 Bu kullanım kılavuzu hakkında................. 20
1.1 Kullanılan semboller..................................... 20
2 Emniyet uyarıları ........................................ 20
2.1 Uzman kişiler ............................................... 20
2.2 Amacına uygun kullanım.............................. 20
2.3 Kullanılan uyarı bilgileri ................................ 20
2.4 Genel emniyet uyarıları ................................ 20
3 Montaj......................................................... 21
3.1 Emniyet uyarıları .......................................... 21
4 Bakım.......................................................... 21
4.1 Profil silindir ................................................. 21
4.2 Kapı menteşeleri.......................................... 21
5 Yüzey koruması ......................................... 21
6 Temizlik ve bakım ...................................... 21
6.1 Bahçe kulübesinin yüzeyleri ........................ 21
6.2 Plastik camlar .............................................. 21
7 Demontaj ve atığa çıkarma....................... 21
1 Bu kullanım kılavuzu hakkında
Bu kılavuzu okuyun ve dikkate alın!
Bahçe kulübesinin güvenli montajı, temizliği ve bakımı
hakkında önemli bilgiler içermektedir.
Bu kullanım kılavuzunu itinalı muhafaza edin.
Seri No'yu (bkz. model levhası) yazın.
Seri No.: ............................................................
1.1 Kullanılan semboller
Maddi hasarları önlemek için önemli bilgiler
İzin verilen düzen veya faaliyetler
İzin verilmeyen düzen veya faaliyetler
Bkz. metin bölümü (örn. madde 2.2.1)
Test etme
Resim bölümü..................................... 31
Opsiyonel yapı parçaları
El kuvvetiyle sabitlendi
Üçgen çatı
Kırma çatı
Yapı parçası / ambalajı çıkarma / geri
dönüşüm
2 Emniyet uyarıları
Bu kılavuzun ve güvenlik uyarılarının dikkate
alınmamasından kaynaklı hasarlarda üretici
sorumlu tutulamaz.
2.1 Uzman kişiler
Montaj ve bakımın bu kılavuza uygun şekilde bir
uzman kişi (Madde2 par.5 BetrSichV) tarafından
yapılmasını sağlayın.
2.2 Amacına uygun kullanım
• Bahçe kulübesi; bahçe aletlerinin, bisikletlerin ve
boş zamanlarda kullanılan eşyaların saklanması için
uygundur.
• Bahçe kulübesi; tehlikeli maddelerin depolanmasına
ve kişilerin veya hayvanların barındırılmasına uygun
değildir.
• Bir bahçe kulübesinin kurulumuyla ilgili geçerli
düzenlemeler ve yönetmelikler hakkında bilgileri
yetkili yerel kurumlardan öğrenin.
2.3 Kullanılan uyarı bilgileri
Özel güvenlik uyarıları söz konusu önemli noktalarda
belirtilir. Aşağıdaki sembollerle ve uyarı sözcükleriyle
işaretlenmiştir.
Genel uyarı işareti yaralanmalara veya
ölüme neden olabilecek tehlikeleri işaretler.
UYARI
Ağır yaralanmalara veya ölüme neden olabilecek
tehlikeleri göstermektedir.
DİKKAT
Ürünün hasar görmesine veya tahrip olmasına
neden olabilecek tehlikeleri göstermektedir.
2.4 Genel emniyet uyarıları
• Uzman kişi, iş güvenliğinin ulusal yönergelerine
uyulmasına dikkat etmelidir.
Bu dokümanın başka kişilere verilmesi ve de çoğaltılması, içeriğinden
faydalanması ve başka kişilere iletilmesi izin verilmedikçe yasak.
Aykırıhareketler tazminat ödenmesini gerektiriyor. Patent, kullanım
numuneler, veya kişisel zevk örnekleri tüm haklar gizlidir. Değişiklik
yapma hakları saklıdır.
20 1 343 501 RE / 02.2022
TÜRKÇE
This manual suits for next models
8
Table of contents
Languages:
Other Hornbach Garden House manuals
Popular Garden House manuals by other brands

Kingfisher
Kingfisher 3663602713388 manual

Mercia Garden Products
Mercia Garden Products 2DTSHDB0606SFD5W-V1-PEFC manual

Décor et Jardin
Décor et Jardin Abri massif 19mm Assembly Notice

Solid Build
Solid Build ASPEN Assembly instructions

Décor et Jardin
Décor et Jardin VALODEAL Assembly Notice

G21
G21 GAH 529 manual